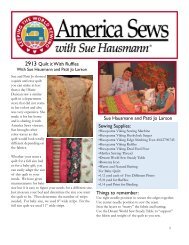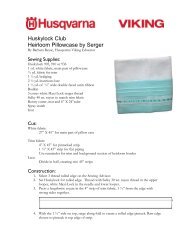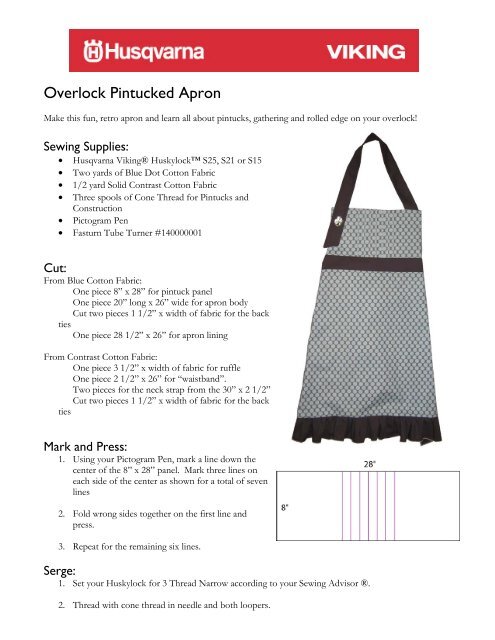
Overlock Pintucked Apron - Husqvarna Viking
Overlock Pintucked Apron - Husqvarna Viking
Overlock Pintucked Apron - Husqvarna Viking

Create successful ePaper yourself
Turn your PDF publications into a flip-book with our unique Google optimized e-Paper software.
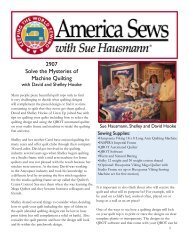
<strong>Overlock</strong> <strong>Pintucked</strong> <strong>Apron</strong><br />
Make this fun, retro apron and learn all about pintucks, gathering and rolled edge on your overlock!<br />
Sewing Supplies:<br />
• <strong>Husqvarna</strong> <strong>Viking</strong>® Huskylock S25, S21 or S15<br />
• Two yards of Blue Dot Cotton Fabric<br />
• 1/2 yard Solid Contrast Cotton Fabric<br />
• Three spools of Cone Thread for Pintucks and<br />
Construction<br />
• Pictogram Pen<br />
• Fasturn Tube Turner #140000001<br />
Cut:<br />
From Blue Cotton Fabric:<br />
One piece 8” x 28” for pintuck panel<br />
One piece 20” long x 26” wide for apron body<br />
Cut two pieces 1 1/2” x width of fabric for the back<br />
ties<br />
One piece 28 1/2” x 26” for apron lining<br />
From Contrast Cotton Fabric:<br />
One piece 3 1/2” x width of fabric for ruffle<br />
One piece 2 1/2” x 26” for “waistband”.<br />
Two pieces for the neck strap from the 30” x 2 1/2”<br />
Cut two pieces 1 1/2” x width of fabric for the back<br />
ties<br />
Mark and Press:<br />
1. Using your Pictogram Pen, mark a line down the<br />
center of the 8” x 28” panel. Mark three lines on<br />
each side of the center as shown for a total of seven<br />
lines<br />
2. Fold wrong sides together on the first line and<br />
press.<br />
3. Repeat for the remaining six lines.<br />
Serge:<br />
1. Set your Huskylock for 3 Thread Narrow according to your Sewing Advisor ®.<br />
2. Thread with cone thread in needle and both loopers.
3. Place the folded fabric for the first pintuck under the presser foot. Align the fold of the fabric<br />
about 1/16” to the left of the cutter. You are NOT cutting off any fabric in this technique.<br />
4. Serge the first pintuck.<br />
5. Repeat for the remaining pintucks. Be sure that you are feeding the fabric in the same way each<br />
time. The previously sewn pintuck should be underneath, not showing as you serge.<br />
6. Press the pintucks all going in one direction.<br />
7. Trim the pintuck panel to 7” x 26”.<br />
8. Set your Huskylock for 3 Tthread Rolled Edge according to the Sewing Advisor ®.<br />
9. You have a choice of thread for the upper looper which is the one that will show. You can use a<br />
“wooly” nylon thread that “expands” and fills in the stitching for a solid look, or you can thread<br />
two regular cones or decorative 40 wt. rayon threads through the upper looper and treat them as<br />
one thread. It depends on the look you desire, and on the available thread colors for the fabric<br />
you have chosen. Thread with cone thread in the needle and lower looper.<br />
10. Test stitch on a scrap of your fabric. Depending on the threads you have chose, you may need to<br />
adjust the tension.<br />
11. Serge the long edge of the 3 1/2” x width of fabric strip. Be sure to cut off just a bit, as you sew,<br />
to get a consistent, nice stitch.<br />
12. Serge the short ends of the ruffle, cutting off the selvage, to finish the ends.<br />
13. Use a fray blocking liquid to seal the ends of the rolled hem chain at the fabric corner. After<br />
drying, cut off the excess chain.<br />
Gather the Ruffle:<br />
1. To gather the ruffle, set your Huskylock® for a 4 Thread <strong>Overlock</strong>.<br />
2. Set the left needle tension to 9.9.<br />
3. Set the Differential Feed to 2.0.<br />
4. Set the Stitch Length to 4.0.<br />
5. Feed the unfinished long edge of the ruffle strip under the foot so it is cutting off just a bit. Hold<br />
your finger behind the foot, to encourage a tighter gather. Leave long thread tails at the beginning<br />
and end so you can adjust your gathers to fit the apron bottom.<br />
6. Set the ruffle aside.<br />
Finish your <strong>Apron</strong>:<br />
1. Set your Huskylock® for 4 Thread <strong>Overlock</strong> according to your Sewing Advisor ®.<br />
2. Place the 2 1/2” x 26” “waistband” piece right sides together with one of the 26” edges of the<br />
pintuck panel. Serge the seam.
3. Place the 26” side of the 20” long x 26” wide piece right sides together with the other side of the<br />
“waistband” piece. Serge the seam.<br />
4. Press both seams towards the “waistband”.<br />
5. Fold in half, to measure 26” x 28 1/2”. Place the armhole template in place aligning the straight<br />
edges of the template with the top and sides of the apron. Cut the armholes.<br />
6. Place the apron on the lining fabric and using the apron as your pattern, cut out the lining the<br />
same size as your apron.<br />
7. Pin the ruffle to the bottom of the apron. Keep the pins out of the seam allowance, away from<br />
where the cutter will cut. Adjust the gathers as needed to fit the bottom of the apron. Start the<br />
ruffle edge 1/2” from each edge so it won’t get caught in the lining seam.<br />
8. Pin the corners of the ruffle, in, out of the way of the side seam.<br />
Make the Ties and Strap:<br />
1. Using the marks on your rotary cutter ruler, cut a 60°<br />
angle on one end of one of the 30” x 2 1/2” neck pieces<br />
as shown.<br />
2. Fold over the strip, and using the first end as your guide,<br />
cut the same angle on the other end.<br />
3. Place the trimmed neck strip right side together with the<br />
un-trimmed neck strip.<br />
4. Stitch the two long edges and one short edge.<br />
5. Turn using your Fasturn Tube Turner.<br />
6. Place one of each fabric back tie pieces right sides together. Serge the short and two long edges.<br />
7. Repeat for the other tie.<br />
8. Turn using your Fasturn Tube Turner.<br />
9. Pin the ties in place on the apron as shown, keeping the pins out of the seam<br />
allowance area, well away from where the cutter will cut.<br />
10. Serge all around the apron leaving a 5” opening on one side edge to turn. Turn<br />
through the opening.<br />
11. Place Steam-A-Seam 2 in the opening and press with steam to fuse closed.
12. Try on the apron and mark the buttonhole/button placement. Stitch a buttonhole on the end of<br />
the neck strap. Stitch a corresponding button on the apron.
![[pdf] husqvarna viking sewing machine stitch comparison chart](https://img.yumpu.com/11869478/1/190x146/pdf-husqvarna-viking-sewing-machine-stitch-comparison-chart.jpg?quality=85)