OPERATION / SERVICE MANUAL - Midmark
OPERATION / SERVICE MANUAL - Midmark
OPERATION / SERVICE MANUAL - Midmark

Create successful ePaper yourself
Turn your PDF publications into a flip-book with our unique Google optimized e-Paper software.
30<br />
IQmark Digital Spirometer Operation Manual<br />
Calibration Pump Window<br />
Follow the instructions displayed. Use the red dotted line and/or the blue timer arrow as a<br />
target flow rate. Try to inject the air from the syringe at a rate close to that of the red line.<br />
Remember that the syringe handle attached to the plunger must be pulled all the way out<br />
before you inject. Once the handle is all the way out, inject the air from the syringe until<br />
the handle is all the way in. PUSH THE HANDLE IN AND DRAW THE HANDLE OUT<br />
SMOOTHLY – TRY NOT TO “BANG” THE PLUNGER AS YOU PERFORM THE<br />
MANEUVER. “Banging” the plunger can cause the timer arrow to start to count. If it<br />
does, just wait for the timer to reset and inject the plunger. This will not affect the<br />
calibration results.<br />
If the pump is performed correctly, the program will prompt you to begin a second<br />
injection. Repeat the process, injecting all of the air in the syringe. If the injection is not<br />
performed correctly, the system will discard the attempt and prompt you to inject again.<br />
After three correctly performed injections, the system will automatically calculate a<br />
correction factor and prompt you to perform a verification pump. ALWAYS VERIFY<br />
YOUR CALIBRATION. After a verification injection, the software will display the<br />
measured volume and the percentage difference from 3.0 Liters. The ATS recommends<br />
that the verified volume should be between 2.91 and 3.09 (+/- 3.0 %) to be accepted. Be<br />
sure to check these numbers before accepting the verification.<br />
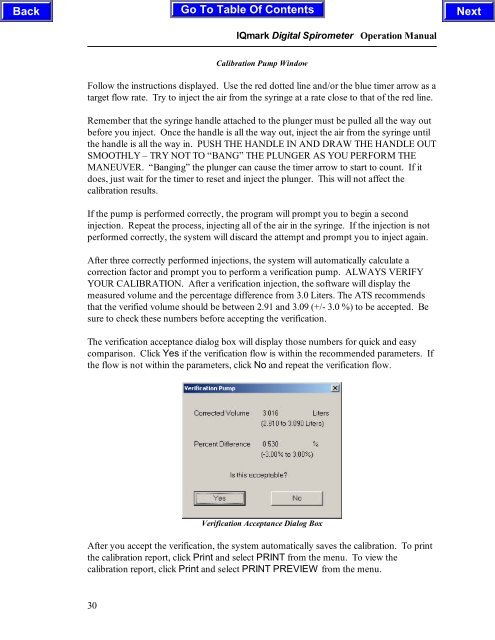
The verification acceptance dialog box will display those numbers for quick and easy<br />
comparison. Click Yes if the verification flow is within the recommended parameters. If<br />
the flow is not within the parameters, click No and repeat the verification flow.<br />
Verification Acceptance Dialog Box<br />
After you accept the verification, the system automatically saves the calibration. To print<br />
the calibration report, click Print and select PRINT from the menu. To view the<br />
calibration report, click Print and select PRINT PREVIEW from the menu.