Building the Powerhouse - Society of Antique Modelers
Building the Powerhouse - Society of Antique Modelers
Building the Powerhouse - Society of Antique Modelers

You also want an ePaper? Increase the reach of your titles
YUMPU automatically turns print PDFs into web optimized ePapers that Google loves.
centered when we add left thrust. Before gluing<br />
<strong>the</strong> firewall in place, it is always a good idea to<br />
chase <strong>the</strong> threads with a 4 x 40 tap to make sure<br />
no glue got into <strong>the</strong> threads. Sal Taibi used to<br />
make <strong>the</strong> tank mounts like <strong>the</strong> one shown in figure<br />
27, but no longer does. The current SAM rules<br />
allow for 15cc <strong>of</strong> fuel, but <strong>the</strong> rule cycle is due to<br />
be voted on again, and <strong>the</strong>re is a movement to go<br />
to 8cc (<strong>the</strong> size <strong>of</strong> a stock Cox Texaco tank). It is<br />
beneficial to run a tank-mount as shown. It spaces<br />
<strong>the</strong> engine out to <strong>the</strong> proper location (without it, a<br />
spacer will have to be made to get <strong>the</strong> engine<br />
where it needs to be). Getting <strong>the</strong> engine in <strong>the</strong><br />
proper location will really help with balancing<br />
your model as <strong>the</strong>y almost always come out tail<br />
heavy. Cox engines have an o-ring in <strong>the</strong>m that is<br />
in <strong>the</strong> middle <strong>of</strong> <strong>the</strong> tank. When <strong>the</strong> tank is full,<br />
<strong>the</strong> o-ring is submerged in fuel. When it gets<br />
down to a half tank, it starts to be surrounded by<br />
air. Many times, this will leak and cause your<br />
engine to lean and only run ½ <strong>the</strong> tank and <strong>the</strong><br />
engine will stop.<br />
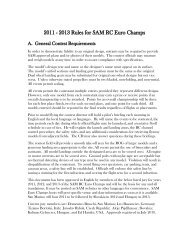
I bend <strong>the</strong> landing gear and glue it up between<br />
balsa sheet wood. When completed, <strong>the</strong><br />
sandwiched gear should line up with <strong>the</strong> fuselage<br />
uprights, where it can be secured well (see figure<br />
28).<br />
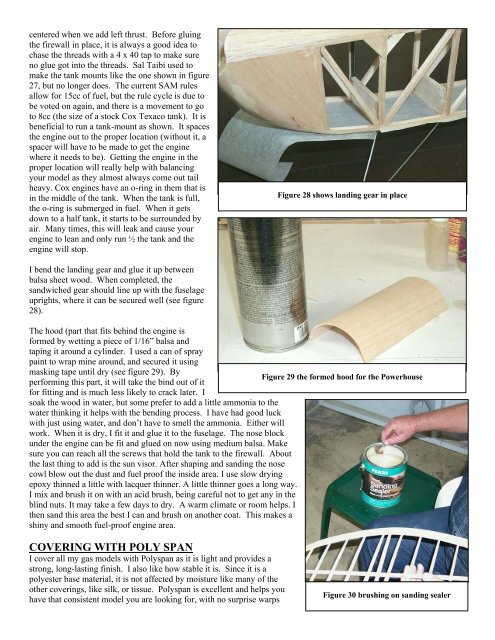
The hood (part that fits behind <strong>the</strong> engine is<br />
formed by wetting a piece <strong>of</strong> 1/16” balsa and<br />
taping it around a cylinder. I used a can <strong>of</strong> spray<br />
paint to wrap mine around, and secured it using<br />
masking tape until dry (see figure 29). By<br />
Figure 29 <strong>the</strong> formed hood for <strong>the</strong> <strong>Powerhouse</strong><br />
performing this part, it will take <strong>the</strong> bind out <strong>of</strong> it<br />
for fitting and is much less likely to crack later. I<br />
soak <strong>the</strong> wood in water, but some prefer to add a little ammonia to <strong>the</strong><br />
water thinking it helps with <strong>the</strong> bending process. I have had good luck<br />
with just using water, and don’t have to smell <strong>the</strong> ammonia. Ei<strong>the</strong>r will<br />
work. When it is dry, I fit it and glue it to <strong>the</strong> fuselage. The nose block<br />
under <strong>the</strong> engine can be fit and glued on now using medium balsa. Make<br />
sure you can reach all <strong>the</strong> screws that hold <strong>the</strong> tank to <strong>the</strong> firewall. About<br />
<strong>the</strong> last thing to add is <strong>the</strong> sun visor. After shaping and sanding <strong>the</strong> nose<br />
cowl blow out <strong>the</strong> dust and fuel pro<strong>of</strong> <strong>the</strong> inside area. I use slow drying<br />
epoxy thinned a little with lacquer thinner. A little thinner goes a long way.<br />
I mix and brush it on with an acid brush, being careful not to get any in <strong>the</strong><br />
blind nuts. It may take a few days to dry. A warm climate or room helps. I<br />
<strong>the</strong>n sand this area <strong>the</strong> best I can and brush on ano<strong>the</strong>r coat. This makes a<br />
shiny and smooth fuel-pro<strong>of</strong> engine area.<br />
COVERING WITH POLY SPAN<br />
I cover all my gas models with Polyspan as it is light and provides a<br />
strong, long-lasting finish. I also like how stable it is. Since it is a<br />
polyester base material, it is not affected by moisture like many <strong>of</strong> <strong>the</strong><br />
o<strong>the</strong>r coverings, like silk, or tissue. Polyspan is excellent and helps you<br />
have that consistent model you are looking for, with no surprise warps<br />
Figure 28 shows landing gear in place<br />
Figure 30 brushing on sanding sealer