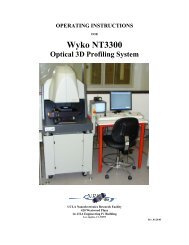
FILM THICKNESS MEASUREMENT (SCI FilmTek 2000)
FILM THICKNESS MEASUREMENT (SCI FilmTek 2000)
FILM THICKNESS MEASUREMENT (SCI FilmTek 2000)

You also want an ePaper? Increase the reach of your titles
YUMPU automatically turns print PDFs into web optimized ePapers that Google loves.
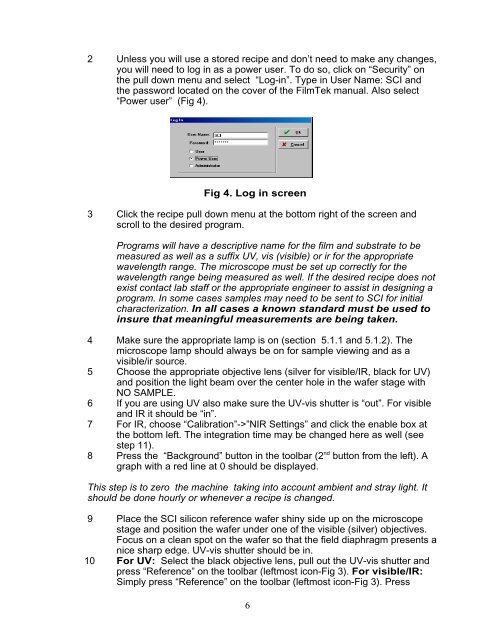
2 Unless you will use a stored recipe and don’t need to make any changes,<br />
you will need to log in as a power user. To do so, click on “Security” on<br />
the pull down menu and select “Log-in”. Type in User Name: <strong>SCI</strong> and<br />
the password located on the cover of the <strong>FilmTek</strong> manual. Also select<br />
“Power user” (Fig 4).<br />
Fig 4. Log in screen<br />
3 Click the recipe pull down menu at the bottom right of the screen and<br />
scroll to the desired program.<br />
Programs will have a descriptive name for the film and substrate to be<br />
measured as well as a suffix UV, vis (visible) or ir for the appropriate<br />
wavelength range. The microscope must be set up correctly for the<br />
wavelength range being measured as well. If the desired recipe does not<br />
exist contact lab staff or the appropriate engineer to assist in designing a<br />
program. In some cases samples may need to be sent to <strong>SCI</strong> for initial<br />
characterization. In all cases a known standard must be used to<br />
insure that meaningful measurements are being taken.<br />
4 Make sure the appropriate lamp is on (section 5.1.1 and 5.1.2). The<br />
microscope lamp should always be on for sample viewing and as a<br />
visible/ir source.<br />
5 Choose the appropriate objective lens (silver for visible/IR, black for UV)<br />
and position the light beam over the center hole in the wafer stage with<br />
NO SAMPLE.<br />
6 If you are using UV also make sure the UV-vis shutter is “out”. For visible<br />
and IR it should be “in”.<br />
7 For IR, choose “Calibration”->”NIR Settings” and click the enable box at<br />
the bottom left. The integration time may be changed here as well (see<br />
step 11).<br />
8 Press the “Background” button in the toolbar (2 nd button from the left). A<br />
graph with a red line at 0 should be displayed.<br />
This step is to zero the machine taking into account ambient and stray light. It<br />
should be done hourly or whenever a recipe is changed.<br />
9 Place the <strong>SCI</strong> silicon reference wafer shiny side up on the microscope<br />
stage and position the wafer under one of the visible (silver) objectives.<br />
Focus on a clean spot on the wafer so that the field diaphragm presents a<br />
nice sharp edge. UV-vis shutter should be in.<br />
10 For UV: Select the black objective lens, pull out the UV-vis shutter and<br />
press “Reference” on the toolbar (leftmost icon-Fig 3). For visible/IR:<br />
Simply press “Reference” on the toolbar (leftmost icon-Fig 3). Press<br />
6