Dektak 8 Advanced Development Profiler Manual
Dektak 8 Advanced Development Profiler Manual
Dektak 8 Advanced Development Profiler Manual

You also want an ePaper? Increase the reach of your titles
YUMPU automatically turns print PDFs into web optimized ePapers that Google loves.
<strong>Dektak</strong> 8 <strong>Advanced</strong> <strong>Development</strong> <strong>Profiler</strong><br />
<strong>Manual</strong><br />
Software Version 8.34<br />
004-800-000 (standard)<br />
004-800-100 (cleanroom)<br />
Copyright © [2003, 2004] Veeco Instruments Inc.<br />
All rights reserved.<br />
Document Revision History: <strong>Dektak</strong> 8 <strong>Manual</strong><br />
Revision Date Section(s) Affected Reference Approval<br />
G 12/29/04 All (SW V 8.34) N/A D. Page<br />
F 4/16/04 All. N/A D. Page<br />
E 1/23/04 Chapter 9, Sections 9.13, 9.14 N/A D. Page<br />
D 9/10/03 Chapter 4, p.81 N/A L. Burrows<br />
C 8/12/03 All. 477 C. Kowalski<br />
B 10/24/01 All. 445 C. Kowalski<br />
A 04/27/01 All. 402 J. Valencia
©2004, Veeco Instruments, Inc.<br />
All rights reserved.<br />
Printed in the United States of America.<br />
COPYRIGHT NOTICE:<br />
This document and the software (computer program) described in it are copyright © Veeco Instruments,<br />
Inc. They are protected by United States copyright laws and international treaty provisions.<br />
Under copyright laws, this guide and the software program contained herein may not be<br />
copied, in whole or in part, without prior written consent of Veeco Instruments, Inc., except in the<br />
normal use of the software or to make a backup copy. This exception does not allow copies to be<br />
made for others, whether or not sold, but all of the material purchased (with all backup copies)<br />
may be sold, given, or loaned to another person. Under the law, copying includes translating into<br />
another language or format.<br />
Veeco Instruments, Inc. retains all rights not otherwise expressly granted here. Nothing in this<br />
notice constitutes a waiver of our rights under U.S. Copyright laws or any other federal or state<br />
law.<br />
TRADEMARK NOTICE:<br />
Wyko, Vision, <strong>Dektak</strong> and N-Lite are trademarks or registered trademarks of WYKO Corporation<br />
and Veeco Instruments, Inc. Microsoft, Windows and Microsoft Excel are trademarks or registered<br />
trademarks of Microsoft Corporation. Dell is a registered trademark of Dell Computer Corporation.<br />
Intel, Pentium and Celeron are trademarks or registered trademarks of Intel Corporation.<br />
All other brand or product names are trademarks or registered trademarks of their respective holders.<br />
Veeco Instruments, Inc.<br />
2650 East Elvira Road<br />
Tucson, Arizona 85706<br />
The information in this document is subject to change without notice. No liability is assumed for<br />
errors contained herein or for incidental or consequential damages in connection with the furnishing,<br />
performance, or use of this material.
Table of Contents<br />
Chapter 1 System Overview 1<br />
1.1 Safety Precautions . . . . . . . . . . . . . . . . . . . . . . . . . . . . . . . . . . . . . . . . . . . 3<br />
1.2 Included Reference Materials. . . . . . . . . . . . . . . . . . . . . . . . . . . . . . . . . . . 5<br />
1.3 Printer Selection . . . . . . . . . . . . . . . . . . . . . . . . . . . . . . . . . . . . . . . . . . . . . 5<br />
1.4 Principle of Operation . . . . . . . . . . . . . . . . . . . . . . . . . . . . . . . . . . . . . . . . 6<br />
1.5 Configuration. . . . . . . . . . . . . . . . . . . . . . . . . . . . . . . . . . . . . . . . . . . . . . . 7<br />
1.5.1 Computer Console . . . . . . . . . . . . . . . . . . . . . . . . . . . . . . . . . . . . . . . . . . . . . . 7<br />
1.5.2 Video Monitor . . . . . . . . . . . . . . . . . . . . . . . . . . . . . . . . . . . . . . . . . . . . . . . . . 7<br />
1.5.3 <strong>Profiler</strong>. . . . . . . . . . . . . . . . . . . . . . . . . . . . . . . . . . . . . . . . . . . . . . . . . . . . . . . 7<br />
1.5.4 Dual Switchable Video Cameras . . . . . . . . . . . . . . . . . . . . . . . . . . . . . . . . . . . 7<br />
1.5.5 Programmable X-Y Positioning . . . . . . . . . . . . . . . . . . . . . . . . . . . . . . . . . . . 7<br />
1.6 Stylus Size Considerations . . . . . . . . . . . . . . . . . . . . . . . . . . . . . . . . . . . . . 8<br />
1.7 Scan Speed Versus Stylus Force. . . . . . . . . . . . . . . . . . . . . . . . . . . . . . . . . 8<br />
1.8 Horizontal Resolution. . . . . . . . . . . . . . . . . . . . . . . . . . . . . . . . . . . . . . . . . 9<br />
1.9 Scan Data Storage Requirements . . . . . . . . . . . . . . . . . . . . . . . . . . . . . . . . 9<br />
1.10 <strong>Dektak</strong> 8 Technical Specifications . . . . . . . . . . . . . . . . . . . . . . . . . . . . . 10<br />
1.11 Options and Accessories. . . . . . . . . . . . . . . . . . . . . . . . . . . . . . . . . . . . . 11<br />
1.12 Operation Overview . . . . . . . . . . . . . . . . . . . . . . . . . . . . . . . . . . . . . . . . 12<br />
1.12.1 Automation Program . . . . . . . . . . . . . . . . . . . . . . . . . . . . . . . . . . . . . . . . . . 12<br />
1.12.2 Scan Routine . . . . . . . . . . . . . . . . . . . . . . . . . . . . . . . . . . . . . . . . . . . . . . . . 12<br />
1.12.3 Sample Positioning . . . . . . . . . . . . . . . . . . . . . . . . . . . . . . . . . . . . . . . . . . . 12<br />
1.12.4 Scanning . . . . . . . . . . . . . . . . . . . . . . . . . . . . . . . . . . . . . . . . . . . . . . . . . . . 12<br />
1.12.5 Profile Manipulation and Measurement . . . . . . . . . . . . . . . . . . . . . . . . . . . 13<br />
1.12.6 Data Plot Display. . . . . . . . . . . . . . . . . . . . . . . . . . . . . . . . . . . . . . . . . . . . . 13<br />
1.12.7 Analytical Functions . . . . . . . . . . . . . . . . . . . . . . . . . . . . . . . . . . . . . . . . . . 13<br />
1.12.8 Boundary Magnification . . . . . . . . . . . . . . . . . . . . . . . . . . . . . . . . . . . . . . . 13<br />
1.12.9 Side Bar Buttons . . . . . . . . . . . . . . . . . . . . . . . . . . . . . . . . . . . . . . . . . . . . . 14<br />
1.13 System Components. . . . . . . . . . . . . . . . . . . . . . . . . . . . . . . . . . . . . . . . 15<br />
1.14 Tracer . . . . . . . . . . . . . . . . . . . . . . . . . . . . . . . . . . . . . . . . . . . . . . . . . . . 16<br />
1.15 Excel Macro . . . . . . . . . . . . . . . . . . . . . . . . . . . . . . . . . . . . . . . . . . . . . . 16<br />
Rev. G <strong>Dektak</strong> 8 <strong>Manual</strong> v
Chapter 2 Installation 17<br />
2.1 Facilities Requirements. . . . . . . . . . . . . . . . . . . . . . . . . . . . . . . . . . . . . . 18<br />
2.2 Installing the Vibration Isolated Workstation Option . . . . . . . . . . . . . . . 26<br />
2.3 Installing the Stage Assembly. . . . . . . . . . . . . . . . . . . . . . . . . . . . . . . . . 27<br />
2.4 Positioning the Universal Chuck. . . . . . . . . . . . . . . . . . . . . . . . . . . . . . . 29<br />
2.5 Shipping Bracket Removal . . . . . . . . . . . . . . . . . . . . . . . . . . . . . . . . . . . 30<br />
2.6 Enclosure Assembly . . . . . . . . . . . . . . . . . . . . . . . . . . . . . . . . . . . . . . . . 33<br />
2.7 Cabling and Connections . . . . . . . . . . . . . . . . . . . . . . . . . . . . . . . . . . . . 34<br />
2.8 Porous Vacuum Chuck (Option) Installation . . . . . . . . . . . . . . . . . . . . . 40<br />
2.9 Stylus Installation . . . . . . . . . . . . . . . . . . . . . . . . . . . . . . . . . . . . . . . . . . 41<br />
2.10 System Configuration . . . . . . . . . . . . . . . . . . . . . . . . . . . . . . . . . . . . . . 41<br />
2.11 System Checkout. . . . . . . . . . . . . . . . . . . . . . . . . . . . . . . . . . . . . . . . . . 41<br />
2.12 Optics Alignment . . . . . . . . . . . . . . . . . . . . . . . . . . . . . . . . . . . . . . . . . 42<br />
Chapter 3 Basic Functions 43<br />
3.1 Software Interface. . . . . . . . . . . . . . . . . . . . . . . . . . . . . . . . . . . . . . . . . . 44<br />
3.1.1 Stage Control. . . . . . . . . . . . . . . . . . . . . . . . . . . . . . . . . . . . . . . . . . . . . . . . . 44<br />
3.1.2 Microsoft Windows . . . . . . . . . . . . . . . . . . . . . . . . . . . . . . . . . . . . . . . . . . . . 44<br />
3.1.3 Trackball . . . . . . . . . . . . . . . . . . . . . . . . . . . . . . . . . . . . . . . . . . . . . . . . . . . . 44<br />
3.1.4 Keyboard Shortcuts . . . . . . . . . . . . . . . . . . . . . . . . . . . . . . . . . . . . . . . . . . . . 45<br />
3.2 Start Sequence (Normal Usage) . . . . . . . . . . . . . . . . . . . . . . . . . . . . . . . 49<br />
3.2.1 Power On. . . . . . . . . . . . . . . . . . . . . . . . . . . . . . . . . . . . . . . . . . . . . . . . . . . . 49<br />
3.2.2 System Tray Quick-Access Menu . . . . . . . . . . . . . . . . . . . . . . . . . . . . . . . . . 51<br />
3.2.3 Stage Control Panel . . . . . . . . . . . . . . . . . . . . . . . . . . . . . . . . . . . . . . . . . . . . 53<br />
3.2.4 Template Editor . . . . . . . . . . . . . . . . . . . . . . . . . . . . . . . . . . . . . . . . . . . . . . . 54<br />
3.2.5 Setup . . . . . . . . . . . . . . . . . . . . . . . . . . . . . . . . . . . . . . . . . . . . . . . . . . . . . . . 56<br />
3.3 Sample Loading . . . . . . . . . . . . . . . . . . . . . . . . . . . . . . . . . . . . . . . . . . . 56<br />
3.3.1 Stage Tracking. . . . . . . . . . . . . . . . . . . . . . . . . . . . . . . . . . . . . . . . . . . . . . . . 58<br />
3.4 Viewing the Sample . . . . . . . . . . . . . . . . . . . . . . . . . . . . . . . . . . . . . . . . 60<br />
3.4.1 <strong>Manual</strong> Theta Rotation . . . . . . . . . . . . . . . . . . . . . . . . . . . . . . . . . . . . . . . . . 61<br />
3.4.2 Stage Rotation (Optional Programmable Theta) . . . . . . . . . . . . . . . . . . . . . . 62<br />
3.4.3 Lowering/Raising the Stylus . . . . . . . . . . . . . . . . . . . . . . . . . . . . . . . . . . . . . 62<br />
3.4.4 Optics Illumination Adjustment . . . . . . . . . . . . . . . . . . . . . . . . . . . . . . . . . . 62<br />
3.4.5 Stylus Reticle Alignment. . . . . . . . . . . . . . . . . . . . . . . . . . . . . . . . . . . . . . . . 63<br />
3.4.6 Feature Reticle Alignment. . . . . . . . . . . . . . . . . . . . . . . . . . . . . . . . . . . . . . . 65<br />
3.4.7 Sample Positioning Adjustments. . . . . . . . . . . . . . . . . . . . . . . . . . . . . . . . . . 66<br />
3.5 Unloading the Sample. . . . . . . . . . . . . . . . . . . . . . . . . . . . . . . . . . . . . . . 67<br />
3.6 Power Down . . . . . . . . . . . . . . . . . . . . . . . . . . . . . . . . . . . . . . . . . . . . . . 67<br />
Chapter 4 Single Scan Operation 69<br />
4.1 Create a Single-Scan Automation Program . . . . . . . . . . . . . . . . . . . . . . 70<br />
vi <strong>Dektak</strong> 8 <strong>Manual</strong> Rev. G
4.2 Define Scan Location and Length . . . . . . . . . . . . . . . . . . . . . . . . . . . . . . 73<br />
4.3 Run a Scan Routine . . . . . . . . . . . . . . . . . . . . . . . . . . . . . . . . . . . . . . . . . 76<br />
4.4 Reference/Measurement Cursors . . . . . . . . . . . . . . . . . . . . . . . . . . . . . . . 77<br />
4.4.1 Basic Cursor Positioning . . . . . . . . . . . . . . . . . . . . . . . . . . . . . . . . . . . . . . . . 77<br />
4.4.2 Setting Cursor Bandwidths . . . . . . . . . . . . . . . . . . . . . . . . . . . . . . . . . . . . . . 78<br />
4.4.3 Cursor Positioning Using Arrows . . . . . . . . . . . . . . . . . . . . . . . . . . . . . . . . . 79<br />
4.4.4 Numeric Entry Cursor Positioning . . . . . . . . . . . . . . . . . . . . . . . . . . . . . . . . 80<br />
4.5 Stage Leveling . . . . . . . . . . . . . . . . . . . . . . . . . . . . . . . . . . . . . . . . . . . . . 81<br />
4.5.1 <strong>Manual</strong> Stage Leveling . . . . . . . . . . . . . . . . . . . . . . . . . . . . . . . . . . . . . . . . . 81<br />
4.5.2 Optional Power Stage Leveling. . . . . . . . . . . . . . . . . . . . . . . . . . . . . . . . . . . 82<br />
4.6 Software Leveling . . . . . . . . . . . . . . . . . . . . . . . . . . . . . . . . . . . . . . . . . . 85<br />
4.7 Setting the Zero Point. . . . . . . . . . . . . . . . . . . . . . . . . . . . . . . . . . . . . . . . 86<br />
4.8 Delta Average Step Height Measurement . . . . . . . . . . . . . . . . . . . . . . . . 87<br />
4.9 Plot Magnification . . . . . . . . . . . . . . . . . . . . . . . . . . . . . . . . . . . . . . . . . . 89<br />
4.10 Save Boundaries. . . . . . . . . . . . . . . . . . . . . . . . . . . . . . . . . . . . . . . . . . . 90<br />
4.10.1 Showing Saved Boundaries. . . . . . . . . . . . . . . . . . . . . . . . . . . . . . . . . . . . . 90<br />
4.10.2 Restoring Saved Boundaries . . . . . . . . . . . . . . . . . . . . . . . . . . . . . . . . . . . . 91<br />
4.11 Data Printout. . . . . . . . . . . . . . . . . . . . . . . . . . . . . . . . . . . . . . . . . . . . . . 92<br />
4.12 Saving an Automation Program . . . . . . . . . . . . . . . . . . . . . . . . . . . . . . . 93<br />
4.13 Aborting an Operation . . . . . . . . . . . . . . . . . . . . . . . . . . . . . . . . . . . . . . 94<br />
Chapter 5 Multiple Scan Operation 95<br />
5.1 Automation Program Description . . . . . . . . . . . . . . . . . . . . . . . . . . . . . . 96<br />
5.2 Opening a New Automation Program . . . . . . . . . . . . . . . . . . . . . . . . . . . 96<br />
5.3 Editing an Automation Program . . . . . . . . . . . . . . . . . . . . . . . . . . . . . . . 98<br />
5.4 Program Entry . . . . . . . . . . . . . . . . . . . . . . . . . . . . . . . . . . . . . . . . . . . . . 99<br />
5.4.1 Define Scan Location and Length . . . . . . . . . . . . . . . . . . . . . . . . . . . . . . . . 100<br />
5.4.2 Scan Routines Window . . . . . . . . . . . . . . . . . . . . . . . . . . . . . . . . . . . . . . . . 102<br />
5.5 Editing Scan Routines . . . . . . . . . . . . . . . . . . . . . . . . . . . . . . . . . . . . . . 104<br />
5.5.1 Scan Parameters. . . . . . . . . . . . . . . . . . . . . . . . . . . . . . . . . . . . . . . . . . . . . . 104<br />
5.5.2 Display Parameters . . . . . . . . . . . . . . . . . . . . . . . . . . . . . . . . . . . . . . . . . . . 105<br />
5.5.3 Data Processing Settings . . . . . . . . . . . . . . . . . . . . . . . . . . . . . . . . . . . . . . . 105<br />
5.5.4 Analytical Functions . . . . . . . . . . . . . . . . . . . . . . . . . . . . . . . . . . . . . . . . . . 106<br />
5.5.5 Global Editing of Scan Routine Parameters . . . . . . . . . . . . . . . . . . . . . . . . 106<br />
5.6 Automation Program Options . . . . . . . . . . . . . . . . . . . . . . . . . . . . . . . . 109<br />
5.6.1 Data File/Data Export . . . . . . . . . . . . . . . . . . . . . . . . . . . . . . . . . . . . . . . . . 109<br />
5.6.2 Enabling Automation Program Summary (APS) . . . . . . . . . . . . . . . . . . . . 112<br />
5.6.3 Automation Program Summary Window . . . . . . . . . . . . . . . . . . . . . . . . . . 113<br />
5.6.4 Printer . . . . . . . . . . . . . . . . . . . . . . . . . . . . . . . . . . . . . . . . . . . . . . . . . . . . . 116<br />
5.6.5 Pause During Autoprogram. . . . . . . . . . . . . . . . . . . . . . . . . . . . . . . . . . . . . 117<br />
5.6.6 Stage Control . . . . . . . . . . . . . . . . . . . . . . . . . . . . . . . . . . . . . . . . . . . . . . . . 118<br />
Rev. G <strong>Dektak</strong> 8 <strong>Manual</strong> vii
5.7 Deskew . . . . . . . . . . . . . . . . . . . . . . . . . . . . . . . . . . . . . . . . . . . . . . . . . .119<br />
5.7.1 Establishing Program Deskew Points . . . . . . . . . . . . . . . . . . . . . . . . . . . . . 120<br />
5.7.2 Establishing Scan Deskew Points . . . . . . . . . . . . . . . . . . . . . . . . . . . . . . . . 121<br />
5.7.3 Running an Automation Program Containing Deskew Points . . . . . . . . . . 123<br />
Chapter 6 Analytical Functions 127<br />
6.1 Analytical Functions Description . . . . . . . . . . . . . . . . . . . . . . . . . . . . . 128<br />
6.2 Roughness Parameters . . . . . . . . . . . . . . . . . . . . . . . . . . . . . . . . . . . . . 129<br />
6.3 Waviness Parameters. . . . . . . . . . . . . . . . . . . . . . . . . . . . . . . . . . . . . . . 133<br />
6.4 Height Parameters . . . . . . . . . . . . . . . . . . . . . . . . . . . . . . . . . . . . . . . . . 135<br />
6.5 Geometry Parameters . . . . . . . . . . . . . . . . . . . . . . . . . . . . . . . . . . . . . . 136<br />
6.6 Analytical Function Exercise . . . . . . . . . . . . . . . . . . . . . . . . . . . . . . . . 138<br />
6.6.1 Run Scan and Level Trace. . . . . . . . . . . . . . . . . . . . . . . . . . . . . . . . . . . . . . 138<br />
6.6.2 Average Roughness Measurement . . . . . . . . . . . . . . . . . . . . . . . . . . . . . . . 139<br />
6.7 Determining the Cutoff Wavelength . . . . . . . . . . . . . . . . . . . . . . . . . . . 140<br />
6.8 Activating the Cutoff Filters . . . . . . . . . . . . . . . . . . . . . . . . . . . . . . . . . 141<br />
6.9 Entering Filter Cutoffs into a Scan Routine . . . . . . . . . . . . . . . . . . . . . 142<br />
6.10 Data Type Selection . . . . . . . . . . . . . . . . . . . . . . . . . . . . . . . . . . . . . . 143<br />
6.11 Entering Data Type into a Scan Routine . . . . . . . . . . . . . . . . . . . . . . . 144<br />
6.12 Measuring and Entering Analytical Functions . . . . . . . . . . . . . . . . . . 145<br />
6.13 Entering Analytical Functions into a Scan Routine . . . . . . . . . . . . . . 146<br />
6.14 Deleting Analytical Functions or Results . . . . . . . . . . . . . . . . . . . . . . 147<br />
6.15 Smoothing . . . . . . . . . . . . . . . . . . . . . . . . . . . . . . . . . . . . . . . . . . . . . . 148<br />
6.16 Activating the Smoothing Function . . . . . . . . . . . . . . . . . . . . . . . . . . 149<br />
6.17 Entering Smoothing into a Scan Routine . . . . . . . . . . . . . . . . . . . . . . 150<br />
Chapter 7 Scan Routine Parameter Description 151<br />
7.1 Scan Parameters . . . . . . . . . . . . . . . . . . . . . . . . . . . . . . . . . . . . . . . . . . 152<br />
7.1.1 Scan ID . . . . . . . . . . . . . . . . . . . . . . . . . . . . . . . . . . . . . . . . . . . . . . . . . . . . 152<br />
7.1.2 Stylus Type . . . . . . . . . . . . . . . . . . . . . . . . . . . . . . . . . . . . . . . . . . . . . . . . . 153<br />
7.1.3 Scan Location . . . . . . . . . . . . . . . . . . . . . . . . . . . . . . . . . . . . . . . . . . . . . . . 153<br />
7.1.4 Scan Length. . . . . . . . . . . . . . . . . . . . . . . . . . . . . . . . . . . . . . . . . . . . . . . . . 154<br />
7.1.5 Scan Duration/Speed . . . . . . . . . . . . . . . . . . . . . . . . . . . . . . . . . . . . . . . . . . 155<br />
7.1.6 Scan Resolution. . . . . . . . . . . . . . . . . . . . . . . . . . . . . . . . . . . . . . . . . . . . . . 156<br />
7.1.7 Scan Type . . . . . . . . . . . . . . . . . . . . . . . . . . . . . . . . . . . . . . . . . . . . . . . . . . 157<br />
7.1.8 Stylus Force. . . . . . . . . . . . . . . . . . . . . . . . . . . . . . . . . . . . . . . . . . . . . . . . . 158<br />
7.1.9 Measurement Range . . . . . . . . . . . . . . . . . . . . . . . . . . . . . . . . . . . . . . . . . . 159<br />
7.1.10 Profile . . . . . . . . . . . . . . . . . . . . . . . . . . . . . . . . . . . . . . . . . . . . . . . . . . . . 160<br />
7.1.11 Additional Parameters . . . . . . . . . . . . . . . . . . . . . . . . . . . . . . . . . . . . . . . . 161<br />
7.1.12 Deflection Scan . . . . . . . . . . . . . . . . . . . . . . . . . . . . . . . . . . . . . . . . . . . . . 162<br />
7.2 Display Parameters . . . . . . . . . . . . . . . . . . . . . . . . . . . . . . . . . . . . . . . . 165<br />
viii <strong>Dektak</strong> 8 <strong>Manual</strong> Rev. G
7.2.1 Software Leveling . . . . . . . . . . . . . . . . . . . . . . . . . . . . . . . . . . . . . . . . . . . . 165<br />
7.2.2 Reference/Measurement Cursors. . . . . . . . . . . . . . . . . . . . . . . . . . . . . . . . . 166<br />
7.2.3 Display Range . . . . . . . . . . . . . . . . . . . . . . . . . . . . . . . . . . . . . . . . . . . . . . . 167<br />
7.2.4 Display Data Type . . . . . . . . . . . . . . . . . . . . . . . . . . . . . . . . . . . . . . . . . . . . 167<br />
7.3 Data Processing . . . . . . . . . . . . . . . . . . . . . . . . . . . . . . . . . . . . . . . . . . . 168<br />
7.3.1 Filter Cutoffs . . . . . . . . . . . . . . . . . . . . . . . . . . . . . . . . . . . . . . . . . . . . . . . . 168<br />
7.3.2 Smoothing . . . . . . . . . . . . . . . . . . . . . . . . . . . . . . . . . . . . . . . . . . . . . . . . . . 169<br />
7.3.3 Step Detection Option . . . . . . . . . . . . . . . . . . . . . . . . . . . . . . . . . . . . . . . . . 169<br />
7.4 Scan Routine Deskew Points . . . . . . . . . . . . . . . . . . . . . . . . . . . . . . . . . 169<br />
Chapter 8 Menu and Toolbar Descriptions 171<br />
8.1 Startup Window . . . . . . . . . . . . . . . . . . . . . . . . . . . . . . . . . . . . . . . . . . . 172<br />
8.2 File Menu . . . . . . . . . . . . . . . . . . . . . . . . . . . . . . . . . . . . . . . . . . . . . . . . 174<br />
8.3 Run Menu. . . . . . . . . . . . . . . . . . . . . . . . . . . . . . . . . . . . . . . . . . . . . . . . 176<br />
8.4 <strong>Profiler</strong> Menu . . . . . . . . . . . . . . . . . . . . . . . . . . . . . . . . . . . . . . . . . . . . . 178<br />
8.5 Setup Menu . . . . . . . . . . . . . . . . . . . . . . . . . . . . . . . . . . . . . . . . . . . . . . 180<br />
8.6 Calibration Menu . . . . . . . . . . . . . . . . . . . . . . . . . . . . . . . . . . . . . . . . . . 186<br />
8.7 Window Menu . . . . . . . . . . . . . . . . . . . . . . . . . . . . . . . . . . . . . . . . . . . . 189<br />
8.8 Help Menu . . . . . . . . . . . . . . . . . . . . . . . . . . . . . . . . . . . . . . . . . . . . . . . 190<br />
8.9 Automation Programs Window Menu Selections . . . . . . . . . . . . . . . . . 191<br />
8.9.1 Edit Menu . . . . . . . . . . . . . . . . . . . . . . . . . . . . . . . . . . . . . . . . . . . . . . . . . . 191<br />
8.9.2 Deskew Menu . . . . . . . . . . . . . . . . . . . . . . . . . . . . . . . . . . . . . . . . . . . . . . . 192<br />
8.10 Scan Routines Window Menu Selections. . . . . . . . . . . . . . . . . . . . . . . 193<br />
8.10.1 Edit Menu . . . . . . . . . . . . . . . . . . . . . . . . . . . . . . . . . . . . . . . . . . . . . . . . . 193<br />
8.10.2 Deskew Menu . . . . . . . . . . . . . . . . . . . . . . . . . . . . . . . . . . . . . . . . . . . . . . 194<br />
8.11 Sample Positioning Window Menu Selections . . . . . . . . . . . . . . . . . . 195<br />
8.11.1 Additional Menu Selections . . . . . . . . . . . . . . . . . . . . . . . . . . . . . . . . . . . 195<br />
8.11.2 Deskew Menu . . . . . . . . . . . . . . . . . . . . . . . . . . . . . . . . . . . . . . . . . . . . . . 197<br />
8.11.3 Pop-Up Menu Selections . . . . . . . . . . . . . . . . . . . . . . . . . . . . . . . . . . . . . . 197<br />
8.12 Data Plot Window Menu Selections. . . . . . . . . . . . . . . . . . . . . . . . . . . 201<br />
8.12.1 Edit Menu . . . . . . . . . . . . . . . . . . . . . . . . . . . . . . . . . . . . . . . . . . . . . . . . . 201<br />
8.12.2 Plot Menu . . . . . . . . . . . . . . . . . . . . . . . . . . . . . . . . . . . . . . . . . . . . . . . . . 202<br />
8.12.3 Analysis Menu. . . . . . . . . . . . . . . . . . . . . . . . . . . . . . . . . . . . . . . . . . . . . . 204<br />
8.13 Auto Prog Summary Window Menu Selections . . . . . . . . . . . . . . . . . 206<br />
8.13.1 Edit Menu . . . . . . . . . . . . . . . . . . . . . . . . . . . . . . . . . . . . . . . . . . . . . . . . . 206<br />
8.14 Toolbars and Icons . . . . . . . . . . . . . . . . . . . . . . . . . . . . . . . . . . . . . . . . 207<br />
8.14.1 Customizing the Toolbars . . . . . . . . . . . . . . . . . . . . . . . . . . . . . . . . . . . . . 207<br />
8.14.2 Startup Window Toolbar and Icons . . . . . . . . . . . . . . . . . . . . . . . . . . . . . . 208<br />
8.14.3 Automation Programs Window Toolbar and Icons . . . . . . . . . . . . . . . . . . 209<br />
8.14.4 Scan Routines Window Toolbar and Icons . . . . . . . . . . . . . . . . . . . . . . . . 211<br />
8.14.5 Sample Positioning Window Toolbar and Icons . . . . . . . . . . . . . . . . . . . . 212<br />
8.14.6 Data Plot Window Toolbar and Icons . . . . . . . . . . . . . . . . . . . . . . . . . . . . 214<br />
Rev. G <strong>Dektak</strong> 8 <strong>Manual</strong> ix
8.14.7 Automation Program Summary Window Toolbar and Icons . . . . . . . . . . 215<br />
Chapter 9 Calibration, Maintenance and Warranty 217<br />
9.1 Care and Handling . . . . . . . . . . . . . . . . . . . . . . . . . . . . . . . . . . . . . . . . 218<br />
9.1.1 Preventative Maintenance . . . . . . . . . . . . . . . . . . . . . . . . . . . . . . . . . . . . . . 218<br />
9.2 Vertical Calibration . . . . . . . . . . . . . . . . . . . . . . . . . . . . . . . . . . . . . . . . 220<br />
9.2.1 Vertical Calibration Help Window . . . . . . . . . . . . . . . . . . . . . . . . . . . . . . . 220<br />
9.3 Calibrating the 65 kÅ Range. . . . . . . . . . . . . . . . . . . . . . . . . . . . . . . . . 221<br />
9.3.1 Scanning the 50 kÅ Calibration Standard . . . . . . . . . . . . . . . . . . . . . . . . . . 221<br />
9.3.2 Calculating Average Step Height . . . . . . . . . . . . . . . . . . . . . . . . . . . . . . . . 222<br />
9.3.3 Setting the Vertical Calibration . . . . . . . . . . . . . . . . . . . . . . . . . . . . . . . . . . 223<br />
9.4 Calibrating the 655 kÅ Range. . . . . . . . . . . . . . . . . . . . . . . . . . . . . . . . 224<br />
9.4.1 Scanning the 100 kÅ Calibration Standard . . . . . . . . . . . . . . . . . . . . . . . . . 225<br />
9.4.2 Calculating Average Step Height . . . . . . . . . . . . . . . . . . . . . . . . . . . . . . . . 226<br />
9.4.3 Setting the Vertical Calibration . . . . . . . . . . . . . . . . . . . . . . . . . . . . . . . . . . 227<br />
9.5 Calibrating the 2620 kÅ Range. . . . . . . . . . . . . . . . . . . . . . . . . . . . . . . 228<br />
9.5.1 Scanning the 100 kÅ Calibration Standard . . . . . . . . . . . . . . . . . . . . . . . . . 229<br />
9.5.2 Calculating Average Step Height . . . . . . . . . . . . . . . . . . . . . . . . . . . . . . . . 230<br />
9.5.3 Setting the Vertical Calibration . . . . . . . . . . . . . . . . . . . . . . . . . . . . . . . . . . 230<br />
9.5.4 Vertical Calibration for the Extended Vertical Range Option . . . . . . . . . . . 232<br />
9.6 Clearing the Vertical Calibration. . . . . . . . . . . . . . . . . . . . . . . . . . . . . . 233<br />
9.7 Calibration Wizards . . . . . . . . . . . . . . . . . . . . . . . . . . . . . . . . . . . . . . . 233<br />
9.8 Cleaning the Optical Flat . . . . . . . . . . . . . . . . . . . . . . . . . . . . . . . . . . . 235<br />
9.9 Stylus Replacement and Tip Cleaning . . . . . . . . . . . . . . . . . . . . . . . . . 237<br />
9.9.1 Replacing the Stylus . . . . . . . . . . . . . . . . . . . . . . . . . . . . . . . . . . . . . . . . . . 237<br />
9.9.2 Cleaning the Stylus . . . . . . . . . . . . . . . . . . . . . . . . . . . . . . . . . . . . . . . . . . . 241<br />
9.10 Optics Adjustment . . . . . . . . . . . . . . . . . . . . . . . . . . . . . . . . . . . . . . . 242<br />
9.10.1 Low Mag Camera Alignment . . . . . . . . . . . . . . . . . . . . . . . . . . . . . . . . . . 243<br />
9.10.2 Low Mag Camera Focus and Alignment . . . . . . . . . . . . . . . . . . . . . . . . . 244<br />
9.10.3 High Mag Camera Alignment . . . . . . . . . . . . . . . . . . . . . . . . . . . . . . . . . . 245<br />
9.10.4 High Mag Camera Rotation . . . . . . . . . . . . . . . . . . . . . . . . . . . . . . . . . . . 246<br />
9.10.5 High Mag Camera Focus. . . . . . . . . . . . . . . . . . . . . . . . . . . . . . . . . . . . . . 246<br />
9.10.6 Video Overlay Adjustment . . . . . . . . . . . . . . . . . . . . . . . . . . . . . . . . . . . . 247<br />
9.11 Service Contracts . . . . . . . . . . . . . . . . . . . . . . . . . . . . . . . . . . . . . . . . 248<br />
9.12 Major Repairs . . . . . . . . . . . . . . . . . . . . . . . . . . . . . . . . . . . . . . . . . . . 248<br />
9.13 Veeco Metrology Group Statement of Limited Warranty . . . . . . . . . . 250<br />
Appendix A Options, Accessories and Replacement Parts 253<br />
Appendix B Stress Measurement Option 257<br />
B.1 Description of Stress. . . . . . . . . . . . . . . . . . . . . . . . . . . . . . . . . . . . . . . 258<br />
B.2 Identifying Substrate Characteristics . . . . . . . . . . . . . . . . . . . . . . . . . . 260<br />
x <strong>Dektak</strong> 8 <strong>Manual</strong> Rev. G
B.3 Entering Stress Parameters . . . . . . . . . . . . . . . . . . . . . . . . . . . . . . . . . . 262<br />
B.4 Stress Results . . . . . . . . . . . . . . . . . . . . . . . . . . . . . . . . . . . . . . . . . . . . . 263<br />
B.4.1 Constraints and Limitations . . . . . . . . . . . . . . . . . . . . . . . . . . . . . . . . . . . . 264<br />
Appendix C Step Detection Software Option 265<br />
C.1 Step Detection Parameters. . . . . . . . . . . . . . . . . . . . . . . . . . . . . . . . . . . 267<br />
C.1.1 Every Step Page . . . . . . . . . . . . . . . . . . . . . . . . . . . . . . . . . . . . . . . . . . . . . 268<br />
C.1.2 First Step Page . . . . . . . . . . . . . . . . . . . . . . . . . . . . . . . . . . . . . . . . . . . . . . 270<br />
C.2 Step Detection Setup . . . . . . . . . . . . . . . . . . . . . . . . . . . . . . . . . . . . . . . 273<br />
C.2.1 Performing Step Detection on a Single Scan . . . . . . . . . . . . . . . . . . . . . . . 273<br />
C.2.2 Programming Step Detection in a Scan Routine. . . . . . . . . . . . . . . . . . . . . 274<br />
C.2.3 Programming Step Detection on Multiple Scans . . . . . . . . . . . . . . . . . . . . 274<br />
Appendix D 3D Mapping Option 277<br />
D.1 3D Mapping Option. . . . . . . . . . . . . . . . . . . . . . . . . . . . . . . . . . . . . . . . 277<br />
D.2 Setting Up a 3-D Mapping Program . . . . . . . . . . . . . . . . . . . . . . . . . . . 279<br />
D.2.1 Files for Mapping Data. . . . . . . . . . . . . . . . . . . . . . . . . . . . . . . . . . . . . . . . 281<br />
D.3 Running a Map Program . . . . . . . . . . . . . . . . . . . . . . . . . . . . . . . . . . . . 282<br />
D.4 Vision Overview . . . . . . . . . . . . . . . . . . . . . . . . . . . . . . . . . . . . . . . . . . 282<br />
D.4.1 Vision for <strong>Dektak</strong> Basic Functions. . . . . . . . . . . . . . . . . . . . . . . . . . . . . . . 282<br />
D.4.2 Vision for <strong>Dektak</strong> Toolbar . . . . . . . . . . . . . . . . . . . . . . . . . . . . . . . . . . . . . 285<br />
D.5 Analyzing Data . . . . . . . . . . . . . . . . . . . . . . . . . . . . . . . . . . . . . . . . . . . 289<br />
D.5.1 Processed Options. . . . . . . . . . . . . . . . . . . . . . . . . . . . . . . . . . . . . . . . . . . . 289<br />
D.6 Displaying Data. . . . . . . . . . . . . . . . . . . . . . . . . . . . . . . . . . . . . . . . . . . 295<br />
D.6.1 Setting the Units . . . . . . . . . . . . . . . . . . . . . . . . . . . . . . . . . . . . . . . . . . . . . 295<br />
D.6.2 Standard Display File . . . . . . . . . . . . . . . . . . . . . . . . . . . . . . . . . . . . . . . . . 295<br />
D.6.3 Standard Plots . . . . . . . . . . . . . . . . . . . . . . . . . . . . . . . . . . . . . . . . . . . . . . . 298<br />
D.6.4 Masking . . . . . . . . . . . . . . . . . . . . . . . . . . . . . . . . . . . . . . . . . . . . . . . . . . . 311<br />
D.7 Dataset vs. Database . . . . . . . . . . . . . . . . . . . . . . . . . . . . . . . . . . . . . . . 317<br />
D.7.1 <strong>Dektak</strong> Vision Databases . . . . . . . . . . . . . . . . . . . . . . . . . . . . . . . . . . . . . . 318<br />
Appendix E N-Lite Option 325<br />
E.1 Introduction . . . . . . . . . . . . . . . . . . . . . . . . . . . . . . . . . . . . . . . . . . . . . . 326<br />
E.2 Main Functions . . . . . . . . . . . . . . . . . . . . . . . . . . . . . . . . . . . . . . . . . . . 327<br />
E.3 <strong>Advanced</strong> Users . . . . . . . . . . . . . . . . . . . . . . . . . . . . . . . . . . . . . . . . . . . 329<br />
E.3.1 N-Lite Algorithm Configuration File Entries . . . . . . . . . . . . . . . . . . . . . . . 329<br />
E.3.2 Stiction Problems . . . . . . . . . . . . . . . . . . . . . . . . . . . . . . . . . . . . . . . . . . . . 329<br />
E.4 Configuration File Setup . . . . . . . . . . . . . . . . . . . . . . . . . . . . . . . . . . . . 331<br />
E.4.1 N-Lite Configuration File . . . . . . . . . . . . . . . . . . . . . . . . . . . . . . . . . . . . . . 331<br />
E.4.2 Hardware Configuration File . . . . . . . . . . . . . . . . . . . . . . . . . . . . . . . . . . . 331<br />
E.4.3 Configuration File Example . . . . . . . . . . . . . . . . . . . . . . . . . . . . . . . . . . . . 332<br />
Rev. G <strong>Dektak</strong> 8 <strong>Manual</strong> xi
Index 335<br />
xii <strong>Dektak</strong> 8 <strong>Manual</strong> Rev. G
List of Figures<br />
Chapter 1 System Overview . . . . . . . . . . . . . . . . . . . . . . . . . . . . . . . . . . . . . . . . . . . . . . . . . . . . .1<br />
Figure 1.0a <strong>Dektak</strong> 8 . . . . . . . . . . . . . . . . . . . . . . . . . . . . . . . . . . . . . . . . . . . . 2<br />
Figure 1.4a Block Diagram of <strong>Dektak</strong> 8 Architecture . . . . . . . . . . . . . . . . . . . 6<br />
Figure 1.13a <strong>Dektak</strong> 8 <strong>Profiler</strong> Components . . . . . . . . . . . . . . . . . . . . . . . . . 15<br />
Chapter 2 Installation . . . . . . . . . . . . . . . . . . . . . . . . . . . . . . . . . . . . . . . . . . . . . . . . . . . . . . . . .17<br />
Figure 2.1a D8 Dimensions with Enclosure - Top View . . . . . . . . . . . . . . . . 19<br />
Figure 2.1b D8 Dimensions with Enclosure - Front View. . . . . . . . . . . . . . . 20<br />
Figure 2.1c D8 Dimensions with Enclosure - Side View . . . . . . . . . . . . . . . 21<br />
Figure 2.1d D8 <strong>Profiler</strong> without Enclosure . . . . . . . . . . . . . . . . . . . . . . . . . . 22<br />
Figure 2.1e D8 <strong>Profiler</strong> Dimensions - Top View . . . . . . . . . . . . . . . . . . . . . . 23<br />
Figure 2.1f D8 <strong>Profiler</strong> Dimensions - Front View . . . . . . . . . . . . . . . . . . . . . 24<br />
Figure 2.1g D8 <strong>Profiler</strong> Dimensions - Side View . . . . . . . . . . . . . . . . . . . . . 25<br />
Figure 2.3a Stage Assembly. . . . . . . . . . . . . . . . . . . . . . . . . . . . . . . . . . . . . . 27<br />
Figure 2.3b Stage . . . . . . . . . . . . . . . . . . . . . . . . . . . . . . . . . . . . . . . . . . . . . . 28<br />
Figure 2.3c Scan Follower Assembly . . . . . . . . . . . . . . . . . . . . . . . . . . . . . . 28<br />
Figure 2.4a Universal Chuck . . . . . . . . . . . . . . . . . . . . . . . . . . . . . . . . . . . . . 29<br />
Figure 2.4b Universal Chuck Mounting Holes and Vacuum Ports . . . . . . . . 30<br />
Figure 2.5a Z-Drive . . . . . . . . . . . . . . . . . . . . . . . . . . . . . . . . . . . . . . . . . . . . 31<br />
Figure 2.5b Gantry Drive Brackets . . . . . . . . . . . . . . . . . . . . . . . . . . . . . . . . 32<br />
Figure 2.5c Scan Head . . . . . . . . . . . . . . . . . . . . . . . . . . . . . . . . . . . . . . . . . . 32<br />
Figure 2.6a Enclosure . . . . . . . . . . . . . . . . . . . . . . . . . . . . . . . . . . . . . . . . . . 33<br />
Figure 2.7a Rear View of Computer . . . . . . . . . . . . . . . . . . . . . . . . . . . . . . . 36<br />
Figure 2.7b Serial-to-USB Adapter Cable . . . . . . . . . . . . . . . . . . . . . . . . . . . 36<br />
Figure 2.7c Rear of E-box . . . . . . . . . . . . . . . . . . . . . . . . . . . . . . . . . . . . . . . 37<br />
Figure 2.7d Optional Theta Encoder . . . . . . . . . . . . . . . . . . . . . . . . . . . . . . . 38<br />
Figure 2.7e Counter Box . . . . . . . . . . . . . . . . . . . . . . . . . . . . . . . . . . . . . . . . 38<br />
Figure 2.7f Counter Box Connection to Computer . . . . . . . . . . . . . . . . . . . . 38<br />
Figure 2.8a Porous Vacuum Chuck Assembly. . . . . . . . . . . . . . . . . . . . . . . . 40<br />
Figure 2.11a LED Banks on E-Box . . . . . . . . . . . . . . . . . . . . . . . . . . . . . . . . 42<br />
Rev. G <strong>Dektak</strong> 8 <strong>Manual</strong> xiii
List of Figures<br />
Chapter 3 Basic Functions . . . . . . . . . . . . . . . . . . . . . . . . . . . . . . . . . . . . . . . . . . . . . . . . . . . . 43<br />
Figure 3.1a Trackball . . . . . . . . . . . . . . . . . . . . . . . . . . . . . . . . . . . . . . . . . . 45<br />
Figure 3.1b Configuration Settings Dialog Box - Shortcuts Folder . . . . . . . 47<br />
Figure 3.2a Rear View of E-Box. . . . . . . . . . . . . . . . . . . . . . . . . . . . . . . . . . 49<br />
Figure 3.2b Startup Window . . . . . . . . . . . . . . . . . . . . . . . . . . . . . . . . . . . . . 50<br />
Figure 3.2c Quick-Access Menu. . . . . . . . . . . . . . . . . . . . . . . . . . . . . . . . . . 51<br />
Figure 3.2d Stage Control Panel (in Sample Positioning Window) . . . . . . . 54<br />
Figure 3.2e Template Editor Dialog Box . . . . . . . . . . . . . . . . . . . . . . . . . . . 55<br />
Figure 3.3a Window Menu, Sample Positioning . . . . . . . . . . . . . . . . . . . . . 56<br />
Figure 3.3b Sample Positioning Window with Stage Control Panel . . . . . . 57<br />
Figure 3.3c Calibration Standard Positioning . . . . . . . . . . . . . . . . . . . . . . . . 58<br />
Figure 3.3d Low Magnification Button . . . . . . . . . . . . . . . . . . . . . . . . . . . . 58<br />
Figure 3.3e Camera View Pane (partial view) . . . . . . . . . . . . . . . . . . . . . . . 59<br />
Figure 3.4a Theta Knob . . . . . . . . . . . . . . . . . . . . . . . . . . . . . . . . . . . . . . . . 61<br />
Figure 3.4b Theta Rotate the Stage. . . . . . . . . . . . . . . . . . . . . . . . . . . . . . . . 61<br />
Figure 3.4c Stylus Movement Icons . . . . . . . . . . . . . . . . . . . . . . . . . . . . . . . 62<br />
Figure 3.4d <strong>Profiler</strong> Menu, Stylus Down . . . . . . . . . . . . . . . . . . . . . . . . . . . 62<br />
Figure 3.4e Sample Positioning Window Pop-up Menu. . . . . . . . . . . . . . . . 63<br />
Figure 3.4f Stylus Reticle Alignment . . . . . . . . . . . . . . . . . . . . . . . . . . . . . . 64<br />
Figure 3.4g Feature Reticle Alignment. . . . . . . . . . . . . . . . . . . . . . . . . . . . . 65<br />
Figure 3.4h Update Alignment Reticule . . . . . . . . . . . . . . . . . . . . . . . . . . . . 66<br />
Figure 3.5a Load Sample Dialog Box. . . . . . . . . . . . . . . . . . . . . . . . . . . . . . 67<br />
Chapter 4 Single Scan Operation . . . . . . . . . . . . . . . . . . . . . . . . . . . . . . . . . . . . . . . . . . . . . . . 69<br />
Figure 4.1a New Automation Program . . . . . . . . . . . . . . . . . . . . . . . . . . . . . 71<br />
Figure 4.1b Scan Routines Window with Default Scan Routine (#1 of 1) . . 72<br />
Figure 4.2a Stylus Reticule Positioned Properly. . . . . . . . . . . . . . . . . . . . . . 73<br />
Figure 4.2b Scan Location Dialog Box. . . . . . . . . . . . . . . . . . . . . . . . . . . . . 74<br />
Figure 4.2c Scan Length Dialog Box . . . . . . . . . . . . . . . . . . . . . . . . . . . . . . 74<br />
Figure 4.2d Scan Parameters Dialog Box . . . . . . . . . . . . . . . . . . . . . . . . . . . 75<br />
Figure 4.3a Calibration Standard Profile . . . . . . . . . . . . . . . . . . . . . . . . . . . 76<br />
Figure 4.4a Setting Default Cursor Band Widths . . . . . . . . . . . . . . . . . . . . . 77<br />
Figure 4.4b Setting Cursor Band Widths: Handle and Dialog Box . . . . . . . 78<br />
Figure 4.4c Data Plot Box. . . . . . . . . . . . . . . . . . . . . . . . . . . . . . . . . . . . . . . 79<br />
Figure 4.4d Cursor-Control Arrows . . . . . . . . . . . . . . . . . . . . . . . . . . . . . . . 79<br />
Figure 4.5a Stage Leveling Knob . . . . . . . . . . . . . . . . . . . . . . . . . . . . . . . . . 81<br />
Figure 4.5b Auto Leveling . . . . . . . . . . . . . . . . . . . . . . . . . . . . . . . . . . . . . . 83<br />
Figure 4.5c Power Leveling Dialog Box . . . . . . . . . . . . . . . . . . . . . . . . . . . 83<br />
Figure 4.6a Cursor Positioning for Software Leveling . . . . . . . . . . . . . . . . . 85<br />
Figure 4.7a Setting the Zero Point . . . . . . . . . . . . . . . . . . . . . . . . . . . . . . . . 86<br />
Figure 4.8a Analytical Functions Dialog Box for Data Plot Window . . . . . 87<br />
Figure 4.8b Step Height Measurement . . . . . . . . . . . . . . . . . . . . . . . . . . . . . 88<br />
Figure 4.9a Plot Magnification . . . . . . . . . . . . . . . . . . . . . . . . . . . . . . . . . . . 89<br />
xiv <strong>Dektak</strong> 8 <strong>Manual</strong> Rev. G
List of Figures<br />
Figure 4.10a Save Boundaries . . . . . . . . . . . . . . . . . . . . . . . . . . . . . . . . . . . .90<br />
Figure 4.10b Restoring Saved Boundaries. . . . . . . . . . . . . . . . . . . . . . . . . . .91<br />
Figure 4.12a Automation Programs Window. . . . . . . . . . . . . . . . . . . . . . . . .93<br />
Figure 4.12b Save <strong>Dektak</strong> Data or Program Dialog Box. . . . . . . . . . . . . . . .94<br />
Chapter 5 Multiple Scan Operation . . . . . . . . . . . . . . . . . . . . . . . . . . . . . . . . . . . . . . . . . . . . . 95<br />
Figure 5.2a New Automation Program . . . . . . . . . . . . . . . . . . . . . . . . . . . . .97<br />
Figure 5.3a Copy to Range Dialog Box . . . . . . . . . . . . . . . . . . . . . . . . . . . . .98<br />
Figure 5.4a Scan Routines Area. . . . . . . . . . . . . . . . . . . . . . . . . . . . . . . . . . .99<br />
Figure 5.4b Scan Location Dialog Box . . . . . . . . . . . . . . . . . . . . . . . . . . . .100<br />
Figure 5.4c Scan Length Dialog Box . . . . . . . . . . . . . . . . . . . . . . . . . . . . . .102<br />
Figure 5.4d Scan Routines Window. . . . . . . . . . . . . . . . . . . . . . . . . . . . . . .103<br />
Figure 5.5a Scan Parameters for Routine #: 2 of 4 Dialog Box. . . . . . . . . .104<br />
Figure 5.5b Display Parameters Dialog Box . . . . . . . . . . . . . . . . . . . . . . . .105<br />
Figure 5.5c Data Processing Parameters Dialog Box . . . . . . . . . . . . . . . . .105<br />
Figure 5.5d Analytical Functions Dialog Box for the Scan Routines<br />
Window. . . . . . . . . . . . . . . . . . . . . . . . . . . . . . . . . . . . .107<br />
Figure 5.5e Analytical Function Appended . . . . . . . . . . . . . . . . . . . . . . . . .107<br />
Figure 5.6a Automation Programs Window: Automation Programs Options<br />
Section. . . . . . . . . . . . . . . . . . . . . . . . . . . . . . . . . . . . . .109<br />
Figure 5.6b Automation Program Options Dialog Box: General Page . . . . 110<br />
Figure 5.6c Load <strong>Dektak</strong> Data or Program File Dialog Box: Scan Data . . . 112<br />
Figure 5.6d Automation Program Summary Window - Examples . . . . . . . 113<br />
Figure 5.6e Load <strong>Dektak</strong> Data or Program File Dialog Box: APS Data . . . 116<br />
Figure 5.6f Automation Program Options Dialog Box: Extended Page . . . 117<br />
Figure 5.7a Automation Program Deskew Points Dialog Box . . . . . . . . . .120<br />
Figure 5.7b Automation Program Deskew Point Setup Dialog Box . . . . . .121<br />
Figure 5.7c Scan Routine Deskew Points Dialog Box. . . . . . . . . . . . . . . . .122<br />
Figure 5.7d Scan Routine Deskew Point Setup Dialog Box . . . . . . . . . . . .122<br />
Figure 5.7e Automation Program Deskew Point Check Dialog Box. . . . . .123<br />
Chapter 6 Analytical Functions . . . . . . . . . . . . . . . . . . . . . . . . . . . . . . . . . . . . . . . . . . . . . . . 127<br />
Figure 6.1a Analytical Functions Dialog Boxes . . . . . . . . . . . . . . . . . . . . .128<br />
Figure 6.2a Ra Roughness Analytical Function. . . . . . . . . . . . . . . . . . . . . .129<br />
Figure 6.2b Rp Roughness Analytical Function . . . . . . . . . . . . . . . . . . . . .130<br />
Figure 6.2c Rq Roughness Analytical Function. . . . . . . . . . . . . . . . . . . . . .130<br />
Figure 6.2d Rt Roughness Analytical Parameters . . . . . . . . . . . . . . . . . . . .131<br />
Figure 6.2e Rv Roughness Analytical Function. . . . . . . . . . . . . . . . . . . . . .131<br />
Figure 6.2f Rz Roughness Analytical Parameter . . . . . . . . . . . . . . . . . . . . .132<br />
Figure 6.3a Wa Waviness Analytical Function . . . . . . . . . . . . . . . . . . . . . .133<br />
Figure 6.6a Calibration Standard Positioning for a Roughness<br />
Measurement. . . . . . . . . . . . . . . . . . . . . . . . . . . . . . . . .138<br />
Figure 6.6b Compute Ra . . . . . . . . . . . . . . . . . . . . . . . . . . . . . . . . . . . . . . .139<br />
Figure 6.8a Roughness and Waviness Filters Dialog Box . . . . . . . . . . . . . .141<br />
Rev. G <strong>Dektak</strong> 8 <strong>Manual</strong> xv
List of Figures<br />
Figure 6.9a Data Processing Parameters Dialog Box . . . . . . . . . . . . . . . . . 142<br />
Figure 6.10a Data Type Dialog Box . . . . . . . . . . . . . . . . . . . . . . . . . . . . . . 143<br />
Figure 6.11a Display Parameters Dialog Box. . . . . . . . . . . . . . . . . . . . . . . 144<br />
Figure 6.12a Analytical Functions Dialog Box (Data Plot Window) / Analytic<br />
Results . . . . . . . . . . . . . . . . . . . . . . . . . . . . . . . . . . . . . 145<br />
Figure 6.13a Analytical Functions Dialog Box (Scan Routines Window) /<br />
Analytic Functions. . . . . . . . . . . . . . . . . . . . . . . . . . . . 146<br />
Figure 6.14a Deleting Analytical Functions . . . . . . . . . . . . . . . . . . . . . . . . 147<br />
Figure 6.16a Smoothing Dialog Box . . . . . . . . . . . . . . . . . . . . . . . . . . . . . 149<br />
Figure 6.17a Data Processing Parameters Dialog Box: Smoothing<br />
Parameter . . . . . . . . . . . . . . . . . . . . . . . . . . . . . . . . . . . 150<br />
Chapter 7 Scan Routine Parameter Description . . . . . . . . . . . . . . . . . . . . . . . . . . . . . . . . . . 151<br />
Figure 7.0a Scan Routine Window . . . . . . . . . . . . . . . . . . . . . . . . . . . . . . . 151<br />
Figure 7.1a Scan Parameter Dialog Box: ID. . . . . . . . . . . . . . . . . . . . . . . . 152<br />
Figure 7.1b Scan Parameter Dialog Box: Stylus Type . . . . . . . . . . . . . . . . 153<br />
Figure 7.1c Scan Parameter Dialog Box: Scan Location . . . . . . . . . . . . . . 154<br />
Figure 7.1d Scan Parameter Dialog Box: Length . . . . . . . . . . . . . . . . . . . . 155<br />
Figure 7.1e Scan Parameter Dialog Box: Duration. . . . . . . . . . . . . . . . . . . 156<br />
Figure 7.1f Scan Parameter Dialog Box: Resolution . . . . . . . . . . . . . . . . . 157<br />
Figure 7.1g Scan Parameter Dialog Box: Scan Type . . . . . . . . . . . . . . . . . 158<br />
Figure 7.1h Scan Parameter Dialog Box: Stylus Force. . . . . . . . . . . . . . . . 159<br />
Figure 7.1i Scan Parameter Dialog Box: Measurement Range . . . . . . . . . 160<br />
Figure 7.1j Sample Surface Profiles . . . . . . . . . . . . . . . . . . . . . . . . . . . . . . 160<br />
Figure 7.1k Scan Parameter Dialog Box: Profile . . . . . . . . . . . . . . . . . . . . 161<br />
Figure 7.1l Scan Parameter Dialog Box: Additional Parameters . . . . . . . . 162<br />
Figure 7.1m Scan Parameter Dialog Box: Deflection Parameters Page . . . 163<br />
Figure 7.2a Display Parameters Dialog Box: Software Leveling Parameter165<br />
Figure 7.2b Display Parameters Dialog Box: Cursor Positioning . . . . . . . 166<br />
Figure 7.2c Display Parameters Dialog Box: Display Range. . . . . . . . . . . 167<br />
Figure 7.2d Display Parameters Dialog Box: Display Data Type . . . . . . . 168<br />
Figure 7.3a Data Processing Parameters Dialog Box: Filters and<br />
Smoothing . . . . . . . . . . . . . . . . . . . . . . . . . . . . . . . . . . 168<br />
Chapter 8 Menu and Toolbar Descriptions . . . . . . . . . . . . . . . . . . . . . . . . . . . . . . . . . . . . . . 171<br />
Figure 8.1a Startup Window . . . . . . . . . . . . . . . . . . . . . . . . . . . . . . . . . . . . 172<br />
Figure 8.2a File Menu. . . . . . . . . . . . . . . . . . . . . . . . . . . . . . . . . . . . . . . . . 174<br />
Figure 8.3a Run Menu . . . . . . . . . . . . . . . . . . . . . . . . . . . . . . . . . . . . . . . . 176<br />
Figure 8.4a <strong>Profiler</strong> Menu. . . . . . . . . . . . . . . . . . . . . . . . . . . . . . . . . . . . . . 178<br />
Figure 8.5a Setup Menu . . . . . . . . . . . . . . . . . . . . . . . . . . . . . . . . . . . . . . . 180<br />
Figure 8.5b Appearance Folder. . . . . . . . . . . . . . . . . . . . . . . . . . . . . . . . . . 180<br />
Figure 8.5c Working Directories Folder . . . . . . . . . . . . . . . . . . . . . . . . . . . 181<br />
Figure 8.5d Diagnostics Folder. . . . . . . . . . . . . . . . . . . . . . . . . . . . . . . . . . 182<br />
Figure 8.5e Shortcuts Folder. . . . . . . . . . . . . . . . . . . . . . . . . . . . . . . . . . . . 182<br />
xvi <strong>Dektak</strong> 8 <strong>Manual</strong> Rev. G
List of Figures<br />
Figure 8.5f Illumination Folder . . . . . . . . . . . . . . . . . . . . . . . . . . . . . . . . . .183<br />
Figure 8.5g Leveling Folder. . . . . . . . . . . . . . . . . . . . . . . . . . . . . . . . . . . . .184<br />
Figure 8.5h Theta Encoder Folder . . . . . . . . . . . . . . . . . . . . . . . . . . . . . . . .185<br />
Figure 8.6a Calibration Menu . . . . . . . . . . . . . . . . . . . . . . . . . . . . . . . . . . .186<br />
Figure 8.6b Force Calibration Dialog Box. . . . . . . . . . . . . . . . . . . . . . . . . .186<br />
Figure 8.7a Window Menu. . . . . . . . . . . . . . . . . . . . . . . . . . . . . . . . . . . . . .189<br />
Figure 8.8a Help Menu. . . . . . . . . . . . . . . . . . . . . . . . . . . . . . . . . . . . . . . . .190<br />
Figure 8.9a Automation Program Window: Edit Menu and Deskew Menu 191<br />
Figure 8.10a Scan Routines Window: Edit Menu and Deskew Menu. . . . .193<br />
Figure 8.11a Sample Positioning Window: Edit Menu and Deskew Menu.195<br />
Figure 8.11b Location for Routine #: m of n Dialog Box . . . . . . . . . . . . . .195<br />
Figure 8.11c Define Scan Length Dialog Box . . . . . . . . . . . . . . . . . . . . . . .196<br />
Figure 8.11d Sample Positioning Window Pop-Up Menu . . . . . . . . . . . . . .198<br />
Figure 8.12a Data Plot Window: Edit, Plot and Analysis Menus . . . . . . . .201<br />
Figure 8.12b Plot Data Type Dialog Box. . . . . . . . . . . . . . . . . . . . . . . . . . .203<br />
Figure 8.12c Set Bandwidths Dialog Box . . . . . . . . . . . . . . . . . . . . . . . . . .204<br />
Figure 8.13a Auto Prog Summary Window: Edit Menu . . . . . . . . . . . . . . .206<br />
Figure 8.14a Toolbar Menu . . . . . . . . . . . . . . . . . . . . . . . . . . . . . . . . . . . . .207<br />
Figure 8.14b Customize Toolbar Dialog Box . . . . . . . . . . . . . . . . . . . . . . .207<br />
Figure 8.14c Startup Window Toolbar . . . . . . . . . . . . . . . . . . . . . . . . . . . . .208<br />
Figure 8.14d Automation Programs Window Toolbar . . . . . . . . . . . . . . . . .209<br />
Figure 8.14e Scan Routines Window Toolbar . . . . . . . . . . . . . . . . . . . . . . . 211<br />
Figure 8.14f Sample Positioning Window Toolbar . . . . . . . . . . . . . . . . . . .212<br />
Figure 8.14g Data Plot Window Toolbar . . . . . . . . . . . . . . . . . . . . . . . . . . .214<br />
Figure 8.14h Automation Program Summary Window Toolbar . . . . . . . . .215<br />
Chapter 9 Calibration, Maintenance and Warranty . . . . . . . . . . . . . . . . . . . . . . . . . . . . . . . . 217<br />
Figure 9.2a Vertical Calibration Help Dialog Box. . . . . . . . . . . . . . . . . . . .220<br />
Figure 9.3a Stylus Reticule Position . . . . . . . . . . . . . . . . . . . . . . . . . . . . . .221<br />
Figure 9.3b 50 kÅ Calibration Standard Plot. . . . . . . . . . . . . . . . . . . . . . . .222<br />
Figure 9.3c Summary Results in APS Window of VERT_65K.mp<br />
Program. . . . . . . . . . . . . . . . . . . . . . . . . . . . . . . . . . . . .223<br />
Figure 9.3d Setting Vertical Calibration Parameters - 65 kÅ Range . . . . . .223<br />
Figure 9.3e Example Calibration Results Using a 50 kÅ Calibration<br />
Standard . . . . . . . . . . . . . . . . . . . . . . . . . . . . . . . . . . . .224<br />
Figure 9.4a Stylus Reticule Position . . . . . . . . . . . . . . . . . . . . . . . . . . . . . .225<br />
Figure 9.4b 100 kÅ Calibration Standard Plot . . . . . . . . . . . . . . . . . . . . . . .226<br />
Figure 9.4c Summary Results in APS Window of VERT_655K.mp<br />
Program. . . . . . . . . . . . . . . . . . . . . . . . . . . . . . . . . . . . .227<br />
Figure 9.4d Setting Vertical Calibration Parameters - 655 kÅ Range . . . . .227<br />
Figure 9.4e Example Calibration Results Using a 100 kÅ Calibration<br />
Standard . . . . . . . . . . . . . . . . . . . . . . . . . . . . . . . . . . . .228<br />
Figure 9.5a Stylus Reticule Position . . . . . . . . . . . . . . . . . . . . . . . . . . . . . .229<br />
Figure 9.5b 100 kÅ Calibration Standard Plot . . . . . . . . . . . . . . . . . . . . . . .230<br />
Rev. G <strong>Dektak</strong> 8 <strong>Manual</strong> xvii
List of Figures<br />
Figure 9.5c Setting Vertical Calibration Parameters - 2620 kÅ Range . . . 231<br />
Figure 9.5d Example Calibration Results Using a 100 kÅ Calibration<br />
Standard . . . . . . . . . . . . . . . . . . . . . . . . . . . . . . . . . . . . 231<br />
Figure 9.5e Calibrating the Extended Vertical Range Option. . . . . . . . . . . 232<br />
Figure 9.5f Scanning the 750 µm Step Height Standard. . . . . . . . . . . . . . . 232<br />
Figure 9.6a Clear Vertical Calibration Dialog Box. . . . . . . . . . . . . . . . . . . 233<br />
Figure 9.7a Calibration Menu . . . . . . . . . . . . . . . . . . . . . . . . . . . . . . . . . . . 233<br />
Figure 9.7b Confirmation Dialog Box for Calibration Wizards . . . . . . . . . 234<br />
Figure 9.8a Stage Removal . . . . . . . . . . . . . . . . . . . . . . . . . . . . . . . . . . . . . 236<br />
Figure 9.9a Stylus Assembly. . . . . . . . . . . . . . . . . . . . . . . . . . . . . . . . . . . . 237<br />
Figure 9.9b Removing Sensor Shield . . . . . . . . . . . . . . . . . . . . . . . . . . . . . 238<br />
Figure 9.9c Stylus Replacement Fixture . . . . . . . . . . . . . . . . . . . . . . . . . . . 238<br />
Figure 9.9d Stylus Replacement Fixture. . . . . . . . . . . . . . . . . . . . . . . . . . . 239<br />
Figure 9.9e Align Stylus Replacement Fixture . . . . . . . . . . . . . . . . . . . . . . 239<br />
Figure 9.9f Scan Head flush with Fixture. . . . . . . . . . . . . . . . . . . . . . . . . . 239<br />
Figure 9.9g Fixture with Captured Stylus. . . . . . . . . . . . . . . . . . . . . . . . . . 240<br />
Figure 9.10a LIS3 Sensor . . . . . . . . . . . . . . . . . . . . . . . . . . . . . . . . . . . . . . 243<br />
Figure 9.10b Low Mag Camera Focus and Alignment. . . . . . . . . . . . . . . . 244<br />
Figure 9.10c High Mag Camera and Fold Mirror. . . . . . . . . . . . . . . . . . . . 245<br />
Figure 9.10d High Mag Focus . . . . . . . . . . . . . . . . . . . . . . . . . . . . . . . . . . 246<br />
Figure 9.10e Video Setup Dialog Box . . . . . . . . . . . . . . . . . . . . . . . . . . . . 247<br />
Appendix A Options, Accessories and Replacement Parts . . . . . . . . . . . . . . . . . . . . . . . . . . 253<br />
Appendix B Stress Measurement Option . . . . . . . . . . . . . . . . . . . . . . . . . . . . . . . . . . . . . . . . . 257<br />
Figure B.1a Stress Results Dialog Box (Example) . . . . . . . . . . . . . . . . . . . 258<br />
Figure B.2a Stress Parameters Dialog Box. . . . . . . . . . . . . . . . . . . . . . . . . 260<br />
Figure B.2b Elasticity Constants Dialog Box . . . . . . . . . . . . . . . . . . . . . . . 261<br />
Figure B.4a Stress Results Dialog Box. . . . . . . . . . . . . . . . . . . . . . . . . . . . 263<br />
Figure B.4b Plot Data Type Dialog Box: Stress Plots . . . . . . . . . . . . . . . . 263<br />
Appendix C Step Detection Software Option . . . . . . . . . . . . . . . . . . . . . . . . . . . . . . . . . . . . . . 265<br />
Figure C.1a Step Detection Dialog Box: General Settings Page . . . . . . . . 267<br />
Figure C.1b Step Detection Dialog Box: Every Step Page. . . . . . . . . . . . . 269<br />
Figure C.1c Step Detection Dialog Box: First Step Page . . . . . . . . . . . . . . 270<br />
Figure C.2a Typical Scan of Multiple Steps . . . . . . . . . . . . . . . . . . . . . . . . 273<br />
Appendix D 3D Mapping Option. . . . . . . . . . . . . . . . . . . . . . . . . . . . . . . . . . . . . . . . . . . . . . . . . 277<br />
Figure D.2a Scan Parameters Dialog Box--Map Scan Type. . . . . . . . . . . . 279<br />
Figure D.2b Scan Parameters Dialog Box: Map Parameters Page . . . . . . . 280<br />
Figure D.4a Vision for <strong>Dektak</strong> Start-Up Window . . . . . . . . . . . . . . . . . . . 282<br />
Figure D.4b Open a Dataset Icon . . . . . . . . . . . . . . . . . . . . . . . . . . . . . . . . 283<br />
Figure D.4c Open Dialog Box . . . . . . . . . . . . . . . . . . . . . . . . . . . . . . . . . . 283<br />
xviii <strong>Dektak</strong> 8 <strong>Manual</strong> Rev. G
List of Figures<br />
Figure D.4d Subtract/Add Dialog Box. . . . . . . . . . . . . . . . . . . . . . . . . . . . .284<br />
Figure D.4e Customize Toolbar Window. . . . . . . . . . . . . . . . . . . . . . . . . . .288<br />
Figure D.5a Processed Options Dialog Box - Terms Removal Tab. . . . . . .290<br />
Figure D.5b Processed Options Dialog Box - Filtering Tab . . . . . . . . . . . .291<br />
Figure D.5c Processed Options Dialog Box - Masking Tab . . . . . . . . . . . .292<br />
Figure D.5d Processed Options Dialog Box - Data Restore Tab . . . . . . . . .293<br />
Figure D.5e Processed Options Dialog Box - General Tab . . . . . . . . . . . . .294<br />
Figure D.5f Processed Options Dialog Box - <strong>Dektak</strong> Tab . . . . . . . . . . . . . .295<br />
Figure D.6a Contour Plot . . . . . . . . . . . . . . . . . . . . . . . . . . . . . . . . . . . . . . .296<br />
Figure D.6b Set Default Output Dialog Box . . . . . . . . . . . . . . . . . . . . . . . .297<br />
Figure D.6c Main Analysis Plots . . . . . . . . . . . . . . . . . . . . . . . . . . . . . . . .298<br />
Figure D.6d Contour Plot . . . . . . . . . . . . . . . . . . . . . . . . . . . . . . . . . . . . . . .299<br />
Figure D.6e Contour Plot Menu. . . . . . . . . . . . . . . . . . . . . . . . . . . . . . . . . .301<br />
Figure D.6f 2D Analysis Plot. . . . . . . . . . . . . . . . . . . . . . . . . . . . . . . . . . . .302<br />
Figure D.6g 3D Interactive Plot . . . . . . . . . . . . . . . . . . . . . . . . . . . . . . . . . .305<br />
Figure D.6h 3D Plot . . . . . . . . . . . . . . . . . . . . . . . . . . . . . . . . . . . . . . . . . . .306<br />
Figure D.6i Filtered Histogram Plot. . . . . . . . . . . . . . . . . . . . . . . . . . . . . . .307<br />
Figure D.6j Filtered Bearing Ratio Analysis Plot . . . . . . . . . . . . . . . . . . . .310<br />
Figure D.7a Database Options Button . . . . . . . . . . . . . . . . . . . . . . . . . . . . .318<br />
Figure D.7b Database Options Dialog Box . . . . . . . . . . . . . . . . . . . . . . . . .318<br />
Figure D.7c Define Database Dialog Box . . . . . . . . . . . . . . . . . . . . . . . . . .319<br />
Figure D.7d Database Units Dialog Box . . . . . . . . . . . . . . . . . . . . . . . . . . .320<br />
Figure D.7e Pass/Fail Dialog Box.. . . . . . . . . . . . . . . . . . . . . . . . . . . . . . . .321<br />
Figure D.7f List View of a Database . . . . . . . . . . . . . . . . . . . . . . . . . . . . . .323<br />
Appendix E N-Lite Option. . . . . . . . . . . . . . . . . . . . . . . . . . . . . . . . . . . . . . . . . . . . . . . . . . . . . . 325<br />
Rev. G <strong>Dektak</strong> 8 <strong>Manual</strong> xix
List of Figures<br />
xx <strong>Dektak</strong> 8 <strong>Manual</strong> Rev. G
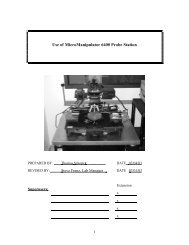
Chapter 1 System Overview<br />
The <strong>Dektak</strong> 8 is an advanced surface texture measuring system that accurately measures surface<br />
texture below submicro-inch and film thickness to 262 µm (see Figure 1.0a). This chapter includes<br />
the following topics:<br />
• Safety Precautions: Section 1.1<br />
• Included Reference Materials: Section 1.2<br />
• Printer Selection: Section 1.3<br />
• Principle of Operation: Section 1.4<br />
• Configuration: Section 1.5<br />
• Stylus Size Considerations: Section 1.6<br />
• Scan Speed Versus Stylus Force: Section 1.7<br />
• Horizontal Resolution: Section 1.8<br />
• Scan Data Storage Requirements: Section 1.9<br />
• <strong>Dektak</strong> 8 Technical Specifications: Section 1.10<br />
• Options and Accessories: Section 1.11<br />
• Operation Overview: Section 1.12<br />
• System Components: Section 1.13<br />
• Tracer: Section 1.14<br />
• Excel Macro: Section 1.15<br />
Rev. G <strong>Dektak</strong> 8 <strong>Manual</strong> 1
System Overview<br />
Figure 1.0a <strong>Dektak</strong> 8<br />
2 <strong>Dektak</strong> 8 <strong>Manual</strong> Rev. G
1.1 Safety Precautions<br />
System Overview<br />
Safety Precautions<br />
CAUTION: Use <strong>Dektak</strong> 8 equipment only as specified in this manual and as specified in any<br />
documentation associated with its components. Any use of the equipment in an<br />
unspecified manner is strongly discouraged and may result in damage or injury as<br />
cautioned by signed warnings in this chapter and throughout the documentation.<br />
Table 1.1a Safety Symbols Key<br />
Symbol Definition<br />
This symbol identifies conditions or practices that could result in<br />
damage to the equipment or other property, and in extreme cases,<br />
possible personal injury.<br />
Ce symbole indique des conditions d'emploi ou des actions pouvant<br />
endommager les équipements ou accessoires, et qui, dans les cas<br />
extrêmes, peuvent conduire à des dommages corporels.<br />
Dieses Symbol beschreibt Zustände oder Handlungen die das Gerät<br />
oder andere Gegenstände beschädigen können und in Extremfällen<br />
zu Verletzungen führen können.<br />
This symbol identifies conditions or practices that involve potential<br />
electric shock hazard.<br />
Ce symbole indique des conditions d'emploi ou des actions comportant<br />
un risque de choc électrique.<br />
Dieses Symbol beschreibt Zustaende oder Handlungen die einen<br />
elekrischen Schock verursachen koennen.<br />
CAUTION: Only qualified personnel aware of the hazards involved may<br />
perform service and adjustments.<br />
ATTENTION: Toute réparation ou étalonnage doit être effectué par des<br />
personnes qualifiées et conscientes des dangers<br />
potentiels.<br />
VORSICHT: Service- und Einstellarbeiten sollten nur von<br />
qualifizierten Personen, die sich der auftretenden<br />
Gefahren bewußt sind, durchgeführt werden.<br />
Rev. G <strong>Dektak</strong> 8 <strong>Manual</strong> 3
System Overview<br />
Safety Precautions<br />
CAUTION: Follow company and government safety regulations. Keep<br />
unauthorized personnel out of the area when working on<br />
equipment.<br />
ATTENTION: Il est impératif de suivre les prérogatives imposées tant<br />
au niveau gouvernemental qu’au niveau des entreprises.<br />
Les personnes non autorisées ne peuvent rester près du<br />
système lorsque celui-ci fonctionne.<br />
VORSICHT: Befolgen Sie die gesetzlichen Sicherheitsbestimmungen<br />
Ihres Landes. Halten Sie nicht authorisierte Personen<br />
während des Betriebs fern vom Gerät.<br />
CAUTION: Voltages supplied to and within certain areas of the system are<br />
potentially dangerous and can cause injury to personnel. Powerdown<br />
everything and unplug from sources of power before doing<br />
ANY electrical servicing. (Digital Instruments, Veeco personnel,<br />
only.)<br />
ATTENTION: Les tensions utilisées dans le système sont<br />
potentiellement dangereuses et peuvent blesser les<br />
utilisateurs. Avant toute intervention électrique, ne pas<br />
oublier de débrancher le système. (Réservé au personnel<br />
de Digital Instruments/Veeco Metrology Group<br />
seulement.)<br />
VORSICHT: Die elektrischen Spannungen, die dem System zugeführt<br />
werden, sowie Spannungen im System selbst sind<br />
potentiell gefährlich und können zu Verletzungen von<br />
Personen führen. Bevor elektrische Servicearbeiten<br />
irgendwelcher Art durchgeführt werden ist das System<br />
auszuschalten und vom Netz zu trennen. (Nur Digital<br />
Instruments/Veeco Personal.)<br />
4 <strong>Dektak</strong> 8 <strong>Manual</strong> Rev. G
1.2 Included Reference Materials<br />
Help<br />
PDF<br />
System Overview<br />
Included Reference Materials<br />
The <strong>Dektak</strong> 8 reference information is provided in multiple formats for easy access. This manual<br />
provides a hard copy format of the <strong>Dektak</strong> 8 <strong>Manual</strong>. As a supplement to the printed manual, the<br />
<strong>Dektak</strong> 8 software contains the Portable Document Format (PDF) of the <strong>Dektak</strong> 8 <strong>Manual</strong> and any<br />
software release notices relevant to the current software version. These electronic files provide a<br />
convenient way to quickly search for a particular subject and the capability to print specific sections<br />
of the manual. Use the following procedures to find these alternate formats of the manual.<br />
To display Help in the <strong>Dektak</strong> 8 software, select Help > Contents, or press the F1 key on the<br />
keyboard. The <strong>Dektak</strong> 8 PDF format allows you to search <strong>Dektak</strong> 8 information while operating the<br />
tool.<br />
1. Locate the PDF file of the manual in the C directory of the computer. The path is C:\Program<br />
Files\Veeco\<strong>Dektak</strong>32\Docs\<strong>Dektak</strong> 8 <strong>Manual</strong>.pdf.<br />
2. Double-click <strong>Dektak</strong> 8 <strong>Manual</strong>.pdf to open the PDF version of the manual.<br />
1.3 Printer Selection<br />
Note: Due to Veeco copyright specifications, certain editing features for this file have<br />
been disabled.<br />
The <strong>Dektak</strong> 8 can transfer the data output to the computer printer port. Refer to the Microsoft<br />
Windows XP manual for a list of compatible printers and printer installation procedure. A LAN<br />
card is provided for connection to local area network printers.<br />
Rev. G <strong>Dektak</strong> 8 <strong>Manual</strong> 5
System Overview<br />
Principle of Operation<br />
1.4 Principle of Operation<br />
The <strong>Dektak</strong> 8 takes measurements electromechanically by moving a diamond-tipped stylus over<br />
the sample. The high precision gantry moves the stylus according to a user-programmed scan<br />
length, speed and stylus force. The stylus is mechanically coupled to the core of a Linear Variable<br />
Differential Transformer (LVDT).<br />
As the gantry moves the stylus, the stylus rides over the sample surface. Surface variations cause<br />
the stylus to be translated vertically. Electrical signals corresponding to stylus movement are<br />
produced as the core position of the LVDT changes. The LVDT produces an analog signal<br />
proportional to the position change, which in turn is conditioned and converted to a digital format<br />
through a high precision, integrating analog-to-digital converter.<br />
The digitized signals from a single scan are stored in computer memory for display, manipulation,<br />
measurement, and printing. The <strong>Dektak</strong> 8 stores programs that can easily be changed to suit both<br />
production and laboratory use.<br />
Figure 1.4a Block Diagram of <strong>Dektak</strong> 8 Architecture<br />
6 <strong>Dektak</strong> 8 <strong>Manual</strong> Rev. G<br />
010
1.5 Configuration<br />
This section describes the <strong>Dektak</strong> 8 <strong>Profiler</strong> Components (see Figure 1.13a).<br />
1.5.1 Computer Console<br />
System Overview<br />
Configuration<br />
The computer console incorporates a Dell Optiplex GX260 or better computer, comprising a 2.53-<br />
GHz Intel Pentium IV processor (or faster) with 512-MB RAM and 40-GB internal drive. It also<br />
includes a CD-R/RW drive and a 1.4-MB, 3.5" high density diskette drive. Microsoft® Windows®<br />
XP provides a user-friendly interface with pull-down menus and pop-up windows.<br />
1.5.2 Video Monitor<br />
The <strong>Dektak</strong> 8 video monitor is an optional 17" high resolution flat panel display color monitor. It<br />
displays programs and graphics in full color, along with a color video image of the substrate surface<br />
from either of two cameras. The <strong>Dektak</strong> 8 will display the substrate either alone or with<br />
superimposed graphics.<br />
1.5.3 <strong>Profiler</strong><br />
The <strong>Dektak</strong> 8 profiler contains the mechanical and optical components for sample placement,<br />
sample viewing, scanning/measurement and environmental protection. A diamond-tipped stylus<br />
permits accurate measurements in a wide range of applications. In standard configuration, user<br />
programmable stylus force from 1 mg to 15 mg allows profiling on soft or hard surfaces. The N-<br />
Lite option enables programmable stylus forces down to 0.03 mg.<br />
1.5.4 Dual Switchable Video Cameras<br />
Dual video cameras provide both high magnification with a 1-mm horizontal field of view, and low<br />
magnification with an 8-mm top-down field of view. The two camera views are software switchable<br />
for coarse and fine sample positioning. The variable intensity illumination adjusts to view samples<br />
with differing reflectivity.<br />
1.5.5 Programmable X-Y Positioning<br />
A high precision programmable positioning system permits X-Y positioning to any location over a<br />
200 mm diameter (8" x 8") area, with +/-5 µm repeatability and 3.175 µm resolution. Theta rotation<br />
is accomplished manually on the standard system. With the optional motorized/programmable<br />
theta, rotation values in 0.1 degree increments up to 360 degrees may be programmed. You can<br />
control stylus position on the sample via the <strong>Dektak</strong> 8 keyboard or trackball.<br />
Rev. G <strong>Dektak</strong> 8 <strong>Manual</strong> 7
System Overview<br />
Stylus Size Considerations<br />
1.6 Stylus Size Considerations<br />
A stylus-based surface profiler measures the physical surface of the sample. To achieve optimum<br />
performance in certain applications, consider stylus size and shape.<br />
The radius of the recommended diamond stylus is 12.5 µm. This stylus meets most requirements<br />
for the majority of applications; however, some applications may require either a larger or smaller<br />
tip radius. Reducing the stylus tip radius increases the point pressure on the sample and may require<br />
resetting of the stylus force. You may program stylus force from 1-15 mg.<br />
Optional styli with radii of 0.2 µm, 0.7 µm, 2.5 µm, 5 µm, and 25 µm are available for applications<br />
which require high horizontal resolution or measurement of very soft films.<br />
New stylus developments include Super Sharp Styli with sub-100 nm radii and HAR tips with 5:1<br />
aspect ratios (200 µm X 20 µm and 20 µm X 2 µm).<br />
Consult your dealer for further information.<br />
1.7 Scan Speed Versus Stylus Force<br />
When using a low stylus force, the stylus may bounce off the surface if it encounters a large step at<br />
high scan speeds. In applications requiring light stylus force, use low or medium scan speed<br />
(in other words, a longer scan duration) at the shortest possible scan length.<br />
8 <strong>Dektak</strong> 8 <strong>Manual</strong> Rev. G
1.8 Horizontal Resolution<br />
System Overview<br />
Horizontal Resolution<br />
The <strong>Dektak</strong> 8 provides ultra high horizontal resolution with a maximum 60,000 data points<br />
available per scan. Scan length and scan duration determine the horizontal resolution of the <strong>Dektak</strong><br />
8. The <strong>Dektak</strong> 8 maintains a constant sampling rate of 300 data points per second. By slowing scan<br />
speed, you can process more samples over a longer period of time over a given scan length. Scan<br />
time duration may be set anywhere from 3 to 200 seconds. The examples below provide the number<br />
of data points per scan at various scan durations for a 2000µm scan length.<br />
Duration Data Points<br />
Table 1.8a Data Points Per Scan<br />
Use the following formula to determine the number of data points for any given scan length and<br />
speed.<br />
OR<br />
The horizontal resolution of the <strong>Dektak</strong> 8 directly relates to the scan length and number of data<br />
points per scan. The scan length is selectable from 50 µm to 30 mm. Without altering the number of<br />
data points per scan, it is possible to adjust the horizontal resolution or the distance between data<br />
points by altering the scan length. The scan resolution parameter displays the distance between data<br />
points (in µm per sample).<br />
1.9 Scan Data Storage Requirements<br />
Resolution at Maximum<br />
Scan Length<br />
200 seconds 60,000 0.033 µm/sample<br />
100 seconds 30,000 0.067 µm/sample<br />
50 seconds 15,000 0.133 µm/sample<br />
13 seconds 3,900 0.513 µm/sample<br />
3 seconds 900 2.222 µm/sample<br />
# Data Points/Scan =<br />
------------------------------------------------------------------------<br />
Scan Length (in µm)<br />
Horizontal Resolution (in µm)<br />
# Data Points/Scan = 300 x Scan Duration (in seconds)<br />
Store scan data on either the hard disk or on floppy diskettes. The number of storable data files<br />
depends on the number of data points scanned. Each data point plotted requires five bytes of<br />
storage space. Therefore, a 13 second scan requires approximately 19,500 bytes of disk space.<br />
Rev. G <strong>Dektak</strong> 8 <strong>Manual</strong> 9
System Overview<br />
<strong>Dektak</strong> 8 Technical Specifications<br />
1.10 <strong>Dektak</strong> 8 Technical Specifications<br />
Table 1.10a <strong>Dektak</strong> 8 Technical Specifications<br />
Specification Standard Option<br />
Vertical Range 50 Å to 2,620 kÅ (0.1 microinch to 10 mils) 1 mm maximum<br />
Vertical Resolution (at various<br />
ranges)<br />
1 Å/65 kÅ, 10 Å/655 kÅ, 40 Å/2620 kÅ 160 Å, 1 mm<br />
Scan Length Range 50 µm to 50 mm (2 mils to 2") 100 mm maximum (200 mm stitched)<br />
Scan Speed Ranges 3 seconds to 200 seconds<br />
Software Leveling Two-point programmable or cursor leveling<br />
Stage Leveling <strong>Manual</strong> Automatic power leveling<br />
Stylus (none) 25 µm, 12.5 µm, 5 µm, 2.5 µm, 0.7 µm,<br />
0.2 µm<br />
Stylus Tracking Force Programmable, 1-15mg Down to 0.03 mg (N-Lite)<br />
Maximum Sample Thickness 25.4 mm (1") 76.2 mm (3”)<br />
Sample Stage Diameter 50 mm to 200 mm (2" to 8")<br />
Sensor Position Translation X Axis: 200 mm (8")<br />
Y Axis: 200 mm (8")<br />
Sample Stage Rotation <strong>Manual</strong> Theta, 360º Programmable Theta, 360º; with and<br />
without encoders<br />
Maximum Sample Weight 2.5 kg (5 lbs.)<br />
Power Requirements<br />
Current Phase<br />
100-120~ or 220-240~, 50/60 Hz<br />
5 A@100-120~ or 3 A @ 220-240~ (+/-10%)<br />
Single Phase<br />
Warm-up Time 15 min. for maximum stability<br />
Operating Temperature 21º C +/-3º C (70º F +/-5º F)<br />
Environmental Humidity 40%, +/-20% (non-condensing)<br />
Camera Field of View High mag. = 1 mm; Low mag. = 8 mm<br />
Color Camera Dual cameras: top-down view and 45º side view<br />
Sample Illumination Variable intensity white light LED<br />
Dimensions 18" W x 24" D x 19" H (profiler only)<br />
10 <strong>Dektak</strong> 8 <strong>Manual</strong> Rev. G
1.11 Options and Accessories<br />
System Overview<br />
Options and Accessories<br />
Table 1.11a details a selection of <strong>Dektak</strong> 8 options and accessories. See Appendix A for a complete<br />
list of options and accessories for the <strong>Dektak</strong> 8.<br />
Table 1.11a <strong>Dektak</strong> 8 Options and Accessories<br />
Interactive 3-D Software Provides 3-D renderings and surface area analysis.<br />
Stress Measurement Calculates tensile or compressive stress on processed<br />
wafers. Includes special fixturing for threepoint<br />
suspension of wafer.<br />
N-Lite Software<br />
(must have LIS 3 Sensor)<br />
Allows stylus-to-surface engage routines for ultralow<br />
force profiling.<br />
Ceramic Vacuum Chuck Removable chuck provides sample restraint<br />
for small samples and pieces of samples.<br />
Vacuum source required.<br />
Vibration Isolation Table Requires 50 PSI compressed air.<br />
Calibration Standards A broad line of calibration standards calibrate the<br />
system for virtually any application. Both step<br />
height and VLSI roughness standards are offered.<br />
Programmable Theta Stage Replaces standard manual theta to enable motorized,<br />
programmable rotation of the sample stage<br />
and deskew samples.<br />
High Resolution Programmable<br />
Theta Stage<br />
Motorized theta positioning with encoder feedback<br />
for high performance automation.<br />
Extended Vertical Range Increases the maximum vertical measurement<br />
range from 262 µm to 1 mm for measuring large<br />
steps or curved surfaces.<br />
Extended Scan Increases the maximum scan length from the standard<br />
50 mm to 100 mm for measuring planarity<br />
and stress.<br />
Rev. G <strong>Dektak</strong> 8 <strong>Manual</strong> 11
System Overview<br />
Operation Overview<br />
1.12 Operation Overview<br />
The following section defines some of the basic operating terms of the <strong>Dektak</strong> 8.<br />
1.12.1 Automation Program<br />
Automation program files can store a number of scan routines on the hard disk. Scan routines,<br />
along with their X,Y and theta stage locations, are inserted into the automation program.<br />
Automation programs are stored for various applications in Windows file format on the hard disk,<br />
giving the <strong>Dektak</strong> 8 virtually unlimited program storage capability.<br />
1.12.2 Scan Routine<br />
The <strong>Dektak</strong> 8 scan routine consists of sixteen individual parameters you may select using the<br />
trackball. The user may determine parameters such as scan length and speed, leveling, and stylus<br />
force. You may enter a maximum of 10,000 scan routines into each automation program file.<br />
1.12.3 Sample Positioning<br />
The sample is placed on the sample stage, and the stylus is positioned for scanning using controls<br />
for X-Y translation (via the gantry), and rotation and leveling (via the stage). Position the sample<br />
using the trackball. In fine positioning mode, the stylus/optics assembly tracks the motion of the<br />
trackball. A crosshair reference displays on the monitor during fine positioning. This software<br />
reticle superimposes over the video image of the sample surface.<br />
In the coarse positioning mode, a template in the shape of a wafer or disk displays on the monitor.<br />
With the trackball, simply point to the desired location on the template, double-click the location,<br />
and the gantry automatically translates to that position. You can also rotate the templates to<br />
accomplish theta rotation of the sample if your <strong>Dektak</strong> 8 is equipped with the Programmable Theta<br />
option.<br />
1.12.4 Scanning<br />
When a scan runs, the stylus lowers and contacts the sample surface. Each time the stylus is<br />
lowered into position, the tower fine-tunes the vertical position, referred to as “null,” to the<br />
optimum zero reference for the selected scan routine parameters. The stage moves the sample as<br />
the stylus rides over the surface features. The video monitor allows a view of both the physical<br />
scanning of the sample and the plotting of the data simultaneously.<br />
At the end of the scan, the stylus automatically retracts, the scan drive resets, and the system is<br />
immediately ready for the next scan. The surface features encountered by the stylus are represented<br />
as a two-dimensional profile which is plotted, scaled, and displayed on the video monitor.<br />
12 <strong>Dektak</strong> 8 <strong>Manual</strong> Rev. G
1.12.5 Profile Manipulation and Measurement<br />
System Overview<br />
Operation Overview<br />
An initial profile may require software leveling, zero referencing and software magnification to<br />
zoom in on an area of interest. Measurement is a continuous process facilitated by simple<br />
movements of the reference (R) and measurement (M) cursors.<br />
1.12.6 Data Plot Display<br />
The plotting screen displays scan data as well as various parameters from the scan routine, such as<br />
the stage X, Y and theta location, scan identification, scan length, scan speed, resolution, stylus<br />
force, measurement range and profile. Also shown are the vertical and horizontal distances between<br />
the cursor/trace intercepts, as well as the distances from the vertical and horizontal “zero” grid<br />
lines. If you request analytical functions, the results from those calculations also display.<br />
1.12.7 Analytical Functions<br />
The <strong>Dektak</strong> 8 has a wide range of analytical functions available for analysis of roughness,<br />
waviness, step height, and geometrical measurements. You can request up to 30 analytical functions<br />
per scan.<br />
1.12.8 Boundary Magnification<br />
Following a scan, you can modify boundary locations to magnify portions of the trace. These new<br />
boundary locations can be stored and recalled at any time.<br />
Rev. G <strong>Dektak</strong> 8 <strong>Manual</strong> 13
System Overview<br />
Operation Overview<br />
1.12.9 Side Bar Buttons<br />
Startup<br />
If you have checked the box Show side bar buttons in the <strong>Dektak</strong> Visual Settings section of the<br />
Appearance folder (Setup > Configuration Settings dialog box), the following large buttons will<br />
be displayed at the left side of the indicated windows.<br />
Table 1.12a Side Bar Buttons<br />
Window(s) Description Button<br />
Sample Positioning<br />
and Data Plot<br />
Open Automation Program file:<br />
Switch to Automation Program window:<br />
Switch to Sample Positioning window:<br />
Launch <strong>Dektak</strong> Help file:<br />
Move the gantry to the current scan routine’s<br />
scan location:<br />
Execute the current scan routine, but at the<br />
current stage location:<br />
Execute the current scan routine:<br />
Run the automation program:<br />
Abort the current operation:<br />
14 <strong>Dektak</strong> 8 <strong>Manual</strong> Rev. G
1.13 System Components<br />
Figure 1.13a <strong>Dektak</strong> 8 <strong>Profiler</strong> Components<br />
System Overview<br />
System Components<br />
Rev. G <strong>Dektak</strong> 8 <strong>Manual</strong> 15
System Overview<br />
Tracer<br />
1.14 Tracer<br />
1.15 Excel Macro<br />
The tracer allows highly detailed technical information to be logged into a file (Tracer.log). This<br />
file can then be sent to Veeco if a software problem occurs. To start the tracer, select Start > All<br />
Programs > Veeco > <strong>Dektak</strong>32 > Tracer.exe, or follow this path: C:\Program<br />
Files\Veeco\<strong>Dektak</strong>32\Tracer.exe.<br />
Note: Unless activated, tracing does not occur during realtime to prevent oversized<br />
logging files and realtime operation burden.<br />
Note: Previous versions of the <strong>Dektak</strong> 8 software included an Excel macro that<br />
allowed you to export scan data to Microsoft Excel. However, since the current<br />
version of the software allows you to export data as a comma-delimited text<br />
file, the macro is no longer needed or provided. See Data File/Data Export:<br />
Section 5.6.1 for more information.<br />
16 <strong>Dektak</strong> 8 <strong>Manual</strong> Rev. G
Chapter 2 Installation<br />
This chapter includes the following topics:<br />
• Facilities Requirements: Section 2.1<br />
• Installing the Vibration Isolated Workstation Option: Section 2.2<br />
• Installing the Stage Assembly: Section 2.3<br />
• Shipping Bracket Removal: Section 2.5<br />
• Enclosure Assembly: Section 2.6<br />
• Cabling and Connections: Section 2.7<br />
• Porous Vacuum Chuck (Option) Installation: Section 2.8<br />
• System Configuration: Section 2.10<br />
• System Checkout: Section 2.11<br />
• Optics Alignment: Section 2.12<br />
Rev. G <strong>Dektak</strong> 8 <strong>Manual</strong> 17
Installation<br />
Facilities Requirements<br />
2.1 Facilities Requirements<br />
Vibration Interference<br />
Floor<br />
Table 2.1a Facilities Requirements<br />
Facility Requirement<br />
Temperature Operating Range, 21°C, +/-3° (70°F, +/- 5°)<br />
Clean Room Not required (Class 1000 or better recommended).<br />
Relative<br />
Humidity<br />
Power<br />
Requirements<br />
Do not operate the system near sources of vibration (such as fans or motors) or in excessive flow of<br />
a clean room air duct. Place the tool in an area with little foot traffic and low acoustical noise for<br />
optimum performance.<br />
The floor must be level, rigid and capable of supporting 300 lbs (136 kg) on a vibration isolation<br />
table.<br />
System Location and Service Access<br />
40%, +/-20% relative humidity (non-condensing)<br />
100-120~ (+/-10%) volts at 5 amps, 1 Phase, 50/60Hz<br />
220-240~ (+/-10%) volts at 3 amps, 1 Phase, 50/60Hz<br />
Power Demand 720 VA maximum<br />
Power<br />
Connection<br />
Six 6-ft, 3-conductor, 16AWG, power cords supplied with system. Cords<br />
terminate with male NEMA L5-15 connectors. Connectors rated for 13<br />
amps, 1,625 watts @ 125 VAC.<br />
Vacuum 24" (610 mm) Hg minimum constant vacuum for the system with one<br />
fitting for 1/4" OD tubing. Standard fitting is 1/4" slip connect.<br />
Clean Dry Air<br />
(For Optional<br />
Vibration)<br />
50 psi clean air for the system with one fitting for 1/4" OD tubing.<br />
Standard fitting is 1/4" slip connect.<br />
Vibration Not to exceed 70 µg from 1 to 100 Hz on floor with flat noise spectrum.<br />
Acoustics Not to exceed 60 dB(A) across the frequency spectrum.<br />
Position the system with the work area in front to allow adequate working space for the operator.<br />
The rear of the system must have a minimum service access clearance of 24" (610 mm).<br />
18 <strong>Dektak</strong> 8 <strong>Manual</strong> Rev. G
Dimensions<br />
Dimensions in the following illustrations are given in inches and (centimeters).<br />
D8 with Enclosure<br />
Installation<br />
Facilities Requirements<br />
The dimensions of the system with the enclosure are shown in Figure 2.1a (top view), Figure 2.1b<br />
(front view) and Figure 2.1c (side view).<br />
Figure 2.1a D8 Dimensions with Enclosure - Top View<br />
Rev. G <strong>Dektak</strong> 8 <strong>Manual</strong> 19
Installation<br />
Facilities Requirements<br />
Figure 2.1b D8 Dimensions with Enclosure - Front View<br />
20 <strong>Dektak</strong> 8 <strong>Manual</strong> Rev. G
Figure 2.1c D8 Dimensions with Enclosure - Side View<br />
Installation<br />
Facilities Requirements<br />
Rev. G <strong>Dektak</strong> 8 <strong>Manual</strong> 21
Installation<br />
Facilities Requirements<br />
D8 <strong>Profiler</strong> without Enclosure<br />
Figure 2.1d D8 <strong>Profiler</strong> without Enclosure<br />
The dimensions of the D8 profiler without the enclosure are shown below in Figure 2.1e (top<br />
view), Figure 2.1f (front view), and Figure 2.1g (side view).<br />
22 <strong>Dektak</strong> 8 <strong>Manual</strong> Rev. G
Figure 2.1e D8 <strong>Profiler</strong> Dimensions - Top View<br />
Installation<br />
Facilities Requirements<br />
Rev. G <strong>Dektak</strong> 8 <strong>Manual</strong> 23
Installation<br />
Facilities Requirements<br />
Figure 2.1f D8 <strong>Profiler</strong> Dimensions - Front View<br />
24 <strong>Dektak</strong> 8 <strong>Manual</strong> Rev. G
Figure 2.1g D8 <strong>Profiler</strong> Dimensions - Side View<br />
Installation<br />
Facilities Requirements<br />
Rev. G <strong>Dektak</strong> 8 <strong>Manual</strong> 25
Installation<br />
Installing the Vibration Isolated Workstation Option<br />
CAUTION: Attempting to lift the unit without assistance may result in personal<br />
injury and/or damage to the equipment.<br />
2.2 Installing the Vibration Isolated Workstation Option<br />
The Newport Isostation Vibration Isolated Workstation option significantly decreases vibration<br />
and allows for more accurate profiling. This workstation is shipped with the <strong>Dektak</strong> 8, but needs to<br />
be placed under the <strong>Dektak</strong> 8 when it arrives at the final site. Refer to Newport’s IsoStation<br />
Vibration Isolated Workstation Instruction <strong>Manual</strong> (provided with the <strong>Dektak</strong> 8) to install this<br />
workstation.<br />
• Install per Section 1 in the Newport manual.<br />
• The table is pre-assembled, so refer to Sections 2.2 and 2.3 in the Newport manual to<br />
install the work surface and the optional keyboard tray.<br />
26 <strong>Dektak</strong> 8 <strong>Manual</strong> Rev. G
2.3 Installing the Stage Assembly<br />
1. Remove the long screws that secure the stage to the belt drive.<br />
Installation<br />
Installing the Stage Assembly<br />
2. Carefully align the stage over the glass block and gently set it on the glass, while preventing<br />
the scan flag from contacting the three scan sensor housings (see Figure 2.3b). Note that the<br />
white teflon guides go on opposite sides of the glass block (see Figure 2.3a).<br />
Figure 2.3a Stage Assembly<br />
Left 014<br />
Right<br />
CAUTION: Be careful to not bend or rotate the scan flag during handling.<br />
Attempting to lift the unit without assistance may result in personal<br />
injury and/or damage to the equipment.<br />
3. Carefully slide the stage while checking the alignment of the scan flag with the three scan<br />
sensor housings. The scan flag must trip the scan sensor without contacting the scan sensor<br />
housing. Adjust the scan flag by loosening the fasteners indicated in Figure 2.3b.<br />
Rev. G <strong>Dektak</strong> 8 <strong>Manual</strong> 27<br />
015
Installation<br />
Installing the Stage Assembly<br />
Scan Flag<br />
Fasteners<br />
Figure 2.3b Stage<br />
4. Slide the Stage over the belt to align its front edge with the stripe running across the belt (see<br />
Figure 2.3c).<br />
Note: The Programmable Theta and Stage Leveling options are shown.<br />
Figure 2.3c Scan Follower Assembly<br />
Sensor Housings<br />
Sensor Housing<br />
016 Sensor Flag<br />
5. Install the long screws in the middle and rear receiver holes (on the left side of the Stage) to<br />
engage the belt.<br />
If your unit includes the Programmable Theta and Auto Stage Leveling options, connect the cable<br />
to the stage cable connector (D Connector) on the right side of the profiler.<br />
28 <strong>Dektak</strong> 8 <strong>Manual</strong> Rev. G<br />
017A
Installation<br />
Positioning the Universal Chuck<br />
Connect the vacuum line to the brass fitting on the left side of the stage assembly and connect the<br />
tubing service loop to the facility vacuum supply.<br />
2.4 Positioning the Universal Chuck<br />
A universal chuck (see Figure 2.4a) is provided with the <strong>Dektak</strong> 8 for use with various sizes of<br />
wafers. The chuck may be positioned on the stage as appropriate to hold wafers of a particular<br />
diameter in place with vacuum. A toggle switch, mounted on the left side of the frame, allows the<br />
operator to apply or remove vacuum as needed.<br />
Figure 2.4a Universal Chuck<br />
The default mounting of the universal chuck on the stage provides vacuum at just the single port in<br />
the center of the stage. To reposition the universal chuck:<br />
1. Remove the three mounting screws from the top of the chuck.<br />
Home (0°) Flag<br />
and Sensor<br />
Universal Chuck<br />
2. Identify the set of three mounting holes to be used as appropriate for the diameter of your<br />
wafers (see Figure 2.4b). Depending on the position of the chuck on the stage, vacuum is<br />
provided to specific ports and associated grooves as shown in the figure.<br />
3. Rotate the chuck to place the desired set of holes in the chuck over the mating set of holes in<br />
the stage. Be careful not to damage the home flag and sensor.<br />
4. Reinstall the three mounting screws, using the appropriate set of mounting holes in the<br />
chuck.<br />
Rev. G <strong>Dektak</strong> 8 <strong>Manual</strong> 29<br />
Stage<br />
<strong>Manual</strong> Leveling<br />
Knob
Installation<br />
Shipping Bracket Removal<br />
Vacuum Grooves for:<br />
3” Wafer<br />
4” / 5” Wafer<br />
6” Wafer<br />
8” Wafer<br />
2.5 Shipping Bracket Removal<br />
Figure 2.4b Universal Chuck Mounting Holes and Vacuum Ports<br />
Default Mounting Hole and<br />
Screw (1 of 3)<br />
Center Vacuum Port<br />
Spare Wafer Alignment Pins<br />
Alternate Mounting Holes:<br />
3” Wafer (1 of 3)<br />
4” / 5” Wafer (1 of 3)<br />
6” Wafer (1 of 3)<br />
8” Wafer (1 of 3)<br />
To protect the precision sample stage and stylus mechanism during shipment, special fixtures are<br />
put in place to restrict their movement.<br />
CAUTION: Neglecting to remove any or all of the shipping brackets<br />
prior to operation may result in damage to the<br />
equipment.<br />
ATTENTION: Oublier d’enlever une ou toutes les pinces de maintien<br />
avant utilisation pourrait endommager les équipements.<br />
VORSICHT: Vor Inbetriebnahme müssen alle Transportklammern<br />
entfernt werden, um eine Beschädigung des Gerätes zu<br />
vermeiden.<br />
1. Place the <strong>Dektak</strong> 8 on a level surface, ensuring adequate service and maintenance clearance.<br />
30 <strong>Dektak</strong> 8 <strong>Manual</strong> Rev. G
Installation<br />
Shipping Bracket Removal<br />
CAUTION: The shipping brackets and foam inserts must be<br />
reinstalled prior to shipping the unit to prevent damage<br />
to the equipment. Save all brackets and screws should it<br />
become necessary to return the unit.<br />
ATTENTION: Les pinces de maintien et les mousses de protections<br />
doivent être ré-installés avant d’expédier le systeme<br />
pour eviter d’endommager les équipements. Conserver<br />
les pinces de maintien et les vis au cas où il serait<br />
nécessaire de renvoyer le système.<br />
VORSICHT: Um eine Beschädigung des Gerätes zu vermeiden,<br />
müssen Transportklammern und Schaumstoffeinsätze<br />
vor der Verladung wieder installiert werden. Bewahren<br />
Sie alle Klammern und Schrauben auf, falls es<br />
notwendig sein sollte, das Gerät zurückzuschicken.<br />
2. Remove the 2 set screws securing the Z-Drive (see Figure 2.5a).<br />
Figure 2.5a Z-Drive<br />
Set Screws (2)<br />
Rev. G <strong>Dektak</strong> 8 <strong>Manual</strong> 31<br />
018
Installation<br />
Shipping Bracket Removal<br />
3. Remove the 2 gantry drive brackets (see Figure 2.5b).<br />
Figure 2.5b Gantry Drive Brackets<br />
4. Remove the special sensor-head restraint bracket (see Figure 2.5c).<br />
Figure 2.5c Scan Head<br />
32 <strong>Dektak</strong> 8 <strong>Manual</strong> Rev. G<br />
020A<br />
Bracket<br />
019
2.6 Enclosure Assembly<br />
4<br />
Installation<br />
Enclosure Assembly<br />
1. The enclosure is shipped pre-assembled. Place the enclosure over the unit, and ensure the<br />
cables slide into the provided slot. Use the drawing (see Figure 2.6a) to identify enclosure<br />
components if required.<br />
3<br />
8<br />
Figure 2.6a Enclosure<br />
Quantity<br />
1<br />
1<br />
1<br />
1<br />
1<br />
1<br />
1<br />
1<br />
Title<br />
SCREW, FLAT HEAD, M4 X 12MM<br />
LEFT SIDE ENCLOSURE<br />
BACK, ENCLOSURE<br />
TOP - ENCLOSURE<br />
DOOR, ASSY<br />
PLATE, FRONT, LOWER ENCLOSURE<br />
Rev. G <strong>Dektak</strong> 8 <strong>Manual</strong> 33<br />
7<br />
2<br />
1<br />
5<br />
6<br />
1<br />
RIGHT SIDE ENCLOSURE<br />
Item Number<br />
1<br />
2<br />
3<br />
4<br />
5<br />
6<br />
7<br />
8<br />
1<br />
4. SLIDE DOOR INTO REAR OPENING OF SLOT.<br />
3. ASSEMBLE ITEMS 9, 8, 5 IN SUCCESSION.<br />
2. ASSEMBLE; ITEMS 2 AND 4 USING THE 3 INDICATED FASTENERS<br />
DOOR IS PREASSEMBLED AT FACTORY.<br />
1<br />
NOTES:<br />
SCREW, BUTTON HEAD, M4 X 12MM<br />
021
Installation<br />
Cabling and Connections<br />
2.7 Cabling and Connections<br />
Air Pressure Connector (Optional for Vibration Isolation Table)<br />
The <strong>Dektak</strong> 8 optional vibration isolation table requires 50 psi minimum to operate properly. The<br />
regulator is set at the factory to reduce the facilities air pressure to 40 psi, but the regulator may<br />
need slight adjustments depending upon variations in facility air pressure.<br />
1. Connect the facility air pressure line (1/4" [6.35 mm] OD tubing) to the “one-touch” fitting<br />
attached to the air pressure regulator.<br />
2. After adjusting the pressure regulator output to 40 psi, turn on the air.<br />
Note: Allow at least 2 minutes for the vibration isolation table to fully engage.<br />
3. Check each corner of the table by pushing down gently. If the table is not floating freely on<br />
each corner, more adjustment may be necessary.<br />
Vacuum Connectors (Optional for Vacuum Chuck)<br />
The Vacuum Chuck requires no less than 24" Hg. (610mm) of vacuum.<br />
Power Supply Setting<br />
• Connect the facility vacuum line (1/4" [6.35mm] OD tubing) to the “one-touch” fitting.<br />
Note: To connect the lines, press them firmly into the fitting. The facility vacuum<br />
may now be turned on.<br />
The <strong>Dektak</strong> 8 operates on 60Hz AC with either 110V or 220V. The <strong>Dektak</strong> 8 requires four power<br />
connections, two electronic power supplies, a monitor and a computer. The power supply has been<br />
factory set at the appropriate voltage for the original user facility. If the unit is transferred to a<br />
facility where the voltage is different, the computer must be reset for alternate voltage.<br />
Complete the following procedure to verify or change the power supply setting:<br />
1. Verify the main power switch located on the front of the computer console is turned off.<br />
2. Verify the main power cable is disconnected from its primary power source and the<br />
computer console.<br />
3. Verify the voltage setting displays the correct voltage once the main power cable is<br />
disconnected from the computer. If it does not, change the voltage setting.<br />
Note: The voltage setting is located above the power switch on the back of the<br />
computer.<br />
34 <strong>Dektak</strong> 8 <strong>Manual</strong> Rev. G
.<br />
Installation<br />
Cabling and Connections<br />
a. To change the voltage supply setting, use a flat head screw driver and slide the setting<br />
switch until the appropriate voltage setting displays.<br />
b. Connect the facility electrical supply to the provided power strip using an approved<br />
IEC-320 power cord, rated at 16 amps or higher.<br />
<strong>Profiler</strong> Cable Connections<br />
CAUTION: Ensure all cables that connect to the power source are<br />
accessible to the operator.<br />
ATTENTION: S'assurer que tous les cables connectés aux prises de<br />
courants sont accessibles par l'utilisateur<br />
VORSICHT: Stellen Sie sicher, daß alle Spannungskabel für den<br />
Benutzer zugänglich sind.<br />
WARNING: Never connect the <strong>Dektak</strong> 8 to a power source which<br />
provides a voltage that is different from the power<br />
supply setting of the voltage select card.<br />
AVERTISSEMENT: Ne jamais brancher le <strong>Dektak</strong> 8 sur une prise<br />
produisant une ddp différente de celle<br />
programmée sur le circuit.<br />
WARNUNG: Das <strong>Dektak</strong> 8 darf niemals an eine Spannungsquelle<br />
angeschlossen werden, deren Spannung von der am<br />
Gerät eingestellten Spannung abweicht.<br />
The E-Box located on the rear of the profiler provides all cable connections for the <strong>Dektak</strong> 8, with<br />
the exception of the optional Theta Encoder. Two electronic power supplies connect to the E-Box.<br />
The upper connector provides power for the scan motors and X-Y-Z and theta positioning systems.<br />
The lower connector provides power to the electronics and signal conditioning board. The video<br />
cable and two communication cables also attach to the E-Box and the computer (see Figure 2.7a<br />
and Figure 2.7c, and Figure 1.13a).<br />
The E-Box connector for the coaxial video cable (video out) is located just below the power switch.<br />
It connects to the back of the computer using the video cable “A/V In” socket. The two<br />
communication cables connect to the two lower 13-pin connectors, one on the back of the E-Box<br />
Rev. G <strong>Dektak</strong> 8 <strong>Manual</strong> 35
Installation<br />
Cabling and Connections<br />
and the other on back of the computer. The E-Box connector to the left (when facing the back of the<br />
profiler, #2) connects to a USB port on the computer using the provided serial-to-USB adapter (see<br />
Figure 2.7b). The E-Box connector to the right (#1) connects to the COM 1 port on the computer.<br />
AC Power In<br />
COM 1<br />
USB (serial);<br />
Trackball; Keyboard<br />
Monitor<br />
Figure 2.7a Rear View of Computer<br />
Figure 2.7b Serial-to-USB Adapter Cable<br />
Voltage Settings<br />
Printer Port<br />
(Printer is<br />
User Provided)<br />
Video Cable<br />
36 <strong>Dektak</strong> 8 <strong>Manual</strong> Rev. G<br />
181A<br />
182A<br />
LAN
Power Switch<br />
Video Out<br />
+5 and +12 VDC<br />
Power In<br />
COM 2<br />
Optional Theta Encoder<br />
Figure 2.7c Rear of E-box<br />
Installation<br />
Cabling and Connections<br />
If you have purchased the Optional Theta Encoder Package for your <strong>Dektak</strong> 8, the stage includes a<br />
scale mounted as a ring around its perimeter (see Figure 2.7d). An encoder readhead is located at<br />
the rear of the stage, to sense the markings on the scale. A cable carries the readhead signals to an<br />
external Counter Box (see Figure 2.7e), to be sent to the computer for use in determining the theta<br />
rotation of the stage.<br />
Make connections as follows:<br />
• Plug in the cable from the encoder readhead to the Readhead connector on the Counter<br />
Box.<br />
• A Gnd screw is provided for an optional ground (earth) connection.<br />
• Connect the second serial-to-USB adapter cable (see Figure 2.7b) between the<br />
connector labeled USB at the Counter Box and the computer’s USB port shown in<br />
Figure 2.7f.<br />
• Connect a power cable to the Power input on the Counter Box, and plug the power cable<br />
into a power strip (or surge protector).<br />
Rev. G <strong>Dektak</strong> 8 <strong>Manual</strong> 37<br />
8078<br />
+24 VDC<br />
Power In<br />
COM 1
Installation<br />
Cabling and Connections<br />
Encoder<br />
Readhead<br />
Readhead and Gnd<br />
connections - left end<br />
Monitor Cable Connections<br />
Figure 2.7d Optional Theta Encoder<br />
Figure 2.7e Counter Box<br />
Figure 2.7f Counter Box Connection to Computer<br />
Stage<br />
Encoder Scale<br />
Ring<br />
AC Power and USB<br />
connections - right end<br />
Connect USB cable<br />
from Counter Box<br />
Here<br />
Connect USB cable<br />
from E-Box Here<br />
The 17" flat panel display color video monitor may be either positioned over the profiler or placed<br />
on a tabletop stand. The monitor cable connects to the video port on the back of the monitor and to<br />
the video board port on the computer. The power supply cable also connects to the back of the<br />
monitor and into a power strip.<br />
38 <strong>Dektak</strong> 8 <strong>Manual</strong> Rev. G
Other Computer Cable Connections<br />
The power-strip cable plugs into a power outlet or into a surge protector. The keyboard and<br />
trackball connect to the back of the computer (see Figure 2.7a).<br />
Installation<br />
Cabling and Connections<br />
Note: Verify that all cables are properly connected prior to plugging in the system and<br />
turning on the main power switch.<br />
CAUTION: Do not connect or disconnect any cables while the<br />
power is on.<br />
ATTENTION: Ne pas connecter ou déconnecter de cables lorsque<br />
l’appareil est branché.<br />
VORSICHT: Während die Spannungsversorgung eingeschaltet ist,<br />
dürfen Kabel weder vom Gerät getrennt, noch<br />
angeschlossen werden.<br />
CAUTION: Always use a surge protector; the surge protector allows<br />
all of the components to power-up simultaneously via<br />
the single master power switch.<br />
ATTENTION: Toujours utiliser un protecteur de circuit. Le protecteur<br />
de circuit sert à mettre sous tension tous les éléments du<br />
circuit simultanément via le connecteur central.<br />
VORSICHT: Benutzen Sie stets einen Überspannungsbegrenzer<br />
(“surge protector”). Der Überspannungsbegrenzer<br />
ermöglicht das gleichzeitige Einschalten aller<br />
Geräteteile mittels eines einzelnen Hauptschalters.<br />
Rev. G <strong>Dektak</strong> 8 <strong>Manual</strong> 39
Installation<br />
Porous Vacuum Chuck (Option) Installation<br />
2.8 Porous Vacuum Chuck (Option) Installation<br />
Vacuum Line<br />
The Porous Vacuum Chuck provides sample restraint for small samples and pieces of samples<br />
and/or samples that are irregularly shaped (see Figure 2.8a). The Porous Vacuum Chuck option<br />
includes the specialized chuck and the associated vacuum tubing.<br />
1. Place Vacuum Chuck assembly on the stage.<br />
Note: The Vacuum Chuck Assembly may be vacuum-secured to the scan stage by<br />
removing the screw from the bottom of the Vacuum Chuck.<br />
2. Use the vacuum tubing provided to connect the vacuum source to the Vacuum Chuck.<br />
Ensure the vacuum tubing does not affect the scan stage movement.<br />
3. Place the sample on the Porous Vacuum surface.<br />
4. Position the stage for scanning.<br />
Vacuum Connector<br />
Note: Disconnect the vacuum source to reposition or remove the sample.<br />
Figure 2.8a Porous Vacuum Chuck Assembly<br />
The Porous Vacuum Chuck option requires no less than 24" Hg. of vacuum.<br />
Porous Vacuum<br />
Surface<br />
Scan Stage<br />
• Connect the facility vacuum line (1/4" [6.35mm] OD tubing) to the Vacuum Chuck air<br />
connector.<br />
Note: To connect the line, press it firmly into the fitting. The vacuum may now be<br />
turned on.<br />
40 <strong>Dektak</strong> 8 <strong>Manual</strong> Rev. G<br />
033A
2.9 Stylus Installation<br />
Install the stylus using the Stylus Replacement Fixture (see Section 9.9).<br />
2.10 System Configuration<br />
The <strong>Dektak</strong> 8 is comprised of three main components:<br />
1. <strong>Profiler</strong> with Electronics Box (E-Box).<br />
2. Monitor<br />
3. Computer with Keyboard and Trackball.<br />
Installation<br />
Stylus Installation<br />
It is possible to arrange these modular components in a number of configurations to suit your needs.<br />
For example, position the monitor over the profiler to reduce the overall footprint, or set the profiler<br />
on a vibration platform, separate from the monitor and computer, to isolate it from external<br />
vibration.<br />
2.11 System Checkout<br />
Once the appropriate cable connections are complete, turn on the power to the <strong>Dektak</strong> 8 to verify<br />
that the system is operating properly. The <strong>Dektak</strong> 8 operating software was loaded onto the hard<br />
disk at the factory prior to shipment. The use of the power bar (provided) allows all of the<br />
components to power-up simultaneously with the flip of the single master power switch.<br />
1. Verify the power switches on the monitor and profiler E-Box are in the “on” position.<br />
2. If using a surge protector, verify the switch on the surge protector is also turned on before<br />
turning on the master power switch located on the power bar.<br />
3. Press and release the power switch on the front of the computer.<br />
4. The computer starts up to the Windows Desktop. Double-click the <strong>Dektak</strong> 8 icon to run the<br />
<strong>Dektak</strong> 8 software. The <strong>Dektak</strong> 8 Startup window displays on the monitor when<br />
initialization is complete (see Section 8.1a). “Ready” displays in the status line at the lower<br />
left of the window.<br />
5. Select Calibration > Stylus Force... from the menu bar to open the Force Calibration<br />
dialog box (see Figure 8.6b). Use the slider in the Force DAC section to increase the DAC<br />
Value to maximum. Observe and verify the stylus swings to the down position. Use the<br />
slider to decrease the DAC Value to minimum. Observe and verify that the stylus moves to<br />
the up position. Then click Cancel to close the dialog box.<br />
6. Observe the two banks of LEDs on the side of the E-Box. The expected state of each LED is<br />
given in Figure 2.11a.<br />
Rev. G <strong>Dektak</strong> 8 <strong>Manual</strong> 41
Installation<br />
Optics Alignment<br />
2.12 Optics Alignment<br />
Figure 2.11a LED Banks on E-Box<br />
124C<br />
+5 V (normally ON)<br />
+/-12 V (normally ON)<br />
+24 V (normally ON)<br />
Scan Back Limit Switch<br />
Scan Forward Limit Switch<br />
Scan Home Switch<br />
Galil Error (normally OFF)<br />
(not used) (normally ON)<br />
Z Down (Tower) Limit Switch<br />
Z Up (Tower) Limit Switch<br />
Note: A Limit or Home LED turns<br />
OFF when the associated device<br />
activates its switch.<br />
(not used) (normally OFF)<br />
(not used) (normally OFF)<br />
+24 V (normally ON)<br />
+5 V (normally ON)<br />
Theta Home Enable (normally OFF)<br />
Heart Beat (pulses)<br />
Gantry Back Limit Switch<br />
Gantry Forward Limit Switch<br />
Gantry Left Limit Switch<br />
Gantry Right Limit Switch<br />
Refer to Section 9.10 for the procedure to adjust the optics.<br />
42 <strong>Dektak</strong> 8 <strong>Manual</strong> Rev. G
Chapter 3 Basic Functions<br />
This chapter details a step-by-step exercise for positioning the sample stage to measure the Veeco<br />
calibration standard (option). This exercise helps you become familiar with the various sample<br />
positioning features of the equipment, enabling you to quickly position samples for a large number<br />
of automation programs. The 10 kÅ calibration standard (option) exercise continues in Chapter 4<br />
and Chapter 5 in this manual. Chapter 4 describes single scan operation, and Chapter 5 describes<br />
multiple scan operation. By completing the entire exercise, you will become well acquainted with<br />
<strong>Dektak</strong> 8 basic operation procedures.<br />
Note: If you did not purchase the 10kÅ standard, use any suitable sample available.<br />
This chapter includes the following topics:<br />
• Software Interface: Section 3.1<br />
• Start Sequence (Normal Usage): Section 3.2<br />
• Sample Loading: Section 3.3<br />
• Viewing the Sample: Section 3.4<br />
• Unloading the Sample: Section 3.5<br />
• Power Down: Section 3.6<br />
Rev. G <strong>Dektak</strong> 8 <strong>Manual</strong> 43
Basic Functions<br />
Software Interface<br />
3.1 Software Interface<br />
The <strong>Dektak</strong> 8 uses the following software interface and control devices:<br />
3.1.1 Stage Control<br />
The <strong>Dektak</strong> 8 has a precision sample stage which allows both automatic and semiautomatic sample<br />
positioning. Automatic or programmable positioning is described in detail in Chapter 4.<br />
Semiautomatic sample positioning is accomplished by using the trackball (or mouse) interactively<br />
with the various screens of the Microsoft ® Windows interface.<br />
3.1.2 Microsoft Windows<br />
The <strong>Dektak</strong> 8 uses Microsoft Windows XP as the operating environment, allowing integration of<br />
different tasks to increase efficiency and ease-of-use.<br />
<strong>Dektak</strong> 8 operational tasks are organized into windows, pop-up dialog boxes and pull-down menus.<br />
Virtually all Windows commands have equivalent keyboard shortcuts to provide full Windows<br />
control, keyboard control, or a combination of both Windows and keyboard operation (see ).<br />
The <strong>Dektak</strong> 8 system contains all the software necessary to run a <strong>Dektak</strong> 8.<br />
With Windows XP, you can take advantage of these features of the Windows environment:<br />
• Running multiple applications: You can run several applications under Windows at one<br />
time and easily switch between them, creating an integrated work environment.<br />
• Data exchange between applications: You can transfer data between <strong>Dektak</strong> 8 and other<br />
standard Windows applications, files, directories, and disks, and control all Windowsrelated<br />
tasks such as directory or file management and formatting disks.<br />
Operating the <strong>Dektak</strong> 8 under Windows XP indicates acceptance of the Microsoft software license<br />
agreement. “Microsoft” and “Windows" are registered trademarks of Microsoft Corporation.<br />
“<strong>Dektak</strong>” is a registered trademark of Veeco.<br />
3.1.3 Trackball<br />
The standard <strong>Dektak</strong> 8 ships with a trackball, but you may also operate the system using a mouse.<br />
Although a trackball typically has multiple buttons, the <strong>Dektak</strong> 8 uses primarily the left button for<br />
selecting commands in most applications, and the right button for opening context-sensitive menus<br />
(see Figure 3.1a).<br />
Rolling the trackball moves the pointer (the arrow on the screen). To select a command, move the<br />
tip of the pointer until it rests on the desired command and click the left button.<br />
44 <strong>Dektak</strong> 8 <strong>Manual</strong> Rev. G
The following definitions are used throughout the rest of this manual:<br />
• Pointing Device: Trackball.<br />
• Point: Move the tip of the pointer until it rests on the item of interest.<br />
• Press: Hold down the left button.<br />
• Click or Select: Quickly press and release the button.<br />
• Drag: Hold down the left button while moving the pointing device.<br />
• Double-click: Click the button twice in rapid succession.<br />
Left<br />
Button<br />
3.1.4 Keyboard Shortcuts<br />
Figure 3.1a Trackball<br />
Basic Functions<br />
Software Interface<br />
Numerous shortcut keystrokes are provided in the <strong>Dektak</strong> 8 software. Many of the shortcuts are<br />
associated with menu items (see Chapter 8), while others perform the same functions as clicking<br />
the trackball button on certain items in the windows (see the tables below).<br />
Note: Combination keystrokes are indicated by “+”. For example, “Ctrl+N” means<br />
hold down the Ctrl key, press and release the N key, and then release the Ctrl<br />
key.<br />
Table 3.1a Keyboard Shortcuts for All Windows<br />
Keyboard<br />
Function<br />
Key(s)<br />
Esc (or A) Interrupts a scan or Multi-Scan program in progress.<br />
Deactivates Stage Tracking.<br />
Aborts the tower-down, gantry and stage-rotation motions.<br />
Note: You must reset the hardware if you have aborted operation while the gantry is<br />
moving or the stage is rotating (and the theta encoder option is not installed).<br />
Rev. G <strong>Dektak</strong> 8 <strong>Manual</strong> 45<br />
079<br />
Right<br />
Button
Basic Functions<br />
Software Interface<br />
Table 3.1b Keyboard Shortcuts for Data Plot Window<br />
Keyboard<br />
Key(s)<br />
Function<br />
Ctrl+R Selects the R cursor.<br />
Ctrl+M Selects the M cursor.<br />
Ctrl+F Toggles between fast and slow cursor movement speeds.<br />
Ctrl+ (Right<br />
Arrow)<br />
Moves the selected cursor to the right at the selected speed.<br />
Ctrl+ (Left<br />
Arrow)<br />
Ctrl+ (Up<br />
Arrow)<br />
Ctrl+ (Down<br />
Arrow)<br />
Moves the selected cursor to the left at the selected speed.<br />
Increases the width of the selected cursor at the selected speed.<br />
Decreases the width of the selected cursor at the selected speed.<br />
Table 3.1c Keyboard Shortcuts for Sample Positioning Window<br />
Keyboard<br />
Key(s)<br />
Function<br />
(Up Arrow) Increases illumination on the sample.<br />
(Down Arrow) Decreases illumination on the sample.<br />
Ctrl+Shift+L Moves gantry to center of rotation<br />
Ctrl+V Moves gantry to currently active scan routine’s scan location<br />
Ctrl+Shift+U Moves stage to unload position<br />
When Stage Tracking is active: (Note: press and hold Shift key for faster jogging movement)<br />
(Up Arrow) Jogs gantry to the right to move the image up<br />
(Down Arrow) Jogs gantry to the left to move the image down<br />
(Left Arrow) Jogs gantry rearward to move the image to the left<br />
(Right Arrow) Jogs gantry forward to move the image to the right<br />
+ Increases illumination on the sample.<br />
- Decreases illumination on the sample.<br />
1 Selects high mag camera<br />
2 Selects low mag camera<br />
46 <strong>Dektak</strong> 8 <strong>Manual</strong> Rev. G
Table 3.1d Keyboard Shortcuts for Automation Program Summary Window<br />
Keyboard<br />
Key(s)<br />
Function<br />
Ctrl+I Includes the highlighted scan results in the table (if they have previously been<br />
excluded).<br />
Ctrl+X Excludes the highlighted scan results in the table from being re-run.<br />
Ctrl+U Re-runs the scans that have not been excluded.<br />
Assigning Analytical Functions to Keystrokes<br />
Basic Functions<br />
Software Interface<br />
<strong>Dektak</strong> 8 analytical functions can be assigned to the F11 and F12 function keys. This is useful if<br />
certain analytical functions are used frequently. The procedure for assigning an analytical function<br />
to a keystroke is described below. For a list of analytical functions and their descriptions, see<br />
Chapter 6.<br />
1. Click Setup > Configuration Settings... to display the Configuration Settings dialog box.<br />
Select the Shortcuts folder (see Figure 3.1b).<br />
Figure 3.1b Configuration Settings Dialog Box - Shortcuts Folder<br />
2. The Shortcuts folder allows an analytical function to be assigned to the F11 function key,<br />
and another to the F12 function key. In the F11 or F12 box, select an analytical function<br />
from the drop-down list to enter it into the box.<br />
3. Click OK to assign the selected analytical functions to the function keys and close the dialog<br />
box.<br />
Rev. G <strong>Dektak</strong> 8 <strong>Manual</strong> 47<br />
144D
Basic Functions<br />
Software Interface<br />
Note: Click Apply instead of OK if you want to keep the dialog box open to select<br />
other folders.<br />
4. When a scan has been run and the profile is displayed in the the Data Plot window, the<br />
selected analytical functions can be run with the F11 and F12 keys. The results of all<br />
analytical functions performed will display in the Analytic Results section of the Data Plot<br />
window. See Measuring and Entering Analytical Functions: Section 6.12.<br />
48 <strong>Dektak</strong> 8 <strong>Manual</strong> Rev. G
3.2 Start Sequence (Normal Usage)<br />
The following sections describe the basic procedure to start the <strong>Dektak</strong> 8.<br />
3.2.1 Power On<br />
Basic Functions<br />
Start Sequence (Normal Usage)<br />
1. Verify that all three <strong>Dektak</strong> 8 power cables are connected to an external power source.<br />
Note: Use a surge protector to guard against power surges.<br />
2. Turn on the <strong>Dektak</strong> 8 by flipping the power switch located on the rear of the E-Box (see<br />
Figure 3.2a).<br />
Figure 3.2a Rear View of E-Box<br />
Power Switch<br />
3. Turn the monitor on by pressing the power button located on the front of the monitor in the<br />
lower-right corner.<br />
4. Turn the computer on by pressing the power switch located on the front of the computer. The<br />
computer will start up to the Windows desktop.<br />
5. Double-click the <strong>Dektak</strong> 8 icon on the desktop to run the <strong>Dektak</strong> 8 software. The<br />
<strong>Dektak</strong> 8 sample stage will initialize and the Startup window will display. When<br />
initialization is complete, the text “Ready” will display in the lower left corner of the window<br />
(see Figure 3.2b).<br />
Rev. G <strong>Dektak</strong> 8 <strong>Manual</strong> 49<br />
8028
Basic Functions<br />
Start Sequence (Normal Usage)<br />
Note: When other <strong>Dektak</strong> 8 windows are displayed, select Window > Close All<br />
Windows to redisplay the Startup window.<br />
Figure 3.2b Startup Window<br />
50 <strong>Dektak</strong> 8 <strong>Manual</strong> Rev. G
3.2.2 System Tray Quick-Access Menu<br />
Basic Functions<br />
Start Sequence (Normal Usage)<br />
Whenever the <strong>Dektak</strong> 8 software is running, an icon (similar in appearance to the one that you<br />
clicked to launch the software) appears in the system tray, located at the right side of the Windows<br />
task bar. Right-click this icon to pop up a quick-access menu (see Figure 3.2c).<br />
Figure 3.2c Quick-Access Menu<br />
See Run Menu: Section 8.3<br />
See <strong>Profiler</strong> Menu: Section 8.4<br />
See Help Menu: Section 8.8<br />
See File Menu: Section 8.2<br />
Items in this menu allow you to run scans or automation programs, reset the hardware, examine the<br />
software version and options, or close the program, all without having to navigate through the<br />
windows and menus in the program itself.<br />
Rev. G <strong>Dektak</strong> 8 <strong>Manual</strong> 51
Basic Functions<br />
Start Sequence (Normal Usage)<br />
ATTENTION: If the <strong>Dektak</strong> 8 does not turn on following the power-on procedure,<br />
do the following before contacting the Veeco service department:<br />
• Verify all cables are properly connected and free of obvious<br />
damage.<br />
• Verify the power switch on the front of the computer is in the<br />
ON ( | ) position.<br />
• Verify all power cords are connected properly.<br />
• Repeat the power on procedure.<br />
ATTENTION: Si le <strong>Dektak</strong> 8 ne s’allume pas lors du démarrage, suivre les<br />
indications suivantes avant de contacter Veeco:<br />
• Vérifier que tous les cables sont correctement connectés et non<br />
endommagés.<br />
• Vérifier que l'interrupteur à l'avant de l'ordinateur est en<br />
position 'ON' ( | ).<br />
• Verifier que tous les fils électriques sont branches correctement<br />
aux prises de courant<br />
• Répéter la procédure de démarrage<br />
ATTENTION: Falls sich das <strong>Dektak</strong> 8 mit dem beshriebenen Verfahren nicht<br />
einschalten lassen sollte, überprüfen Sie die folgenden Punkte,<br />
bevor Sie sich mit Veeco Metrology in Verbindung setzen:<br />
• Überprüfen Sie, ob alle Kabel korrekt installiert wurden, und<br />
daß sie keine offensichtlichen Schäden aufweisen.<br />
• Vergewissern Sie sich, daß der Hauptschalter an der Frontseite<br />
des Computers eingeschaltet ist ( | ).<br />
• Vergewissern Sie sich, daß alle Kabel zur Stromversorgung<br />
korrekt installiert wurden.<br />
• Wiederholen Sie den Einschaltvorgang.<br />
52 <strong>Dektak</strong> 8 <strong>Manual</strong> Rev. G
3.2.3 Stage Control Panel<br />
Basic Functions<br />
Start Sequence (Normal Usage)<br />
The Sample Positioning window contains a Stage Control Panel (see Figure 3.2d), which may be<br />
displayed at the right side of the window, or hidden in order to maximize the camera view pane. To<br />
display (or hide) the Stage Control Panel:<br />
• Select <strong>Profiler</strong> > Stage Control Panel from the menu bar, or<br />
• Click the Display/Hide Stage Control Window icon, or<br />
• Press CTRL+T on the keyboard.<br />
The top section of the panel contains an illustration of the template you have chosen for your<br />
application (see Setup: Section 3.2.5). The cross hairs provide a visual representation of the<br />
rotation (theta) of the stage. Any scan sites that you have defined are shown as red dots. The green<br />
dot shows the current location of the stylus on the sample.<br />
Note: The illustration of the template is always adjusted to fit in the display area in<br />
the top section, regardless of the actual template dimensions.<br />
The center section of the panel contains three categories of templates--disk, panel and wafer, along<br />
with any templates you have designed. (A 200-mm wafer is already provided.) Right-click in this<br />
section to open the Template Editor dialog box (see Template Editor: Section 3.2.4), where you<br />
can change existing templates and create new ones.<br />
The bottom section of the panel contains displays and buttons for monitoring and controlling the<br />
positions of the stage and gantry. The gantry, holding the stylus, can be moved in the X and Y<br />
directions, to place the stylus over any desired location on your sample. The stage may be rotated<br />
(if the Power-Theta option is installed), but otherwise it is not moved except to bring it forward to<br />
an unloading position, or during the performance of an actual scan.<br />
Moving the Gantry and Stage<br />
Two ways to move the gantry and stage are either by using the control buttons, or typing new<br />
values in the X, Y or Theta fields and clicking the Go button. If you want the updated position to<br />
be relative to the current positions, check (click) the Relative box; otherwise, the movement will be<br />
to the absolute positions that you specify.<br />
Note: Since the camera is mounted on the gantry at the right side of the stylus, the<br />
physical motions of the gantry are at right angles to the motions of the image of<br />
your sample that you see in the camera view pane. Refer to Table 3.2a.<br />
A third way to move the gantry is by placing the pointer at the desired location in the illustration of<br />
the template and double-clicking the left trackball button.<br />
A fourth way to move the gantry is through Stage Tracking. See Stage Tracking: Section 3.3.1.<br />
Rev. G <strong>Dektak</strong> 8 <strong>Manual</strong> 53
Basic Functions<br />
Start Sequence (Normal Usage)<br />
3.2.4 Template Editor<br />
Figure 3.2d Stage Control Panel (in Sample Positioning Window)<br />
Current Gantry<br />
(Stylus) X-Y Position<br />
Move Relative to<br />
Current Position<br />
Move Gantry to Center<br />
of Rotation of Stage<br />
Jog Gantry Up<br />
Jog Gantry Left<br />
Rotate Stage CW<br />
Table 3.2a Gantry Motions and Resulting Image Movement<br />
Button Gantry Moves: Image Moves:<br />
Jog Gantry Up To the Right Up<br />
Jog Gantry Down To the Left Down<br />
Jog Gantry Left Rearward Left<br />
Jog Gantry Right Forward Right<br />
Stage with Selected<br />
Template<br />
Template Selector<br />
and Editor<br />
Current Stage<br />
Rotation Angle<br />
Move to New Position<br />
Move Gantry to Current<br />
Scan Routine Location<br />
Move Stage to Unload Position<br />
Jog Gantry Right<br />
Stop Stage Motion<br />
Rotate Stage CCW<br />
Jog Gantry Down<br />
You can use the Template Editor dialog box (see Figure 3.2e) to create custom templates for<br />
various size disks, rectangular samples or wafers. The selected template serves to restrict access to<br />
just the area of the stage that is covered by your sample, as defined by the template. (The 200-mm<br />
wafer template permits access to any location on the sample stage.)<br />
54 <strong>Dektak</strong> 8 <strong>Manual</strong> Rev. G
To change an existing template:<br />
Figure 3.2e Template Editor Dialog Box<br />
Basic Functions<br />
Start Sequence (Normal Usage)<br />
1. Right-click in the center section of the Stage Control Panel to open the Template Editor<br />
dialog box.<br />
Note: You can also double-click the name of the template you want to change.<br />
2. Be sure the template you want to change is displayed in the fields at the left side of the dialog<br />
box. If not, click the name of the desired template in the Available Templates section.<br />
3. Make your changes to the parameters of the selected template and click Change.<br />
4. Click the close box at the upper right corner of the dialog box (or press the ESC key on the<br />
keyboard).<br />
Note: You cannot use the Change button if you change the name of a template. Use<br />
the Add button instead. Then select the previous name of the template in the<br />
Available Templates section and click Delete.<br />
To create a new template:<br />
1. Right-click in the center section of the Stage Control Panel to open the Template Editor<br />
dialog box.<br />
2. Type a name for your new template in the appropriate field (Disk, Panel or Wafer).<br />
3. Enter the parameters for your new template that correspond to your sample, and click Add.<br />
4. Click the close box at the upper right corner of the dialog box (or press the ESC key on the<br />
keyboard).<br />
Rev. G <strong>Dektak</strong> 8 <strong>Manual</strong> 55<br />
003C
Basic Functions<br />
Sample Loading<br />
3.2.5 Setup<br />
Prior to positioning your sample, choose the appropriate template from the center section of the<br />
Stage Control Panel. The set-up menu contains a variety of templates designed for different<br />
applications. The 200-mm wafer template is the default template and can be used as a template to<br />
determine the outer diameter of the sample stage table. You can use the Template Editor dialog<br />
box (see Template Editor: Section 3.2.4, and Figure 3.2e) to create custom templates for various<br />
size wafers, disks or rectangular samples.<br />
Template Selection<br />
Complete the following procedure to select the desired template for your sample:<br />
3.3 Sample Loading<br />
1. If the Stage Control Panel is not displayed in the Sample Positioning window, select<br />
<strong>Profiler</strong> > Stage Control Panel from the menu bar.<br />
2. Click the name of the desired template in the template selection section of the Stage Control<br />
Panel. (Double-click the name of a template type to display templates stored under that<br />
type.)<br />
3. The selected template displays in the template section of the Stage Control Panel.<br />
The <strong>Dektak</strong> 8 automatically positions the stylus at the center of the sample stage during<br />
initialization. Prior to loading samples, verify that the stylus and optics tower are raised. Complete<br />
the following procedure to load a sample:<br />
1. Open the door to the <strong>Dektak</strong> 8 enclosure.<br />
2. Select Window > Sample Positioning from the system menu bar (see Figure 3.3a) to<br />
display the Sample Positioning window (see Figure 3.3b).<br />
Figure 3.3a Window Menu, Sample Positioning<br />
3. In the Sample Positioning window, verify that the Stage Control Panel is displayed. If not,<br />
select <strong>Profiler</strong> > Stage Control Panel from the system menu bar (or press CTRL+T on the<br />
keyboard).<br />
56 <strong>Dektak</strong> 8 <strong>Manual</strong> Rev. G<br />
146A
Feature<br />
Reticule<br />
Cursor<br />
Stylus<br />
Reticule<br />
Figure 3.3b Sample Positioning Window with Stage Control Panel<br />
Basic Functions<br />
Sample Loading<br />
4. In the Stage Control Panel, select the Move Stage to Unload Position button (or press<br />
CTRL+SHIFT+U on the keyboard) to raise the <strong>Dektak</strong> 8 stylus and optics tower to its<br />
maximum height and move the stage forward to the unload position. (Refer to Figure 3.2d for<br />
an illustration of the buttons on the Stage Control Panel.)<br />
ATTENTION: Raise the tower prior to loading samples to protect the stylus and<br />
the sample from damage.<br />
ATTENTION: Remonter la tour avant d’installer les échantillons pour protéger le<br />
stylet et l’échantillon.<br />
ATTENTION: Vor dem Auflegen einer Probe sollte die Abtastspitze nach oben<br />
gefahren werden, um Abtastspitze und Probe vor einer möglichen<br />
Beschädigung zu schützen.<br />
5. Position the sample in the center of the stage below the stylus.<br />
Note: If you are using the calibration standard, it should be square with the sides of<br />
the machine and oriented on the stage as seen in Figure 3.3c.<br />
Rev. G <strong>Dektak</strong> 8 <strong>Manual</strong> 57<br />
003D
Basic Functions<br />
Sample Loading<br />
Figure 3.3c Calibration Standard Positioning<br />
6. Click Yes in the Load Sample popup dialog box to return to stage center after placing the<br />
sample.<br />
3.3.1 Stage Tracking<br />
Front of the stage<br />
1. Click the Low Magnification button in the toolbar (see Figure 3.3d).<br />
Figure 3.3d Low Magnification Button<br />
2. Move the trackball pointer into the camera view pane (see Figure 3.3e). Left-click the trackball<br />
button once to activate Stage Tracking. When Stage Tracking is active:<br />
• The gantry (stylus) tracks the motion of the trackball along the X and Y axes.<br />
• You can also move the stylus with the arrow keys on the keyboard. (Hold down the<br />
SHIFT key for faster motion.)<br />
• The left arrow key moves the image to the left (the gantry moves to the rear).<br />
• The right arrow key moves the image to the right (the gantry moves to the front).<br />
58 <strong>Dektak</strong> 8 <strong>Manual</strong> Rev. G<br />
8027
• The up arrow key moves the image up (the gantry moves to the right).<br />
• The down arrow moves the image down (the gantry moves to the left).<br />
• You can switch between cameras.<br />
• Press 1 on the keyboard (or keypad) to select the high mag camera.<br />
• Press 2 on the keyboard (or keypad) to select the low mag camera.<br />
• You can adjust the illumination on the sample.<br />
• Press + on the keyboard (or keypad) to increase illumination.<br />
• Press - on the keyboard (or keypad) to decrease illumination.<br />
3. Align the stylus with the center of the sample.<br />
4. Left-click a second time to deactivate Stage Tracking.<br />
Part of<br />
Camera View<br />
Pane<br />
Note: The stylus will automatically raise from the sample surface when Stage<br />
Tracking is on.<br />
Figure 3.3e Camera View Pane (partial view)<br />
5. Select <strong>Profiler</strong> > Tower Down to lower the optics tower toward the sample.<br />
Basic Functions<br />
Sample Loading<br />
Note: When using a 200-mm template, you should have access to an entire 8-inch<br />
wafer. However, the stylus should not be allowed to descend beyond the edge<br />
of the sample.<br />
Rev. G <strong>Dektak</strong> 8 <strong>Manual</strong> 59<br />
057A
Basic Functions<br />
Viewing the Sample<br />
3.4 Viewing the Sample<br />
Once the sample is loaded, it is necessary to make a few adjustments for viewing. This section<br />
details the following view functions:<br />
• <strong>Manual</strong> Theta Rotation: Section 3.4.1<br />
• Stage Rotation (Optional Programmable Theta): Section 3.4.2<br />
• Lowering/Raising the Stylus: Section 3.4.3<br />
• Optics Illumination Adjustment: Section 3.4.4<br />
• Stylus Reticle Alignment: Section 3.4.5<br />
• Feature Reticle Alignment: Section 3.4.6<br />
• Sample Positioning Adjustments: Section 3.4.7<br />
60 <strong>Dektak</strong> 8 <strong>Manual</strong> Rev. G
3.4.1 <strong>Manual</strong> Theta Rotation<br />
You can alter X-Y positioning manually by rotating the stage of the <strong>Dektak</strong> 8 to allow a more<br />
desired view of the sample (NOT available with the Programmable Theta Option).<br />
Basic Functions<br />
Viewing the Sample<br />
1. Ensure the stylus is not touching the sample surface. Select <strong>Profiler</strong> > Tower Up to protect<br />
the sample and stylus from damage.<br />
2. Loosen the knob on the left side of the stage to release the secured stage (see Figure 3.4a).<br />
Theta Knob<br />
Figure 3.4a Theta Knob<br />
3. Slowly rotate the stage in the desired direction (see Figure 3.4b).<br />
Physically Rotate the<br />
Stage<br />
Figure 3.4b Theta Rotate the Stage<br />
4. Tighten the knob to secure the stage.<br />
Rev. G <strong>Dektak</strong> 8 <strong>Manual</strong> 61<br />
176<br />
180
Basic Functions<br />
Viewing the Sample<br />
3.4.2 Stage Rotation (Optional Programmable Theta)<br />
The Stage Control Panel allows you to rotate the stage and make adjustments to the theta sample<br />
position. See Stage Control Panel: Section 3.2.3.<br />
3.4.3 Lowering/Raising the Stylus<br />
Lowering the stylus onto the sample surface nulls the stylus LVDT and brings the sample into<br />
focus. With the stylus lowered, you can properly align the stylus with the movable reticule.<br />
1. Raise or lower the stylus using the toolbar icons (see Figure 3.4c) or the <strong>Profiler</strong> menu.<br />
Click <strong>Profiler</strong> > Stylus Up or <strong>Profiler</strong> > Stylus Down (see Figure 3.4d).<br />
Note: The Tower Up and Tower Down commands will raise or lower the entire<br />
tower assembly which includes the video camera, illuminator and stylus<br />
mechanism. The Stylus Up command lifts the stylus only. The Stylus Down<br />
command slightly raises and then lowers the entire tower assembly until the<br />
stylus touches the sample surface.<br />
3.4.4 Optics Illumination Adjustment<br />
Figure 3.4c Stylus Movement Icons<br />
Stylus Down Stylus Up<br />
Figure 3.4d <strong>Profiler</strong> Menu, Stylus Down<br />
After lowering the optics tower to focus the camera, adjust the illumination level of the video<br />
image displayed on the <strong>Dektak</strong> 8 monitor using the toolbar icons (see Figure 8.14f), or the up and<br />
down arrow keys on the keyboard.<br />
Note: You can change the increment by which the illumination changes at each click.<br />
See Illumination Folder in Setup Menu: Section 8.5.<br />
Note: The sample should be in focus whenever the system is nulled by lowering the<br />
stylus onto the sample surface. If not, see Optics Adjustment: Section 9.10.<br />
62 <strong>Dektak</strong> 8 <strong>Manual</strong> Rev. G<br />
143C
3.4.5 Stylus Reticle Alignment<br />
Basic Functions<br />
Viewing the Sample<br />
The stylus reticle may be aligned to a newly installed stylus, or to allow for tolerances in the stylus<br />
head. If the stylus tip is not properly aligned with the reticle in the camera view pane, adjust the<br />
reticle position. The reticle provides a reference point when positioning the sample stage. Because<br />
the stylus is raised off the surface during stage positioning, the reticle indicates where the stylus<br />
will touch on the surface. Complete the following procedure to align the reticle with stylus tip:<br />
Note: During initial set up, you may need to adjust the camera position to position the<br />
stylus within the stylus crosshair box. To adjust the camera position, see<br />
Optics Adjustment: Section 9.10.<br />
Complete the following procedure to align the reticule with the stylus tip:<br />
1. In the Sample Positioning window, right-click the trackball button to display the pop-up<br />
menu (see Figure 3.4e).<br />
Figure 3.4e Sample Positioning Window Pop-up Menu<br />
2. In the pop-up menu, click Stylus Reticule to display two options: Align and Reset.<br />
• Align allows you to manually reposition the reticule.<br />
Rev. G <strong>Dektak</strong> 8 <strong>Manual</strong> 63
Basic Functions<br />
Viewing the Sample<br />
Part of<br />
Camera View<br />
Pane<br />
• Reset repositions the reticule to the original default location in the center of the<br />
screen.<br />
3. Select Align to display the crosshair box (see Figure 3.4f).<br />
4. Align the crosshair with the stylus tip and then double-click the left trackball button.<br />
5. In the dialog box that appears, click Yes to update the stylus reticule location, No to retry the<br />
alignment, or Cancel to close the dialog box and return to the Sample Positioning window.<br />
Figure 3.4f Stylus Reticle Alignment<br />
64 <strong>Dektak</strong> 8 <strong>Manual</strong> Rev. G<br />
060B
3.4.6 Feature Reticle Alignment<br />
Basic Functions<br />
Viewing the Sample<br />
The feature reticle is the smaller green reticle displayed in the camera view pane of the Sample<br />
Positioning window (see Figure 3.4g).<br />
Part of<br />
Camera View<br />
Pane<br />
Feature<br />
Reticule<br />
Cursor<br />
Figure 3.4g Feature Reticle Alignment<br />
Align the feature reticle with surface features away from the stylus to more accurately position the<br />
sample prior to scanning. Complete the following procedure for realigning the feature reticle:<br />
1. In the camera view pane, roll the pointing device to the desired location.<br />
Note: For best results, align the feature reticle with a unique, easily recognizable<br />
surface feature.<br />
2. Once the cursor is properly aligned with the desired feature, click the right button on the<br />
trackball.<br />
3. Click Update Alignment Reticule in the pop-up menu that appears (see Figure 3.4h).<br />
Rev. G <strong>Dektak</strong> 8 <strong>Manual</strong> 65
Basic Functions<br />
Viewing the Sample<br />
Figure 3.4h Update Alignment Reticule<br />
4. Click Yes in the Confirmation dialog box that pops up to update the feature reticule<br />
alignment. The feature reticule moves to the new location.<br />
3.4.7 Sample Positioning Adjustments<br />
Once the optics are properly adjusted, fine stage positioning can be accomplished. Use the Stage<br />
Control Panel (see Stage Control Panel: Section 3.2.3) or Stage Tracking (see Stage Tracking:<br />
Section 3.3.1) to position your sample as desired.<br />
66 <strong>Dektak</strong> 8 <strong>Manual</strong> Rev. G
3.5 Unloading the Sample<br />
3.6 Power Down<br />
Use the following procedure to unload a sample from the stage.<br />
1. Open the door to the <strong>Dektak</strong> 8 enclosure.<br />
Basic Functions<br />
Unloading the Sample<br />
2. In the Sample Positioning window, verify that the Stage Control Panel is displayed. If not,<br />
select <strong>Profiler</strong> > Stage Control Panel from the system menu bar (or press CTRL+T on the<br />
keyboard).<br />
3. In the Stage Control Panel, select the Move Stage to Unload Position button (or press<br />
CTRL+SHIFT+U on the keyboard) to raise the <strong>Dektak</strong> 8 stylus and optics tower to its<br />
maximum height and move the stage forward to the unload position. (Refer to Figure 3.2d for<br />
an illustration of the buttons on the Stage Control Panel.)<br />
4. Remove your sample from the stage.<br />
5. Click Yes in the Load Sample popup dialog box to return to stage center.<br />
Figure 3.5a Load Sample Dialog Box<br />
Use the following procedure to power down the <strong>Dektak</strong> 8.<br />
1. Exit the <strong>Dektak</strong> software.<br />
a. Select File > Exit from the menu bar.<br />
2. Exit Windows XP.<br />
a. Select Start > Shut Down. Click Shut Down in the dialog box that appears.<br />
3. Turn off the power switch on the rear of the <strong>Dektak</strong> 8 E-Box.<br />
4. Turn off the power switch at the front of the computer.<br />
Note: Turn off the power switches on the (optional) printer and the monitor.<br />
Rev. G <strong>Dektak</strong> 8 <strong>Manual</strong> 67
Basic Functions<br />
Power Down<br />
68 <strong>Dektak</strong> 8 <strong>Manual</strong> Rev. G
Chapter 4 Single Scan Operation<br />
This chapter details a step-by-step exercise for performing routine step height measurements on the<br />
10kÅ calibration standard (optional). It is a continuation of the exercise begun in Chapter 3 of this<br />
manual. The exercise teaches the user the basic operational skills required to program and run<br />
simple scan routines. This chapter includes the following topics:<br />
• Create a Single-Scan Automation Program: Section 4.1<br />
• Define Scan Location and Length: Section 4.2<br />
• Run a Scan Routine: Section 4.3<br />
• Reference/Measurement Cursors: Section 4.4<br />
• Stage Leveling: Section 4.5<br />
• Software Leveling: Section 4.6<br />
• Setting the Zero Point: Section 4.7<br />
• Delta Average Step Height Measurement: Section 4.8<br />
• Plot Magnification: Section 4.9<br />
• Save Boundaries: Section 4.10<br />
• Data Printout: Section 4.11<br />
• Saving an Automation Program: Section 4.12<br />
• Aborting an Operation: Section 4.13<br />
The <strong>Dektak</strong> 8 operates via a trackball and keyboard. The user interface screens work in conjunction<br />
with the trackball and keyboard. You may want to become familiar with the <strong>Dektak</strong> 8 user interface<br />
by reading Chapter 3 prior to completing this exercise.<br />
Rev. G <strong>Dektak</strong> 8 <strong>Manual</strong> 69
Single Scan Operation<br />
Create a Single-Scan Automation Program<br />
4.1 Create a Single-Scan Automation Program<br />
Prior to running a scan routine, you must first create an automation program. Automation programs<br />
are files that contain all the necessary information for performing single- or multiple-scan routine<br />
sequences. The procedures for creating a new single-scan automation program are described below.<br />
Note: If you have the 3D Mapping Option, see Appendix D.<br />
1. In the Startup window, select File > New from the system menu bar or click the Create<br />
New Automation Program icon to display the Automation Programs window containing<br />
the default automation program (default.mp). See Figure 4.1a.<br />
2. If you are currently in an automation program that has had changes made to it, a dialog box<br />
will appear asking if you want to save your changes to the current automation program. Click<br />
Yes to save the current automation program.<br />
Note: Be aware that if the current automation program was previously loaded and<br />
then modified, it will be saved under its original file name. If you want to<br />
preserve the original automation program, first select File > Save As... at the<br />
menu bar and choose a new file name for the modified program. Then select<br />
File > New.<br />
Note: If you select Window > Automation Programs from the system menu bar, the<br />
current automation program will be opened (if there is one); otherwise, the<br />
default automation program will be opened.<br />
70 <strong>Dektak</strong> 8 <strong>Manual</strong> Rev. G
Figure 4.1a New Automation Program<br />
Single Scan Operation<br />
Create a Single-Scan Automation Program<br />
3. The Automation Program window contains a default scan routine. You can double-click<br />
the highlighted scan routine (or select Window > Scan Routines from the system menu bar;<br />
or, click the Switch to Scan Routines Window icon) to display the parameters for the scan<br />
routine in the Scan Routines window (see Figure 4.1b).<br />
Rev. G <strong>Dektak</strong> 8 <strong>Manual</strong> 71<br />
120B
Single Scan Operation<br />
Create a Single-Scan Automation Program<br />
Figure 4.1b Scan Routines Window with Default Scan Routine (#1 of 1)<br />
4. You can edit the options for this automation program and add or modify scan routine<br />
parameters. These features are discussed in more detail in Chapter 5.<br />
5. You can save the automation program with selected parameters for specific scan operations.<br />
See Saving an Automation Program: Section 4.12 for more information.<br />
72 <strong>Dektak</strong> 8 <strong>Manual</strong> Rev. G<br />
121B
4.2 Define Scan Location and Length<br />
Single Scan Operation<br />
Define Scan Location and Length<br />
This procedure entails determining the appropriate scan starting location and length for measuring<br />
the optional calibration standard. You can define the scan location and scan length from the Sample<br />
Positioning Window as described below.<br />
1. Select Window > Sample Positioning from the stage menu to display the Sample<br />
Positioning Window.<br />
2. Activate the high magnification camera.<br />
3. Select <strong>Profiler</strong> > Tower Down.<br />
4. Use the Illumination Adjustment icons to adjust the illumination to view the sample.<br />
5. With the stylus tower down, initiate Stage Tracking (left-click in the camera view pane) for<br />
fine sample positioning. The image should now track the motion of the trackball.<br />
6. Position the stylus reticle to the left of the “dog-bone” step of the calibration standard, so that<br />
the vertical line of the stylus reticule is parallel with the length of the dog bone (see Figure<br />
4.2a).<br />
Dog Bone<br />
Stylus Reticule<br />
Figure 4.2a Stylus Reticule Positioned Properly<br />
7. With the stylus reticle properly positioned, click the trackball button a second time to<br />
deactivate Stage Tracking.<br />
8. Select Edit > Define Scan Location. The Location for Routine #: 1 of 1 dialog box pops<br />
up, showing the current X and Y coordinates of the stylus that you determined for this scan<br />
routine with Stage Tracking (see Figure 4.2b). You can accept the values shown, or edit the<br />
values with the keyboard.<br />
Note: The theta (T:) field appears only if you have the Power Theta Option installed.<br />
Rev. G <strong>Dektak</strong> 8 <strong>Manual</strong> 73<br />
225<br />
Wide Portion:<br />
y 1,000 µm<br />
Narrow Portion:<br />
y 200 µm
Single Scan Operation<br />
Define Scan Location and Length<br />
Figure 4.2b Scan Location Dialog Box<br />
9. Click the Enter button in the Current Location section to assign the coordinates to the scan<br />
routine.<br />
10. Since we have only one scan routine in this exercise, we are finished defining scan locations.<br />
Click the close box at the upper right corner to close the dialog box.<br />
11. Now, select Edit > Define Scan Length. Stage Tracking is activated, but this time tracks<br />
only the left and right motion of the trackball to allow you to determine the distance you<br />
want to scan.<br />
12. Roll the trackball until the stylus reticle is to the right of the “dog-bone” step and click the<br />
left trackball button. The Length for Routine #: 1 of 1 dialog box pops up, showing the<br />
length of the scan that you determined with Stage Tracking (see Figure 4.2c). You can accept<br />
the values shown, or edit the values with the keyboard.<br />
Figure 4.2c Scan Length Dialog Box<br />
13. For this exercise, edit the scan Length to be 1000 µm.<br />
14. Click the Enter button in the Length section to assign the length to the scan routine.<br />
74 <strong>Dektak</strong> 8 <strong>Manual</strong> Rev. G
Single Scan Operation<br />
Define Scan Location and Length<br />
Note: A scan is always performed by moving the stage towards the front of the<br />
machine. (During the scan, the image will appear to be moving from right to<br />
left.)<br />
15. Since we have only one scan routine in this exercise, we are finished defining scan lengths.<br />
Click the close box at the upper right corner to close the dialog box.<br />
16. Select Window > Scan Routines from the system menu bar or click the Switch to Scan<br />
Routines Window icon to display the Scan Routines window (see Figure 4.1b).<br />
17. Click any of the ten underlined items in the Scan Parameters section of the window to open<br />
the Scan Parameters dialog box (see Figure 4.2d).<br />
Figure 4.2d Scan Parameters Dialog Box<br />
18. You can adjust other scan parameters in the dialog box, such as scan ID, Duration,<br />
horizontal Resolution, Stylus Force and Measurement Range (see Scan Routine<br />
Parameter Description: Section 7). Click OK to accept your entries and close the dialog<br />
box.<br />
Note: If you want to make other changes, you can click Apply instead of OK to<br />
accept an entry and keep the Scan Parameters dialog box open.<br />
Rev. G <strong>Dektak</strong> 8 <strong>Manual</strong> 75
Single Scan Operation<br />
Run a Scan Routine<br />
4.3 Run a Scan Routine<br />
1. Click the Run Currently Active Scan Routine icon, the F4 key, or select Run > Scan from<br />
the menu to run a scan routine.<br />
The following sequence of events occurs when you initiate a scan:<br />
a. The Data Plot window displays with the scaled grid superimposed over the camera<br />
view pane of the stylus and calibration standard.<br />
b. The stylus lowers onto the sample surface. After a brief pause, the scan commences. As<br />
the stylus scans across the calibration standard, the full scale profile trace plots on the<br />
scaled grid in real time.<br />
Note: Because the camera is mounted at the right side of the stylus, during a scan the<br />
video image shows the sample moving from right to left below the stylus. In<br />
actuality, during a scan the stage is moving from back to front.<br />
c. Once the scan is complete, the stylus lifts off the surface and the stage returns to the<br />
location where the scan originated. The profiler then automatically replots and rescales.<br />
The image displayed on the monitor should resemble Figure 4.3a.<br />
Figure 4.3a Calibration Standard Profile<br />
76 <strong>Dektak</strong> 8 <strong>Manual</strong> Rev. G<br />
180B
4.4 Reference/Measurement Cursors<br />
Single Scan Operation<br />
Reference/Measurement Cursors<br />
The reference (R) cursor and measurement (M) cursor define the portion of the profile trace for<br />
leveling or performing analytical functions. You can adjust the bandwidth at each cursor to average<br />
the data points within the cursor’s bandwidth. This is useful for leveling and average step height<br />
measurements.<br />
4.4.1 Basic Cursor Positioning<br />
Cursor positioning is critical for obtaining accurate results. The simplest way to reposition the<br />
cursors is to use the mouse to drag the R and M cursors flags at the top of the cursors to new<br />
positions in the data plot.<br />
Selecting both R and M cursors allows you to reposition the cursors while maintaining the same<br />
distance between them. Hold down the Ctrl key while dragging with the left mouse button on the R<br />
or M cursor flag. Now, dragging either flag causes both cursors to move simultaneously.<br />
Refer to the following sections for alternate procedures to position the cursors and increase/<br />
decrease cursor bandwidth:<br />
• Cursor Positioning Using Arrows: Section 4.4.3<br />
• Numeric Entry Cursor Positioning: Section 4.4.4<br />
For this exercise, use the default cursor band widths for leveling and measuring. To activate the<br />
default cursor bands select Plot > Default Bands from the menu bar (see Figure 4.4a).<br />
Note: To clear the cursor bandwidths, select Plot > Clear Bands<br />
Figure 4.4a Setting Default Cursor Band Widths<br />
Rev. G <strong>Dektak</strong> 8 <strong>Manual</strong> 77<br />
181A
Single Scan Operation<br />
Reference/Measurement Cursors<br />
4.4.2 Setting Cursor Bandwidths<br />
The simplest way to change the bandwidth of the cursors is to use the mouse to drag the doubletriangle<br />
handles at the bottom of the cursors to new widths in the data plot (see Figure 4.4b).<br />
Note: When the cursors are near the edges of the plot, the handles might not be<br />
visible.<br />
To specify numerical values for the bandwidths, select Plot > Band Widths... from the menu bar<br />
(see Figure 4.4b). Enter the desired values for the R and M cursor widths in the Set Band Widths<br />
dialog box that pops up.<br />
Figure 4.4b Setting Cursor Band Widths: Handle and Dialog Box<br />
R Cursor Bandwidth Handle<br />
78 <strong>Dektak</strong> 8 <strong>Manual</strong> Rev. G<br />
181B
4.4.3 Cursor Positioning Using Arrows<br />
Single Scan Operation<br />
Reference/Measurement Cursors<br />
The R. Cursor and M. Cursor sections (in the data plot box at the bottom of the window) indicate<br />
the locations of the cursors and their bandwidths. The Å numbers in the box indicate the points at<br />
which the cursors intercept the profile trace in relation to the vertical scale (see Figure 4.4c).<br />
Figure 4.4c Data Plot Box<br />
Special cursor-control arrow buttons at the bottom-right of the data plot pane allow you to work<br />
with the cursors (see Figure 4.4d). You can position the cursors by selecting a cursor, and then<br />
clicking and holding the left and right arrow buttons. Similarly, you can increase or decrease the<br />
selected cursor’s bandwidth by clicking the up and down arrow buttons.<br />
Figure 4.4d Cursor-Control Arrows<br />
Note: You can also use the arrow keys on the keyboard to position the selected cursor<br />
and change its bandwidth. Hold down the CTRL key while you press the arrow<br />
keys.<br />
1. Click the red R button (or press CTRL+R) to select the reference cursor.<br />
2. Click the green M button (or press CTRL+M) to select the measurement cursor.<br />
3. Press the F button (or press CTRL+F) to move the cursors or change their bandwidths at high<br />
speed. Press the F button (or press CTRL+F) again to move the cursors or change their<br />
bandwidths at slow speed.<br />
Note: After you have selected a cursor with the right or left cursor-control arrow, you<br />
can double-click in the data plot pane to snap the selected cursor to the<br />
horizontal location of the mouse pointer.<br />
Rev. G <strong>Dektak</strong> 8 <strong>Manual</strong> 79<br />
182B<br />
182A
Single Scan Operation<br />
Reference/Measurement Cursors<br />
4.4.4 Numeric Entry Cursor Positioning<br />
The white boxes in the data plot box display the cursor position (Pos) in relation to the horizontal<br />
scale, and their bandwidths (Width). See Figure 4.4c. Another way to alter cursor locations and<br />
bandwidths is by using the keyboard to numerically enter new values in these boxes.<br />
Note: For this exercise, the location of the R cursor should be set at 100 µm with the<br />
M cursor at 900 µm.<br />
1. Click in the upper white box indicating the R cursor horizontal Position. A blinking prompt<br />
appears in the box.<br />
2. Enter 100 using the keyboard and press ENTER. The R cursor repositions at 100 µm.<br />
3. Click in the lower white box indicating the M cursor horizontal Position. A blinking prompt<br />
appears in the box.<br />
4. Enter 900 and press ENTER. The M cursor repositions at 900 µm.<br />
The ASH section displays the vertical difference between the points at which the R and M cursors<br />
intercept the profile trace. The Distance section below it displays the horizontal distance between<br />
the cursors.<br />
80 <strong>Dektak</strong> 8 <strong>Manual</strong> Rev. G
4.5 Stage Leveling<br />
Single Scan Operation<br />
Stage Leveling<br />
Stage leveling is an important aspect of the <strong>Dektak</strong> 8 operation. You can level the stage manually or<br />
using one of two methods with the Automatic Stage Leveling Option. Refer to the following<br />
sections for procedures for each type of leveling:<br />
• <strong>Manual</strong> Stage Leveling: Section 4.5.1<br />
• Optional Power Stage Leveling: Section 4.5.2<br />
4.5.1 <strong>Manual</strong> Stage Leveling<br />
The standard <strong>Dektak</strong> 8 enables manual stage leveling by turning the leveling knob at the front of the<br />
stage (see Figure 4.5a). The closest possible manual leveling will ensure the best instrument<br />
performance. The manual leveling knob levels the stage about a pivot axis at the front of the stage.<br />
Leveling the stage must be accomplished using a sample that has a known horizontal surface. The<br />
<strong>Dektak</strong> 8 is adjusted to measure the horizontal surface as a level surface. This allows for sample<br />
surfaces not parallel to the reference surface block to be leveled using the procedure below.<br />
Stage<br />
Figure 4.5a Stage Leveling Knob<br />
Knob<br />
1. Perform stage leveling while a scan is in progress to view the affect of leveling on the profile<br />
trace in real time. To run a new scan, click Run > Scan.<br />
2. As the stage is moving and a trace is being generated on the screen, turn the leveling knob<br />
thumb wheel until the profile trace is tracking in a horizontal line. Clockwise rotation raises<br />
the trace and counter-clockwise will lower the trace.<br />
Rev. G <strong>Dektak</strong> 8 <strong>Manual</strong> 81<br />
176
Single Scan Operation<br />
Stage Leveling<br />
3. Again click Run > Scan. The profile must appear totally within the graphic boundaries to<br />
achieve the minimum acceptable manual leveling. If not, repeat the manual leveling<br />
procedure above.<br />
Note: For maximum performance of this instrument, it is very important to position<br />
the sample surface to within +/- 0.01º of level. Use the formula tan-1 (slope of<br />
leveled trace) to determine the level accuracy.<br />
To verify that the maximum possible level has been obtained, the cursors should be placed to<br />
intersect the same horizontal plane.<br />
The slope analytical function can be used to determine to what degree the stage is out of level. The<br />
slope of the trace between the cursors will be displayed in degrees. This angle indicates the amount<br />
that the trace is out of level. If the angle is greater than +/- 0.01º, repeat the above steps to obtain<br />
minimum possible slope/maximum possible level.<br />
Note: If the trace is extremely out of level, change the measurement range to the<br />
maximum range of 2,620kÅ. Level the trace as described above, change to the<br />
intermediate range and repeat the procedure until leveled. The best level is<br />
achieved by using the 65kÅ range.<br />
4.5.2 Optional Power Stage Leveling<br />
If the Power Leveling option is installed in your <strong>Dektak</strong> 8, you have two additional methods for<br />
leveling the stage besides the leveling knob: auto leveling and power leveling.<br />
Auto Leveling<br />
When auto leveling is activated, the stage automatically levels in relation to the points at which the<br />
profile trace intercepts the cursors. You can access the optional auto leveling feature only when the<br />
Data Plot window displays. It is used interactively with the reference and measurement cursors.<br />
The R and M cursors must be positioned on the same horizontal plane along the profile trace. For<br />
best results, position the R and M cursors as far apart as possible.<br />
Complete the following procedure for automatic stage leveling:<br />
1. Select <strong>Profiler</strong> > Stage Leveling > Auto Level from the system menu bar (see Figure 4.5b).<br />
Note: If the stylus is resting on the sample surface when you initiate auto leveling, the<br />
system will first raise the stylus. The stage then automatically levels according<br />
to the vertical difference between the cursors.<br />
2. When a second scan is performed, the profile trace should be adequately leveled to make a<br />
measurement. Additional leveling of the trace can be accomplished in software (see<br />
Software Leveling: Section 4.6).<br />
82 <strong>Dektak</strong> 8 <strong>Manual</strong> Rev. G
Power Leveling<br />
Figure 4.5b Auto Leveling<br />
Single Scan Operation<br />
Stage Leveling<br />
The optional power leveling method allows you to level the stage using buttons on the screen. It is<br />
typically used in applications where the stage or sample is extremely tilted, to the point where the<br />
scan line runs off the scale.<br />
Complete the following procedure for power stage leveling:<br />
1. Select <strong>Profiler</strong> > Stage Leveling > <strong>Manual</strong> (Power) Leveling from the system menu bar to<br />
display the Power Leveling dialog box (see Figure 4.5c). The up- and down-arrow buttons<br />
allow you to raise or lower the stage at one end to adjust the level.<br />
Figure 4.5c Power Leveling Dialog Box<br />
2. Use the left trackball button to click and hold the down-arrow button if the scan trace has a<br />
positive slope or runs off the top of the screen. Release the trackball button to stop the stage<br />
from lowering.<br />
3. Use the left trackball button to click and hold the up-arrow button if the scan trace has a<br />
negative slope or runs off the bottom of the screen. Release the trackball button to stop the<br />
stage from rising.<br />
Rev. G <strong>Dektak</strong> 8 <strong>Manual</strong> 83<br />
077A<br />
084A
Single Scan Operation<br />
Stage Leveling<br />
4. Click the close box in the upper right corner when the desired stage leveling adjustments<br />
have been accomplished to clear the Power Leveling box from the screen.<br />
5. Run another scan to verify if you have adjusted the stage level satisfactorily.<br />
Note: The power leveling method uses a trial-and-error technique, so you will have to<br />
repeat the operation several times before the stage is leveled.<br />
84 <strong>Dektak</strong> 8 <strong>Manual</strong> Rev. G
4.6 Software Leveling<br />
Single Scan Operation<br />
Software Leveling<br />
Although the stage may have been adjusted mechanically, ensuing scans may show the profile trace<br />
slightly tilted. Software leveling allows the system to quickly level the profile trace without<br />
actually having to completely level the stage. You must software level the stage in order to obtain<br />
accurate step height measurements or accurate readings from analytical functions. Software<br />
leveling sets the reference and measurement cursors at zero to establish reference for<br />
measurements.<br />
Complete the following procedure to software level a trace:<br />
1. Position the R and M cursors along the baseline of the step.<br />
2. Click the Level icon, press F7, or select Plot > Level from the system menu bar. The profile<br />
trace will replot and level with the R and M cursor intercepts at zero (see Figure 4.6a).<br />
You can also program software leveling into the scan routine to level the trace automatically at the<br />
conclusion of the scan by selecting Edit > Enter Software Leveling. For more information see<br />
Software Leveling: Section 7.2.1.<br />
Figure 4.6a Cursor Positioning for Software Leveling<br />
Baseline<br />
Rev. G <strong>Dektak</strong> 8 <strong>Manual</strong> 85<br />
184A
Single Scan Operation<br />
Setting the Zero Point<br />
4.7 Setting the Zero Point<br />
You may select any point on the profile trace as the zero point. The zero point is the point of<br />
reference from which all measurements are taken. Software leveling sets both the R and M cursor<br />
intercepts at zero. However, when the Zero function is activated, it sets the zero point only at the R<br />
cursor intercept.<br />
1. Position the R (reference) cursor at the desired zero location.<br />
2. Select Plot > Zero (or press F8 on the keyboard) to automatically replot the profile trace and<br />
establish the zero point at the R cursor intercept (see Figure 4.7a).<br />
Figure 4.7a Setting the Zero Point<br />
Zero Point<br />
86 <strong>Dektak</strong> 8 <strong>Manual</strong> Rev. G<br />
185A
4.8 Delta Average Step Height Measurement<br />
Single Scan Operation<br />
Delta Average Step Height Measurement<br />
Once you run the scan routine and properly level and zero the profile, you can obtain an accurate<br />
step height measurement of the calibration standard using the delta average step height analytical<br />
function. Analytical functions are calculated using the R and M cursors. The cursor positions<br />
shown in Figure 4.8b are correct for the delta average step height calculation, with the R cursor at<br />
the base of the step and the M cursor at the top of the step.<br />
Complete the following procedure to calculate the delta average step height:<br />
1. Click the Analytical Functions icon or select Analysis > Analytical Functions to display<br />
the Analytical Functions dialog box (see Figure 4.8a).<br />
2. In the Height section, select ASH to activate the delta average step height function.<br />
3. In the Band Widths dialog box that pops up, you can enter new bandwidth values or accept<br />
the values displayed. Click OK.<br />
4. Click the Measure radio button located at the bottom of the Analytical Functions dialog<br />
box.<br />
Note: The Measure and Program radio button would enter the ASH function into<br />
the current scan routine to be performed automatically when the current scan<br />
routine runs again.<br />
Figure 4.8a Analytical Functions Dialog Box for Data Plot Window<br />
5. Click the COMPUTE button to calculate the average step height. The value displays in the<br />
Analytic Results area to the left of the data plot pane (see Figure 4.8b).<br />
Rev. G <strong>Dektak</strong> 8 <strong>Manual</strong> 87<br />
186A
Single Scan Operation<br />
Delta Average Step Height Measurement<br />
Figure 4.8b Step Height Measurement<br />
88 <strong>Dektak</strong> 8 <strong>Manual</strong> Rev. G<br />
185B
4.9 Plot Magnification<br />
Single Scan Operation<br />
Plot Magnification<br />
Once you run the scan and plot the profile trace, a portion of the data plot display can be isolated<br />
and magnified for more detailed analysis of the profile trace.<br />
1. To magnify an area of interest, move the trackball pointer into the data plot grid.<br />
2. Move the pointer to one corner of the area of the data plot pane you want magnified and leftclick<br />
on that location. Hold down the trackball button.<br />
3. Drag the pointer device away from the first corner at a diagonal to expand the box.<br />
4. Release the trackball button when the box covers the area of interest. For this exercise, the<br />
boundaries should look similar to those shown in Figure 4.9a. In the Plot menu that now<br />
pops up, you can choose Replot, to replot the profile trace with the new boundaries (similar<br />
to Figure 4.10a).<br />
Note: Click the REPLOT icon or select Plot > Replot from the menu bar if you want<br />
to replot and display the original profile trace.<br />
Figure 4.9a Plot Magnification<br />
Rev. G <strong>Dektak</strong> 8 <strong>Manual</strong> 89<br />
187B
Single Scan Operation<br />
Save Boundaries<br />
4.10 Save Boundaries<br />
Complete the following procedure to save the new set of boundaries:<br />
1. Select Plot > Save Boundaries to display a dialog box requesting an identification number<br />
under which to save the boundaries (see Figure 4.10a).<br />
Note: You may use any number between 1 and 9.<br />
2. Enter an identification number for the plot boundaries using the keyboard (for this exercise<br />
enter 1).<br />
3. Click OK to clear the dialog box and save the current boundaries in memory under<br />
identification number 1.<br />
Note: If previous boundaries were saved under identification number 1, the new<br />
boundaries replace the old.<br />
4.10.1 Showing Saved Boundaries<br />
1. Select Plot > Show Boundaries to display the saved boundaries.<br />
Note: All of the boundaries currently saved in memory will display on the data plot<br />
pane along with their identification number.<br />
Figure 4.10a Save Boundaries<br />
90 <strong>Dektak</strong> 8 <strong>Manual</strong> Rev. G<br />
188A
4.10.2 Restoring Saved Boundaries<br />
Single Scan Operation<br />
Save Boundaries<br />
The restore function allows you to replot the profile trace displayed on the data plot screen using a<br />
set of boundaries saved in memory.<br />
1. Select Plot > Restore from the menu bar to display a dialog box requesting the identification<br />
number of the desired boundaries to be restored (see Figure 4.10b).<br />
2. Enter the identification number using the keyboard. (For this exercise, enter 1.)<br />
3. Click OK to replot the current scan trace using the saved boundaries.<br />
Figure 4.10b Restoring Saved Boundaries<br />
Rev. G <strong>Dektak</strong> 8 <strong>Manual</strong> 91<br />
189A
Single Scan Operation<br />
Data Printout<br />
4.11 Data Printout<br />
You may obtain a printout of all the scan data with the plotted profile, a summary of the scan data,<br />
the scan routine form, the automation program form, the expanded APS form and the automation<br />
program summary, using a Windows-compatible printer.<br />
or<br />
• Select File > Print, press CTRL+P, or press the F10 key, to display a standard Windows<br />
dialog box listing various printer options.<br />
• Click the PRINT icon to produce a printout on the currently active printer.<br />
Note: Drivers for the Windows-compatible printer must be installed before use.<br />
92 <strong>Dektak</strong> 8 <strong>Manual</strong> Rev. G
4.12 Saving an Automation Program<br />
Single Scan Operation<br />
Saving an Automation Program<br />
You may store an automation program on the <strong>Dektak</strong> 8 hard disk or on a diskette to open, rerun, or<br />
alter the automation program at a later time. For the purpose of this exercise, follow the procedure<br />
described below to save the automation program created in this chapter exercise onto the C drive.<br />
1. Click the Automation Program icon or select Window > Automation Programs from the<br />
system menu bar to display the Automation Programs window (see Figure 4.12a).<br />
Figure 4.12a Automation Programs Window<br />
2. Select File > Save As from the Automation Program window menu bar to display the Save<br />
<strong>Dektak</strong> Data or Program dialog box (see Figure 4.12b).<br />
Rev. G <strong>Dektak</strong> 8 <strong>Manual</strong> 93<br />
120B
Single Scan Operation<br />
Aborting an Operation<br />
Figure 4.12b Save <strong>Dektak</strong> Data or Program Dialog Box<br />
3. Enter the file name and file type (for this exercise you can accept the file name<br />
’Default.mp’).<br />
4. Click Save.<br />
4.13 Aborting an Operation<br />
Note: The dialog box closes and the Automation Program is now saved on the hard<br />
disk under the designated file name.<br />
To abort a <strong>Dektak</strong> 8 operation, select the Abort icon or press the ESC or A key on the keyboard.<br />
Note: If you abort an operation while the stage is rotating, you will have to reset the<br />
hardware (<strong>Profiler</strong> > Reset Hardware from the menu, or CTRL+ALT+R at the<br />
keyboard).<br />
94 <strong>Dektak</strong> 8 <strong>Manual</strong> Rev. G<br />
191A
Chapter 5 Multiple Scan Operation<br />
This chapter continues the exercise introduced in Chapter 3 using the optional 10kÅ calibration<br />
standard. By building on the experience gained in creating and performing a single scan operation,<br />
you can use the <strong>Dektak</strong> 8 to produce complex multi-scan sequences. This chapter discusses the<br />
following items:<br />
• Automation Program Description: Section 5.1<br />
• Opening a New Automation Program: Section 5.2<br />
• Editing an Automation Program: Section 5.3<br />
• Program Entry: Section 5.4<br />
• Editing Scan Routines: Section 5.5<br />
• Automation Program Options: Section 5.6<br />
• Deskew: Section 5.7<br />
Rev. G <strong>Dektak</strong> 8 <strong>Manual</strong> 95
Multiple Scan Operation<br />
Automation Program Description<br />
5.1 Automation Program Description<br />
The automation program is the basis for all operations performed on the <strong>Dektak</strong> 8. Automation<br />
programs are stored in files on the hard disk, giving the <strong>Dektak</strong> 8 ample program storage capability.<br />
Basic knowledge of Microsoft Windows commands will help in understanding and creating<br />
automation programs. For more information, see the Microsoft Windows XP operating system user<br />
guide and user reference.<br />
The Automation Program Window displays the current scan routines along with their X, Y, and<br />
theta locations, deskew points and data destination options. This window allows you to program<br />
the <strong>Dektak</strong> 8 for performing multi-scan operations at various locations on a sample.<br />
The Automation Program window menu bar contains File and Edit menus items not available in<br />
other windows. These menus are described in further detail in Chapter 8.<br />
5.2 Opening a New Automation Program<br />
For the purpose of the exercise, open a new automation program to create a multi-scan automation<br />
program.<br />
1. In the Startup window, select File > New from the system menu bar or click the Create<br />
New Automation Program icon to display the Automation Programs window containing<br />
the default automation program (default.mp). See Figure 5.2a.<br />
2. If you are currently in an automation program that has had changes made, a dialog box will<br />
appear asking if you want to save your changes to the current automation program. Click Yes<br />
to save the current automation program.<br />
Note: Be aware that if the current automation program was previously loaded and<br />
then modified, it will be saved under its original file name. If you want to<br />
preserve the original automation program, first select File > Save As... at the<br />
menu bar and choose a new file name for the modified program. Then select<br />
File > New.<br />
Note: If you select Window > Automation Programs from the system menu bar, the<br />
current automation program will be opened (if there is one); otherwise, the<br />
default automation program will be opened.<br />
96 <strong>Dektak</strong> 8 <strong>Manual</strong> Rev. G
Figure 5.2a New Automation Program<br />
Multiple Scan Operation<br />
Opening a New Automation Program<br />
Rev. G <strong>Dektak</strong> 8 <strong>Manual</strong> 97<br />
120B
Multiple Scan Operation<br />
Editing an Automation Program<br />
5.3 Editing an Automation Program<br />
The procedure below describes how to copy a current scan routine to create an automation program<br />
containing multiple scan routines. An automation program may contain up to 10,000 scan routines;<br />
however, for the purpose of the exercise, you will create an automation program containing four<br />
scan routines.<br />
1. Click the Copy to Range icon or select Edit > Copy To Range to display a dialog box for<br />
entering the lower and upper limits of the range (see Figure 5.3a).<br />
Figure 5.3a Copy to Range Dialog Box<br />
Note: The flashing insertion point appears in the field labeled To Scan Routine #.<br />
2. Enter a numerical value into the field (enter 2 for the exercise).<br />
3. Click on the field below labeled Through Scan Routine #.<br />
4. Enter a numerical value into the field (enter 4 for the exercise).<br />
5. Click OK.<br />
Note: The current scan routine 1 copies to scan routines 2, 3 and 4 (listed in the Scan<br />
Routines area at the right side of the Automation Program window). Scan<br />
routine 2 is now the current scan routine.<br />
98 <strong>Dektak</strong> 8 <strong>Manual</strong> Rev. G<br />
125A
5.4 Program Entry<br />
Multiple Scan Operation<br />
Program Entry<br />
The scan routine is identified in the Scan Routines area by five entries: the left number is the scan<br />
number, the center entry is the Scan Type and the three numbers to the right are the X location, Y<br />
location in µm and the theta (T) rotation in degrees (see Figure 5.4a).<br />
Note: Theta rotation displays only if the Power Theta option is installed.<br />
Figure 5.4a Scan Routines Area<br />
Double-click any of the scans listed in the Scan Routines area to open the Scan Routines window<br />
to display the parameters for that scan routine.<br />
At this point, all four scan routines in your current automation program have the same values. You<br />
can determine new values for the location and length of each scan routine in the Sample<br />
Positioning Window, using the functions described below in Section 5.4.1. Also, you can adjust or<br />
edit values for each scan routine in the Scan Routines windows, using the functions described<br />
below in Section 5.4.2.<br />
Rev. G <strong>Dektak</strong> 8 <strong>Manual</strong> 99<br />
233B
Multiple Scan Operation<br />
Program Entry<br />
5.4.1 Define Scan Location and Length<br />
This procedure entails determining the appropriate scan starting location and length for measuring<br />
the optional calibration standard. You define the scan location and scan length from the Sample<br />
Positioning Window as described below.<br />
1. Select Window > Sample Positioning from the menu to display the Sample Positioning<br />
Window.<br />
2. Activate the high magnification camera.<br />
3. Select <strong>Profiler</strong> > Tower Down.<br />
4. Use the Illumination Adjustment icons to adjust the illumination to view the sample.<br />
5. With the stylus tower down, initiate Stage Tracking (left-click in the camera view pane) for<br />
fine sample positioning. The image should now track the motion of the trackball.<br />
6. Position the stylus reticle just to the left of the feature that you want to measure.<br />
Note: For optimal repeatability in stage positioning, always select left for scan<br />
locations (that is, move the stylus to the left of the position desired and<br />
approach the position from that side before selecting it). This eliminates<br />
repeatability errors due to backlash in the gears.<br />
7. With the stylus reticle properly positioned, click the trackball button a second time to<br />
deactivate Stage Tracking.<br />
8. Select Edit > Define Scan Location (or press CTRL+L on the keyboard). The Location for<br />
Routine #: 1 of 4 dialog box pops up, showing the current X and Y coordinates of the stylus<br />
that you determined for this scan routine with Stage Tracking (see Figure 5.4b). You can<br />
accept the values shown, or edit the values with the keyboard.<br />
Note: The theta (T:) field appears only if you have the Power Theta Option installed.<br />
Figure 5.4b Scan Location Dialog Box<br />
100 <strong>Dektak</strong> 8 <strong>Manual</strong> Rev. G
Multiple Scan Operation<br />
Program Entry<br />
9. Click the Enter button in the Current Location section to assign the coordinates to the scan<br />
routine.<br />
Note: At this point, there are two ways you can proceed: 1) define the location for<br />
each of the scan routines in your automation program, and then go back and<br />
define the length of each of the scan routines; or, 2) define the location and then<br />
the length of each scan routine in turn. Choose the method that is appropriate<br />
for your particular scan routines.<br />
The following steps assume you want to define all of the scan-routine locations first:<br />
10. Click the Enter button in the Scan Browser section to select the next scan routine.<br />
11. Select <strong>Profiler</strong> > Tower Down.<br />
12. With the stylus tower down, initiate Stage Tracking (left-click in the camera view pane) for<br />
fine sample positioning. The image should now track the motion of the trackball.<br />
13. Position the stylus reticle just to the left of the feature that you want to measure with the next<br />
scan routine.<br />
14. With the stylus reticle properly positioned, click the trackball button again to deactivate<br />
Stage Tracking.<br />
15. You can accept the values shown in the dialog box, or edit the values with the keyboard.<br />
Click the Enter button in the Current Location section to assign the coordinates to this scan<br />
routine.<br />
16. Repeat the above steps to define scan locations for each of the remaining scan routines.<br />
17. Click the close box at the upper right corner to close the dialog box.<br />
18. Select Edit > Go To Scan Routine (or press CTRL+G on the keyboard). Type 1 in the popup<br />
dialog box and press the ENTER key on the keyboard. This makes Scan Routine #1 the<br />
currently active scan routine.<br />
19. Press CTRL+V on the keyboard to move the stylus to the location you defined for the<br />
currently active scan routine (Scan Routine #1).<br />
20. Now, select Edit > Define Scan Length. Stage Tracking is activated, but this time tracks<br />
only the left and right motion of the trackball to allow you to determine the distance you want<br />
to scan.<br />
21. Roll the trackball until the stylus reticle is at the end of the scan, and click the left trackball<br />
button. The Length for Routine #: 1 of 4 dialog box pops up, showing the length of the scan<br />
that you determined with Stage Tracking (see Figure 5.4c). You can accept the value shown,<br />
or edit the value with the keyboard.<br />
Rev. G <strong>Dektak</strong> 8 <strong>Manual</strong> 101
Multiple Scan Operation<br />
Program Entry<br />
Figure 5.4c Scan Length Dialog Box<br />
22. Click the Enter button in the Length section to assign the length to this scan routine.<br />
Note: A scan is always performed by moving the stage towards the front of the<br />
machine. (During the scan, the image will appear to be moving from right to<br />
left.)<br />
23. Click the Enter button in the Scan Browser section to select the next scan routine as the<br />
currently active scan routine.<br />
24. Press CTRL+V on the keyboard to move the stylus to the location you defined for the<br />
currently active scan routine.<br />
25. Initiate Stage Tracking (left-click in the camera view pane), and roll the trackball until the<br />
stylus reticle is at the end of the scan.<br />
26. Click the left trackball button to deactivate Stage Tracking.<br />
27. You can accept the value shown in the dialog box, or edit the value with the keyboard. Click<br />
the Enter button in the Length section to assign the length to this scan routine.<br />
28. Repeat the above steps to define scan lengths for each of the remaining scan routines.<br />
29. Click the close box at the upper right corner to close the dialog box.<br />
5.4.2 Scan Routines Window<br />
The Scan Routines window allows you to edit the scan parameters and display parameters, and<br />
choose data processing settings, for each scan routine in your automation program (see Figure<br />
5.4d). The scan routine number is shown in the title bar at the top of the window, as well as the total<br />
number of scan routines in the automation program.<br />
102 <strong>Dektak</strong> 8 <strong>Manual</strong> Rev. G
Figure 5.4d Scan Routines Window<br />
Multiple Scan Operation<br />
Program Entry<br />
The scan routine shown in the Scan Routines window is the routine that was selected (highlighted)<br />
in the Automation Program window. However, there are several ways to display the other scan<br />
routines in this window without returning to the Automation Program window.<br />
• Click the Previous Scan Routine icon or the Next Scan Routine icon to display the<br />
previous or next scan routine, respectively.<br />
• Select Edit > Previous or Edit > Next at the menu bar to display the previous or next<br />
scan routine, respectively.<br />
• Press CTRL+< or CTRL+> on the keyboard to display the previous or next scan routine,<br />
respectively.<br />
• Select Edit > GoTo... at the menu bar (or press CTRL+G) to open the Go To dialog box,<br />
where you can type in a scan routine number. Then press the Enter key.<br />
Rev. G <strong>Dektak</strong> 8 <strong>Manual</strong> 103<br />
121C
Multiple Scan Operation<br />
Editing Scan Routines<br />
5.5 Editing Scan Routines<br />
5.5.1 Scan Parameters<br />
Select any of the parameters in the Scan Parameters section of the Scan Routines window to<br />
open the Scan Parameters for Routine # dialog box (see Figure 5.5a). Use this dialog box to<br />
adjust or enter new values such as the scan length or duration for the scan routine.<br />
Note: You can use the > buttons in this dialog box to display and change the<br />
parameters for the previous and next scan routines, respectively.<br />
Figure 5.5a Scan Parameters for Routine #: 2 of 4 Dialog Box<br />
Note: The Map Parameters tab is available only if the 3D Mapping option has been<br />
installed.<br />
104 <strong>Dektak</strong> 8 <strong>Manual</strong> Rev. G
5.5.2 Display Parameters<br />
Multiple Scan Operation<br />
Editing Scan Routines<br />
Select any of the parameters in the Display Parameters section of the Scan Routines window to<br />
open the Display Parameters dialog box (see Figure 5.5b). Use this dialog box to enter new values<br />
such as the cursor positioning or display range for the scan routine.<br />
5.5.3 Data Processing Settings<br />
Figure 5.5b Display Parameters Dialog Box<br />
Select either of the entries in the Data Processing section of the Scan Routines window to open<br />
the Data Processing Parameters dialog box (see Figure 5.5c). Use this dialog box to choose<br />
values for filters and smoothing.<br />
Note: Entering a value of zero (0) disables the function.<br />
Figure 5.5c Data Processing Parameters Dialog Box<br />
Rev. G <strong>Dektak</strong> 8 <strong>Manual</strong> 105<br />
134C<br />
134B
Multiple Scan Operation<br />
Editing Scan Routines<br />
For details on filters, see: For details on smoothing, see:<br />
Determining the Cutoff Wavelength: Section 6.7 Smoothing: Section 6.15<br />
Activating the Cutoff Filters: Section 6.8 Activating the Smoothing Function: Section 6.16<br />
Entering Filter Cutoffs into a Scan Routine: Entering Smoothing into a Scan Routine: Section<br />
Section 6.9<br />
6.17<br />
5.5.4 Analytical Functions<br />
Select Edit > Append Analytical Functions to open the Analytical Functions dialog box. Use<br />
this dialog box to select the analytical functions to be appended to the scan routine. See Chapter 6<br />
for details.<br />
Note: If you want to append the same analytical functions to all of the scan routines in<br />
your automation program, you can save time by using the Global Edit Mode,<br />
described in the next section.<br />
5.5.5 Global Editing of Scan Routine Parameters<br />
You can change individual scan parameters within each scan routine of an automation program at<br />
any time. Use the Global Edit Mode to edit the parameters of all the scan routines simultaneously<br />
within the automation program.<br />
To become familiar with the Global Edit Mode, follow the steps in the exercise given below. (It is<br />
assumed you are still working with your new automation program containing four scan routines.)<br />
1. Select Window > Scan Routines to display the Scan Routines window. The highlighted<br />
scan routine is displayed. (It does not matter which one.)<br />
2. Click the Global Edit icon or select Edit > Global Edit Mode.<br />
Note: A Global Edit Warning dialog box pops up to emphasize that Global Edit<br />
Mode affects all of the scans in the current automation program. Click YES to<br />
continue. A global edit symbol (similar to the icon) is displayed in the status<br />
bar at the bottom of the window:<br />
3. Click an entry in the Display Parameters section to open the Display Parameters dialog<br />
box (see Figure 5.5b).<br />
4. Click the Automatic Leveling check box.<br />
5. Enter 50 into each Cursor Width box.<br />
106 <strong>Dektak</strong> 8 <strong>Manual</strong> Rev. G
6. Click OK to close.<br />
Multiple Scan Operation<br />
Editing Scan Routines<br />
7. Select Edit > Append Analytical Functions to display the Analytical Functions options.<br />
8. In the R cursor box enter 300.<br />
9. In the M cursor box enter 900.<br />
10. Under Height Parameters, click the ASH check box.<br />
11. In the Band Widths dialog box that pops up, enter 50 for each cursor width, and click OK<br />
(see Figure 5.5d).<br />
Figure 5.5d Analytical Functions Dialog Box for the Scan Routines Window<br />
12. Click Add to append the analytical function (see Figure 5.5e).<br />
13. Click Done when finished.<br />
Figure 5.5e Analytical Function Appended<br />
14. Select Edit > Global Edit Mode to disable Global Edit Mode.<br />
15. Display each scan routine in turn, and notice that all four scan routines have been modified.<br />
16. Select File > Save As...<br />
Rev. G <strong>Dektak</strong> 8 <strong>Manual</strong> 107<br />
186C
Multiple Scan Operation<br />
Editing Scan Routines<br />
17. Enter the desired file location and file name. The path of the file location is C:\Program<br />
Files\Veeco\<strong>Dektak</strong>32\Programs\, unless you have changed it (see Setup Menu: Section<br />
8.5).<br />
Note: You must include the file name extension “.mp”.<br />
108 <strong>Dektak</strong> 8 <strong>Manual</strong> Rev. G
5.6 Automation Program Options<br />
Multiple Scan Operation<br />
Automation Program Options<br />
You can select various options for the automation program to be performed at the conclusion of<br />
each scan routine (see Figure 5.6a).<br />
Figure 5.6a Automation Programs Window: Automation Programs Options Section<br />
Several data-destination options are available in the <strong>Dektak</strong> application:<br />
• Data File, Data Export;<br />
• Automation Program Summary (APS) File, APS Export;<br />
• Printer Output<br />
A Timing option allows you to pause before each scan until you decide to continue, or specify a<br />
time delay between scans.<br />
A Stage Control option allows you to move the stage to the unload position automatically when the<br />
automation program has finished.<br />
The procedure to select these options is described in the following sections.<br />
5.6.1 Data File/Data Export<br />
The data file and data export options allow you to save the data plot from the scan routine just<br />
concluded either as a <strong>Dektak</strong> data file or as ASCII data on the <strong>Dektak</strong> 8 hard disk. You can redisplay<br />
the plotted profile at a later date for further analysis. For an exercise, you will save the data<br />
to the C: drive.<br />
1. In the Automation Programs window, click Data File or Data Export in the Automation<br />
Program Options section to display the General page in the Automation Program<br />
Options dialog box.<br />
Rev. G <strong>Dektak</strong> 8 <strong>Manual</strong> 109
Multiple Scan Operation<br />
Automation Program Options<br />
Figure 5.6b Automation Program Options Dialog Box: General Page<br />
2. In the Scan Data section, you have the following choices:<br />
• Accept the default file to save the scan data.<br />
Note: Unless otherwise specified, data automatically saves to the Default data file in<br />
the <strong>Dektak</strong>32\Data\Default folder on the C: drive.<br />
• Click the button to open the Select a Data File dialog box where you can select a data<br />
file or specify a new one. (For the exercise, enter Exercise.dat in the File name field.<br />
Then click Save to close the dialog box.)<br />
• Check the box Select At Run Time, which allows you to wait until the scan has run<br />
before you choose the file to save the scan data.<br />
3. Under Export in the Scan Data section, you have the following choices:<br />
• Check the box None, which prevents ASCII scan data from being exported.<br />
• Check the box Select At Run Time, which allows you to wait until the scan has run<br />
before you choose the file to save the exported ASCII scan data.<br />
• Click the button to open the Specify a File dialog box where you can select a text file or<br />
specify a new one for your exported ASCII scan data. The Additional Options section<br />
in this dialog box allows you to choose either tabs or commas as data delimiters, and to<br />
specify whether to overwrite or append data when using an existing file.<br />
4. In the Auto Program Summary (APS) section, you have the following choices:<br />
• Leave the boxes unchecked, which prevents APS data from being saved.<br />
110 <strong>Dektak</strong> 8 <strong>Manual</strong> Rev. G<br />
177A
Multiple Scan Operation<br />
Automation Program Options<br />
• Check the box Compute & Display, which selects the default file to save the APS data<br />
that will be computed. You can click the button to open the Select a Data File dialog<br />
box where you can select a text file or specify a new one for your APS data.<br />
• Check the box Select At Run Time, which allows you to wait until the scan has run<br />
before you choose the file to save the APS data.<br />
Note: See Enabling Automation Program Summary (APS): Section 5.6.2, for<br />
additional information and an exercise.<br />
5. Under Export in the Auto Program Summary (APS) section, you have the following<br />
choices:<br />
• Check the box None, which prevents ASCII APS data from being exported.<br />
• Check the box Select At Run Time, which allows you to wait until the scan has run<br />
before you choose the file to save the exported ASCII APS data.<br />
• Click the button to open the Specify a File dialog box where you can select a text file or<br />
specify a new one for your exported ASCII APS data.<br />
6. When you have finished, click OK to close the Automation Program Options dialog box.<br />
Opening Saved Scan Data Plot<br />
Note: Click Apply instead of OK if you want to keep the dialog box open to make<br />
other selections.<br />
For the purpose of the exercise, you will run the current automation program to demonstrate how<br />
the data file option saves data plots to the selected filename.<br />
1. Click the Run Automation Program icon or select Run > Auto Program to run the<br />
automation program and save the data plot.<br />
2. Select File > Open at the conclusion of the automation program to retrieve the data plots<br />
through the Load <strong>Dektak</strong> Data or Program File dialog box (see Figure 5.6c).<br />
3. Under Files of type, confirm that Scan Data has been selected.<br />
Note: A directory listing of the saved data plots appears. The data plot from scan<br />
routines 1, 2, 3 and 4 are filed under Exercise.001.dat, Exercise.002.dat,<br />
Exercise.003.dat, and Exercise.004.dat, respectively.<br />
4. Select Exercise.001.dat and click OPEN to redisplay the data plot from scan routine 1.<br />
Note: The data plot from scan routine 1 replots and redisplays.<br />
Rev. G <strong>Dektak</strong> 8 <strong>Manual</strong> 111
Multiple Scan Operation<br />
Automation Program Options<br />
Figure 5.6c Load <strong>Dektak</strong> Data or Program File Dialog Box: Scan Data<br />
5.6.2 Enabling Automation Program Summary (APS)<br />
The auto program summary (APS) option provides a summary and listing of the analytical function<br />
results for an automation program.<br />
Note: All scan routines within the automation program must have identical scan<br />
routine parameters before the automation program summary can be computed.<br />
This may be accomplished using the global edit mode in the Scan Routines<br />
window.<br />
For the exercise, do the following:<br />
1. Click the Automation Programs icon or select Window > Automation Programs to<br />
display the Automation Program window.<br />
2. In the Automation Programs Options section, click APS File to display the General page<br />
in the Automation Program Options dialog box (see Figure 5.6b).<br />
3. In the Auto Program Summary (APS) section of the General page, check the box<br />
Compute & Display. Then click the button to open the Select a Data File dialog box.<br />
4. In the File name field, enter the filename Exercise for your APS data. (The extension .aps<br />
will be added automatically.) Click Select to close the dialog box.<br />
5. In the Automation Program Options dialog box, select the Extended page (see Figure 5.6f<br />
in Section 5.6.4).<br />
6. Check the box Print APS to produce a printout of the automation program summary. Click<br />
OK to close the Automation Program Options dialog box.<br />
112 <strong>Dektak</strong> 8 <strong>Manual</strong> Rev. G<br />
251A
Multiple Scan Operation<br />
Automation Program Options<br />
7. Select Run > Auto Program to run the current automation program and compute, display,<br />
print, and save the automation program summary.<br />
5.6.3 Automation Program Summary Window<br />
The Automation Program Summary window provides data in tabular form on the just concluded<br />
automation program (see Figure 5.6d-1).<br />
• The items in the bar above the table include: automation program filename, number of<br />
scan routines (at the far right side of the bar--not shown in the figure), and automation<br />
program start time and date.<br />
• The column headings display the locations of the reference and measurement cursors for<br />
each analytical function.<br />
• The first five row headings provide the mean, standard deviation, minimum, maximum,<br />
and range of the analytical function for all the scan routines.<br />
• The remaining items in the table provide the individual analytical function results for<br />
each scan routine.<br />
Figure 5.6d Automation Program Summary Window - Examples<br />
(1)<br />
Excluding Selected Scans<br />
Scans Selected Scans Excluded<br />
(2) (3)<br />
Use the following procedure to exclude selected scan results from the calculations displayed in the<br />
first five rows.<br />
1. Left-click the mouse on a row containing scan-routine results to be excluded.<br />
• Use the CTRL key on the keyboard along with the left mouse button to select<br />
multiple rows.<br />
Rev. G <strong>Dektak</strong> 8 <strong>Manual</strong> 113
Multiple Scan Operation<br />
Automation Program Options<br />
• Use the SHIFT key on the keyboard along with the left mouse button to select two<br />
rows and all of the rows in between.<br />
2. The selected scan row(s) will be highlighted (see Figure 5.6d-2).<br />
Note: You can use the CTRL key on the keyboard along with the left mouse button on<br />
a row that has been selected if you want to de-select it.<br />
3. Select Edit > Exclude from the menu bar. Alternatively, you can:<br />
• Click the Exclude icon in the toolbar.<br />
• Press CTRL+X on the keyboard.<br />
• Right-click the mouse on a highlighted row and select Exclude from the pop-up<br />
menu.<br />
4. The excluded scan rows will display grayed-out data (see Figure 5.6d-3), and the<br />
calculations in the first five rows will not include the data from those rows.<br />
5. You can change any rows from excluded to included status by selecting the rows as<br />
described above. Then select Edit > Include from the menu bar. Alternatively, you can:<br />
Re-Running Selected Scans<br />
• Click the Include icon in the toolbar.<br />
• Press CTRL+I on the keyboard.<br />
• Right-click the mouse on a highlighted row and select Include from the pop-up<br />
menu.<br />
Use the following procedure to re-run certain scan routines if desired, without re-running the entire<br />
automation program.<br />
1. Left-click the mouse on a row containing scan-routine results to be re-run. (It does not matter<br />
if the row has previously been excluded.)<br />
• Use the CTRL key on the keyboard along with the left mouse button to select<br />
multiple rows.<br />
• Use the SHIFT key on the keyboard along with the left mouse button to select two<br />
rows and all of the rows in between.<br />
• Press CTRL+A on the keyboard to select every scan row.<br />
2. The selected scan row(s) will be highlighted (see Figure 5.6d).<br />
3. Select Edit > Re-run Scans from the menu bar. Alternatively, you can:<br />
114 <strong>Dektak</strong> 8 <strong>Manual</strong> Rev. G
• Click the Re-run Scans icon in the toolbar.<br />
• Press CTRL+U on the keyboard.<br />
Multiple Scan Operation<br />
Automation Program Options<br />
• Right-click the mouse on the highlighted row and select Re-run Scans from the<br />
pop-up menu.<br />
Note: Be sure not to click Run. That will run all of the scans, regardless of your<br />
exclusions.<br />
4. The automation program will run all of the scan routines that were highlighted, and the new<br />
data will be displayed in the Automation Program Summary window in those rows. The<br />
calculations displayed in the first five rows will be updated.<br />
Note: Use the above procedures only on summary data that has just been acquired.<br />
Re-running scans with APS data that has been loaded from a file would<br />
produce meaningless results.<br />
Printing, Loading or Saving APS Files<br />
1. Click the Automation Program Summary icon or select Window > Auto Prog Summary<br />
to display the automation program summary.<br />
2. Select File > Print > Auto Program Summary (APS) to print an automation program<br />
summary.<br />
3. Select File > Open to open the Load <strong>Dektak</strong> Data or Program File dialog box (see Figure<br />
5.6e).<br />
Note: A listing of the files saved under the .aps file extension will display.<br />
Rev. G <strong>Dektak</strong> 8 <strong>Manual</strong> 115
Multiple Scan Operation<br />
Automation Program Options<br />
5.6.4 Printer<br />
Figure 5.6e Load <strong>Dektak</strong> Data or Program File Dialog Box: APS Data<br />
4. Click the desired filename and click Load.<br />
5. Select File > Save or File > Save As to save an automation program summary to a file from<br />
the APS Window.<br />
6. Enter the desired filename in the dialog box that pops up and click Save.<br />
Note: This section applies only if a printer is connected to the computer or the<br />
network. The printer may require setup before the initial use (see Printer<br />
Selection: Section 1.3).<br />
In the Automation Programs window, click Printer Output in the Automation Program<br />
Options section to display the Extended page in the Automation Program Options dialog box.<br />
There are three printer options available: None, Print Plot, and Print APS (see Figure 5.6f).<br />
• If you select None, the printer will not produce any printouts.<br />
• If you select Print Plot, the printer prints the plotted profile trace after each completed<br />
scan routine, along with the scan data.<br />
• If you select Print APS, the printer produces a summary of the scan data only.<br />
116 <strong>Dektak</strong> 8 <strong>Manual</strong> Rev. G<br />
195A
Figure 5.6f Automation Program Options Dialog Box: Extended Page<br />
5.6.5 Pause During Autoprogram<br />
Multiple Scan Operation<br />
Automation Program Options<br />
In the Automation Programs window, click Timing in the Automation Program Options section<br />
to display the Extended page in the Automation Program Options dialog box (see Figure 5.6f).<br />
The Timing section allows you to program a pause or time delay between each scan routine to<br />
allow the operator time to visually inspect or record scan data. Three options are available: No<br />
Pause During Processing, Adjust Position Before Each Scan, and Delay.<br />
• When you select No Pause During Processing, all scan routines within the automation<br />
program run one right after another.<br />
• When you select Adjust Position Before Each Scan, the system stops after each scan<br />
routine to allow you to make any necessary adjustments to the sample position. Select<br />
Run > Continue to move to the next scan routine in sequence contained in the<br />
automation program.<br />
• Finally, the Delay selection permits you to type in a time delay in seconds between<br />
scans.<br />
Rev. G <strong>Dektak</strong> 8 <strong>Manual</strong> 117<br />
176B
Multiple Scan Operation<br />
Automation Program Options<br />
5.6.6 Stage Control<br />
In the Automation Programs window, click Stage Control in the Automation Program Options<br />
section to display the Extended page in the Automation Program Options dialog box (see Figure<br />
5.6f).<br />
The Stage Control section allows you to choose whether or not you want the stage to move<br />
automatically to the unload position at the profiler door after the automation program has<br />
completed, to allow easy loading and unloading of samples.<br />
• Check or uncheck Unload Stage When Done as appropriate.<br />
118 <strong>Dektak</strong> 8 <strong>Manual</strong> Rev. G
5.7 Deskew<br />
Multiple Scan Operation<br />
Deskew<br />
When developing an automation program on a production reference sample, all programmed X, Y<br />
and theta coordinates relate to the position of that particular sample as it rests on the sample stage.<br />
It is unlikely that you can load subsequent samples at the exact physical location of the reference<br />
sample used to define the automation program. Although tooling or fixturing pins are extremely<br />
helpful and recommended if you desire fast, accurate sample positioning, nevertheless slight<br />
sample and/or physical positioning variances will throw off--or skew--the programmed X, Y and<br />
theta coordinates. Therefore, you can establish deskew points for your samples, and for the<br />
individual scan routines, as described in the following paragraphs.<br />
Program Deskew Points<br />
Note: Your system should include the Power Theta and Theta Encoder options for<br />
maximum accuracy in using deskew points.<br />
To compensate for skewing, you can establish deskew points on the reference sample when the<br />
automation program is defined. You may select any easily identifiable landmarks on the reference<br />
sample as deskew points (e.g., test pads on a silicon wafer, or substrate corners). These points,<br />
called Program Deskew Points, are then used to correct for variations in the positions of subsequent<br />
samples before running your automation program on them.<br />
Scan Deskew Points<br />
The Program Deskew Points described above enable you to adjust the position of each sample<br />
before running your automation program on the sample. In some cases you may also want to verify<br />
and adjust the starting position of some of the individual scan routines in the automation program.<br />
The Scan Deskew Points serve this purpose.<br />
Before You Start<br />
Before you establish deskew points, you should be aware of several factors that affect the accuracy<br />
and performance of deskewing:<br />
• The center of rotation of the stage must be accurately calibrated. If you have not already<br />
performed this calibration, select Calibration > COR of Stage to open the Calibration<br />
Wizard for the center of rotation (COR) of the stage. Follow the step-by-step<br />
instructions presented in the Wizard to calibrate the center of rotation of the stage.<br />
• The reference sample on the stage must be as level as possible. See Stage Leveling:<br />
Section 4.5, for information on leveling the stage.<br />
• The stage must be fully returned back to its center position from the unload position<br />
each time you load a sample (click the Yes button in the Load Sample dialog box to<br />
return back to stage center). See Stage Control Panel: Section 3.2.3, and Unloading<br />
the Sample: Section 3.5.<br />
Rev. G <strong>Dektak</strong> 8 <strong>Manual</strong> 119
Multiple Scan Operation<br />
Deskew<br />
• Be sure to tower down over the features that you are using for your deskew points<br />
(select <strong>Profiler</strong> > Tower Down from the menu).<br />
5.7.1 Establishing Program Deskew Points<br />
Two deskew points are required. For best results, establish the two deskew points at the greatest<br />
diagonal position possible (at least 5” apart), and ensure that they are outside the area on the sample<br />
that contains the scan locations. The coordinates for Program Deskew Points display in the<br />
Automation Program Deskew Points section of the Automation Programs window. If you do<br />
not enter deskew points, Not Set will appear for each point.<br />
The procedure for setting reference deskew points for an automation program is described below.<br />
1. In the Automation Programs window, click one of the parameters in the Automation<br />
Program Deskew Points section (e.g., 1st Point) to open the Automation Program<br />
Deskew Points dialog box (see Figure 5.7a).<br />
Figure 5.7a Automation Program Deskew Points Dialog Box<br />
2. Check (select) the Enable Rotation box if you want to include theta rotation in the program<br />
deskew points you are establishing.<br />
Note: Deskew points established with just the X, Y coordinates are more accurate<br />
than ones that include theta rotation. Select Enable Rotation only if rotation is<br />
critical for your scan routines (i.e., scanning in the same orientation along your<br />
feature is required).<br />
3. Click Location to switch to the Sample Positioning window, where you can view your<br />
sample and identify landmarks to use as deskew points.<br />
4. In the Sample Positioning window, the Automation Program Deskew Point Setup dialog<br />
box is displayed for the 1st deskew point (see Figure 5.7b).<br />
120 <strong>Dektak</strong> 8 <strong>Manual</strong> Rev. G
Figure 5.7b Automation Program Deskew Point Setup Dialog Box<br />
Multiple Scan Operation<br />
Deskew<br />
Note: You can go directly to the Automation Program Deskew Point Setup dialog<br />
box in the Sample Positioning window if you select Deskew > Set Program<br />
Deskew Points from the menu bar in either the Automation Programs or<br />
Sample Positioning window.<br />
5. Position a feature under the stylus, using either stage tracking (see Stage Tracking: Section<br />
3.3.1), the Stage Control Panel (see Stage Control Panel: Section 3.2.3), or both.<br />
6. Select <strong>Profiler</strong> > Tower Down to lower the stylus, to ensure the tower is nulled over the<br />
feature prior to establishing the 1st deskew point.<br />
7. Click Set to accept the 1st deskew point.<br />
8. The dialog box is now ready for the 2nd deskew point. Position a feature under the stylus,<br />
using either stage tracking, the Stage Control Panel, or both.<br />
9. Select <strong>Profiler</strong> > Tower Down to lower the stylus, to ensure the tower is nulled over the<br />
feature prior to establishing the 2nd deskew point.<br />
10. Click Set to accept the 2nd deskew point. The dialog box closes.<br />
11. Switch back to the Automation Programs window. You can verify the coordinates for your<br />
deskew points in the Automation Program Deskew Points section.<br />
12. Save your automation program.<br />
5.7.2 Establishing Scan Deskew Points<br />
For each scan routine, you can establish deskew points or not as desired. Two deskew points are<br />
required. For best results, establish the two deskew points at the greatest diagonal position possible,<br />
and ensure that they straddle the area containing the scan location. The coordinates for Scan<br />
Deskew Points display in the Scan Routine Deskew Points section of the Scan Routines window.<br />
If you do not enter deskew points for a scan routine, Not Set will appear for each point.<br />
The procedure for setting reference deskew points for a scan routine is described below.<br />
Rev. G <strong>Dektak</strong> 8 <strong>Manual</strong> 121
Multiple Scan Operation<br />
Deskew<br />
1. Click one of the parameters in the Scan Routine Deskew Points section (e.g., 1st Point) to<br />
open the Scan Routine Deskew Points dialog box (see Figure 5.7c).<br />
Figure 5.7c Scan Routine Deskew Points Dialog Box<br />
2. Check (select) the Enable Rotation box if you want to include theta rotation in the scan<br />
deskew points you are establishing.<br />
Note: Deskew points established with just the X, Y coordinates are more accurate<br />
than ones that include theta rotation. Select Enable Rotation only if rotation is<br />
critical for your scan routine (i.e., scanning in the same orientation along your<br />
feature is required).<br />
3. Click Location, which will switch to the Sample Positioning window, where you can view<br />
your sample and identify landmarks to use as deskew points.<br />
4. In the Sample Positioning window, the Scan Routine Deskew Point Setup dialog box is<br />
displayed for the 1st deskew point (see Figure 5.7d).<br />
Figure 5.7d Scan Routine Deskew Point Setup Dialog Box<br />
Note: You can go directly to the Scan Routine Deskew Point Setup dialog box in the<br />
Sample Positioning window if you select Deskew > Set Scan Deskew Points<br />
from the menu bar in the Sample Positioning window.<br />
5. Position a feature under the stylus, using either stage tracking (see Stage Tracking: Section<br />
3.3.1), the Stage Control Panel (see Stage Control Panel: Section 3.2.3), or both.<br />
122 <strong>Dektak</strong> 8 <strong>Manual</strong> Rev. G
Multiple Scan Operation<br />
Deskew<br />
6. Select <strong>Profiler</strong> > Tower Down to lower the stylus, to ensure the tower is nulled over the<br />
feature prior to establishing the 1st deskew point.<br />
7. Click Set to accept the 1st deskew point.<br />
8. The dialog box is now ready for the 2nd deskew point. Position a feature under the stylus,<br />
using either stage tracking, the Stage Control Panel, or both.<br />
9. Select <strong>Profiler</strong> > Tower Down to lower the stylus, to ensure the tower is nulled over the<br />
feature prior to establishing the 2nd deskew point.<br />
10. Click Set to accept the 2nd deskew point. The dialog box closes.<br />
11. Switch back to the Scan Routines window. You can verify the coordinates for your deskew<br />
points in the Scan Routine Deskew Points section.<br />
12. Save your automation program.<br />
5.7.3 Running an Automation Program Containing Deskew Points<br />
Once the program deskew points for the reference sample have been included in your automation<br />
program, you can run the program on subsequent samples, as follows:<br />
1. Select Run > Auto Program from the menu. The Sample Positioning window opens, the<br />
stage translates to the X, Y (and theta, if enabled) location of the reference deskew point, and<br />
the Automation Program Deskew Point Check dialog box displays with instructions for<br />
checking the 1st deskew point (see Figure 5.7e).<br />
Figure 5.7e Automation Program Deskew Point Check Dialog Box<br />
2. Left-click in the camera view pane to activate stage tracking.<br />
3. Roll the pointing device to line up the software reticle with the visually identifiable landmark<br />
selected as the 1st reference deskew point.<br />
4. Ensure the tower is nulled over the feature.<br />
5. Left-click again in the camera view pane to deactivate stage tracking, once the reticle is<br />
properly aligned with the 1st deskew point.<br />
Rev. G <strong>Dektak</strong> 8 <strong>Manual</strong> 123
Multiple Scan Operation<br />
Deskew<br />
6. Click Set in the dialog box to accept the current X, Y (and theta, if enabled) stage location as<br />
the 1st deskew point.<br />
Note: If you click Abort in the dialog box, a Deskew dialog box pops up, where you<br />
have the choice of whether or not to continue execution of the program<br />
(without deskew). If you then choose not to continue, you will have the option<br />
to clear the deskew points.<br />
7. If you clicked Set, the stage now translates to the X, Y (and theta, if enabled) location<br />
entered as the 2nd reference deskew point.<br />
8. Left-click in the camera view pane to activate stage tracking.<br />
9. Roll the pointing device to line up the software reticle with the visually identifiable landmark<br />
selected as the 2nd reference deskew point.<br />
10. Ensure the tower is nulled over the feature.<br />
11. Left-click again in the camera view pane to deactivate stage tracking, once the reticle is<br />
properly aligned with the 2nd deskew point.<br />
12. Click Set in the dialog box to accept the current X, Y (and theta, if enabled) stage location as<br />
the 2nd deskew point.<br />
Note: If you click Abort in the dialog box, you have the same choices as described<br />
for the 1st deskew point in the note above.<br />
13. If you clicked Set, the Data Plot window opens, and your automation program runs with the<br />
sample in the proper location as determined by the deskew offsets.<br />
Note: You should be aware that once you have accepted program deskew offsets, they<br />
remain associated with your automation program until you change or clear<br />
them. To clear the deskew offsets, select Deskew > Clear Program Deskew<br />
Points from the menu bar, or Clear All in the Automation Program Deskew<br />
Points dialog box. Always clear your deskew points, thereby resetting the<br />
deskew offsets to zero, before establishing new deskew points.<br />
14. If you have set deskew points for any of the scan routines in your automation program, the<br />
Sample Positioning window opens just before each of those routines is run, and the Scan<br />
Routine Deskew Point Check dialog box displays with instructions for checking the 1st and<br />
2nd deskew points for the scan routine.<br />
15. The procedure for checking scan routine deskew points and accepting or rejecting the offsets<br />
is the same as for the program deskew points.<br />
16. Once you apply the offsets, by clicking Yes, the Data Plot window opens, and your<br />
automation program continues with the scan routine properly located on the sample by its<br />
deskew offsets.<br />
Note: If you click No in the Deskew Results Confirmation dialog box, the scan<br />
routine runs without the deskew offsets applied.<br />
124 <strong>Dektak</strong> 8 <strong>Manual</strong> Rev. G
Multiple Scan Operation<br />
Deskew<br />
Note: You should be aware that once you have accepted scan deskew offsets, they<br />
remain associated with your scan routine until you change or clear them. To<br />
clear the deskew offsets, select Deskew > Clear Scan Deskew Points from the<br />
menu bar, or Clear All in the Scan Routine Deskew Points dialog box.<br />
Always clear your deskew points, thereby resetting the deskew offsets to zero,<br />
before establishing new deskew points.<br />
Rev. G <strong>Dektak</strong> 8 <strong>Manual</strong> 125
Chapter 6 Analytical Functions<br />
The analytical functions included as part of the standard <strong>Dektak</strong> software allow you to perform<br />
complex analytical computations on the profile data quickly and easily. You may enter multiple<br />
analytical functions into a scan routine to automatically calculate surface texture parameters on like<br />
samples. You can also perform analytical functions at the conclusion of a scan by selecting the<br />
desired parameters one-by-one.<br />
• Analytical Functions Description: Section 6.1<br />
• Roughness Parameters: Section 6.2<br />
• Waviness Parameters: Section 6.3<br />
• Height Parameters: Section 6.4<br />
• Geometry Parameters: Section 6.5<br />
• Analytical Function Exercise: Section 6.6<br />
• Determining the Cutoff Wavelength: Section 6.7<br />
• Activating the Cutoff Filters: Section 6.8<br />
• Entering Filter Cutoffs into a Scan Routine: Section 6.9<br />
• Data Type Selection: Section 6.10<br />
• Entering Data Type into a Scan Routine: Section 6.11<br />
• Measuring and Entering Analytical Functions: Section 6.12<br />
• Entering Analytical Functions into a Scan Routine: Section 6.13<br />
• Deleting Analytical Functions or Results: Section 6.14<br />
• Smoothing: Section 6.15<br />
• Activating the Smoothing Function: Section 6.16<br />
• Entering Smoothing into a Scan Routine: Section 6.17<br />
Rev. G <strong>Dektak</strong> 8 <strong>Manual</strong> 127
Analytical Functions<br />
Analytical Functions Description<br />
6.1 Analytical Functions Description<br />
The <strong>Dektak</strong> application has thirty different analytical functions for measuring surface texture. The following<br />
section provides the abbreviation for each function as it appears on the screen, along with a brief description<br />
of the parameter. By using these functions to analyze the profile data, you can obtain valuable information<br />
for controlling and monitoring a production process.<br />
The analytical functions are grouped by applications: roughness, waviness, height, and geometrical<br />
parameters.<br />
There are two similar versions of the Analytical Functions dialog box, depending on the window that is<br />
active when the dialog box is opened.<br />
• To open the Analytical Functions dialog box from the Scan Routines window, click<br />
the Append Analytical Functions to Current Scan Routine icon, or select Edit ><br />
Append Analytical Functions from the menu bar. See Figure 6.1a at the left. (For<br />
further information on this version of the Analytical Functions dialog box, see<br />
Entering Filter Cutoffs into a Scan Routine: Section 6.9.)<br />
• To open the Analytical Functions dialog box from the Data Plot window, click the<br />
Display Analytical Functions Dialog Box icon, or select Analysis > Analytical<br />
Functions from the menu bar. See Figure 6.1a at the right. (For further information on<br />
this version of the Analytical Functions dialog box, see Measuring and Entering<br />
Analytical Functions: Section 6.12.)<br />
Figure 6.1a Analytical Functions Dialog Boxes<br />
158A<br />
(from Scan Routines window) (from Data Plot window)<br />
If you plan to conduct extensive surface texture analysis, refer to the ANSI B46.1 specification on<br />
surface texture. You can obtain a copy of this specification from the American Society of<br />
Mechanical Engineers, 345 East 47th Street, New York, NY 10017, telephone number:<br />
1.800.THE.ASME.<br />
128 <strong>Dektak</strong> 8 <strong>Manual</strong> Rev. G<br />
158B
6.2 Roughness Parameters<br />
The following parameters are listed alphabetically.<br />
Maxdev (Maximum Deviation)<br />
Calculates the furthest data point above or below the mean line.<br />
MaxRa (Maximum Ra)<br />
Analytical Functions<br />
Roughness Parameters<br />
Identifies the portion of the assessment length which has the highest Ra. The assessment length,<br />
defined by the cursors, divides into nineteen overlapping segments. Each segment is equal to onetenth<br />
of the assessment length distance. The Ra is calculated for each segment. The R cursor<br />
positions in the center of the segment with the highest Ra. You can program only one MaxRa into a<br />
scan program.<br />
Ra (Average Roughness)<br />
Formerly known as Arithmetic Average (AA) and Center Line Average (CL), Ra is the universally<br />
recognized, and most used, international parameter of roughness. It is the arithmetic average<br />
deviation from the mean line (see Figure 6.2a).<br />
Figure 6.2a Ra Roughness Analytical Function<br />
Rev. G <strong>Dektak</strong> 8 <strong>Manual</strong> 129<br />
159
Analytical Functions<br />
Roughness Parameters<br />
Rp (Maximum Peak)<br />
The maximum height or the highest peak of the profile roughness above the mean line, within the<br />
assessment length (see Figure 6.2b).<br />
Rq (Root-Mean-Square (RMS))<br />
Figure 6.2b Rp Roughness Analytical Function<br />
Determines the root-mean-square value of roughness corresponding to Ra (see Figure 6.2c). Rq has<br />
the greatest value in optical applications where it is directly related to the optical quality of a<br />
surface.<br />
Figure 6.2c Rq Roughness Analytical Function<br />
130 <strong>Dektak</strong> 8 <strong>Manual</strong> Rev. G<br />
160<br />
161
Rt (Maximum Peak to Valley)<br />
Analytical Functions<br />
Roughness Parameters<br />
The sum total of the maximum peak and maximum valley measurements of roughness within the<br />
assessment length (Rt = Rp + Rv) (see Figure 6.2d).<br />
Rv (Maximum Valley)<br />
Figure 6.2d Rt Roughness Analytical Parameters<br />
R t = R p + R v<br />
The lowest point, or the maximum depth of the profile roughness below the mean line, within the<br />
assessment length (see Figure 6.2e).<br />
Figure 6.2e Rv Roughness Analytical Function<br />
Rev. G <strong>Dektak</strong> 8 <strong>Manual</strong> 131<br />
162<br />
R t is the sum total of the maximum valley and maximum peak of<br />
roughness.<br />
163
Analytical Functions<br />
Roughness Parameters<br />
Rz_din (Ten Point Height Average)<br />
The average height difference between the five highest peaks and the five lowest valleys in<br />
accordance with DIN 4768/1 specification published by the Deutsche Institut fuer Normung c.v.<br />
(see Figure 6.2f).<br />
Skew (Skewness)<br />
Figure 6.2f Rz Roughness Analytical Parameter<br />
The symmetry of the profile about the mean line. It will distinguish between asymmetrical profiles<br />
of the same Ra or Rq. Skewness is non-dimensional.<br />
Note: For best results, software level the scan trace prior to calculating any analytical<br />
functions.<br />
R SK<br />
1<br />
----------- r 3 L<br />
=<br />
( x)<br />
dx<br />
3<br />
LRq 132 <strong>Dektak</strong> 8 <strong>Manual</strong> Rev. G<br />
∫<br />
0<br />
164
6.3 Waviness Parameters<br />
The following parameters are listed alphabetically.<br />
Wa (Arithmetic Average of Waviness)<br />
The average deviation of waviness from the mean line (see Figure 6.3a). (Corresponds to Ra.)<br />
WMaxdev (Maximum Deviation of Waviness)<br />
Figure 6.3a Wa Waviness Analytical Function<br />
Measures the distance of the furthest data point above or below the mean line of the waviness<br />
profile. (Corresponds to Maxdev.)<br />
Wp (Maximum Peak of Waviness)<br />
Analytical Functions<br />
Waviness Parameters<br />
Measures the maximum height of the highest peak of the waviness profile above the mean line.<br />
(Corresponds to Rp.)<br />
Wq (Root-Mean-Square of Waviness)<br />
Determines the root-mean-square (RMS) value of waviness. (Corresponds to Rq.)<br />
Wt (Maximum Peak to Valley of Waviness)<br />
The sum total of the maximum peak and maximum valley measurements of waviness<br />
(Wt=Wp+Wv). (Corresponds to Rt.)<br />
Rev. G <strong>Dektak</strong> 8 <strong>Manual</strong> 133<br />
165
Analytical Functions<br />
Waviness Parameters<br />
Wv (Maximum Valley of Waviness)<br />
The lowest point, or the maximum depth of the waviness profile below the mean line. (Corresponds<br />
to Rv.)<br />
Note: Waviness calculations are performed on raw profile data unless you activate the<br />
low pass waviness filter.<br />
134 <strong>Dektak</strong> 8 <strong>Manual</strong> Rev. G
6.4 Height Parameters<br />
The following parameters are listed alphabetically.<br />
ASH (Delta Average Step Height)<br />
Analytical Functions<br />
Height Parameters<br />
Used to obtain a step height measurement in applications where roughness or noise is present on the<br />
profile trace. It computes the difference between two average height measurements.<br />
Avg Ht (Average Height)<br />
Calculates the average height of a step with respect to the zero line, using the R and M cursors to<br />
define the area of measurement.<br />
HSC (High Spot Count)<br />
The number of peaks per inch (or cm) that project above a line that is parallel to the mean line. A<br />
peak must cross above the threshold and then back below it.<br />
Pc (Peak Count)<br />
The number of peaks that project through a selectable band centered about the mean line of the<br />
assessment length. Pc is expressed in peaks/inch or peaks/cm.<br />
Peak (Maximum Peak)<br />
Calculates the maximum height above the baseline as determined by the cursor/trace intercepts.<br />
P_V (Maximum Peak to Valley)<br />
Calculates the vertical distance between the maximum peak and maximum valley.<br />
TIR (Total Indicated Reading)<br />
Calculates the vertical distance between the highest and lowest data points between the cursors.<br />
Valley (Maximum Valley)<br />
Calculates the maximum depth below the baseline determined by the cursor/trace intercepts.<br />
Rev. G <strong>Dektak</strong> 8 <strong>Manual</strong> 135
Analytical Functions<br />
Geometry Parameters<br />
6.5 Geometry Parameters<br />
The following parameters are listed alphabetically.<br />
Area (Area-Under-The-Curve)<br />
Computes the area of a profile between the R and M cursors with respect to the horizontal zero grid<br />
line. You must level the profile for accurate results. If the profile is above the zero line, area is<br />
expressed as a positive value in square µm. If the profile is below the zero line, the result will be a<br />
negative value.<br />
Perim (Perimeter)<br />
Radius<br />
Slope<br />
Calculates the outside perimeter of a profile between the R and M cursors. A horizontal reference<br />
line is created using the R and M cursor intercepts. You must level the profile for accurate results.<br />
A least-squares-arc is fitted to the data points and the radius is calculated from the equation for a<br />
circle. The algorithm does not distinguish between concave and convex shapes. To maximize the<br />
accuracy of the results, the following factors must be considered: (1) the sample shape must<br />
approximate a sector of a circle, and (2) the stylus tip must traverse the apex of the sample if it is a<br />
sphere. Using the largest radius stylus possible helps minimize the error. (3) Repeatability errors<br />
may dominate the measurement if the chord rise is less than 100Å for scans longer than 1 mm.<br />
Calculates the arc tangent of the ratio of the vertical distance to the horizontal distance between the<br />
R and M cursor/trace intercepts. The result is expressed in degrees. Slope is useful only for<br />
relatively shallow slopes. If the stylus radius is too large or the step too steep, the stylus contacts the<br />
upper edge of the step before the lower edge and the slope measurement will be inaccurate.<br />
Sm (Mean Spacing Between Peaks)<br />
Calculates the mean spacing between peaks, as defined by downward crossing of the mean line,<br />
followed by an upward crossing to the next downward crossing. If the distance between these<br />
downward crossing points is less than 1 percent of the measurement length, than this peak is<br />
ignored. Sm is expressed as micro-inches or microns.<br />
Tp (Bearing Ratio)<br />
The percentage of points along the assessment length that project above a line that is parallel to the<br />
mean line.<br />
136 <strong>Dektak</strong> 8 <strong>Manual</strong> Rev. G
Volume<br />
Analytical Functions<br />
Geometry Parameters<br />
The integration-by-shells technique is used to find the volume of a solid. This is accomplished by<br />
rotating the lamina delineated by the scan trace and a line segment connecting the cursor intercepts<br />
through 180 degrees about a vertical axis located half way between the cursors.<br />
Rev. G <strong>Dektak</strong> 8 <strong>Manual</strong> 137
Analytical Functions<br />
Analytical Function Exercise<br />
6.6 Analytical Function Exercise<br />
This exercise demonstrates how to perform an average roughness measurement at the conclusion of<br />
a scan. For the purpose of this exercise, use an optically flat sample, such as the glass of the<br />
optional calibration standard. Position the calibration standard so that a 2 mm scan traverses across<br />
the glass portion of the standard without encountering a step (see Figure 6.6a).<br />
6.6.1 Run Scan and Level Trace<br />
1. Select Window > Automation Programs to display the Automation Programs window.<br />
2. Select File > New from the menu to enter the default scan routine into the current automation<br />
program.<br />
3. Select Run > Scan Here with the stage in position to run the current scan routine.<br />
Note: Once you run the scan routine and the profile plots, you must level the trace.<br />
4. Select Plot > Level to replot and level the trace.<br />
Note: Software level the trace prior to initiating any analytical function to obtain<br />
accurate results.<br />
Figure 6.6a Calibration Standard Positioning for a Roughness Measurement<br />
Stylus<br />
Dog bone<br />
Approximately 2 mm<br />
138 <strong>Dektak</strong> 8 <strong>Manual</strong> Rev. G<br />
167
6.6.2 Average Roughness Measurement<br />
Analytical Functions<br />
Analytical Function Exercise<br />
Once you run the scan and level the profile trace, you may perform an analytical function from the<br />
Data Plot window. The procedure for executing the Average Roughness (Ra) analytical function<br />
on the raw profile data is described below. The analytical function domain is on the data between<br />
the R and M cursors. You can relocate the cursors if desired, but for this exercise use the default<br />
cursor setting of 100 and 1900 µm for a 2 mm scan.<br />
1. Select Analysis > Analytical Functions to display the Analytical Functions dialog box<br />
with selections for setting roughness, waviness, heights, and geometry parameters.<br />
2. Click Ra under Roughness in the Analytical Functions dialog box (see Figure 6.6b).<br />
3. Click Measure in the Analytical Functions dialog box (selecting Measure and Program<br />
automatically enters the analytical function into the scan routine program).<br />
4. Click Compute to clear the dialog box and calculate the average roughness.<br />
Note: The result from the Ra function and the cursor locations display in the Analytic<br />
Results area located on the left of the Data Plot window. An asterisk appears<br />
next to the Ra indicating that the analytical function was calculated on raw,<br />
unfiltered data.<br />
Figure 6.6b Compute Ra<br />
Rev. G <strong>Dektak</strong> 8 <strong>Manual</strong> 139<br />
199A
Analytical Functions<br />
Determining the Cutoff Wavelength<br />
6.7 Determining the Cutoff Wavelength<br />
The <strong>Dektak</strong> application is equipped with short pass and long pass digital filters for filtering out<br />
high and low frequency signals. The cutoff frequencies define the intended difference between<br />
roughness and waviness.<br />
The filters are designed in accordance with the ANSI B46.1 specification on surface texture. The<br />
wavelengths are user selectable from 1 to 200,000 µm.<br />
The appropriate cutoff wavelength varies from application to application; however, the cut-off<br />
wavelength must be less than the scan length. Also, the cutoff value will not be accepted if fewer<br />
than 8 data points are available per cutoff wavelength. The Scan Resolution parameter displayed<br />
on the Scan Routines window provides the number of µm per sample for a given scan length and<br />
speed. The minimum acceptable cut-off wavelength must be at least eight times longer than the<br />
value listed as the scan resolution. This can be otherwise defined as: µm per sample x 8 = minimum<br />
acceptable cut-off wavelength. Veeco recommends for typical applications the cutoff filter be set at<br />
1/5 the scan length.<br />
For example, the default scan routine used for the purpose of this exercise has a scan length of 2000<br />
µm, a scan duration of 1 second and a scan resolution of 0.513 µm per sample. Multiplying 0.513<br />
by 8 equals 4.10, so the minimum acceptable cut-off wavelength is 5 µm. The scan length must<br />
equal the cut-off wavelength, so the maximum cutoff length is 2000. Therefore, you must select a<br />
cut-off value between 5 and 2000 µm.<br />
There are three separate cut-off filters for selecting the wavelength bypass frequency. The three<br />
filters are described below.<br />
Short (High) Pass Filter<br />
This filter calculates roughness data, filtering out low frequency waviness signals and allowing<br />
high frequency roughness data to pass through.<br />
Long (Low) Pass Filters<br />
This filter calculates waviness data, filtering out high frequency roughness signals and allowing<br />
low frequency waviness data to pass through.<br />
Band Pass Filter<br />
When you select the band pass filter, both the short pass and long pass filters are enabled to<br />
calculate the roughness data, creating a band that filters out high frequency signals above the band<br />
and low frequency signals below the band.<br />
140 <strong>Dektak</strong> 8 <strong>Manual</strong> Rev. G
6.8 Activating the Cutoff Filters<br />
Analytical Functions<br />
Activating the Cutoff Filters<br />
To obtain accurate roughness measurements, activate the short pass filter. The procedure for<br />
activating the short pass and long pass filters is described below.<br />
1. Select Analysis > Cutoff Filter from the Data Plot window menu bar to display a dialog<br />
box for setting the roughness and waviness filters (see Figure 6.8a).<br />
2. Enter a value of 200 in the Short Pass Filter Cutoff field.<br />
3. Enter a value of 200 in the Long Pass Filter Cutoff field.<br />
4. Click OK to replot the profile trace with three separate scan traces.<br />
Note: The white trace represents the raw profile data, the yellow trace represents the<br />
roughness profile as determined with the short pass filter, and the red trace<br />
represents the waviness profile as determined by the long pass filter.<br />
Figure 6.8a Roughness and Waviness Filters Dialog Box<br />
Rev. G <strong>Dektak</strong> 8 <strong>Manual</strong> 141<br />
200A
Analytical Functions<br />
Entering Filter Cutoffs into a Scan Routine<br />
6.9 Entering Filter Cutoffs into a Scan Routine<br />
You can enter the short pass and long pass filters into the scan routine to automatically calculate<br />
roughness and waviness analytical functions. The procedure for entering filter cutoffs into a scan<br />
routine is described below.<br />
1. Under Data Processing in the Scan Routines window, click Filter Cutoffs to open the Data<br />
Processing Parameters dialog box (see Figure 6.9a).<br />
2. Enter a cutoff value of 200 µm in the Short Pass Filter Cutoff box for calculating<br />
roughness.<br />
3. Enter a cutoff value of 200 µm in the Long Pass Filter Cutoff box for calculating waviness.<br />
4. Click OK to close the dialog box and enter the cutoff values into the scan routine.<br />
Figure 6.9a Data Processing Parameters Dialog Box<br />
142 <strong>Dektak</strong> 8 <strong>Manual</strong> Rev. G<br />
202A
6.10 Data Type Selection<br />
You may select the type of data to display in the Data Plot window. You may display the raw,<br />
roughness, and waviness profile data either individually or simultaneously. The procedure for<br />
selecting the data type is described below.<br />
1. Select Plot > Data Type to display a dialog box for selecting the raw, roughness, or<br />
waviness data type.<br />
Analytical Functions<br />
Data Type Selection<br />
Note: All three selections should be activated as indicated by their respective check<br />
boxes (see Figure 6.10a).<br />
Click to<br />
clear<br />
Figure 6.10a Data Type Dialog Box<br />
2. Click to clear the Waviness check box.<br />
3. Click OK to replot the data with the roughness and raw data profiles displayed and the<br />
waviness profile deleted.<br />
Rev. G <strong>Dektak</strong> 8 <strong>Manual</strong> 143<br />
197A
Analytical Functions<br />
Entering Data Type into a Scan Routine<br />
6.11 Entering Data Type into a Scan Routine<br />
You can predetermine the type of profile data to display at the conclusion of a scan by entering the<br />
selected data types into the scan routine. The procedure for entering the data type into a scan<br />
routine is described below.<br />
1. In the Display Parameters section of the Scan Routines window, click Display Data Type<br />
to open the Display Parameters dialog box, where you can select from three display<br />
options: raw, roughness, and waviness (see Figure 6.11a).<br />
Note: When you use the default scan routine, the raw profile data is entered as the<br />
Display Data Type parameter. For this exercise, all three data types are<br />
displayed.<br />
2. Click the Waviness and Roughness check boxes to enter all three data types into the scan<br />
routine.<br />
Note: You cannot select the roughness data type unless you first activate the short<br />
pass filter. Likewise, you cannot select the waviness data type unless you<br />
activate the long pass filter.<br />
3. Click OK when finished.<br />
Once you enter the analytical functions, cutoff filters, and display data types into the current scan<br />
routine, they automatically execute whenever the current scan routine runs.<br />
Figure 6.11a Display Parameters Dialog Box<br />
144 <strong>Dektak</strong> 8 <strong>Manual</strong> Rev. G<br />
203A
6.12 Measuring and Entering Analytical Functions<br />
Analytical Functions<br />
Measuring and Entering Analytical Functions<br />
Once you activate the short pass roughness filter, perform the average roughness analytical function<br />
a second time. You may enter one or more analytical functions into the current scan routine from<br />
the Data Plot window to be automatically calculated whenever the current scan routine runs. As an<br />
exercise, the procedure for measuring the Ra function and entering it into the scan routine is<br />
described below.<br />
1. Select Analysis > Analytical Functions from the Data Plot window to display the<br />
Analytical Functions dialog box (see Figure 6.1a at the right).<br />
2. Under Roughness in the Analytical Functions dialog box, click Ra.<br />
3. Select Measure and Program in the Analytical Functions dialog box (see Figure 6.12a).<br />
4. Click Compute to close the Analytical Functions dialog box, perform the measurement,<br />
and enter the average roughness into the current scan routine.<br />
Note: The result from the Ra function displays in the Analytic Results area on the<br />
left side of the Data Plot window (see Figure 6.12a). The different results from<br />
the first Ra are calculated on the unfiltered raw profile data (shown with an<br />
asterisk) and the second Ra calculated on the filtered roughness data (shown<br />
without an asterisk).<br />
Figure 6.12a Analytical Functions Dialog Box (Data Plot Window) / Analytic Results<br />
Analytical Functions Dialog Box<br />
Analytic Results Section<br />
Rev. G <strong>Dektak</strong> 8 <strong>Manual</strong> 145<br />
198A<br />
198B
Analytical Functions<br />
Entering Analytical Functions into a Scan Routine<br />
6.13 Entering Analytical Functions into a Scan Routine<br />
You may enter one or more analytical functions into the Scan Routines window to be<br />
automatically calculated at the conclusion of the scan. The procedure for entering analytical<br />
functions into the scan routine is described in the exercise below.<br />
1. Select Window > Scan Routines to display the Scan Routines window.<br />
2. Select Edit > Append Analytical Functions to display the Analytical Functions dialog<br />
box.<br />
3. Under Waviness in the Analytical Functions dialog box, click Wa.<br />
Note: You may set the cursors at different locations for each individual analytical<br />
function.<br />
4. Enter 0 in the R Cursor box.<br />
5. Enter 1900 in the M Cursor box.<br />
6. Click Add to enter the Wa function into the Analytical Functions area on the right side of<br />
the Scan Routines window (see Figure 6.13a).<br />
7. Click Done when complete.<br />
Figure 6.13a Analytical Functions Dialog Box (Scan Routines Window) / Analytic Functions<br />
146 <strong>Dektak</strong> 8 <strong>Manual</strong> Rev. G<br />
201A<br />
201B
6.14 Deleting Analytical Functions or Results<br />
Analytical Functions<br />
Deleting Analytical Functions or Results<br />
When the Scan Routines window is displayed and an analytical function is listed, you can access<br />
the delete function from the Analytical Functions area.<br />
When the Data Plot window is displayed and an analytical result is listed, you can access the delete<br />
function from the Analytical Results area.<br />
The procedure for deleting an analytical function from the Scan Routines window is described in<br />
the exercise below. (The procedure for deleting an analytical result from the Data Plot window is<br />
similar.)<br />
1. Move the mouse pointer to the right-hand portion of the Scan Routines window where the<br />
analytical functions are listed.<br />
2. Select (highlight) the analytical function you want to delete (for the purpose of this exercise,<br />
select Wa).<br />
3. Select Edit > Delete Analytical Functions to display the Delete Analytical Functions<br />
dialog box (see Figure 6.14a).<br />
Note: If there is no analytical function selected (highlighted), the dialog box will not<br />
display.<br />
Figure 6.14a Deleting Analytical Functions<br />
204A<br />
4. Click OK in the Delete Analytical Functions dialog box to delete the highlighted analytical<br />
function from the scan routine.<br />
Note: If there are several analytical functions listed, and you want to delete a group of<br />
them, select (highlight) the first function in the group, select Edit > Delete<br />
Analytical Functions, and enter the number of items to be deleted in the<br />
Delete Analytical Functions dialog box.<br />
Rev. G <strong>Dektak</strong> 8 <strong>Manual</strong> 147<br />
204B
Analytical Functions<br />
Smoothing<br />
6.15 Smoothing<br />
Whenever you activate the smoothing function, the roughness, waviness, or raw profiles are<br />
calculated using the smoothed data. The smoothing function reduces high frequency/low amplitude<br />
noise on a trace. Some applications involve films deposited over rough substrates. This substrate<br />
roughness transfers to the film surface, which can make measurements difficult or questionable.<br />
The smoothing function may be used in one of two ways. In applications where rough samples will<br />
be run on a regular basis, you may enter smoothing into the scan routine. In this way, the smoothing<br />
function performs automatically on each scan profile. You may also select the smoothing function<br />
after a scan has completed. Both methods for smoothing are discussed on the following pages.<br />
The <strong>Dektak</strong> application offers three degrees of smoothing. The higher the degree, the more<br />
smoothing will be realized.<br />
• Degree 1: 5-point smoothing<br />
• Degree 2: 11-point smoothing<br />
• Degree 3: 23-point smoothing<br />
Once you select the degree of smoothing, a prompt asks for the value of the vertical distance<br />
between the maximum peak to valley roughness. Determine the maximum peak to valley distance<br />
of the high frequency low amplitude noise and enter this or a greater value. (You can easily use the<br />
TIR analytical function to determine the noise band.) The smoothing function smooths all data<br />
within the specified noise band by examining each data point in turn and comparing it with the<br />
previous and following points.<br />
For example, if Degree 1 is selected, five consecutive data points are used in the smoothing<br />
calculation. If they lie within the specified noise band, a running calculation is started. A first-order<br />
curve is fitted to all consecutive points lying within the noise band. As new points are examined,<br />
the routine calculates the new value of each point by looking at the four closest points that lie<br />
within the band.<br />
When the algorithm encounters a point that lies outside the band, the calculation is interrupted. The<br />
new point is left as is and becomes a center point of a new noise band. If the next five points are<br />
within the new band, the calculation restarts. If subsequent points lie outside the band, they are<br />
plotted as is and each becomes a new reference point.<br />
This technique is preferable to straight filtering since the slope of the profile is maintained.<br />
148 <strong>Dektak</strong> 8 <strong>Manual</strong> Rev. G
6.16 Activating the Smoothing Function<br />
Analytical Functions<br />
Activating the Smoothing Function<br />
You may perform smoothing on profile data at the conclusion of a scan. The procedure for<br />
activating the smoothing function from the Data Plot window is described below.<br />
1. Select Window > Data Plot to display the Data Plot window with the replotted profile data.<br />
2. Select Analysis > Analytical Functions to display the Analytical Functions dialog box.<br />
3. Under Height, click TIR.<br />
4. Select Measure.<br />
5. Click Compute.<br />
Note: The total indicated reading peak-to-valley distance is calculated.<br />
6. Select Analysis > Smoothing to display a dialog box for entering smoothing parameters (see<br />
Figure 6.16a).<br />
7. Choose one of three available degrees of smoothing (for the purpose of this exercise, choose<br />
2 in the Degree section).<br />
8. Enter a value equal to or greater than the value displayed as the TIR result in the Band field.<br />
9. Click OK to smooth and replot the raw profile data.<br />
Figure 6.16a Smoothing Dialog Box<br />
Rev. G <strong>Dektak</strong> 8 <strong>Manual</strong> 149<br />
206A
Analytical Functions<br />
Entering Smoothing into a Scan Routine<br />
6.17 Entering Smoothing into a Scan Routine<br />
You may enter smoothing into the current scan routine to execute automatically at the conclusion of<br />
the scan. The procedure for entering smoothing into the scan routine is described below.<br />
1. Select Window > Scan Routines to display the Scan Routines window.<br />
2. In the Data Processing section, click Smoothing to display the Data Processing<br />
Parameters dialog box.<br />
3. Choose the desired smoothing Degree (1, 2, or 3) in the Smoothing Parameters section (see<br />
Figure 6.17a).<br />
4. Determine the smoothing band value by performing the Total Indicated Reading (TIR)<br />
analytical function on the scan to be smoothed.<br />
5. Enter a value equal to or greater than the TIR value in the Band field.<br />
6. Click OK to automatically smooth the profile data whenever the current scan routine<br />
executes.<br />
7. To clear smoothing, click Smoothing in the Data Processing section and enter “0” in the<br />
Band field.<br />
Figure 6.17a Data Processing Parameters Dialog Box: Smoothing Parameter<br />
150 <strong>Dektak</strong> 8 <strong>Manual</strong> Rev. G<br />
206B
Chapter 7 Scan Routine Parameter Description<br />
This chapter describes the various scan parameters and display parameters of the Scan Routine<br />
Window (see Figure 7.0a).<br />
Figure 7.0a Scan Routine Window<br />
You can enter up to 10,000 different scan routines into a single automation program file. Each scan<br />
routine within an automation program contains all the necessary parameters for performing a<br />
specified scan. These individual parameters are user selectable, providing extraordinary flexibility<br />
to adopt the <strong>Dektak</strong> 8 for a wide range of applications.<br />
Scan Routine parameters discussed in this section include:<br />
Scan Parameters: Section 7.1 Data Processing: Section 7.3<br />
Display Parameters: Section 7.2 Scan Routine Deskew Points: Section 7.4<br />
Rev. G <strong>Dektak</strong> 8 <strong>Manual</strong> 151<br />
121B
Scan Routine Parameter Description<br />
Scan Parameters<br />
7.1 Scan Parameters<br />
All of the scan parameters are user selectable and can be accessed from the Scan Routines<br />
window. To display the Scan Routines window, select Window > Scan Routines from the menu<br />
bar. The procedure for setting the various scan parameters is described below. To display the Scan<br />
Parameters dialog box, click any of the parameters under Scan Parameters, such as Scan ID or<br />
Scan Length (see Figure 7.0a).<br />
7.1.1 Scan ID<br />
This parameter allows you to assign a fifteen-digit scan identification file name or number.<br />
1. To display the Scan Parameters dialog box, click any of the parameters under Scan<br />
Parameters (see Figure 7.0a).<br />
2. Select the Nominal Parameters page.<br />
3. In the ID section enter the desired file name or number using the keyboard (see Figure 7.1a).<br />
Note: Most special characters are allowed in the file name, but no spaces.<br />
4. Click OK to close the dialog box and enter the ID into the scan program.<br />
Note: Click Apply if you want to enter the ID into the scan program but keep the<br />
dialog box open to make additional entries.<br />
Figure 7.1a Scan Parameter Dialog Box: ID<br />
152 <strong>Dektak</strong> 8 <strong>Manual</strong> Rev. G<br />
133D
7.1.2 Stylus Type<br />
Scan Routine Parameter Description<br />
Scan Parameters<br />
You can specify the type of stylus that is installed in your system. The Stylus Type parameter<br />
allows you to specify which stylus type is being used.<br />
1. To display the Scan Parameters dialog box, click any of the parameters under Scan<br />
Parameters (see Figure 7.0a).<br />
2. Select the Nominal Parameters page.<br />
3. In the Stylus Type section choose the desired stylus type from the drop-down list (see Figure<br />
7.1b).<br />
4. Click OK to close the dialog box and enter the stylus type into the scan program.<br />
7.1.3 Scan Location<br />
Note: Click Apply if you want to enter the stylus type into the scan program but keep<br />
the dialog box open to make additional entries.<br />
Figure 7.1b Scan Parameter Dialog Box: Stylus Type<br />
This parameter displays the X, Y, and theta (T) stage location at which the current scan routine<br />
performs. The X and Y parameters are expressed in µm, and the theta location is expressed in<br />
degrees.<br />
Note: Theta rotation displays only if the Programmable Theta option is installed.<br />
Rev. G <strong>Dektak</strong> 8 <strong>Manual</strong> 153<br />
133D
Scan Routine Parameter Description<br />
Scan Parameters<br />
1. To display the Scan Parameters dialog box, click any of the parameters under Scan<br />
Parameters (see Figure 7.0a).<br />
2. Select the Nominal Parameters page.<br />
3. Click in the desired box labeled X, Y, or T and enter the desired coordinates using the<br />
keyboard (see Figure 7.1c).<br />
4. Click OK to close the dialog box and enter the location into the scan program.<br />
7.1.4 Scan Length<br />
Note: Click Apply if you want to enter the location into the scan program but keep<br />
the dialog box open to make additional entries.<br />
Figure 7.1c Scan Parameter Dialog Box: Scan Location<br />
Note: Because the numeric values of the X, Y, theta location are often not known, in<br />
most cases you will determine the stage location by using the Sample<br />
Positioning Window. From the menu in this window, select Edit > Define<br />
Scan Location.<br />
Scan lengths from 50 µm to 30,000 µm (30 mm) are possible.<br />
1. To display the Scan Parameters dialog box, click any of the parameters under Scan<br />
Parameters (see Figure 7.0a).<br />
2. Select the Nominal Parameters page.<br />
154 <strong>Dektak</strong> 8 <strong>Manual</strong> Rev. G<br />
133D
Scan Routine Parameter Description<br />
Scan Parameters<br />
3. In the Length field enter the desired scan length using the keyboard (see Figure 7.1d).<br />
Note: The scan length is expressed in microns (µm).<br />
4. Click OK to close the dialog box and enter the length into the scan program.<br />
7.1.5 Scan Duration/Speed<br />
Note: Click Apply if you want to enter the length into the scan program but keep the<br />
dialog box open to make additional entries.<br />
Figure 7.1d Scan Parameter Dialog Box: Length<br />
Note: The scan length can also be set from the Sample Positioning Window by<br />
selecting Edit > Enter Scan Length. You can enter the scan length manually<br />
using stage tracking, as discussed in Chapter 4.<br />
The Duration setting displays the amount of time it takes to complete a given scan. Scan duration,<br />
in conjunction with scan length, determines the horizontal resolution of a scan. Therefore, scan<br />
speed is directly related to the resolution.<br />
For example, a 13-second scan provides 3900 Sample data Points. You can set the scan duration<br />
from 3 to 200 seconds for a maximum of 60,000 data points per scan.<br />
Select a longer scan duration for long scan applications and measurements of very fine surface<br />
roughness requiring the highest horizontal resolution. When high throughput is the primary<br />
consideration, use a shorter scan duration. For most applications, a 10-20 second scan provides<br />
adequate resolution and throughput.<br />
Rev. G <strong>Dektak</strong> 8 <strong>Manual</strong> 155<br />
133D
Scan Routine Parameter Description<br />
Scan Parameters<br />
1. To display the Scan Parameters dialog box, click any of the parameters under Scan<br />
Parameters (see Figure 7.0a).<br />
2. Select the Nominal Parameters page.<br />
3. In the Duration field enter the desired scan duration (in seconds) using the keyboard (see<br />
Figure 7.1e).<br />
4. Click OK to close the dialog box and enter the duration into the scan program.<br />
7.1.6 Scan Resolution<br />
Note: Click Apply if you want to enter the duration into the scan program but keep<br />
the dialog box open to make additional entries.<br />
Figure 7.1e Scan Parameter Dialog Box: Duration<br />
The Resolution parameter (see Figure 7.1f) displays the horizontal resolution for the scan length<br />
and scan speed (duration) entered into the scan routine. The scan resolution is expressed in µm/<br />
sample, indicating the horizontal distance between data points. Data points are the points along the<br />
scan path at which data samples are taken. The more data points taken during a given scan length,<br />
the shorter the distance between data samples. Therefore, a scan routine with the lowest number of<br />
µm per sample provides the best possible horizontal resolution.<br />
Note: The resolution automatically adjusts in accordance with the new duration<br />
value.<br />
156 <strong>Dektak</strong> 8 <strong>Manual</strong> Rev. G<br />
133D
7.1.7 Scan Type<br />
Figure 7.1f Scan Parameter Dialog Box: Resolution<br />
Scan Routine Parameter Description<br />
Scan Parameters<br />
You can choose the type of scan to be run. The Scan Type parameter allows you to specify which<br />
scan type to use.<br />
1. To display the Scan Parameters dialog box, click any of the parameters under Scan<br />
Parameters (see Figure 7.0a).<br />
2. Select the Nominal Parameters page.<br />
3. In the Scan Type section choose the desired scan type from the drop-down list (see Figure<br />
7.1g):<br />
• Standard Scan: A normal scan type, in which the scan is performed across the surface<br />
of a sample. The tower is nulled before each scan; therefore, each successive scan has its<br />
own reference point.<br />
• Static Tower Scan: A special scan type, in which the scan is performed across the<br />
surface of a sample, but the tower is nulled before only the first scan. Each successive<br />
scan therefore uses the same initial reference point.<br />
• Static Scan: A special scan type, in which the scan is performed at the same point (the<br />
stage does not move). The tower is nulled before the scan. This scan type is primarily<br />
used for determining the noise and drift of the system.<br />
• Map Scan: The <strong>Dektak</strong> Three Dimensional (3D) Mapping Option allows <strong>Dektak</strong><br />
surface profiler customers to measure, analyze, and view surface contour data in 3<br />
dimensions (X, Y, and Z). See Appendix D for complete information on 3D mapping.<br />
Rev. G <strong>Dektak</strong> 8 <strong>Manual</strong> 157<br />
133D
Scan Routine Parameter Description<br />
Scan Parameters<br />
• Deflection Scan: See Deflection Scan: Section 7.1.12.<br />
4. Click OK to close the dialog box and enter the scan type into the scan program.<br />
7.1.8 Stylus Force<br />
Note: Click Apply if you want to enter the scan type into the scan program but keep<br />
the dialog box open to make additional entries.<br />
Figure 7.1g Scan Parameter Dialog Box: Scan Type<br />
You can set the stylus force from 1mg to 15 mg force. The Stylus Force parameter allows you to<br />
adjust the stylus force.<br />
1. To display the Scan Parameters dialog box, click any of the parameters under Scan<br />
Parameters (see Figure 7.0a).<br />
2. Select the Nominal Parameters page.<br />
3. In the Stylus Force field enter desired stylus force (see Figure 7.1h).<br />
4. Click OK to close the dialog box and enter the stylus force into the scan program.<br />
Note: Click Apply if you want to enter the stylus force into the scan program but<br />
keep the dialog box open to make additional entries.<br />
158 <strong>Dektak</strong> 8 <strong>Manual</strong> Rev. G<br />
133D
7.1.9 Measurement Range<br />
Figure 7.1h Scan Parameter Dialog Box: Stylus Force<br />
Scan Routine Parameter Description<br />
Scan Parameters<br />
The available vertical resolution depends upon the Measurement Range selected. When<br />
measuring extremely fine geometries, the 65 kÅ range provides a vertical bit resolution of 1 Å. For<br />
general applications, the 10 Å vertical resolution of the 655 kÅ range is usually adequate. When<br />
measuring thick films or very rough or curved samples, select the 2620 kÅ range with 40 Å<br />
resolution.<br />
1. To display the Scan Parameters dialog box, click any of the parameters under Scan<br />
Parameters (see Figure 7.0a).<br />
2. Select the Nominal Parameters page.<br />
3. In the Meas Range field, select one of the measurement ranges from the drop-down list: 65<br />
kÅ, 655 kÅ or 2620 kÅ (or 1 mm, optional). See Figure 7.1i.<br />
4. Click OK to close the dialog box and enter the measurement range into the scan program.<br />
Note: Click Apply if you want to enter the measurement range into the scan program<br />
but keep the dialog box open to make additional entries.<br />
Rev. G <strong>Dektak</strong> 8 <strong>Manual</strong> 159<br />
133D
Scan Routine Parameter Description<br />
Scan Parameters<br />
7.1.10 Profile<br />
Figure 7.1i Scan Parameter Dialog Box: Measurement Range<br />
The Profile setting scales the measurement range according to the profile selected. Three different<br />
profiles are available for a variety of sample surface characteristics (see Figure 7.1j).<br />
Figure 7.1j Sample Surface Profiles<br />
• Valleys: Provides 90 percent of the measurement range below the zero horizontal grid<br />
line. Used primarily for measuring etch depths.<br />
• Hills and Valleys: Provides 50 percent of the measurement range above the zero<br />
horizontal grid line and 50 percent below. Used in most applications, especially if the<br />
surface characteristics of the sample are not well known, or if the sample is out of level.<br />
• Hills: Provides 90 percent of the measurement range above the horizontal grid line.<br />
Used primarily for measuring step heights.<br />
160 <strong>Dektak</strong> 8 <strong>Manual</strong> Rev. G<br />
133D
Scan Routine Parameter Description<br />
Scan Parameters<br />
1. To display the Scan Parameters dialog box, click any of the parameters under Scan<br />
Parameters (see Figure 7.0a).<br />
2. Select the Nominal Parameters page.<br />
3. Select the desired profile (see Figure 7.1k).<br />
4. Click OK to close the dialog box and enter the selected profile into the scan program.<br />
7.1.11 Additional Parameters<br />
Note: Click Apply if you want to enter the selected profile into the scan program but<br />
keep the dialog box open to make additional entries.<br />
Figure 7.1k Scan Parameter Dialog Box: Profile<br />
You can choose to enable a soft touchdown when the stylus is lowered onto the sample. Soft<br />
touchdown is accomplished by gradually incrementing the stylus force up to the specified value,<br />
which slowly lowers the stylus.<br />
Note: Using this feature will significantly increase the time to perform a scan routine.<br />
Soft touchdown is particularly appropriate for soft samples when a Static Tower scan type is being<br />
used, to prevent damage to the sample. The Additional Parameters section allows you to make<br />
this selection.<br />
1. To display the Scan Parameters dialog box, click any of the parameters under Scan<br />
Parameters.<br />
Rev. G <strong>Dektak</strong> 8 <strong>Manual</strong> 161<br />
133D
Scan Routine Parameter Description<br />
Scan Parameters<br />
2. Select the Nominal Parameters page.<br />
3. In the Additional Parameters section check the Soft Touchdown box to enable this feature<br />
(see Figure 7.1l).<br />
Note: This feature is available only when a Static Tower scan type has been selected.<br />
4. Click OK to close the dialog box and enable soft touchdown in the scan program.<br />
7.1.12 Deflection Scan<br />
Note: Click Apply if you want to enable soft touchdown in the scan program but keep<br />
the dialog box open to make additional entries.<br />
Figure 7.1l Scan Parameter Dialog Box: Additional Parameters<br />
A Deflection Scan is a special scan type in which the scan is performed at the same point (the stage<br />
does not move), but the stylus force is successively incremented beyond the specified value. The<br />
tower is nulled before the scan. When the scan is completed, the Data Plot window displays the<br />
deflections plotted against the applied forces. This scan type is primarily used for determining the<br />
deflection and material properties (such as Young’s modulus) of movable devices (such as passive<br />
MEMS and cantilever devices) subjected to different applied forces.<br />
The Scan Type parameter allows you to specify which scan type to use.<br />
1. To display the Scan Parameters dialog box, click any of the parameters under Scan<br />
Parameters (see Figure 7.0a).<br />
2. Select the Nominal Parameters page.<br />
162 <strong>Dektak</strong> 8 <strong>Manual</strong> Rev. G<br />
133D
Scan Routine Parameter Description<br />
Scan Parameters<br />
3. In the Scan Type section choose Deflection Scan from the drop-down list (see Figure 7.1g).<br />
4. In the Stylus Force section, enter the stylus force to be applied at the start of the scan (see<br />
Figure 7.1h).<br />
5. Click Apply to enter the scan type and stylus force into the scan program and keep the dialog<br />
box open.<br />
6. Select the Deflection Parameters page to see the Additional Parameters section (see<br />
Figure 7.1m).<br />
7. Enter the Interval in msec during which each increment of stylus force should be applied.<br />
8. Enter the Increment in mg by which the stylus force is incremented after each interval.<br />
9. Click Apply.<br />
Example:<br />
Note: The End Force that will be applied by the stylus is calculated and displayed<br />
Figure 7.1m Scan Parameter Dialog Box: Deflection Parameters Page<br />
• Scan duration was set at 13 seconds (see Figure 7.1e).<br />
• Stylus force was set at 3 mg (see Figure 7.1h).<br />
• Interval is set at 1000 msec (1 second) (see Figure 7.1m).<br />
• Increment is set at 0.05 mg.<br />
Rev. G <strong>Dektak</strong> 8 <strong>Manual</strong> 163<br />
133E
Scan Routine Parameter Description<br />
Scan Parameters<br />
• End Force is calculated and displayed as 3.65 mg (13 seconds divided by 1 second,<br />
multiplied by 0.05 mg = 0.65 mg to be added in 0.05-mg increments to 3 mg).<br />
164 <strong>Dektak</strong> 8 <strong>Manual</strong> Rev. G
7.2 Display Parameters<br />
Scan Routine Parameter Description<br />
Display Parameters<br />
The Scan Routines window contains additional parameters under the heading Display Parameters<br />
allowing automatic manipulation of the graphic display of the profile trace. The display parameters<br />
are described below.<br />
7.2.1 Software Leveling<br />
You can program the <strong>Dektak</strong> application to software level the profile trace automatically, in relation<br />
to the cursor/trace intercepts, at the conclusion of a scan. In order to obtain accurate step height<br />
readings and analytical calculations, you must software-level the trace. You may also enter cursor<br />
band widths to perform delta average leveling.<br />
1. To display the Display Parameters dialog box, click any of the parameters under Display<br />
Parameters (see Figure 7.0a).<br />
2. Select the Automatic Leveling check box to activate the two boxes for entering the R and M<br />
Cursor Widths into the software leveling parameter (see Figure 7.2a).<br />
• The default band width is 0, and the trace levels using the default fine-line cursors.<br />
• If you know the desired cursor widths, you can enter them into the scan routine. The<br />
first box sets the width of the reference cursor (R) and the second box sets the width of<br />
the measurement cursor (M).<br />
3. Click OK to enter automatic leveling and the leveling cursor widths into the scan routine.<br />
Figure 7.2a Display Parameters Dialog Box: Software Leveling Parameter<br />
Note: You can also enter cursor band widths from the Data Plot window. A delta<br />
averaging technique provides a roughness average reading of the section of the<br />
profile trace within the bands. The profile trace can then be leveled according to<br />
the two average readings. See Setting Cursor Bandwidths: Section 4.4.2.<br />
Rev. G <strong>Dektak</strong> 8 <strong>Manual</strong> 165<br />
135A
Scan Routine Parameter Description<br />
Display Parameters<br />
7.2.2 Reference/Measurement Cursors<br />
The R Cursor and M Cursor parameters allow you to enter the reference and measurement cursor<br />
locations in relation to the horizontal scale of the Data Plot window into a scan routine. Whenever<br />
the scan routine executes, the cursors automatically position at the programmed locations.<br />
Note: You MUST select Automatic Leveling for cursor positioning values to take<br />
effect (see Software Leveling: Section 7.2.1).<br />
If you know the desired cursor settings, you can numerically enter the settings directly into the scan<br />
routine in the Scan Routines window.<br />
1. To display the Display Parameters dialog box, click any of the parameters under Display<br />
Parameters.<br />
2. Enter the desired cursor location for the R and/or M Cursor (see Figure 7.2b).<br />
3. Click OK to enter the cursor positions into the scan routine.<br />
Figure 7.2b Display Parameters Dialog Box: Cursor Positioning<br />
If you do not know the desired cursor settings, you can enter cursor locations into the current scan<br />
routine from the Data Plot window.<br />
4. To set the cursor locations for leveling, run a sample scan of the feature to measure.<br />
5. Position the reference cursor at a location along the reference plane (such as the base of a<br />
step or the lip of an etched depth) once the scan is complete (for more information on cursor<br />
positioning see Reference/Measurement Cursors: Section 4.4).<br />
6. To level the trace accurately, position the measurement cursor some distance away from the<br />
reference cursor, but along the same horizontal plane (such as the base of the step or the lip<br />
of the etched depth).<br />
7. Once the cursors are properly positioned, select Edit > Enter Software Leveling from the<br />
menu bar to enter the new cursor locations into the scan routine.<br />
166 <strong>Dektak</strong> 8 <strong>Manual</strong> Rev. G<br />
135A
7.2.3 Display Range<br />
Scan Routine Parameter Description<br />
Display Parameters<br />
Note: The software leveling function now occurs at the specified cursor locations<br />
whenever the current scan routine executes and software leveling has been<br />
selected.<br />
The Automatic Ranging feature automatically scales and ranges the profile trace to fill 80 percent<br />
of the data plot display. However, in some applications where repetitive or like scans are compared,<br />
you can preset the graphic scale by numeric entry.<br />
1. To display the Display Parameters dialog box, click any of the parameters under Display<br />
Parameters (see Figure 7.0a).<br />
2. To select automatic ranging, click Automatic Ranging. To set the display range at a<br />
specified value, click Set Range Values to display two additional boxes for entering the<br />
upper and lower boundaries of the graphic scale (see Figure 7.2c).<br />
3. Enter the desired setting for the lower boundary in the first box and the upper boundary in the<br />
second box. Then click OK.<br />
7.2.4 Display Data Type<br />
Figure 7.2c Display Parameters Dialog Box: Display Range<br />
This parameter allows you to display the raw profile data, roughness and waviness profile (see<br />
Figure 7.2d). You can display the raw profile and roughness or waviness profiles individually or<br />
simultaneously, to easily correlate the profiles.<br />
Rev. G <strong>Dektak</strong> 8 <strong>Manual</strong> 167<br />
135A
Scan Routine Parameter Description<br />
Data Processing<br />
Figure 7.2d Display Parameters Dialog Box: Display Data Type<br />
See Entering Data Type into a Scan Routine: Section 6.11 for a detailed description of the<br />
function and use of the Display Data Type parameter.<br />
7.3 Data Processing<br />
The <strong>Dektak</strong> program provides parameters for processing profile data for specific applications. In<br />
the Scan Routines window are two parameters listed under the heading Data Processing; they are<br />
Filter Cutoffs and Smoothing. These parameters, which you can enter at the Data Processing<br />
Parameters dialog box (see Figure 7.3a), allow you to activate filter cutoffs and smoothing filters.<br />
See Chapter 6 for more information regarding their use and function.<br />
7.3.1 Filter Cutoffs<br />
Figure 7.3a Data Processing Parameters Dialog Box: Filters and Smoothing<br />
You may enter roughness and waviness filter cutoffs from the Scan Routines window or the Data<br />
Plot window. This parameter allows you to enter selected cutoff values into the current scan<br />
routine. A short pass filter is available for calculating roughness analytical functions. A long pass<br />
filter is available for calculating waviness analytical functions.<br />
168 <strong>Dektak</strong> 8 <strong>Manual</strong> Rev. G<br />
202A<br />
135A
7.3.2 Smoothing<br />
The smoothing parameter allows you to activate a smoothing filter. When you use the smoothing<br />
function, raw, roughness and waviness profiles are calculated using the smoothed data. Three<br />
degrees of smoothing are available. The higher the degree, the more smoothing will be realized.<br />
7.3.3 Step Detection Option<br />
The <strong>Dektak</strong> 8 provides optional features for Step Detection. See Appendix C for instructions<br />
regarding these features.<br />
7.4 Scan Routine Deskew Points<br />
See Establishing Scan Deskew Points: Section 5.7.2 for instructions on setting up scan routine<br />
deskew points.
Chapter 8 Menu and Toolbar Descriptions<br />
This chapter provides a brief description of the various menus and menu selections available in the<br />
<strong>Dektak</strong> 8 software which were not discussed in detail in previous chapters. Many menu-selection<br />
functions can be performed by selecting the associated icon for the function (see Toolbars and<br />
Icons: Section 8.14 for more information).<br />
This chapter includes the following topics:<br />
• Startup Window: Section 8.1<br />
• File Menu: Section 8.2<br />
• Run Menu: Section 8.3<br />
• <strong>Profiler</strong> Menu: Section 8.4<br />
• Setup Menu: Section 8.5<br />
• Calibration Menu: Section 8.6<br />
• Window Menu: Section 8.7<br />
• Help Menu: Section 8.8<br />
• Automation Programs Window Menu Selections: Section 8.9<br />
• Scan Routines Window Menu Selections: Section 8.10<br />
• Sample Positioning Window Menu Selections: Section 8.11<br />
• Data Plot Window Menu Selections: Section 8.12<br />
• Auto Prog Summary Window Menu Selections: Section 8.13<br />
• Toolbars and Icons: Section 8.14<br />
The <strong>Dektak</strong> program uses Microsoft Windows XP as the operating system. Whenever you first<br />
access the <strong>Dektak</strong> program, or close all windows, the <strong>Dektak</strong> Startup window displays (see Figure<br />
8.1a). The menu bar and the toolbar below it continually display at the top of all <strong>Dektak</strong> windows,<br />
and the status bar displays at the bottom. Each <strong>Dektak</strong> window has its own specific menus and<br />
toolbars. All of the various menu items and toolbar icons are described in the following sections.<br />
Rev. G <strong>Dektak</strong> 8 <strong>Manual</strong> 171
Menu and Toolbar Descriptions<br />
Startup Window<br />
8.1 Startup Window<br />
Default<br />
Menu Bar<br />
Toolbar<br />
The <strong>Dektak</strong> user interface consists of a variety of windows. When no other window is active, the<br />
Startup window is displayed, containing a default menu bar, toolbar and status bar (see Figure<br />
8.1a).<br />
Default Menu Bar<br />
Figure 8.1a Startup Window<br />
Status<br />
Bar 015B<br />
Status<br />
Progress<br />
Notification<br />
Messages<br />
Current Stage<br />
Bar<br />
Icon<br />
Position<br />
The default menu bar (see Figure 8.1a) provides access to the different types of operations<br />
available. The various menus contained within the default menu bar in the Startup window come<br />
under the headings<br />
File, Run, <strong>Profiler</strong>, Setup, Calibration, Window and Help.<br />
A description of the contents of each menu, the keyboard shortcuts (if any) associated with the<br />
menu items, and instructions for accessing them are provided in the following sections of this<br />
chapter.<br />
Note: Menu items appear “grayed out” when the function is not currently available.<br />
For example, the menu item File > Print... is not available when there is<br />
nothing to be printed.<br />
172 <strong>Dektak</strong> 8 <strong>Manual</strong> Rev. G
Additional Menus<br />
Toolbar<br />
Menu and Toolbar Descriptions<br />
Startup Window<br />
Note: Combination keystrokes are indicated by “+”. For example, “Ctrl+N” means<br />
hold down the Ctrl key, press and release the N key, and then release the Ctrl<br />
key.<br />
Most of the other windows contain at least one additional menu, as described in the following<br />
sections.<br />
Each window contains a unique toolbar, consisting of a set of icons to perform various functions<br />
when clicked. You can open some menu items with icons located in specific toolbars. See Toolbars<br />
and Icons: Section 8.14, for a complete description of each toolbar.<br />
Status Bar<br />
A status bar is visible at all times, located at the bottom of the screen. The status bar contains<br />
window-specific status messages, a progress bar (when appropriate), a notification icon when<br />
Global Editing Mode is active, and the current position of the stage (see Figure 8.1a).<br />
Rev. G <strong>Dektak</strong> 8 <strong>Manual</strong> 173
Menu and Toolbar Descriptions<br />
File Menu<br />
8.2 File Menu<br />
The File menu allows you to open and save files, and print scan data and parameters. To access the<br />
File menu, select File from the menu bar (see Figure 8.2a).<br />
New... Ctrl+N<br />
Figure 8.2a File Menu<br />
The New command creates a new automation program with a single scan containing the default<br />
scan parameters.<br />
Open... Ctrl+O<br />
The Open command opens an automation program or other previously saved files. Select File ><br />
Open to display a list of available files.<br />
Save Ctrl+S<br />
The Save command by default saves any recent changes to the current automation program.<br />
However, if the Data Plot window is active, scan data is saved. Likewise, if the Automation<br />
Program Summary window is active, APS summary data is saved.<br />
Save As...<br />
The Save As command by default saves an automation program under a different file name. Select<br />
File > Save As to display a list of file names currently in use, and type a new file name to use. If the<br />
Data Plot window is active, scan data is saved under a different file name. Likewise, if the<br />
174 <strong>Dektak</strong> 8 <strong>Manual</strong> Rev. G
Menu and Toolbar Descriptions<br />
File Menu<br />
Automation Program Summary window is active, APS summary data is saved under a different<br />
file name.<br />
Export... Ctrl+E<br />
The Export command by default exports an automation program as an ASCII file with a .txt file<br />
extension. Select File > Export to display a list of .txt file names currently in use, and type a new<br />
file name to use. If the Data Plot window is active, scan data is exported under a different .txt file<br />
name. Likewise, if the Automation Program Summary window is active, APS summary data is<br />
exported under a different .txt file name.<br />
Print... Ctrl+P<br />
Select File > Print to print a form appropriate for the active window. (If there is no predefined form<br />
for the window, the print function acts as a print-screen command, printing the entire current active<br />
screen.)<br />
Explore <strong>Dektak</strong> Directory... Ctrl+Alt+E<br />
Opens Windows Explorer at the active directory (\Veeco\<strong>Dektak</strong>32 by default).<br />
Exit... Alt+F4<br />
Closes the <strong>Dektak</strong> application (after confirmation)<br />
Rev. G <strong>Dektak</strong> 8 <strong>Manual</strong> 175
Menu and Toolbar Descriptions<br />
Run Menu<br />
8.3 Run Menu<br />
This pull-down menu runs a scan routine or an automation program. To access the Run menu,<br />
select Run from the menu bar (see Figure 8.3a).<br />
Scan F4<br />
Figure 8.3a Run Menu<br />
Select Run > Scan to run the current scan at the stage position specified in the scan.<br />
Scan Here Ctrl+F4<br />
Select Run > Scan Here to run the current scan, but at the current stage position.<br />
Auto Program F5<br />
Select Run > Auto Program to run all of the scan routines in the current automation program,<br />
beginning with scan routine 1.<br />
Auto Program From Ctrl+F5<br />
Select Run > Auto Program From to run the current automation program beginning at the<br />
selected scan routine.<br />
176 <strong>Dektak</strong> 8 <strong>Manual</strong> Rev. G
Continue<br />
The Continue function has two purposes:<br />
Menu and Toolbar Descriptions<br />
Run Menu<br />
• Select Run > Continue to run the next scan in sequence of a multiple scan automation<br />
program, when the autoprogram function (Adjust Position Before Each Scan) has<br />
been activated.<br />
• Select Run > Continue to continue at the next scan in sequence of a multiple scan<br />
automation program, when the automation program was aborted during a scan.<br />
Note: If you abort operation while the gantry is moving or the stage is rotating (and<br />
the theta encoder option is not installed), then you cannot continue. You must<br />
reset the hardware.<br />
Rev. G <strong>Dektak</strong> 8 <strong>Manual</strong> 177
Menu and Toolbar Descriptions<br />
<strong>Profiler</strong> Menu<br />
8.4 <strong>Profiler</strong> Menu<br />
This pull-down menu is used for controlling profiler functions. To access the <strong>Profiler</strong> menu, select<br />
<strong>Profiler</strong> from the menu bar (see Figure 8.4a).<br />
Tower Up Ctrl+F3<br />
Figure 8.4a <strong>Profiler</strong> Menu<br />
Select <strong>Profiler</strong> > Tower Up to lift the stylus and raise the tower and optics up to the home position.<br />
Tower Down Ctrl+Shift+F3<br />
Select <strong>Profiler</strong> > Tower Down to lower the tower and optics down to the stylus null position, and<br />
then raise the stylus from the sample.<br />
Stylus Up Ctrl+F2<br />
Select <strong>Profiler</strong> > Stylus Up to lift the stylus off the sample surface without raising the tower. This<br />
allows the user to view the video image of the sample surface while positioning the stage, without<br />
contact between the stylus and sample.<br />
Stylus Down Ctrl+Shift+F2<br />
Select <strong>Profiler</strong> > Stylus Down to lower the stylus onto the sample surface unless the tower is<br />
already in the home position. The tower and stylus automatically raise a small amount off the<br />
sample surface whenever the sample stage repositions.<br />
178 <strong>Dektak</strong> 8 <strong>Manual</strong> Rev. G
Stage Control Panel Ctrl+T<br />
Menu and Toolbar Descriptions<br />
<strong>Profiler</strong> Menu<br />
Select <strong>Profiler</strong> > Stage Control Panel to display the Stage Control Panel at the right side of the<br />
Sample Positioning window. Select the menu entry again to hide the Stage Control Panel.<br />
Stage Leveling<br />
Note: The Stage Control Panel menu item is available only when the Sample<br />
Positioning window is open. Otherwise, the item is grayed out as shown here.<br />
Select <strong>Profiler</strong> > Stage Leveling to open the Stage Leveling submenu, which offers the following<br />
two choices.<br />
Auto Level<br />
<strong>Manual</strong> Leveling...<br />
Select Auto Level to level the stage mechanically using a stepper motor. The cursors must be set<br />
appropriately in the Data Plot window after running a scan in order for the automatic leveling to be<br />
performed correctly. (See Optional Power Stage Leveling: Section 4.5.2 for more information.)<br />
Select <strong>Manual</strong> Leveling to display a dialog box containing arrows you can click for leveling the<br />
stage by raising or lowering the rear of the stage using the stepper motor. (See Optional Power<br />
Stage Leveling: Section 4.5.2 for more information.)<br />
Note: The Stage Leveling menu item is available only if the Power Leveling option is<br />
installed. (See Appendix A.)<br />
Reset Hardware Ctrl+Alt+R<br />
Select <strong>Profiler</strong> > Reset Hardware for a complete hardware reset (same as the software<br />
initialization sequence).<br />
Note: You must reset the hardware if you have aborted operation while the gantry is<br />
moving or the stage is rotating (and the theta encoder option is not installed).<br />
Rev. G <strong>Dektak</strong> 8 <strong>Manual</strong> 179
Menu and Toolbar Descriptions<br />
Setup Menu<br />
8.5 Setup Menu<br />
This pull-down menu is used for setting up the <strong>Dektak</strong> 8 (see Figure 8.5a).<br />
Configuration Settings...<br />
Figure 8.5a Setup Menu<br />
Select Setup > Configuration Settings to open the Configuration Settings dialog box, which<br />
contains five folders as described below.<br />
Appearance folder<br />
Note: Click OK after making your selections to close the dialog box. Click Apply<br />
instead of OK if you want to keep the dialog box open to select other folders.<br />
Figure 8.5b Appearance Folder<br />
• In the Vertical Display Units section, choose the units to be used when displaying<br />
vertical values.<br />
Note: You must close the <strong>Dektak</strong> application and restart it for any changes to take<br />
effect.<br />
180 <strong>Dektak</strong> 8 <strong>Manual</strong> Rev. G
Menu and Toolbar Descriptions<br />
Setup Menu<br />
• In the <strong>Dektak</strong> Visual Settings section, check the box if you want the three large side bar<br />
buttons to be displayed along the left side of the Sample Positioning and Data Plot<br />
windows. (See Side Bar Buttons: Section 1.12.9.)<br />
Working Directories folder<br />
Figure 8.5c Working Directories Folder<br />
This folder allows you to specify the default working directories for data, program, export and 3d<br />
Map files. Check the box if you want icons for the directories to appear in the various file dialog<br />
boxes (Open, Save, Save As, etc.).<br />
Rev. G <strong>Dektak</strong> 8 <strong>Manual</strong> 181
Menu and Toolbar Descriptions<br />
Setup Menu<br />
Diagnostics folder<br />
Figure 8.5d Diagnostics Folder<br />
• The Diagnostics folder is for engineering use only.<br />
Shortcuts folder<br />
Figure 8.5e Shortcuts Folder<br />
This folder allows you to assign the F11 and F12 keys to a selected analytical function. (See<br />
Keyboard Shortcuts: Section 3.1.4 for more information.)<br />
182 <strong>Dektak</strong> 8 <strong>Manual</strong> Rev. G
Illumination folder<br />
Figure 8.5f Illumination Folder<br />
Menu and Toolbar Descriptions<br />
Setup Menu<br />
This folder allows you to set the increment to be used when changing the sample illumination (see<br />
Stylus Reticle Alignment: Section 3.4.5). Enter a value between 1 and 255 for the Illumination<br />
Increment for the Low Mag Camera and for the High Mag Camera. The default value for each<br />
camera is 3.<br />
Rev. G <strong>Dektak</strong> 8 <strong>Manual</strong> 183
Menu and Toolbar Descriptions<br />
Setup Menu<br />
Leveling<br />
Figure 8.5g Leveling Folder<br />
This folder allows you to determine the mechanical direction of the stage movement when the<br />
Stage Leveling menu item is selected.<br />
Note: The Leveling folder is available only if the Power Leveling option is installed.<br />
(See Appendix A.)<br />
184 <strong>Dektak</strong> 8 <strong>Manual</strong> Rev. G
Theta Encoder<br />
Figure 8.5h Theta Encoder Folder<br />
Menu and Toolbar Descriptions<br />
Setup Menu<br />
This folder provides a box for the appropriate Conversion Factor for the installed encoder, and<br />
allows Reverse Polarity to be selected if required by the installed encoder. These settings are<br />
determined at the factory.<br />
Note: The Theta Encoder folder is available only if the Power-Theta and Theta-<br />
Encoder options are installed. (See Appendix A.)<br />
Rev. G <strong>Dektak</strong> 8 <strong>Manual</strong> 185
Menu and Toolbar Descriptions<br />
Calibration Menu<br />
8.6 Calibration Menu<br />
This pull-down menu is used for calibrating various operations of the system.<br />
Stylus Force...<br />
Figure 8.6a Calibration Menu<br />
This selection opens the Force Calibration dialog box.<br />
Figure 8.6b Force Calibration Dialog Box<br />
186 <strong>Dektak</strong> 8 <strong>Manual</strong> Rev. G
Menu and Toolbar Descriptions<br />
Calibration Menu<br />
In this dialog box you can choose the measurement range in the Stylus LVDT section, and<br />
manually select the amount of force to be placed on the stylus to change the position of the stylus in<br />
the Force DAC section.<br />
To calibrate the stylus force, follow the instructions given in the three steps listed at the right side of<br />
the dialog box.<br />
Vertical<br />
Select Calibration > Vertical to open the vertical submenu, which offers the following two<br />
choices.<br />
Set...<br />
Clear...<br />
Select Set or Clear to display a dialog box for setting and clearing the vertical calibration of the<br />
<strong>Dektak</strong> 8. (See Vertical Calibration: Section 9.2 for detailed information.)<br />
COR of Stage...<br />
Select Calibration > COR of Stage to open the Calibration Wizard for the center of rotation<br />
(COR) of the stage.<br />
Note: There are two different Wizards for COR calibration, depending on whether or<br />
not the Power-Theta option is installed.<br />
Follow the step-by-step instructions presented in the Wizard to calibrate the center of rotation of the<br />
stage. (See Calibration Wizards: Section 9.7 for detailed information.)<br />
Theta<br />
Select Calibration > Theta to open the Calibration Wizard for the theta calibration.<br />
Note: This Wizard is available only if the Power-Theta option is installed.<br />
Follow the step-by-step instructions presented in the Wizard to auto calibrate the theta motor. (See<br />
Calibration Wizards: Section 9.7 for detailed information.)<br />
Rev. G <strong>Dektak</strong> 8 <strong>Manual</strong> 187
Menu and Toolbar Descriptions<br />
Calibration Menu<br />
Gantry Range...<br />
Select Calibration > Gantry Range to open the Calibration Wizard for the gantry range<br />
calibration. Follow the step-by-step instructions to adjust the software limits of the gantry motion<br />
to be coincident with the hardware limit switches for the gantry. (See Calibration Wizards:<br />
Section 9.7 for detailed information.)<br />
Gantry Orthogonality...<br />
Select Calibration > Gantry Orthogonality to open the Calibration Wizard for the gantry<br />
orthogonality calibration. Follow the step-by-step instructions to use a sample containing known<br />
orthogonal lines to adjust the gantry orthogonality. (See Calibration Wizards: Section 9.7 for<br />
detailed information.)<br />
Stage Backlash...<br />
Select Calibration > Stage Backlash to open the Calibration Wizard for the backlash<br />
calibration. Follow the step-by-step instructions to enable the backlash algorithm. The algorithm is<br />
enabled when a value other than 0 is in the X and Y fields. Backlash values are in µm for the gantry<br />
axes, and in degrees for stage theta (if appropriate). A value of 1000 µm is optimal. Enter 0 to<br />
disable the algorithm. (See Calibration Wizards: Section 9.7.)<br />
When the stage automatically positions for scanning, if the anti-backlash algorithm is enabled the<br />
scan location is approached from the left. This eliminates repeatability errors due to backlash in the<br />
gears.<br />
188 <strong>Dektak</strong> 8 <strong>Manual</strong> Rev. G
8.7 Window Menu<br />
This pull-down menu provides access to the various <strong>Dektak</strong> windows (see Figure 8.7a).<br />
Automation Programs Ctrl+1<br />
Figure 8.7a Window Menu<br />
Menu and Toolbar Descriptions<br />
Window Menu<br />
Select Window > Automation Programs to make alterations to the automation programs.<br />
Scan Routines Ctrl+2<br />
Select Window > Scan Routines to edit the scan parameters.<br />
Sample Positioning Ctrl+3<br />
This selection enables a real-time video display allowing you to position the stylus accurately to the<br />
points of interest on a sample.<br />
Data Plot Ctrl+4<br />
You can access the Data Plot selection only after a scan routine has run and plotted, or if previously<br />
saved scan data has been loaded from a file. The data plot screen displays the scaled profile trace.<br />
Rev. G <strong>Dektak</strong> 8 <strong>Manual</strong> 189
Menu and Toolbar Descriptions<br />
Help Menu<br />
Auto Prog Summary Ctrl+5<br />
This selection allows you to access the Auto Program Summary. Once APS is enabled in the<br />
Automation Program window and the automation program has run, the data will display.<br />
Alternatively, you can load and display APS data that was previously saved in a file.<br />
Close All Windows Ctrl+6<br />
8.8 Help Menu<br />
Select Window > Close All Windows to return to the <strong>Dektak</strong> Startup window (see Figure 8.1a).<br />
Contents F1<br />
Figure 8.8a Help Menu<br />
Select Help > Contents to display the Help system, or the <strong>Dektak</strong>8-Help.pdf file. You can also<br />
open Help by pressing F1 on the keyboard.<br />
About...<br />
Select Help > About to view the <strong>Dektak</strong> version, a list of installed options, and system<br />
information.<br />
190 <strong>Dektak</strong> 8 <strong>Manual</strong> Rev. G
8.9 Automation Programs Window Menu Selections<br />
Menu and Toolbar Descriptions<br />
Automation Programs Window Menu Selections<br />
When the Automation Programs window is open, two additional menu selections are provided<br />
(see Figure 8.9a). These menus are briefly described below. A more detailed description of the use<br />
and functions of the menu items is provided in Editing an Automation Program: Section 5.3 and<br />
Deskew: Section 5.7.<br />
8.9.1 Edit Menu<br />
Figure 8.9a Automation Program Window: Edit Menu and Deskew Menu<br />
Insert Default Scan… Insert<br />
Inserts a default scan routine at the highlighted scan in the list, or at the specified scan index<br />
number.<br />
Delete Scan Delete<br />
Removes the highlighted scan from the list.<br />
Delete Scan Range Ctrl+Delete<br />
Removes scans from the list within a specified range<br />
Copy To… Ctrl+C<br />
Copies the highlighted scan to a specified location in the list.<br />
Rev. G <strong>Dektak</strong> 8 <strong>Manual</strong> 191
Menu and Toolbar Descriptions<br />
Automation Programs Window Menu Selections<br />
Copy To Range… Ctrl+A<br />
Copies the highlighted scan to each of a specified range of scan locations in the list.<br />
8.9.2 Deskew Menu<br />
Set Program Deskew Points…<br />
Establish deskew points on a reference sample for an automation program (see Establishing<br />
Program Deskew Points: Section 5.7.1).<br />
Clear Program Deskew Points<br />
Clear the deskew points from the automation program.<br />
192 <strong>Dektak</strong> 8 <strong>Manual</strong> Rev. G
8.10 Scan Routines Window Menu Selections<br />
Menu and Toolbar Descriptions<br />
Scan Routines Window Menu Selections<br />
When the Scan Routines window is open, two additional menu selections are provided (see Figure<br />
8.10a). These menus are briefly described below. A more detailed description of the use and<br />
functions of the menu items is provided in Analytical Functions: Section 5.5.4 and Establishing<br />
Scan Deskew Points: Section 5.7.2.<br />
8.10.1 Edit Menu<br />
Note: See Deskew Menu: Section 8.9.2 for a brief description of the Deskew menu.<br />
Figure 8.10a Scan Routines Window: Edit Menu and Deskew Menu<br />
Next Ctrl+><br />
Makes the next scan in the automation program list the active scan.<br />
Previous Ctrl+<<br />
Makes the previous scan in the automation program list the active scan.<br />
GoTo... Ctrl+G<br />
Makes the specified scan in the automation program list the active scan. Type the scan number in<br />
the pop-up Go To dialog box and press the ENTER key.<br />
Append Analytical Functions… Insert<br />
Opens the Analytical Functions dialog box, where functions may be selected to be attached to the<br />
scan routines.<br />
Rev. G <strong>Dektak</strong> 8 <strong>Manual</strong> 193
Menu and Toolbar Descriptions<br />
Scan Routines Window Menu Selections<br />
Delete Analytical Functions… Delete<br />
Opens the Delete Analytical Functions dialog box, where one or more analytical functions may be<br />
deleted from the scan routines.<br />
Global Edit Mode Ctrl+B<br />
Toggles the Global Edit Mode on or off. When on, changes made to the current scan routine are<br />
also made in all the other scan routines within a multiscan automation program.<br />
8.10.2 Deskew Menu<br />
Set Scan Deskew Points…<br />
Establish deskew points on a reference sample for the current scan routine (see Establishing Scan<br />
Deskew Points: Section 5.7.2).<br />
Clear Scan Deskew Points<br />
Clear the deskew points from the current scan routine.<br />
194 <strong>Dektak</strong> 8 <strong>Manual</strong> Rev. G
8.11 Sample Positioning Window Menu Selections<br />
8.11.1 Additional Menu Selections<br />
Menu and Toolbar Descriptions<br />
Sample Positioning Window Menu Selections<br />
When the Sample Positioning window is open, two additional menu selections are provided (see<br />
Figure 8.11a). The Edit menu is briefly described below. A more detailed description of the use and<br />
functions of the menu items is provided in Define Scan Location and Length: Section 5.4.1,<br />
Establishing Program Deskew Points: Section 5.7.1 and Establishing Scan Deskew Points:<br />
Section 5.7.2.<br />
Edit Menu<br />
Note: See Deskew Menu: Section 8.9.2 for a brief description of the Deskew menu.<br />
Figure 8.11a Sample Positioning Window: Edit Menu and Deskew Menu<br />
Define Scan Location... Ctrl+L<br />
Select Edit > Define Scan Location to open the Location for Routine #: m of n dialog box (see<br />
Figure 8.11b). The Current Location section shows the x and y coordinates of the current position<br />
of the stylus, as well as the rotatonal angle T of the stage (if the Power-Theta option is installed).<br />
Figure 8.11b Location for Routine #: m of n Dialog Box<br />
• If you want to change any of the values shown, type them into the appropriate fields and<br />
click the Enter button in this section to accept the changes.<br />
Rev. G <strong>Dektak</strong> 8 <strong>Manual</strong> 195
Menu and Toolbar Descriptions<br />
Sample Positioning Window Menu Selections<br />
• To display scan location values for other routines, click the arrows in the Scan Browser<br />
section, or enter the number of the desired scan routine in the Go to field. Then click the<br />
Enter button in this section.<br />
• Click the close box in the upper right corner of the dialog box when you have finished.<br />
Define Scan Length... Ctrl+H<br />
Select Edit > Define Scan Length to specify the length of a scan, starting at the location defined in<br />
the Location for Routine #: m of n dialog box. Follow the instructions shown in the upper left<br />
corner of the camera view pane: “Roll track ball in X direction along scan line.Then click the left<br />
mouse button to define the scan length.” When you click the mouse button, the Length for<br />
Routine #: m of n dialog box opens (see Figure 8.11c).<br />
Figure 8.11c Define Scan Length Dialog Box<br />
• If you want to change the value shown, type it into the field in the Length section and<br />
click the Enter button in this section to accept the change.<br />
• To display scan length values for other routines, click the arrows in the Scan Browser<br />
section, or enter the number of the desired scan routine in the Go to field. Then click the<br />
Enter button in this section.<br />
• Click the close box in the upper right corner of the dialog box when you have finished.<br />
Go To Scan Routine... Ctrl+G<br />
Makes the specified scan in the automation program list the active scan. Type the scan number in<br />
the pop-up Go To dialog box and press the ENTER key.<br />
196 <strong>Dektak</strong> 8 <strong>Manual</strong> Rev. G
8.11.2 Deskew Menu<br />
Set Program Deskew Points…<br />
Menu and Toolbar Descriptions<br />
Sample Positioning Window Menu Selections<br />
Establish deskew points on a reference sample for an automation program (see Establishing<br />
Program Deskew Points: Section 5.7.1).<br />
Clear Program Deskew Points<br />
Clear the deskew points from the automation program.<br />
Set Scan Deskew Points…<br />
Establish deskew points on a reference sample for the current scan routine (see Establishing Scan<br />
Deskew Points: Section 5.7.2).<br />
Clear Scan Deskew Points<br />
Clear the deskew points from the current scan routine.<br />
8.11.3 Pop-Up Menu Selections<br />
When the Sample Positioning window is open, you can open a pop-up menu (see Figure 8.11d) by<br />
right-clicking the mouse in the camera view pane. Several of the menu items are the same as ones<br />
listed in the Edit, Run, <strong>Profiler</strong> and Deskew menus. The other menu items are described below.<br />
Rev. G <strong>Dektak</strong> 8 <strong>Manual</strong> 197
Menu and Toolbar Descriptions<br />
Sample Positioning Window Menu Selections<br />
Save Video Image...<br />
Figure 8.11d Sample Positioning Window Pop-Up Menu<br />
The video image of the sample surface can be saved as an image file which can be exported into<br />
other programs or documents for later viewing. You can choose to save the video image as a jpeg<br />
file (.jpg extension), a bitmap file (.bmp extension), a tiff file (.tif extension) or a tga file (.tga<br />
extension). The procedure for saving the video image is described below.<br />
1. In the Sample Positioning window, adjust the focus and sample position until the desired<br />
video image of the sample surface is displayed on the screen.<br />
2. Right-click the mouse anywhere in the video/graphics display area.<br />
3. Click Save Video Image in the pop-up menu..<br />
4. The Save Video Image dialog box displays, enabling the current video image to be saved in<br />
the format you select. Enter the desired file name and directory location and click OK.<br />
198 <strong>Dektak</strong> 8 <strong>Manual</strong> Rev. G
Video Overlay Settings...<br />
Menu and Toolbar Descriptions<br />
Sample Positioning Window Menu Selections<br />
Select Video Overlay Settings to open the Video Settings dialog box. This dialog box allows you<br />
to adjust parameters on the video card. See Video Overlay Adjustment: Section 9.10.6.<br />
Video<br />
Select Video to open the video submenu, which offers the following three choices.<br />
Video Only<br />
Select Video > Video Only to project the video image of the sample surface from the <strong>Dektak</strong> 8<br />
camera on the monitor.<br />
Graphics Only<br />
Select Video > Graphics Only to display the graphic screen on the monitor without the video<br />
image.<br />
Video and Graphics<br />
Select Video > Video and Graphics to superimpose the graphic screen over the video image of the<br />
sample surface.<br />
Stylus Reticule<br />
Select Stylus Reticule to open the stylus reticule submenu, which offers the following two choices.<br />
Align...<br />
Select Stylus Reticule > Align to open the Stylus Alignment window, where you can align the<br />
targeting cursor to the stylus tip. Then double click the left mouse button to open a Confirmation<br />
dialog box, where you can choose whether or not to update the stylus reticule location, or cancel<br />
and close the window. (See Stylus Reticle Alignment: Section 3.4.5 for more information.)<br />
Reset...<br />
Select Stylus Reticule > Reset to open a Confirmation dialog box, where you can choose whether<br />
or not to reset the stylus reticule location to its default (centered) location.<br />
Rev. G <strong>Dektak</strong> 8 <strong>Manual</strong> 199
Menu and Toolbar Descriptions<br />
Sample Positioning Window Menu Selections<br />
Update Alignment Reticule<br />
Select Update Alignment Reticule to align the feature reticule with surface features away from the<br />
stylus to more accurately position the stylus prior to scanning. (See Feature Reticle Alignment:<br />
Section 3.4.6 for more information.)<br />
200 <strong>Dektak</strong> 8 <strong>Manual</strong> Rev. G
8.12 Data Plot Window Menu Selections<br />
Menu and Toolbar Descriptions<br />
Data Plot Window Menu Selections<br />
When the Data Plot window is open, additional menu selections are provided (see Figure 8.12a).<br />
These menus are briefly described below. A more detailed description of the use and functions of<br />
the menu items is provided in Single Scan Operation: Section 4 and Analytical Functions:<br />
Section Chapter 6 of this manual.<br />
8.12.1 Edit Menu<br />
Figure 8.12a Data Plot Window: Edit, Plot and Analysis Menus<br />
Delete Results... Delete<br />
Deletes selected analytic results (if any). Select (highlight) the analytic result in the list at the left<br />
side of the Data Plot window, and then select Edit > Delete Results... In the pop-up Delete<br />
Analytical Results dialog box, choose one of the following:<br />
• Select Delete 1 Item(s) to remove the highlighted analytic result from the list.<br />
• Type a number in the field to remove that number of analytic results from the list,<br />
starting with the highlighted one.<br />
• Select Delete All to remove all analytic results from the list.<br />
Enter Software Leveling<br />
Select Edit > Enter Software Leveling to capture the current positions of the R and M cursors.<br />
Rev. G <strong>Dektak</strong> 8 <strong>Manual</strong> 201
Menu and Toolbar Descriptions<br />
Data Plot Window Menu Selections<br />
8.12.2 Plot Menu<br />
Replot F6<br />
Re-plots the trace according to the boundaries settings. Also redisplays the original boundaries if<br />
no boundary box is being drawn on the plot.<br />
Level F7<br />
Levels the trace at the current R and M cursor intercepts.<br />
Zero F8<br />
Changes the zero position of the graph vertically to align with the intercept of the R cursor and the<br />
plot.<br />
Data Type...<br />
Opens the Plot Data Type dialog box (see Figure 8.12b), where you can choose Raw, Roughness<br />
and/or Waviness in the Scan section. See Data Type Selection: Section 6.10 for details.<br />
Note: The Step Detection and Stress sections in this dialog box are for use with the<br />
optional Step Detection and Stress Measurement software packages. See<br />
Appendix A (Options, Accessories and Replacement Parts) for the<br />
descriptions and part numbers of these options. The stress measurement option<br />
is described in Appendix B, and the step detection option is described in<br />
Appendix C.<br />
202 <strong>Dektak</strong> 8 <strong>Manual</strong> Rev. G
Clear Bands<br />
Figure 8.12b Plot Data Type Dialog Box<br />
Resets the bands to zero width at the R and M cursors.<br />
Default Bands<br />
Menu and Toolbar Descriptions<br />
Data Plot Window Menu Selections<br />
Sets the width of the bands at the R and M cursors to the number of samples acquired in 1 second,<br />
according to the formula:<br />
Band Widths...<br />
300 * (scan length) / (number of data points)<br />
Opens the Set Bandwidths dialog box (see Figure 8.12c), where you can type in the widths of the<br />
bands at the R and at the M cursors.<br />
Rev. G <strong>Dektak</strong> 8 <strong>Manual</strong> 203
Menu and Toolbar Descriptions<br />
Data Plot Window Menu Selections<br />
Boundaries<br />
Figure 8.12c Set Bandwidths Dialog Box<br />
Select Boundaries to open the boundaries submenu, which offers the following three choices:<br />
Save...<br />
Opens the Save Boundaries dialog box, where you can assign a number between 1 and 20 to the<br />
current boundary box.<br />
Restore...<br />
Opens the Restore Boundaries dialog box, where you can recall a saved boundary box by<br />
specifying the number that you previously assigned to it.<br />
Show<br />
Displays the boundary boxes on the plot, with their assigned numbers appearing in their upper left<br />
corners.<br />
8.12.3 Analysis Menu<br />
Analytical Functions… Insert<br />
Opens the Analytical Functions dialog box, where functions may be selected in real time to be<br />
attached to the current scan and computed.<br />
Note: Analytical functions are not appended to the scan routine. In order to do that,<br />
you would use the Append Analytical Functions… item in the Scan Routines<br />
window Edit Menu (see Scan Routines Window Menu Selections: Section<br />
8.10).<br />
204 <strong>Dektak</strong> 8 <strong>Manual</strong> Rev. G
Cutoff Filters...<br />
Menu and Toolbar Descriptions<br />
Data Plot Window Menu Selections<br />
Select Analysis > Cutoff Filters to open the Roughness and Waviness Filters dialog box, where<br />
you can specify values for Long Pass and Short Pass Filter Cutoffs. Check the box if you want to<br />
apply a Band Pass Filter.<br />
Smoothing...<br />
Select Analysis > Smoothing to open the Smoothing dialog box, where you can specify the<br />
Smoothing degree and Smoothing band.<br />
Step Detection...<br />
Select Analysis > Step Detection to open the Step Detection dialog box, where you can specify<br />
various parameters for performing the step detection function. See Appendix C.1 for more<br />
information.<br />
Compute Stress...<br />
Note: The Step Detection option must be installed for this menu item to appear.<br />
Select Analysis > Compute Stress to open the Stress Parameters dialog box, where you can<br />
specify various parameters for characteristics of the substrate being measured for stress. See<br />
Appendix B.4 for more information.<br />
Stress Results...<br />
Note: The Stress Measurement option must be installed for this menu item to appear.<br />
Select Analysis > Stress Results to open the Stress Results dialog box, where you can view the<br />
maximum and average compressive and tensile stresses as calculated from the stress curve,. See<br />
Appendix B.4 for more information.<br />
Note: The Stress Measurement option must be installed, and stress computed, for this<br />
menu item to appear.<br />
Rev. G <strong>Dektak</strong> 8 <strong>Manual</strong> 205
Menu and Toolbar Descriptions<br />
Auto Prog Summary Window Menu Selections<br />
8.13 Auto Prog Summary Window Menu Selections<br />
When the Auto Prog Summary window is open, an additional menu selection is provided (see<br />
Figure 8.13a). This menu is briefly described below. A more detailed description of the use and<br />
functions of the menu items is provided in Automation Program Summary Window: Section<br />
5.6.3 of this manual.<br />
8.13.1 Edit Menu<br />
Include Ctrl+I<br />
Figure 8.13a Auto Prog Summary Window: Edit Menu<br />
Enables selected scan routine(s) to be used in the summary calculations.<br />
Exclude Ctrl+X<br />
Excludes selected scan routine(s) from being used in the summary calculations.<br />
Re-run Scans Ctrl+U<br />
Re-runs selected (highlighted) scan routines in the automation program.<br />
206 <strong>Dektak</strong> 8 <strong>Manual</strong> Rev. G
8.14 Toolbars and Icons<br />
Menu and Toolbar Descriptions<br />
Toolbars and Icons<br />
Each window includes a toolbar containing a series of icons allowing you to perform a variety of<br />
different functions with a click of a button. These icons and their respective functions are described<br />
in the sections below for each window.<br />
8.14.1 Customizing the Toolbars<br />
Note: Some similar icons have slightly different functions depending on the particular<br />
toolbar in which they appear.<br />
You can customize the toolbar in each window to include only those icons you want. To customize<br />
a toolbar, right-click anywhere in the toolbar ribbon to pop up the Toolbar menu (see Figure 8.14a).<br />
Figure 8.14a Toolbar Menu<br />
Select Customize... to open the Customize Toolbar dialog box (see Figure 8.14b).<br />
Figure 8.14b Customize Toolbar Dialog Box<br />
The dialog box shown in the figure is associated with the Startup window, but is typical of the<br />
dialog box you would obtain at any window. (The specific contents of the list boxes reflect the<br />
toolbar of the particular <strong>Dektak</strong> window that is displayed.)<br />
The Current toolbar buttons list box at the right shows the buttons (icons) currently on the toolbar<br />
for the window that is displayed.<br />
Rev. G <strong>Dektak</strong> 8 <strong>Manual</strong> 207
Menu and Toolbar Descriptions<br />
Toolbars and Icons<br />
The Available toolbar buttons list box at the left contains buttons that are not on the toolbar, but<br />
are available for use.<br />
1. To add a button (or a separator) to the toolbar, select (highlight) the item in the Available<br />
toolbar buttons list box and double-click it, or click the Add -> button. Your selection will<br />
be moved to the Current toolbar buttons list box and placed beneath the currently<br />
highlighted item in the list. (The separator line always remains available for use.)<br />
2. To remove a button (or a separator line) from the toolbar, select the item in the Current<br />
toolbar buttons list box and double-click it, or click the
Save: Save currently active automation program.<br />
Export: Export currently active automation<br />
program.<br />
Automation Program Window: Switch to<br />
Automation Program Window.<br />
Scan Routines Window: Switch to Scan<br />
Routines Window.<br />
Sample Positioning Window: Switch to Sample<br />
Positioning Window.<br />
Data Plot Window: Switch to Data Plot<br />
Window.<br />
Automation Program Summary Window:<br />
Switch to Automation Program Summary<br />
Window.<br />
8.14.3 Automation Programs Window Toolbar and Icons<br />
Figure 8.14d Automation Programs Window Toolbar<br />
Table 8.14b Automation Programs Window Toolbar Icon Descriptions<br />
Description Icon<br />
New: Create new automation program.<br />
Open: Open automation program file.<br />
Menu and Toolbar Descriptions<br />
Toolbars and Icons<br />
Rev. G <strong>Dektak</strong> 8 <strong>Manual</strong> 209
Menu and Toolbar Descriptions<br />
Toolbars and Icons<br />
Save: Save currently active automation program.<br />
Print: Print automation program parameters.<br />
Export: Export currently active automation<br />
program.<br />
Copy: Copy currently selected scan routine.<br />
Copy to Range: Copy currently selected scan<br />
routine to a range of scan routines.<br />
Delete: Delete currently selected scan routine.<br />
Delete Range: Delete range of scan routines.<br />
Run Scan Routine: Run currently active scan<br />
routine.<br />
Run Scan Routine Here: Run currently active<br />
scan routine at current stage location.<br />
Run Automation Program: Run automation<br />
program.<br />
Scan Routines Window: Switch to Scan<br />
Routines Window.<br />
Sample Positioning Window: Switch to Sample<br />
Positioning Window.<br />
Data Plot Window: Switch to Data Plot<br />
Window.<br />
Automation Program Summary Window:<br />
Switch to Automation Program Summary<br />
Window.<br />
210 <strong>Dektak</strong> 8 <strong>Manual</strong> Rev. G
8.14.4 Scan Routines Window Toolbar and Icons<br />
Figure 8.14e Scan Routines Window Toolbar<br />
Table 8.14c Scan Routines Window Toolbar Icon Descriptions<br />
New: Create new automation program.<br />
Open: Open automation program file.<br />
Save: Save currently active automation program.<br />
Print: Print automation program parameters.<br />
Previous Scan: Select and display previous scan<br />
routine of a multiscan automation program.<br />
Next Scan: Select and display next scan routine<br />
of a multiscan automation program.<br />
Append Functions: Append analytical functions<br />
to current scan routine.<br />
Global Edit: Enables and disables global edit<br />
mode for scan routines.<br />
Run Scan Routine: Run currently active scan<br />
routine.<br />
Run Automation Program: Run automation<br />
program.<br />
Automation Program Window: Switch to<br />
Automation Program Window.<br />
Menu and Toolbar Descriptions<br />
Toolbars and Icons<br />
Rev. G <strong>Dektak</strong> 8 <strong>Manual</strong> 211
Menu and Toolbar Descriptions<br />
Toolbars and Icons<br />
Sample Positioning Window: Switch to Sample<br />
Positioning Window.<br />
Data Plot Window: Switch to Data Plot<br />
Window.<br />
Automation Program Summary Window:<br />
Switch to Automation Program Summary<br />
Window.<br />
8.14.5 Sample Positioning Window Toolbar and Icons<br />
Figure 8.14f Sample Positioning Window Toolbar<br />
Table 8.14d Sample Positioning Window Toolbar Icon Descriptions<br />
Description Icon<br />
Select High Mag Camera: Select the highmagnification<br />
camera.<br />
Select Low Mag Camera: Select the lowmagnification<br />
camera.<br />
Increase Illumination: Increases sample<br />
illumination.<br />
Decrease Illumination: Decreases sample<br />
illumination.<br />
Video Display: Display video only.<br />
Graphics Display: Display graphics only.<br />
Video and Graphics Display: Display both<br />
video and graphics.<br />
212 <strong>Dektak</strong> 8 <strong>Manual</strong> Rev. G
Tower Up: Lift the stylus, raise the tower and<br />
optics to the home position.<br />
Tower Down: Lower the tower and optics to the<br />
stylus null position. The stylus is then raised<br />
from the sample.<br />
Stylus Up: Lift the stylus off the sample surface,<br />
while the tower and camera remain in the null<br />
position.<br />
Stylus Down: Move the tower down to the null<br />
position. Lower the stylus.<br />
Run Scan Routine: Run currently active scan<br />
routine.<br />
Run Scan Routine Here: Run currently active<br />
scan routine at current stage location.<br />
Run Automation Program: Run automation<br />
program.<br />
Abort: Abort current operation.<br />
Stage Control Window: Display/Hide Stage<br />
Control Window.<br />
Automation Program Window: Switch to<br />
Automation Program Window.<br />
Scan Routines Window: Switch to Scan<br />
Routines Window.<br />
Data Plot Window: Switch to Data Plot<br />
Window.<br />
Automation Program Summary Window:<br />
Switch to Automation Program Summary<br />
Window.<br />
Menu and Toolbar Descriptions<br />
Toolbars and Icons<br />
Rev. G <strong>Dektak</strong> 8 <strong>Manual</strong> 213
Menu and Toolbar Descriptions<br />
Toolbars and Icons<br />
8.14.6 Data Plot Window Toolbar and Icons<br />
Figure 8.14g Data Plot Window Toolbar<br />
Table 8.14e Data Plot Window Toolbar Icon Descriptions<br />
New: Create new automation program.<br />
Open: Open scan data file.<br />
Save: Save scan data.<br />
Export: Export scan data.<br />
Print: Print scan data and parameters.<br />
Display Analytical Functions: Display<br />
Analytical Functions Dialog Box.<br />
Level: Level the trace at the current R and M<br />
cursor intercepts.<br />
Replot: Performs the replot function on the scan<br />
trace.<br />
Toggle Data Plot Size: Toggle data plot size.<br />
Run Scan Routine: Run currently active scan<br />
routine.<br />
Run Automation Program: Run automation<br />
program.<br />
214 <strong>Dektak</strong> 8 <strong>Manual</strong> Rev. G
Abort: Abort current operation.<br />
Automation Program Window: Switch to<br />
Automation Program Window.<br />
Scan Routines Window: Switch to Scan<br />
Routines Window.<br />
Sample Positioning Window: Switch to Sample<br />
Positioning Window.<br />
Automation Program Summary Window:<br />
Switch to Automation Program Summary<br />
Window.<br />
8.14.7 Automation Program Summary Window Toolbar and Icons<br />
Figure 8.14h Automation Program Summary Window Toolbar<br />
Table 8.14f Automation Program Summary Window Toolbar Icon Descriptions<br />
New: Create new automation program.<br />
Open: Open automation program summary file.<br />
Save: Save automation program summary.<br />
Export: Export automation program summary.<br />
Print: Print automation program summary.<br />
Menu and Toolbar Descriptions<br />
Toolbars and Icons<br />
Rev. G <strong>Dektak</strong> 8 <strong>Manual</strong> 215
Menu and Toolbar Descriptions<br />
Toolbars and Icons<br />
Include Scans: Include the currently selected<br />
scans.<br />
Exclude Scans: Exclude selected scans.<br />
Rerun Scans: Rerun scans.<br />
Run Scan Routine: Run currently active scan<br />
routine.<br />
Run Scan Routine Here: Run currently active<br />
scan routine at current stage location.<br />
Run Automation Program: Run automation<br />
program.<br />
Automation Program Window: Switch to<br />
Automation Program Window.<br />
Scan Routines Window: Switch to Scan<br />
Routines Window.<br />
Sample Positioning Window: Switch to Sample<br />
Positioning Window.<br />
Data Plot Window: Switch to Data Plot<br />
Window.<br />
216 <strong>Dektak</strong> 8 <strong>Manual</strong> Rev. G
Chapter 9 Calibration, Maintenance and<br />
Warranty<br />
This chapter includes the following topics:<br />
• Care and Handling: Section 9.1<br />
• Vertical Calibration: Section 9.2<br />
• Calibrating the 65 kÅ Range: Section 9.3<br />
• Calibrating the 655 kÅ Range: Section 9.4<br />
• Calibrating the 2620 kÅ Range: Section 9.5<br />
• Clearing the Vertical Calibration: Section 9.6<br />
• Calibration Wizards: Section 9.7<br />
• Cleaning the Optical Flat: Section 9.8<br />
• Stylus Replacement and Tip Cleaning: Section 9.9<br />
• Optics Adjustment: Section 9.10<br />
• Service Contracts: Section 9.11<br />
• Major Repairs: Section 9.12<br />
• Veeco Metrology Group Statement of Limited Warranty: Section 9.13<br />
Rev. G <strong>Dektak</strong> 8 <strong>Manual</strong> 217
Calibration, Maintenance and Warranty<br />
Care and Handling<br />
9.1 Care and Handling<br />
Like any precision instrument, the <strong>Dektak</strong> 8 requires care in handling and operation. Please adhere<br />
to the following recommendations:<br />
• Allow the <strong>Dektak</strong> 8 to warm up for approximately 15 minutes prior to use to stabilize<br />
the electronics.<br />
• Do not use leadscrew lubricants. The leadscrews are Teflon-coated and require no<br />
additional lubricant.<br />
• Always position the sample so that the stylus is the only part of the stylus arm that<br />
touches the sample.<br />
• Always keep the profiler door closed when the <strong>Dektak</strong> 8 is not in use.<br />
• Never connect or disconnect any cables when power is on.<br />
• Do not lower the stylus tower without the stage assembly in place.<br />
• Do not move a sample during a scan.<br />
• Avoid vibration and shock during measurements (such as, an operator or observer<br />
touching or bumping a surface close to the instrument or the instrument itself during a<br />
scan).<br />
• Always raise stylus tower and optics assembly into maximum vertical position when the<br />
system is not in use, even when power is left on.<br />
9.1.1 Preventative Maintenance<br />
Stage<br />
Contamination of the stage will cause scan performance to decrease. To avoid this, Veeco<br />
recommends cleaning the stage regularly depending on use. Clean the stage before scanning if<br />
visible contamination is present on the exposed reference block. Generally, use the following<br />
guidelines for cleaning the stage:<br />
• Heavy use: Clean weekly, more frequently if environmental contamination is present.<br />
• Minimum use: Clean quarterly.<br />
Also see Cleaning the Optical Flat: Section 9.8.<br />
218 <strong>Dektak</strong> 8 <strong>Manual</strong> Rev. G
<strong>Dektak</strong> 8 Exterior<br />
Calibration, Maintenance and Warranty<br />
Care and Handling<br />
Clean the exposed surfaces of <strong>Dektak</strong> 8 using a soft cloth and isopropyl alcohol or deionized water.<br />
Clean the profiler at a minimum of every six months, in addition to cleaning the profiler whenever<br />
visible contamination is present.<br />
Teflon Pads<br />
CAUTION: Dispose of wipes in an appropriately labelled solventcontaminated<br />
waste container.<br />
ATTENTION: Jeter les compresses de nettoyage daus une poubelle<br />
correctement étiquettée pour les solvents.<br />
VORSICHT: Entsorgen Sie Alkohol-getränkte Tücher in einem dafür<br />
vorgesehenen Behälter für Lösungsmittel abfälle.<br />
Replace the Teflon pads of the scan follower every 3 years. Contact Veeco for service.<br />
Rev. G <strong>Dektak</strong> 8 <strong>Manual</strong> 219
Calibration, Maintenance and Warranty<br />
Vertical Calibration<br />
9.2 Vertical Calibration<br />
Software calibrate the <strong>Dektak</strong> 8 regularly (at least once a month) to ensure vertical measurement<br />
accuracy. Use 50 kÅ and 100 kÅ calibration standards for this purpose. Additional calibration<br />
standards are also available to calibrate the instrument for a wide variety of applications. Stepheight<br />
calibration standards range in thickness from 200 to 100,000 angstroms. All calibration<br />
standards are traceable to the National Institute of Standards and Technology and include a<br />
certificate of calibration.<br />
Note: Setting the vertical calibration for the Extended Vertical Range option requires<br />
use of the 750 µm step height standard provided with the option (see Section<br />
9.5.4).<br />
9.2.1 Vertical Calibration Help Window<br />
The <strong>Dektak</strong> application provides user instructions for setting vertical calibration. You can display<br />
these instructions from any window. The procedure to display the Vertical Calibration Help<br />
dialog box is described below.<br />
1. Select Calibration > Vertical > Set at the menu bar to display the Vertical Calibration<br />
Help dialog box (see Figure 9.2a).<br />
Figure 9.2a Vertical Calibration Help Dialog Box<br />
2. As shown in the dialog box, you must first run a scan using a calibration standard and<br />
calculate the average step height function on the scan data. Detailed instructions for sample<br />
positioning and running a scan are provided in Chapter 3 and Chapter 4 of this manual.<br />
3. Then you enter the actual step height of the calibration standard. The software compares the<br />
measured with the actual values of the calibration standard’s step height, and automatically<br />
sets a calibration factor.<br />
Note: You will have the choice of using the same calibration values for all<br />
measurement ranges, or calibrating each range separately. The following<br />
procedures show how to calibrate each range separately.<br />
220 <strong>Dektak</strong> 8 <strong>Manual</strong> Rev. G
9.3 Calibrating the 65 kÅ Range<br />
1. Place a 50 kÅ calibration standard on the center of the stage.<br />
Calibration, Maintenance and Warranty<br />
Calibrating the 65 kÅ Range<br />
2. Select Window > Sample Positioning to display the Sample Positioning window.<br />
3. Use Stage Tracking (see Stage Tracking: Section 3.3.1) to ensure the sample is positioned<br />
beneath the stylus.<br />
4. Select <strong>Profiler</strong> > Tower Down.<br />
5. Use the Illumination Adjustment icons to adjust the illumination to view the sample.<br />
6. Position the stylus reticule to the left of the narrowest portion of the “dog bone” on the<br />
calibration standard, so that the vertical line of the stylus reticule is parallel with the length of<br />
the dog bone (see Figure 9.3a).<br />
“Dog Bone”<br />
Stylus Reticule<br />
Figure 9.3a Stylus Reticule Position<br />
9.3.1 Scanning the 50 kÅ Calibration Standard<br />
1. Select File > Open... from the menu bar, and then in the popup dialog box select the<br />
VERT_65K.mp program from the \<strong>Dektak</strong>32\Programs directory. Click Load.<br />
2. Select Run > Scan Here from the menu bar (or press CTRL+F4 on the keyboard) to run one<br />
scan.<br />
3. Observe the trace as displayed in the Data Plot window.<br />
a. If the trace rises or falls as it progresses across the plot, level the stage (see Stage<br />
Leveling: Section 4.5).<br />
b. If the step does not start at 500 µm, move the stage in the appropriate direction and run<br />
another scan (see Define Scan Location and Length: Section 4.2). Repeat until the<br />
step starts at 500 µm.<br />
Rev. G <strong>Dektak</strong> 8 <strong>Manual</strong> 221<br />
225<br />
Wide Portion:<br />
y1,000 µm<br />
Narrow Portion:<br />
y 200 µm
Calibration, Maintenance and Warranty<br />
Calibrating the 65 kÅ Range<br />
4. The resulting plot should resemble Figure 9.3b below.<br />
9.3.2 Calculating Average Step Height<br />
Figure 9.3b 50 kÅ Calibration Standard Plot<br />
1. Select Run > Auto Program from the menu bar (or press the F5 key on the keyboard) to run<br />
the five scans in the VERT_65K.mp program.<br />
2. At the conclusion of the automation program, the Auto Prog Summary window opens to<br />
display the summary results for the measured ASH. The figures in the first column should<br />
resemble those shown in Figure 9.3c.<br />
222 <strong>Dektak</strong> 8 <strong>Manual</strong> Rev. G<br />
220B
Figure 9.3c Summary Results in APS Window of VERT_65K.mp Program<br />
9.3.3 Setting the Vertical Calibration<br />
Calibration, Maintenance and Warranty<br />
Calibrating the 65 kÅ Range<br />
1. Select Calibration > Vertical > Set... from the menu bar to open the dialog box (see Figure<br />
9.3d).<br />
Figure 9.3d Setting Vertical Calibration Parameters - 65 kÅ Range<br />
2. In the Set Vertical Calibration dialog box, select Set For This Range Only in the Set<br />
Options section.<br />
3. Enter the Measured Step Height obtained from the measured mean value of the step height<br />
(ASH) as displayed in the Auto Program Summary window.<br />
4. Enter the Actual Step Height of the step height standard. Click OK to close the dialog box.<br />
Rev. G <strong>Dektak</strong> 8 <strong>Manual</strong> 223
Calibration, Maintenance and Warranty<br />
Calibrating the 655 kÅ Range<br />
5. Select Run > Auto Program from the menu bar (or press the F5 key on the keyboard) to run<br />
the five scans in the VERT_65K.mp program.<br />
6. Compare the measured ASH (as corrected by the software) with the actual ASH of the step<br />
height (see Figure 9.3e). If the measured value is within 1% of the actual value, then the<br />
calibration has been correctly set.<br />
Figure 9.3e Example Calibration Results Using a 50 kÅ Calibration Standard<br />
9.4 Calibrating the 655 kÅ Range<br />
1. Place a 100 kÅ calibration standard on the center of the stage.<br />
2. Select Window > Sample Positioning to display the Sample Positioning window.<br />
3. Use Stage Tracking (see Stage Tracking: Section 3.3.1) to ensure the sample is positioned<br />
beneath the stylus.<br />
4. Select <strong>Profiler</strong> > Tower Down.<br />
5. Use the Illumination Adjustment icons to adjust the illumination to view the sample.<br />
6. Position the stylus reticule to the left of the narrowest portion of the “dog bone” on the<br />
calibration standard, so that the vertical line of the stylus reticule is parallel with the length of<br />
the dog bone (see Figure 9.4a).<br />
224 <strong>Dektak</strong> 8 <strong>Manual</strong> Rev. G
“Dog Bone”<br />
Stylus Reticule<br />
Figure 9.4a Stylus Reticule Position<br />
9.4.1 Scanning the 100 kÅ Calibration Standard<br />
Calibration, Maintenance and Warranty<br />
Calibrating the 655 kÅ Range<br />
1. Select File > Open... from the menu bar, and then in the popup dialog box select the<br />
VERT_655K.mp program from the \<strong>Dektak</strong>32\Programs directory. Click Load.<br />
2. Select Run > Scan Here from the menu bar (or press CTRL+F4 on the keyboard) to run one<br />
scan.<br />
3. Observe the trace as displayed in the Data Plot window.<br />
a. If the trace rises or falls as it progresses across the plot, level the stage (see Stage<br />
Leveling: Section 4.5).<br />
b. If the step does not start at 500 µm, move the stage in the appropriate direction and run<br />
another scan (see Define Scan Location and Length: Section 4.2). Repeat until the<br />
step starts at 500 µm.<br />
4. The resulting plot should resemble Figure 9.4b below.<br />
Rev. G <strong>Dektak</strong> 8 <strong>Manual</strong> 225<br />
225<br />
Wide Portion:<br />
y1,000 µm<br />
Narrow Portion:<br />
y 200 µm
Calibration, Maintenance and Warranty<br />
Calibrating the 655 kÅ Range<br />
9.4.2 Calculating Average Step Height<br />
Figure 9.4b 100 kÅ Calibration Standard Plot<br />
1. Select Run > Auto Program from the menu bar (or press the F5 key on the keyboard) to run<br />
the five scans in the VERT_655K.mp program.<br />
2. At the conclusion of the automation program, the Auto Prog Summary window opens to<br />
display the summary results for the measured ASH. The figures in the first column should<br />
resemble those shown in Figure 9.4c.<br />
226 <strong>Dektak</strong> 8 <strong>Manual</strong> Rev. G<br />
220E
Figure 9.4c Summary Results in APS Window of VERT_655K.mp Program<br />
9.4.3 Setting the Vertical Calibration<br />
Calibration, Maintenance and Warranty<br />
Calibrating the 655 kÅ Range<br />
1. Select Calibration > Vertical > Set... from the menu bar to open the dialog box (see Figure<br />
9.4d).<br />
Figure 9.4d Setting Vertical Calibration Parameters - 655 kÅ Range<br />
2. In the Set Vertical Calibration dialog box, select Set For This Range Only in the Set<br />
Options section.<br />
3. Enter the Measured Step Height obtained from the measured mean value of the step height<br />
(ASH) as displayed in the Auto Program Summary window.<br />
4. Enter the Actual Step Height of the step height standard. Click OK to close the dialog box.<br />
Rev. G <strong>Dektak</strong> 8 <strong>Manual</strong> 227<br />
220F
Calibration, Maintenance and Warranty<br />
Calibrating the 2620 kÅ Range<br />
5. Select Run > Auto Program from the menu bar (or press the F5 key on the keyboard) to run<br />
the five scans in the VERT_655K.mp program.<br />
6. Compare the measured ASH (as corrected by the software) with the actual ASH of the step<br />
height (see Figure 9.4e). If the measured value is within 1% of the actual value, then the<br />
calibration has been correctly set.<br />
Figure 9.4e Example Calibration Results Using a 100 kÅ Calibration Standard<br />
9.5 Calibrating the 2620 kÅ Range<br />
Note: If you have just performed calibration for the 655 kÅ range, and you have not<br />
moved the calibration standard or the stage, you can skip ahead to Scanning<br />
the 100 kÅ Calibration Standard: Section 9.5.1.<br />
1. Place a 100 kÅ calibration standard on the center of the stage.<br />
2. Select Window > Sample Positioning to display the Sample Positioning window.<br />
3. Use Stage Tracking (see Stage Tracking: Section 3.3.1) to ensure the sample is positioned<br />
beneath the stylus.<br />
4. Select <strong>Profiler</strong> > Tower Down.<br />
5. Use the Illumination Adjustment icons to adjust the illumination to view the sample.<br />
6. Position the stylus reticule to the left of the narrowest portion of the “dog bone” on the<br />
calibration standard, so that the vertical line of the stylus reticule is parallel with the length of<br />
the dog bone (see Figure 9.5a).<br />
228 <strong>Dektak</strong> 8 <strong>Manual</strong> Rev. G<br />
220G
“Dog Bone”<br />
Stylus Reticule<br />
Figure 9.5a Stylus Reticule Position<br />
9.5.1 Scanning the 100 kÅ Calibration Standard<br />
Calibration, Maintenance and Warranty<br />
Calibrating the 2620 kÅ Range<br />
1. Select File > Open... from the menu bar, and then in the popup dialog box select the<br />
VERT_2620K.mp program from the \<strong>Dektak</strong>32\Programs directory. Click Load.<br />
2. Select Run > Scan Here from the menu bar (or press CTRL+F4 on the keyboard) to run one<br />
scan.<br />
3. Observe the trace as displayed in the Data Plot window.<br />
a. If the trace rises or falls as it progresses across the plot, level the stage (see Stage<br />
Leveling: Section 4.5).<br />
b. If the step does not start at 500 µm, move the stage in the appropriate direction and run<br />
another scan (see Define Scan Location and Length: Section 4.2). Repeat until the<br />
step starts at 500 µm.<br />
4. The resulting plot should resemble Figure 9.5b below.<br />
Rev. G <strong>Dektak</strong> 8 <strong>Manual</strong> 229<br />
225<br />
Wide Portion:<br />
y1,000 µm<br />
Narrow Portion:<br />
y 200 µm
Calibration, Maintenance and Warranty<br />
Calibrating the 2620 kÅ Range<br />
9.5.2 Calculating Average Step Height<br />
Figure 9.5b 100 kÅ Calibration Standard Plot<br />
1. Select Run > Auto Program from the menu bar (or press the F5 key on the keyboard) to run<br />
the five scans in the VERT_2620K.mp program.<br />
2. At the conclusion of the automation program, the Auto Prog Summary window opens to<br />
display the summary results for the measured ASH. The figures in the first column should<br />
resemble those shown in Figure 9.4c for the 655 kÅ range.<br />
9.5.3 Setting the Vertical Calibration<br />
1. Select Calibration > Vertical > Set... from the menu bar to open the dialog box (see Figure<br />
9.5c).<br />
230 <strong>Dektak</strong> 8 <strong>Manual</strong> Rev. G<br />
220E
Figure 9.5c Setting Vertical Calibration Parameters - 2620 kÅ Range<br />
Calibration, Maintenance and Warranty<br />
Calibrating the 2620 kÅ Range<br />
2. In the Set Vertical Calibration dialog box, select Set For This Range Only in the Set<br />
Options section.<br />
3. Enter the Measured Step Height obtained from the measured mean value of the step height<br />
(ASH) as displayed in the Auto Program Summary window.<br />
4. Enter the Actual Step Height of the step height standard. Click OK to close the dialog box.<br />
5. Select Run > Auto Program from the menu bar (or press the F5 key on the keyboard) to run<br />
the five scans in the VERT_2620K.mp program.<br />
6. Compare the measured ASH (as corrected by the software) with the actual ASH of the step<br />
height (see Figure 9.5d). If the measured value is within 1% of the actual value, then the<br />
calibration has been correctly set.<br />
Figure 9.5d Example Calibration Results Using a 100 kÅ Calibration Standard<br />
Rev. G <strong>Dektak</strong> 8 <strong>Manual</strong> 231<br />
220H<br />
220I
Calibration, Maintenance and Warranty<br />
Calibrating the 2620 kÅ Range<br />
9.5.4 Vertical Calibration for the Extended Vertical Range Option<br />
To set the vertical calibration for the 1mm stylus (the Extended Vertical Range option), use the<br />
750 µm step height standard provided with the option (see Figure 9.5e).<br />
Figure 9.5e Calibrating the Extended Vertical Range Option<br />
Scanning on the 750 µm step height standard differs from the step height standards used in<br />
previous exercises. The measured step height (750 µm) is the height of the standard itself, not a<br />
step on the standard. Scan across the top of the standard and on to the chuck surface, calibrating to<br />
the step down (see Figure 9.5f).<br />
750 µm Step Height Standard<br />
Note: To scan the 750 µm standard, you must use the Valleys setting under Profile in<br />
the Scan Parameters dialog box (see Profile: Section 7.1.10).<br />
Figure 9.5f Scanning the 750 µm Step Height Standard<br />
0.75<br />
750 µm 030<br />
1mm Stylus Tip<br />
232 <strong>Dektak</strong> 8 <strong>Manual</strong> Rev. G
9.6 Clearing the Vertical Calibration<br />
Calibration, Maintenance and Warranty<br />
Clearing the Vertical Calibration<br />
Whenever you set the vertical calibration, the old values are automatically cleared and replaced by<br />
the new parameters. However, in some cases, it may be desirable to clear individual ranges or all<br />
ranges. This procedure is described below.<br />
1. Select Calibrate > Vertical > Clear from the menu to display the Clear Vertical<br />
Calibration dialog box (see Figure 9.6a).<br />
Note: The dialog box permits you to clear the vertical calibration from the various<br />
display ranges either individually or from all the ranges.<br />
2. Select the range or ranges to be cleared and click Clear.<br />
3. Click OK to clear the vertical calibration from the selected range or ranges and close the<br />
dialog box.<br />
9.7 Calibration Wizards<br />
Figure 9.6a Clear Vertical Calibration Dialog Box<br />
Wizards are provided in the <strong>Dektak</strong> 8 application to expedite the calibration of various mechanisms<br />
in the profiler. To open the appropriate wizard, select Calibration from the main menu, and then<br />
choose the desired operation (see Figure 9.7a).<br />
Figure 9.7a Calibration Menu<br />
Calibration Wizards<br />
Note: Theta calibration is available only if the Power-Theta option is installed.<br />
Rev. G <strong>Dektak</strong> 8 <strong>Manual</strong> 233<br />
223A
Calibration, Maintenance and Warranty<br />
Calibration Wizards<br />
All of the wizards use the same format:<br />
• The opening dialog box displays the description of the calibration procedure to be<br />
presented, and lists the requirements, if any.<br />
• The succeeding dialog boxes present the steps to follow to perform the specific<br />
calibration procedure.<br />
• When you have finished the procedure, a Confirmation dialog box pops up to allow<br />
you to save the new parameters, discard them, or return to the wizard to make changes<br />
(see Figure 9.7b).<br />
Figure 9.7b Confirmation Dialog Box for Calibration Wizards<br />
234 <strong>Dektak</strong> 8 <strong>Manual</strong> Rev. G
9.8 Cleaning the Optical Flat<br />
Calibration, Maintenance and Warranty<br />
Cleaning the Optical Flat<br />
Periodically clean the optical flat under the scan stage to ensure measurement repeatability and<br />
optimum performance. The required cleaning frequency depends on the cleanliness of the<br />
environment in which the <strong>Dektak</strong> 8 operates. You must remove the <strong>Dektak</strong> 8 scan stage in order to<br />
clean the optical flat. The procedure for removing the stage and cleaning the optical flat is<br />
described below.<br />
1. Verify the stylus and optics are positioned at their maximum vertical height and moved to the<br />
back of the profiler to provide additional clearance for removing the stage by selecting<br />
<strong>Profiler</strong> > Unload.<br />
2. Turn off the <strong>Dektak</strong> 8 profiler and computer.<br />
3. Remove the stylus (see Section 9.9.1 ).<br />
4. Remove the horizontal bezel around the stage covering the cables by removing the six screws<br />
connecting the cover to the profiler base.<br />
5. If Programmable Theta option is installed, disconnect the cable connected to the right side of<br />
the scan stage.<br />
6. Turn off the vacuum source and disconnect the vacuum line from the stage.<br />
7. Unscrew and remove the two bolts located on the left side of the stage that feed under the belt<br />
drive.<br />
8. Remove the stage by lifting it off the optical flat with two hands and set the stage upsidedown<br />
on a clean, level surface.<br />
9. Clean the stage Teflon pads and optical flat (sides and top) with lint-free, non-abrasive<br />
tissues moistened with deionized water or laboratory grade alcohol.<br />
Note: Always wipe new spots with a clean portion of the tissue to avoid transferring<br />
contamination to another area<br />
ATTENTION: Do not use other solvents, such as spectrograde acetone, as they<br />
may attack the adhesives used to mount the Teflon pads.<br />
10. Buff the optical flat and stage pads with a clean, dry lint-free wipe.<br />
Rev. G <strong>Dektak</strong> 8 <strong>Manual</strong> 235
Calibration, Maintenance and Warranty<br />
Cleaning the Optical Flat<br />
Stage/Belt<br />
Bolts<br />
ATTENTION: Do not touch the Teflon pads or the surface block after cleaning.<br />
11. Inspect the Teflon pad surfaces to ensure that no debris or excess adhesive is embedded in<br />
the pads.<br />
12. Reinstall the stage assembly. See Installing the Stage Assembly: Section 2.3 for the<br />
procedure to reinstall the stage assembly.<br />
13. Replace the horizontal bezel covering the cables and replace the six screws holding the bezel<br />
in place.<br />
14. Install the stylus (see Section 9.9.1 ).<br />
15. Turn on the <strong>Dektak</strong> 8.<br />
Note: If the scan stage does not home during initialization, you may not have<br />
reinstalled the scan stage in the correct location.<br />
Figure 9.8a Stage Removal<br />
Optical Flat Belt Drive<br />
236 <strong>Dektak</strong> 8 <strong>Manual</strong> Rev. G<br />
8086<br />
Stage Cable<br />
Connector
9.9 Stylus Replacement and Tip Cleaning<br />
9.9.1 Replacing the Stylus<br />
Calibration, Maintenance and Warranty<br />
Stylus Replacement and Tip Cleaning<br />
All <strong>Dektak</strong> 8 styli have the same shank size but differ in the radius of the diamond tip (see Figure<br />
9.9a). The procedure to remove and/or replace a stylus is described below.<br />
Figure 9.9a Stylus Assembly<br />
Note: The stylus suspension system is delicate. Use the stylus replacement fixture<br />
when removing or installing a stylus.<br />
1. Select <strong>Profiler</strong> > Tower Up to raise the stylus and optics tower to the maximum vertical<br />
position.<br />
2. Remove the stylus air shield using a small slot screwdriver to gently pry the sensor air shield<br />
down and away from the stylus head (see Figure 9.9b). Do NOT touch the stylus.<br />
Rev. G <strong>Dektak</strong> 8 <strong>Manual</strong> 237<br />
022
Calibration, Maintenance and Warranty<br />
Stylus Replacement and Tip Cleaning<br />
Figure 9.9b Removing Sensor Shield<br />
3. Remove the stylus using the stylus replacement fixture.<br />
Figure 9.9c Stylus Replacement Fixture<br />
Stylus Head<br />
Sensor Shield<br />
Note: The quick release stylus mechanism enables fast and easy stylus replacement.<br />
a. Verify the fixture is in the disengaged position (the magnet wheel is rotated so a notch is<br />
visible). See Figure 9.9d.<br />
238 <strong>Dektak</strong> 8 <strong>Manual</strong> Rev. G<br />
023<br />
(pry here)
Magnet<br />
Wheel,<br />
Notch<br />
Visible<br />
Magnet Disengaged<br />
(Stylus Released)<br />
Figure 9.9d Stylus Replacement Fixture<br />
183<br />
Alignment<br />
Pins<br />
Stylus<br />
Channel<br />
Magnet<br />
Wheel,<br />
Green Dot<br />
Visible<br />
b. Place the stylus replacement fixture underneath the scan head.<br />
Calibration, Maintenance and Warranty<br />
Stylus Replacement and Tip Cleaning<br />
c. Align the pins of the stylus replacement fixture with the stylus sensor housing<br />
(see Figure 9.9e).<br />
Figure 9.9e Align Stylus Replacement Fixture<br />
d. Push the stylus replacement fixture up until the bottom of the scan head is against the<br />
top of the stylus replacement fixture (see Figure 9.9f). Be sure the stylus is seated in the<br />
channel on the fixture. If necessary, gently tap the end of the stylus shaft (NOT the tip)<br />
with your finger to align the shaft with the channel.<br />
Figure 9.9f Scan Head flush with Fixture<br />
Magnet Engaged<br />
(Stylus Captured)<br />
Rev. G <strong>Dektak</strong> 8 <strong>Manual</strong> 239<br />
186<br />
187<br />
184
Calibration, Maintenance and Warranty<br />
Stylus Replacement and Tip Cleaning<br />
Note: If the stylus is not properly seated in the channel, it will tend to rotate when you<br />
remove it.<br />
e. Rotate the magnet wheel to engage the magnet in the stylus replacement fixture.<br />
f. Carefully lower the stylus replacement fixture.<br />
The stylus is held in place magnetically (see Figure 9.9g).<br />
Figure 9.9g Fixture with Captured Stylus<br />
4. To remove the stylus from the stylus replacement fixture, disengage the magnet (rotate the<br />
wheel in either direction so a notch is visible) and gently lift the stylus out of the fixture.<br />
To install the stylus:<br />
Stylus<br />
5. Replace the stylus with a new one if necessary.<br />
6. Place the stylus in the stylus replacement fixture and rotate the magnet wheel back to the<br />
engaged position.<br />
7. Raise the stylus replacement fixture until it is once again in place under the scan head.<br />
8. Rotate the magnet wheel to the disengaged position.<br />
9. Carefully lower the stylus replacement fixture.<br />
10. Replace the sensor shield, being very careful not to touch the stylus tip.<br />
11. Align the stylus reticle position with the video image of the stylus tip.<br />
Note: See below for instructions for adjusting the video image of the stylus tip.<br />
240 <strong>Dektak</strong> 8 <strong>Manual</strong> Rev. G<br />
188
9.9.2 Cleaning the Stylus<br />
Calibration, Maintenance and Warranty<br />
Stylus Replacement and Tip Cleaning<br />
A stylus may need to be cleaned periodically to remove any dust particles from the tip. Use the<br />
following procedure to clean the stylus tip.<br />
1. Select Stylus > Tower Up to raise the tower to the maximum vertical position.<br />
2. Remove any samples from the stage.<br />
3. Clean the tip using a lint-free swab moistened with deionized water or laboratory grade<br />
alcohol. Lightly touch the tip with the lint-free swab to remove dust. You may also use a<br />
small soft-bristle paintbrush.<br />
CAUTION: Dispose of wipes in an appropriately labelled solventcontaminated<br />
waste container.<br />
ATTENTION: Jeter les compresses de nettoyage daus une poubelle<br />
correctement étiquettée pour les solvents.<br />
VORSICHT: Entsorgen Sie Alkohol-getränkte Tücher in einem dafür<br />
vorgesehenen Behälter für Lösungsmittel abfälle.<br />
Rev. G <strong>Dektak</strong> 8 <strong>Manual</strong> 241
Calibration, Maintenance and Warranty<br />
Optics Adjustment<br />
9.10 Optics Adjustment<br />
After replacing a stylus, you may need to adjust the optics to align the video image so that the<br />
stylus tip appears in the center of the screen. Alignment and focus of the <strong>Dektak</strong> 8 optics must be<br />
performed in the sequence outlined here. If a specific adjustment is acceptable as is, skip to the next<br />
instruction.<br />
Note: If the optical setup is substantially out of range, multiple iterations of this<br />
procedure may be required to optimize all adjustments.<br />
The following topics are included section:<br />
• Low Mag Camera Alignment: Section 9.10.1<br />
• Low Mag Camera Focus and Alignment: Section 9.10.2<br />
• High Mag Camera Alignment: Section 9.10.3<br />
• High Mag Camera Rotation: Section 9.10.4<br />
• High Mag Camera Focus: Section 9.10.5<br />
• Video Overlay Adjustment: Section 9.10.6<br />
242 <strong>Dektak</strong> 8 <strong>Manual</strong> Rev. G
9.10.1 Low Mag Camera Alignment<br />
Calibration, Maintenance and Warranty<br />
Optics Adjustment<br />
1. Select Window > Sample Positioning and select the LOW MAG CAMERA button.<br />
2. Ensure the reticle is set to the default position in the center of the screen. In the Low Mag<br />
Camera view, align the end of the stylus tip with the red stylus reticle.<br />
3. Loosen (but Do Not Remove) the two LIS3 sensor fasteners (see Figure 9.10a).<br />
LIS3 Sensor Fasteners<br />
LIS3 Sensor<br />
Housing<br />
Figure 9.10a LIS3 Sensor<br />
4. While carefully avoiding the stylus tip and sensor wiring, grasp the sides of the sensor<br />
housing and adjust the position while aligning the tip of the stylus with the reticle.<br />
5. Retighten the two screws while restraining the housing by hand.<br />
Note: Low Mag Camera focus may also affect the alignment of the stylus in the Low<br />
Mag Camera view. If the desired stylus alignment cannot be achieved, proceed<br />
to the next step.<br />
Rev. G <strong>Dektak</strong> 8 <strong>Manual</strong> 243<br />
817S
Calibration, Maintenance and Warranty<br />
Optics Adjustment<br />
9.10.2 Low Mag Camera Focus and Alignment<br />
Vertical<br />
Slide<br />
Knob<br />
1. Adjust the knurled vertical-slide knob to the center of its travel (see Figure 9.10b).<br />
2. Loosen the Low Mag focus and alignment setscrews. by turning each counter-clockwise<br />
once. Do not remove the screws.<br />
3. Raise or lower the Low Mag Camera to achieve best focus and alignment when the stylus<br />
touches the sample.<br />
4. Tighten the focus and alignment setscrews.<br />
Figure 9.10b Low Mag Camera Focus and Alignment<br />
Low Mag<br />
Camera<br />
Low Mag Focus<br />
and Alignment<br />
Screws<br />
(High Mag<br />
Camera)<br />
244 <strong>Dektak</strong> 8 <strong>Manual</strong> Rev. G<br />
815S
9.10.3 High Mag Camera Alignment<br />
Select the HIGH MAG CAMERA button.<br />
Calibration, Maintenance and Warranty<br />
Optics Adjustment<br />
In the High Mag Camera view, align the tip of the stylus with the red stylus reticle using the<br />
position adjustment screws on the fold mirror as described below (see Figure 9.10c).<br />
High Mag<br />
Camera<br />
Vertical<br />
Adjustment<br />
Screw<br />
Vertical and<br />
Horizontal<br />
Adjustment<br />
Screw<br />
Figure 9.10c High Mag Camera and Fold Mirror<br />
1. Use the adjustment screw at the upper left side of the fold mirror for vertical adjustment.<br />
2. Use the adjustment screw at the lower right side of the fold mirror for horizontal adjustment.<br />
It is advised to align the stylus by turning the appropriate setscrew counter-clockwise. If the desired<br />
position is not obtainable, turn the lower left adjustment screw very slightly clockwise. (This<br />
setscrew affects both vertical and horizontal positioning.)<br />
Note: Turning the lower left adjustment screw excessively clockwise can damage the<br />
mirror.<br />
Rev. G <strong>Dektak</strong> 8 <strong>Manual</strong> 245<br />
816S<br />
High Mag Camera<br />
Rotational<br />
Adjustment Screw<br />
Fold Mirror<br />
Horizontal<br />
Adjustment<br />
Screw
Calibration, Maintenance and Warranty<br />
Optics Adjustment<br />
9.10.4 High Mag Camera Rotation<br />
1. Loosen the High Mag Camera rotational alignment screw (see Figure 9.10c).<br />
2. Rotate the High Mag Camera housing to orient the image to the camera view pane.<br />
3. Tighten the High Mag Camera rotational alignment screw. Do not overtighten.<br />
9.10.5 High Mag Camera Focus<br />
1. Loosen the High Mag Lens locking setscrew (see Figure 9.10d).<br />
2. Carefully rotate the lens to achieve proper focus when the stylus touches the sample.<br />
3. Tighten the locking setscrew when finished.<br />
High Mag<br />
Lens<br />
Figure 9.10d High Mag Focus<br />
(Fold Mirror)<br />
High Mag Lens<br />
Locking Screw<br />
246 <strong>Dektak</strong> 8 <strong>Manual</strong> Rev. G<br />
HighMagLens
9.10.6 Video Overlay Adjustment<br />
Calibration, Maintenance and Warranty<br />
Optics Adjustment<br />
You can also change parameters on the video card to improve the optics. Alter the digital<br />
processing parameters in the Video Setup dialog box. Use the following procedure to access this<br />
box:<br />
1. Select Setup > Video Overlay Settings from the menu bar to open the Video Setup dialog<br />
box (see Figure 9.10e). This dialog box allows you to adjust parameters on the video card.<br />
Figure 9.10e Video Setup Dialog Box<br />
Note: Do NOT alter any parameters in the Standard and Input Type sections of the<br />
Video Setup dialog box.<br />
2. Change the parameters in the Adjustments section you wish to alter, and click OK to return<br />
to the <strong>Dektak</strong> application software.<br />
Rev. G <strong>Dektak</strong> 8 <strong>Manual</strong> 247/(Next Page is Blank)<br />
157A<br />
Adjustments Section<br />
Standard Section<br />
(Do not alter)<br />
Input Type Section<br />
(Do not alter)
9.11 Service Contracts<br />
To maximize equipment operation and avoid major repairs, Veeco offers customized service<br />
contracts to meet customer needs and to extend the one-year factory warranty. Service contracts<br />
include routine maintenance to keep the equipment up to factory specification.<br />
For more information on service contracts, contact your local Veeco Service Center.<br />
9.12 Major Repairs<br />
The <strong>Dektak</strong> 8 cannot be readily repaired after major component failures without the assistance of<br />
specialized test equipment and software routines. In the event of equipment failure, please call the<br />
Veeco Service Center nearest you for assistance.<br />
Before calling the Veeco Service Center, do the following:<br />
1. Restart the <strong>Dektak</strong> 8 by closing the Windows application, turn off the system, then turning<br />
the power back on.<br />
2. Verify all cables are properly connected and free of obvious damage.<br />
3. Verify all power cords are connected properly.<br />
4. Verify the sample illumination is properly adjusted.<br />
5. Verify the stylus tower moves up and down when you activate the Tower Up and Tower<br />
Down functions.<br />
Note: All parts of the <strong>Dektak</strong> 8 must be serviced by the manufacturer or designated<br />
representative.
Calibration, Maintenance and Warranty<br />
Major Repairs<br />
WARNING: Never open the profiler, E-Box, computer console or video<br />
monitor when connected to the primary power source. Major<br />
service should only be performed by qualified, factory-trained,<br />
Veeco service personnel.<br />
AVERTISSEMENT: Ne jamais ouvrir l’ordinateur ou l’écran video lorsqu’ils sont<br />
branchés sur une source de courant. Toute intervention majeure<br />
devrait seulement être réalisée par du personnel qualifié et formé<br />
par Veeco.<br />
WARNUNG: Computerkonsole und Videomonitor dürfen unter keinen<br />
Umständen geöffnet werden, während sie an die<br />
Spannungsversorgung angeschlossen sind. Größere<br />
Wartungsarbeiten sollten nur von qualifiziertem, und durch Veeco<br />
ausgebildetes Personal durchgeführt werden.<br />
Rev. G <strong>Dektak</strong> 8 <strong>Manual</strong> 249
Calibration, Maintenance and Warranty<br />
Veeco Metrology Group Statement of Limited Warranty<br />
9.13 Veeco Metrology Group Statement of Limited Warranty<br />
This product is covered by the terms of the Veeco standard warranty as in effect on the date of<br />
shipment and as reflected on Veeco's Order Acknowledgement and Quote. While a summary of the<br />
warranty statement is provided below, please refer to the Order Acknowledgement or Quote for a<br />
complete statement of the applicable warranty provisions. In addition, a copy of these warranty<br />
terms may be obtained by contacting Veeco.<br />
WARRANTY. Seller warrants to the original Buyer that new equipment will be free of defects in<br />
material and workmanship for a period of one year commencing (x) on final acceptance or (y) 90<br />
days from shipping, whichever occurs first. This warranty covers the cost of parts and labor<br />
(including, where applicable, field service labor and travel required to restore the equipment to<br />
normal operation).<br />
Seller warrants to the original Buyer that replacement parts will be new or of equal functional<br />
quality and warranted for the remaining portion of the original warranty or 90 days, whichever is<br />
longer.<br />
Seller warrants to the original Buyer that software will perform in substantial compliance with the<br />
written materials accompanying the software. Seller does not warrant uninterrupted or error-free<br />
operation.<br />
Seller's obligation under these warranties is limited to repairing or replacing at Seller's option<br />
defective non-expendable parts or software. These services will be performed, at Seller's option, at<br />
either Seller's facility or Buyer's business location. For repairs performed at Seller's facility, Buyer<br />
must contact Seller in advance for authorization to return equipment and must follow Seller's<br />
shipping instructions. Freight charges and shipments to Seller are Buyer's responsibility. Seller will<br />
return the equipment to Buyer at Seller's expense. All parts used in making warranty repairs will be<br />
new or of equal functional quality.<br />
The warranty obligation of Seller shall not extend to defects that do not impair service or to provide<br />
warranty service beyond normal business hours, Monday through Friday (excluding Seller<br />
holidays). No claim will be allowed for any defect unless Seller shall have received notice of the<br />
defect within thirty days following its discovery by Buyer. Also, no claim will be allowed for<br />
equipment damaged in shipment sold under standard terms of F.O.B. factory. Within thirty days of<br />
Buyer's receipt of equipment, Seller must receive notice of any defect which Buyer could have<br />
discovered by prompt inspection. Products shall be considered accepted 30 days following (a)<br />
installation, if Seller performs installation, or (b) shipment; unless written notice of rejection is<br />
provided to Seller within such 30-day period.<br />
Expendable items, including, but not limited to, styli, lamps, pilot lights, filaments, fuses,<br />
mechanical pump belts, V-belts, wafer transport belts, pump fluids, O-rings and seals ARE<br />
SPECIFICALLY EXCLUDED FROM THE FOREGOING WARRANTIES AND ARE NOT<br />
WARRANTED. All used equipment is sold 'AS IS, WHERE IS,' WITHOUT ANY WARRANTY,<br />
EXPRESS OR IMPLIED.<br />
Seller assumes no liability under the above warranties for equipment or system failures resulting<br />
from (1) abuse, misuse, modification or mishandling; (2) damage due to forces external to the<br />
machine including, but not limited to, acts of God, flooding, power surges, power failures,<br />
defective electrical work, transportation, foreign equipment/attachments or Buyer-supplied<br />
250 <strong>Dektak</strong> 8 <strong>Manual</strong> Rev. G
Calibration, Maintenance and Warranty<br />
Veeco Metrology Group Statement of Limited Warranty<br />
replacement parts or utilities or services such as gas; (3) improper operation or maintenance or (4)<br />
failure to perform preventive maintenance in accordance with Seller's recommendations (including<br />
keeping an accurate log of preventive maintenance). In addition, this warranty does not apply if any<br />
equipment or part has been modified without the written permission of Seller or if any Seller serial<br />
number has been removed or defaced.<br />
No one is authorized to extend or alter these warranties on Seller's behalf without the written<br />
authorization of Seller.<br />
NO CONSEQUENTIAL DAMAGES. LIMITATION OF LIABILITY. Seller shall not be<br />
liable for consequential damages, for anticipated or lost profits, incidental, indirect, special or<br />
punitive damages, loss of time, loss of use, or other losses, even if advised of the possibility of such<br />
damages, incurred by Buyer or any third party in connection with the equipment or services<br />
provided by Seller. In no event will Seller's liability in connection with the equipment or services<br />
provided by Seller exceed the amounts paid to Seller by Buyer hereunder.<br />
Buyer is advised that, if the equipment is used in a manner not specified by the manufacturer, the<br />
protection provided by the equipment may be impaired.<br />
Claims for Shipment Damage<br />
Service<br />
THE ABOVE WARRANTIES ARE EXPRESSLY IN LIEU OF ANY OTHER<br />
EXPRESS OR IMPLIED WARRANTIES (INCLUDING THE WARRANTY OF<br />
MERCHANTABILITY), AND OF ANY OTHER OBLIGATION ON THE PART<br />
OF SELLER. SELLER DOES NOT WARRANT THAT ANY EQUIPMENT OR<br />
SYSTEM CAN BE USED FOR ANY PARTICULAR PURPOSE OR WITH ANY<br />
PARTICULAR PROCESS OTHER THAN THAT COVERED BY THE<br />
APPLICABLE PUBLISHED SPECIFICATIONS.<br />
No claim will be allowed for equipment damaged in shipment sold under standard terms of F.O.B.<br />
Factory. Within thirty days of purchaser’s receipt of equipment, Veeco must receive notice of any<br />
defect which purchaser could have discovered by prompt inspection of equipment. In any event,<br />
Veeco shall have the option of inspection at purchaser's premises or at Veeco’s plant before<br />
allowing or rejecting the claim.<br />
Field service is available worldwide. Service and installations are performed by factory-trained<br />
Veeco service personnel. Contact your local Veeco sales/service office for prompt service.<br />
Rev. G <strong>Dektak</strong> 8 <strong>Manual</strong> 251
Appendix A Options, Accessories and<br />
Replacement Parts<br />
100 mm Scan<br />
Capability<br />
Table A.1a Options<br />
Item Description Part No.<br />
Provides the ability to perform scans up to<br />
100 mm in length.<br />
994-000-001<br />
Chuck Porous Vacuum Chuck 838-071<br />
Vibration Isolation<br />
Table<br />
Programmable Theta<br />
and Stage Leveling<br />
with Chuck Vacuum<br />
High Precision Theta<br />
Stage with Universal<br />
Chuck<br />
Stress Measurement<br />
Software<br />
Vision 3D Image and<br />
Analysis Software<br />
Extended Vertical<br />
Range<br />
N-Lite Low Inertia<br />
Sensor 3 Options<br />
200-mm Scan<br />
Capability<br />
Isolates external vibration. 994-000-003<br />
Enables theta locations to be programmed<br />
into automation programs as well as automatic/motorized<br />
leveling of sample stage.<br />
Closed-servo-loop theta positioning system<br />
with high precision accuracy for automation.<br />
Calculates tensile or compressive stress<br />
on processed wafers. Includes special fixturing<br />
for three-point suspension of wafer.<br />
3-D Mapping and image rendering<br />
software.<br />
Adds a fourth measurement range of 1<br />
mm to existing Sensor head.<br />
Enables stylus forces to be adjusted down<br />
to 0.03 mg force for measuring very soft<br />
films, or when using a very sharp, sub-µm<br />
stylus for measuring sub-µm lines and<br />
trenches.<br />
Provides scan capability of 200 mm in<br />
length.<br />
994-000-004<br />
838-052<br />
994-000-005<br />
994-000-006<br />
994-000-007<br />
994-000-008<br />
775-254<br />
Rev. G <strong>Dektak</strong> 8 <strong>Manual</strong> 253
Options, Accessories and Replacement Parts<br />
Table A.1b Accessories<br />
Item Description Part No.<br />
Low Inertia Sensor 3<br />
Styli<br />
Individual Calibration<br />
Standards<br />
Calibration Standards<br />
Set<br />
Color Code Size<br />
Orange Assy, Stylus, 5 µm 838-031-1<br />
Green Assy, Stylus, 0.7 µm R x 45° 838-030-3<br />
Gray Assy, Stylus, 2.5 µm R 838-031-2<br />
Yellow Assy, Stylus, 0.2 µm 838-030-5<br />
Red Assy, Stylus, 12.5 µm 838-031-3<br />
Black Assy, Stylus, 25 µm 838-031-4<br />
Gold Assy, Stylus,50 nm Sharp<br />
Tip (30°)--for N-Lite only<br />
Assy, Stylus, Hi Aspect<br />
Ratio, 2 x 10 (2w x 10d)<br />
Assy, Stylus, Hi Aspect<br />
Ratio, 20 x 200 (20w x<br />
200d)<br />
838-030-8<br />
838-030-2-1<br />
838-030-10<br />
Nominal 200 Å measurement 138365<br />
Nominal 500 Å measurement 138366<br />
Nominal 1 kÅ measurement 138367<br />
Nominal 5 kÅ measurement 138368<br />
Nominal 10 kÅ measurement 138369<br />
Nominal 50 kÅ measurement 138370<br />
Nominal 100 kÅ measurement 138371<br />
Five Calibration Standards.<br />
Certified nominal 200 Å and 500 Å, and NBS<br />
traceable nominal 1 kÅ, 5 kÅ, and 50 kÅ measurements.<br />
May be used with all Stylus <strong>Profiler</strong>s.<br />
Includes a Certificate of Calibration and<br />
Cleanroom Compatible Case.<br />
Note: Factory Recertification of Calibration Standard(s) available.<br />
<strong>Advanced</strong> Training On-Site advanced system installation, operation<br />
and application training for one day (maximum<br />
8 hours), maximum 3 people. USA only.<br />
138375<br />
800571<br />
Clean Room <strong>Manual</strong> Operator manual printed on clean room paper. 004-800-100<br />
254 <strong>Dektak</strong> 8 <strong>Manual</strong> Rev. G
Environmental<br />
Enclosure<br />
Table A.1c Replacement Parts<br />
Item Description Part No.<br />
Conductive translucent enclosure protects<br />
sample and scan area from the adverse<br />
affects of dust, acoustic noise and air flow.<br />
Options, Accessories and Replacement Parts<br />
838-035<br />
Rev. G <strong>Dektak</strong> 8 <strong>Manual</strong> 255/(Next Page is Blank)
Appendix B Stress Measurement Option<br />
This appendix includes the following topics:<br />
• Description of Stress: Section B.1<br />
• Identifying Substrate Characteristics: Section B.2<br />
• Entering Stress Parameters: Section B.3<br />
• Stress Results: Section B.4<br />
Note: Stress Measurement is an optional feature that must be installed in the <strong>Dektak</strong><br />
program prior to use.<br />
Rev. G <strong>Dektak</strong> 8 <strong>Manual</strong> 257
Stress Measurement Option<br />
Description of Stress<br />
B.1 Description of Stress<br />
The stress algorithm creates a curve comprising stress values for every data point on the scan trace.<br />
If a pre-stress (pre-deposition) scan data file is saved, the calculation proceeds (on all the scan data<br />
points) as follows:<br />
1. A running average with a window size of 1/10 the scan length loads and smooths the prestress<br />
scan data.<br />
2. The smoothed data is further smoothed using a segmented third order polynomial<br />
interpolation technique.<br />
3. The first and second derivatives of the smoothed data trace derives the curvature trace.<br />
4. Steps 1-3 are also applied to the post-stress scan data producing a curvature trace for the<br />
post-stress scan data.<br />
5. The stress curve computes from the comparison of the two curvature traces.<br />
6. The maximum and average compressive and tensile stresses are calculated from the stress<br />
curve, and displayed in the Stress Results dialog box (see Figure B.1a).<br />
Figure B.1a Stress Results Dialog Box (Example)<br />
Note: Only those values of the stress curve between the cursors are considered.<br />
Three-Point Substrate Suspension<br />
To compensate for substrate deflection created by gravity or by a vacuum hold stage, the stress<br />
option kit provides three-point substrate suspension. Three 0.25" diameter steel ball bearings<br />
suspend the substrate above the stage surface. These ball bearings insert into the holes on top of the<br />
stage. A magnet is also provided for removing the ball bearings from the stage. If necessary, raise<br />
the alignment pins on the stage by turning them clockwise.<br />
258 <strong>Dektak</strong> 8 <strong>Manual</strong> Rev. G<br />
237A
Stress Reference<br />
Stress Measurement Option<br />
Description of Stress<br />
Prior to calculating stress, you must establish a reference. You can calculate stress using a straight<br />
line as the reference, or by producing a preliminary reference scan on the sample prior to<br />
processing. In order to accurately measure stress accurately, the reference scan and the scan<br />
produced after thin film deposition must have identical scan parameters, including cursor locations<br />
(stress computes the data between the reference and measurement cursors). For this reason, save the<br />
scan parameters used to produce the original reference scan in an automation program file to use<br />
after deposition.<br />
Once you produce the reference scan, save the scan in a data file. The data file is then used as the<br />
reference for comparison and stress calculation.<br />
Rev. G <strong>Dektak</strong> 8 <strong>Manual</strong> 259
Stress Measurement Option<br />
Identifying Substrate Characteristics<br />
B.2 Identifying Substrate Characteristics<br />
Collecting Stress Statistics:<br />
1. Position the R and M cursors to surround the portion of the scan trace over which to collect<br />
stress statistics.<br />
2. If a reference scan is used to compute stress, use the exact scan parameters for the reference<br />
scan to produce the scan on the substrate after deposition. Whether you use the default<br />
straight line reference or a reference scan to calculate stress, scan the substrate after thin film<br />
deposition.<br />
Note: The scan will automatically plot.<br />
3. Once you complete the scan on the substrate after deposition, enter the characteristics of the<br />
substrate being measured for stress into the stress calculation:<br />
a. Select Analysis > Compute Stress to display the Stress Parameters dialog box (see<br />
Figure B.2a).<br />
Note: The Thin Film Substrate box of the Stress Parameters dialog box displays<br />
the material, orientation, and elasticity of the thin film substrate. Several<br />
options are stored in memory to compute stress in a variety of applications.<br />
Figure B.2a Stress Parameters Dialog Box<br />
4. Click Select... in the Thin Film Substrate section to view the pre-programmed thin film<br />
substrate elasticity constants (see Figure B.2b).<br />
260 <strong>Dektak</strong> 8 <strong>Manual</strong> Rev. G<br />
213A
Figure B.2b Elasticity Constants Dialog Box<br />
5. Select the thin film substrate to be measured for stress and click OK.<br />
Stress Measurement Option<br />
Identifying Substrate Characteristics<br />
Rev. G <strong>Dektak</strong> 8 <strong>Manual</strong> 261/(Next Page is Blank)<br />
212A
B.3 Entering Stress Parameters<br />
Once you identify the substrate material and orientation, you can enter other stress parameters in<br />
the Stress Parameters dialog box (see Figure B.2a).<br />
1. Verify the correct value displays in the Elasticity field. If the elasticity of the substrate is<br />
different than the value displayed, click the field and enter the correct value.<br />
2. Click the Substrate thickness field and enter that value in µm.<br />
3. Click the Film thickness field and enter that value in µm.<br />
4. Click OK if the stress is to be measured against the default straight line reference to display<br />
the stress result.<br />
5. Click Select... in the PreDeposition Data File section if the stress is to be measured against<br />
a reference scan produced earlier and saved in a data file. The Specify a File dialog box<br />
opens.<br />
6. Browse the data folder and choose the appropriate file. Click Load to close the Specify a<br />
File dialog box.<br />
7. Click OK to close the Stress Parameters dialog box and open the Stress Results dialog box<br />
(see Stress Results: Section B.4).
B.4 Stress Results<br />
Stress Measurement Option<br />
Stress Results<br />
The statistical results display in the Stress Results dialog box (see Figure B.4a). You can view<br />
these results at any time after stress has been computed by selecting Analysis > Stress Results<br />
from the Data Plot window.<br />
Figure B.4a Stress Results Dialog Box<br />
You can obtain a printout of stress results by either selecting the Print button from the Stress<br />
Results dialog box or as part of the Scan Data Summary printout.<br />
Upon completion of the stress computation, you can display the stress data traces on the scan data<br />
plot. Select Plot > Data Type... from the menu bar or right-click on the plot and select Data Type...<br />
to open the Plot Data Type dialog box (see Figure B.4b).<br />
Figure B.4b Plot Data Type Dialog Box: Stress Plots<br />
Note: Whenever a stress computation is performed, the vertical scale of the plot<br />
changes from angstroms to dynes/cm2 .<br />
You can select the following types of stress plots from the dialog box:<br />
Rev. G <strong>Dektak</strong> 8 <strong>Manual</strong> 263<br />
237B<br />
237A
Stress Measurement Option<br />
Stress Results<br />
Curve Fit<br />
Curve fit plots in cyan.<br />
PreDeposition<br />
Pre-deposition data curve plots in blue.<br />
PostDeposition<br />
Note: This choice is available only if a pre-deposition data file was loaded.<br />
Post-deposition data curve plots in green.<br />
Film Stress Curve<br />
Film stress curve plots in orange.<br />
Note: This choice is relevant only if a pre-deposition data file was loaded.<br />
B.4.1 Constraints and Limitations<br />
1. You must hardware level the stage and verify that the stage is in the same leveled position<br />
before running both the pre- and post-stress scans.<br />
2. Both pre- and post-stress scans must have the same number of data points. Do not abort<br />
either scan before completion.<br />
3. The algorithm performs best on flat wafers. Surface features can throw off the curve-fitting<br />
algorithm and produce invalid maximum stress values.<br />
264 <strong>Dektak</strong> 8 <strong>Manual</strong> Rev. G
Appendix C Step Detection Software Option<br />
This appendix includes the following topics:<br />
• Step Detection Parameters: Section C.1<br />
• Every Step Page: Section C.1.1<br />
• First Step Page: Section C.1.2<br />
• Step Detection Setup: Section C.2<br />
• Performing Step Detection on a Single Scan: Section C.2.1<br />
• Programming Step Detection in a Scan Routine: Section C.2.2<br />
• Programming Step Detection on Multiple Scans: Section C.2.3<br />
The <strong>Dektak</strong> 6M Step Detection software enables the automatic computation of analytic functions<br />
on scanned features using a two step process. First, the Step Detection algorithm locates the leading<br />
and trailing edge of each scanned feature. <strong>Dektak</strong> reference and measurement cursors then<br />
automatically position at a relative distance from each detected edge, where chosen analytic<br />
functions (for example, Average Step Height, Slope, Peak,Valley, Peak to Valley, and so on)<br />
compute. The Step Finder is a filter that accentuates the edges of a scanned feature where a high<br />
variation (high frequency) between data points exist.<br />
Note: Verify that Step Detection is installed in the <strong>Dektak</strong> program prior to use.<br />
Rev. G <strong>Dektak</strong> 8 <strong>Manual</strong> 265
Step Detection Software Option<br />
How Does it Work?<br />
A least-squares fit algorithm determines the location of feature edges. The following variables are<br />
used by the least-squares fit algorithm to determine the fitting criteria of a line to scanned data<br />
points.<br />
Detection Method<br />
• First Step: Positions the R and M cursors for selected analytical functions relative to the<br />
beginning of the first step that matches the Step Description parameters. If a matching<br />
step is found, the ASH of the left edge and the right edge are the first two entries in the<br />
Analytic Results area.<br />
• Every Step: Positions the R and M cursors for selected analytical functions relative to<br />
every step that matches the Step Description parameters.<br />
Feature edges are determined by the relative change in slope of each line segment and the<br />
proximity (minimum width) from other line segments. The operational procedure for step detection<br />
is described in the following pages.<br />
266 <strong>Dektak</strong> 8 <strong>Manual</strong> Rev. G
C.1 Step Detection Parameters<br />
Step Detection Software Option<br />
Step Detection Parameters<br />
The Step Detection dialog box displays all the necessary parameters for performing the step<br />
detection function.<br />
You can open the Step Detection dialog box from two of the <strong>Dektak</strong> 8 application windows. One of<br />
the choices displayed in the dialog box depends on the window from which the box was opened, as<br />
explained below.<br />
• To open the Step Detection dialog box from the Scan Routines window, click Step<br />
Detection in the Data Processing section (lower left corner of the window).<br />
• To open the Step Detection dialog box from the Data Plot window, select Analysis ><br />
Step Detection... from the menu bar.<br />
When the dialog box first displays it defaults to the Every Step Detection Method on the General<br />
Settings page (see Figure C.1a), and the Every Step tab appears.<br />
Figure C.1a Step Detection Dialog Box: General Settings Page<br />
You can adjust various parameters on this page to suit your requirements.<br />
Detection Range<br />
Note: If you select First Step as the Detection Method, the Every Step tab changes<br />
to a First Step tab.<br />
• Start Position: The position, in µm, to start searching for a step.<br />
Rev. G <strong>Dektak</strong> 8 <strong>Manual</strong> 267<br />
217A
Step Detection Software Option<br />
Step Detection Parameters<br />
• End Position: The position, in µm, to end searching for a step.<br />
Automatic Leveling<br />
When selected, automatically levels the trace with the R and M cursors each placed near an edge at<br />
a Relative Position that you specify, at a distance from the edge that you specify. You can also<br />
specify the Width for each cursor.<br />
Save Changes To Scan Routine<br />
When checked, all entered Step Detection parameters save to the current scan routine.<br />
Enable Step Detection<br />
Note: This check box is available only when step detect has been initiated from the<br />
menu bar in the Data Plot window.<br />
When checked, performs Step Detection as specified on a completed scan.<br />
C.1.1 Every Step Page<br />
Note: This check box is available only when the dialog box is opened from the Data<br />
Processing section of the Scan Routines window.<br />
You may need to change the parameter values on the Every Step page depending on the steps to<br />
measure (see Figure C.1b). Click the Every Step tab to display the page. A description of the<br />
parameters contained in the Every Step page is provided below.<br />
268 <strong>Dektak</strong> 8 <strong>Manual</strong> Rev. G
Step Description:<br />
Figure C.1b Step Detection Dialog Box: Every Step Page<br />
Step Detection Software Option<br />
Step Detection Parameters<br />
• Min Height: Indicates the minimum height (in angstroms) of features to measure. You<br />
can enter decimal values to indicate any portion of angstroms.<br />
• Max Height: Indicates the maximum height (in angstroms) of the features to measure.<br />
• Smoothing: The minimum edge height used to search for potential steps, in angstroms.<br />
• + Steps: When selected, Step Detection searches for the first positive step matching Step<br />
Description parameters.<br />
• - Steps: When selected, Step Detection searches for the first negative step matching Step<br />
Description parameters.<br />
Analytical Functions:<br />
• ASH: Compute Average Step Height function.<br />
• Slope: Compute Slope function.<br />
• AvgHt: Compute Average Height function.<br />
• Peak: Compute Maximum Peak function.<br />
• Valley: Compute Maximum Valley function.<br />
Rev. G <strong>Dektak</strong> 8 <strong>Manual</strong> 269<br />
217B
Step Detection Software Option<br />
Step Detection Parameters<br />
C.1.2 First Step Page<br />
• P_V: Compute Maximum Peak to Valley function.<br />
• Compute Average: Compute the average of all results of an analytical function.<br />
If you select First Step as the detection method, you can click the First Step tab to display the First<br />
Step page. A description of the parameters contained in the First Step page is provided below (see<br />
Figure C.1c).<br />
Step Description<br />
Figure C.1c Step Detection Dialog Box: First Step Page<br />
• Height: The desired height of the step to detect in angstroms.<br />
• Width: The desired width of the step to detect in µm.<br />
• Distance to Step:<br />
• R: The relative position of the R cursor to the left of the potential step being<br />
detected.<br />
• M: The relative position of the M cursor to the right of the potential step being<br />
detected.<br />
270 <strong>Dektak</strong> 8 <strong>Manual</strong> Rev. G<br />
218A
Band Width<br />
Additional Parameters<br />
Analytical Functions<br />
Step Detection Software Option<br />
Step Detection Parameters<br />
• R: Width of R cursor positioned to the left of the potential step being detected.<br />
• M: Width of M cursor positioned to the right of the potential step being detected.<br />
• Smoothing: Factor used for smoothing. Larger values result in more smoothing.<br />
• Tolerance: Error factor used for calculating the height and width of the matching step.<br />
• + Step: When selected, Step Detection will search for the first positive step matching<br />
Step Description parameters.<br />
• - Step: When selected, Step Detection will search for the first negative step matching<br />
Step Description parameters.<br />
Put a check mark in the boxes for the analytical functions desired:<br />
• ASH: Computes Average Step Height function.<br />
• Slope: Computes Slope function.<br />
• AvgHt: Compute Average Height function.<br />
• Peak: Compute Maximum Peak function.<br />
• Valley: Compute Maximum Valley function.<br />
• P_V: Compute Maximum Peak to Valley function.<br />
• Compute Average: Compute the average of all results of each selected analytical<br />
function.<br />
Then select each of the desired functions in turn from the Function drop-down list to enter the<br />
appropriate cursor information in the grid for each function:<br />
Distance To Step<br />
R (µm)<br />
The relative distance from the beginning of the detected step at which to place the R cursor prior to<br />
performing the corresponding analytical function. Negative values fall to the left of the beginning<br />
of the step, positive values to the right. You may enter up to 10 distances for each analytical<br />
function.<br />
Rev. G <strong>Dektak</strong> 8 <strong>Manual</strong> 271
Step Detection Software Option<br />
Step Detection Parameters<br />
M (µm)<br />
The relative distance from the beginning of the detected step at which to place the M cursor prior to<br />
performing the corresponding analytical function. Negative values fall to the left of the beginning<br />
of the step, positive values to the right. You may enter up to 10 distances for each analytical<br />
function.<br />
Band Width<br />
R (µm)<br />
R-cursor band width used when performing corresponding analytical function. You may enter up to<br />
10 widths for each analytical function.<br />
M (µm)<br />
M-cursor band width used when performing corresponding analytical function. You may enter up<br />
to 10 widths for each analytical function.<br />
272 <strong>Dektak</strong> 8 <strong>Manual</strong> Rev. G
C.2 Step Detection Setup<br />
Step Detection Software Option<br />
Step Detection Setup<br />
Step Detection is typically used for finding and measuring steps when performing multi-scan<br />
operations. It scans similar features at multiple locations on multiple samples with the step heights<br />
measured automatically.<br />
Prior to using Step Detection in a multi-scan operation, create a sample scan of the feature to aid in<br />
setting up the Step Detection parameters. Using the scan shown in Figure C.2a as an example of a<br />
sample scan, the following pages demonstrate how to set up and perform Step Detection on a scan<br />
data file.<br />
Figure C.2a shows a scan across a feature with steps (trenches) located at approximately 350 µm<br />
and 1350 µm. The procedure to invoke Step Detection on an existing scan data file is provided<br />
below.<br />
Select Analysis > Step Detection from the menu bar with a scanned profile of multiple steps<br />
displayed in the Data Plot window (see Figure C.2a).<br />
Figure C.2a Typical Scan of Multiple Steps<br />
C.2.1 Performing Step Detection on a Single Scan<br />
1. With the Step Parameters dialog box displayed, select the Step Detection method (First<br />
Step or Every Step).<br />
2. Select the desired parameters for the scan to measure the scanned step or steps.<br />
Rev. G <strong>Dektak</strong> 8 <strong>Manual</strong> 273<br />
240A
Step Detection Software Option<br />
Step Detection Setup<br />
3. Click OK.<br />
The resulting scan after you enable Step Detection redisplays the plotted profile and detects and<br />
measures the steps applicable to selected Step Detection parameters.<br />
Selected analytical functions (such as ASH measurement) perform on the detected steps. The steps<br />
are detected, causing the ASH measurement to compute with R and M cursors positioned on either<br />
side of the step and displayed to the left of the plotted profile.<br />
You can now automatically locate the cursors to their corresponding position by highlighting the<br />
desired analytic result.<br />
C.2.2 Programming Step Detection in a Scan Routine<br />
The same criteria for locating feature edges on a single data file can be used for performing step<br />
detection on similar features during subsequent scans.<br />
1. Select Window > Scan Routines to display the Scan Routines window to enable Step<br />
Detection during a scan.<br />
2. Under Data Processing click Step Detection to display the default values in the Step<br />
Detection dialog box.<br />
3. Click the Step Detection Enabled check box to enable step detection while scanning.<br />
C.2.3 Programming Step Detection on Multiple Scans<br />
You can use the Automation Program Summary (APS) with step detection to automatically<br />
compute standard deviation and mean values of chosen analytic functions at each detected step for<br />
a series of scans.<br />
1. Select Window > Automation Programs to program a series of scans with Step Detection.<br />
2. Under Automation Program Options, click APS File to open the Automation Program<br />
Options dialog box.<br />
3. At the General page, in the Auto Program Summary (APS) section, click the Compute &<br />
Display check box.<br />
4. Accept the default file, or specify the desired file for the APS summary, and click OK.<br />
5. Select Edit > Copy To... to create a copy of the previously developed scan routine.<br />
6. In the dialog box that pops up, enter a numerical value for the new Scan Routine # into the<br />
field and click OK.<br />
274 <strong>Dektak</strong> 8 <strong>Manual</strong> Rev. G
Step Detection Software Option<br />
Step Detection Setup<br />
7. Double-click the left mouse button on the newly created scan routine to allow modification<br />
of the new scan routine location.<br />
8. Modify any parameters of the scan routine you wish to alter.<br />
9. Select Window > Automation Programs to run the automation programs.<br />
10. Select Run > Auto Program From... after highlighting the first automation program to<br />
execute.<br />
The result is an Automation Program Summary with Mean, Standard Deviation, Minimum,<br />
Maximum and Range values for ASH measurements at each detected step.<br />
Rev. G <strong>Dektak</strong> 8 <strong>Manual</strong> 275
Step Detection Software Option<br />
Step Detection Setup<br />
276 <strong>Dektak</strong> 8 <strong>Manual</strong> Rev. G
Appendix D 3D Mapping Option<br />
This appendix includes the following topics:<br />
D.1 3D Mapping Option<br />
• 3D Mapping Option: Section D.1<br />
• Setting Up a 3-D Mapping Program: Section D.2<br />
• Running a Map Program: Section D.3<br />
• Vision Overview: Section D.4<br />
• Analyzing Data: Section D.5<br />
• Displaying Data: Section D.6<br />
• Dataset vs. Database: Section D.7<br />
The <strong>Dektak</strong> Three Dimensional (3D) Mapping Option is an add-on software package that allows<br />
<strong>Dektak</strong> surface profiler customers to measure, analyze, and view surface contour data in 3<br />
dimensions (X, Y, and Z), instead of the 2 dimensions (X and Z) that standard products provide.<br />
<strong>Dektak</strong> surface profilers collect 3-D data through the use of mapped scans. The mapped scan data is<br />
then converted into data files that the Vision for <strong>Dektak</strong> rendering software can use.<br />
Overview<br />
The 3D Mapping Option is intended to run on the <strong>Dektak</strong> 8 platform, within the software. However,<br />
the Vision for <strong>Dektak</strong> component can run as a stand-alone analysis tool on any computer that meets<br />
the system configuration specifications.You can call up the program through one of the standard<br />
Microsoft Windows functions (double-clicking an icon, using a shortcut, and so on).<br />
Rev. G <strong>Dektak</strong> 8 <strong>Manual</strong> 277
3D Mapping Option<br />
3D Mapping Option<br />
Minimum System Configuration to Run 3D Mapping Software<br />
Hardware: Pentium-based IBM compatible PC.<br />
Software: Microsoft Windows XP. The package is network-compatible based on the network<br />
compatibility of the underlying operating system. This typically includes remote file system<br />
storage and retrieval, along with remote printing.<br />
Software included with the 3D Mapping Option<br />
• Vision for <strong>Dektak</strong>, Image Analysis Software CD<br />
• <strong>Advanced</strong> Analysis, plug-in Software CD<br />
278 <strong>Dektak</strong> 8 <strong>Manual</strong> Rev. G
D.2 Setting Up a 3-D Mapping Program<br />
The following steps describe how to set up a 3-D map.<br />
1. Open the Scan Routines window.<br />
3D Mapping Option<br />
Setting Up a 3-D Mapping Program<br />
2. Click any of the entries in the Scan Parameters section at the left side of the window, to pop<br />
up the Scan Parameters dialog box (see Figure D.2a).<br />
3. Select the Nominal Parameters page in the dialog box.<br />
4. In the Scan Type section of the Nominal Parameters page, select Map Scan from the dropdown<br />
list.<br />
Figure D.2a Scan Parameters Dialog Box--Map Scan Type<br />
5. Click OK to close the dialog box and enter the scan type into the scan program.<br />
Note: Click Apply if you want to enter the scan type into the scan program but keep<br />
the dialog box open to make additional entries.<br />
6. In the Sample Positioning window, locate the feature to be mapped, using either the high or<br />
low magnification camera to view the area. Null the stylus at any corner of the intended<br />
mapping area.<br />
Note: To null the stylus, first position the stylus horizontally over the sample. Select<br />
Tower Down and the stylus will descend vertically until the tip of the stylus<br />
reaches the surface of the sample. The Z value at this point becomes the<br />
reference point from which all the other Z values will be determined<br />
Rev. G <strong>Dektak</strong> 8 <strong>Manual</strong> 279
3D Mapping Option<br />
Setting Up a 3-D Mapping Program<br />
7. Select Edit > Define Map Area (or press CTRL+D on the keyboard).<br />
Note: The Define Map Area option exists in the Edit menu only if Map Scan is<br />
selected for the current scan routine.<br />
8. Follow the directions displayed:<br />
a. Roll the trackball to define the X extent.<br />
b. Click the left mouse button.<br />
c. Roll the trackball to define the Y extent.<br />
d. Click the left mouse button.<br />
The Scan Parameters dialog box now pops up (see Figure D.2b).<br />
Figure D.2b Scan Parameters Dialog Box: Map Parameters Page<br />
The software always calculates the coordinates at the lower left corner of the map area. It also<br />
enters those coordinates into both the Automation Program window (Scan Routines section) and<br />
the Location for the scan routine in the Scan Routines window (Scan Parameters section). The<br />
map will proceed from bottom to top, moving in the positive Y direction with each new scan line.<br />
9. Enter or change any of the parameters as desired in the Scan Parameters dialog box, at the<br />
Map Parameters page. For example, enter the number of Profiles (scan lines) up to 10,000,<br />
or the vertical scan Resolution (down to 1.0 µm/scan).<br />
Note: Entering a new value for Resolution will automatically reset the number of<br />
Profiles required for the specified Y Extent. Conversely, entering a new value<br />
for the number of Profiles will automatically reset the value for Resolution as<br />
280 <strong>Dektak</strong> 8 <strong>Manual</strong> Rev. G
3D Mapping Option<br />
Setting Up a 3-D Mapping Program<br />
required for the specified Y Extent. (The product of Profiles times Resolution<br />
equals Y Extent.)<br />
10. Click OK in the Scan Parameters dialog box to accept the scan parameters. The mapping<br />
parameters are now stored into the Automation Program.<br />
D.2.1 Files for Mapping Data<br />
In the Automation Programs window, click Data File in the Automation Program Options<br />
section to display the General page in the Automation Program Options dialog box.<br />
In the Scan Data section, you have the following choices for saving your data:<br />
• Accept the default file name to save the mapping data.<br />
• Click the button to open the Select a Data File dialog box where you can specify a new<br />
data file name.<br />
Note: Unless otherwise specified, mapping data automatically saves to Default.nnn<br />
data files in the <strong>Dektak</strong>32\Data\Default folder on the C: drive, in a sub-folder<br />
named MapSitem. The m is the same number as the number of the scan routine.<br />
• For example, if you specified 10 Profiles for scan routine #3 at the Map Parameters<br />
page, the default data files would be named Default.001, Default.002, and so forth.<br />
Once all of the data files have been created, the program automatically creates an image<br />
file, Default_MapSite3_Test.img, and stores it in the MapSite3 sub-folder along with<br />
the data files.<br />
Rev. G <strong>Dektak</strong> 8 <strong>Manual</strong> 281
3D Mapping Option<br />
Running a Map Program<br />
D.3 Running a Map Program<br />
To execute a mapping program, simply run the automation program containing the desired<br />
mapping parameters.<br />
Select Run > Auto Program to run the current automation mapping program.<br />
D.4 Vision Overview<br />
Note: The Data Plot window displays and plots each scan in real time. Once all the<br />
scans in the automation mapping program are complete, the image file (.img) is<br />
created. You can then access the image file from the Vision for <strong>Dektak</strong> software<br />
program.<br />
The <strong>Dektak</strong> 3D Mapping Option produces 3-D images of a sample that are converted into data that<br />
the <strong>Dektak</strong> Vision 3D rendering software can analyze, and are stored in a .img file (see D.2.1<br />
Files for Mapping Data).<br />
D.4.1 Vision for <strong>Dektak</strong> Basic Functions<br />
Start-Up Window<br />
Once started, the Vision for <strong>Dektak</strong> package displays a Start-Up Window that incorporates both a<br />
menu bar and a toolbar for command selection (see Figure D.4a). Use the Start-Up Window as a<br />
home base for performing data analysis, transformations, and image presentation.<br />
Figure D.4a Vision for <strong>Dektak</strong> Start-Up Window<br />
282 <strong>Dektak</strong> 8 <strong>Manual</strong> Rev. G<br />
139
Open<br />
3D Mapping Option<br />
Vision Overview<br />
1. Select File > Open Stored Dataset or click the OPEN A DATASET icon to open a scanned<br />
image file and transfer the data into a working data buffer (current data set) for use by the<br />
package (see Figure D.4b). The Open Stored Dataset dialog box will display (see Figure<br />
D.4c). All data analysis, transformations, and image presentations perform from the current<br />
data set.<br />
Figure D.4b Open a Dataset Icon<br />
2. Choose the type of file you want to open by selecting the drop-down list box next to the<br />
Open box. Vision opens four different file types: <strong>Dektak</strong> (*.img), ASCII Files (*.asc), SDF<br />
(*.sdf), and OPD (*.opd).<br />
Note: The default file type for Vision for <strong>Dektak</strong> is .img.<br />
3. Select OPEN to browse for a file. A preview of the file you highlight will display for quick<br />
recognition of the file.<br />
Preview<br />
Window<br />
Add or Subtract<br />
Figure D.4c Open Dialog Box<br />
Use this option to combine several datasets by adding or subtracting every point in their surface<br />
profiles (see Figure D.4d). The datasets you add or subtract must have the same sized arrays. You<br />
can add two or more files together. You can subtract only two datasets.<br />
Rev. G <strong>Dektak</strong> 8 <strong>Manual</strong> 283<br />
140
3D Mapping Option<br />
Vision Overview<br />
Save<br />
Figure D.4d Subtract/Add Dialog Box<br />
1. Select File > Subtract/Add Files to display the Subtract/Add dialog box.<br />
2. Select two files (or more, if adding) by clicking on the first file, then pressing CTRL and<br />
selecting the next file(s).<br />
3. Specify whether you want to Add or Subtract the files.<br />
4. Select the Auto Center Data check box to center the second surface with respect to the first.<br />
5. If the surfaces are not the same size, select the Auto Zoom Data option to resize the second<br />
surface to match the first.<br />
6. Click OK. The combined dataset will be displayed using the default output file. You can now<br />
apply analyses, processed options and masks to the averaged data.<br />
Note: This option applies to stored datasets. During a new measurement you can<br />
subtract two readings in the same location by making a difference<br />
measurement.<br />
Select File > Save As to save an image. This command is typically used when you have<br />
transformed the data set and wish to save the results of the transformation independent of the raw<br />
data set.<br />
284 <strong>Dektak</strong> 8 <strong>Manual</strong> Rev. G<br />
141
Printing<br />
3D Mapping Option<br />
Vision Overview<br />
You can print the current window from anywhere within the package on an attached printer. There<br />
are three print options available: the entire display contents, the current window, or the client area<br />
of the current window. The entire display command sends every pixel shown on the monitor to the<br />
printer. The current window is defined as the current active MS Windows window, including the<br />
window border, sizing handles, title bar, menu bar, and window client area (contents). The client<br />
area is the portion of a window excluding the title bar, menu bar, and window border, if any. To<br />
print the current window press CTRL+P; to print the entire screen press CTRL+S; to print the current<br />
client area press CTRL+SHIFT+P. The specific portion of the screen is then sent to the current<br />
default printer as defined by MS Windows and the user. The page orientation of the output<br />
automatically changes so the largest possible image prints on a page.<br />
D.4.2 Vision for <strong>Dektak</strong> Toolbar<br />
Vision for <strong>Dektak</strong> has two modes: Lab mode and Production mode. Lab mode provides access to all<br />
analyses and configuration options. Lab mode has a specific toolbar (see Table D.4a).<br />
Table D.4a Vision Toolbar (Lab Mode)<br />
Production mode is limited to only the basic options required to take measurements according to a<br />
present configuration. A password must be supplied before you can return to Lab mode. Production<br />
mode has a specific toolbar (see Table D.4b).<br />
• Password = Wyko (It is not case sensitive).<br />
Table D.4b Vision Toolbar (Production Mode)<br />
The menu bar provides access to the most frequently used options of the Vision for <strong>Dektak</strong><br />
software. The icons and buttons of the toolbars are described below (see Table D.4c).<br />
Rev. G <strong>Dektak</strong> 8 <strong>Manual</strong> 285
3D Mapping Option<br />
Vision Overview<br />
Open: Opens a dataset for viewing and analysis.<br />
Save: Saves the current database.<br />
Print: Prints the active dataset.<br />
Table D.4c Vision for <strong>Dektak</strong> Menu Bar<br />
Description Button/Icon<br />
Processed Options: Opens the Processed Options dialog box<br />
where you can set various data processing parameters. Lab<br />
mode only.<br />
Edit Masks for this Dataset: Opens the Mask Editor window<br />
Multiple Region Options: Opens the Options dialog box for<br />
the Multiple Region Analysis.<br />
Custom Analysis Options: Opens the Custom Analysis dialog<br />
box, allowing you to create custom display files.<br />
Custom Analysis Display: Opens the dialog box that allows<br />
you to select a custom display file for your data.<br />
Units Options: Opens the Units dialog box, which allows you<br />
to change the display units between English and metric.<br />
Database Options: Opens the Database Options dialog box.<br />
Here, you can perform most database-related functions, such as<br />
defining a database, updating a master database, or viewing the<br />
contents of a database file.<br />
Contour Plot: Applies a contour plot display file to the current<br />
dataset.<br />
Lab Mode Production Mode<br />
286 <strong>Dektak</strong> 8 <strong>Manual</strong> Rev. G
Editing the Toolbar<br />
Description Button/Icon<br />
2D Analysis: Applies the 2D display file to the current dataset.<br />
3D Interactive Plot: Applies the 3D display file to the current<br />
dataset and allows you to interact with the data.<br />
3D Plot: Applies the 3D display file to the current dataset.<br />
Filtered Histogram Analysis: Applies the Filtered Histogram<br />
analysis to the current dataset.<br />
Filtered Bearing Ratio Analysis: Applies the Filtered Bearing<br />
Ratio analysis to the current dataset.<br />
Edit Toolbar: Allows you to edit the buttons which are displayed<br />
on the toolbar.<br />
Set Lab/Production Mode: Allows you to switch between<br />
Lab Mode and Production Mode.<br />
Help Mode: Opens the <strong>Dektak</strong> Vision Help files.<br />
3D Mapping Option<br />
Vision Overview<br />
You can customize the toolbar in both Lab and Production modes to include only those operational<br />
and analysis buttons which you use regularly. Production mode, however, requires that you supply<br />
a password before you can customize the toolbar.<br />
To edit the toolbar:<br />
1. In Lab mode, click the Edit Toolbar icon or choose Edit > Edit Toolbar. In Production<br />
mode, click EDIT TOOLBAR, then enter your password. Either action opens the Customize<br />
Toolbar Window (see Figure D.4e).<br />
Rev. G <strong>Dektak</strong> 8 <strong>Manual</strong> 287
3D Mapping Option<br />
Vision Overview<br />
Figure D.4e Customize Toolbar Window<br />
2. The Unused Toolbar Buttons list box contains buttons that are not on the toolbar but are<br />
available for use. The Active Toolbar Buttons list box lists the buttons on the current<br />
toolbar.<br />
a. To add a button to the toolbar, select a button in the Unused Toolbar Buttons list, then<br />
click ADD. Your selection will be placed beneath the currently highlighted option in the<br />
Active Toolbar Buttons list.<br />
b. To add a separator between tool bar buttons, select a button in the Active Toolbar<br />
Buttons list. Click SEPARATOR to place a separator line beneath the selected button.<br />
c. To remove a button or separator from the toolbar, select a button or separator line in the<br />
Active Toolbar Buttons list, then click REMOVE. If you have selected a button, it will be<br />
moved to the Unused Toolbar Buttons list. If you selected a separator line, it will simply<br />
be removed.<br />
3. Select any other options that may be applicable:<br />
• LOAD DEFAULT TOOLBAR: Click this button to load the <strong>Dektak</strong> Vision default toolbar<br />
options.<br />
• Save as Default for All Configuration Files: Click this check box to save your most<br />
recent toolbar changes as the default for your current work session, and for all<br />
configuration files. If this box is unchecked, the program will apply your most recent<br />
toolbar changes only to the current work session.<br />
4. Click OK to accept your changes.<br />
288 <strong>Dektak</strong> 8 <strong>Manual</strong> Rev. G<br />
142
D.5 Analyzing Data<br />
3D Mapping Option<br />
Analyzing Data<br />
After you have taken a measurement, you can use a number of options and analyses to produce a<br />
vast array of information about your sample data. Analyses calculate a wide range of statistics from<br />
measured data. Analyses can be applied automatically following each new measurement. The name<br />
of the analysis, in this case, is stored with the configuration file. Analyses can also be applied to<br />
stored datasets.<br />
Vision includes several standard analyses, such as producing 2D and 3D plots and displaying<br />
intensity. Most systems include additional analyses for more specific types of measurements. An<br />
analysis typically includes a graphical display file designed to show the calculated statistics, along<br />
with a plot of the data. Many analyses include an Options dialog box which allows you to<br />
configure the analysis to match your measurement<br />
The Analysis Menu displays the analysis options included in your system. Frequently accessed<br />
analyses appear directly on the menu. A comprehensive list of installed analyses appears under<br />
Analysis > Custom Options.<br />
Datasets<br />
A dataset contains raw data and parameters for a single measured part. Dataset files have an .img<br />
extension, designating a binary format specific to <strong>Dektak</strong> datasets. Dataset contents are shown onscreen<br />
in a display file, which typically shows a plot of the raw data and a list of the parameters.<br />
After the measurement is taken, it is saved with a temporary file name, ~last.img. If you wish to<br />
store the dataset, you must rename it. Select Save As from the file menu, then provide a path, file<br />
name, and select the type of file you would like to save it as. If you do not save/rename your file, it<br />
will be overwritten the next time a measurement is taken.<br />
Once you store a dataset, you can open it again at any time. To open a dataset, choose File > Open<br />
Dataset, then select the file to open. The data will be shown using the display file which was in use<br />
when the data was saved.<br />
When you open a dataset, you may change the way the file is displayed. To save these changes,<br />
choose File > Save Dataset. The next time you open the dataset, these viewing options will be<br />
used.<br />
Sample data can be from a just-completed measurement, or it can be from an existing dataset that<br />
you have just opened. To open a dataset, select File > Open Existing Dataset, then select the file to<br />
open.<br />
D.5.1 Processed Options<br />
Processed Options allow you to remove terms, apply filtering, and perform data operations to<br />
enhance the measurement data. Processed options can be applied to the current dataset only or can<br />
be set as the measurement default and saved in the configuration file.<br />
Rev. G <strong>Dektak</strong> 8 <strong>Manual</strong> 289
3D Mapping Option<br />
Analyzing Data<br />
To access these options, select Analysis > Processed Options, or click the PROCESSED OPTIONS<br />
button on the toolbar. Either action will open the Processed Options dialog box (see Figure D.5a).<br />
Note: When you change options in this dialog box and click OK, the changes will be<br />
immediately effected in any currently open display windows. By saving your<br />
configuration, you can assure that your settings will be used each time you<br />
open your configuration file.<br />
Figure D.5a Processed Options Dialog Box - Terms Removal Tab<br />
Within the Processed Options dialog box you can set the options described below.<br />
Terms Removal<br />
Terms removal options remove tilt, curvature, or cylindrical characteristics inherent to your sample<br />
or measurement method (see Figure D.5a).<br />
Filtering<br />
• Tilt Only: Removes linear tilt from surface measurements. Since a wafer will always<br />
have some inherent tilt, this term is almost always removed.<br />
• Curvature and Tilt: Will make spherical samples appear flat, enabling you to observe<br />
the surface features instead of the spherical shape. Tilt is also removed.<br />
• Cylinder and Tilt: Causes a cylindrical surface to appear flat, allowing you to see the<br />
surface features, not the cylindrical shape. Tilt is also removed.<br />
The filtering algorithms create a modified data array to produce one of the following effects on the<br />
current data set (see Figure D.5b).<br />
290 <strong>Dektak</strong> 8 <strong>Manual</strong> Rev. G<br />
143
Figure D.5b Processed Options Dialog Box - Filtering Tab<br />
Low Pass Smoothing (Box Car Filter)<br />
3D Mapping Option<br />
Analyzing Data<br />
This filter removes the effects of high spatial frequency roughness, smoothing over features that are<br />
smaller than the specified window size. The program eliminates small scale roughness, making the<br />
most significant features of the dataset become easier to distinguish.<br />
Median Smoothing (Median Filter)<br />
The median of the valid points in each window is used as the data element in the new, smoother<br />
array. (In other words, it filters out noisy and "spiked" data.) The median is the value of the middle<br />
point when the points are sorted from smallest to largest.<br />
High Pass Smoothing (Edge Enhancing Filter)<br />
High spatial frequencies are emphasized. This filter removes major undulations and large-scale<br />
waviness, making small-scale roughness easier to distinguish.<br />
Digital Filters (Fourier Filtering)<br />
Digital filters selectively suppress roughness or waviness in a dataset. These filters work in the<br />
spatial frequency spectrum of the dataset rather than on the pixels themselves. By selecting<br />
different digital filter types, some of frequency content of the dataset can be selectively removed<br />
from the image, accentuating or attenuating features of selected size range. Select from the digital<br />
filter options (see Table D.5a).<br />
Rev. G <strong>Dektak</strong> 8 <strong>Manual</strong> 291<br />
144
3D Mapping Option<br />
Analyzing Data<br />
Table D.5a Digital Filter Options<br />
Digital Filter Description<br />
Fourier Low Pass Removes spatial frequency components above the specified Low<br />
Digital Cutoff Frequency. It makes the larger features of the<br />
dataset easier to distinguish.<br />
Fourier High Pass Removes spatial frequency components below the specified High<br />
Digital Cutoff Frequency. It accentuates surface roughness by<br />
minimizing the effect of large-scale waviness.<br />
Band Pass Passes spatial frequencies below the High Cutoff and above the<br />
Low Cutoff.<br />
Notch Filter Passes spatial frequencies above the High Cutoff and below the<br />
Low Cutoff.<br />
Fourier Filter Type Select the shape of the digital filter to apply: Rectangle,<br />
Butterworth (default is 3rd Order), or Exponential (the default<br />
is s = standard deviation = 0.2). You can also click Adv. Setup to<br />
access more options for digital filtering.<br />
Low Cut Off Specify the low cut off to be used for Fourier Filtering options.<br />
High Cut Off Specify the high cut off to be used for Fourier Filtering options.<br />
Mask Options<br />
Masks let you temporarily eliminate areas of information from a dataset so that you can focus on<br />
the pertinent data (see Figure D.5c) Using masks you can also analyze or modify specific portions<br />
of the data. Once you've defined a mask, you can save it to disk, to a dataset, or as part of a<br />
configuration file.<br />
Figure D.5c Processed Options Dialog Box - Masking Tab<br />
292 <strong>Dektak</strong> 8 <strong>Manual</strong> Rev. G<br />
145
• Use Analysis Mask: Activates the mask associated with the current analysis.<br />
3D Mapping Option<br />
Analyzing Data<br />
• Use Terms Mask: Activates the current terms mask. For the mask option to be valid,<br />
you must set a mask for the selected dataset. If terms are selected for removal, but a<br />
terms mask is not applied, terms will be removed across the entire dataset.<br />
For more information on masks, refer to Section D.6.4.<br />
Data Restore<br />
Data restore (see Figure D.5d) fills in bad pixels in areas from the dataset to allow certain analyses<br />
that require all the data to be valid to work properly.<br />
Figure D.5d Processed Options Dialog Box - Data Restore Tab<br />
• Use Data Restore: Fills in small areas of bad pixels for the interpolation of<br />
measurement data.<br />
CAUTION: Data Restore is intended only to improve small areas of bad pixels.<br />
If used with a very rough sample or a sample with large areas of<br />
bad data, the results could be misleading.<br />
• Restore Only Interior: Extrapolate only the specified number of pixels if it connects<br />
two points together.<br />
• Restore Interior and Exterior: Extrapolate all data pixels up to the number specified<br />
below.<br />
Rev. G <strong>Dektak</strong> 8 <strong>Manual</strong> 293<br />
146
3D Mapping Option<br />
Analyzing Data<br />
General<br />
<strong>Dektak</strong><br />
• Data Restore Pixels: Set the number of pixels to restore for the above options.<br />
Centering data allows analyses involving the entire data set to be carried out (see Figure D.5e).<br />
• Center of Mass of Valid Pixels<br />
• Fit Center to Outside Valid Pixels<br />
Figure D.5e Processed Options Dialog Box - General Tab<br />
• Data Flip rotates an image about a particular axis.<br />
• Data Invert reverses the position of the image.<br />
Data Flattening flattens data using averages from the X or Y axes.<br />
294 <strong>Dektak</strong> 8 <strong>Manual</strong> Rev. G<br />
078
D.6 Displaying Data<br />
Figure D.5f Processed Options Dialog Box - <strong>Dektak</strong> Tab<br />
3D Mapping Option<br />
Displaying Data<br />
<strong>Dektak</strong> Vision provides a large number of graphical plots allowing you to produce meaningful data<br />
from test results.<br />
D.6.1 Setting the Units<br />
You may wish to display your data in specific units or in a common unit system. By clicking the<br />
Units icon or by selecting Options > Units, you can display the Units dialog box. This dialog box<br />
allows you to choose which units (English or metric) you prefer to use, and which magnitude you<br />
prefer. This option can be set before the measurement and saved in the configuration file, or it can<br />
be changed at any time after the measurement. In addition, you can set the units you choose as the<br />
default for future measurements by checking the box entitled Set as Default.<br />
D.6.2 Standard Display File<br />
The standard .wdf display file includes the basic statistics from the measurement along with a<br />
contour plot of the results (see Figure D.6a).<br />
Rev. G <strong>Dektak</strong> 8 <strong>Manual</strong> 295<br />
151
3D Mapping Option<br />
Displaying Data<br />
Display Files for Each Analysis<br />
Figure D.6a Contour Plot<br />
<strong>Dektak</strong> Vision includes many analysis routines to manipulate measurement results. Typically, each<br />
analysis includes its own display output that shows the relevant statistics and plots for that analysis.<br />
The file type of this output will be either .wdf or .cdf (custom display file).<br />
To use the display output from a different analysis:<br />
1. Select Analysis > Custom Options.<br />
2. Select your analysis from the scrolling list.<br />
3. Click Calculate to perform the analysis and display the output.<br />
Display Custom Files (.cdf)<br />
Your customer representative may provide you with one or more custom display (.cdf) files<br />
designed for your particular application. You can choose to use one of these output files, or you can<br />
create your own .cdf file as well.<br />
To create a custom display file:<br />
1. Select Edit > Create Custom Display. This will open a blank display file for editing.<br />
Note: You may also select Edit > Open Custom Display to view and edit an existing<br />
custom display file. It is often easier to alter an existing file than to create one<br />
from scratch.<br />
296 <strong>Dektak</strong> 8 <strong>Manual</strong> Rev. G<br />
167
3D Mapping Option<br />
Displaying Data<br />
2. To add a rectangle to the display, select Edit > New Rectangle. Click the Filled Rectangle<br />
box to add a filled rectangle, then select the fill color. Click OK to add the rectangle to the<br />
display file, then position it and size it on the page.<br />
3. To add headings or other text, select Edit > New Static Text. Enter the text string, its size<br />
and typeface, then click OK. Position the text on the page.<br />
4. To add an analysis result field, select Edit > New Analysis Result. Select the result from the<br />
list, define its text characteristics on the left, then click OK. Position the field on the page.<br />
5. To add a plot, select Edit > New Plot Item. Select the desired plot from the list, choose the<br />
required calculation, then click OK. Position the plot on the page.<br />
6. To add an analysis results table, select Edit > New Plot Item. Select Results Table from the<br />
Type of Plot pull-down menu, then click OK. Position the table on the page.<br />
7. When you have completed the custom display, click the SAVE button on the toolbar, or select<br />
File > Save Custom File As. Save the custom display file for future use.<br />
Select a Default Output File<br />
The “Default Output File” is the display file that will appear each time you click the NEW<br />
MEASUREMENT button to take a measurement. To select the default output:<br />
1. Select Output > Default Output. This action will open the Set Default Output dialog box<br />
(Figure D.6b).<br />
2. Select the default output display format to use. If you choose to use a custom .cdf file, click<br />
BROWSE to select the path to the file.<br />
3. Click OK to accept the new default display.<br />
Figure D.6b Set Default Output Dialog Box<br />
Rev. G <strong>Dektak</strong> 8 <strong>Manual</strong> 297<br />
147
3D Mapping Option<br />
Displaying Data<br />
Setting Titles and User Notes<br />
<strong>Dektak</strong> Vision offers two fields that you can customize on most display files: Title and Note (see<br />
Figure D.6d). The Title and Note are displayed on any of the standard display files. You may also<br />
add them to any custom display files. In addition, <strong>Dektak</strong> Vision allows you to set various “User<br />
Notes” which are saved with the file but do not appear on the display file. They may be viewed<br />
when the file is open. These parameters are optional; they will remain blank if you do not set them.<br />
To set the Title and Notes:<br />
1. Select Options > Set Title/Notes.<br />
2. Enter the title/note text in the appropriate boxes.<br />
3. Click OK. The active dataset will automatically be updated.<br />
To set the User Notes:<br />
4. Select Options > Set User Notes.<br />
5. Enter the text in the appropriate boxes.<br />
6. Click OK. The notes will be appended to the active dataset. They will not be visible on the<br />
display file.<br />
<strong>Dektak</strong> Vision does not automatically save the titles or notes you add to the dataset. To save the<br />
changes to your dataset, select File > Save.<br />
D.6.3 Standard Plots<br />
Analyses are the specific calculations performed upon measurement data to return particular results<br />
about the test part. <strong>Dektak</strong> Vision can perform many analyses on data. You can open several<br />
windows simultaneously, showing various analyses of the same measurement data. The icons for<br />
these plots are grouped in the Lab mode menu bar (see Figure D.6c).<br />
Contour Plot<br />
Contour Plot<br />
Figure D.6c Main Analysis Plots<br />
Filtered Bearing<br />
Ratio Analysis<br />
2D Analysis 3D interactive 3D Plot Filtered Histogram Analysis<br />
A contour plot provides a visual, pixel-for-pixel representation of your dataset and applicable<br />
dataset statistics. Data heights are color-coded for easy interpretation. To display a contour plot of<br />
the current dataset, select Analysis > Contour, Analysis > Custom Options > Contour Plot > OK,<br />
298 <strong>Dektak</strong> 8 <strong>Manual</strong> Rev. G
Title and<br />
Note Fields<br />
3D Mapping Option<br />
Displaying Data<br />
or click the CONTOUR PLOT button (see Figure D.6c). This option is available when a dataset is<br />
open.<br />
Contour<br />
Plot Box<br />
Contour Plot Box<br />
Figure D.6d Contour Plot<br />
Surface Plot<br />
The Contour Plot Box to the left of the surface plot contains statistics and information about the<br />
plot. The terms regarding the plot in the Contour Plot are defined below:<br />
• Lateral Surface Area: Lateral surface area of the plot.<br />
• Total Surface Area: Total surface area of the plot.<br />
• Surface Statistics: Surface statistics for the region measured. The statistics are based on<br />
the entire area.<br />
• Ra: Average Roughness<br />
• Rq: Root Mean Square (RMS) Roughness<br />
• Rz: Average Maximum Height<br />
• Rt: Maximum Height of Profile, Rp + Rv<br />
Height (Z) Scale<br />
Rev. G <strong>Dektak</strong> 8 <strong>Manual</strong> 299<br />
167
3D Mapping Option<br />
Displaying Data<br />
Surface Plot<br />
• Terms Removed: Lists the terms removed from the plot.<br />
• Filtering: Lists the filtering options in use.<br />
Plot of the surface as viewed from directly above (see Figure D.6d). Surface heights are depicted<br />
by the colors on the vertical height scale to the right of the plot.<br />
Height (Z) Scale<br />
Vertical height scale, centered about the mean height (see Figure D.6d). The scale relates colors (or<br />
gray-scale levels) to the surface heights they represent. You can change the vertical scale with the<br />
Output > User Limits command.<br />
• Lateral Surface Area: Lateral surface area of the plot.<br />
• Total Surface Area: Total surface area of the plot.<br />
• Terms Removed: Lists the terms removed from the plot.<br />
• Filtering: Lists the filtering options in use.<br />
Plot Options Menu<br />
Right-click on a contour plot to access these options (see Figure D.6e):<br />
• Plot Options: Opens the Plot Options dialog box.<br />
• Analysis Options: Opens the Processed Options dialog box.<br />
• Color: Choose the colors used to designate data heights.<br />
• Background Color: Choose a background to enhance readability. If your plot contains<br />
data in the entire field of view, you will not see the effect of changing the background<br />
color.<br />
• Max Contrast: Provides maximum color contrast for data set displays.<br />
• Define Subregion: Zoom in on a rectangular area of your plot. Click Define Subregion,<br />
then click and drag to draw a rectangular region. A new window will appear showing<br />
your subregion and its statistics. After you have clicked Define Subregion, but before<br />
selecting the subregion, you may choose Abort Subregion to cancel.<br />
• After defining a subregion, a Zero Mean box will be added to the Processed<br />
Options dialog box. Right-click on the contour plot to open the Contour Plot menu,<br />
select Analysis Options, then select the Zero Mean check box to set the “zero”<br />
height to the mean height of the subregion.<br />
300 <strong>Dektak</strong> 8 <strong>Manual</strong> Rev. G
2D Analysis<br />
3D Mapping Option<br />
Displaying Data<br />
• Duplicate: Make a copy of the plot. You can then make changes to plot options and<br />
compare the plot to the original. Choose Full Resolution to copy every pixel, Half<br />
Resolution to copy every other pixel, or Quarter Resolution to copy every fourth<br />
pixel.<br />
• Save as TIFF: Saves only the Contour plot to a tagged image format (.tif) file.<br />
• Save to disk: Opens the Save As dialog box, which allows one to save the dataset.<br />
• Cursor Type: Choose the type of cursor to display.<br />
• Cursor Width: Choose the width of the Crosshair, 2-point or Radial cursors.<br />
Figure D.6e Contour Plot Menu<br />
The 2D Analysis displays a contour plot and X and Y profile plots (see Figure D.6f). You can<br />
access the 2D Plot by selecting Analysis > 2D Profile, Analysis > Custom Options > 2D Plot ><br />
OK, or by clicking the 2D ANALYSIS button (see Figure D.6c). This option is available when a<br />
dataset is open.<br />
Rev. G <strong>Dektak</strong> 8 <strong>Manual</strong> 301<br />
148
3D Mapping Option<br />
Displaying Data<br />
Contour Plot<br />
on 2D<br />
Cursor<br />
Parameters<br />
Figure D.6f 2D Analysis Plot<br />
The 2D profiles correspond to the cursor positions on the contour plot. You can view different<br />
profiles in the X and Y directions by moving the cursors on the contour plot. Point to the region of<br />
interest and click the left mouse button or click and drag the cursors.<br />
2D Analysis Plot Cursors<br />
On the 2D Analysis plots, set these cursors at the points of interest by clicking and dragging them<br />
to position (see Figure D.6f). The statistics to the right of the X and Y profile plots refer to the area<br />
between the cursors. The X and Y distance between the two points are shown above and to the right<br />
of the plot.<br />
You can expand the width of each cursor by clicking and dragging the arrows at its base. When<br />
expanded, the height of the cursor is the average height over the cursor region.<br />
When you have selected the Multiple Crosshairs cursor type, you may have several traces on the<br />
profile plots, each of which can have associated cursors. Only the cursors for the currently-active<br />
trace are shown. To show statistics for the different traces, you can click on the trace, or right-click<br />
on the profile plot and select Next Trace or Previous Trace.<br />
Cursor Parameters<br />
X Profile<br />
Y Profile<br />
2D Analysis<br />
Plot Statistics<br />
These parameters are related to the cursor positions on the contour plot (see Figure D.6f). If no<br />
cursors are present, parameters are based on the farthest left and the farthest right data points. The<br />
Cursor Parameter box is to the right of the 2D Analysis Plot (see Figure D.6f).<br />
302 <strong>Dektak</strong> 8 <strong>Manual</strong> Rev. G<br />
Cursors<br />
169
Table D.6a Cursor Parameters<br />
Crosshair Multiple Crosshair 2-Point Radial<br />
X X position of<br />
cursor relative<br />
to lower left<br />
corner.<br />
Y Y position of<br />
cursor relative<br />
to lower left<br />
corner.<br />
Ht. Data height at<br />
crosshair<br />
X Profile<br />
3D Mapping Option<br />
Displaying Data<br />
Data profile corresponding to the X cursor or Radial cursor on the contour plot (see Figure D.6f).<br />
Y Profile<br />
X position of last two cursors<br />
touched, and the difference<br />
(delta) between them.<br />
Y position of last two cursors<br />
touched, and the difference<br />
(delta) between them.<br />
Data height at crosshair of the<br />
last two cursors touched, and<br />
the height difference between<br />
them.<br />
Dist N/A Distance between crosshairs of<br />
the last two cursors touched.<br />
Angle N/A Angle created by a line<br />
between crosshairs of the last<br />
two cursors touched. Zero is<br />
horizontal.<br />
Data profile corresponding to the Y cursor or Circumference cursor on the contour plot (see Figure<br />
D.6f).<br />
2D Analysis Plot Statistics<br />
Surface statistics for the region between the cursors on the X profile or Y profile (see Figure D.6f):<br />
• Rq: Root mean square (RMS) roughness.<br />
• Ra: Average roughness.<br />
• Rt: Maximum height of profile, Rp + Rv.<br />
• Rp: Maximum peak height.<br />
• Rv: Maximum valley depth.<br />
X positions of the two endpoints<br />
and the difference<br />
(delta) between them.<br />
Y positions of the two endpoints<br />
and the difference<br />
(delta) between them.<br />
Data height at each endpoint<br />
and the difference<br />
(delta) between them.<br />
Distance between the two<br />
endpoints.<br />
The angle of the line. Zero<br />
is horizontal.<br />
• Angle: Angle between the two intersection points.<br />
X position of center of circle<br />
and the end of the radius line,<br />
and the difference (delta)<br />
between them.<br />
Y position of center of circle<br />
and the end of the radius line,<br />
and the difference (delta)<br />
between them.<br />
Data height at center of circle<br />
and end of the radius line, and<br />
the difference (delta) between<br />
them.<br />
Radius of the circle.<br />
The angle of the radius line.<br />
Zero is horizontal.<br />
Rev. G <strong>Dektak</strong> 8 <strong>Manual</strong> 303
3D Mapping Option<br />
Displaying Data<br />
• Curve: Radius of curvature of region between the cursors.<br />
• Terms: Terms removed under Plot Properties.<br />
• Avg Ht.: Average height of region between cursors.<br />
• Area: Area under curve between the cursors.<br />
When one or both cursors are against the edge of the profile plot, the statistics will be shown for the<br />
entire profile.<br />
When using Multiple Crosshairs, your profile plots will include a trace for each set of crosshairs.<br />
Click on a trace to show statistics for it. You can also right-click on the profile plot and select Next<br />
Trace or Previous Trace.<br />
The crosshairs corresponding to the active trace will be marked on the contour plot. Therefore, you<br />
can look to the contour plot to see for which trace the statistics are shown. Also, the title of the<br />
profile plot will appear in the color of the currently-active trace.<br />
3D Interactive<br />
The 3D interactive plot lets you view a dataset in three dimensions, from any angle, with various<br />
color and lighting effects.<br />
1. Open a dataset, select Analysis > 3D Interactive Plot, Analysis > Custom Options > 3D<br />
Interactive Plot > OK, or click the 3D INTERACTIVE PLOT button to view the dataset in 3-D<br />
(see Figure D.6c).<br />
2. Click and drag in the plot to rotate the dataset in all three dimensions.<br />
Note: While the data is rotating, Vision will switch to a low-resolution mode to redraw<br />
the plot in real time.<br />
304 <strong>Dektak</strong> 8 <strong>Manual</strong> Rev. G
3D Plot<br />
3D Interactive Plot Menu<br />
Figure D.6g 3D Interactive Plot<br />
Right-click on the plot to view the following options in the 3D Interactive menu:<br />
• Analysis Options: Opens the Processed Options dialog box.<br />
3D Mapping Option<br />
Displaying Data<br />
• Plot Options: Opens the 3D Settings dialog box where you can adjust lighting, scaling<br />
and other plot options.<br />
• Color: Select the color palette.<br />
• Background Color: Choose the background color for the plot.<br />
The 3D Plot creates a 3-D rendering of the surface data (see Figure D.6h). Right-click on the plot to<br />
manipulate the view angle, lighting, rotation, and so on. The 3D plot is very frequently used and is<br />
therefore accessible from a number of locations. To use the 3D Plot, select Analysis > 3D, select<br />
Analysis > Custom Options > 3D Plot > OK, or click the 3D PLOT button (see Figure D.6c).<br />
Rev. G <strong>Dektak</strong> 8 <strong>Manual</strong> 305<br />
170
3D Mapping Option<br />
Displaying Data<br />
3D Plot Menu<br />
Figure D.6h 3D Plot<br />
Right-click on the plot to view the following options in the 3D Interactive menu:<br />
3D Plot Box<br />
3D Plot Box 3D Plot<br />
• Plot Options: Control the appearance of the 3D plot.<br />
• Analysis Options: Opens the Processed Options dialog box.<br />
• Color: Choose the colors used to designate data heights.<br />
• Background Color: Choose a background to enhance readability. If your plot contains<br />
data in the entire field of view, you will not see the effect of changing the background<br />
color.<br />
• Max Contrast: Provides maximum color contrast for dataset displays.<br />
The 3D Plot Box to the left of the surface plot contains statistics and information about the plot.<br />
• Roughness: Roughness statistics for the region measured. The statistics are based on<br />
the entire area.<br />
• Ra: Average Roughness<br />
Height (Z) Scale<br />
306 <strong>Dektak</strong> 8 <strong>Manual</strong> Rev. G<br />
171
• Rq: Root Mean Square (RMS) Roughness<br />
• Rz: Average Maximum Height<br />
• Rt: Maximum Height of Profile, Rp + Rv<br />
• Terms Removed: Lists the terms removed from the plot.<br />
• Filtering: Lists the filtering options in use.<br />
Height (Z) Scale<br />
3D Mapping Option<br />
Displaying Data<br />
Vertical height scale, centered about the mean height (see Figure D.6h). The scale relates colors (or<br />
gray-scale levels) to the surface heights they represent. You can change the vertical scale with the<br />
Output > User Limits command.<br />
Filtered Histogram<br />
The histogram is a line graph representing the number of data points at each surface height. The<br />
vertical axis represents the number of data points contained within equally spaced intervals (bins),<br />
while the horizontal axis represents the surface height.<br />
To generate a histogram choose Analysis > Filtered Histogram > Calculate, or click the<br />
FILTERED HISTOGRAM ANALYSIS button (see Figure D.6c).<br />
Filtered Histogram Plot Box<br />
Figure D.6i Filtered Histogram Plot<br />
Filtered Histogram Plot<br />
Rev. G <strong>Dektak</strong> 8 <strong>Manual</strong> 307<br />
172
3D Mapping Option<br />
Displaying Data<br />
Filtered Histogram Plot<br />
In addition to showing the height distribution, the histogram also shows the amount of noise in the<br />
measurement. For a random surface, noise spikes are suggested by infrequently occurring peaks.<br />
Filtered Histogram Options Dialog Box<br />
To access the Filtered Histogram Options dialog box, right-click on the histogram plot then<br />
choose Histogram Options. The following options are available in the Filtered Histogram dialog<br />
box:<br />
• Number of bins: Sets the number of bins (10 to 5000) used in the histogram<br />
calculation.<br />
• Mirror X Axis: Plots the histogram data on an X axis that is centered about zero. This<br />
allows you to see how the data points are distributed about a zero mean level.<br />
• Show All Open Datasets: The histogram for the dataset in the active window is drawn<br />
in black. Histograms for all other open datasets are drawn in different colors on the<br />
same plot. This allows you to compare the actual distributions of multiple datasets.<br />
• Show Gaussian: Displays a Gaussian curve on the histogram, based upon the RMS, the<br />
number of data points, and the current bin size. The curve lets you compare a normal,<br />
random distribution to the actual distribution of your dataset.<br />
• Show Q Value Stats: Q value statistics are calculated using a certain percentage of data<br />
points from the histogram. At each percentage point, the difference between the highest<br />
bin value and the lowest bin value is calculated. These statistics are useful for<br />
examining how the peak-to-valley changes as the number of data points changes. Q<br />
value statistics are calculated using 80%, 85%, 90%, and 95% of the data points.<br />
• To obtain a more detailed listing of the histogram data and Q value statistics, click<br />
the right mouse button on the histogram. Select Print Table to print two histogram<br />
data tables: one based on the point distribution, and one based on the Q value<br />
distribution. The Q value distribution may be listed in terms of percent (if the Q<br />
Value Table by Percent option is selected) or in terms of peak-to-valley.<br />
• Print Q Value Table by Percent: If this option is selected, the Q value distribution<br />
printed with the Print Table option described above is listed by percentage (in<br />
increments of 5%) for 5% to 100% of the data points. If this option is not selected, the Q<br />
value distribution is listed by peak-to-valley increments.<br />
• Log Scale: If selected, this option displays logarithmic units along the Y-axis of the<br />
plot.<br />
• Set as Default: Check this box to define the current options settings as the default<br />
settings. Any subsequent filtered histogram measurement will be analyzed using these<br />
settings.<br />
308 <strong>Dektak</strong> 8 <strong>Manual</strong> Rev. G
Filtered Histogram Plot Box<br />
3D Mapping Option<br />
Displaying Data<br />
The Contour Plot Box to the left of the surface plot contains the following statistics and parameters<br />
about the plot:<br />
• Roughness: Roughness statistics for the region measured. The statistics are based on<br />
the entire area.<br />
• Ra: Average Roughness<br />
• Rq: Root Mean Square (RMS) Roughness<br />
• Rz: Average Maximum Height<br />
• Rt: Maximum Height of Profile, Rp + Rv<br />
• Terms Removed: Lists the terms removed from the plot.<br />
• Filtering: Lists the filtering options in use.<br />
Filtered Bearing Ratio Analysis Plot<br />
The bearing ratio curve (also called material ratio curve) is a graphical representation of the tp<br />
(bearing ratio) parameter in relation to the profile level (see Figure D.6j). This curve contains all of<br />
the amplitude information of a profile.<br />
The display file for the bearing ratio analysis shows the bearing ratio curve, along with various<br />
bearing ratio statistics. You can use the profile plot to mask portions of the data as well.<br />
To generate a filtered bearing ratio histogram, click the FILTERED BEARING RATIO ANALYSIS<br />
button (see Figure D.6c).<br />
Rev. G <strong>Dektak</strong> 8 <strong>Manual</strong> 309
3D Mapping Option<br />
Displaying Data<br />
Statistics<br />
Box<br />
Statistics Box<br />
Figure D.6j Filtered Bearing Ratio Analysis Plot<br />
To determine these parameters, the analysis calculates the area of minimum slope of the bearing<br />
ratio curve within a 40% window. This is accomplished by computing the height difference of the<br />
curve’s profile depth axis for points separated by 40% on the tp axis. The bearing ratio curve is first<br />
intersected at 0% and 40%, and the Htp is found. The 40% window is then moved to the right and<br />
the Htp monitored for each point until the minimum Htp value is found.<br />
• tp1: User-defined peak threshold (peak offset)<br />
• tp2: User-defined valley threshold (valley offset)<br />
• Htp: H1 - H2<br />
• H1: Height corresponding to tp1<br />
• H2: Height corresponding to tp2<br />
• Mr1: Peak material component<br />
• Mr2: Valley material component<br />
• RK: Core roughness depth<br />
• Rpk: Reduced peak height<br />
Filtered Bearing Ratio Analysis Plot<br />
310 <strong>Dektak</strong> 8 <strong>Manual</strong> Rev. G<br />
173
• Rvk: Reduced valley depth<br />
• V1: Related to Rpk and MR1<br />
• V2: Related to Rpk and MR1<br />
• Ra: Average Roughness<br />
• Rq: Root Mean Square (RMS) Roughness<br />
• Rz: Average Maximum Height<br />
Filtered Bearing Ratio Analysis Options<br />
Right click the Filtered Ratio Analysis plot and click Bearing Options to display the Bearing<br />
Ratio Options dialog box. The following options are available:<br />
D.6.4 Masking<br />
3D Mapping Option<br />
Displaying Data<br />
• Number of Bins: The bearing ratio calculation uses a histogram of heights. The number<br />
of bins specifies the number of equally spaced height intervals into which the data<br />
points fall.<br />
• Peak Offset: A percentage of the highest pixels in the dataset to be excluded from the<br />
analysis.<br />
• Valley Offset: A percentage of the lowest pixels in the dataset to be excluded from the<br />
analysis.<br />
• Upper (tp1): The peak threshold bearing ratio value, corresponding to the height H1<br />
Used to calculate the Htp height between bearing ratios (see Figure D.6j).<br />
• Lower (tp2): The valley threshold bearing ratio value, corresponding to the height H2.<br />
Used to calculate Htp (see Figure D.6j)<br />
• Set as Default: Check this box to define the current options settings as the default<br />
settings. Any subsequent bearing ratio measurement will be analyzed using these<br />
settings.<br />
• Show All Open Datasets: The histogram for the dataset in the active window is drawn<br />
in black. Histograms for all other open datasets are drawn in different colors on the same<br />
plot. This allows you to compare the actual distributions of multiple datasets.<br />
A mask, by temporarily eliminating regions of data from the display, enables you to focus on<br />
specific regions of interest for your analyses and to perform data modifications on specific portions<br />
of your data. You can also create a detector mask to mask detector pixels during a measurement.<br />
Once you have defined a mask, you can store it to disk for future use.<br />
Rev. G <strong>Dektak</strong> 8 <strong>Manual</strong> 311
3D Mapping Option<br />
Displaying Data<br />
Masks have a number of uses, including:<br />
Types of Masks<br />
Analysis Mask<br />
• Eliminating a bad spot from the sample surface (seen after data is taken).<br />
• Isolating a single area of the sample surface for repeated analyses.<br />
• Showing only those data points within a certain height range.<br />
• Fitting terms tilt, curvature, or cylinder terms to a region that you specify.<br />
• Eliminating detector pixel elements (while data is taken).<br />
An analysis mask enables you to block areas of data that could adversely affect your<br />
measurements. You can use an analysis mask to view or analyze specified portions of a dataset.<br />
With the analysis mask applied, the program eliminates the blocked data from the analysis, and the<br />
surface statistics change to depict the masked dataset. Retrieve data that was blocked by turning off<br />
the mask and re-analyzing the data.<br />
Terms Mask<br />
A terms mask acts like a filter, enabling you to define an area over which you can specify an area<br />
that more accurately defines a surface for terms analysis. Terms masks are typically used for<br />
surfaces with steps or other discontinuous features. For example, you can use a terms mask to<br />
perform a tilt, curvature, or cylinder terms fit. The fit performed on the masked area is then applied<br />
to the entire dataset.<br />
A terms mask is particularly useful when you want to fit terms to a surface that has an abrupt<br />
change. If you were to select tilt for terms removal, the resulting dataset would resemble a<br />
sawtooth. This is because the plane that best represents the data must take into account both planes<br />
forming the step. This "best fit" plane is approximately the average of the two plane surfaces;<br />
subtracting it produces the sawtooth. If you define a terms mask that covers only one side of the<br />
step, the terms fit will be based on the best fit plane over the flat part of the sample.<br />
Height Threshold (Histogram) Mask<br />
A height threshold mask blocks data points of a specified height or range of heights. This can be<br />
useful for looking at surfaces with features of distinctive heights. You can also use a height<br />
threshold mask to mask spikes that are not in the normal distribution of heights. When you create a<br />
height threshold mask, you examine a histogram of height data to determine which heights to mask.<br />
312 <strong>Dektak</strong> 8 <strong>Manual</strong> Rev. G
Detector Mask<br />
3D Mapping Option<br />
Displaying Data<br />
A detector mask blocks detector pixel elements during a measurement. This is useful for<br />
eliminating regions of the surface from the analysis, such as irrelevant background features. You<br />
can also use a detector mask to eliminate detector pixels that are defective and adversely affect your<br />
measurements. Note that unlike an analysis mask, a detector mask permanently eliminates data<br />
points from the raw data. The only way to “retrieve” these lost data points is to disable the detector<br />
mask and make another measurement of the same surface.<br />
Note: If you use the Data Restore function to restore data points that were included<br />
in the raw data but considered invalid for analysis purposes, the program will<br />
also attempt to restore the data points that were permanently blocked with the<br />
detector mask.<br />
Loading and Saving Masks<br />
To load and use an existing mask:<br />
1. Select Edit > Set New Measurement Masks.<br />
2. Locate the mask by clicking the BROWSE button next to the appropriate type of mask.<br />
3. Check the Apply Mask to Stored Data box to apply the mask.<br />
To save a mask to the current Configuration file, click SAVE from the Mask Editor window.<br />
Creating and Editing Masks<br />
Note: Analysis and terms masks are automatically saved with the dataset. Datasets are<br />
stored as raw data and processed data. If a mask is applied during analysis, the<br />
mask will be stored with the processed data. When you reopen the dataset, the<br />
mask can be reapplied to the dataset by turning on the mask. Remember that<br />
with a detector mask, masked regions of data are permanently blocked in the<br />
raw data.<br />
To create or edit Analysis, Terms or Height Threshold masks:<br />
1. Open a dataset.<br />
2. Select Edit > Edit Masks to access the Mask Editor Window.<br />
To create or edit a Detector Mask:<br />
3. Select Measurement Options > PSI Options.<br />
4. Click the EDIT DETECTOR MASK button to open the Detector Mask Editor window.<br />
Rev. G <strong>Dektak</strong> 8 <strong>Manual</strong> 313
3D Mapping Option<br />
Displaying Data<br />
You will use several cursor tools to create and change the mask. To use cursor tools, first select a<br />
cursor type from the Cursor pull-down menu. Move your cursor to the Mask Editor plot to begin<br />
creating a mask.<br />
For Local (Area) masks:<br />
Use the Crosshair tool to set an insertion point wherever you click on your plot. You can also drag<br />
to move the cursor point. Once you have an insertion point you can choose to perform functions to<br />
the selected Point of data, to data Above or Below the cursor, or to data to the Left or Right of the<br />
cursor.<br />
Use the four Area tools to create shapes within the mask area:<br />
• Rectangle: Press the left mouse button and drag to create a rectangular area.<br />
• Circle: Press the left mouse button and drag to create a circular area.<br />
• Ellipse: Press the left mouse button and drag to create an elliptical area.<br />
• Polygon: Place the mouse pointer over the location of one point on the polygon. Click<br />
to set your starting point, position the cursor and click once for each side you wish to<br />
create, then double-click to set the shape in place. A polygon can have up to 50 sides.<br />
After you've created an area, you can move it by holding down the Shift key while clicking and<br />
dragging it with the left mouse button.<br />
Note: By right-clicking in the Mask viewing region, you can select the size and the<br />
location of the mask to be displayed in pixels or in mm.<br />
You can also perform the following functions on an area:<br />
• Block: Block out sections of data. For example, if you are working with a circular<br />
cursor tool and you select Block, when you click on the INSIDE button the program will<br />
define a mask that blocks all the data inside the circle.<br />
• Pass: Allows data to pass through area(s) that may have been previously blocked. For<br />
example, if you create a blocked inner circle, select Pass, and then click on the INSIDE<br />
button, the program will define a mask that passes the data within the circle.<br />
• Invert: Used to invert the mask; exposed portions of your plot will be masked, and<br />
previously masked portions will be exposed.<br />
• Inside: Applies the selected function (Block, Pass, or Invert) to the inside of the area.<br />
• Outside: Applies the selected function to the outside of the area.<br />
• Entire: Applies the selected function (Block, Pass, or Invert) to the entire mask. May<br />
be used at any time as long as a cursor tool is not in the process of being created. To<br />
erase the current mask you can select Pass and then click on Entire.<br />
314 <strong>Dektak</strong> 8 <strong>Manual</strong> Rev. G
3D Mapping Option<br />
Displaying Data<br />
• Undo: Used to undo the most recent change made to the mask currently defined in the<br />
Mask Editor.<br />
With a mask visible in the mask editor window, select Mask Outline to create an outline of the<br />
mask on the dataset. You can then modify the identical, outlined mask. This is useful when you are<br />
making measurements of samples in which identical features from sample to sample vary slightly<br />
in size or position.<br />
For Height Threshold (Histogram) Masks<br />
The Height Threshold editor shows you a histogram of the height distribution for your sample. You<br />
have the option to create a high pass, low pass, or range pass mask.<br />
1. Select the number of cursors you wish to use—one cursor for a high or low pass mask, and<br />
two cursors for a selected range.<br />
2. If using one cursor, place your cursor at the cutoff point, then select Left (to mask all data<br />
left of the cursor, lower than the cutoff) or Right (to mask all data right of the cursor, higher<br />
than the cutoff).<br />
3. If using two cursors, place the two cursors at the cutoff points and select Outside (to mask all<br />
data outside the cursor range) or Inside (to mask all data inside the cursor range).<br />
4. Press Mask. The editor will mask the selected region(s) and adjust the histogram<br />
accordingly. You can repeat this process as many times as desired on the same histogram.<br />
Selecting Mask Views<br />
In the Mask Editor, you can select from three View options:<br />
• Select Data to see data wherever the mask is set to Pass.<br />
• Select Mask to view the mask itself.<br />
• Select Data & Mask to view the data and mask in four color sets. Data appears as either<br />
good or bad, as follows:<br />
• White indicates that data is good and unmasked.<br />
• Green indicates that data is good and masked.<br />
• Black indicates that data is bad and unmasked if a detector mask is not applied. If a<br />
detector mask is applied, black can indicate bad and masked data.<br />
• Red indicates that data is bad and masked.<br />
Rev. G <strong>Dektak</strong> 8 <strong>Manual</strong> 315
3D Mapping Option<br />
Displaying Data<br />
Selecting Data Displays<br />
In the Mask Editor window you can choose to display data before or after processing.<br />
Select Raw to see the data in its unprocessed state, without any terms applied. When making<br />
changes to a mask that has already been applied, raw data is sometimes better to use because the<br />
analysis mask has not been applied to it.<br />
You can also view Processed data that has had masks, terms, or other options applied to it.<br />
Saving Masks<br />
Terms, analysis and detector masks can all be saved independently of a dataset. By saving a mask<br />
separately from the data, you can use the same mask to apply to different datasets.<br />
To save a mask, open the Mask Editor and select To/From Disk from the Current Mask pulldown<br />
menu. Click Save and enter a file name for the mask. The mask will be saved into the<br />
specified directory with a .msk extension.<br />
Applying Masks and Filters<br />
After a mask has been created and saved, you can use the mask for measurements and data<br />
analysis.<br />
To Apply a Detector Mask:<br />
1. Select Edit > Set New Measurement Mask.<br />
2. Enter the path and file name of your saved detector mask in the appropriate slot (or choose<br />
Browse to determine the location of your mask).<br />
3. Close the Mask Editor.<br />
4. Select Hardware > Measurement Options > PSI Options.<br />
5. Check the Use Detector Mask box.<br />
To Apply an Analysis or Terms Mask to a New Measurement:<br />
1. Select Edit > Set New Measurement Mask.<br />
2. Enter the path and the file name of your saved mask in the appropriate slot (either Terms<br />
Mask or Analysis Mask). You may use the BROWSE button to determine the location of your<br />
mask.<br />
3. Close the Mask Editor.<br />
316 <strong>Dektak</strong> 8 <strong>Manual</strong> Rev. G
3D Mapping Option<br />
Dataset vs. Database<br />
4. Select Analysis > Processed Options to access the Processed Data Options dialog box.<br />
5. Check either the Use Analysis Mask or Use Terms Mask box.<br />
6. Select any terms to be removed, if applicable. Filtering, data invert, and data restore options<br />
can also be selected.<br />
7. Click OK to close the dialog box.<br />
With this configuration, all new measurements taken will have the selected mask applied.<br />
To Apply a Saved Analysis or Terms Mask to an existing (unmasked) dataset:<br />
1. Select Edit > Edit Mask.<br />
2. In the Current Mask pull-down menu, select To/From Disk.<br />
3. Click Load.<br />
4. Select your mask and press OK.<br />
The selected mask will be applied to the current dataset only.<br />
Saving a Mask to a Configuration File<br />
1. Create the mask.<br />
2. Select On and press SAVE. This will save the current mask, but will not permanently save the<br />
mask to the configuration file or to the disk.<br />
3. Select File > Save Configuration to save the mask to the current configuration file.<br />
D.7 Dataset vs. Database<br />
When you make a measurement, the system determines the height of every point on the sample.<br />
This data is the height profile, also known as the raw data. <strong>Dektak</strong> Vision analyses this raw data to<br />
determine the pertinent parameters.<br />
You can store data and parameters in two forms through <strong>Dektak</strong> Vision: datasets and databases.<br />
Datasets allow you to view snapshots of your process. Databases allow you to store data over time<br />
and to view trends in your process.<br />
A database stores analysis parameters from one measurement or from many measurements.<br />
<strong>Dektak</strong> Vision database files are comma-separated-variable files with .csv extensions. Raw data is<br />
not recorded in a database.<br />
Rev. G <strong>Dektak</strong> 8 <strong>Manual</strong> 317
3D Mapping Option<br />
Dataset vs. Database<br />
The analysis options available for the data in the form of a dataset may also be recorded in a<br />
database, allowing you to compile long-term data or to apply various statistical analysis to your<br />
data.<br />
D.7.1 <strong>Dektak</strong> Vision Databases<br />
Once you have performed a measurement you can store the results to a Vision database. The basic<br />
steps to working with a database are:<br />
1. Define a database and the fields within it.<br />
2. Select and activate the database.<br />
3. Select whether to log data automatically or manually.<br />
4. Decide whether to add the contents of the current database to a master database.<br />
5. View or print the results of the database file.<br />
Click the DATABASE OPTIONS button (see Figure D.7a) on the toolbar to open the Database<br />
Options dialog box (see Figure D.7b). Here, you can reach most of the database functions.<br />
Figure D.7a Database Options Button<br />
Figure D.7b Database Options Dialog Box<br />
318 <strong>Dektak</strong> 8 <strong>Manual</strong> Rev. G<br />
152
Defining a Database<br />
3D Mapping Option<br />
Dataset vs. Database<br />
To work with a database, you must first define the database file to use. If no database file exists, or<br />
if you need parameters that differ from those in existing database(s), you will need to define a new<br />
database:<br />
1. Click the DATABASE OPTIONS button on the toolbar.<br />
2. Click the DEFINE button to open the Define Database dialog box.<br />
Figure D.7c Define Database Dialog Box<br />
3. The fields available for use in the database are listed in the left-hand column. The right-hand<br />
column will display the fields in the new database. The fields will be organized either<br />
alphabetically or by the analyses that create them. (Click Display All Entries to switch<br />
between the two views).<br />
4. Select a field in the Available Entries column, then use the ADD button to move it to the<br />
Selected Entries column. You can also double-click a field to move it to the Selected<br />
Entries list.<br />
5. To add fields from an existing database, click the TEMPLATE button, then select an existing<br />
database file. All fields in that database will be added to the Selected Entries column for<br />
your new database. The template option is particularly useful when you are creating a master<br />
database file.<br />
Note: All database file(s) used to update the master database must have the same<br />
fields as the master database.<br />
6. To remove a field from the database, choose the field in the right-hand list and click Delete.<br />
You can also remove a field by double-clicking on it, or remove all fields by clicking Delete<br />
All.<br />
Rev. G <strong>Dektak</strong> 8 <strong>Manual</strong> 319<br />
153
3D Mapping Option<br />
Dataset vs. Database<br />
7. Click the UNITS button to open the Database Units dialog box (see Figure D.7d). Here, you<br />
can set database values for default, metric, or English units. Results logged to the database<br />
will appear in the selected units.<br />
Figure D.7d Database Units Dialog Box<br />
8. Once you have defined the database, click OK, then specify a name for the file.<br />
Pass/Fail Criteria for Database Fields<br />
You can enter Pass/Fail criteria for each field in the database. All Pass/Fail criteria will be stored<br />
with the database.<br />
1. Click Pass/Fail from the Database Options dialog box to open the Define Pass/Fail dialog<br />
box (see Figure D.7e).<br />
320 <strong>Dektak</strong> 8 <strong>Manual</strong> Rev. G<br />
154
Figure D.7e Pass/Fail Dialog Box.<br />
2. From the Parameter list, select the field for which you want to set pass/fail criteria.<br />
3. Type in the tolerances for the upper and/or lower limits.<br />
4. From the Pass pop-up, select when the part should be passed or failed:<br />
• Always Always pass the part (such as no pass/fail criteria).<br />
• < Pass if the measurement is less than the tolerance.<br />
• Pass if the measurement is greater than the limit.<br />
• => Pass if the measurement is greater than or equal to the tolerance.<br />
5. Repeat for each field that requires Pass/Fail criteria.<br />
Select and Activate a Database<br />
Once you have defined a database, you must select it for use and activate it, as follows:<br />
1. Click the DATABASE OPTIONS button on the toolbar.<br />
2. Type in the database path and name under Current Database, or click SET to locate the<br />
database file.<br />
3. Click OPEN to select the database.<br />
4. Click the Database Active check box to activate the database.<br />
3D Mapping Option<br />
Dataset vs. Database<br />
Rev. G <strong>Dektak</strong> 8 <strong>Manual</strong> 321<br />
174
3D Mapping Option<br />
Dataset vs. Database<br />
5. To deactivate the database, click to clear the Database Active check box.<br />
Logging Data to a Database<br />
When you are making measurements from within <strong>Dektak</strong> Vision, you can decide to store<br />
measurement results automatically, semi-automatically, or manually:<br />
• Automatic Logging: Automatically stores the results to a database when you close a<br />
dataset. This is the default mode.<br />
• Semi-Automatic Logging: When you close a data set, asks you whether you wish to<br />
store results. To enable this mode, select the Prompt to Save check box in the<br />
Database Options dialog box.<br />
• <strong>Manual</strong> Logging: Stores results to a database only when you specifically request it. To<br />
manually log to a database, first make sure the data set from which you want to log data<br />
is open as the active window. Then select Options > Log to Database Now from the<br />
main <strong>Dektak</strong> Vision window. Statistics and other information for the active data set will<br />
be logged to the database.<br />
Using a Master Database<br />
Note: When one or more data sets are open, the Option menu will contain the Log to<br />
Database Now command. If a database has been activated and the current data<br />
set has not been logged, this command will be available for use. Select this<br />
option to add the current dataset to the database.<br />
A master database collects data from one or more databases. As you learned earlier, <strong>Dektak</strong> Vision<br />
can gather per-part measurement results into a database which can be used for statistical process<br />
control. You can also create and use master databases when you make measurements from within<br />
<strong>Dektak</strong> Vision.<br />
Master database files and current database files should use the same template to ensure consistency.<br />
To make sure the files are consistent, when you define a new master database file, use the<br />
TEMPLATE button to copy the template of the current database to the new master database.<br />
To work with a master database:<br />
1. Click the DATABASE OPTIONS button on the toolbar to access the Database Options dialog<br />
box.<br />
2. Select and activate the Current Database file you want added to the master database file.<br />
3. Either type in a Master Database path and file name, or click the SET button to open the<br />
Select a Database File dialog box where you can then choose a master database file.<br />
4. If you want the contents of the current database to be automatically printed after the master<br />
database is appended, select the Auto Print check box.<br />
322 <strong>Dektak</strong> 8 <strong>Manual</strong> Rev. G
3D Mapping Option<br />
Dataset vs. Database<br />
5. If you want the contents of the current database to be automatically erased after the master<br />
database is appended, select the Auto Clear check box. This option erases logged data, so be<br />
sure you use it judiciously.<br />
6. Click the UPDATE button to append the master database with the contents of the current<br />
database. The current database values are appended to the end of the master database.<br />
Viewing or Printing a Database File<br />
You can view a database file on your computer monitor. Or, you can print a hard copy of your<br />
database file using two different formats.<br />
Viewing a Database File<br />
1. Click the DATABASE OPTIONS button on the toolbar to access the Database Options dialog<br />
box.<br />
2. Click the LIST VIEW button to open the Select Database dialog box where you can choose a<br />
database to view.<br />
3. Make your selection and click Open. <strong>Dektak</strong> Vision will display a Database List View of<br />
the selected file. List view includes the name of the database file, logged parameters,<br />
statistics, and pass/fail information (see Figure D.7f).<br />
Figure D.7f List View of a Database<br />
Rev. G <strong>Dektak</strong> 8 <strong>Manual</strong> 323<br />
175
3D Mapping Option<br />
Dataset vs. Database<br />
Note: To display database results automatically in list view when you open a<br />
configuration (.ini) file, select the Display List View w/ Open Configuration<br />
check box in the Database Options dialog box. Save your configuration.<br />
You can also choose to view one or more of the fields as a graph or histogram. These options are<br />
available from the View menu in List View.<br />
For more information on using the list view options, refer to the <strong>Dektak</strong> Vision Online Help.<br />
Printing a Database File<br />
1. Click the DATABASE OPTIONS button on the toolbar to access the Database Options dialog<br />
box.<br />
2. Click the LIST VIEW button to open the Select Database dialog box where you can choose a<br />
database file for viewing.<br />
3. Make your selection and click Open. <strong>Dektak</strong> Vision will display a List View of the selected<br />
file.<br />
4. From the database list view pull-down menus, select either File > Print All or File > Print<br />
Stats. If you select Print All, all logged parameters and their statistics will be included. If<br />
you select Print Stats, only the statistics will be included.<br />
Note: Following an automated measurement, the operator can click the PRINT button<br />
on the operator interface to print the results. Remember that you can also set up<br />
the system to automatically print results following each measurement.<br />
324 <strong>Dektak</strong> 8 <strong>Manual</strong> Rev. G
Appendix E N-Lite Option<br />
This appendix includes the following topics:<br />
• Introduction: Section E.1<br />
• Main Functions: Section E.2<br />
• <strong>Advanced</strong> Users: Section E.3<br />
• Configuration File Setup: Section E.4<br />
Rev. G <strong>Dektak</strong> 8 <strong>Manual</strong> 325
N-Lite Option<br />
Introduction<br />
E.1 Introduction<br />
The N-Lite LIS 3 Option allows stylus-to-surface engage routine for ultra low force profiling. The<br />
sensor enables stylus force to be adjusted down to 0.03mg force for measuring very soft films or<br />
when using a very sharp, sub-micron stylus to measure sub-micron lines and trenches.<br />
The N-Lite LIS 3 Option includes the following characteristics:<br />
• Low force servoed sample engage.<br />
• Force range: 0.03mg to 2.0mg.<br />
• Reduced pre-scan stylus touch-down.<br />
• Does not alter the user interface.<br />
• <strong>Dektak</strong> 8 implicitly invokes N-Lite for scans less than 2mg.<br />
• Accurate measurement force: ± 20µg.<br />
• Vertical positioning accuracy: ± 0.20µm.<br />
• Automatic force calibration.<br />
CAUTION: To avoid damage to the stylus, do not use a stylus larger than<br />
2.5µm with the N-Lite option.<br />
326 <strong>Dektak</strong> 8 <strong>Manual</strong> Rev. G
E.2 Main Functions<br />
N-Lite Option<br />
Main Functions<br />
Three functions of the N-Lite option distinguish it as a necessary tool to produce very low, accurate<br />
forces for any sensor position:<br />
Servoed Engage<br />
• Servoed Engage<br />
• Fine Positioning<br />
• Stylus Retouch<br />
The servoed engage is designed to prevent the stylus from traveling across the sample surface<br />
during tower engagement. This significantly reduces the traverse distance and forces exerted on the<br />
sample surface. It is especially useful in preventing damage to soft samples with extremely sharp<br />
styli. By default, N-Lite is designed to limit stylus travel, following contact, to no more than 5µm<br />
vertically during the servoed engage.<br />
Fine Positioning<br />
Fine positioning precisely locates the sensor relative to the sample surface. During this operation,<br />
the servo is disabled, and the force is set to the minimum value necessary to remain on surface.<br />
There is a small amount of stylus traverse during this phase of the engage.<br />
Stylus Retouch<br />
The retouch accurately establishes the true minimum force necessary for the stylus to engage the<br />
sample surface. During this phase there is no profiler tower motion. The stylus lifts from the sample<br />
surface and then lowers to (retouches) the sample surface with the minimum possible force. This<br />
“minimum,” “zero,” force is used to dynamically shift the force calibration curve when applying<br />
the final scanning force, thus providing automatic force calibration. Since the retouch compensates<br />
for thermal and electrical drift in the sensor force mechanism, very precise forces (within ±20 µg)<br />
are possible.<br />
Due to the very low forces achievable with N-Lite, it is possible for the sensor to have limited<br />
downward travel from the final engage (null) position. This is because the sensor mechanism is a<br />
balanced pivot arm, with the balance point set so that the zero-force-coil position of the stylus rests<br />
at its upper stop. The force coil is energized to bring the stylus down into visibility and apply scan<br />
forces. Even though the jewel bearings used for the sensor pivot are effectively friction free, it still<br />
takes a small fraction of a milligram of force to swing the pivot-arm across the measurable range.<br />
When engaging N-Lite, it is possible for the sample surface to “disappear” below the reach of the<br />
stylus during scanning. As discussed above, at very low forces the stylus has limited downward<br />
travel from the final engage (null) position. Due to these sensor physics, proper use of the tool<br />
requires that the user:<br />
Rev. G <strong>Dektak</strong> 8 <strong>Manual</strong> 327
N-Lite Option<br />
Main Functions<br />
1. Carefully level the sample to prevent “walk away” from the stylus.<br />
2. Run tests and carefully level for map scans to prevent data distortion or loss. This problem<br />
will be evident when the sample “walks away” from the stylus on individual, intermittent,<br />
scans in the map.<br />
3. Specify and test scan forces adequate to deflect the stylus to the bottom of all depressed<br />
sample features to prevent the detail of these features becoming lost in temporary,<br />
unintended disengages.<br />
4. Know and understand the expected sample/scan shape, ensuring that measured data are<br />
correctly understood and evaluated.<br />
With proper use, N-Lite is a reliable feature of the <strong>Dektak</strong> tool.<br />
If you are unsure of how to make a particular measurement, or are experiencing difficulties, please<br />
contact Veeco Applications Support for assistance in designing specific tests to measure, quantify,<br />
and qualify your processes.<br />
328 <strong>Dektak</strong> 8 <strong>Manual</strong> Rev. G
E.3 <strong>Advanced</strong> Users<br />
E.3.1 N-Lite Algorithm Configuration File Entries<br />
N-Lite Option<br />
<strong>Advanced</strong> Users<br />
Note: In this version of <strong>Dektak</strong> 8 software, the N-Lite algorithm configuration file<br />
entries are stored in an algorithm specific initialization file. However, in<br />
future software releases these entries will be stored in the hardware<br />
initialization file.<br />
The N-Lite algorithm behavior is controlled by 43 parameters stored in the N-Lite configuration<br />
file. These parameters control all aspects of the algorithm:<br />
• Time limits<br />
• Motion<br />
• Stylus behavior<br />
• Measurement specifics<br />
• Performance and tuning<br />
Note: The default values used by the <strong>Dektak</strong> 8 system were tested and performed<br />
well for most scanning conditions. If your sample or measurement<br />
requirements are unusual, please consult Veeco Technical Support for<br />
assistance with tuning your system.<br />
In general, the only desirable tuning of the algorithm is an update of the “K 0” parameter of the<br />
servo PID. This parameter is discussed, below, in the Configuration File Setup section.<br />
E.3.2 Stiction Problems<br />
Static electricity is generally responsible for stiction problems during the retouch phase. Adjusting<br />
the “timeout” and “lift increment” parameters can help alleviate this problem. In this case, however,<br />
the system and sample grounding must be checked. If necessary, perform the following:<br />
1. Install the <strong>Dektak</strong> 8 Enhanced Grounding Kit.<br />
• This kit is for retrofit and upgrade systems only.<br />
• Verify the tool’s grounding following installation.<br />
2. Verify that the system is properly grounded to the site.<br />
3. Using a digital volt meter (DVM), verify that the system grounding is functioning properly.<br />
Rev. G <strong>Dektak</strong> 8 <strong>Manual</strong> 329
N-Lite Option<br />
<strong>Advanced</strong> Users<br />
4. Verify that appropriate grounding equipment is available and in use:<br />
• Static discharge mats<br />
• Wrist straps<br />
• Others<br />
5. Use proper sample handling.<br />
6. Mount an alpha-particle source on the system<br />
• Mount the source as close to the stylus tip as possible.<br />
• The source should not interfere with the sample or profiler mechanics.<br />
For all other issues, contact Veeco Applications or Technical support.<br />
330 <strong>Dektak</strong> 8 <strong>Manual</strong> Rev. G
E.4 Configuration File Setup<br />
N-Lite Option<br />
Configuration File Setup<br />
After installing the N-Lite software, you will need to configure your system tuning parameters to<br />
run the algorithm correctly.<br />
E.4.1 N-Lite Configuration File<br />
During N-Lite installation, several N-Lite initialization file parameters will move to the<br />
initialization file specific to your profiler. For example, if you have a D8p1000 these nLite.ini file<br />
parameters can now be found in [D8p1000.ini].<br />
You can use any editor with text file compatibility to view and edit the sample configuration file<br />
(see the Notepad example below). Irrespective of the editor you use for the file, you must save it in<br />
text or ASCII file format. In general, word-processor formats will not work with the <strong>Dektak</strong><br />
control software.<br />
Notepad<br />
1. Open Notepad by clicking Start > Programs > Accessories > Notepad.<br />
2. Select File > Open to open the Open dialog box.<br />
3. In the Open dialog box, select All Files under Files of type. The N-Lite configuration file<br />
will display in the selection window.<br />
4. Locate the N-Lite configuration file and highlight the file name.<br />
5. Click OPEN to open and edit the file.<br />
E.4.2 Hardware Configuration File<br />
Once you have the N-Lite configuration file open, open the hardware configuration file for your<br />
profiler. This file is also located in the <strong>Dektak</strong> binaries directory. Using a text editor, follow one of<br />
the procedures given for the N-Lite configuration file to open this file as well. The configuration<br />
file for your system is named based on the model number of the profiler, specifically:<br />
• .INI<br />
For example, if your profiler is a D8p1100, the hardware configuration file is named: D8p1100.INI<br />
Although you have opened this file, you will need to make no changes to it.<br />
1. Copy the hardware configuration value from the D0 entry of the [FORCE-<br />
CALIBRATION] section to the servo K0 (dac) entry of the appropriate section of the<br />
N-Lite configuration file.<br />
Rev. G <strong>Dektak</strong> 8 <strong>Manual</strong> 331
N-Lite Option<br />
Configuration File Setup<br />
2. Save and close the N-Lite configuration file.<br />
3. Close the hardware configuration file. Do not save this file.<br />
E.4.3 Configuration File Example<br />
The following is an example configuration file which implements the defaults for the d8p1100<br />
profiler:<br />
[d8p1100]<br />
algorithm timeout (msec)=120000<br />
algorithm retry limit (count)=8<br />
start phase timeout (msec)=200<br />
retract phase timeout (msec)=2000<br />
retract tower pulse period (tic/pulse)=4<br />
retract tower time (msec)=500<br />
stiction phase timeout (msec)=250<br />
servo phase timeout (msec)=4000<br />
servo goal (lvdt)=2048<br />
servo goal error (lvdt)=125<br />
servo run (sample)=300<br />
servo K0 (dac)=18176<br />
servo Kd [char] (dac-sample/lvdt)=3<br />
servo Kd [expt] (dac-sample/lvdt)=0<br />
servo Ki [char] (dac/lvdt)=-16777<br />
servo Ki [expt] (dac/lvdt)=-24<br />
servo Kp [char] (dac/lvdt)=-26214<br />
servo Kp [expt] (dac/lvdt)=-18<br />
proximity phase timeout (msec)=200<br />
proximity pulse period (tic/pulse)=4<br />
slow engage phase timeout (msec)=80000<br />
slow engage startup pause (msec)=200<br />
slow engage threshold (lvdt)=1250<br />
slow engage pulse period (tic/pulse)=16<br />
restore force phase timeout (msec)=200<br />
restore range identifier=3<br />
zero phase timeout (msec)=4000<br />
zero phase startup pause (msec)=200<br />
zero phase target (lvdt)=32767<br />
zero phase pulse period (tic/pulse)=32<br />
332 <strong>Dektak</strong> 8 <strong>Manual</strong> Rev. G
null phase timeout (msec)=8000<br />
null phase target (lvdt)=32767<br />
null phase pulse delay (msec)=5<br />
retouch phase timeout (msec)=10000<br />
retouch delay (msec)=500<br />
retouch lift delay (msec)=50<br />
retouch lift increment (dac)=32<br />
retouch lift offset (lvdt)=4096<br />
retouch top pause (msec)=500<br />
retouch touch delay 0 (msec)=50<br />
retouch touch delay 1 (msec)=100<br />
retouch touch error (lvdt)=1000<br />
retouch touch increment (dac)=16<br />
retouch touch offset (lvdt)=4000<br />
force phase timeout (msec)=200<br />
force value (dac)=2243<br />
N-Lite Option<br />
Configuration File Setup<br />
Rev. G <strong>Dektak</strong> 8 <strong>Manual</strong> 333
Index<br />
Symbols<br />
.cdf files 296<br />
.opd files 289<br />
.wdf files 295<br />
Numerics<br />
2D Analysis 301<br />
3D 305<br />
3D Interactive 304<br />
3D Plot 305<br />
A<br />
Abort 94<br />
Acoustics 18<br />
Air Pressure Connector 34<br />
Air Vacuum Connectors 34, 40<br />
Alignment<br />
High Mag Camera 245<br />
Low Mag Camera 243<br />
Analyses 298<br />
Analysis<br />
Custom Display file 296<br />
Analysis Mask 312<br />
Analytical Functions 13<br />
assigning keystrokes 47<br />
deleting functions or results 147<br />
entering into a scan routine 146<br />
measuring and entering 145<br />
Analytical Functions Description 128<br />
Analytical Functions Dialog Box 128, 204<br />
Area (Area-Under-the Curve) 136<br />
ASH (Delta Average Step Height) 135<br />
Auto Prog Summary Window<br />
edit menu 206<br />
Auto Prog Summary Window Menu 206<br />
Automatic Leveling (Step Detection) 268<br />
Automation Program 12<br />
description 96<br />
editing 98<br />
opening 96<br />
running with deskew points 123<br />
saving 93<br />
Automation Program Options 109<br />
data file/data export 109<br />
pause during autoprogram 117<br />
printer 116<br />
Automation Program Summary (APS) 112<br />
Automation Program Summary Window 113<br />
Automation Programs Window<br />
edit menu 191<br />
Automation Programs Window Menu 191<br />
Avg Ht (Average Height) 135<br />
B<br />
Boundaries<br />
saving 90<br />
Boundaries Submenu 204<br />
Boundary Magnification 13<br />
C<br />
Calculate button 296<br />
Calibration<br />
Vertical 220<br />
Calibration Menu 186<br />
Calibration Standards 11<br />
Camera<br />
color 10<br />
Camera Field of View 10<br />
Camera View Pane 58<br />
CDF file 296<br />
Clean Dry Air 18<br />
Clean Room 18<br />
Coarse Positioning 12<br />
Color Camera 10<br />
Computer Cable Connections 39<br />
Computer Console 7<br />
Rev. G <strong>Dektak</strong> 8 <strong>Manual</strong> 335
Index<br />
Configuration 7<br />
Configuration File<br />
N-Lite 329, 331<br />
Configuration Settings<br />
Appearance folder 180<br />
Diagnostics folder 182<br />
Illumination folder 183<br />
Shortcuts folder 182<br />
Working Directories folder 181<br />
Configuration Settings Dialog Box 180<br />
Contour Plot 298<br />
Contract<br />
Service 248<br />
Creating master database 319<br />
Custom display file 296<br />
Edit 296<br />
Open 296<br />
Save 297<br />
Customize Toolbar Dialog Box 207<br />
Customizing the Toolbars 207<br />
Cutoff Filters<br />
entering in scan routine 142<br />
D<br />
Data Plot Display 13<br />
Data Plot Window<br />
analysis menu 204<br />
edit menu 201<br />
Data Plot Window Menu 201<br />
Data Points Per Scan 9<br />
Data Processing 168<br />
filter cutoffs 168<br />
smoothing 169<br />
Data Restore 293<br />
Data Type<br />
displaying 167<br />
entering in scan routine 144<br />
Database<br />
.csv format 318<br />
Creating master database 322<br />
Current database 322<br />
Defining 319<br />
defining (creating) 319<br />
Internal 318<br />
List View 323<br />
Logging Options 322<br />
Master database 319, 322<br />
Master database, Defining fields 319<br />
Pass/Fail criteria 320<br />
Printing 323, 324<br />
Selecting 321<br />
Standard display file 295<br />
Viewing 323<br />
viewing or printing 323<br />
Dataset 289<br />
Default Menu Bar 172<br />
Default output file 297<br />
Deflection Scan 162<br />
Deskew 119<br />
Deskew Offsets<br />
clearing 124<br />
Deskew Points<br />
clearing 124<br />
establishing for automation program 120<br />
establishing for scan routine 121<br />
factors that affect accuracy 119<br />
program 119<br />
scan 119<br />
Detection Range (Step Detection) 267<br />
Detector Mask 313<br />
Dimensions 10<br />
Display Parameters 165<br />
display data type 167<br />
display range 167<br />
reference/measurement cursors 166<br />
software leveling 165<br />
Display Range 167<br />
Dual Switchable Video Camera 7<br />
E<br />
Editing Scan Routines 104<br />
analytical functions 106<br />
data processing settings 105<br />
display parameters 105<br />
global editing 106<br />
scan parameters 104<br />
Environmental Humidity 10<br />
Equipment Damage<br />
Symbol 3<br />
Exclude Selected Scan Results 113<br />
Extended Scan Option 11<br />
Extended Vertical Range 11<br />
Extended Vertical Range Option<br />
setting vertical calibration 232<br />
F<br />
Facilities Requirements 18<br />
Feature Reticle Alignment 65<br />
Feedback<br />
336 <strong>Dektak</strong> 8 <strong>Manual</strong> Rev. G
service 251<br />
File Menu 174<br />
new command 174<br />
Filter<br />
applying 316<br />
Filter Cutoffs 168<br />
Filtered Bearing Ratio Analysis Plot 309<br />
Filtered Histogram 307<br />
Filtering 290<br />
High Pass 291<br />
Low Pass 291<br />
Median Pass 291<br />
Floor 18<br />
Focusing<br />
High Mag Camera 246<br />
Low Mag Camera 244<br />
Force<br />
Stylus Tracking 10<br />
Force Calibration Dialog Box 186<br />
G<br />
Geometry Parameters 136<br />
Area 136<br />
Perim 136<br />
Radius 136<br />
Slope 136<br />
Sm 136<br />
Tp 136<br />
Volume 137<br />
Global Edit Mode 106<br />
Graphical plots<br />
Custom display file 296<br />
Default output file 297<br />
H<br />
Hardware Configuration File<br />
N-Lite 331<br />
Height Average<br />
ten point (Rz_din) 132<br />
Height Parameters<br />
ASH 135<br />
Avg Ht 135<br />
HSC 135<br />
P_V 135<br />
Pc 135<br />
Peak 135<br />
TIR 135<br />
Valley 135<br />
Height Threshold 312<br />
Help 5<br />
Help Menu 190<br />
High Mag Camera<br />
Alignment 245<br />
Focus 246<br />
Rotation 246<br />
High Spot Count (HSC) 135<br />
Horizontal Resolution 9<br />
HSC (High Spot Count) 135<br />
I<br />
Icons<br />
Attention 3<br />
IEC-320 Power Cord 35<br />
Illumination<br />
sample 10<br />
Interactive 3-D Software 11<br />
L<br />
Leveling<br />
software 10, 165<br />
stage 10<br />
Leveling (Step Detection)<br />
automatic 268<br />
Linear Variable Differential Transformer 6<br />
Low Mag Camera<br />
Alignment 243<br />
Focus 244<br />
M<br />
Maintenance<br />
<strong>Dektak</strong> 8 exterior 219<br />
preventative 218<br />
stage 218<br />
Teflon Pads 219<br />
<strong>Manual</strong> Theta Rotation 61<br />
Masking Options 292<br />
Masks<br />
Analysis 293, 312<br />
applying 316<br />
creating and editing 313<br />
data displays 316<br />
Detector 313<br />
Height Threshold 312<br />
loading and saving 313<br />
saving 316<br />
saving to configuration 317<br />
Terms 293, 312<br />
types 312<br />
views 315<br />
Master Database 322<br />
Index<br />
Rev. G <strong>Dektak</strong> 8 <strong>Manual</strong> 337
Index<br />
Maxdev (Maximum Deviation) 129<br />
Maximum Sample Thickness 10<br />
Maximum Sample Weight 10<br />
MaxRa (Maximum Ra) 129<br />
Measurement Cursor 166<br />
Measurement Range 159<br />
Microsoft Windows 44<br />
Microsoft Windows XP 7<br />
Monitor Cable Connections 38<br />
N<br />
New Command 174<br />
N-Lite 11<br />
Algorithm Configuration File 329, 331<br />
Configuration File Example 332<br />
Fine Positioning 327<br />
Hardware Configuration File 331<br />
Servoed Engage 327<br />
Stiction 329<br />
Stylus Retouch 327<br />
O<br />
OPD Files 289<br />
Opening Saved Scan Data Plot 111<br />
Operating Temperature 10, 18<br />
Operation Overview 12<br />
Optics Illumination Adjustment 62<br />
Option<br />
calibration standards 11<br />
Extended Vertical Range 11<br />
N-Lite Software 11<br />
Vacuum Chuck 11<br />
Vibration Isolation Table 11<br />
Optional Theta Encoder 37<br />
Options and Accessories 11<br />
P<br />
P_V (Maximum Peak to Valley) 135<br />
Pc (Peak Count) 135<br />
Peak (Maximum Peak) 135<br />
Peak to Valley<br />
maximum (P_V) 135<br />
Peaks<br />
mean spacing between (Sm) 136<br />
Perim (Perimeter) 136<br />
Personal Injury<br />
Symbol 3<br />
Plot Data Type dialog box 202<br />
Position the Sample<br />
coarse 12<br />
Power Connection 18<br />
Power Demand 18<br />
Power On 49<br />
Power Requirements 10, 18<br />
Power Supply Setting 34<br />
Powering Down 67<br />
Precision Scan Head 7<br />
Preventative Maintenance 218<br />
Principle of Operation 6<br />
Printer Selection 5<br />
Printout 92<br />
Processed 289<br />
Processed Options 289<br />
Data Restore 293<br />
Filtering 290<br />
Masking Options 292<br />
Terms Removal 290<br />
Profile 160<br />
Profile Manipulation and Measurement 13<br />
<strong>Profiler</strong> Menu 178<br />
Program Entry 99<br />
Programmable X-Y Positioning 7<br />
Property Damage<br />
Symbol 3<br />
Q<br />
Quick-Access Menu 51<br />
R<br />
Ra (Average Roughness) 129<br />
Radius 136<br />
Reference Cursor 166<br />
Reference Material 5<br />
Relative Humidity 18<br />
Repairs<br />
Major 248<br />
Replacement Parts 255<br />
Re-Run Selected Scan Routines 114<br />
Restore Boundaries Dialog Box 204<br />
Rotation<br />
High Mag Camera 246<br />
Roughness<br />
average (Ra) 129<br />
Roughness and Waviness Filters Dialog Box 205<br />
Roughness Parameters<br />
Maxdev 129<br />
MaxRa 129<br />
Ra 129<br />
Rp 130<br />
Rq 130<br />
Rt 131<br />
338 <strong>Dektak</strong> 8 <strong>Manual</strong> Rev. G
Rv 131<br />
Rz_din 132<br />
Skew 132<br />
Rp (Maximum Peak) 130<br />
Rq (Root-Mean-Square) 130<br />
Rt (Maximum Peak to Valley) 131<br />
Run Menu 176<br />
Rv (Maximum Valley) 131<br />
Rz_din (Ten Point Height Average) 132<br />
S<br />
Safety Hazards<br />
Attention 3<br />
Sample Illumination 10<br />
Sample Loading 56<br />
Sample Positioning 12<br />
Sample Positioning Window 56, 57<br />
additional menu selections 195<br />
deskew menu 197<br />
pop-up menu selections 197<br />
Sample Positioning Window Menu 195<br />
Sample Stage Diameter 10<br />
Sample Stage Rotation 10<br />
Sample Stage Translation 10<br />
Save Boundaries Dialog Box 204<br />
Saved Boundaries<br />
restoring 91<br />
showing 90<br />
Scan<br />
Extended Option 11<br />
Scan Data<br />
opening 111<br />
Scan Duration 155<br />
Scan ID 152<br />
Scan Length 154<br />
entering 73, 100<br />
Scan Length Range 10<br />
Scan Location 153<br />
entering 73, 100<br />
Scan Parameters<br />
stylus type 153<br />
additional parameters 161<br />
deflection scan 162<br />
measurement range 159<br />
profile 160<br />
scan duration/speed 155<br />
scan ID 152<br />
scan length 154<br />
scan location 153<br />
scan resolution 156<br />
scan type 157<br />
stylus force 158<br />
Scan Resolution 156<br />
Scan Routine 12<br />
running 76<br />
Scan Routine Menu<br />
edit menu 195<br />
Scan Routines Window<br />
edit menu 193<br />
Scan Routines Window Menu 193<br />
Scan Speed 155<br />
Scan Speed Ranges 10<br />
Scan Speeds 8<br />
Scan Storage Data Requirements 9<br />
Scan Type 157<br />
Scanning 12<br />
Serial-to-USB Adapter Cable 36<br />
Service Contract 248<br />
Servoed Engage<br />
N-Lite 327<br />
Set Bandwidths dialog box 203<br />
Setup 56<br />
Setup Menu 180<br />
Side Bar Buttons 14<br />
Skew (Skewness) 132<br />
Slope 136<br />
Sm (Mean Spacing Between Peaks) 136<br />
Smoothing 169<br />
Smoothing Dialog Box 205<br />
Smoothing Function 148<br />
activating 149<br />
entering into scan routine 150<br />
Software Interface 44<br />
Software Leveling 10, 165<br />
Stage Control 44<br />
Stage Leveling 10<br />
Stage Rotation<br />
optional programmable theta 62<br />
Standard display file 295<br />
Standard Plots 298<br />
Start Sequence 49<br />
Startup Window 50<br />
Step Detection 265<br />
automatic leveling 268<br />
Index<br />
Rev. G <strong>Dektak</strong> 8 <strong>Manual</strong> 339
Index<br />
detection range 267<br />
performing on a single scan 273<br />
programming into a scan routine 274<br />
programming on multiple scans 274<br />
setup 273<br />
Step Height<br />
delta average 87<br />
Stiction Problems<br />
N-Lite 329<br />
Stress<br />
constraints and limitations 264<br />
results 263<br />
Stress Measurement Software 11<br />
Stress Parameters<br />
entering 262<br />
Stylus 10<br />
cleaning 241<br />
lowering/raising 62<br />
replacing 237<br />
replacing and tip cleaning 237<br />
type 153<br />
Stylus Force 158<br />
Stylus Reticle Alignment 63<br />
Stylus Retouch<br />
N-Lite 327<br />
Stylus Size 8<br />
Stylus Tracking Force 10<br />
Substrate Characteristics<br />
identifying 260<br />
Surface Block Bracket 31<br />
Symbols<br />
Attention 3<br />
System 15<br />
System Menu<br />
system menu bar 172<br />
System Menu Bar 172<br />
System Tray Quick-Access Menu 51<br />
T<br />
Technical Specifications 10<br />
Teflon Pads<br />
replace 219<br />
Temperature<br />
During Operation 18<br />
Template Selection 56<br />
Terms Mask 312<br />
Terms Removal 290<br />
Curvature and Tilt 290<br />
Cylinder and Tilt 290<br />
Tilt 290<br />
Use Analysis Mask 293<br />
Use Terms Mask 293<br />
Theta Rotation<br />
<strong>Manual</strong> 61<br />
Tip<br />
cleaning 241<br />
TIR (Total Indicated Reading) 135<br />
Toolbar<br />
Automation Program Summary window 215<br />
Automation Programs window 209<br />
customizing 207<br />
Data Plot window 214<br />
database options<br />
selecting a database 321<br />
New Measurement icon 297<br />
Sample Positioning window 212<br />
Scan Routines window 211<br />
Startup window 208<br />
Toolbars and Icons 207<br />
Tp (Bearing Ratio) 136<br />
Tracer 16<br />
Trackball 44<br />
V<br />
Vacuum 18<br />
Vacuum Chuck 11<br />
Valley<br />
maximum (RV) 131<br />
Valley (Maximum Valley) 135<br />
Vertical Calibration 220<br />
clearing 233<br />
extended vertical range option 232<br />
Vertical Range 10<br />
Vertical Resolution 10<br />
Vibration 18<br />
Vibration Interference 18<br />
Vibration Isolation Table 11<br />
Video Monitor 7<br />
Video Overlay<br />
adjusting 247<br />
Vision32<br />
Analyses 298<br />
Custom display file 296<br />
Database 319<br />
Activating 321<br />
Defining 319<br />
List View 323<br />
Pass/Fail criteria 320<br />
Printing 323, 324<br />
Viewing 323<br />
340 <strong>Dektak</strong> 8 <strong>Manual</strong> Rev. G
Database, Defining fields 319<br />
Processed Options 289<br />
Data Restore 293<br />
Filtering 290<br />
Masking 292<br />
Terms Removal 290<br />
Standard Plots 298<br />
2D Analysis 301<br />
3D Interactive 304<br />
3D Plot 305<br />
Contour Plot 298<br />
Filtered Bearing Ratio Analysis 309<br />
Filtered Histogram 307<br />
Toolbar 285<br />
Vision32 Toolbar<br />
Lab mode 285<br />
Production mode 285<br />
Volume 137<br />
W<br />
Wa (Arithmetic Average of Waviness) 133<br />
Warm-up Time 10<br />
Warranty<br />
claims for shipment damage 251<br />
service 251<br />
Waviness Parameters<br />
Wa 133<br />
WMaxdev 133<br />
Wp 133<br />
Wq 133<br />
Wt 133<br />
Wv 134<br />
WDF file 295<br />
Window Menu 189<br />
WMaxdev (Maximum Deviation of Waviness)<br />
133<br />
Wp (Maximum Peak of Waviness) 133<br />
Wq (Root-Mean-Square of Waviness) 133<br />
Wt (Maximum Peak to Valley of Waviness) 133<br />
Wv (Maximum Valley of Waviness) 134<br />
X<br />
X-Y and Fine Stage Position Adjustments 66<br />
Z<br />
Zero Point<br />
setting 86<br />
Index<br />
Rev. G <strong>Dektak</strong> 8 <strong>Manual</strong> 341