Prefurnace Clean Sink (PFC Sink) - Login | Nanolab, UCLA
Prefurnace Clean Sink (PFC Sink) - Login | Nanolab, UCLA
Prefurnace Clean Sink (PFC Sink) - Login | Nanolab, UCLA

Create successful ePaper yourself
Turn your PDF publications into a flip-book with our unique Google optimized e-Paper software.
Superusers:<br />
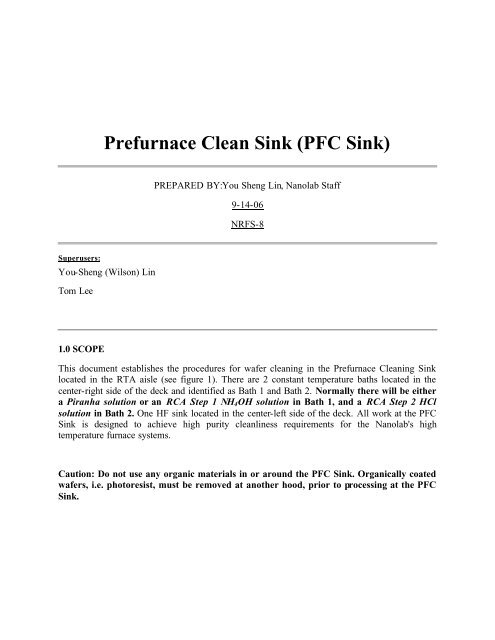
<strong>Prefurnace</strong> <strong>Clean</strong> <strong>Sink</strong> (<strong>PFC</strong> <strong>Sink</strong>)<br />
You-Sheng (Wilson) Lin<br />
Tom Lee<br />
1.0 SCOPE<br />
PREPARED BY:You Sheng Lin, <strong>Nanolab</strong> Staff<br />
9-14-06<br />
NRFS-8<br />
This document establishes the procedures for wafer cleaning in the <strong>Prefurnace</strong> <strong>Clean</strong>ing <strong>Sink</strong><br />
located in the RTA aisle (see figure 1). There are 2 constant temperature baths located in the<br />
center-right side of the deck and identified as Bath 1 and Bath 2. Normally there will be either<br />
a Piranha solution or an RCA Step 1 NH4OH solution in Bath 1, and a RCA Step 2 HCl<br />
solution in Bath 2. One HF sink located in the center-left side of the deck. All work at the <strong>PFC</strong><br />
<strong>Sink</strong> is designed to achieve high purity cleanliness requirements for the <strong>Nanolab</strong>'s high<br />
temperature furnace systems.<br />
Caution: Do not use any organic materials in or around the <strong>PFC</strong> <strong>Sink</strong>. Organically coated<br />
wafers, i.e. photoresist, must be removed at another hood, prior to processing at the <strong>PFC</strong><br />
<strong>Sink</strong>.
#3<br />
Dump Rinse<br />
2.0 APPLICABLE DOCUMENTS<br />
Figure 1<br />
MSDS for sulfuric acid, hydrogen peroxide, hydrochloric acid, ammonium hydroxide,<br />
hydrofluoric acid. All the MSDS documents are stored at the table next to the entrance of the<br />
<strong>Nanolab</strong>.<br />
3.0 MATERIALS AND EQUIPMENT<br />
Chemical Bath Controllers<br />
Dump Rinse Controllers<br />
#2<br />
Chemical Bath<br />
# 1<br />
Properly exhausted <strong>PFC</strong> <strong>Sink</strong> exhaust system as noted on the Magnehelic gauge (see figure 2).
Materials:<br />
Fig 2<br />
1. Dedicated constant temperature baths, either Bath 1 or Bath 2, depending<br />
on process<br />
2. Temperature controller, located in <strong>PFC</strong> top plenum area, identified as Bath<br />
1 or Bath 2 controller<br />
3. Required chemicals (see individual specification for each chemical bath<br />
process)<br />
4. Acid safe gloves<br />
5. Face Shield<br />
6. Acid apron<br />
7. Teflon cassette<br />
8. Graduated cylinder or clean beaker<br />
9. <strong>Prefurnace</strong> <strong>Clean</strong> <strong>Sink</strong> (<strong>PFC</strong>) Fume Hood<br />
10. Dry N2 gun or Verteq spin dryer (depending on wafer size and condition)<br />
Note: No broken, fractured or wafer pieces are allowed in the Verteq spin dryer system,<br />
rather these pieces or wafers should be dried with the nitrogen blow gun.
4.0 GENERAL<br />
Note: Follow all safety procedures for handling, pouring, and disposing of<br />
chemicals.<br />
Note: This procedure is to be conducted only within the exhausting <strong>PFC</strong> <strong>Sink</strong> fume<br />
hood.<br />
Materials: Use only the clean quartz constant temperature bath identified as Bath 1 or<br />
Bath 2. Use dedicated materials for any piece that comes in direct contact with the acid<br />
solutions. Keep the wafer carrier handles with the wafer carrier in the chemical baths.<br />
5.0 PROCESS PREPARATION<br />
5.1 Select bath and wafer cassettes<br />
1. There are two chemical baths located on the center-right side of the <strong>PFC</strong> sink (see figure<br />
1).<br />
CAUTION: Do not use any of the colored cassettes e.g., black or<br />
orange. (These are not Teflon)<br />
2. For 4 inch, use a full 4 inch cassette and they are located in the storage cart under the<br />
fumehood. (See Figure 3)<br />
Figure 3<br />
3. Single wafer Teflon carriers are available for single 2.5" or quartered wafers, or for<br />
irregularly shaped substrates.
5.2 Chemical Bath Replacement (STAFF ONLY)<br />
1. Confirm bath is below 40 o C (turn on bath power to see current temperature).<br />
2. Contact <strong>Nanolab</strong> staff to replace the bath.<br />
5.3 Pour Chemicals<br />
NOTE: At this point you must be wearing safety glasses, safety shield, acid apron and acid<br />
gloves. (See Figure 4)<br />
Figure 4<br />
You must decide which <strong>Prefurnace</strong> cleaning process is desired, as this will effect which<br />
chemical bath you will use, as well as what chemicals you will use. (See Figure 5) For gate<br />
interface oxidation runs (Dry OX), the RCA procedure is recommended, using
Figure 5<br />
1. RCA Process Bath 1: DI Water (H2O) : Ammonium Hydroxide (NH4OH) :<br />
Hydrogen Peroxide (H2O2) 5:1:1 ratio.<br />
a. 6000 ml DI Water<br />
b. 1200 ml Ammonium Hydroxide<br />
c. 1200 ml Hydrogen Peroxide (Refresh solution with 250 ml H2O2, each usage)<br />
d. Heat the solution to 90 o C. The solution should begin to bubble vigorously as it<br />
approaches 90 o C. If not, wait a little longer and/or add more hydrogen peroxide. If<br />
the solution does not bubble, there is a problem contact <strong>Nanolab</strong> management.<br />
2. RCA Process Bath 2: DI Water (H2O) : Hydrochloric Acid (HCl) : Hydrogen<br />
Peroxide (H2O2) 5:1:1 ratio.<br />
a. 5000 ml DI Water<br />
Dump Rinsers<br />
b. 1000 ml Hydrochloric Acid<br />
Bath 2<br />
HCl Only<br />
Bath 1<br />
Piranha or NH4OH<br />
c. 1000 ml Hydrogen Peroxide (Refresh solution with 250 ml H2O2, each usage)<br />
d. Heat the solution to 85 o C. The solution should begin to bubble vigorously as it
approaches 85 o C. If not, wait a little longer and/or add more hydrogen peroxide. If<br />
the solution does not bubble, there is a problem contact <strong>Nanolab</strong> management.<br />
3. Piranha Process Bath 1: Sulfuric Acid (98%) (H2SO4) : Hydrogen Peroxide<br />
(H2O2) 17:1 ratio.<br />
6.0 PROCEDURE<br />
6.1 Sample Loading<br />
a. (2 bottles @ 15 lb. each) Sulfuric Acid (~7400ml)<br />
b. 425 ml Hydrogen Peroxide (Refresh solution with 250 ml H2O2, each usage)<br />
c. Heat the solution to 100 o C. The solution should begin to bubble vigorously as it<br />
approaches 100 o C. If not, wait a little longer and/or add more hydrogen peroxide.<br />
If the solution does not bubble, there is a problem contact <strong>Nanolab</strong> management.<br />
1. Place wafers in white Teflon cassette and secure the Teflon handle to the cassette. NOTE:<br />
For a polysilicon run, include a silicon wafer with 1000 Å of oxide to be used as a<br />
thickness monitor on the Nanospec. Record the monitor number in the polysilicon<br />
logbook.<br />
6.2 Wafer cleaning and rinsing<br />
1. Piranha (or RCA 1) <strong>Clean</strong>ing Procedure:<br />
a. Turn on Power buttons for constant temperature baths 1 & 2. Press Hold to turn<br />
off the HOLD LED to begin the heating sequence.<br />
b. Verify that the solution in chemical bath 1 is Piranha solution. This is verified by<br />
looking for the recent bath entry in the log book.<br />
c. If the bath is different than Piranha, please contact <strong>Nanolab</strong> Staff.<br />
Note 1: If you replace or change the type of chemical bath solution, remember to fill in the<br />
logbook. <br />
Note 2: To make more Piranha solution chemical for Bath 1: pour 2 new sulfuric acid<br />
bottles (15 pounds each) into the empty Bath 1 quartz pot. Using a graduated cylinder or a<br />
clean beaker, measure 425ml of H2O2 (hydrogen peroxide). Allow solution to come to<br />
temperature (100 o C) prior to inserting wafers. We use a 17:1 ratio for our Piranha<br />
solution. : <br />
Note 3: To make more RCA Step 1 chemical for the bath: using graduated cylinder or a<br />
clean beaker, measure 6000ml of DI water; 1200ml of NH4OH (ammonium hydroxide);<br />
and 1200ml of H2O2 (hydrogen peroxide). Allow solution to come to temperature prior to<br />
inserting wafers. We use a 5:1:1 ratio.
d. Remove the top cover of the chemical bath 1. Refresh the solution with 250 ml<br />
hydrogen peroxide (H2O2), unless the solution was made immediately prior to<br />
usage. Make sure the bath temperature is less than 30C.<br />
CAUTION: Do not overfill the bath, use the aspirator (figure 6) to remove some<br />
chemical prior to adding the hydrogen peroxide.<br />
Figure 6<br />
e. Verify it is at 90 o C prior to usage then immerse the cassette in Bath 1. (see figure<br />
7 below). Press Timer on the Bath 1 controller to activate the 10 minute timer.
Figure 7<br />
Hot Pot Lid<br />
Chemical Bath<br />
Dump Rinser<br />
f. After 10 minutes, move the wafers to the dump rinser in front of the hotpot and<br />
close the lid on the dump riser. Turn off the chemical bath controller by hitting<br />
POWER and hit START on the appropriate dump rinse controller. Dump rinse<br />
controllers are set for 5 dump cycles, and will require about 10 minutes to finish<br />
the rinsing process.<br />
g. For the RCA 2 clean process, after the wafers are rinsed in dump rinser 1, refresh<br />
the HCl bath (bath 2) with 250ml of hydrogen peroxide and at 90 o C perform the<br />
HCl step ONLY USING BATH 2. Bath 2 has its own controller (see figure 1), so<br />
follow the procedures in 6.2.a above and verify it is at 90 o C prior to usage. After<br />
the 10 minutes minimum in bath 2, turn off the power by hitting POWER. Then<br />
move the wafers into dump rinser 2 (directly in front of bath 2) and hit START on<br />
dump rinse controller 2.<br />
Note: If you need to make (or<br />
replace) the HCl solution in Bath 2, follow procedure in 5.2. Then, using the<br />
graduated cylinder or a clean beaker, add 5000ml H2O (DI water); add 1000ml<br />
HCl (hydrochloric acid); and 1000ml of H2O2 (hydrogen peroxide). Allow the<br />
solution to come up to 90 o C prior to inserting your wafers and carrier. We use a<br />
5:1:1 ratio.<br />
h. If an HF dip is required (figure 8), remove wafers in carrier from the dump rinser<br />
and remove the lid of the cascade rinser on left of <strong>PFC</strong> sink deck. The chemical is<br />
DI:HF (10:1 ratio) or BOE (NH4F:HF: 6:1). CAUTION: Never place hot
wafers in the HF tank. Always finish the dump rinse step and ensure that the<br />
wafers are at room temperature. Set the wafer carrier with handle into the HF<br />
solution for the desired time. Turn on the cascade rinser and nitrogen bubbler for<br />
the rinsing step.(See Figure 8). When finished, turnoff both cascade bubble and<br />
water, then dry the wafers as discussed in 6.3 below.<br />
NOTE: HF is a separate training; only trained users can use HF bath.<br />
Figure 8<br />
HF or BOE<br />
Rinse Bath<br />
Cascade Bubble and Water<br />
Rinse Controller
Fill out logbook: Enter run number, date, your name, new bath or refresh, comments.<br />
Drying the wafers: Fill out Logbook for Verteq Spin Dryer System<br />
Note: Only 4 inch wafers carriers can go into the Verteq Spin Dryer System. 3 inch<br />
wafers can be spun dry only in the modified 3 inch carrier inserted into a standard 4<br />
inch carrier.<br />
4 inch wafer full cassettes<br />
NOTE: Make sure all wafers are sitting straight in the cassette, no cross slotting, before<br />
starting rinse/dry.<br />
1. Immediately place the boat into top chamber (H-bar forward) and select the proper recipe<br />
(Recipe 0) and press START. Step 1 of Recipe 0 is a 3 minute heated DI rinse, followed<br />
by step 2, 10 minutes of heated nitrogen for the dry. When the recipe is complete, remove<br />
the wafers to load the furnaces.<br />
2. Wafers are allowed to stay in dryer no longer than a half hour.<br />
Minispec: You-Sheng (Wilson) Lin (yousheng@seas.ucla.edu)<br />
©2006 <strong>UCLA</strong>, The Nanoelectronics Research Facility, Los Angeles, CA, USA. All rights reserved.