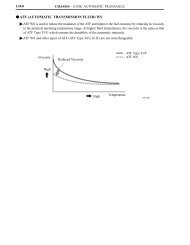
722.6 TECHNICAL SERVICE INFORMATION
722.6 TECHNICAL SERVICE INFORMATION
722.6 TECHNICAL SERVICE INFORMATION

You also want an ePaper? Increase the reach of your titles
YUMPU automatically turns print PDFs into web optimized ePapers that Google loves.
Valve Body Assembly Tips continued:<br />
Hold down brackets<br />
Protective Covers<br />
Figure 59<br />
Figure 60<br />
Figure 61<br />
<strong>TECHNICAL</strong> <strong>SERVICE</strong> <strong>INFORMATION</strong><br />
AUTOMATIC TRANSMISSION <strong>SERVICE</strong> GROUP<br />
28<br />
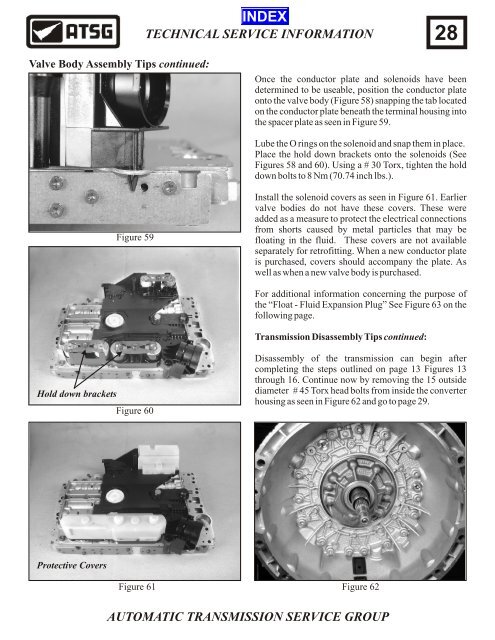
Once the conductor plate and solenoids have been<br />
determined to be useable, position the conductor plate<br />
onto the valve body (Figure 58) snapping the tab located<br />
on the conductor plate beneath the terminal housing into<br />
the spacer plate as seen in Figure 59.<br />
Lube the O rings on the solenoid and snap them in place.<br />
Place the hold down brackets onto the solenoids (See<br />
Figures 58 and 60). Using a # 30 Torx, tighten the hold<br />
down bolts to 8 Nm (70.74 inch lbs.).<br />
Install the solenoid covers as seen in Figure 61. Earlier<br />
valve bodies do not have these covers. These were<br />
added as a measure to protect the electrical connections<br />
from shorts caused by metal particles that may be<br />
floating in the fluid. These covers are not available<br />
separately for retrofitting. When a new conductor plate<br />
is purchased, covers should accompany the plate. As<br />
well as when a new valve body is purchased.<br />
For additional information concerning the purpose of<br />
the “Float - Fluid Expansion Plug” See Figure 63 on the<br />
following page.<br />
Transmission Disassembly Tips continued:<br />
Disassembly of the transmission can begin after<br />
completing the steps outlined on page 13 Figures 13<br />
through 16. Continue now by removing the 15 outside<br />
diameter # 45 Torx head bolts from inside the converter<br />
housing as seen in Figure 62 and go to page 29.<br />
Figure 62