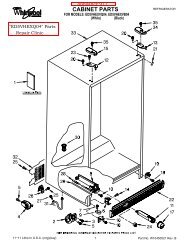
ASD2620HE Amana Refrigerator Service Manual - Appliance 911 ...
ASD2620HE Amana Refrigerator Service Manual - Appliance 911 ...
ASD2620HE Amana Refrigerator Service Manual - Appliance 911 ...

You also want an ePaper? Increase the reach of your titles
YUMPU automatically turns print PDFs into web optimized ePapers that Google loves.
Component Testing<br />
! WARNING<br />
To avoid risk of electrical shock, personal injury, or death, disconnect electrical power source to unit, unless test<br />
procedures require power to be connected. Discharge capacitor through a resistor before attempting to service.<br />
Ensure all ground wires are connected before certifying unit as repaired and/or operational.<br />
Component Description Test Procedures<br />
Overload / Relay When voltage is connected and relay is 1. Disconnect power to the refrigerator.<br />
cool, current passes through relay to start 2. Remove relay cover and disconnect leads.<br />
winding.<br />
3. Check resistance across terminals 2 and 3 with an ohmmeter:<br />
Normal = 3 to 12 ohms<br />
After a short time, current heats the<br />
Shorted = 0 ohms<br />
resistor in relay and resistance will rise<br />
blocking current flow through relay.<br />
Open = infinite ohms<br />
Freezer<br />
temperature control<br />
Control board<br />
Start winding remains in the circuit through<br />
run capacitor.<br />
Solid state relay plugs directly on<br />
compressor start and run terminals. Relay<br />
terminals 2 and 3 are connected within<br />
relay. Run capacitor is connected to relay<br />
terminal 3. L2 side of 120 VAC power is<br />
connected to relay terminal 2.<br />
Freezer temperature control is a capillary<br />
tube operating a single pole, single throw<br />
switch.<br />
Freezer temperature control controls run<br />
cycle through defrost timer.<br />
Altitude Adjustment<br />
When altitude adjustment is required on a<br />
G.E. control, turn altitude adjustment<br />
screw 1/7 turn counter clockwise for each<br />
1,000 feet increase in altitude up to 10,000<br />
feet. One full turn equals 10,000 feet<br />
maximum.<br />
In most cases the need for altitude<br />
adjustments can be avoided by simply<br />
turning temperature control knob to colder<br />
setting.<br />
On some models.<br />
See “Control Board” section for<br />
troubleshooting information.<br />
Ice Maker Optional on some models.<br />
ECM condenser<br />
motor<br />
Evaporator fan<br />
motor<br />
See “Ice Maker” section for service<br />
information.<br />
Condenser fan moves cooling air across<br />
condenser coil and compressor body.<br />
Condenser fan motor is in parallel circuit<br />
with compressor.<br />
Evaporator fan moves air across<br />
evaporator coil and throughout refrigerator<br />
cabinet.<br />
Check for proper calibration with thermocouple capillary in air supply well by<br />
recording cut-in and cut-out temperatures at middle setting. Refer to tech sheet<br />
for model being serviced for expected temperatures.<br />
Check control contacts are opening by disconnecting electrical leads to control<br />
and turning control knob to coldest setting. Check for continuity across<br />
terminals.<br />
Feet Above<br />
Sea Level<br />
2,000<br />
4,000<br />
6,000<br />
8,000<br />
10,000<br />
Altitude Counter in Feet<br />
Turn Screw<br />
Clockwise (Angular<br />
Degrees)<br />
©2005 Maytag <strong>Service</strong>s 16025628 7<br />
30<br />
81<br />
129<br />
174<br />
216<br />
Check resistance across coil.<br />
0<br />
330<br />
1. Disconnect power to unit.<br />
2. Disconnect fan motor leads.<br />
3. Check resistance from ground connection solder. Trace to motor frame must<br />
not exceed .05 ohms.<br />
4. Check for voltage at connector to motor with unit in refrigeration mode and<br />
compressor operating.<br />
300<br />
270<br />
30<br />
60<br />
240<br />
210<br />
180 150<br />
120<br />
90