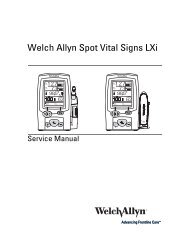
Spot Vital Signs LXi Directions for Use - Frank's Hospital Workshop
Spot Vital Signs LXi Directions for Use - Frank's Hospital Workshop
Spot Vital Signs LXi Directions for Use - Frank's Hospital Workshop

Create successful ePaper yourself
Turn your PDF publications into a flip-book with our unique Google optimized e-Paper software.
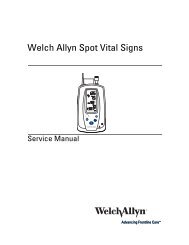
Welch Allyn <strong>Spot</strong> <strong>Vital</strong> <strong>Signs</strong> <strong>LXi</strong><br />
4 WEST<br />
127 AM<br />
Reading<br />
01 735<br />
F<br />
98<br />
%<br />
62<br />
BP<br />
SYS<br />
mmHg<br />
DIA<br />
mmHg<br />
TEMP<br />
SpO2 PULSE /min<br />
Patient ID 0123456789<br />
Weight<br />
Pain<br />
Height<br />
Clear<br />
Respiration Send/Next Reading<br />
Enter<br />
<strong>Spot</strong> <strong>Vital</strong> <strong>Signs</strong> <strong>LXi</strong><br />
<strong>Directions</strong> <strong>for</strong> <strong>Use</strong><br />
4 WEST 127 AM<br />
Reading<br />
01 735<br />
F<br />
98<br />
%<br />
62<br />
BP<br />
SYS<br />
mmHg<br />
DIA<br />
mmHg<br />
TEMP<br />
SpO2 PULSE /min<br />
Patient ID 0123456789<br />
Weight<br />
Height<br />
Respiration<br />
Pain<br />
Clear<br />
Send/Next Reading<br />
Enter<br />
<strong>Spot</strong> <strong>Vital</strong> <strong>Signs</strong> <strong>LXi</strong><br />
BRAUn
Welch Allyn <strong>Spot</strong> <strong>Vital</strong> <strong>Signs</strong> <strong>LXi</strong><br />
<strong>Directions</strong> <strong>for</strong> <strong>Use</strong>
ii Welch Allyn <strong>Spot</strong> <strong>Vital</strong> <strong>Signs</strong> <strong>LXi</strong><br />
Copyright 2005 Welch Allyn. All rights are reserved. No one is permitted to reproduce or duplicate, in any<br />
<strong>for</strong>m, this manual or any part thereof without permission from Welch Allyn.<br />
Welch Allyn assumes no responsibility <strong>for</strong> any injury to anyone, or <strong>for</strong> any illegal or improper use of the<br />
product, that may result from failure to use this product in accordance with the instructions, cautions,<br />
warnings, or statement of intended use published in this manual.<br />
Welch Allyn ® , <strong>Spot</strong> <strong>Vital</strong> <strong>Signs</strong> ® , and SureTemp ® are registered trademarks of Welch Allyn.<br />
SureBP Technology is a trademark of Welch Allyn.<br />
Braun ThermoScan ® is a registered trademark of the Braun Company.<br />
LNCS is a trademark of, and SET ® , LNOP ® , and Masimo ® are registered trademarks of, Masimo<br />
Corporation. Possession or purchase of a Masimo SpO 2 -equipped device does not convey any express or<br />
implied license to use the device with unauthorized sensors or cables which would, alone or in<br />
combination with this device, fall within the scope of one or more of the patents relating to this device.<br />
Nellcor ® and Oxi-Max ® are registered trademarks of Nellcor Puritan Bennett Inc.<br />
Software in this product is Copyright 2005 Welch Allyn or its vendors. All rights are reserved. The software<br />
is protected by United States of America copyright laws and international treaty provisions applicable<br />
worldwide. Under such laws, the licensee is entitled to use the copy of the software incorporated with<br />
this instrument as intended in the operation of the product in which it is embedded. The software may not<br />
be copied, decompiled, reverse-engineered, disassembled, or otherwise reduced to human-perceivable<br />
<strong>for</strong>m. This is not a sale of the software or any copy of the software; all right, title, and ownership of the<br />
software remain with Welch Allyn or its vendors.<br />
For in<strong>for</strong>mation about any Welch Allyn product, call Welch Allyn Technical Support:<br />
Manual Material No. 705310 Rev. D<br />
Welch Allyn<br />
4341 State Street Road<br />
Skaneateles Falls, NY 13153 USA<br />
Printed in USA<br />
USA +1 800 535 6663<br />
+ 1 315 685 4560<br />
Australia +61 2 9638 3000<br />
+800 074 793<br />
Canada +1 800 561 8797 China +86 21 6327 9631<br />
European Call Center +353 46 90 67790 France +33 1 55 69 58 49<br />
Germany +49 7477 9271 70 Japan +81 3 3219 0071<br />
Latin America +1 305 669 9003 Netherlands +31 157 505 000<br />
Singapore +65 6419 8100 South Africa +27 11 777 7555<br />
United Kingdom +44 207 365 6780 Sweden +46 85 853 6551<br />
0297
<strong>Directions</strong> <strong>for</strong> <strong>Use</strong> iii<br />
Initial Configuration<br />
Be<strong>for</strong>e using <strong>Spot</strong> <strong>LXi</strong> <strong>for</strong> the first time, you must program an initial configuration screen. See page 23 <strong>for</strong><br />
more details.<br />
Change Local Defaults Menu<br />
Model No.: 45NTO<br />
Serial No. 2005040004<br />
Language:<br />
BP Units:<br />
Temperature Units:<br />
Height Units:<br />
Weight Units:<br />
Date Format:<br />
Date:<br />
Time Format:<br />
Time:<br />
Select
iv Welch Allyn <strong>Spot</strong> <strong>Vital</strong> <strong>Signs</strong> <strong>LXi</strong>
Contents<br />
Initial Configuration . . . . . . . . . . . . . . . . . . . . . . . . . . . . . . . . . . . . . . . . . . . . . . . . iii<br />
1 - Introduction . . . . . . . . . . . . . . . . . . . . . . . . . . . . . . . . . . . . . . . . . . . . . 1<br />
Intended <strong>Use</strong> . . . . . . . . . . . . . . . . . . . . . . . . . . . . . . . . . . . . . . . . . . . . . . . . . . . . 1<br />
Symbols . . . . . . . . . . . . . . . . . . . . . . . . . . . . . . . . . . . . . . . . . . . . . . . . . . . . . . . . 2<br />
Safety Symbols . . . . . . . . . . . . . . . . . . . . . . . . . . . . . . . . . . . . . . . . . . . . . . . 2<br />
Button Symbols . . . . . . . . . . . . . . . . . . . . . . . . . . . . . . . . . . . . . . . . . . . . . . . 2<br />
Connection Symbols . . . . . . . . . . . . . . . . . . . . . . . . . . . . . . . . . . . . . . . . . . . 3<br />
Agency Symbols. . . . . . . . . . . . . . . . . . . . . . . . . . . . . . . . . . . . . . . . . . . . . . . 3<br />
Related Publications . . . . . . . . . . . . . . . . . . . . . . . . . . . . . . . . . . . . . . . . . . . . . . . 3<br />
Warnings and Cautions. . . . . . . . . . . . . . . . . . . . . . . . . . . . . . . . . . . . . . . . . . . . . 4<br />
General Warnings. . . . . . . . . . . . . . . . . . . . . . . . . . . . . . . . . . . . . . . . . . . . . . 4<br />
Blood Pressure Warnings. . . . . . . . . . . . . . . . . . . . . . . . . . . . . . . . . . . . . . . . 5<br />
Temperature Warnings . . . . . . . . . . . . . . . . . . . . . . . . . . . . . . . . . . . . . . . . . . 7<br />
SpO 2 Warnings. . . . . . . . . . . . . . . . . . . . . . . . . . . . . . . . . . . . . . . . . . . . . . . . 8<br />
General Cautions . . . . . . . . . . . . . . . . . . . . . . . . . . . . . . . . . . . . . . . . . . . . . . 9<br />
Blood Pressure Cautions . . . . . . . . . . . . . . . . . . . . . . . . . . . . . . . . . . . . . . . 10<br />
Temperature Cautions . . . . . . . . . . . . . . . . . . . . . . . . . . . . . . . . . . . . . . . . . 10<br />
SpO2 Cautions . . . . . . . . . . . . . . . . . . . . . . . . . . . . . . . . . . . . . . . . . . . . . . . 10<br />
Mises en gardes et avertissements . . . . . . . . . . . . . . . . . . . . . . . . . . . . . . . . . . 11<br />
Mises en garde générales . . . . . . . . . . . . . . . . . . . . . . . . . . . . . . . . . . . . . . 11<br />
Mises en garde relatives à la pression artérielle . . . . . . . . . . . . . . . . . . . . . 12<br />
Mises en garde relatives à la température . . . . . . . . . . . . . . . . . . . . . . . . . . 14<br />
Mises en garde relatives au SpO2. . . . . . . . . . . . . . . . . . . . . . . . . . . . . . . . . . . . . . . . . 15<br />
Avertissements généraux. . . . . . . . . . . . . . . . . . . . . . . . . . . . . . . . . . . . . . . 16<br />
Avertissements relatifs à la pression artérielle. . . . . . . . . . . . . . . . . . . . . . . 17<br />
Avertissements relatifs à la température . . . . . . . . . . . . . . . . . . . . . . . . . . . 17<br />
Avertissements relatifs au SpO2 . . . . . . . . . . . . . . . . . . . . . . . . . . . . . . . . . . . . . . . . . . 18<br />
Contents Checklist . . . . . . . . . . . . . . . . . . . . . . . . . . . . . . . . . . . . . . . . . . . . . . . 19<br />
Possible Attachments . . . . . . . . . . . . . . . . . . . . . . . . . . . . . . . . . . . . . . . . . . . . . 19<br />
2 - Controls, Display Window, and Connections . . . . . . . . . . . . . . . . . 21<br />
Controls . . . . . . . . . . . . . . . . . . . . . . . . . . . . . . . . . . . . . . . . . . . . . . . . . . . . . . . 21<br />
Display Window . . . . . . . . . . . . . . . . . . . . . . . . . . . . . . . . . . . . . . . . . . . . . . . . . 23<br />
Connections . . . . . . . . . . . . . . . . . . . . . . . . . . . . . . . . . . . . . . . . . . . . . . . . . . . . 25<br />
Braun ThermoScan PRO 4000 Lock. . . . . . . . . . . . . . . . . . . . . . . . . . . . . . . 26<br />
Blood Pressure Hose and Cuff . . . . . . . . . . . . . . . . . . . . . . . . . . . . . . . . . . . 26<br />
Thermometer . . . . . . . . . . . . . . . . . . . . . . . . . . . . . . . . . . . . . . . . . . . . . . . . 26<br />
SpO 2 Sensor . . . . . . . . . . . . . . . . . . . . . . . . . . . . . . . . . . . . . . . . . . . . . . . . 27<br />
v
vi Contents Welch Allyn <strong>Spot</strong> <strong>Vital</strong> <strong>Signs</strong> <strong>LXi</strong><br />
Quick Reference Card . . . . . . . . . . . . . . . . . . . . . . . . . . . . . . . . . . . . . . . . . 27<br />
AC Power Trans<strong>for</strong>mer . . . . . . . . . . . . . . . . . . . . . . . . . . . . . . . . . . . . . . . . . 28<br />
Battery . . . . . . . . . . . . . . . . . . . . . . . . . . . . . . . . . . . . . . . . . . . . . . . . . . . . . 28<br />
Power On/Off . . . . . . . . . . . . . . . . . . . . . . . . . . . . . . . . . . . . . . . . . . . . . . . . . . . 28<br />
Standby Mode . . . . . . . . . . . . . . . . . . . . . . . . . . . . . . . . . . . . . . . . . . . . . . . . . . 29<br />
3 - Internal Configuration. . . . . . . . . . . . . . . . . . . . . . . . . . . . . . . . . . . . 31<br />
4 - Blood Pressure Operation . . . . . . . . . . . . . . . . . . . . . . . . . . . . . . . . 35<br />
Blood Pressure Cuff Selection . . . . . . . . . . . . . . . . . . . . . . . . . . . . . . . . . . . . . . 35<br />
Blood Pressure Measurement . . . . . . . . . . . . . . . . . . . . . . . . . . . . . . . . . . . . . . 36<br />
5 - Temperature Operation. . . . . . . . . . . . . . . . . . . . . . . . . . . . . . . . . . . 37<br />
Temperature Operation Mode Selection. . . . . . . . . . . . . . . . . . . . . . . . . . . . . . . 37<br />
Normal Mode . . . . . . . . . . . . . . . . . . . . . . . . . . . . . . . . . . . . . . . . . . . . . . . . 37<br />
Monitor Mode . . . . . . . . . . . . . . . . . . . . . . . . . . . . . . . . . . . . . . . . . . . . . . . 40<br />
Temperature Measurement Range Indicators . . . . . . . . . . . . . . . . . . . . . . . . . . 40<br />
Ear Temperatures . . . . . . . . . . . . . . . . . . . . . . . . . . . . . . . . . . . . . . . . . . . . . . . . 41<br />
6 - Pulse Oximetry Operation . . . . . . . . . . . . . . . . . . . . . . . . . . . . . . . . 43<br />
7 - Manual Entries and External Device Operation . . . . . . . . . . . . . . . 45<br />
Manual Entries . . . . . . . . . . . . . . . . . . . . . . . . . . . . . . . . . . . . . . . . . . . . . . . . . . 45<br />
Weight, Height, Respiration, and Pain Level . . . . . . . . . . . . . . . . . . . . . . . . 45<br />
Body Mass Index . . . . . . . . . . . . . . . . . . . . . . . . . . . . . . . . . . . . . . . . . . . . . 45<br />
Memory Recall . . . . . . . . . . . . . . . . . . . . . . . . . . . . . . . . . . . . . . . . . . . . . . . 45<br />
External Devices . . . . . . . . . . . . . . . . . . . . . . . . . . . . . . . . . . . . . . . . . . . . . . . . . 46<br />
Printer. . . . . . . . . . . . . . . . . . . . . . . . . . . . . . . . . . . . . . . . . . . . . . . . . . . . . . 46<br />
Weight Scale . . . . . . . . . . . . . . . . . . . . . . . . . . . . . . . . . . . . . . . . . . . . . . . . 46<br />
Barcode Scanner . . . . . . . . . . . . . . . . . . . . . . . . . . . . . . . . . . . . . . . . . . . . . 47<br />
Wireless Radio . . . . . . . . . . . . . . . . . . . . . . . . . . . . . . . . . . . . . . . . . . . . . . . 47<br />
8 - Troubleshooting . . . . . . . . . . . . . . . . . . . . . . . . . . . . . . . . . . . . . . . . 49<br />
Error Codes. . . . . . . . . . . . . . . . . . . . . . . . . . . . . . . . . . . . . . . . . . . . . . . . . . . . . 49<br />
Event Causes and Corrective Actions. . . . . . . . . . . . . . . . . . . . . . . . . . . . . . . . . 51<br />
9 - Specifications . . . . . . . . . . . . . . . . . . . . . . . . . . . . . . . . . . . . . . . . . . 55<br />
Per<strong>for</strong>mance . . . . . . . . . . . . . . . . . . . . . . . . . . . . . . . . . . . . . . . . . . . . . . . . . . . . 55<br />
Blood Pressure Accuracy . . . . . . . . . . . . . . . . . . . . . . . . . . . . . . . . . . . . . . . 55<br />
Temperature Specifications . . . . . . . . . . . . . . . . . . . . . . . . . . . . . . . . . . . . . 56<br />
SpO 2 Specifications . . . . . . . . . . . . . . . . . . . . . . . . . . . . . . . . . . . . . . . . . . . . . . 57<br />
Masimo Sensor Accuracy Guide . . . . . . . . . . . . . . . . . . . . . . . . . . . . . . . . . 57<br />
Masimo Patents . . . . . . . . . . . . . . . . . . . . . . . . . . . . . . . . . . . . . . . . . . . . . . 57<br />
Nellcor ® Sensor Accuracy Guide . . . . . . . . . . . . . . . . . . . . . . . . . . . . . . . . . 58<br />
Nellcor Patents . . . . . . . . . . . . . . . . . . . . . . . . . . . . . . . . . . . . . . . . . . . . . . . 58<br />
Mechanical . . . . . . . . . . . . . . . . . . . . . . . . . . . . . . . . . . . . . . . . . . . . . . . . . . . . . 59<br />
Electrical . . . . . . . . . . . . . . . . . . . . . . . . . . . . . . . . . . . . . . . . . . . . . . . . . . . . . . . 59
<strong>Directions</strong> <strong>for</strong> <strong>Use</strong> Contents vii<br />
Battery . . . . . . . . . . . . . . . . . . . . . . . . . . . . . . . . . . . . . . . . . . . . . . . . . . . . . . . . 59<br />
Environmental. . . . . . . . . . . . . . . . . . . . . . . . . . . . . . . . . . . . . . . . . . . . . . . . . . . 59<br />
Wireless Radio . . . . . . . . . . . . . . . . . . . . . . . . . . . . . . . . . . . . . . . . . . . . . . . . . . 59<br />
Patents . . . . . . . . . . . . . . . . . . . . . . . . . . . . . . . . . . . . . . . . . . . . . . . . . . . . . . . . 60<br />
Guidance and Manufacturer’s Declaration . . . . . . . . . . . . . . . . . . . . . . . . . . . . . 60<br />
Emissions and Immunity In<strong>for</strong>mation . . . . . . . . . . . . . . . . . . . . . . . . . . . . . 60<br />
10 - Maintenance and Service . . . . . . . . . . . . . . . . . . . . . . . . . . . . . . . . 63<br />
Cleaning . . . . . . . . . . . . . . . . . . . . . . . . . . . . . . . . . . . . . . . . . . . . . . . . . . . . . . . 63<br />
<strong>Spot</strong> <strong>Vital</strong> <strong>Signs</strong> <strong>LXi</strong> . . . . . . . . . . . . . . . . . . . . . . . . . . . . . . . . . . . . . . . . . . . 63<br />
Blood Pressure Cuff . . . . . . . . . . . . . . . . . . . . . . . . . . . . . . . . . . . . . . . . . . . 63<br />
Blood Pressure Hose and Cable. . . . . . . . . . . . . . . . . . . . . . . . . . . . . . . . . . 63<br />
SureTemp Plus Thermometer . . . . . . . . . . . . . . . . . . . . . . . . . . . . . . . . . . . 63<br />
Braun ThermoScan PRO 4000 Thermometer . . . . . . . . . . . . . . . . . . . . . . . 64<br />
SpO 2 Sensors. . . . . . . . . . . . . . . . . . . . . . . . . . . . . . . . . . . . . . . . . . . . . . . . 64<br />
Printer. . . . . . . . . . . . . . . . . . . . . . . . . . . . . . . . . . . . . . . . . . . . . . . . . . . . . . 64<br />
Battery Replacement . . . . . . . . . . . . . . . . . . . . . . . . . . . . . . . . . . . . . . . . . . . . . 65<br />
<strong>Spot</strong> <strong>Vital</strong> <strong>Signs</strong> <strong>LXi</strong> . . . . . . . . . . . . . . . . . . . . . . . . . . . . . . . . . . . . . . . . . . . 65<br />
Braun ThermoScan PRO 4000 . . . . . . . . . . . . . . . . . . . . . . . . . . . . . . . . . . . 66<br />
Printer. . . . . . . . . . . . . . . . . . . . . . . . . . . . . . . . . . . . . . . . . . . . . . . . . . . . . . 66<br />
Calibration . . . . . . . . . . . . . . . . . . . . . . . . . . . . . . . . . . . . . . . . . . . . . . . . . . . . . . 67<br />
Blood Pressure Calibration Check . . . . . . . . . . . . . . . . . . . . . . . . . . . . . . . . 67<br />
Temperature Calibration Check. . . . . . . . . . . . . . . . . . . . . . . . . . . . . . . . . . . 68<br />
Masimo SpO2 Calibration Check . . . . . . . . . . . . . . . . . . . . . . . . . . . . . . . . . 68<br />
Nellcor SpO2 Functional Check . . . . . . . . . . . . . . . . . . . . . . . . . . . . . . . . . . 68<br />
Service . . . . . . . . . . . . . . . . . . . . . . . . . . . . . . . . . . . . . . . . . . . . . . . . . . . . . . . . 68<br />
Technical Assistance . . . . . . . . . . . . . . . . . . . . . . . . . . . . . . . . . . . . . . . . . . 68<br />
Service Manual/Spare Parts . . . . . . . . . . . . . . . . . . . . . . . . . . . . . . . . . . . . . 69<br />
Service Loaners . . . . . . . . . . . . . . . . . . . . . . . . . . . . . . . . . . . . . . . . . . . . . . 69<br />
11 - Supplies and Accessories . . . . . . . . . . . . . . . . . . . . . . . . . . . . . . . . 71<br />
Blood Pressure . . . . . . . . . . . . . . . . . . . . . . . . . . . . . . . . . . . . . . . . . . . . . . . . . . 71<br />
Temperature . . . . . . . . . . . . . . . . . . . . . . . . . . . . . . . . . . . . . . . . . . . . . . . . . . . . 72<br />
Pulse Oximetry . . . . . . . . . . . . . . . . . . . . . . . . . . . . . . . . . . . . . . . . . . . . . . . . . . 73<br />
Masimo Accessories . . . . . . . . . . . . . . . . . . . . . . . . . . . . . . . . . . . . . . . . . . 73<br />
Nellcor Accessories . . . . . . . . . . . . . . . . . . . . . . . . . . . . . . . . . . . . . . . . . . . 74<br />
Miscellaneous. . . . . . . . . . . . . . . . . . . . . . . . . . . . . . . . . . . . . . . . . . . . . . . . . . . 75<br />
Service Contracts . . . . . . . . . . . . . . . . . . . . . . . . . . . . . . . . . . . . . . . . . . . . . . . . 75<br />
Warranty . . . . . . . . . . . . . . . . . . . . . . . . . . . . . . . . . . . . . . . . . . . . . . . . . 77<br />
<strong>Spot</strong> <strong>LXi</strong> . . . . . . . . . . . . . . . . . . . . . . . . . . . . . . . . . . . . . . . . . . . . . . . . . . . . . . . 77<br />
Accessories . . . . . . . . . . . . . . . . . . . . . . . . . . . . . . . . . . . . . . . . . . . . . . . . . . . . 77
viii Contents Welch Allyn <strong>Spot</strong> <strong>Vital</strong> <strong>Signs</strong> <strong>LXi</strong>
1<br />
Intended <strong>Use</strong><br />
Introduction<br />
This <strong>Directions</strong> <strong>for</strong> <strong>Use</strong> manual is a comprehensive guide designed to help you<br />
understand the capabilities and operation of your <strong>Spot</strong> <strong>Vital</strong> <strong>Signs</strong> <strong>LXi</strong>. The in<strong>for</strong>mation in<br />
this manual includes all options available with <strong>Spot</strong> <strong>LXi</strong> (e.g., pulse oximetry, barcode<br />
scanner, printer, mobile stand, and wall mount). The applicability of some sections of this<br />
manual depends on the configuration of your particular device. Read this manual<br />
thoroughly be<strong>for</strong>e attempting to use the device.<br />
Table 1. Available Versions of <strong>Spot</strong> <strong>Vital</strong> <strong>Signs</strong> <strong>LXi</strong><br />
REF Description<br />
450T0 SureBP Technology with SureTemp Plus Thermometer<br />
450E0 SureBP Technology with Braun ThermoScan PRO 4000 Thermometer<br />
45MT0 SureBP Technology with Masimo SpO 2 and SureTemp Plus Thermometer<br />
45ME0 SureBP Technology with Masimo SpO 2 and Braun ThermoScan PRO 4000 Thermometer<br />
45NT0 SureBP Technology with Nellcor SpO 2 and SureTemp Plus Thermometer<br />
45NE0 SureBP Technology with Nellcor SpO 2 and Braun ThermoScan PRO 4000 Thermometer<br />
The <strong>Spot</strong> <strong>Vital</strong> <strong>Signs</strong> <strong>LXi</strong> automatically measures systolic and diastolic pressure (excluding<br />
neonates), pulse rate, temperature (oral, adult axillary, pediatric axillary, rectal, and ear),<br />
and pulse oximetry (SpO 2) as well as calculates Mean Arterial Pressure (MAP).<br />
Furthermore, <strong>Spot</strong> <strong>Vital</strong> <strong>Signs</strong> <strong>LXi</strong> allows the entry of height, weight, respiration rate, and<br />
pain level. <strong>Spot</strong> <strong>Vital</strong> <strong>Signs</strong> <strong>LXi</strong> also calculates Body Mass Index (BMI) following height and<br />
weight entry.<br />
The device is intended to be used by clinicians and medically qualified personnel. It is<br />
available <strong>for</strong> sale only upon the order of a physician or licensed health care provider.<br />
1
2 Introduction Welch Allyn <strong>Spot</strong> <strong>Vital</strong> <strong>Signs</strong> <strong>LXi</strong><br />
Symbols<br />
Safety Symbols<br />
Button Symbols<br />
The following symbols are associated with the <strong>Spot</strong> <strong>Vital</strong> <strong>Signs</strong> <strong>LXi</strong>.<br />
Identifies in<strong>for</strong>mation within the<br />
manual to avoid injury.<br />
Caution: consult accompanying<br />
documents<br />
Identifies in<strong>for</strong>mation within the<br />
manual to avoid equipment failure.<br />
Internally Powered, Lead Acid<br />
Battery<br />
Handle with Care Transport Temperature<br />
Storage Humidity Recycle<br />
Class II Equipment Equipment is not protected against<br />
IPXØ<br />
the ingress of liquid.<br />
Type BF Equipment On/Off<br />
Do not dispose of this product as<br />
unsorted municipal waste. Prepare this<br />
product <strong>for</strong> reuse or separate<br />
collection as specified by Directive<br />
2002/96/EC of the European<br />
Parliament and the Council of the<br />
European Union on Waste Electronic<br />
and Electrical Equipment (WEEE). If<br />
this product is contaminated, this<br />
directive does not apply.<br />
For more specific disposal in<strong>for</strong>mation,<br />
see www.welchallyn.com/weee,<br />
or contact Welch Allyn Customer<br />
Service at +44 207 365 6780.<br />
Mode of Operation: Continuous<br />
Navigation Buttons Select<br />
Blood Pressure Memory<br />
MEM<br />
Power On/Off<br />
Pb<br />
Non-ionizing radiation (RF<br />
transmitter)
<strong>Directions</strong> <strong>for</strong> <strong>Use</strong> Introduction 3<br />
Connection Symbols<br />
Agency Symbols<br />
C US<br />
166292<br />
0297<br />
EC REP<br />
Related Publications<br />
USB Connection Serial Port Connection<br />
CERTIFIED TO:<br />
CAN/CSA STD C22.2 NO. 601.1<br />
CONFORMS TO:<br />
UL STD 60601-1<br />
IEC 60601-1<br />
EMC Framework of Australia<br />
The CE mark on this product indicates that it has been tested to and con<strong>for</strong>ms with<br />
the provisions noted within the 93/42/EEC Medical Device Directive.<br />
European Regulatory Manager<br />
Welch Allyn Ltd.<br />
Navan Business Park<br />
Dublin Road<br />
Navan, County Meath, Republic of Ireland<br />
Tel.: 353 46 90 67700<br />
Fax: 353 46 90 67756<br />
Braun ThermoScan PRO 4000 <strong>Use</strong>r’s Guide - <strong>for</strong> models 450E0, 45NE0, 45ME0.<br />
Masimo <strong>Directions</strong> <strong>for</strong> <strong>Use</strong> - <strong>for</strong> models 45MT0, 45ME0.<br />
Nellcor <strong>Directions</strong> <strong>for</strong> <strong>Use</strong> - <strong>for</strong> models 45NT0, 45NE0.
4 Introduction Welch Allyn <strong>Spot</strong> <strong>Vital</strong> <strong>Signs</strong> <strong>LXi</strong><br />
Warnings and Cautions<br />
General Warnings<br />
Familiarize all operating personnel with the general safety in<strong>for</strong>mation in this summary.<br />
Specific warnings and cautions are also found throughout this manual.<br />
A warning statement in this manual identifies a condition or practice, which if not<br />
corrected or discontinued immediately, could lead to patient injury, illness, or death.<br />
These warnings pertain to the entire <strong>Spot</strong> <strong>Vital</strong> <strong>Signs</strong> <strong>LXi</strong> device.<br />
WARNING The in<strong>for</strong>mation in this manual is a comprehensive guide to the<br />
operation of <strong>Spot</strong> <strong>LXi</strong>. For best results, read this manual thoroughly be<strong>for</strong>e using<br />
the device.<br />
WARNING <strong>Spot</strong> <strong>LXi</strong> is designed <strong>for</strong> medical clinician use. Although this manual<br />
may illustrate medical spot-check techniques, only a trained clinician who knows<br />
how to take and interpret a patient’s vital signs should use this device.<br />
WARNING <strong>Spot</strong> <strong>LXi</strong> is not intended <strong>for</strong> use in environments that are without<br />
health care practitioner supervision.<br />
WARNING <strong>Spot</strong> <strong>LXi</strong> is not intended <strong>for</strong> continuous monitoring. Do not leave<br />
the device unattended while taking measurements on a patient.<br />
WARNING To ensure data integrity, save readings and clear the <strong>Spot</strong> <strong>LXi</strong> display<br />
between patients.<br />
WARNING The <strong>Spot</strong> <strong>LXi</strong> is not defibrillator proof.<br />
WARNING <strong>Spot</strong> <strong>LXi</strong> is not intended <strong>for</strong> use during patient transport.<br />
WARNING This device is not suitable <strong>for</strong> use in the presence of a flammable<br />
anesthetic mixture with air or oxygen or nitrous oxide. An explosion may result.<br />
WARNING To ensure patient safety, use only accessories and supplies (i.e.,<br />
cuffs, hoses, temperature probes, SpO 2 sensors, etc.) recommended <strong>for</strong> or<br />
supplied with <strong>Spot</strong> <strong>LXi</strong>. Using unapproved accessories with <strong>Spot</strong> <strong>LXi</strong> can affect<br />
patient and/or operator safety.<br />
WARNING Take care to prevent water or other fluid from entering any<br />
connectors on the device. Should this occur, dry the connectors with warm air.<br />
Check the accuracy of all operating functions.<br />
WARNING Every three months, inspect the blood pressure cuff, SpO 2 cable,<br />
and other accessories <strong>for</strong> fraying or other damage. Replace as necessary.<br />
WARNING Do not use <strong>Spot</strong> <strong>LXi</strong> on patients who are on heart/lung machines.<br />
WARNING Electric shock hazard. There are no user-serviceable parts inside<br />
<strong>Spot</strong> <strong>LXi</strong> other than battery replacement (see “Battery Replacement” on<br />
page 65). An operator may only per<strong>for</strong>m maintenance procedures specifically<br />
described in this manual. For service, refer the device to an Authorized Service<br />
Center.<br />
WARNING This device is not intended <strong>for</strong> hand-held use during operation.
<strong>Directions</strong> <strong>for</strong> <strong>Use</strong> Introduction 5<br />
Blood Pressure Warnings<br />
WARNING Do not autoclave.<br />
WARNING This device complies with current required standards <strong>for</strong><br />
electromagnetic interference and should not present problems to other<br />
equipment or be affected by other devices. As a precaution, avoid using this<br />
device in close proximity to other equipment.<br />
WARNING Welch Allyn is not responsible <strong>for</strong> the integrity of any mounting<br />
installation. Welch Allyn recommends that the customer contact their Biomedical<br />
Engineering Department or maintenance service to ensure professional<br />
installation <strong>for</strong> safety and reliability of any mounting accessory.<br />
WARNING The <strong>Spot</strong> <strong>LXi</strong> consists of high-quality precision parts. Protect it from<br />
severe impact and shock. A qualified service technician must check any <strong>Spot</strong> <strong>LXi</strong><br />
that is dropped or damaged <strong>for</strong> proper operation prior to further use. Do not use<br />
the <strong>Spot</strong> <strong>LXi</strong> if you notice any signs of damage. Contact the Welch Allyn<br />
Customer Service Department <strong>for</strong> assistance.<br />
WARNING Do not use an SpO 2 finger clip sensor and a blood pressure cuff<br />
simultaneously on the same limb. Doing so may result in inaccurate pulse rate<br />
and perfusion readings.<br />
WARNING The USB port is <strong>for</strong> service only. Do not use this connection <strong>for</strong> any<br />
external equipment connections.<br />
These warnings pertain to the <strong>Spot</strong> <strong>LXi</strong> blood pressure feature.<br />
WARNING <strong>Spot</strong> <strong>LXi</strong> is not intended to measure BLOOD PRESSURE on<br />
neonatal patients. The AAMI SP10:2002 standard defines neonates as children 28<br />
days or less of age if born at term (37 weeks gestation or more); otherwise up to<br />
44 gestational weeks.<br />
WARNING To ensure pediatric blood pressure accuracy and safety, the Child<br />
Reusable Two-Piece Blood Pressure Cuff (4500-01), Infant Durable One-Piece<br />
Cuff (5082-82-4MQ), and the Infant Disposable One-Piece Cuff (5082-92-4MQ)<br />
are the smallest cuffs approved <strong>for</strong> use with young children and infants. The<br />
child’s arm must fit within the range markings on the cuff.<br />
WARNING Avoid compression of the blood pressure hose or cuff tubing of <strong>Spot</strong><br />
<strong>LXi</strong>. This may cause system errors to occur in the device.<br />
WARNING Patients who are experiencing moderate to severe arrhythmias may<br />
give inaccurate blood pressure measurements.<br />
WARNING <strong>Spot</strong> <strong>LXi</strong> does not operate effectively on patients who are<br />
experiencing convulsions or tremors.<br />
WARNING <strong>Use</strong> only Welch Allyn blood pressure cuffs and/or hoses. Using other<br />
manufacturers’ blood pressure cuffs and/or hoses may produce inaccurate blood<br />
pressure readings.<br />
WARNING When several blood pressure measurements are taken on the same<br />
patient, regularly check the cuff site and extremity <strong>for</strong> possible ischemia, purpura,<br />
and/or neuropathy.
6 Introduction Welch Allyn <strong>Spot</strong> <strong>Vital</strong> <strong>Signs</strong> <strong>LXi</strong><br />
WARNING Do not allow a blood pressure cuff to remain on the patient more<br />
than 10 minutes when inflated above 10 mmHg. This may cause patient distress,<br />
disturb blood circulation, and contribute to injury of peripheral nerves.<br />
WARNING Do not place the cuff on any extremity that is used <strong>for</strong> intravenous<br />
infusions or any area where circulation is compromised.<br />
WARNING Excessive cuff tightness may cause venous congestion and<br />
discoloration of the limb.<br />
WARNING Wrapping the cuff too loosely (preventing proper inflation) may result<br />
in errors.<br />
WARNING Do not change the connector(s) on the blood pressure cuff tubing of<br />
this device to luer type. Luer type connectors are commonly used in intravenous<br />
infusion systems. Using the luer connectors on blood pressure cuff tubing<br />
creates the risk that the blood pressure tubing could be mistakenly connected to<br />
a patient's intravenous line, resulting in the introduction of air into the patient's<br />
circulatory system.
<strong>Directions</strong> <strong>for</strong> <strong>Use</strong> Introduction 7<br />
Temperature Warnings<br />
SureTemp ® Plus<br />
These warnings pertain to the <strong>Spot</strong> <strong>LXi</strong> temperature feature.<br />
These warnings are specific to the SureTemp Plus thermometer option.<br />
WARNING <strong>Use</strong> only Welch Allyn probe covers. Using other manufacturers’<br />
probe covers or no probe cover may produce temperature measurement errors<br />
and/or inaccuracy.<br />
WARNING Long-term continuous monitoring beyond three to five minutes is<br />
not recommended in any mode.<br />
WARNING Oral/axillary probes (blue ejection button at top of probe) and blue<br />
removable probe wells are used <strong>for</strong> taking oral and axillary temperatures only.<br />
Rectal probes (red ejection button) and red removable probe wells are used <strong>for</strong><br />
taking rectal temperatures only. <strong>Use</strong> of the probe at the wrong site will result in<br />
temperature errors. <strong>Use</strong> of the incorrect removable probe well could result in<br />
patient cross-contamination.<br />
WARNING The thermometer connectors and probe are not waterproof. Do not<br />
immerse or drip fluids on these items. Should this occur, dry the connectors and<br />
probe with warm air. Check all functions <strong>for</strong> proper operation and accuracy.<br />
WARNING Do not take an axillary temperature through patient’s clothing. Direct<br />
probe cover to skin contact is required.<br />
WARNING Do not autoclave.<br />
WARNING <strong>Use</strong> Welch Allyn single-use disposable probe covers to limit patient<br />
cross-contamination.<br />
WARNING Incorrect insertion of probe can cause bowel per<strong>for</strong>ation.<br />
WARNING Washing hands greatly reduces the risk of cross-contamination and<br />
nosocomial infection.<br />
WARNING To ensure optimal accuracy, always confirm that the correct mode is<br />
selected.
8 Introduction Welch Allyn <strong>Spot</strong> <strong>Vital</strong> <strong>Signs</strong> <strong>LXi</strong><br />
Braun Thermoscan PRO 4000<br />
SpO 2 Warnings<br />
These warnings are specific to the Braun ThermoScan PRO 4000 thermometer option.<br />
WARNING Keep the probe window clean, dry, and undamaged at all times to<br />
ensure accurate measurements. To protect the probe window, always keep the<br />
thermometer in the storage cover while transporting or when not in use.<br />
WARNING Only use Braun ThermoScan probe covers with this thermometer.<br />
Using other manufacturer’s probe covers or no probe cover may produce<br />
temperature measurement errors and/or inaccuracies. If the thermometer is used<br />
without a probe cover attached, clean the lens (see “Braun ThermoScan PRO<br />
4000 Thermometer” on page 64).<br />
WARNING Do not autoclave.<br />
WARNING The thermometer is not waterproof. Do not immerse or drip fluids<br />
on it. Should this occur, dry the thermometer with warm air. Check <strong>for</strong> proper<br />
operation and accuracy.<br />
These warnings pertain to the <strong>Spot</strong> <strong>LXi</strong> SpO 2 feature.<br />
WARNING Only use <strong>Spot</strong> <strong>LXi</strong> with Masimo or Nellcor SpO 2 option with Masimo<br />
or Nellcor brand sensors and accessories, respectively. Using the wrong or<br />
unapproved sensors or cables may cause improper per<strong>for</strong>mance.<br />
WARNING The SpO 2 sensor and extension cables are intended <strong>for</strong> use only <strong>for</strong><br />
pulse oximetry measurements. Do not attempt to connect these cables to a PC<br />
or any similar device.<br />
WARNING Be<strong>for</strong>e using, carefully read the sensor <strong>Directions</strong> <strong>for</strong> <strong>Use</strong>, including<br />
all warnings, cautions, and instructions.<br />
WARNING Do not use a damaged sensor or pulse oximetry cable or a sensor<br />
with exposed optical components.<br />
WARNING Incorrect application or a long duration of use of an SpO 2 sensor may<br />
cause tissue damage. Inspect the sensor site periodically as directed in the<br />
sensor’s <strong>Directions</strong> <strong>for</strong> <strong>Use</strong>.<br />
WARNING Certain ambient environmental conditions, sensor application errors,<br />
and certain patient conditions may affect SpO 2 readings and pulse signal.<br />
WARNING Do not immerse the sensor or patient cables in water, solvents, or<br />
cleaning solutions (the sensors and connections are not waterproof). Do not use<br />
irradiation, steam, or ethylene oxide <strong>for</strong> sterilization.<br />
WARNING The SpO 2 in the <strong>Spot</strong> <strong>LXi</strong> device is not intended <strong>for</strong> use as an apnea<br />
monitor.<br />
WARNING Consider the SpO 2 an early warning device. As a trend toward<br />
patient deoxygenation is indicated, use laboratory instruments to analyze blood<br />
samples to completely understand the patient’s condition.
<strong>Directions</strong> <strong>for</strong> <strong>Use</strong> Introduction 9<br />
General Cautions<br />
WARNING Tissue damage can be caused by incorrect application or duration of<br />
use of a Nellcor OxiMax sensor. Inspect the sensor site as directed in the sensor<br />
<strong>Directions</strong> <strong>for</strong> <strong>Use</strong>.<br />
WARNING Do not use the sensors during magnetic resonance imaging (MRI)<br />
scanning. Induced current could potentially cause burns. The MS board pulse<br />
oximeter may affect the MRI image, and the MRI unit may affect the accuracy of<br />
the oximetry measurements.<br />
WARNING Carefully route patient cabling to reduce the possibility of patient<br />
entanglement or strangulation.<br />
WARNING Failure to cover the Nellcor OxiMax sensor site with opaque material<br />
in high ambient light conditions may result in inaccurate measurements.<br />
A caution statement in this manual identifies a condition or practice, which if not<br />
corrected or discontinued immediately, could lead to equipment failure, equipment<br />
damage, or data loss.<br />
These cautions pertain to the entire <strong>Spot</strong> <strong>Vital</strong> <strong>Signs</strong> <strong>LXi</strong> device.<br />
Caution If the accuracy of any measurement is in question, check the patient’s<br />
vital sign(s) with an alternate method and then check to verify the device is<br />
functioning properly.<br />
Caution Place the device on a secure surface or use one of the optional<br />
mounting accessories.<br />
Caution Do not place fluids on or near the device.<br />
Caution It is recommended that the device is used within stated operating<br />
temperature ranges (see “Environmental” on page 59). The device will not meet<br />
its per<strong>for</strong>mance specifications if used outside these temperatures ranges.<br />
Caution For proper patient electrical isolation, use only a Welch Allyn power<br />
supply (4500-101A) to charge <strong>Spot</strong> <strong>LXi</strong> and its attached peripheral devices. Do not<br />
use an external charger while the printer is attached to <strong>Spot</strong> <strong>LXi</strong>.<br />
Caution Always unplug the AC power trans<strong>for</strong>mer from the outlet be<strong>for</strong>e<br />
moving the mobile stand to a new location.<br />
Caution The basket has a three-pound weight limit. Take care not to exceed<br />
this limit.<br />
Caution Only use a 9V battery with the Healthometer scale. Remove and<br />
discard the wall mounted power supply.<br />
Caution The Healthometer scale, REF 349KLX, is not sold with an RS-232 cable<br />
to connect the scale to the <strong>Spot</strong> <strong>LXi</strong>. The customer must purchase a standard<br />
RS-232 cable.<br />
Caution When using the Healthometer scale, remove the two hex nuts on the<br />
RS-232 cable, as supplied, be<strong>for</strong>e screwing the cable into the scale base.
10 Introduction Welch Allyn <strong>Spot</strong> <strong>Vital</strong> <strong>Signs</strong> <strong>LXi</strong><br />
Blood Pressure Cautions<br />
Temperature Cautions<br />
SpO 2 Cautions<br />
These cautions pertain to the <strong>Spot</strong> <strong>LXi</strong> blood pressure feature.<br />
Caution Minimize extremity and cuff motion during blood pressure readings.<br />
Caution If the blood pressure cuff is not at heart level, note the difference in<br />
reading due to the hydrostatic effect. Add the value of 1.80 mmHg (.2 kPa) to the<br />
displayed reading <strong>for</strong> every inch (2.5 cm) above heart level. Subtract the value of<br />
1.80 mmHg (.2 kPa) from the displayed reading <strong>for</strong> every inch (2.5 cm) below<br />
heart level.<br />
Caution Proper blood pressure cuff size and placement is essential to the<br />
accuracy of the blood pressure determination. See Reusable Two-Piece Cuff<br />
Measurements (Table 10) or Durable One-Piece Cuff Measurements (Table 11)<br />
on page 35 <strong>for</strong> sizing in<strong>for</strong>mation.<br />
Caution The position and physiologic condition of the subject can affect a blood<br />
pressure reading.<br />
These cautions pertain to the <strong>Spot</strong> <strong>LXi</strong> temperature feature.<br />
Caution The SureTemp Plus feature only operates with the probe well in place.<br />
Caution Do not use alkaline batteries in the Braun ThermoScan PRO 4000.<br />
Caution Biting the probe tip may result in damage to the probe.<br />
These cautions pertain to the <strong>Spot</strong> <strong>LXi</strong> SpO 2 feature.<br />
Caution The pulse oximeter is calibrated to determine the percentage of<br />
arterial oxygen saturation of functional hemoglobin. Significant levels of<br />
dysfunctional hemoglobin such as carboxyhemoglobin or methemoglobin may<br />
affect the accuracy of the measurement.<br />
Caution Some sensors may not be appropriate <strong>for</strong> a particular patient. If at<br />
least 10 seconds of perfusion pulses cannot be observed <strong>for</strong> a given sensor,<br />
change sensor location or sensor type <strong>for</strong> perfusion to resume.<br />
Caution Physiological conditions, medical procedures, or external agents that<br />
may interfere with the pulse oximeter’s ability to detect and display<br />
measurements include dysfunctional hemoglobin, arterial dyes, low perfusion,<br />
dark pigment, and externally applied coloring agents such as nail polish, dye, or<br />
pigmented cream.<br />
Caution When selecting a sensor, consider the patient’s weight and activity<br />
level, the adequacy of perfusion, the available sensor sites, the need <strong>for</strong> sterility,<br />
and the anticipated duration of monitoring.
<strong>Directions</strong> <strong>for</strong> <strong>Use</strong> Introduction 11<br />
Mises en gardes et avertissements<br />
Tout le personnel d’exploitation doit connaître les consignes de sécurité générale de cette<br />
synthèse. Des mises en garde et avertissements spécifiques sont également donnés tout<br />
au long de ce manuel.<br />
Mises en garde générales<br />
Les mises en garde de ce manuel identifient les conditions ou pratiques qui, si elles ne<br />
sont pas corrigées ou arrêtées immédiatement, risquent de provoquer des blessures, des<br />
maladies ou le décès du patient.<br />
Ces mises en garde ont trait à tout le dispositif du <strong>Spot</strong> <strong>Vital</strong> <strong>Signs</strong> <strong>LXi</strong>.<br />
MISE EN GARDE Les in<strong>for</strong>mations de ce manuel constituent un guide complet de<br />
l’utilisation du <strong>Spot</strong> <strong>LXi</strong>. Pour obtenir les meilleurs résultats possibles, lisez attentivement<br />
ce manuel avant d’utiliser le dispositif.<br />
MISE EN GARDE Le <strong>Spot</strong> <strong>LXi</strong> est conçu pour usage clinique médical. Bien que ce<br />
manuel puisse illustrer des techniques de surveillance médicale ponctuelle, cet instrument<br />
ne doit être utilisé que par un clinicien <strong>for</strong>mé sachant comment prendre et interpréter les<br />
signes vitaux du patient.<br />
MISE EN GARDE Le <strong>Spot</strong> <strong>LXi</strong> n’est pas destiné à être utilisé dans des environnement<br />
non supervisés par un professionnel de la santé.<br />
MISE EN GARDE Le <strong>Spot</strong> <strong>LXi</strong> n’est pas conçu pour les surveillances en continu. Ne<br />
laissez pas le dispositif sans surveillance lors de la prise de mesures sur un patient.<br />
MISE EN GARDE Pour assurer l’intégrité des données, enregistrez les mesures et<br />
effacez l’affichage du <strong>Spot</strong> <strong>LXi</strong> entre les patients.<br />
MISE EN GARDE Le <strong>Spot</strong> <strong>LXi</strong> n’est pas conçu pour résister aux défibrillateurs.<br />
MISE EN GARDE Le <strong>Spot</strong> <strong>LXi</strong> n’est pas destiné à être utilisé pendant le transport des<br />
patients.<br />
MISE EN GARDE Ce dispositif n’est pas adapté aux utilisations en présence d’un<br />
mélange anesthésique inflammable contenant de l’air, de l’oxygène ou de l’oxyde nitreux.<br />
Une explosion pourrait se produire.<br />
MISE EN GARDE Pour garantir la sécurité du patient, utilisez seulement les accessoires<br />
et fournitures (par ex., brassards, sondes de température, détecteurs de SpO 2 , capteurs,<br />
etc.) recommandés pour, ou fournis avec, le <strong>Spot</strong> <strong>LXi</strong>. L’utilisation d’accessoires non<br />
approuvés pour le <strong>Spot</strong> <strong>LXi</strong> est nuisible à la sécurité du patient et/ou de l’opérateur.<br />
MISE EN GARDE Veillez à éviter que de l’eau ou d’autres fluides pénètre(nt) dans l’un<br />
des connecteurs du dispositif. Si cela se produisait, séchez les connecteurs avec de l’air<br />
chaud. Vérifiez l’exactitude de toutes les fonctions opérationnelles.<br />
MISE EN GARDE Tous les trois mois, inspectez le brassard, le câble du SpO 2 et les<br />
autres accessoires pour vérifier qu’ils ne sont pas effilochés ni autrement endommagés.<br />
Remplacez-les si nécessaire.<br />
MISE EN GARDE N’utilisez pas le <strong>Spot</strong> <strong>LXi</strong> sur des patients raccordés à des appareils<br />
cardiaques/respiratoires.<br />
AVERTISSEMENT Risque d’électrocution. Outre la batterie qui peut être remplacée (see<br />
“Remplacement des batteries” on page 53) aucune pièce pouvant être entretenue par<br />
l’utilisateur ne se trouve à l’intérieur du <strong>Spot</strong> <strong>LXi</strong>. Chaque opérateur ne peut effectuer que<br />
les procédures de maintenance spécifiquement décrites dans ce manuel. Pour l’entretien<br />
du dispositif, consultez un centre d’entretien agréé.
12 Introduction Welch Allyn <strong>Spot</strong> <strong>Vital</strong> <strong>Signs</strong> <strong>LXi</strong><br />
MISE EN GARDE Ce dispositif n’est pas destiné à être tenu à la main pendant son<br />
fonctionnement.<br />
MISE EN GARDE Ne passez pas à l’autoclave.<br />
MISE EN GARDE Ce produit satisfait aux normes actuelles en vigueur concernant les<br />
interférences électromagnétiques et ne devrait ni affecter, ni être affecté par les autres<br />
appareils. Par mesure de précaution, évitez d’utiliser ce produit très près d’un autre appareil.<br />
MISE EN GARDE Welch Allyn n’est pas responsable de l’intégrité de l’installation de<br />
support quelle qu’elle soit. Welch Allyn recommande au client de contacter son service<br />
d’ingénierie biomédicale ou son service de maintenance pour veiller à ce tout accessoire<br />
d’installation soit monté de manière professionnelle et respecte les critères de sécurité et<br />
de fiabilité.<br />
MISE EN GARDE Le <strong>Spot</strong> <strong>LXi</strong> est constitué de pièces de précision de grande qualité.<br />
Protégez-le des impacts et chocs importants. Avant d’être utilisé à nouveau, tout <strong>Spot</strong> <strong>LXi</strong><br />
qui est tombé ou endommagé doit être vérifié par un technicien d’entretien qualifié qui<br />
s’assurera de son bon fonctionnement. N’utilisez pas le <strong>Spot</strong> <strong>LXi</strong> en cas de signe<br />
d’endommagement. Contactez le service clientèle Welch Allyn pour assistance.<br />
MISE EN GARDE N’utilisez pas simultanément un capteur de doigt SpO 2 et un brassard<br />
sur le même membre. Ceci risquerait d’entraîner des lectures inexactes de la fréquence du<br />
pouls et de la perfusion.<br />
MISE EN GARDE Le port USB est strictement réservé aux opérations d’entretien.<br />
Ne l’utilisez pas pour le raccordement d’équipements externes.<br />
Mises en garde relatives à la pression artérielle<br />
Ces mises en garde ont trait à la fonction de pression artérielle du <strong>Spot</strong> <strong>LXi</strong>.<br />
MISE EN GARDE Le <strong>Spot</strong> <strong>LXi</strong> n’est pas destiné à mesurer la PRESSION ARTÉRIELLE<br />
des nouveau-nés. La norme AAMI SP10:2002 définit les nouveau-nés comme les enfants<br />
âgés de 28 jours au plus s’ils sont nés à terme (37 semaines de gestation minimum) ; ou<br />
les enfants jusqu’à 44 semaines de gestation maximum.<br />
MISE EN GARDE Pour assurer l’exactitude et la sécurité des mesures de pression<br />
artérielle pédiatrique, le brassard pédiatrique à deux pièces (4500-01), le brassard pour<br />
nourrissons mono-pièce longue durée (5082-82-4MQ), et le brassard pour nourrissons<br />
mono-pièce à usage unique (5082-92-4MQ) sont les plus petits brassards approuvés pour<br />
les jeunes enfants et les nourrissons. Le bras de l’enfant doit être compris entre les<br />
marques limites de plage d’utilisation figurant sur le brassard.<br />
MISE EN GARDE Évitez de comprimer le flexible de pression artérielle ou la tubulure du<br />
brassard du <strong>Spot</strong> <strong>LXi</strong>. Ceci risque de provoquer des erreurs système au niveau du<br />
dispositif.<br />
MISE EN GARDE Les patients souffrant d’arythmies légères à grave peuvent donner lieu<br />
à des mesures inexactes de la pression artérielle.<br />
MISE EN GARDE Le <strong>Spot</strong> <strong>LXi</strong> ne fonctionne pas efficacement sur des patients qui sont<br />
en crise de convulsions ou de tremblements.<br />
MISE EN GARDE Utilisez exclusivement les brassards et/ou les tubulures de Welch<br />
Allyn. Utiliser les brassards et/ou les tubulures d’autres fabricants risque de provoquer des<br />
mesures inexactes de la pression artérielle.<br />
MISE EN GARDE Si plusieurs mesures de pression artérielle sont prises sur le même<br />
patient, inspectez régulièrement le site du brassard et les extrémités pour vérifier<br />
l’absence de d’ischémie, de purpura et/ou de neuropathie.
<strong>Directions</strong> <strong>for</strong> <strong>Use</strong> Introduction 13<br />
MISE EN GARDE Ne laissez pas un brassard sur le bras du patient pendant plus de<br />
10 minutes s’il est gonflé à plus de 10 mm Hg. Ceci pourrait faire mal au patient, troubler la<br />
circulation sanguine et entraîner une lésion des nerfs périphériques.<br />
MISE EN GARDE Ne placez pas le brassard sur un membre servant à une perfusion<br />
intraveineuse ou une zone dont la circulation est ou pourrait être compromise.<br />
MISE EN GARDE Un brassard trop serré risque d’entraîner une congestion veineuse et la<br />
décoloration du membre.<br />
MISE EN GARDE Ne pas serrer suffisamment le brassard (ce qui empêche de le gonfler<br />
correctement) risque de provoquer des erreurs.<br />
MISE EN GARDE Ne pas changer le(s) connexion(s) de la tubulure du brassard de ce<br />
dispositif avec des connexions de type luer. Ces dernières s’utilisent généralement dans le<br />
cas d’intraveineuses. L’utilisation de connexions de type luer sur les tubulures du brassard<br />
présente le risque de voir la tubulure du brassard connectée par erreur au système<br />
d’intraveineuse du patient, ce qui peut entraîner l’introduction d’air dans le système<br />
circulatoire du patient.
14 Introduction Welch Allyn <strong>Spot</strong> <strong>Vital</strong> <strong>Signs</strong> <strong>LXi</strong><br />
Mises en garde relatives à la température<br />
SureTemp ® Plus<br />
Ces mises en garde ont trait à la fonction de température du <strong>Spot</strong> <strong>LXi</strong>.<br />
Ces mises en garde sont spécifiques à l’option du thermomètre SureTemp Plus.<br />
MISE EN GARDE Utilisez exclusivement les protections Welch Allyn. L’utilisation de<br />
protections de sonde d’un autre fabricant ou la non-utilisation d’une protection de sonde<br />
risque de produire une prise de température erronée et/ou inexacte.<br />
MISE EN GARDE La prise de température en continu à long terme, c’est-à-dire au delà<br />
de trois à cinq minutes, n’est recommandée en aucun mode.<br />
MISE EN GARDE Les sondes orales/axillaires (bouton d’éjection bleu au-dessus de la<br />
sonde) et le puits de sonde oral/axillaire amovible bleu sont utilisés exclusivement pour les<br />
prises de température orales et axillaires. Les sondes rectales (bouton d’éjection rouge) et<br />
le puits de sonde amovible rouge sont utilisés exclusivement pour les prises de<br />
température rectales. L’utilisation de la sonde dans un site incorrect entraîne des erreurs<br />
de température. L’utilisation du puits de sonde amovible incorrect risque d’entraîner une<br />
contamination croisée entre patients.<br />
MISE EN GARDE Les connecteurs du thermomètre et la sonde ne sont pas étanches.<br />
N’immergez pas ces éléments et ne faites pas tomber de gouttes dessus. Si cela se<br />
produisait, séchez les connecteurs et la sonde avec de l’air chaud. Vérifiez ensuite que<br />
toutes les fonctions sont bien opérationnelles et fournissent des résultats exacts.<br />
MISE EN GARDE Ne prenez pas la température axillaire au-dessus des vêtements du<br />
patient. La sonde doit toucher directement la peau.<br />
MISE EN GARDE Ne pas passer à l’autoclave.<br />
MISE EN GARDE Utilisez des protections de sonde à usage unique et jetables afin de<br />
limiter la contamination croisée entre patients.<br />
MISE EN GARDE L’insertion incorrecte de la sonde risque de provoquer la per<strong>for</strong>ation<br />
des selles.<br />
MISE EN GARDE Se laver les mains réduit considérablement le risque de contamination<br />
croisée entre les patients et le risque d’infection hospitalière.<br />
MISE EN GARDE Pour vous assurer d’obtenir une exactitude optimale, assurez-vous<br />
toujours que le mode approprié est sélectionné.
<strong>Directions</strong> <strong>for</strong> <strong>Use</strong> Introduction 15<br />
Braun Thermoscan PRO 4000<br />
Ces mises en garde sont spécifiques à l’option du thermomètre Braun ThermoScan PRO<br />
4000.<br />
MISE EN GARDE Maintenez à tout moment la fenêtre de la sonde propre, sèche et sans<br />
dommages pour vous assurer de l’exactitude des mesures. Pour protéger la fenêtre de la<br />
sonde, gardez toujours le thermomètre dans sa protection de rangement lorsque vous ne<br />
le transportez pas ou ne l’utilisez pas.<br />
MISE EN GARDE Utilisez exclusivement les protections de sonde Braun ThermoScan<br />
avec ce thermomètre. L’utilisation de protections de sonde d’un autre fabricant ou la nonutilisation<br />
d’une protection de sonde risque de produire une prise de température erronée<br />
et/ou inexacte. Si le thermomètre est utilisé sans protection de sonde, nettoyez la lentille<br />
(see “Braun ThermoScan PRO 4000 Thermometer” on page 64).<br />
MISE EN GARDE Ne passez pas à l’autoclave.<br />
MISE EN GARDE Le thermomètre n’est pas étanche. Ne l’immergez pas et ne faites pas<br />
tomber de gouttes dessus. Si cela se produisait, séchez le thermomètre avec de l’air<br />
chaud. Vérifiez ensuite qu’il fonctionne et fournit des résultats exacts.<br />
Mises en garde relatives au SpO 2<br />
Ces mises en garde ont trait à la fonction <strong>Spot</strong> <strong>LXi</strong> SpO 2 .<br />
MISE EN GARDE Utilisez exclusivement <strong>Spot</strong> <strong>LXi</strong> et l’option Masimo ou Nellcor SpO 2<br />
avec les capteurs et accessoires de la marque Masimo ou Nellcor, respectivement. Utiliser<br />
des capteurs ou des câbles incorrects ou non approuvés risque d’entraîner des<br />
per<strong>for</strong>mances incorrectes.<br />
MISE EN GARDE Le capteur et les câbles d’extension SpO 2 sont destinés à être utilisés<br />
exclusivement pour les mesures d’oxymétrie du pouls. N’essayez pas de connecter ces<br />
câbles à un PC ou à un dispositif similaire.<br />
MISE EN GARDE Avant d’utiliser le capteur, lisez attentivement son mode d’emploi, dont<br />
l’ensemble des mises en garde, avertissements et instructions.<br />
MISE EN GARDE N’utilisez pas un capteur ou un câble d’oxymétrie de pouls<br />
endommagé et n’utilisez pas un capteur dont les composants optiques sont exposés.<br />
MISE EN GARDE Une application ou une durée inappropriée d’utilisation du capteur du<br />
SpO 2 risque d’entraîner l’endommagement des tissus. Inspectez régulièrement le site<br />
occupé par le capteur con<strong>for</strong>mément au mode d’emploi de celui-ci.<br />
MISE EN GARDE Certaines conditions de l’environnement ambiant, des erreurs<br />
d’application du capteur et certaines conditions du patient risquent d’avoir un impact sur<br />
les mesures du SpO 2 et sur le signal du pouls.<br />
MISE EN GARDE N’immergez pas le capteur ou les câbles du patient dans de l’eau, des<br />
solvants ou des solutions de nettoyage (les capteurs et les connexions ne sont pas<br />
étanches). N’utilisez pas d’irradiations, de vapeur ou d’oxyde d’éthylène pour la<br />
stérilisation.<br />
MISE EN GARDE Le SpO 2 du dispositif <strong>Spot</strong> <strong>LXi</strong> n’est pas destiné à être utilisé en tant<br />
que moniteur d’apnée.<br />
MISE EN GARDE Considérez le SpO 2 comme un dispositif de mise en garde précoce. Si<br />
une tendance vers la désoxygénation du patient est indiquée, utilisez des instruments de<br />
laboratoire pour analyser des échantillons sanguins afin de bien comprendre la condition<br />
du patient.
16 Introduction Welch Allyn <strong>Spot</strong> <strong>Vital</strong> <strong>Signs</strong> <strong>LXi</strong><br />
Avertissements généraux<br />
MISE EN GARDE Une application ou une durée inappropriée d’utilisation du capteur du<br />
Nellcor OxiMax peut entraîner l’endommagement des tissus. Inspectez le site occupé par<br />
le capteur con<strong>for</strong>mément au mode d’emploi de celui-ci.<br />
MISE EN GARDE N’utilisez pas les capteurs pendant les scannages MRI (imagerie par<br />
résonance magnétique). Le courant induit risque de provoquer des brûlures éventuelles.<br />
L’oxymètre de pouls de la carte MS risque d’avoir un impact sur l’image MRI, et l’unité MRI<br />
risque d’avoir un impact sur l’exactitude des mesures d’oxymétrie.<br />
MISE EN GARDE Acheminez avec soin les câbles du patient pour réduire le risque<br />
d’emmêlement ou d’étranglement du patient.<br />
MISE EN GARDE Ne pas recouvrir le site du capteur de Nellcor OxiMax avec un matériau<br />
opaque lorsque l’éclairage ambiant est <strong>for</strong>t risque d’entraîner des mesures inexactes.<br />
Les avertissements de ce manuel identifient les conditions ou pratiques qui, si elles ne<br />
sont pas corrigées ou arrêtées immédiatement, risquent de provoquer des défaillances ou<br />
des endommagements des équipements ou encore des pertes de données.<br />
Ces avertissements ont trait à tout le dispositif du <strong>Spot</strong> <strong>Vital</strong> <strong>Signs</strong> <strong>LXi</strong>.<br />
Avertissement Si l’exactitude d’une mesure quelconque est en doute, vérifiez le(s)<br />
signe(s) vital(aux) du patient par une autre méthode, puis vérifiez que le dispositif<br />
fonctionne correctement.<br />
Avertissement Vérifiez que le dispositif est placé sur une surface fixe ou utilisez l’un des<br />
accessoires de fixation en option.<br />
Avertissement Ne placez pas de liquides sur ou à proximité du dispositif.<br />
Avertissement Nous recommandons d’utiliser le dispositif dans les plages de<br />
température opérationnelle indiquées (see “Critères environnementaux” on page 47). Le<br />
dispositif ne sera pas con<strong>for</strong>me aux per<strong>for</strong>mances spécifiées s’il est utilisé hors de ces<br />
plages de température.<br />
Avertissement Pour obtenir une isolation électrique appropriée du patient, utilisez<br />
exclusivement un bloc d’alimentation Welch Allyn (4500-101 A) pour charger le <strong>Spot</strong> <strong>LXi</strong> et<br />
les périphériques qui y sont reliés. N’utilisez pas de chargeur externe pendant que<br />
l’imprimante est reliée au <strong>Spot</strong> <strong>LXi</strong>.<br />
Avertissement Débranchez toujours le trans<strong>for</strong>mateur d’alimentation C.A. de la prise<br />
avant de placer le pied mobile dans un nouvel endroit.<br />
Avertissement La capacité du panier est limitée à 1,32 kg. Il est donc important de ne<br />
pas dépasser cette limite.<br />
Avertissement Utilisez exclusivement une batterie de 9 V avec la balance Healthometer.<br />
Retirez et jetez le dispositif d’alimentation mural.<br />
Avertissement La balance Healthometer, REF 349KLX, ne se vend pas avec un câble de<br />
type RS-232 pour connecter la balance au <strong>Spot</strong> <strong>LXi</strong>. Pour pouvoir réaliser cette opération,<br />
vous devez acheter un câble standard de type RS-232.<br />
Avertissement Pour utiliser la balance Healthometer, retirez les deux vis hexagonales<br />
sur le câble RS-232 avant de visser ce dernier sur le socle de la balance.
<strong>Directions</strong> <strong>for</strong> <strong>Use</strong> Introduction 17<br />
Avertissements relatifs à la pression artérielle<br />
Ces avertissements ont trait à la fonction de pression artérielle du <strong>Spot</strong> <strong>LXi</strong>.<br />
Avertissement Minimisez les déplacements des extrémités et du brassard pendant les<br />
mesures de la pression artérielle.<br />
Avertissement Si le brassard ne se trouve pas au même niveau que le cœur, notez la<br />
différence de lecture due à l’effet hydrostatique. Ajoutez 1,80 mm Hg (0,2 kPa) à la valeur<br />
affichée pour chaque pouce (2,5 cm) au-dessus du niveau du cœur. Soustrayez 1,80 mm Hg<br />
(0,2 kPa) de la valeur affichée pour chaque pouce (2,5 cm) au-dessous du niveau du cœur.<br />
Avertissement Pour obtenir des lectures exactes de la pression artérielle, il est essentiel<br />
que le brassard soit d’une taille appropriée et placé correctement. Reportez-vous à<br />
Mesures avec un brassard à deux pièces réutilisable (Table 10) ou à Mesures avec un<br />
brassard mono-pièce longue durée (Table 11) à la page 35 pour de plus amples<br />
in<strong>for</strong>mations sur la taille.<br />
Avertissement La position et la condition physiologique du sujet peuvent avoir un<br />
impact sur la mesure de la pression artérielle.<br />
Avertissements relatifs à la température<br />
Ces avertissements ont trait à la fonction de température du <strong>Spot</strong> <strong>LXi</strong>.<br />
Avertissement La fonction SureTemp Plus ne fonctionne que lorsque le puits de sonde<br />
est en place.<br />
Avertissement N’utilisez pas de piles alcalines dans le Braun ThermoScan PRO 4000.<br />
Avertissement Mordre la pointe de la sonde risque d’endommager la sonde.
18 Introduction Welch Allyn <strong>Spot</strong> <strong>Vital</strong> <strong>Signs</strong> <strong>LXi</strong><br />
Avertissements relatifs au SpO 2<br />
Ces avertissements ont trait à la fonction <strong>Spot</strong> <strong>LXi</strong> SpO 2.<br />
Avertissement L’oxymètre de pouls est calibré de façon à déterminer le pourcentage de<br />
la saturation artérielle en oxygène de l’hémoglobine fonctionnelle. Des teneurs<br />
importantes en hémoglobine dysfonctionnelle comme la carboxyhémoglobine et la<br />
méthémoglobine peuvent altérer l’exactitude de la mesure.<br />
Avertissement Certains capteurs peuvent s’avérer inappropriés pour un patient donné.<br />
Si vous ne parvenez pas à observer un minimum de 10 secondes de pulsations de<br />
perfusion sur un capteur donné, changez l’emplacement du capteur ou le type du capteur<br />
jusqu’à ce que cette observation soit faite.<br />
Avertissement Les conditions physiologiques, les procédures médicales ou les agents<br />
externes pouvant interférer avec la capacité de l’oximètre du pouls de détecter et<br />
d’afficher les mesures incluent l’hémoglobine dysfonctionnelle, les colorants artériels, les<br />
perfusions faibles, les pigments foncés et les agents colorants à application externe tels<br />
que les vernis à ongle, les teintures ou les crèmes pigmentées.<br />
Avertissement Lorsque vous sélectionnez un capteur, considérez le poids et le niveau<br />
d’activité du patient, le caractère adéquat de la perfusion, le site de capteur disponible, les<br />
besoins en matière de stérilité et la durée anticipée de la surveillance.
<strong>Directions</strong> <strong>for</strong> <strong>Use</strong> Introduction 19<br />
Contents Checklist<br />
Unpack the <strong>Spot</strong> <strong>LXi</strong> and any applicable accessories and then inspect <strong>for</strong> missing items.<br />
Retain the shipping materials in the event of shipping damage or <strong>for</strong> return, if necessary,<br />
to Welch Allyn <strong>for</strong> repair or warranty service. Report any signs of shipping damage to the<br />
carrier. Report any missing or damaged items to the Welch Allyn Service Center near you.<br />
All <strong>Spot</strong> <strong>LXi</strong> devices include the following components:<br />
<strong>Spot</strong> <strong>LXi</strong> Device. This device automatically measures and displays blood pressure, pulse<br />
rate, and temperature.<br />
<strong>Directions</strong> <strong>for</strong> <strong>Use</strong> Manual. Read this manual thoroughly be<strong>for</strong>e using <strong>Spot</strong> <strong>LXi</strong>. Save<br />
this manual <strong>for</strong> reference.<br />
Warranty Card. This card validates the <strong>Spot</strong> <strong>LXi</strong> warranty. Fill out the warranty card and<br />
mail it today.<br />
Blood Pressure Cuff. One cuff with connectors. Other size cuffs are available separately.<br />
Blood Pressure Hose. Latex-free pressure hose with connectors to attach various sizes of<br />
blood pressure cuffs to the <strong>Spot</strong> <strong>LXi</strong>.<br />
AC Power Trans<strong>for</strong>mer and Cord Assembly. Provides power to the <strong>Spot</strong> <strong>LXi</strong> and charges<br />
the internal battery.<br />
Quick Reference Card. Attach this quick operating guide to the device handle, mobile<br />
stand, or wall mount.<br />
Possible Attachments<br />
<strong>Spot</strong> <strong>LXi</strong> may include the following items based on the model and accessories purchased:<br />
SureTemp Plus Temperature Probe, Well, and Covers. One oral temperature probe<br />
(blue ejection button and well) and one box of 25 single-use, disposable probe covers.<br />
Braun ThermoScan PRO 4000 Thermometer and Covers. One ear thermometer; one<br />
box of 20 single-use, disposable probe covers; one rechargeable battery pack; and<br />
one lock release pin.<br />
Wireless Radio and Mounting Bracket. Attach these items to the back of the mobile<br />
stand or wall mount basket.<br />
Barcode Scanner and Mounting Bracket. Attach these items on the basket of the<br />
mobile stand or wall mount.<br />
Pulse Oximetry (SpO 2). The finger clip SpO 2 sensor and extension cable are <strong>for</strong> use<br />
with adult and pediatric patients. Other sensors are available separately.<br />
Printer. Attach to the basket of the mobile stand or wall mount. The printer comes with<br />
paper. Rolls of paper and labels are available separately.
20 Introduction Welch Allyn <strong>Spot</strong> <strong>Vital</strong> <strong>Signs</strong> <strong>LXi</strong>
2<br />
Controls<br />
Navigation button: move<br />
throughout the options in<br />
the Navigation Window or<br />
to increase/decrease<br />
parameter units.<br />
Power button: controls<br />
power to the device.<br />
Controls, Display Window, and<br />
Connections<br />
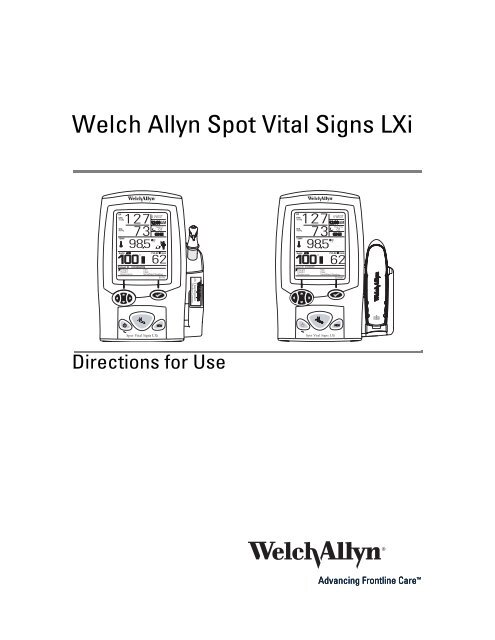
Drawings and text are representative of <strong>Spot</strong> <strong>Vital</strong> <strong>Signs</strong> <strong>LXi</strong> with all available options. Your<br />
device may not include all functions based on the model purchased.<br />
Figure 1. <strong>Spot</strong> <strong>LXi</strong> Front Panel with SureTemp Plus Thermometer<br />
BP<br />
SYS<br />
mmHg<br />
DIA<br />
mmHg<br />
TEMP<br />
Charging LED: indicates<br />
when device is plugged in and<br />
charging the battery.<br />
127 735<br />
98<br />
4 WEST<br />
AM<br />
Reading<br />
01<br />
F<br />
62<br />
SpO2 PULSE /min<br />
%<br />
Patient ID 0123456789<br />
Weight<br />
Pain<br />
Height<br />
Clear<br />
Respiration Send/Next Reading<br />
Enter<br />
<strong>Spot</strong> <strong>Vital</strong> <strong>Signs</strong> <strong>LXi</strong><br />
Blood Pressure Start/Stop button:<br />
initiates a new blood pressure cycle.<br />
Pressing again aborts an active blood<br />
pressure measurement.<br />
SureTemp Plus<br />
thermometer:<br />
remove the probe to<br />
take a temperature.<br />
Removable probe<br />
well: store the<br />
temperature probe<br />
here when not in use;<br />
remove to clean or<br />
replace to eliminate<br />
cross-contamination.<br />
Probe cover<br />
storage area:<br />
storage space <strong>for</strong> one<br />
box of probe covers.<br />
Select button:<br />
accepts the current<br />
option.<br />
Memory button:<br />
recalls up to 50 most<br />
recent readings.<br />
21
22 Controls, Display Window, and Connections Welch Allyn <strong>Spot</strong> <strong>Vital</strong> <strong>Signs</strong> <strong>LXi</strong><br />
Navigation button: move<br />
throughout the options in<br />
the Navigation Window or<br />
to increase/decrease<br />
parameter units.<br />
Power button: controls<br />
power to the device.<br />
Figure 2. <strong>Spot</strong> <strong>LXi</strong> Front Panel with Braun ThermoScan PRO 4000 Thermometer<br />
BP<br />
SYS<br />
mmHg<br />
DIA<br />
mmHg<br />
TEMP<br />
Charging LED: indicates<br />
when device is plugged in<br />
and charging the battery.<br />
127 735<br />
98<br />
4 WEST<br />
AM<br />
F<br />
Reading<br />
01<br />
62<br />
SpO2 PULSE /min<br />
%<br />
Patient ID 0123456789<br />
Weight<br />
Height<br />
Respiration<br />
Pain<br />
Clear<br />
Send/Next Reading<br />
<strong>Spot</strong> <strong>Vital</strong> <strong>Signs</strong> <strong>LXi</strong><br />
Enter<br />
Memory button:<br />
recalls up to 50 most<br />
recent measurements.<br />
Blood Pressure Start/Stop button:<br />
initiates a new blood pressure cycle.<br />
Pressing again aborts an active blood<br />
pressure measurement.<br />
Braun ThermoScan PRO 4000<br />
thermometer: store the probe<br />
covers toward the back of the<br />
thermometer housing; remove the<br />
thermometer to access the covers.<br />
BRAUn<br />
Charging LED: indicates<br />
the thermometer battery<br />
is charging.<br />
Select button:<br />
accepts the current<br />
option.
<strong>Directions</strong> <strong>for</strong> <strong>Use</strong> Controls, Display Window, and Connections 23<br />
Display Window<br />
Be<strong>for</strong>e using <strong>Spot</strong> <strong>LXi</strong> <strong>for</strong> the first time, you must program an initial configuration screen.<br />
1. Press the Power button. The display window shows the initial configuration screen.<br />
Figure 3. Initial Configuration Screen<br />
Change Local Defaults Menu<br />
Model No.: 45NTO<br />
Serial No. 2005040004<br />
Language:<br />
BP Units:<br />
Temperature Units:<br />
Height Units:<br />
Weight Units:<br />
Date Format:<br />
Date:<br />
Time Format:<br />
Time:<br />
Select<br />
2. <strong>Use</strong> the Select button to access the options and accept the entries, and use the<br />
Navigation buttons to move through the menu.<br />
3. The word “Exit” appears at the bottom of the list after you have programmed all<br />
items in the menu. You must program all items be<strong>for</strong>e you can start to use the device.<br />
4. Scroll to Exit and press the Select button to save the entries.
24 Controls, Display Window, and Connections Welch Allyn <strong>Spot</strong> <strong>Vital</strong> <strong>Signs</strong> <strong>LXi</strong><br />
Systolic and Diastolic<br />
display: if MAP is turned on,<br />
the screen toggles between<br />
the systolic and diastolic<br />
values, and the word “MAP”<br />
and the MAP value.<br />
Temperature display and<br />
indicator: shows the<br />
temperature in Fahrenheit or<br />
Celsius.<br />
SpO 2 display: shows the<br />
percent saturation of arterial<br />
hemoglobin. For devices with<br />
SpO 2 only.<br />
Navigation Window:<br />
shows menu options, error<br />
messages, or temperature<br />
conversion.<br />
The liquid crystal display (LCD) may indicate any of the following: systolic blood pressure<br />
(mmHg or kPa), diastolic blood pressure (mmHg or kPa), MAP (mmHg or kPa),<br />
temperature (°F or °C), temperature mode, pulse rate, pulse signal level, SpO 2 percent,<br />
department location, date, time, record number, height (in or cm), weight (lb or kg),<br />
respiration rate, pain level, connectivity signal strength, and battery charge level.<br />
Figure 4. Display Window<br />
{<br />
BP<br />
SYS<br />
{<br />
{<br />
{<br />
Connectivity indicator:<br />
shows the status of <strong>Spot</strong> <strong>LXi</strong><br />
sending a wireless reading.<br />
mmHg<br />
DIA<br />
mmHg<br />
TEMP<br />
127 735<br />
98<br />
F<br />
4 WEST<br />
AM<br />
Reading<br />
SpO2 PULSE /min<br />
62<br />
%<br />
01<br />
Patient ID 0123456789<br />
Weight<br />
Pain<br />
Height<br />
Clear<br />
Respiration Send/Next Reading<br />
Pulse Signal Bar Graph: shows<br />
the strength of the pulses detected.<br />
Location identifier: shows<br />
where the device belongs. If no<br />
location is entered, this area<br />
displays the date.<br />
Enter<br />
Clock: shows the current time.<br />
Reading number indicator:<br />
shows what reading the device is<br />
on. <strong>Spot</strong> <strong>LXi</strong> retains up to 50<br />
readings in memory.<br />
Battery level indicator:<br />
displays the battery charge level.<br />
Thermometer probe setting<br />
indicators: shows temperature<br />
mode. For devices with SureTemp<br />
Plus thermometer only.<br />
Thermometer probe setting<br />
indicators: shows Monitor<br />
Mode. For devices with SureTemp<br />
Plus thermometer only.<br />
Out-of-range indicator: shows<br />
the patient’s temperature reading<br />
above or below the measurement<br />
range limits. For devices with<br />
SureTemp Plus thermometer only.<br />
Pulse display: shows the pulse<br />
rate.
<strong>Directions</strong> <strong>for</strong> <strong>Use</strong> Controls, Display Window, and Connections 25<br />
Connections<br />
SureTemp Plus thermometer<br />
connection port (<strong>for</strong> units<br />
with SureTemp Plus only)<br />
Port I <strong>for</strong> external<br />
device connection<br />
USB connection <strong>for</strong> PC<br />
(behind plug)<br />
Port II <strong>for</strong> external<br />
device connection<br />
<strong>Use</strong> the following instructions to connect the blood pressure hose, thermometer probe,<br />
and optional attachments to the <strong>Spot</strong> <strong>Vital</strong> <strong>Signs</strong> <strong>LXi</strong>.<br />
Figure 5. <strong>Spot</strong> <strong>LXi</strong> Side and Rear Panel Connections<br />
Battery door<br />
Mobile stand or wall<br />
mount screw connection<br />
SpO 2 cable<br />
connection<br />
port (<strong>for</strong><br />
units with<br />
SpO 2 only)<br />
Blood pressure<br />
hose<br />
connection port<br />
AC power<br />
connection<br />
port
26 Controls, Display Window, and Connections Welch Allyn <strong>Spot</strong> <strong>Vital</strong> <strong>Signs</strong> <strong>LXi</strong><br />
Braun ThermoScan PRO 4000 Lock<br />
Press the lock tab toward the Braun ThermoScan PRO 4000 thermometer until it clicks. To<br />
release the housing, insert the lock release pin into the lock release hole until the lock tab<br />
snaps back.<br />
Figure 6. <strong>Spot</strong> <strong>LXi</strong> with Braun ThermoScan PRO 4000 Lock<br />
Blood Pressure Hose and Cuff<br />
Thermometer<br />
SureTemp Plus<br />
Lock release pin<br />
Lock tab<br />
Lock release hole<br />
Identify and have available the <strong>Spot</strong> <strong>LXi</strong>, blood pressure cuff, and the blood pressure hose.<br />
1. Inspect the blood pressure hose; notice that one end has a single, gray connector<br />
fitting and the other end has two white fittings.<br />
2. Squeeze the side tabs on the gray connector and completely push the blood pressure<br />
hose connector into the blood pressure hose connection port until it clicks into place<br />
(see Figure 5 on page 25).<br />
3. Twist the white connectors on the blood pressure hose and cuff connectors together.<br />
<strong>Spot</strong> <strong>LXi</strong> is available with either the SureTemp Plus thermometer or the Braun<br />
ThermoScan PRO 4000 thermometer.<br />
SureTemp Plus is available with two probes and matching wells; one <strong>for</strong> oral/axillary<br />
temperatures (blue ejection button and probe well) and one <strong>for</strong> rectal temperatures (red<br />
ejection button and probe well). The rectal probe and well are accessory items that are<br />
sold separately (see “Temperature” on page 72).<br />
Caution The SureTemp Plus feature only operates with the probe well in place.<br />
1. Align the probe well with the tabs facing up and down into the round opening of the<br />
SureTemp Plus housing on the right side of <strong>Spot</strong> <strong>LXi</strong>. Push it into place.
<strong>Directions</strong> <strong>for</strong> <strong>Use</strong> Controls, Display Window, and Connections 27<br />
2. Align the temperature probe connector with the SureTemp Plus thermometer<br />
connection port on the back of the <strong>Spot</strong> <strong>LXi</strong> (see Figure 5 on page 25). You can only<br />
insert the connector into the port one way.<br />
3. Press the tab on the connector and push it until it clicks into place.<br />
4. Insert the temperature probe into the probe well.<br />
Braun ThermoScan PRO 4000<br />
SpO 2 Sensor<br />
1. Open the package of rechargable batteries and follow the installation guide provided.<br />
2. Open the box of probe covers as directed on the box and slide the box into the metal<br />
guides toward the back of the thermometer housing with the opening at the top and<br />
per<strong>for</strong>ation facing <strong>for</strong>ward.<br />
3. Hold the Braun thermometer at a 45° angle then insert the probe and the top of the<br />
thermometer into the housing.<br />
4. Lower the bottom portion of the thermometer into the housing until it snaps into<br />
place. If you do not properly seat the thermometer, it could fall out of the holder and<br />
become damaged.<br />
5. Slide the thermometer housing into the thermometer slot on the right side of the<br />
<strong>Spot</strong> <strong>LXi</strong> device.<br />
6. Push the lock tab <strong>for</strong>ward to prevent the thermometer housing from falling out of<br />
<strong>Spot</strong> <strong>LXi</strong> (see Figure 6 on page 26).<br />
To release the lock, insert the lock release pin into the lock release hole.<br />
<strong>Spot</strong> <strong>LXi</strong> is available with a wide variety of SpO 2 sensors and ships with a reusable finger<br />
clip sensor. All other sensors are accessory items that are sold separately (see “Pulse<br />
Oximetry” on page 73).<br />
Quick Reference Card<br />
Caution Do not use alkaline batteries in the Braun ThermoScan PRO 4000<br />
thermometer.<br />
1. Align the shape and pin configuration of the extension cable connector to the SpO 2<br />
cable connection port on the left side of the <strong>Spot</strong> <strong>LXi</strong> device.<br />
2. Push the connector firmly into the SpO 2 cable connection port until you hear it click<br />
into place (see Figure 5 on page 25).<br />
3. Align the opposite end of the extension cable to the sensor cable connector and<br />
firmly push them together.<br />
Note <strong>Use</strong> only Masimo or Nellcor SpO 2 sensors and accessories with the <strong>Spot</strong> <strong>LXi</strong> with<br />
Masimo or Nellcor configurations, respectively.<br />
Attach the Quick Reference Card to the <strong>Spot</strong> <strong>LXi</strong> handle, mobile stand, or wall mount<br />
using the supplied plastic cable tie.
28 Controls, Display Window, and Connections Welch Allyn <strong>Spot</strong> <strong>Vital</strong> <strong>Signs</strong> <strong>LXi</strong><br />
AC Power Trans<strong>for</strong>mer<br />
Battery<br />
Power On/Off<br />
The operator can use the <strong>Spot</strong> <strong>LXi</strong> with AC or battery power (after charging the battery).<br />
1. Insert the round trans<strong>for</strong>mer connector into the AC power connection port on the<br />
back of the <strong>Spot</strong> <strong>LXi</strong> (see Figure 5 on page 25).<br />
2. Insert the line cord into the line connector on the trans<strong>for</strong>mer then plug the power<br />
cord on the trans<strong>for</strong>mer into the AC main power source to charge the battery.<br />
Charge the battery <strong>for</strong> 6 hours be<strong>for</strong>e initial use. Charge the device an additional hour if it<br />
includes a Braun ThermoScan PRO 4000 thermometer. If there is an external printer,<br />
connect the printer to the <strong>Spot</strong> <strong>LXi</strong>, enable it in the Internal Configuration Mode (see<br />
“Initial Configuration Screen” on page 23 if this is the first time you power on the device<br />
and then Table 7 on page 33), and then charge the <strong>Spot</strong> <strong>LXi</strong> <strong>for</strong> an additional 4 hours.<br />
While <strong>Spot</strong> <strong>LXi</strong> is charging, the charging LED (~) flashes and the battery level indicator<br />
segments on the display continuously sequence. When the battery is fully charged, the<br />
charging LED is solid and the battery level indicator is steady with all segments<br />
continuously shown on the display.<br />
If the device includes a Braun ThermoScan PRO 4000 thermometer, the charging LED<br />
below the thermometer will illuminate orange as it is charging. When the battery is fully<br />
charged, the LED will power off.<br />
If the device has an external printer, the charging LED on the printer will flash orange and<br />
green when <strong>Spot</strong> <strong>LXi</strong> is plugged into the AC main power source.<br />
Note There is no hazard associated with leaving the battery in the device, even if the<br />
device is not used <strong>for</strong> long periods of time.<br />
A dead battery may result if the <strong>Spot</strong> <strong>LXi</strong> is left uncharged or shipped/stored <strong>for</strong> a long<br />
period of a time. If this occurs use the supplied trans<strong>for</strong>mer to plug the <strong>Spot</strong> <strong>LXi</strong> into the<br />
AC line. Do not use the device <strong>for</strong> two hours. In extreme cases, the charge condition LED<br />
does not blink (to indicate a fast charge) or the device loses the time and date stamp. If<br />
this happens unplug the accessories and plug the <strong>Spot</strong> <strong>LXi</strong> into the AC line using the<br />
appropriate adapter. If the <strong>Spot</strong> <strong>LXi</strong> still fails to indicate a fast charge, unplug the AC<br />
adapter, disconnect and reconnect the battery, and plug in the AC adapter. Leave unused<br />
<strong>for</strong> two hours.<br />
Press the Power button to turn the device on or off. Upon each power up, the display<br />
lights up, a beep sounds, and the <strong>Spot</strong> <strong>LXi</strong> displays the model and serial numbers. If the<br />
internal self-check is successful, the display shows its normal functions (see Figure 4 on<br />
page 24) with all values blank, and the device is ready <strong>for</strong> operation. If the self-check fails,<br />
an error code is shown in the Navigation Window.<br />
<strong>Spot</strong> <strong>LXi</strong> automatically powers off when not used <strong>for</strong> 30 minutes.
<strong>Directions</strong> <strong>for</strong> <strong>Use</strong> Controls, Display Window, and Connections 29<br />
Standby Mode<br />
The Standby Mode conserves battery power. The device goes into Standby Mode if it is<br />
not used <strong>for</strong> two minutes. Press any button to bring the <strong>Spot</strong> <strong>LXi</strong> out of Standby Mode.
30 Controls, Display Window, and Connections Welch Allyn <strong>Spot</strong> <strong>Vital</strong> <strong>Signs</strong> <strong>LXi</strong>
3<br />
Internal Configuration<br />
You can change several device operating parameters in the Internal Configuration Mode.<br />
When changed, these settings become the default power-up settings. You will also see<br />
non-changeable device configurations <strong>for</strong> technical service purposes.<br />
To Enter the Internal Configuration Mode:<br />
1. Turn the <strong>Spot</strong> <strong>LXi</strong> off.<br />
2. Press and hold the Select and Power buttons <strong>for</strong> 5 seconds. The device enters the<br />
Internal Configuration Mode and the Configuration Menu screen appears on the<br />
display.<br />
Figure 7. Internal Configuration Mode Menu<br />
Version<br />
Numbers<br />
Battery<br />
Location<br />
Identifier<br />
Configuration Menu<br />
Date/Time<br />
Blood Pressure<br />
Temperature<br />
Manual<br />
Parameters<br />
External<br />
Devices<br />
Save Readings<br />
Buttons<br />
Lockout<br />
Defaults<br />
Event Log<br />
Select<br />
3. <strong>Use</strong> the Navigation buttons to move through the menu options and then press the<br />
Select button to access the options or accept a change. See the following tables <strong>for</strong><br />
descriptions of the menu options.<br />
4. Press the Power button to exit the Internal Configuration Mode.<br />
31
32 Internal Configuration Welch Allyn <strong>Spot</strong> <strong>Vital</strong> <strong>Signs</strong> <strong>LXi</strong><br />
Table 2. Configuration Menu Options<br />
Setting Description<br />
Version Numbers* Displays the software and hardware version numbers in the <strong>Spot</strong> <strong>LXi</strong> device.<br />
Battery* Displays the battery level.<br />
Location Identifier Allows the entry of the device’s location (e.g., the department name). Follow the<br />
display prompts to enter up to 10 characters.<br />
Date/Time Changes the date and time <strong>for</strong>mats or updates the actual date and time. See Table 3,<br />
“Date/Time Menu Options” <strong>for</strong> available settings.<br />
Blood Pressure Changes the blood pressure options. See Table 4, “Blood Pressure Menu Options” <strong>for</strong><br />
available settings.<br />
Temperature Changes the temperature options. See Table 5, “Temperature Menu Options” <strong>for</strong><br />
available settings.<br />
Manual Parameters Changes the manual parameters defaults. See Table 6, “Manual Parameters Menu<br />
Options” <strong>for</strong> available settings.<br />
External Devices Enables or disables available external devices. See Table 7, “External Devices Menu<br />
Options” <strong>for</strong> available settings.<br />
Save Readings Saves the current patient reading at a preselected time interval or upon request. See<br />
Table 8, “Save Readings Menu Options” <strong>for</strong> available settings.<br />
Buttons Lockout Secures <strong>Spot</strong> <strong>LXi</strong> so unauthorized people cannot use the device or access data without<br />
enacting the proper key sequence.<br />
Defaults Allows the user to select the default settings <strong>for</strong> the device and reset the unit to the<br />
default settings. See Table 9, “Change Local Defaults Options” <strong>for</strong> available settings.<br />
Event Log* Displays the recent button presses, errors, measurements, measurement sites, battery<br />
state changes, and patient reading send events.<br />
* Displayed in<strong>for</strong>mation only; operator cannot change.<br />
Table 3. Date/Time Menu Options<br />
Setting Description<br />
Date Format Displays the date in one of the following styles:<br />
mm/dd/yyyy example: July 16, 2005 = 07/16/2005<br />
dd/mm/yyyy example: 16 July 2005 = 16/07/2005<br />
Date Changes the date on the Display Window and in patient readings. If a location is<br />
entered (see “Location Identifier “ in Table 2, “Configuration Menu Options”), the date<br />
will not appear on the Display Window; the location will.<br />
Time Format Displays the time in one of the following styles:<br />
12-hour example: 5:00 PM<br />
24-hour example: 17:00<br />
Time Changes the time on the Display Window.
<strong>Directions</strong> <strong>for</strong> <strong>Use</strong> Internal Configuration 33<br />
Table 4. Blood Pressure Menu Options<br />
Setting Description<br />
BP Calibration Check Prepares the <strong>Spot</strong> <strong>LXi</strong> <strong>for</strong> calibration. Only qualified personnel should verify the <strong>Spot</strong><br />
<strong>LXi</strong> blood pressure calibration. For more details, see “Calibration” on page 67.<br />
Blood Pressure Units mmHg or kPa.<br />
Mean Arterial Pressure (MAP) On or off.<br />
Table 5. Temperature Menu Options<br />
Setting Description<br />
Temperature Units Fahrenheit (°F) or Celsius (°C).<br />
Temperature Mode SureTemp Plus models only: Oral, Pediatric Axillary, Adult Axillary, and Last Mode. In<br />
Last Mode the device takes the next temperature in the mode in which the previous<br />
temperature was measured. Rectal Mode is available only when the rectal probe (red<br />
ejection button) and probe well are attached.<br />
Table 6. Manual Parameters Menu Options<br />
Setting Description<br />
Height On or off.<br />
Height Units Inches (in) or centimeters (cm).<br />
Height Default Changes the default patient height displayed in the Navigation Window.<br />
Weight On or off. Even if weight is enabled here, if weight scale is enabled in the External<br />
Devices Menu, you cannot manually enter the weight.<br />
Weight Units Pounds (lb) or kilograms (kg).<br />
Weight Default Changes the default patient weight displayed in the Navigation Window.<br />
Respiration On or off.<br />
Pain Level On or off.<br />
Table 7. External Devices Menu Options<br />
Setting Description<br />
In<strong>for</strong>mation System On or off. You must enable this option to send patient readings wired or wirelessly.<br />
Barcode Patient ID On or off. You must enable this option to send patient readings wirelessly.<br />
Barcode Clinician ID On or off.<br />
Weight Scale On or off. <strong>Spot</strong> <strong>LXi</strong> can connect to a scale and the weight will appear on the display<br />
window (see “Manual Entries and External Device Operation” on page 45 <strong>for</strong> scale<br />
details).<br />
Wireless Module None or DPAC. You must enable DPAC to send patient readings wirelessly. The<br />
wireless radio is available as an accessory.<br />
Printer On or off.<br />
Printer Paper Plain or labels. Only available if the Printer is enabled.
34 Internal Configuration Welch Allyn <strong>Spot</strong> <strong>Vital</strong> <strong>Signs</strong> <strong>LXi</strong><br />
Table 8. Save Readings Menu Options<br />
Setting Description<br />
Save Mode Manual or automatic. If automatic, <strong>Spot</strong> <strong>LXi</strong> saves readings at a preselected time<br />
interval. For either option, <strong>Spot</strong> <strong>LXi</strong> automatically saves the measured parameters into<br />
memory be<strong>for</strong>e automatically powering off when not used <strong>for</strong> 30 minutes.<br />
Auto Save Interval Changes the amount of time be<strong>for</strong>e automatically saving the current patient reading.<br />
Only available if Automatic Save Mode is enabled.<br />
Reading Full Action Auto Overwrite, Ask Overwrite, Do not Overwrite. <strong>Spot</strong> <strong>LXi</strong> can save 50 patient<br />
readings in memory. Upon reaching reading 51, the device may automatically overwrite<br />
reading 1, ask the user if he/she wants to overwrite reading 1, or disable the ability to<br />
take another reading until at least one reading is erased.<br />
Table 9. Change Local Defaults Options<br />
Setting Description<br />
Language English, Dansk, Nederlands, Suomi, Français, Deutsch, Italiano, Norsk, Español,<br />
Português, Svenska, or Chinese.<br />
BP Units mmHg or kPa.<br />
Temperature Units Fahrenheit (°F) or Celsius (°C).<br />
Height Units Inches (in) or centimeters (cm).<br />
Weight Units Pounds (lb) or kilograms (kg).<br />
Date Format Displays the date in one of the following styles:<br />
mm/dd/yyyy example: July 16, 2005 = 07/16/2005<br />
dd/mm/yyyy example: 16 July 2005 = 16/07/2005<br />
Time Format Displays the time in one of the following styles:<br />
12-hour example: 5:00 PM<br />
24-hour example: 17:00
4<br />
Blood Pressure Operation<br />
Blood Pressure Cuff Selection<br />
Careful sizing of the cuff is important <strong>for</strong> accurate blood pressure readings. If the cuff is<br />
too small or too large, you may have false high or low readings, respectively. When there<br />
is an area of overlap <strong>for</strong> using a smaller or larger cuff, use the larger size cuff.<br />
The device uses oscillometric technology; there<strong>for</strong>e, if the cuff extends to the antecubital<br />
fossa (bend in the elbow) this does NOT result in an inaccurate blood pressure reading.<br />
Measure the arm circumference (midway between the elbow and shoulder) <strong>for</strong> the<br />
correct Reusable Two-Piece Cuff size (Table 10) or Durable One-Piece Cuff size (Table 11).<br />
Wrap the cuff around the patient’s upper arm and verify that the artery index marker falls<br />
within the two divisions that identify the “range” on the cuff to indicate a proper fit.<br />
Table 10. Reusable Two-Piece Cuff Measurements<br />
Cuff Size Reusable<br />
Two-Piece Cuff<br />
(1 per pack)<br />
Maximum<br />
Range<br />
(cm)<br />
Maximum<br />
Range<br />
(in)<br />
Child 4500-01 20.8 8.2<br />
Adult 4500-02 31.5 12.4<br />
Large Adult 4500-03 38.4 15.1<br />
Thigh 4500-04 47.4 18.7<br />
Table 11. One-Piece Cuff Measurements<br />
Cuff Size Durable One-Piece Cuff<br />
(1 per pack)<br />
Disposable One-Piece<br />
Cuff (5 per pack)<br />
Range<br />
(cm)<br />
Range<br />
(in)<br />
Infant 5082-82-4MQ 5082-92-4MQ 9.8 to 13.3 3.9 to 5.2<br />
Small Child 5082-83-4MQ 5082-93-4MQ 12.4 to 16.8 4.9 to 6.6<br />
Child 5082-84-4MQ 5082-94-4MQ 15.8 to 21.3 6.2 to 8.4<br />
Small Adult 5082-85-4MQ 5082-95-4MQ 20.0 to 27.0 7.9 to 10.6<br />
Adult 5082-86-4MQ 5082-96-4MQ 25.3 to 34.3 10.0 to 13.5<br />
Large Adult 5082-87-4MQ 5082-97-4MQ 32.1 to 43.4 12.6 to 17.1<br />
Thigh 5082-88-4MQ 5082-98-4MQ 40.7 to 55.0 16.0 to 21.7<br />
To ensure pediatric blood pressure accuracy and safety, the Child Reusable Two-Piece<br />
Blood Pressure Cuff (4500-01), Infant Durable One-Piece Cuff (5082-82-4MQ), and the<br />
35
36 Blood Pressure Operation Welch Allyn <strong>Spot</strong> <strong>Vital</strong> <strong>Signs</strong> <strong>LXi</strong><br />
Infant Disposable One-Piece Cuff (5082-92-4MQ) are the smallest cuffs approved <strong>for</strong> use<br />
with young children and infants. The child’s arm must fit within the range markings on the<br />
cuff.<br />
Blood Pressure Measurement<br />
The preferred blood pressure measurement site <strong>for</strong> adults and children is the upper arm.<br />
Keep the patient’s arm relaxed and motion-free during measurement(s). Alternate blood<br />
pressure measurement sites include the thigh, ankle, or <strong>for</strong>earm.<br />
WARNING Do not place the cuff on any extremity that is used <strong>for</strong> intravenous<br />
infusions, or any area where circulation is compromised.<br />
WARNING Using the same arm <strong>for</strong> cuff inflation and SpO 2 measurement may<br />
cause inaccurate SpO 2 results.<br />
WARNING Excessive cuff tightness may cause venous congestion and<br />
discoloration of the limb.<br />
WARNING Wrapping the cuff too loosely (preventing proper inflation) may result<br />
in errors.<br />
WARNING The <strong>Spot</strong> <strong>LXi</strong> is not intended to measure blood pressure on neonatal<br />
patients. The AAMI SP10:2002 standard defines neonates as children 28 days or<br />
less of age if born at term (37 weeks gestation or more); otherwise up to 44<br />
gestational weeks.<br />
To initiate blood pressure measurements:<br />
1. Properly size the blood pressure cuff and position it around the patient’s bare upper<br />
arm (or alternate site as necessary) with the artery index marker over the brachial<br />
artery. Leave room between the cuff and the arm <strong>for</strong> two fingers.<br />
2. Press the Blood Pressure Start/Stop button. <strong>Spot</strong> <strong>LXi</strong> inflates the cuff to<br />
the appropriate level, measuring the blood pressure as the cuff is inflating.<br />
The systolic display shows the pressure in the cuff as the blood pressure<br />
determination is in process.<br />
Pressing the Blood Pressure Start/Stop button at any time during a blood pressure<br />
determination aborts the measurement and rapidly deflates the cuff.<br />
When complete, <strong>Spot</strong> <strong>LXi</strong> displays the systolic, diastolic, and pulse rate<br />
measurements. If you have enabled MAP in the Internal Configuration Mode <strong>Spot</strong> <strong>LXi</strong><br />
also displays this value.<br />
If <strong>Spot</strong> <strong>LXi</strong> is unable to determine a blood pressure while the cuff is inflating due to<br />
patient movement, excessive noise, or an arrhythmia, the device will attempt to<br />
measure the blood pressure while deflating the cuff.<br />
Note <strong>Spot</strong> <strong>LXi</strong> displays the pulse rate, as determined from the blood pressure<br />
measurement method only if the SpO 2 option is absent or disabled. If the SpO 2<br />
function is operational, all pulse rate determinations are a result of the SpO 2<br />
measurement method.
5<br />
Temperature Operation<br />
Temperature Operation Mode Selection<br />
Normal Mode<br />
<strong>Spot</strong> <strong>LXi</strong> with the SureTemp Plus thermometer takes a temperature in either Normal or<br />
Monitor Mode. The default setting is Normal Mode.<br />
In the Normal Mode, the SureTemp Plus thermometer “predicts” body temperature in<br />
the oral, axillary, or rectal modes. The thermometer takes an oral reading in approximately<br />
4 to 6 seconds, a pediatric axillary reading (ages 17 years and younger) in approximately<br />
10 to 13 seconds, an adult axillary reading (ages 18 years and older) in approximately 12 to<br />
15 seconds, and a rectal reading in approximately 10 to 13 seconds. <strong>Use</strong> the Monitor<br />
Mode when difficult situations prevent taking an accurate temperature in the Normal<br />
Mode.<br />
Patient actions may interfere with accurate oral temperature readings. Ingesting hot or<br />
cold liquids, eating food, chewing gum or mints, brushing teeth, smoking, or per<strong>for</strong>ming<br />
strenuous activity may affect oral temperature readings <strong>for</strong> up to 20 minutes after activity<br />
has ended.<br />
Probe contact with electrodes or bandages, poor tissue contact, taking an axillary<br />
temperature over clothing, or prolonged exposure of axilla to ambient air can cause<br />
inaccurate axillary temperature readings.<br />
WARNING To ensure optimal accuracy, always confirm that the correct mode is<br />
selected.<br />
WARNING <strong>Use</strong> only Welch Allyn probe covers. Using other manufacturers’<br />
probe covers or no probe cover may produce temperature measurement errors<br />
and/or inaccuracy.<br />
To take a temperature in oral or axillary mode:<br />
WARNING Do not take an axillary temperature through the patient’s clothing.<br />
Direct contact between the patient’s skin and the probe is required.<br />
Caution <strong>Use</strong> the temperature probe with the blue ejection button and blue<br />
probe well to obtain accurate oral or axillary temperatures.<br />
37
38 Temperature Operation Welch Allyn <strong>Spot</strong> <strong>Vital</strong> <strong>Signs</strong> <strong>LXi</strong><br />
1. Verify that the oral probe (blue ejection button) and matching probe well are installed<br />
(see “SureTemp Plus” on page 26).<br />
2. Hold the probe handle with your thumb and two fingers on the indentations of the<br />
probe handle and withdraw the probe from the probe well.<br />
3. Verify the desired temperature mode in the temperature display area and the desired<br />
temperature mode icon is flashing.<br />
Figure 8. Temperature Mode Icons<br />
Oral Adult Axillary<br />
If the desired mode is not selected, press the Navigation button up or down until the<br />
desired mode is highlighted in the Navigation Window and the correct icon is flashing<br />
in the temperature display area. Then press the Select button.<br />
4. Insert the probe into a probe cover and press the probe handle down firmly. The<br />
probe handle moves slightly to engage the probe cover.<br />
5. Quickly put the probe in place.<br />
a. For oral temperatures, place the probe tip under the patient’s tongue on either<br />
side of the mouth to reach the sublingual pocket and ask the patient to close his/<br />
her lips.<br />
Figure 9. Sublingual Pocket Location<br />
Pediatric Axillary<br />
b. For axillary temperatures, lift the patient’s arm so that the entire axilla is easily<br />
seen and place the probe as high as possible in the axilla. Do not allow the probe<br />
tip to come into contact with the patient until the probe is placed in the<br />
measurement site. Any prior contact between the probe tip and the tissue with<br />
another material may cause inaccurate readings. Verify that axillary tissue<br />
completely surrounds the probe tip and place the arm snugly at the patient’s side.<br />
6. Firmly hold the probe in place and keep the tip of the probe in contact with the tissue<br />
throughout the measurement process. During the measurement process, the<br />
temperature display area displays rotating “walking” segments.<br />
The device beeps when the final temperature is reached. The temperature display<br />
area displays the patient temperature, temperature scale, and measurement site.
<strong>Directions</strong> <strong>for</strong> <strong>Use</strong> Temperature Operation 39<br />
The temperature is shown in degrees Fahrenheit and degrees Celsius <strong>for</strong> 5 seconds<br />
in the Navigation Window.<br />
To switch to Monitor Mode, leave the probe in place. The <strong>Spot</strong> <strong>LXi</strong> automatically<br />
switches to Monitor Mode after approximately 30 seconds. Once in Monitor Mode<br />
proceed to Step 6 on page 40.<br />
7. Remove the probe after the temperature measurement is complete and firmly press<br />
the ejection button on the top of the probe to release the probe cover.<br />
8. Return the probe to the probe well.<br />
To take a temperature in Rectal Mode:<br />
WARNING Incorrect insertion of probe can cause bowel per<strong>for</strong>ation.<br />
WARNING Washing hands greatly reduces the risk of cross-contamination and<br />
nosocomial infection.<br />
Caution To obtain accurate rectal temperatures, use the temperature probe<br />
with the red ejection button and red probe well.<br />
1. Verify that the rectal probe (red ejection button) and matching probe well are installed<br />
(see “SureTemp Plus” on page 26). <strong>Spot</strong> <strong>LXi</strong> only operates in Rectal Mode if the red<br />
rectal probe and probe well are installed.<br />
2. Hold the probe handle with your thumb and two fingers on the indentations of the<br />
probe handle and withdraw the probe from the probe well.<br />
3. Verify the lower-body icon in <strong>Spot</strong> <strong>LXi</strong>’s temperature display area is flashing.<br />
4. Insert the probe into a probe cover and press the probe handle down firmly.<br />
The probe handle moves slightly to engage the probe cover.<br />
5. Separate the patient’s buttocks with one hand. <strong>Use</strong> the other hand to gently insert the<br />
probe only 5/8 in. (1.5 cm) inside the rectum (less <strong>for</strong> infants and children). The use of<br />
a lubricant is optional.<br />
6. Tilt the probe so that the tip is in contact with tissue. Continue to separate the<br />
buttocks and hold the probe in place throughout the measurement process. During<br />
the measurement process, the temperature display area displays rotating “walking”<br />
segments.<br />
The device beeps when the final temperature is reached. The temperature display<br />
area displays the patient temperature, temperature scale, and measurement site.<br />
The temperature is shown in degrees Fahrenheit and degrees Celsius <strong>for</strong> 5 seconds<br />
in the Navigation Window.<br />
To switch to Monitor Mode, leave the probe in place. The <strong>Spot</strong> <strong>LXi</strong> automatically<br />
switches to Monitor Mode after approximately 30 seconds. Once in Monitor Mode<br />
proceed to Step 6 on page 40.<br />
7. Remove the probe after the temperature measurement is complete and firmly press<br />
the ejection button on the top of the probe to release the probe cover.<br />
8. Return the probe to the probe well and wash your hands.
40 Temperature Operation Welch Allyn <strong>Spot</strong> <strong>Vital</strong> <strong>Signs</strong> <strong>LXi</strong><br />
Monitor Mode<br />
Monitor Mode displays the temperature of the probe as long as the probe remains in<br />
place at the measurement site and remains within the operating patient temperature<br />
range. The patient’s temperature will reach final equilibrium in approximately three<br />
minutes in the oral and rectal sites and five minutes in the axillary site.<br />
WARNING Long-term continuous monitoring beyond three to five minutes is not<br />
recommended in any mode.<br />
Note <strong>Spot</strong> <strong>LXi</strong> does not retain Monitor Mode temperatures in memory <strong>for</strong> recall.<br />
To take a temperature in Monitor Mode:<br />
1. Verify that the correct probe (oral/axillary = blue ejection button or rectal = red<br />
ejection button) and matching probe well are installed (see “SureTemp Plus” on<br />
page 26).<br />
2. Hold the probe handle with your thumb and two fingers on the indentations of the<br />
probe handle and withdraw the probe from the probe well.<br />
3. Insert the probe into a probe cover and press the probe handle down firmly. The<br />
probe handle moves slightly to engage the probe cover.<br />
4. Take the patient’s temperature using the Normal Mode as previously described. Leave<br />
the probe in place after <strong>Spot</strong> <strong>LXi</strong> beeps and the temperature is displayed.<br />
5. Hold the probe in place <strong>for</strong> approximately 30 seconds after the temperature is<br />
displayed until the temperature display shows the Monitor Mode indicator.<br />
6. Hold the thermometer in place <strong>for</strong> a total of three minutes <strong>for</strong> oral and rectal mode or<br />
five minutes <strong>for</strong> axillary mode. The thermometer will not beep to indicate a final<br />
temperature.<br />
7. Record the temperature be<strong>for</strong>e removing the probe from the site; the monitored<br />
temperature is not stored in memory <strong>for</strong> recall.<br />
8. Remove the probe from the patient and firmly press the ejection button on the top of<br />
the probe to release the probe cover.<br />
9. Return the probe to the probe well to reset the thermometer to Normal Mode.<br />
Temperature Measurement Range Indicators<br />
When <strong>Spot</strong> <strong>LXi</strong> detects a temperature out of the SureTemp Plus measurement range, it<br />
beeps twice and displays the exceeded temperature limit. A small arrow flashes to<br />
indicate whether the out-of-range temperature measurement is too high (up arrow) or too<br />
low (down arrow).
<strong>Directions</strong> <strong>for</strong> <strong>Use</strong> Temperature Operation 41<br />
Ear Temperatures<br />
<strong>Spot</strong> <strong>LXi</strong> with the Braun ThermoScan PRO 4000 thermometer takes a temperature in the<br />
ear. The thermometer probe shape prevents insertion far into the ear canal which could<br />
per<strong>for</strong>ate the tympanic membrane.<br />
WARNING Keep the probe window clean, dry, and undamaged at all times to<br />
ensure accurate measurements. To protect the probe window, always keep the<br />
thermometer in the storage cover while transporting or when not in use.<br />
WARNING Only use Braun ThermoScan probe covers with this thermometer.<br />
Using other manufacturer’s probe covers or no probe cover may produce<br />
temperature measurement errors and/or inaccuracies. If the thermometer is used<br />
without a probe cover attached, clean the lens (see “Braun ThermoScan PRO<br />
4000 Thermometer” on page 64).<br />
WARNING Do not autoclave.<br />
WARNING The thermometer is not waterproof. Do not immerse or drip fluids on<br />
it. Should this occur, dry the thermometer with warm air. Check <strong>for</strong> proper<br />
operation and accuracy.<br />
To take an ear temperature reading:<br />
1. Pull the bottom of the thermometer gently toward you to remove it from the housing.<br />
2. Locate the probe cover box inside the thermometer housing. Firmly push the probe<br />
tip into the probe cover box. When the probe cover is in place the thermometer turns<br />
on automatically.<br />
3. Listen <strong>for</strong> the ready signal beep and three dashes to appear on the thermometer<br />
display.<br />
4. Fit the probe snugly into the ear canal and then push the Start button.<br />
a. If the probe is positioned correctly in the ear canal the «ExacTemp» light flashes.<br />
When the thermometer detects an accurate measurement, the «ExacTemp» light<br />
is continuously on, a long beep signals the end of the measurement, and the<br />
display shows the result.<br />
b. If the probe is positioned incorrectly in the ear canal or is moved during the<br />
measuring process, the «ExacTemp» light goes out, a sequence of short beeps<br />
sounds, and the display shows an error message («POS» = position error).<br />
5. Press the ejector button to eject the used probe cover into the trash when you are<br />
finished taking the temperature.<br />
6. Return the thermometer to its holder. <strong>Spot</strong> <strong>LXi</strong> displays the patient’s temperature and<br />
temperature scale in the Temperature Display area on the LCD (see “Display<br />
Window” on page 24).
42 Temperature Operation Welch Allyn <strong>Spot</strong> <strong>Vital</strong> <strong>Signs</strong> <strong>LXi</strong>
6<br />
Pulse Oximetry Operation<br />
The following factors may cause inaccurate measurements during an SpO 2 reading:<br />
Patient is in cardiac arrest or shock. Excessive patient movement.<br />
Bright light. Sensor is too tight.<br />
Moisture in the sensor. Placement of a sensor on an extremity with a blood pressure<br />
cuff, arterial catheter, or intravascular line.<br />
Incorrect sensor application or use. Poor patient perfusion.<br />
Arterial occlusion proximal to the sensor. Venous pulsations.<br />
Intravascular dyes such as indocyanine green<br />
or methylene blue.<br />
Significant levels of dysfunctional hemoglobins (e.g.,<br />
carboxyhemoglobin or methemoglobin).<br />
Fingernail polish (if finger sensor is used). Patient has hypotension, severe vasoconstriction, severe<br />
anemia, or hypothermia.<br />
Exposure to excessive illumination, such as surgical lamps<br />
(especially ones with a xenon light source), bilrubin lamps,<br />
fluorescent lights, infrared heating lamps, or direct sunlight<br />
(exposure to excessive illumination can be corrected by<br />
covering the sensor with a dark or opaque material).<br />
WARNING Tissue damage can be caused by incorrect application or duration of<br />
use of a Nellcor OxiMax sensor. Inspect the sensor site as directed in the sensor<br />
<strong>Directions</strong> <strong>for</strong> <strong>Use</strong>.<br />
WARNING Do not use a damaged sensor or pulse oximetry cable or a sensor<br />
with exposed optical components.<br />
If blood pressure measurement is occurring simultaneously, place the finger clip sensor<br />
on the limb opposite the one with the blood pressure cuff.<br />
1. Insert the patient’s finger completely into the sensor; the thumb is specifically not<br />
recommended <strong>for</strong> use with the Nellcor finger clip sensor.<br />
The pulse signal bar graph illuminates, indicating the relative strength and quality of<br />
the patient’s pulses at the sensor site. The sensor takes approximately 10 seconds to<br />
determine the initial SpO 2% value and pulse rate. When the initial values are<br />
determined, they are shown in the SpO 2 display and the pulse rate display,<br />
respectively. If the accuracy of any measurement does not seem reasonable, first use<br />
an alternate means to check the patient’s vital signs and then check the <strong>Spot</strong> <strong>LXi</strong> <strong>for</strong><br />
proper functioning.<br />
43
44 Pulse Oximetry Operation Welch Allyn <strong>Spot</strong> <strong>Vital</strong> <strong>Signs</strong> <strong>LXi</strong><br />
<strong>Spot</strong> <strong>LXi</strong> measures a patient’s SpO 2 <strong>for</strong> up to 10 minutes. After 10 minutes, a C9 error<br />
code is displayed. This error code means that the use has exceeded the 10-minute<br />
time limit.<br />
2. Check sensor sites periodically to assess circulation, sensor positioning, and skin<br />
sensitivity.<br />
3. Remove the sensor from the patient. The SpO 2 reading flashes <strong>for</strong> 8 seconds. If the<br />
sensor is not reattached to the patient in 8 seconds, the SpO 2 % and pulse rate<br />
flashing, signalling that the measurement period has ended. The device continues to<br />
display the last SpO 2 reading.
7<br />
Manual Entries<br />
Manual Entries and External Device<br />
Operation<br />
Weight, Height, Respiration, and Pain Level<br />
Body Mass Index<br />
Memory Recall<br />
<strong>Use</strong>rs can manually enter weight, height, respiration rate, and pain level parameters along<br />
with the <strong>Spot</strong> <strong>LXi</strong> readings if the specific parameter is turned on in the Internal<br />
Configuration Mode (see “Internal Configuration” on page 31). The default <strong>for</strong> each<br />
manual parameter is on.<br />
1. Press the Navigation buttons until the cursor is in front of the parameter in the<br />
Navigation Window.<br />
2. Press the Select button. The default parameter value appears and flashes above the<br />
Navigation button.<br />
3. Press the Navigation buttons to increase or decrease the value.<br />
4. Press the Select button to accept the value. The Navigation Window returns to its<br />
previous state with the accepted parameter value appearing next to the parameter<br />
heading in the list.<br />
If a parameter is entered incorrectly, repeat these steps to correct the value.<br />
Body Mass Index (BMI) is calculated with weight and height entry. After you save the<br />
reading, press the Memory button to view the BMI calculation as part of the entire<br />
reading. If the reading is transferred to an electronic medical record (EMR) the BMI<br />
calculation should appear in the patient record.<br />
The Memory button allows you to scroll through, print, or erase readings.<br />
1. Press the Memory button. <strong>Spot</strong> <strong>Vital</strong> <strong>Signs</strong> <strong>LXi</strong> displays the previous<br />
reading.<br />
The Navigation Window displays the scroll, print, erase, and erase all options.<br />
Scroll Allows the user to move up and down through the saved readings with the Navigation<br />
button.<br />
Print Sends the current reading to the printer (see “Printer” on page 46)<br />
MEM<br />
45
46 Manual Entries and External Device Operation Welch Allyn <strong>Spot</strong> <strong>Vital</strong> <strong>Signs</strong> <strong>LXi</strong><br />
External Devices<br />
Printer<br />
Weight Scale<br />
Erase Removes the displayed record from memory. Yes or no.<br />
Erase All Removes all records from memory. Yes or no.<br />
2. Press the Navigation buttons to select the desired function and press the Select<br />
button. Follow instructions on the display.<br />
You must enable each external device in the Internal Configuration Mode be<strong>for</strong>e using<br />
it (see Table 7 on page 33). Verify that each device is attached on the back of <strong>Spot</strong> <strong>LXi</strong><br />
as instructed in the Internal Configuration Mode.<br />
Once the printer is enabled in the Internal Configuration Mode, you can use plain or label<br />
paper. If you use label paper, you must clean the printer heads after every 10 rolls. A head<br />
cleaner kit is provided with each package of label paper available from Welch Allyn.<br />
To print the most recent reading:<br />
1. Press the Memory button to recall the last reading.<br />
2. <strong>Use</strong> the Navigation buttons to scroll to “Print” and then press the Select button.<br />
To print a previous reading:<br />
1. Press the Memory button; the most recent reading is displayed.<br />
2. <strong>Use</strong> the Navigation buttons to move to “Scroll” and then press the Select button.<br />
3. <strong>Use</strong> the Navigation buttons to scroll to the appropriate reading and press the Select<br />
button.<br />
4. <strong>Use</strong> the Navigation buttons to scroll to “Print” and then press the Select button.<br />
Caution Only use a 9V battery with the Healthometer scale. Remove and<br />
discard the wall mounted power supply.<br />
Caution The Healthometer scale, REF 349KLX, is not sold with an RS-232 cable<br />
to connect the scale to the <strong>Spot</strong> <strong>LXi</strong>. The customer must purchase a standard<br />
RS-232 cable.<br />
Caution When using the Healthometer scale, remove the two hex nuts on the<br />
RS-232 cable, as supplied, be<strong>for</strong>e screwing the cable into the scale base.<br />
If the weight scale is enabled in the Internal Configuration Mode, you cannot manually<br />
enter the patient’s weight. The <strong>Spot</strong> <strong>LXi</strong> supports the Healthometer 349KLX (http://<br />
www.healthometer.com) and Tanita WB-300 Plus (http://www.tanita.com/) weight scales.<br />
1. Follow the weight scale’s instructions to zero out the weight scale.
<strong>Directions</strong> <strong>for</strong> <strong>Use</strong> Manual Entries and External Device Operation 47<br />
Barcode Scanner<br />
Wireless Radio<br />
2. Instruct the patient to step on the scale and to remain relatively still until the weight<br />
levels out. The <strong>Spot</strong> <strong>LXi</strong> display shows the weight. The patient may step off the scale;<br />
the weight will remain on the display.<br />
The Internal Configuration Mode allows you to enable the scanning of patients’ and/or<br />
clinicians’ barcodes <strong>for</strong> identification purposes. The barcode scanner supports most linear<br />
barcodes.<br />
1. Remove the barcode scanner from its holder.<br />
2. Hold the scanner approximately 6 inches (15.4 cm) from the barcode and squeeze the<br />
button so that the light from the scanner appears on the barcode.<br />
<strong>Spot</strong> <strong>LXi</strong> beeps when the scanner reads the barcode. If the scanner has difficulty<br />
reading the barcode, adjust the distance between the scanner and the barcode while<br />
squeezing the scanner button. If it continues to have difficulty, verify that the barcode<br />
is as flat as possible; curved barcodes are sometimes difficult <strong>for</strong> scanners to read.<br />
3. If Patient ID is enabled in the Internal Configuration Mode but Clinician ID is disabled,<br />
the patient identification number will appear in the Navigation Window on the <strong>Spot</strong><br />
<strong>LXi</strong> display. However, if both Patient ID and Clinician ID are enabled in the Internal<br />
Configuration Mode, <strong>Spot</strong> <strong>LXi</strong> asks if the scanned ID is <strong>for</strong> the patient or the clinician.<br />
Follow the instructions on the display. Clinician ID numbers do not appear on the <strong>Spot</strong><br />
<strong>LXi</strong> display; however, they are retained in memory <strong>for</strong> recall, printing, or to send<br />
electronically to patient records.<br />
Verify the In<strong>for</strong>mation System is enabled in the Internal Configuration Mode.<br />
1. Measure the patient vital signs. The words “Send/Next Reading” appear in the<br />
Navigation Window. Verify that the patient’s barcode appears on the display.<br />
2. When vitals are complete, use the Navigation buttons to scroll to “Send/Next<br />
Reading.” Press the Select button.<br />
<strong>Spot</strong> <strong>LXi</strong> displays “Sending reading to in<strong>for</strong>mation system” in the Navigation<br />
Window and the successful operation icon upon completion.<br />
If the reading was not sent, it is retained in memory and <strong>Spot</strong> <strong>LXi</strong> displays the<br />
failed send operation icon. <strong>Spot</strong> <strong>LXi</strong> will attempt to resend the reading when<br />
the next reading is sent.<br />
X
48 Manual Entries and External Device Operation Welch Allyn <strong>Spot</strong> <strong>Vital</strong> <strong>Signs</strong> <strong>LXi</strong>
8<br />
Error Codes<br />
Troubleshooting<br />
The following tables of error codes provide a quick reference of the descriptions and<br />
probable causes of error codes. For service-level troubleshooting, refer to the Service<br />
Manual (part number 704432).<br />
Table 12. General Error Codes<br />
Code Description Corrective Action<br />
C12 Device outside operating temperature<br />
range.<br />
Change ambient temperature.<br />
C13 Low battery level. Charge battery.<br />
E30 Internal malfunction. Contact Technical Service.<br />
E31 Internal malfunction. Contact Technical Service.<br />
E32 Internal malfunction. Contact Technical Service.<br />
E33 Internal malfunction. Contact Technical Service.<br />
E38 Date and time not set. Set date and time (see “Date/Time Menu Options” on<br />
page 32)<br />
E42 Internal malfunction. Contact Technical Service.<br />
E44 Internal malfunction. Contact Technical Service.<br />
E45 Internal malfunction. Contact Technical Service.<br />
Table 13. Blood Pressure Error Codes<br />
Code Description Corrective Action<br />
C01 Blood pressure reading cancelled by user. Retake blood pressure reading.<br />
C02 Unable to release cuff pressure. Check tubing <strong>for</strong> kinks and connection integrity.<br />
C03 Inflation too quick. Check tubing and connections.<br />
C04 Air leak. Check blood pressure cuff and tubing connections.<br />
C05 Unable to determine blood pressure. Check connections; restrict patient movement.<br />
C06 Unable to determine blood pressure. Check connections; restrict patient movement.<br />
C07 Internal NIBP error. Device will power down.<br />
E10 Cuff pressure limits exceeded. Device will power down.<br />
E11 Cuff pressure duration exceeded. Device will power down.<br />
E20 Internal NIBP error. Device will power down.<br />
49
50 Troubleshooting Welch Allyn <strong>Spot</strong> <strong>Vital</strong> <strong>Signs</strong> <strong>LXi</strong><br />
Table 14. SureTemp Plus Temperature Error Codes<br />
Code Description Corrective Action<br />
C22 Temperature time limit exceeded. Remove probe from patient.<br />
E0.1 Probe heater error. Retake reading. If problem persists, replace probe.<br />
E0.2 Thermometer probe or device malfunction. Replace probe. If problem persists, contact Technical Service.<br />
E0.4 Probe is over temperature. If problem persists, contact Technical Service.<br />
E0.5 Unable to determine temperature. Retake reading. If problem persists, replace probe.<br />
E0.6 Probe data error. Retake reading. If problem persists, replace probe.<br />
E0.7 Broken thermometer probe. Replace probe.<br />
E0.8 Cannot read the probe’s configuration<br />
in<strong>for</strong>mation.<br />
Contact Technical Service.<br />
E0.8 Temperature module data error. Contact Technical Service to return the device.<br />
E0.8 Cannot read the device’s Error Log. This problem will correct itself. If it persists, contact<br />
Technical Service.<br />
E0.9 Broken thermometer probe. Replace probe.<br />
E4.0 Internal temperature malfunction. Retake temperature. If problem persists, contact Technical<br />
Service.<br />
E4.1 Internal temperature malfunction. Retake temperature. If problem persists, contact Technical<br />
Service.<br />
E4.2 Internal temperature malfunction. If problem persists, contact Technical Service.<br />
E4.3 Internal temperature malfunction. If problem persists, contact Technical Service.<br />
E4.4 Temperature malfunction. Restart device. If problem persists, contact Technical Service.<br />
E4.5 Temperature malfunction. Restart device. If problem persists, contact Technical Service.<br />
E4.6 Temperature malfunction. Restart device. If problem persists, contact Technical Service.<br />
E4.7 Cannot initialize thermometer. If problem persists, contact Technical Service.<br />
E4.8 Thermometer needs to be calibrated. Contact Technical Service.<br />
E4.9 Probe well missing or installed improperly. Reinstall probe well.<br />
E5.0 Temperature heater error. If problem persists, contact Technical Service.<br />
E5.2 Heatsink Failsafe Failure If problem persists, contact Technical Service.<br />
A^! Device outside operating temperature<br />
range.<br />
Change ambient temperature.<br />
Av! Device outside operating temperature<br />
range.<br />
Change ambient temperature.<br />
b^ Internal temperature malfunction. Contact Technical Service.<br />
bv Internal temperature malfunction. Contact Technical Service.<br />
Table 15. SpO 2 Error Codes<br />
Code Description Corrective Action<br />
C8 Faulty SpO 2 sensor. Replace sensor.<br />
C9 SpO 2 time limit exceeded. Remove sensor from patient.<br />
E7 Internal SpO 2 error. Retake reading.
<strong>Directions</strong> <strong>for</strong> <strong>Use</strong> Troubleshooting 51<br />
Event Causes and Corrective Actions<br />
Note Differences of up to 10 mmHg between manual and automatic readings are<br />
considered normal and occur <strong>for</strong> a number of reasons including intra-patient BP<br />
variability, observer hearing differences, and auscultatory deflation rate.<br />
Table 16. Inaccurate Blood Pressure Readings<br />
Possible Cause Corrective Action and Explanation<br />
Incorrect cuff size <strong>Use</strong> Welch Allyn approved cuffs only.<br />
Measure patient’s arm circumference midway between elbow and<br />
shoulder (see “Blood Pressure Cuff Selection” on page 35 to select correct<br />
cuff size). <strong>Use</strong> reference markings on cuff to ensure correct cuff size.<br />
Patient’s arm position Ensure patient’s arm is at heart level.<br />
Arm movement during blood pressure<br />
cycle<br />
Keep arm still during blood pressure cycle.<br />
Movement may cause inaccuracies from artifact.<br />
Blood pressure taken over clothing Take blood pressure on a bare arm.<br />
Arrhythmia Check <strong>for</strong> regularity of heart rate (palpate pulse or check device).<br />
Moderate to severe heart rate irregularities may make blood pressure<br />
difficult to measure accurately.<br />
Change in blood pressure between<br />
auscultatory reading and <strong>Spot</strong> <strong>LXi</strong> reading<br />
Check blood pressure immediately be<strong>for</strong>e <strong>Spot</strong> <strong>LXi</strong> reading.<br />
Blood pressure is dynamic and changing. It is normal <strong>for</strong> blood<br />
pressure to fluctuate 5 to 10 mmHg.<br />
Incorrect reference <strong>Use</strong> the correct Korotkoff sound to determine diastolic blood pressure.<br />
Many listeners incorrectly equate diastolic blood pressure with the<br />
disappearance of sound only (phase 5). <strong>Spot</strong> <strong>LXi</strong> was developed using<br />
the American Heart Association recommendations, which state that<br />
phase 5 be used unless sound continues to 0 mmHg, in which case the<br />
change in the quality of sound (phase 4) is to be used.<br />
Deflate cuff no faster than 3 mmHg per second.<br />
One of the major sources of error in auscultatory blood pressure<br />
measurement is deflating the cuff too quickly. The American Heart<br />
Association recommends deflation no faster than 3 mmHg per second.<br />
Only use a sphygmomanometer that is calibrated.<br />
An uncalibrated sphygmomanometer may result in inaccurate blood<br />
pressure measurements.<br />
Poor auscultatory sound recognition by<br />
observer<br />
<strong>Use</strong> high-quality stethoscope. Have a different observer check patient’s<br />
blood pressure.<br />
Table 17. Cuff Inflation and Deflation with No Blood Pressure Reading Displayed (or Error Code in<br />
Display)<br />
Possible Cause Corrective Action and Explanation<br />
Leak in pneumatic system Ensure all cuff attachments are tight.<br />
Carefully check <strong>for</strong> leaks in the blood pressure cuff, tubing, and pressure<br />
hose attached to <strong>Spot</strong> <strong>LXi</strong>.<br />
Arm movement during cycle Keep arm still during blood pressure cycle.<br />
Movement may cause inaccuracies from artifact, long cycle times, and<br />
error message.<br />
Cuff tubing or pressure hose movement<br />
artifact<br />
Do not contact cuff tubing or pressure hose during blood pressure cycle.<br />
Movement may cause inaccuracies from artifact.
52 Troubleshooting Welch Allyn <strong>Spot</strong> <strong>Vital</strong> <strong>Signs</strong> <strong>LXi</strong><br />
Table 18. No Cuff Inflation<br />
Possible Cause Corrective Action<br />
Connections between device and cuff<br />
loose<br />
Table 19. Cuff Pops Off<br />
Possible Cause Corrective Action<br />
Check all connections (do not overtighten).<br />
Inappropriate cuff size See “Blood Pressure Cuff Selection” on page 35.<br />
If cuff continues to pop off, notify biomedical department or Welch Allyn<br />
Technical Support.<br />
Cuff not applied securely Smooth hook and loop securely be<strong>for</strong>e inflating cuff.<br />
Cuff applied inside out Re-apply cuff. Verify that the Welch Allyn label is facing away from arm.<br />
Table 20. Cuff Deflating Too Slowly<br />
Possible Cause Corrective Action and Explanation<br />
Patient movement Have patient sit still.<br />
Do not have arm tight against chest wall, as respiration may affect speed<br />
and accuracy of blood pressure measurement.<br />
Arrhythmia Check <strong>for</strong> regularity of heart rate (palpate pulse or check device).<br />
Moderate to severe heart rate irregularities may make blood pressure<br />
difficult to measure accurately.<br />
Small leak in pneumatic system Check cuff tubing and pressure hose <strong>for</strong> leaks.<br />
Table 21. Temperature Malfunction<br />
Possible Cause Corrective Action and Explanation<br />
Error code displayed Probe is broken, replace it.<br />
Consult Service Manual.<br />
Notify biomedical department or Welch Allyn Technical Support.<br />
Low temperature readings Place probe in the most posterior sublingual pocket when in Oral Mode.<br />
Verify the thermometer is in the correct mode.<br />
No temperature displayed Place the temperature probe in holder prior to taking another temperature.<br />
Check the temperature probe connection to <strong>Spot</strong> <strong>LXi</strong>, see “SureTemp Plus”<br />
on page 26 (SureTemp Plus models only).<br />
Loss of tissue contact The probe has lost contact with the patient’s tissue. Once you achieve<br />
proper contact <strong>Spot</strong> <strong>LXi</strong> continues the temperature measurement. It is<br />
recommended that you take a new temperature reading.<br />
Ambient temperature exceeds lower or<br />
upper measurement range limit<br />
Bring the device into the proper ambient temperature.<br />
Ambient temperature range limit is 50° F to 104° F (10° C to 40° C).
<strong>Directions</strong> <strong>for</strong> <strong>Use</strong> Troubleshooting 53<br />
Table 22. SpO 2 Malfunction<br />
Possible Cause Corrective Action<br />
Sensor in place but no SpO 2 on display Insert the patient’s finger completely into sensor.<br />
Verify blood pressure and SpO 2 measurements are not taken on the same<br />
extremity.<br />
Verify the sensor cable is correctly plugged into <strong>Spot</strong> <strong>LXi</strong> (see “SpO2<br />
Sensor” on page 27).<br />
Verify you are using the correct sensor. <strong>Use</strong> only Masimo or Nellcor SpO 2<br />
sensors and accessories with the <strong>Spot</strong> <strong>LXi</strong> with Masimo or Nellcor<br />
configurations, respectively.<br />
Table 23. Device Does Not Turn On<br />
Possible Cause Corrective Action<br />
Low battery Plug in the device. Check connections between the <strong>Spot</strong> <strong>LXi</strong> and<br />
trans<strong>for</strong>mer then between the trans<strong>for</strong>mer and wall receptacle.<br />
Device not powering up Unplug <strong>Spot</strong> <strong>LXi</strong> from wall receptacle and check <strong>for</strong> breaks in cord. If<br />
connections are secure, check electrical outlet <strong>for</strong> power.<br />
Charging indicator is on if connections are good and the device is plugged<br />
into a working outlet.<br />
If the battery is completely discharged, the LEDs will not illuminate. Allow<br />
the unit to charge at least 15 minutes be<strong>for</strong>e proceeding.<br />
Replace the battery.<br />
Verify that the AC power trans<strong>for</strong>mer connections are intact and that the<br />
charging indicator is on. If the connections are secure, check the electrical<br />
outlet <strong>for</strong> power.<br />
Plug the device into a known working electrical outlet.<br />
Notify biomedical department or Welch Allyn Technical Support.
54 Troubleshooting Welch Allyn <strong>Spot</strong> <strong>Vital</strong> <strong>Signs</strong> <strong>LXi</strong>
9<br />
Per<strong>for</strong>mance<br />
Specifications<br />
This section describes normal ranges <strong>for</strong> <strong>Spot</strong> <strong>Vital</strong> <strong>Signs</strong> <strong>LXi</strong>.<br />
Blood Pressure Accuracy<br />
Blood pressure accuracy meets or exceeds AAMI SP10:2002 standards <strong>for</strong> non-invasive<br />
blood pressure accuracy (± 5 mmHg mean error, 8 mmHg standard deviation). Blood<br />
pressure accuracy is validated <strong>for</strong> pressure measurement using the upper arm only.<br />
Cuff Pressure Range 0 to 300 mmHg<br />
Systolic Range 60 to 250 mmHg<br />
Diastolic Range 30 to 160 mmHg<br />
Blood Pressure Determination Time Typical: 15 seconds<br />
Mean Arterial Pressure Range 40 to 190 mmHg<br />
Pulse Rate Range<br />
(using SpO2 determination)<br />
Pulse Rate Range<br />
(using Blood Pressure determination)<br />
Pulse Rate Accuracy (using SpO2 determination)<br />
25 to 240 bpm<br />
35 to 199 bpm<br />
Without Motion: 25 to 240 bpm ± 3 digits 1<br />
With Motion: normal physiologic range (55 to 125 bpm) ± 5 digits<br />
Low Perfusion: 25 to 240 bpm ± 3 digits 1<br />
Pulse Rate Accuracy<br />
(using Blood Pressure determination)<br />
±5.0%<br />
Overpressure Cutoff 315 mmHg ±15 mmHg<br />
1 Specification applies to device per<strong>for</strong>mance and was validated with Biotek and Nellcor simulators.<br />
55
56 Specifications Welch Allyn <strong>Spot</strong> <strong>Vital</strong> <strong>Signs</strong> <strong>LXi</strong><br />
Temperature Specifications<br />
Temperature Range<br />
SureTemp Plus<br />
Braun ThermoScan PRO 4000<br />
Calibration Accuracy<br />
SureTemp Plus<br />
Braun ThermoScan PRO 4000 <strong>for</strong> displayed<br />
temperature ranges<br />
80° to 110° F (26.7° to 43.3° C)<br />
68° to 108° F (20° to 42.2° C)<br />
±0.2° F (0.1° C) (Monitor Mode)<br />
± 0.4° F (±0.2° C) 95.9° to 107.6° F (35.5° to 42° C)<br />
±0.5° F (±0.25° C) (outside this temperature range)<br />
Display Resolution 0.1° F or ° C<br />
SureTemp Plus Predict Time<br />
Oral<br />
Adult Axillary<br />
Pediatric Axillary<br />
Rectal<br />
Approx. 4 to 6 seconds<br />
Approx. 12 to 15 seconds (age 18 years and older)<br />
Approx. 10 to 13 seconds (age 17 years and younger)<br />
Approx. 10 to 13 seconds
<strong>Directions</strong> <strong>for</strong> <strong>Use</strong> Specifications 57<br />
SpO 2 Specifications<br />
Masimo Sensor Accuracy Guide<br />
Masimo Patents<br />
Accuracy specified when used with Masimo SET pulse oximetry monitors or with<br />
licensed Masimo SET pulse oximetry modules using PC series patient cables, during no<br />
motion. Numbers present ± 1 standard deviation. Plus or minus one standard deviation<br />
represents 68% of the population. SpO 2 accuracy from 70% to 100%. Pulse rate<br />
accuracy from 25 to 240 bpm.<br />
Per<strong>for</strong>mance Measurement Range SpO 2 : 1 to 100%<br />
Pulse Rate: 25 - 240 beats per minute (BPM)<br />
Perfusion 0.02% to 20%<br />
Accuracy Saturation: 70% to 100%<br />
No Motion: Adults, Pediatrics ± 2 digits<br />
Neonates ± 3 digits<br />
Motion: Adults, Pediatrics ± 3 digits<br />
Neonates ± 3 digits<br />
Low Perfusion: Adults, Pediatrics ± 2 digits<br />
Neonates ± 3 digits<br />
Pulse Rate Accuracy Pulse Rate: 25 to 250 bpm<br />
Table 24. Masimo Sensor Accuracy Guide<br />
No Motion: Adults, Pediatrics, Neonates ± 3 digits<br />
Motion: Adults, Pediatrics, Neonates ± 5 digits<br />
Low Perfusion: Adults, Pediatrics, Neonates ± 5 digits<br />
Saturation Accuracy Pulse Rate Accuracy<br />
Sensor Weight Range No Motion Motion No Motion Motion<br />
LNOP-ADT > 30 kg ± 2% ± 3% ± 3 bpm ± 5 bpm<br />
LNOP-PDT 10 to 50 kg ± 2% ± 3% ± 3 bpm ± 5 bpm<br />
LNOP-NEO < 10 kg ± 3% ± 3% ± 3 bpm ± 5 bpm<br />
LNOP-NEOPT < 1 kg ± 3% ± 3% ± 3 bpm ± 5 bpm<br />
LNOP-DCI > 30 kg ± 2% ± 3% ± 3 bpm ± 5 bpm<br />
LNOP-DCIP 10 to 50 kg ± 2% ± 3% ± 3 bpm ± 5 bpm<br />
The Masimo sensors and cables are covered under one or more of the following U.S.A.<br />
patents: 5,758,644; 5,823,950; 6,011,986; 6,157,850; 6,263,222; 6,501,975; and other<br />
applicable patents listed at www.masimo.com/patents.htm.
58 Specifications Welch Allyn <strong>Spot</strong> <strong>Vital</strong> <strong>Signs</strong> <strong>LXi</strong><br />
Nellcor ® Sensor Accuracy Guide<br />
Nellcor Patents<br />
Accuracy specifications are based on controlled hypoxia studies with healthy,<br />
non-smoking adult volunteers over the specified saturation SpO 2 range. Pulse oximeter<br />
SpO 2 readings were compared to SaO 2 values of drawn blood samples measured by<br />
hemoximetry. All accuracies are expressed as + “X” digits. This variation equals + one<br />
standard deviation (+ 1 SD), which encompasses 68% of the population.<br />
Table 25. OxiMax Sensor Models, Single Patient <strong>Use</strong><br />
Sensor Models SpO 2 Range<br />
70% to 100%<br />
MAX-AI ± 2<br />
MAX-PI* ± 2<br />
MAX-II ± 2<br />
MAX-RI 1<br />
1<br />
The accuracy specification has been determined between saturations of 80% to 100%.<br />
± 3.5<br />
Table 26. OxiCliq Sensor Models, Single Patient <strong>Use</strong><br />
Sensor Models SpO 2 Range<br />
70% to 100%<br />
OXICLIQ-PI ± 2.5<br />
Table 27. Reusable Sensor Models<br />
Sensor Models SpO 2 Range<br />
70% to 100%<br />
D-YS (Infant to Adult) ± 3<br />
D-YS and D-YSE ± 3.5<br />
D-YS and D-YSPD ± 3.5<br />
DS-100A ± 3<br />
OXI-A/N (Adult/neonate) Adult: ± 3<br />
Neonate: ± 4<br />
OXI-P/I (Pediatric/infant) ± 3<br />
Covered by one or more of the following US Patents: 4,802,486; 4,869,254; 4,928,692;<br />
4,934,372; 5,078,136; 5,351,685; 5,485,847; 5,533,507; 5,577,500; 5,803,910; 5,853,364;<br />
5,865,736; 6,083,172; 6,708,049; Re. 35,122 and <strong>for</strong>eign equivalents.
<strong>Directions</strong> <strong>for</strong> <strong>Use</strong> Specifications 59<br />
Mechanical<br />
Electrical<br />
Battery<br />
Environmental<br />
Wireless Radio<br />
Dimensions Height: 10.63 “ (27 cm)<br />
Length/Braun: 8” (20.32 cm)<br />
Length/SureTemp Plus: 7.5” (19 cm)<br />
Depth: 5.25” (13.34 cm)<br />
Weight 7.5 lbs (3.4 kg)<br />
Mounting Self-supporting on rubber feet<br />
Custom mobile stand<br />
Custom wall mount<br />
Portability May be hand-carried when held by the rear handle<br />
Power Requirements Patient-rated isolation trans<strong>for</strong>mer is connected to AC mains:<br />
North American Version: 120VAC, 60Hz. 0.20A Input, 8VDC, 0.75A Output<br />
International Version: 240VAC, 50Hz 0.10A Input, 8VDC, 0.75A Output<br />
Australian Version: 240VAC, 50Hz, 13VA Input, 8VDC, 0.75A Output<br />
Sealed lead acid, with external charger.<br />
The <strong>Spot</strong> <strong>LXi</strong> battery is 90 to 100% charged after 6 hours of charging. The rechargeable<br />
batteries in the Braun ThermoScan PRO 4000 thermometer requires an additional 1 hour<br />
to charge and the rechargeable batteries in the external printer require an additional 4<br />
hours to charge. The battery automatically charges when <strong>Spot</strong> <strong>LXi</strong> is powered through the<br />
AC power trans<strong>for</strong>mer. An operator can use the device while the battery is charging;<br />
however, the battery charges faster when the instrument is not in operation.<br />
WARNING This device is not suitable <strong>for</strong> use in the presence of a flammable<br />
anesthetic mixture with air or oxygen or nitrous oxide. An explosion may result.<br />
Operating Temperature 50° to 104° F (10° to 40° C)<br />
Storage/Transport Temperature Device with SureTemp Plus: -13° to 131°F (-25° to 55°C)<br />
Device with Braun ThermoScan PRO 4000: -4° to 122°F (-20° to 50°C)<br />
Relative Humidity 15 to 95% (non-condensing)<br />
Operating Altitude -557 to 16,000 ft. (-170 to 4877 m)<br />
Wireless Network Interface IEEE 802.11b DSSS, WiFi compliant<br />
Frequency 2.4 to 2.4835 GHz
60 Specifications Welch Allyn <strong>Spot</strong> <strong>Vital</strong> <strong>Signs</strong> <strong>LXi</strong><br />
Patents<br />
The <strong>Spot</strong> <strong>LXi</strong> is covered under the following patents: 6,827,488; 6,971,790; and other<br />
patents pending.<br />
Guidance and Manufacturer’s Declaration<br />
Emissions and Immunity In<strong>for</strong>mation<br />
Electromagnetic Emissions<br />
The <strong>Spot</strong> <strong>Vital</strong> <strong>Signs</strong> <strong>LXi</strong> is intended <strong>for</strong> use in the electromagnetic environment specified below. The customer or user of the <strong>Spot</strong> <strong>Vital</strong> <strong>Signs</strong><br />
<strong>LXi</strong> should assure that it is used in such an environment.<br />
Emissions Test Compliance Electromagnetic Environment - Guidance<br />
RF emissions<br />
CISPR 11<br />
RF emissions<br />
CISPR 11<br />
Harmonic emissions<br />
IEC 61000-3-2<br />
Voltage fluctuations/<br />
flicker emissions<br />
IEC 61000-3-3<br />
Group 1 The <strong>Spot</strong> <strong>Vital</strong> <strong>Signs</strong> <strong>LXi</strong> uses RF energy only <strong>for</strong> its internal function. There<strong>for</strong>e, its RF<br />
emissions are very low and are not likely to cause any interference in nearby electronic<br />
equipment.<br />
Class B The <strong>Spot</strong> <strong>Vital</strong> <strong>Signs</strong> <strong>LXi</strong> is suitable <strong>for</strong> use in all establishments, including domestic<br />
establishments and those directly connected to the public low-voltage<br />
power supply network that supplies buildings used <strong>for</strong> domestic purposes.<br />
Class A<br />
Complies<br />
Electromagnetic Immunity<br />
The <strong>Spot</strong> <strong>Vital</strong> <strong>Signs</strong> <strong>LXi</strong> is intended <strong>for</strong> use in the electromagnetic environment specified below. The customer or user of the <strong>Spot</strong> <strong>Vital</strong> <strong>Signs</strong><br />
<strong>LXi</strong> should assure that it is used in such an environment.<br />
Immunity Test IEC 60601<br />
Test Level<br />
Electrostatic discharge ± 6 kV contact<br />
(ESD)<br />
± 8 kV air<br />
IEC 61000-4-2<br />
Electrical fast transient/<br />
burst<br />
IEC 61000-4-4<br />
Surge<br />
IEC 61000-4-5<br />
±2 kV <strong>for</strong> power supply<br />
lines<br />
±1 kV <strong>for</strong> input/output<br />
lines<br />
±1 kV differential mode<br />
±2 kV common mode<br />
Compliance Level Electromagnetic Environment - Guidance<br />
± 6 kV contact<br />
± 8 kV air<br />
±2 kV <strong>for</strong> power supply<br />
lines<br />
±1 kV <strong>for</strong> input/output<br />
lines<br />
±1 kV differential mode<br />
±2 kV common mode<br />
Floors should be wood, concrete, or ceramic tile. If floors are<br />
covered with synthetic material, the relative humidity should<br />
be at least 30%.<br />
Mains power quality should be that of a typical commercial or<br />
hospital environment.<br />
Mains power quality should be that of a typical commercial or<br />
hospital environment.
<strong>Directions</strong> <strong>for</strong> <strong>Use</strong> Specifications 61<br />
Voltage dips, short<br />
interruptions, and<br />
voltage variations on<br />
power supply input<br />
lines.<br />
IEC 61000-4-11<br />
Power frequency<br />
(50/60Hz)<br />
magnetic field<br />
IEC 61000-4-8<br />
>95% dip in 0.5 cycle<br />
60% dip in 5 cycles<br />
30% dip <strong>for</strong> 25 cycles<br />
>95% dip in 5 seconds<br />
>95% dip in 0.5 cycle<br />
60% dip in 5 cycles<br />
30% dip <strong>for</strong> 25 cycles<br />
>95% dip in 5 seconds<br />
Mains power quality should be that of a typical commercial or<br />
hospital environment. If the user of the <strong>Spot</strong> <strong>Vital</strong> <strong>Signs</strong> <strong>LXi</strong><br />
requires continued operation during power mains<br />
interruptions, it is recommended that the <strong>Spot</strong> <strong>Vital</strong> <strong>Signs</strong> <strong>LXi</strong><br />
be powered from an uninterruptible power supply or battery.<br />
3 A/m 3 A/m Power frequency magnetic fields should be at levels<br />
characteristic of a typical location in a typical commercial or<br />
hospital environment.<br />
Electromagnetic Immunity<br />
The <strong>Spot</strong> <strong>Vital</strong> <strong>Signs</strong> <strong>LXi</strong> is intended <strong>for</strong> use in the electromagnetic environment specified below. The customer or user of the <strong>Spot</strong> <strong>Vital</strong> <strong>Signs</strong><br />
<strong>LXi</strong> should assure that it is used in such an environment.<br />
Immunity Test IEC 60601<br />
Test Level<br />
Conducted RF<br />
IEC 61000-4-6<br />
Radiated RF<br />
IEC 61000-4-3<br />
3 Vrms<br />
150 kHz to 80 MHz<br />
3 V/m<br />
80 MHz to 2.5 GHz<br />
Compliance<br />
Level<br />
3 Vrms d = (1.17)<br />
Note 1: At 80 MHz and 800 MHz, the higher frequency range applies.<br />
Electromagnetic Environment - Guidance<br />
Portable and mobile RF communications equipment should be used no closer<br />
to any part of the <strong>Spot</strong> <strong>Vital</strong> <strong>Signs</strong> <strong>LXi</strong>, including cables, than the<br />
recommended separation distance calculated from the equation applicable<br />
to the frequency of the transmitter.<br />
Recommended separation distance<br />
3 V/m d = (1.17) P 80 MHz to 800 MHz<br />
d = (2.33) P<br />
800 MHz to 2.5 GHz<br />
where P is the maximum output power rating of the transmitter in watts (W)<br />
according to the transmitter manufacturer and d is the recommended<br />
separation distance in metres (m).<br />
Field strengths from fixed RF transmitters, as determined by an<br />
electromagnetic site survey, a should be less than the compliance level in<br />
each frequency range. b<br />
Interference may occur in the vicinity of equipment marked with the<br />
following symbol:<br />
Note 2: These guidelines may not apply in all situations. Electromagnetic propagation is affected by absorption and reflection from structures,<br />
objects, and people.<br />
a Field strengths from fixed transmitters, such as base stations <strong>for</strong> radio (cellular/cordless) telephones and land mobile radios, amateur radio,<br />
AM and FM radio broadcast and TV broadcast cannot be predicted theoretically with accuracy. To assess the electromagnetic environment due<br />
to fixed RF transmitters, an electromagnetic site survey should be considered. If the measured field strength in the location in which the <strong>Spot</strong><br />
<strong>Vital</strong> <strong>Signs</strong> <strong>LXi</strong> is used exceeds the applicable RF compliance level above, the electrocardiograph should be observed to verify normal operation.<br />
If abnormal per<strong>for</strong>mance is observed, additional measures may be necessary, such as reorienting or relocating the electrocardiograph.<br />
b Over the frequency range 150 kHz to 80 MHz, field strengths should be less than 3 V/m.<br />
P
62 Specifications Welch Allyn <strong>Spot</strong> <strong>Vital</strong> <strong>Signs</strong> <strong>LXi</strong><br />
Recommended Separation Distances Between Portable and Mobile RF Communications Equipment and the <strong>Spot</strong> <strong>Vital</strong> <strong>Signs</strong> <strong>LXi</strong><br />
The <strong>Spot</strong> <strong>Vital</strong> <strong>Signs</strong> <strong>LXi</strong> is intended <strong>for</strong> use in an electromagnetic environment in which radiated RF disturbances are controlled. The customer<br />
or user of the <strong>Spot</strong> <strong>Vital</strong> <strong>Signs</strong> <strong>LXi</strong> can help prevent electromagnetic interference by maintaining a minimum distance between portable and<br />
mobile RF communications equipment (transmitters) and the <strong>Spot</strong> <strong>Vital</strong> <strong>Signs</strong> <strong>LXi</strong> as recommended below, according to the maximum output<br />
power of the communications equipment.<br />
Rated Max. Output<br />
Power of Transmitter<br />
(W)<br />
150 kHz to 80 MHz<br />
d = (1.17)<br />
Separation Distance According to Frequency of Transmitter (m)<br />
80 MHz to 800 MHz<br />
800 MHz to 2.5 GHz<br />
P d = (1.17) P d = (2.33) P<br />
0.01 0.117 0.117 0.233<br />
0.1 0.37 0.37 0.74<br />
1 1.17 1.17 2.33<br />
10 3.70 3.70 7.37<br />
100 11.70 11.70 23.30<br />
For transmitters rated at a maximum output power not listed above, the recommended separation distance d in meters (m) can be estimated<br />
using the equation applicable to the frequency of the transmitter, where P is the maximum output power rating of the transmitter in watts (W)<br />
according to the transmitter manufacturer.<br />
Note 1: At 80 MHz and 800 MHz, the separation distance <strong>for</strong> the higher frequency range applies.<br />
Note 2: These guidelines may not apply in all situations. Electromagnetic propagation is affected by absorption and reflection from structures,<br />
objects, and people.
10<br />
Cleaning<br />
<strong>Spot</strong> <strong>Vital</strong> <strong>Signs</strong> <strong>LXi</strong><br />
Blood Pressure Cuff<br />
Maintenance and Service<br />
As necessary, clean the device with a cloth slightly dampened with either 70% isopropyl<br />
alcohol, 10% chlorine bleach solution, or mild detergent in water, or use PDI Sani-System<br />
Cloths. Never immerse <strong>Spot</strong> <strong>LXi</strong> in any type of fluid.<br />
Be<strong>for</strong>e washing the Reusable Two-Piece Cuff, remove the two connectors and bladder,<br />
close off tubes with plugs (available as accessory 5082-163), and close the hook and loop<br />
fasteners. After washing, allow the cuff to air dry. Re-assemble the tube fittings.<br />
Never press with an iron.<br />
Blood Pressure Hose and Cable<br />
Wipe the pressure hose with a damp cloth moistened in a mild detergent solution. Do not<br />
immerse hose.<br />
SureTemp Plus Thermometer<br />
Temperature Probe<br />
WARNING Be<strong>for</strong>e per<strong>for</strong>ming any maintenance or service to the <strong>Spot</strong> <strong>LXi</strong>,<br />
disconnect the AC power line from the electrical outlet.<br />
Caution Prevent water or other fluids from entering any connectors. If the<br />
connectors get wet, dry them with warm air. Check all measurement functions.<br />
Caution Do not sterilize or autoclave the <strong>Spot</strong> <strong>LXi</strong> device.<br />
Caution DO NOT immerse or soak the probe in any type of fluid.<br />
Caution DO NOT use steam, heat, or gas sterilization on the probe.<br />
Caution DO NOT autoclave the probe.<br />
63
64 Maintenance and Service Welch Allyn <strong>Spot</strong> <strong>Vital</strong> <strong>Signs</strong> <strong>LXi</strong><br />
Removable Probe Well<br />
Press down on the connector tab and slide the connector out of the port to remove the<br />
temperature probe.<br />
Regularly wipe the probe with a cloth dampened with warm water and a mild detergent<br />
solution, a 70% isopropyl alcohol solution, or a 10% chlorine bleach solution.<br />
1. Remove the temperature probe from <strong>Spot</strong> <strong>LXi</strong> (see “Temperature Probe” on page 63).<br />
2. Grasp the well under the probe opening and pull up gently to remove it from the<br />
device.<br />
3. Swab the inner and outer surface of the probe well with a cloth dampened with a mild<br />
detergent solution, 70% isopropyl alcohol, or 10% chlorine bleach solution. Immerse<br />
the probe well in mild detergent solution as necessary <strong>for</strong> cleaning.<br />
4. Dry all surfaces thoroughly be<strong>for</strong>e re-assembling the device (see “SureTemp Plus” on<br />
page 26) <strong>for</strong> reassembly instructions.<br />
Braun ThermoScan PRO 4000 Thermometer<br />
SpO 2 Sensors<br />
Printer<br />
Caution DO NOT use hard or sharp objects to clean the probe well. This could<br />
damage the probe well and cause the device to not function properly.<br />
Caution DO NOT use steam, heat, or gas sterilization on the probe well.<br />
Caution DO NOT autoclave the probe well.<br />
<strong>Use</strong> a soft cloth slightly moistened with alcohol to clean the thermometer display and<br />
exterior. Do not use abrasive cleaners.<br />
Damage to the probe window or the presence of dirt or cerumen on the probe window<br />
can affect the accuracy of your temperature measurement. To clean the window, gently<br />
wipe it with a cotton swab slightly moistened with alcohol and immediately wipe dry with<br />
a clean cotton swab. Allow to dry at least five minutes be<strong>for</strong>e taking a temperature.<br />
Every month, clean the Braun ThermoScan PRO 4000 charging contacts within the <strong>Spot</strong><br />
<strong>LXi</strong> housing with a swab slightly dampened with alcohol.<br />
WARNING Do not immerse the sensor in water, solvents, or cleaning solutions<br />
(the sensors and connections are not waterproof). Do not use irradiation, steam,<br />
or ethylene oxide <strong>for</strong> sterilization.<br />
Clean the reusable SpO 2 sensor with a 70% isopropyl alcohol solution. Do not immerse<br />
the sensor.<br />
The printer label kit comes with a two-step head cleaner. Follow the directions provided<br />
with the cleaner.
<strong>Directions</strong> <strong>for</strong> <strong>Use</strong> Maintenance and Service 65<br />
Battery Replacement<br />
<strong>Spot</strong> <strong>Vital</strong> <strong>Signs</strong> <strong>LXi</strong><br />
Caution Only use the Welch Allyn 4500-84 lead acid battery. Using an incorrect<br />
battery will cause damage to the <strong>Spot</strong> <strong>LXi</strong> and void the warranty.<br />
Caution Do not break the shrinkwrap around the battery.<br />
If necessary, replace the internal battery after heavy use or the battery no longer charges.<br />
1. Power off the <strong>Spot</strong> <strong>LXi</strong> and disconnect the AC power trans<strong>for</strong>mer cord.<br />
2. Remove the four screws holding the battery door using a phillips-head screwdriver.<br />
Remove the battery door to expose the battery.<br />
3. Tip the <strong>Spot</strong> <strong>LXi</strong> backward and slide the battery out. Disconnect the one-way<br />
connector and then attach a new battery to the connector as shown. The one-way<br />
connector ends only connect one way. Do this as quickly as possibly to prevent loss<br />
of clock time.<br />
Figure 10. Battery Removal and One-way Connector<br />
One-way<br />
connector<br />
4. Slide the battery into the compartment as far as it will go. Push the connector down<br />
into the case next to the battery.<br />
5. Replace the battery door and tighten each of the four screws.<br />
6. Connect the AC power trans<strong>for</strong>mer to the <strong>Spot</strong> <strong>LXi</strong> and allow the new battery to<br />
charge <strong>for</strong> approximately 6 hours. The rechargeable batteries in the Braun<br />
ThermoScan PRO 4000 thermometer requires an additional 1 hour to charge and the<br />
rechargeable batteries in the external printer require an additional 4 hours to charge.<br />
You can use the <strong>Spot</strong> <strong>LXi</strong> during this charging period via the AC power cord.<br />
If <strong>Spot</strong> <strong>LXi</strong> displays the E38 error code after power up, set the date (see “Date/Time<br />
Menu Options” on page 32).<br />
The battery is a non-spillable lead-acid battery and must be recycled or<br />
disposed of properly according to national or local regulations.
66 Maintenance and Service Welch Allyn <strong>Spot</strong> <strong>Vital</strong> <strong>Signs</strong> <strong>LXi</strong><br />
Braun ThermoScan PRO 4000<br />
Printer<br />
Caution Do not use alkaline batteries in the Braun ThermoScan PRO 4000<br />
thermometer.<br />
Welch Allyn supplies a rechargeable battery pack with the Braun ThermoScan PRO 4000<br />
thermometer.<br />
1. Open the battery compartment.<br />
2. Remove the battery pack and replace with a new battery pack, verify the poles are in<br />
the right direction.<br />
3. Slide the battery door back in until it snaps into place.<br />
If the battery is completely discharged, the LEDs will not illuminate. Allow the unit to<br />
charge at least 15 minutes be<strong>for</strong>e proceeding.<br />
The battery is a rechargeable battery and must be recycled or disposed<br />
of properly according to national or local regulations.<br />
Caution Do not use alkaline batteries in the printer.<br />
1. Open the battery compartment.<br />
2. Remove the battery pack and replace with a new battery pack, verify the poles are in<br />
the right direction.<br />
3. Slide the battery door back in until it snaps into place.<br />
Allow the printer to charge at least 15 minutes be<strong>for</strong>e proceeding.<br />
The battery is a rechargeable battery and must be recycled or disposed<br />
of properly according to national or local regulations.
<strong>Directions</strong> <strong>for</strong> <strong>Use</strong> Maintenance and Service 67<br />
Calibration<br />
Blood Pressure Calibration Check<br />
The calibration check is a simple, yet valuable test to determine that the unit is sensing<br />
pressure accurately. Verify the pressure measurement accuracy of the Welch Allyn <strong>Spot</strong><br />
<strong>LXi</strong> with an accurate, calibrated pressure meter or sphygmomanometer.<br />
To per<strong>for</strong>m the calibration check:<br />
Have the following equipment available:<br />
Accurate, calibrated pressure meter or<br />
sphygmomanometer<br />
1. Disconnect the blood pressure cuff from the blood pressure tubing.<br />
2. Attach two pieces of the 4” tubing to the T-connector. Verify that the tubing is<br />
positioned perpendicular to each other.<br />
3. Attach the pressure meter or sphygmomanometer to one of the tubes and the bulb<br />
and value assembly to the second tube.<br />
4. Push a female fitting into the third piece of 4” tubing and connect the opposite end of<br />
the tubing to the T-connector.<br />
5. Twist the blood pressure tubing fitting that connects to the right blood pressure cable<br />
connection port to the female fitting and connect the opposite end of the blood<br />
pressure tubing to the blood pressure cable connection port. Verify that all<br />
connections are tight.<br />
Figure 11. Blood Pressure Calibration Tubing Connections<br />
4” tubing with an inside diameter of<br />
approximately .250” (quantity 3 each)<br />
T-connector Bulb and valve (5088-01)<br />
Female fittings (12P524-1) (quantity 2 each)<br />
Right female<br />
fitting<br />
4” tubing<br />
T-connector<br />
Right blood<br />
pressure cable<br />
connection<br />
Bulb and valve<br />
Accurate, calibrated<br />
pressure meter or<br />
sphygmomanometer<br />
6. Enter the Internal Configuration Mode (see “Internal Configuration” on page 31).
68 Maintenance and Service Welch Allyn <strong>Spot</strong> <strong>Vital</strong> <strong>Signs</strong> <strong>LXi</strong><br />
7. Press the Navigation button to highlight “Blood Pressure” on the display and press<br />
the Select button.<br />
8. Press the Navigation button to highlight “BP Calibration Check” on the display and<br />
press the Select button.<br />
9. Press the Select button to close the valve.<br />
10. Verify that the pressure meter is on and the thumb screw valve is closed. Inflate the<br />
device manually to about 250 mmHg.<br />
11. Drop the pressure to 200 mmHg, wait 15 seconds <strong>for</strong> stabilization, and take a<br />
reading.<br />
12. Repeat <strong>for</strong> 150 mmHg, 50 mmHg, and 0 mmHg (all measuring downscale).<br />
13. If the calibration at any point is outside of ±3 mmHg, call Welch Allyn Technical<br />
Service <strong>for</strong> assistance.<br />
Temperature Calibration Check<br />
<strong>Use</strong> the 9600 Plus Calibration Tester (see “Temperature” on page 72) to check the<br />
SureTemp Plus or Braun ThermoScan PRO 4000 thermometer accuracy. If the<br />
thermometer is out of calibration, contact Technical Service.<br />
Masimo SpO 2 Calibration Check<br />
<strong>Use</strong> a Masimo-approved SpO 2 simulator (Fluke Biotek or Clinical Dynamics SmartSat) to<br />
check the SpO 2 accuracy. There is no way to change the calibration of the SpO 2 module. If<br />
the SpO 2 is out of calibration, contact Technical Service.<br />
Nellcor SpO 2 Functional Check<br />
Service<br />
Technical Assistance<br />
<strong>Use</strong> a Nellcor SpO 2 simulator (SRC-MAX ) to check the SpO 2 funcationality. There is no<br />
way to change the functionality of the SpO 2 module. If the SpO 2 is not functioning<br />
properly, contact Technical Service.<br />
Caution Unauthorized repairs will void the warranty.<br />
A Welch Allyn Service Center must per<strong>for</strong>m all repairs on products under warranty.<br />
Qualified electronics personnel or a Welch Allyn Service Center should repair products out<br />
of warranty.<br />
If you have an equipment problem that you cannot resolve, call the Welch Allyn Service<br />
Center nearest you <strong>for</strong> assistance. Technical service telephone support is available on<br />
normal business days.
<strong>Directions</strong> <strong>for</strong> <strong>Use</strong> Maintenance and Service 69<br />
If you are advised to return a product to Welch Allyn <strong>for</strong> repair or routine maintenance,<br />
schedule the repair with the service center nearest you.<br />
Be<strong>for</strong>e returning a product <strong>for</strong> repair, you must obtain authorization from Welch Allyn.<br />
Service personnel will give you a Service Notification number. Please note this number on<br />
the outside of your shipping box. Returns without a Service Notification number will not<br />
be accepted <strong>for</strong> delivery.<br />
Service Manual/Spare Parts<br />
Service Loaners<br />
A Service Manual is available by request to qualified electronics personnel. The Service<br />
Manual is a comprehensive guide to troubleshooting, service, and repair of <strong>Spot</strong> <strong>LXi</strong> (see<br />
“Miscellaneous” on page 75).<br />
Also included with the Service Manual is a complete spare parts list. Order spare parts<br />
from your local Welch Allyn Service Center.<br />
Service loaners are provided, on request, if a Welch Allyn Service Center provides repair<br />
service. Loaners <strong>for</strong> products repaired while under the original warranty, or while under<br />
service contract, are provided free of charge and are shipped within 48 hours of<br />
notification of need.<br />
For service repairs outside of warranty or contract, loaners are available <strong>for</strong> a nominal<br />
charge and shipment is subject to availability. Loaners are shipped pre-paid; however, this<br />
charge is added to the service charges.
70 Maintenance and Service Welch Allyn <strong>Spot</strong> <strong>Vital</strong> <strong>Signs</strong> <strong>LXi</strong>
11<br />
Blood Pressure<br />
Supplies and Accessories<br />
Table 28. Reusable Two-Piece Blood Pressure Cuffs (1 per pack)<br />
REF Size REF Size<br />
4500-01 Child 4500-03 Large Adult<br />
4500-02 Adult 4500-04 Thigh<br />
Table 29. Durable One-Piece Blood Pressure Cuffs (5 per box)<br />
REF Size REF Size<br />
5082-82-4MQ Infant 5082-86-4MQ Adult<br />
5082-83-4MQ Small Child 5082-87-4MQ Large Adult<br />
5082-84-4MQ Child 5082-88-4MQ Thigh<br />
5082-85-4MQ Small Adult<br />
Table 30. Disposable One-Piece Blood Pressure Cuffs (5 per box)<br />
REF Size REF Size<br />
5082-92-4MQ Infant 5082-96-4MQ Adult<br />
5082-93-4MQ Small Child 5082-97-4MQ Large Adult<br />
5082-94-4MQ Child 5082-98-4MQ Thigh<br />
5082-95-4MQ Small Adult<br />
Table 31. Miscellaneous Supplies and Accessories<br />
REF Description REF Description<br />
4500-30 Blood Pressure Hose (5ft/1.5M) 5200-08 Calibration T-Connector<br />
71
72 Supplies and Accessories Welch Allyn <strong>Spot</strong> <strong>Vital</strong> <strong>Signs</strong> <strong>LXi</strong><br />
Temperature<br />
Table 32. SureTemp Plus<br />
REF Description<br />
02895-000 SureTemp Plus Oral Probe and Well (9 feet/2.7M)<br />
02895-100 SureTemp Plus Rectal Probe and Well (9 feet/2.7M)<br />
02894-0000 SureTemp Plus Oral Well<br />
02894-1000 SureTemp Plus Rectal Well<br />
06138-000 SureTemp Plus Temperature Calibration Key<br />
01802-110 9600 Plus Calibration Tester<br />
05031-101 Disposable SureTemp Plus Probe Covers (1,000 covers, packaged 25/box)<br />
Table 33. Braun ThermoScan PRO 4000<br />
REF Description<br />
04000-200 Braun ThermoScan PRO 4000 Thermometer (<strong>for</strong> North America, South America, and<br />
Asia Pacific)<br />
04000-600 Braun ThermoScan PRO 4000 Thermometer (<strong>for</strong> Europe, Middle East, and Africa)<br />
05075-800 Braun ThermoScan PRO 4000 Disposable Probe Covers (Case of 800 covers <strong>for</strong> North<br />
America, South America, and Asia Pacific)<br />
04000-800 Braun ThermoScan PRO 4000 Disposable Probe Covers (Case of 800 covers <strong>for</strong> Europe,<br />
Middle East, and Africa)<br />
01802-110 9600 Plus Calibration Tester<br />
53020-0000 Braun ThermoScan PRO 4000 Rechargeable Battery Pack<br />
4500-53 Braun Locking Key
<strong>Directions</strong> <strong>for</strong> <strong>Use</strong> Supplies and Accessories 73<br />
Pulse Oximetry<br />
Masimo Accessories<br />
Table 34. Adhesive Sensors: Single-Patient <strong>Use</strong><br />
Catalog # Description Weight Range Quantity<br />
LNOP-ADT Adult sensor >66 lbs (30 kg) 20<br />
LNOP-PDT Pediatric sensor 22 to 110 lbs<br />
(10 to 50 kg)<br />
20<br />
LNOP-NEO Neonatal sensor
74 Supplies and Accessories Welch Allyn <strong>Spot</strong> <strong>Vital</strong> <strong>Signs</strong> <strong>LXi</strong><br />
Nellcor Accessories<br />
Table 37. OxiMax Adhesive Sensors: Single-Patient <strong>Use</strong><br />
Catalog # Description Weight Range Quantity<br />
MAX-AI MAX-A Adhesive Sensor, adult >66 lbs (30 kg) Case of 24<br />
MAX-PI MAX-P Adhesive Sensor, pediatric 22 to 110 lbs<br />
(10 to 50 kg)<br />
Case of 24<br />
MAX-II MAX-I Adhesive Sensor, infant 6.5 to 44 lbs<br />
(3 to 20 kg)<br />
Case of 24<br />
MAX-RI MAX-R Adhesive Sensor, adult nasal >110 lbs (50 kg) Case of 24<br />
Table 38. OxiMax OxiCliq ® Sensors: Reusable Cable with Adhesive Sensor Bandage<br />
Catalog # Description Weight Range Quantity<br />
OC-3 OxiCliq Sensor Cable (3 ft / 91cm) N/A 1<br />
OXICLIQ-PI OxiCliq P, pediatric 22 to 110 lbs<br />
(10 to 50 kg)<br />
Table 39. OxiMax Resuable Sensors<br />
Case of 24<br />
Catalog # Description Weight Range Quantity<br />
DS-100A Durasensor® DS-100A finger-clip sensor, adult >88 lbs (40 kg) 1<br />
OXI-A/N Oxiband® OXI-A/N, adult/neonatal < 6.5 lbs or > 88 lbs<br />
(40 kg)<br />
1<br />
OXI-P/I Oxiband OXI-P/I, pediatric/infant 6.5 lbs to 88 lbs<br />
(3 to 40 kg)<br />
1<br />
D-YS Dura-Y® D-YS, multisite sensor >2.2 lbs (1 kg) 1<br />
D-YSE D-YSE ear clip <strong>for</strong> Dura-Y sensor >66 lbs (30 kg) 1<br />
D-YSPD PediCheck D-YSPD pediatric spot-check sensor 6.5lbs to 88 lbs<br />
(3 to 40 kg)<br />
Table 40. OxiMax Sensor Cables<br />
Catalog # Description Weight Range Quantity<br />
DOC-10 DOC-10 (10 ft/3M) N/A 1<br />
1
<strong>Directions</strong> <strong>for</strong> <strong>Use</strong> Supplies and Accessories 75<br />
Miscellaneous<br />
REF Description<br />
4500-60 Mobile Stand<br />
4500-62 Wall Mount<br />
4500-84 Lead Acid Battery<br />
700860 <strong>Directions</strong> <strong>for</strong> <strong>Use</strong><br />
700862 Quick Reference Card<br />
704432 Service Manual<br />
4500-150E Inservice CD<br />
4500-100 Carrying Case<br />
Service Contracts<br />
4500-101A AC Power Trans<strong>for</strong>mer (desktop trans<strong>for</strong>mer, line cord not included)<br />
4500-400 Line Cord (United States/Canadian/Japanese version)<br />
4500-402 Line Cord (European version)<br />
4500-404 Line Cord (United Kingdom version)<br />
4500-406 Line Cord (Australian Version)<br />
4500-408 Line Cord (South African version)<br />
4500-500 Printer with Mounting Bracket<br />
4500-505 Printer Rechargeable Battery Pack<br />
4500-510 Printer Paper (10 rolls)<br />
4500-520 Label Paper (10 rolls) and Cleaning Kit<br />
4500-910 Barcode Scanner with Mounting Bracket<br />
4500-920 DPAC Wireless Radio<br />
4500-925 Cable <strong>for</strong> Wired Connectivity<br />
REF Description<br />
4500-BT0 Blood Pressure with Thermometry<br />
4500-BTS Blood Pressure with Thermometry and SpO 2
76 Supplies and Accessories Welch Allyn <strong>Spot</strong> <strong>Vital</strong> <strong>Signs</strong> <strong>LXi</strong>
Warranty<br />
<strong>Spot</strong> <strong>LXi</strong><br />
Accessories<br />
Welch Allyn warrants <strong>Spot</strong> <strong>LXi</strong>, when new, to be free of defects in material and<br />
workmanship and to per<strong>for</strong>m in accordance with manufacturer's specifications <strong>for</strong> a<br />
period of two years from the date of purchase from Welch Allyn or its authorized<br />
distributors or agents. The battery is covered by a one-year warranty against original<br />
defects in material or workmanship. Welch Allyn will either repair or replace any<br />
components found to be defective or at variance from manufacturer's specifications<br />
within this time at no cost to the customer. It shall be the purchaser's responsibility to<br />
return <strong>Spot</strong> <strong>LXi</strong> to Welch Allyn or an authorized distributor, agent, or service<br />
representative. This warranty does not include breakage or failure due to tampering,<br />
misuse, neglect, accidents, modification, or shipping. This warranty is also void if the<br />
instrument is not used in accordance with manufacturer's recommendations or if repaired<br />
by other than Welch Allyn or an authorized agent. Purchase date determines warranty<br />
requirements. No other express warranty is given.<br />
Remember to submit the instrument registration/warranty card <strong>for</strong> warranty validation.<br />
Complete the in<strong>for</strong>mation and mail the pre-addressed card to Welch Allyn.<br />
The Masimo finger sensor and cable are covered by a six-month warranty against original<br />
defects in material or workmanship.<br />
The Nellcor DS-100A is covered by a one-year warranty and the Nellcor DOC-10 cable is<br />
covered by a three-month warranty against original defects in material or workmanship.<br />
The Reusable Two-Piece Blood Pressure Cuff is covered by a two-year warranty against<br />
original defects in material or workmanship.<br />
The SureTemp Plus probe is covered by a one-year warranty and the SureTemp Plus probe<br />
well is covered by a 90-day warranty against original defects in material and workmanship.<br />
Probe covers are intended <strong>for</strong> single-use only.<br />
The Braun ThermoScan PRO 4000 is covered by a three-year warranty against original<br />
defects in material or workmanship.<br />
The printer is covered by a one-year warranty against original defects in material or<br />
workmanship.<br />
The barcode scanner is covered by a five-year warranty against original defects in material<br />
or workmanship.<br />
The wireless radio is covered by a one-year warranty against original defects in material or<br />
workmanship.<br />
77
78 Warranty Welch Allyn <strong>Spot</strong> <strong>Vital</strong> <strong>Signs</strong> <strong>LXi</strong>
Material No.705310 Rev. D