CL100 / CL300 Service Manual - Welch Allyn
CL100 / CL300 Service Manual - Welch Allyn
CL100 / CL300 Service Manual - Welch Allyn

Create successful ePaper yourself
Turn your PDF publications into a flip-book with our unique Google optimized e-Paper software.
PN: LB-MAN-CLSERV Rev. A<br />
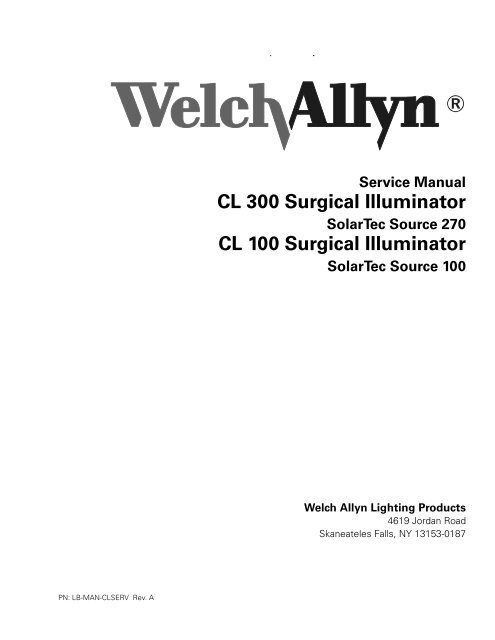
<strong>Service</strong> <strong>Manual</strong><br />
CL 300 Surgical Illuminator<br />
SolarTec Source 270<br />
CL 100 Surgical Illuminator<br />
SolarTec Source 100<br />
<strong>Welch</strong> <strong>Allyn</strong> Lighting Products<br />
4619 Jordan Road<br />
Skaneateles Falls, NY 13153-0187
Rev. Description ECN # Date Approved<br />
A New Release 0-1013 8/20/02 D. Rutan<br />
Drawings, illustrations, and/or part numbers contained in this document are for reference purposes only. For current revisions<br />
call the <strong>Welch</strong> <strong>Allyn</strong> Customer <strong>Service</strong> phone number listed in “<strong>Service</strong> Centers” on page 2 of this manual.
Table of Contents<br />
GENERAL INFORMATION - - - - - - - - - - - - - - - - - - - - - - - - - - - - - - - - - - - - - - - - - - - - - - - - - - - - - - - 1-1<br />
TECHNICAL HELP INFORMATION - - - - - - - - - - - - - - - - - - - - - - - - - - - - - - - - - - - - - - - - - - - - - - - - - - - - 1-1<br />
SERVICE CENTERS - - - - - - - - - - - - - - - - - - - - - - - - - - - - - - - - - - - - - - - - - - - - - - - - - - - - - - - - - - - 1-2<br />
WARRANTY - - - - - - - - - - - - - - - - - - - - - - - - - - - - - - - - - - - - - - - - - - - - - - - - - - - - - - - - - - - - - - - 1-3<br />
SYSTEM SYMBOL DESCRIPTIONS - - - - - - - - - - - - - - - - - - - - - - - - - - - - - - - - - - - - - - - - - - - - - - - - - 1-4<br />
WARNINGS AND PRECAUTIONS - - - - - - - - - - - - - - - - - - - - - - - - - - - - - - - - - - - - - - - - - - - - - - - - - - 1-5<br />
Warning - - - - - - - - - - - - - - - - - - - - - - - - - - - - - - - - - - - - - - - - - - - - - - - - - - - - - - - - - - - - - - - - - - 1-5<br />
Caution - - - - - - - - - - - - - - - - - - - - - - - - - - - - - - - - - - - - - - - - - - - - - - - - - - - - - - - - - - - - - - - - - - - 1-5<br />
OPERATING INSTRUCTIONS - - - - - - - - - - - - - - - - - - - - - - - - - - - - - - - - - - - - - - - - - - - - - - - - - - - - - 1-6<br />
Controls - - - - - - - - - - - - - - - - - - - - - - - - - - - - - - - - - - - - - - - - - - - - - - - - - - - - - - - - - - - - - - - - - - 1-6<br />
POWER ON/OFF SWITCH - - - - - - - - - - - - - - - - - - - - - - - - - - - - - - - - - - - - - - - - - - - - - - - - - - - - - - - - - 1-6<br />
FIBER PORT - - - - - - - - - - - - - - - - - - - - - - - - - - - - - - - - - - - - - - - - - - - - - - - - - - - - - - - - - - - - - - - - - 1-6<br />
MULTI LINK EXPANSION PORT - INSTALLATION AND USE (OPTIONAL) - - - - - - - - - - - - - - - - - - - - - - - - - 1-7<br />
LIGHT ATTENUATION CONTROL - - - - - - - - - - - - - - - - - - - - - - - - - - - - - - - - - - - - - - - - - - - - - - - - - - - - 1-7<br />
LAMP LIFE INDICATOR - - - - - - - - - - - - - - - - - - - - - - - - - - - - - - - - - - - - - - - - - - - - - - - - - - - - - - - - - - 1-7<br />
Principles Of Operation - - - - - - - - - - - - - - - - - - - - - - - - - - - - - - - - - - - - - - - - - - - - - - - - - - - - - - - 1-8<br />
LIGHT SOURCE - - - - - - - - - - - - - - - - - - - - - - - - - - - - - - - - - - - - - - - - - - - - - - - - - - - - - - - - - - - - - - - 1-8<br />
REPLACEMENT LAMPS - - - - - - - - - - - - - - - - - - - - - - - - - - - - - - - - - - - - - - - - - - - - - - - - - - - - - - - - - - 1-8<br />
POWER SUPPLY WITH CONTROL ELECTRONICS - - - - - - - - - - - - - - - - - - - - - - - - - - - - - - - - - - - - - - - - - - 1-8<br />
MULTI LINK PORT AND MULTI LINK EXPANSION PORT - - - - - - - - - - - - - - - - - - - - - - - - - - - - - - - - - 1-8<br />
SERVICE - - - - - - - - - - - - - - - - - - - - - - - - - - - - - - - - - - - - - - - - - - - - - - - - - - - - - - - - - - - - - - - - - - 1-9<br />
CLEANING - - - - - - - - - - - - - - - - - - - - - - - - - - - - - - - - - - - - - - - - - - - - - - - - - - - - - - - - - - - - - - - - - - 1-9<br />
SURGICAL ILLUMINATOR - - - - - - - - - - - - - - - - - - - - - - - - - - - - - - - - - - - - - - - - - - - - - - - - - - - - - - - - - 1-9<br />
MULTI LINK EXPANSION PORT - - - - - - - - - - - - - - - - - - - - - - - - - - - - - - - - - - - - - - - - - - - - - - - - - - - 1-9<br />
TOOLS REQUIRED - - - - - - - - - - - - - - - - - - - - - - - - - - - - - - - - - - - - - - - - - - - - - - - - - - - - - - - - - - 1-10<br />
TROUBLESHOOTING - - - - - - - - - - - - - - - - - - - - - - - - - - - - - - - - - - - - - - - - - - - - - - - - - - - - - - - - - 1-11<br />
CL 100 SURGICAL ILLUMINATOR - - - - - - - - - - - - - - - - - - - - - - - - - - - - - - - - - - - - - - - - - - - - - - - - - - 1-11<br />
CL 100 SURGICAL ILLUMINATOR DISASSEMBLY - - - - - - - - - - - - - - - - - - - - - - - - - - - - - - - - - - - - - - - - 1-12<br />
TEST #1: BLOWN FUSES - - - - - - - - - - - - - - - - - - - - - - - - - - - - - - - - - - - - - - - - - - - - - - - - - - - - - - - - 1-12<br />
TEST #2: 100 WATT POWER SUPPLY - - - - - - - - - - - - - - - - - - - - - - - - - - - - - - - - - - - - - - - - - - - - - - 1-13<br />
TEST #3: COOLING FAN - - - - - - - - - - - - - - - - - - - - - - - - - - - - - - - - - - - - - - - - - - - - - - - - - - - - - - - - 1-13<br />
TEST #4: LED/OVERTEMP SWITCH - - - - - - - - - - - - - - - - - - - - - - - - - - - - - - - - - - - - - - - - - - - - - - - - - 1-13
TEST #5: MICRO LINK® FIBER TEST - - - - - - - - - - - - - - - - - - - - - - - - - - - - - - - - - - - - - - - - - - - - - - - - 1-13<br />
TEST #6: POWER SUPPLY CALIBRATION - - - - - - - - - - - - - - - - - - - - - - - - - - - - - - - - - - - - - - - - - - - - - 1-14<br />
CL 100 SURGICAL ILLUMINATOR DISASSEMBLY - - - - - - - - - - - - - - - - - - - - - - - - - - - - - - - - - - - - - - 1-15<br />
POWER SUPPLY REMOVAL - - - - - - - - - - - - - - - - - - - - - - - - - - - - - - - - - - - - - - - - - - - - - - - - - - - - - - 1-15<br />
PLATFORM REMOVAL - - - - - - - - - - - - - - - - - - - - - - - - - - - - - - - - - - - - - - - - - - - - - - - - - - - - - - - - - - 1-16<br />
FRONT BEZEL REMOVAL - - - - - - - - - - - - - - - - - - - - - - - - - - - - - - - - - - - - - - - - - - - - - - - - - - - - - - - - 1-16<br />
FAN DEFLECTOR REMOVAL - - - - - - - - - - - - - - - - - - - - - - - - - - - - - - - - - - - - - - - - - - - - - - - - - - - - - - 1-16<br />
CHASSIS FAN REMOVAL - - - - - - - - - - - - - - - - - - - - - - - - - - - - - - - - - - - - - - - - - - - - - - - - - - - - - - - - 1-17<br />
LED/OVERTEMP HARNESS REMOVAL - - - - - - - - - - - - - - - - - - - - - - - - - - - - - - - - - - - - - - - - - - - - - - - 1-17<br />
LAMP CABLE REMOVAL - - - - - - - - - - - - - - - - - - - - - - - - - - - - - - - - - - - - - - - - - - - - - - - - - - - - - - - - 1-17<br />
INTERLOCK SWITCH REMOVAL - - - - - - - - - - - - - - - - - - - - - - - - - - - - - - - - - - - - - - - - - - - - - - - - - - - - 1-18<br />
POWER ENTRY MODULE REMOVAL - - - - - - - - - - - - - - - - - - - - - - - - - - - - - - - - - - - - - - - - - - - - - - - - - 1-18<br />
CL 100 SURGICAL ILLUMINATOR REPAIR PARTS LIST - - - - - - - - - - - - - - - - - - - - - - - - - - - - - - - - - - - - 1-19<br />
CL 300 SURGICAL ILLUMINATOR - - - - - - - - - - - - - - - - - - - - - - - - - - - - - - - - - - - - - - - - - - - - - - - - - - 1-25<br />
CL 300 SURGICAL ILLUMINATOR DISASSEMBLY - - - - - - - - - - - - - - - - - - - - - - - - - - - - - - - - - - - - - - 1-27<br />
TEST #1: BLOWN FUSES - - - - - - - - - - - - - - - - - - - - - - - - - - - - - - - - - - - - - - - - - - - - - - - - - - - - - - - 1-27<br />
TEST #2: AUXILIARY BOARD INPUT TERMINALS - - - - - - - - - - - - - - - - - - - - - - - - - - - - - - - - - - - - - - - - 1-27<br />
TEST #3: COOLING FAN - - - - - - - - - - - - - - - - - - - - - - - - - - - - - - - - - - - - - - - - - - - - - - - - - - - - - - - - 1-27<br />
TEST #4: LED OPERATION - - - - - - - - - - - - - - - - - - - - - - - - - - - - - - - - - - - - - - - - - - - - - - - - - - - - - - 1-27<br />
TEST #5: MICRO LINK® FIBER TEST - - - - - - - - - - - - - - - - - - - - - - - - - - - - - - - - - - - - - - - - - - - - - - - - 1-28<br />
CL 300 SURGICAL ILLUMINATOR DISASSEMBLY - - - - - - - - - - - - - - - - - - - - - - - - - - - - - - - - - - - - - - 1-29<br />
INTERNAL MODULE REMOVAL - - - - - - - - - - - - - - - - - - - - - - - - - - - - - - - - - - - - - - - - - - - - - - - - - - - - 1-29<br />
POWER SUPPLY REMOVAL - - - - - - - - - - - - - - - - - - - - - - - - - - - - - - - - - - - - - - - - - - - - - - - - - - - - - - 1-29<br />
PCBA (PART NO. A4-10670) REMOVAL - - - - - - - - - - - - - - - - - - - - - - - - - - - - - - - - - - - - - - - - - - - - - 1-30<br />
IGNITOR REMOVAL - - - - - - - - - - - - - - - - - - - - - - - - - - - - - - - - - - - - - - - - - - - - - - - - - - - - - - - - - - - - 1-31<br />
LINE FILTER REMOVAL - - - - - - - - - - - - - - - - - - - - - - - - - - - - - - - - - - - - - - - - - - - - - - - - - - - - - - - - - 1-31<br />
CHASSIS FAN REMOVAL - - - - - - - - - - - - - - - - - - - - - - - - - - - - - - - - - - - - - - - - - - - - - - - - - - - - - - - - 1-32<br />
POWER ENTRY MODULE REMOVAL - - - - - - - - - - - - - - - - - - - - - - - - - - - - - - - - - - - - - - - - - - - - - - - - - 1-33<br />
PLATFORM REMOVAL - - - - - - - - - - - - - - - - - - - - - - - - - - - - - - - - - - - - - - - - - - - - - - - - - - - - - - - - - - 1-34<br />
FRONT BEZEL REMOVAL - - - - - - - - - - - - - - - - - - - - - - - - - - - - - - - - - - - - - - - - - - - - - - - - - - - - - - - - 1-34<br />
BLOWER FAN REMOVAL - - - - - - - - - - - - - - - - - - - - - - - - - - - - - - - - - - - - - - - - - - - - - - - - - - - - - - - - 1-34<br />
LAMP CABLE REMOVAL - - - - - - - - - - - - - - - - - - - - - - - - - - - - - - - - - - - - - - - - - - - - - - - - - - - - - - - - 1-35<br />
CL 300 SURGICAL ILLUMINATOR REPAIR PARTS LIST - - - - - - - - - - - - - - - - - - - - - - - - - - - - - - - - - - - - 1-36
GLOSSARY OF TERMS - - - - - - - - - - - - - - - - - - - - - - - - - - - - - - - - - - - - - - - - - - - - - - - - - - - - - - - 1-42<br />
FINAL INSPECTION - - - - - - - - - - - - - - - - - - - - - - - - - - - - - - - - - - - - - - - - - - - - - - - - - - - - - - - - - - 1-43<br />
CL 100 SURGICAL ILLUMINATOR - - - - - - - - - - - - - - - - - - - - - - - - - - - - - - - - - - - - - - - - - - - - - - - - - - 1-43<br />
CL 300 SURGICAL ILLUMINATOR - - - - - - - - - - - - - - - - - - - - - - - - - - - - - - - - - - - - - - - - - - - - - - - - - - 1-43<br />
SPECIFICATIONS - - - - - - - - - - - - - - - - - - - - - - - - - - - - - - - - - - - - - - - - - - - - - - - - - - - - - - - - - - - 1-45<br />
THEORY OF OPERATION - - - - - - - - - - - - - - - - - - - - - - - - - - - - - - - - - - - - - - - - - - - - - - - - - - - - - - 1-46<br />
LIGHT SOURCE - - - - - - - - - - - - - - - - - - - - - - - - - - - - - - - - - - - - - - - - - - - - - - - - - - - - - - - - - - - - - - 1-46<br />
REPLACEMENT LAMPS - - - - - - - - - - - - - - - - - - - - - - - - - - - - - - - - - - - - - - - - - - - - - - - - - - - - - - - - - 1-46<br />
POWER SUPPLY WITH CONTROL ELECTRONICS - - - - - - - - - - - - - - - - - - - - - - - - - - - - - - - - - - - - - - - - - 1-46<br />
MULTI LINK PORT AND MULTI LINK EXPANSION PORT - - - - - - - - - - - - - - - - - - - - - - - - - - - - - - - - 1-46<br />
CL 100 SURGICAL ILLUMINATOR CIRCUIT DIAGRAM - - - - - - - - - - - - - - - - - - - - - - - - - - - - - - - - - - - 1-47<br />
CL 300 SURGICAL ILLUMINATOR CIRCUIT DIAGRAM - - - - - - - - - - - - - - - - - - - - - - - - - - - - - - - - - - - 1-48
GENERAL INFORMATION<br />
The <strong>Welch</strong> <strong>Allyn</strong> CL 100 Surgical Illuminator and the <strong>Welch</strong> <strong>Allyn</strong> CL 300 Surgical Illuminator provide brilliant<br />
illumination for the physician and surgeon. The lamps produce high intensity light nearly identical to the spectrum<br />
of sunlight. Special features include the ability to use either a Cogent Optics Micro Link® Fiber or a conventional<br />
fiber bundle.<br />
TECHNICAL HELP INFORMATION<br />
Only fully trained and properly equipped personnel should perform all service and repairs, using genuine<br />
replacement parts and correct procedures. Failure to do so will invalidate the product warranty and could<br />
compromise instrument safety and performance.<br />
Read and understand all safety warnings and service notes printed in this <strong>Service</strong> <strong>Manual</strong> and the Operating<br />
<strong>Manual</strong>s, part number LB-MAN-100W270W. If there is any doubt about any precaution or procedure, for phone<br />
help, or to order additional copies of the Operating <strong>Manual</strong>, contact:<br />
Customer <strong>Service</strong><br />
<strong>Welch</strong> <strong>Allyn</strong>, Inc.<br />
4619 Jordan Road, PO Box 187<br />
Skaneateles Falls, NY 13153-0187 USA<br />
Telephone: 1-315-685-2993 or<br />
1-866-801-8428<br />
FAX: 1-315-685-2999<br />
Techncial Assistance<br />
Telephone: 1-315-685-4233, 7:00am-3:00pm(EST)<br />
When calling, refer to the model number shown on the data label, found on the back of your Surgical Illuminator.<br />
Technical assistance is contained in “Troubleshooting” on page 11 of this manual.<br />
PN: LB-MAN-CLSERV Rev. A 1-1
SERVICE CENTERS<br />
If you have an equipment problem that you cannot resolve, you may call the <strong>Welch</strong> <strong>Allyn</strong> <strong>Service</strong> Center nearest<br />
you for assistance. Technical service support is available by telephone on normal business days at the phone<br />
numbers listed below. If you are advised to return a product to <strong>Welch</strong> <strong>Allyn</strong> for repair or routine maintenance,<br />
schedule the repair with the service center nearest you.<br />
BEFORE RETURNING A PRODUCT FOR REPAIR YOU MUST OBTAIN AUTHORIZATION FROM WELCH<br />
ALLYN. AN RMA (RETURN MERCHANDISE AUTHORIZATION) NUMBER WILL BE GIVEN TO YOU BY OUR<br />
SERVICE PERSONNEL. BE SURE TO NOTE THIS NUMBER ON THE OUTSIDE OF YOUR SHIPPING BOX.<br />
RETURNS WITHOUT AN RMA NUMBER WILL NOT BE ACCEPTED FOR DELIVERY.<br />
USA CUSTOMERS CANADA CUSTOMERS<br />
<strong>Welch</strong> <strong>Allyn</strong>, Inc., U.S.A. <strong>Welch</strong> <strong>Allyn</strong>, Ltd., Canada<br />
4619 Jordan Road 160 Matheson Blvd. E., Unit #2<br />
Skaneateles Falls, NY 13153-0187 Mississauga, Canada L4Z 1V4<br />
Tel: 1-315-685-2993 Tel: 905-890-0004<br />
Fax: 315-685-2999 Fax: 905-890-0008<br />
INTERNATIONAL CUSTOMERS<br />
<strong>Welch</strong> <strong>Allyn</strong>, GmbH <strong>Welch</strong> <strong>Allyn</strong>, Ltd., Singapore<br />
Zollerstrasse 2-4 300 Beach Road, #25-08<br />
72417 Jungingen, Germany, The Concourse<br />
Tel: 011-49-7477-9271-73 Singapore 199589<br />
Fax: 011-49-7477-9271-93 Tel: 011-65-291-0882<br />
Fax: 011-65-291-5780<br />
<strong>Welch</strong> <strong>Allyn</strong>, Ltd., Australia <strong>Welch</strong> <strong>Allyn</strong>, China<br />
Metro Center Room 708, 227 Huang Pi Road, North<br />
Unit 5 38 South Street Central Plaza<br />
Rydalmere, NSW 2116, Australia Shanghai 200003<br />
Tel: 011-61-294-183-155 P.R. China<br />
Fax: 011-61-294-183-650 Tel: 011-86-21-63279631<br />
Fax: 011-86-21-63279632<br />
<strong>Welch</strong> <strong>Allyn</strong>, Japan<br />
Bon Marusan 8F, 3-5-1 Kanda<br />
Jinbo-Cho, Chiyoda-Ku<br />
Tokyo 101-0051<br />
Japan<br />
Tel: 011-813-5212-7391<br />
Fax: 011-813-3261-7372<br />
LATIN AMERICAN CUSTOMERS<br />
MD International<br />
11300 N.W. 41st Street<br />
Miami, FL 33178 USA<br />
Tel: 1-305-669-9003<br />
Fax: 1-305-669-1971<br />
1-2 WELCH ALLYN
WARRANTY<br />
<strong>Welch</strong> <strong>Allyn</strong> warrants the CL 300 or CL 100 Surgical Illuminator when new, to be free of defects in material and<br />
workmanship and to perform in accordance with manufacturer’s specifications when subject to normal use and<br />
service for a period of one year from date of purchase from <strong>Welch</strong> <strong>Allyn</strong> or an authorized agent. <strong>Welch</strong> <strong>Allyn</strong> will<br />
either repair or replace any components found to be defective or at variance from manufacturer’s specifications<br />
within this time at no cost to the customer. It shall be the purchaser’s responsibility to return the instrument to the<br />
authorized distributor, agent, or service representative.<br />
<strong>Welch</strong> <strong>Allyn</strong> warrants the lamp to be free of defects in materials and workmanship for a period of 6 months from<br />
the date of purchase. This warranty does not cover the lamp for breakage or failure due to tampering, misuse,<br />
neglect, accidents, improper installation, modification, shipping, or from improper maintenance, service, or<br />
cleaning procedures.<br />
This warranty is void if the instrument is not used in accordance with manufacturer’s recommendations or if<br />
required service is performed by other than <strong>Welch</strong> <strong>Allyn</strong> or an authorized agent. Purchase date determines<br />
warranty requirements. No other express or implied warranty is given.<br />
PN: LB-MAN-CLSERV Rev. A 1-3
SYSTEM SYMBOL DESCRIPTIONS<br />
5A, 250V<br />
-20 C<br />
o<br />
Attention: Read Operating <strong>Manual</strong> for Warnings, Precautions, and Instructions for Use<br />
Caution – Hot Surface Area<br />
Replace Fuse as Marked<br />
250V, 5A<br />
WARNING – High voltage is present<br />
Symbol on power switch indicates power is off when pressed<br />
~ Symbol in electrical rating signifies AC mains power<br />
+49 C<br />
o<br />
95%<br />
MAX<br />
IPXØ<br />
High Intensity Light<br />
Protective Earth Ground<br />
Storage Temperature Range<br />
Maximum Storage Humidity<br />
Type BF equipment, Class I<br />
Not protected against the ingress of water<br />
Manufactured in accordance with the relevant regulations and technical requirements of<br />
Japan.<br />
1-4 WELCH ALLYN
WARNINGS AND PRECAUTIONS<br />
WARNING<br />
Keep out of reach of patient.<br />
Not suitable for use in the presence of a flammable anesthetic mixture with air or with oxygen or<br />
nitrous oxide.<br />
Disconnect from the patient before the discharge of a cardiac defibrillator.<br />
ELECTRICAL SHOCK HAZARD. Do not remove the top cover.<br />
Routinely examine the power cord and plug. Do not use if inspection reveals damage. Replace only<br />
with approved hospital grade power cord and plug with appropriate electrical rating.<br />
Do not place the exposed distal end of the Micro Link® Fiber or fiber bundle attached to either a<br />
headlight or other accessory. Failure to observe these precautions may result in burns to skin,<br />
clothing, or other material inadvertently placed in front of the Micro Link® Fiber or fiber bundle.<br />
High energy radiated light guided through endoscopes may give rise to high temperatures in front of<br />
the light outlet and to the tip of the instrument.<br />
Use care not to point the distal end of the fiber or headlight directly at the eye when unit is operating.<br />
The brilliant light output from the unit can cause eye injury per RP-27.1 (1994-1995 Threshold Limit<br />
Values for Chemical Substances and Physical Agent and Biological Exposure Indices, Final draft March<br />
3,1995).<br />
Applied parts attached to this equipment should be approved 1) to the Medical Device Directive (93/<br />
42/EEC) (Europe), 2) approved by a Nationally Recognized Testing Laboratory (United States), and 3) by<br />
a Standards Council of Canada accredited laboratory (Canada) to the appropriate medical standards.<br />
The use of non-approved components may compromise safety.<br />
During life threatening procedures, it is recommended to have a backup Light source and an additional<br />
replacement lamp.<br />
The light source lamps are highly pressurized, any damage or improper handling may cause premature<br />
failure or explosion of the lamp.<br />
The light source lamps are hot immediately after use, allow the lamp to cool for five (5) minutes after<br />
operation. Temperatures peak in the light Sources approximately 60 seconds after the Light Source is<br />
powered off.<br />
CAUTION<br />
Do not place anything on top of the Light Source. Do not store liquid above the Light Source.<br />
Clogged or blocked vents may cause Light Source overheating and will result in thermal shutdown.<br />
Keep the Light Source clear of any obstructions.<br />
Fully close the attenuator before turning on the Light Source or when operational but not in use.<br />
PN: LB-MAN-CLSERV Rev. A 1-5
OPERATING INSTRUCTIONS<br />
CONTROLS<br />
POWER ON/OFF SWITCH<br />
Plug hospital grade Power Cord into a grounded “Hospital Grade” or “Hospital Use” receptacle to ensure<br />
grounding reliability.<br />
Press Main Power Switch ON (I pressed in).<br />
The lamp will continue to operate until the power switch is moved to the OFF position (O pressed in). If the lamp<br />
cannot be started or stops operating see Section 8: Troubleshooting.<br />
NOTE:<br />
FIBER PORT<br />
It is normal to hear clicking (10 pulses or less) before the lamp is started.<br />
To insure proper operation, wait thirty (30) seconds between on/off cycles.<br />
To increase the versatility and applicability of use, the Light Sources are designed to use either a Micro Link ® Fiber<br />
or a fiber bundle via the Multi Link Port and Multi Link Expansion Port.<br />
For cables with no Multi Link Expansion Port required:<br />
Cable Compatibility Table<br />
Multi Link Port Multi Link Expansion Port<br />
Micro Link ® Fiber<br />
Karl Storz ACMI<br />
Olympus Wolf, Dyonics<br />
1. Close the light attenuator or turn the Light Source off.<br />
1-6 WELCH ALLYN
2. Connect the instrument end of the Micro Link ® Fiber or fiber bundle to the instrument.<br />
3. Insert, until fully engaged (snap sound), the Light Source end into the Multi Link Port.<br />
4. Turn on Light Source. Adjust the light attenuator to the required illumination level.<br />
MULTI LINK EXPANSION PORT - INSTALLATION AND USE (OPTIONAL)<br />
CAUTION: The Multi Link Expansion Port contains optical elements that can become damaged if dropped<br />
or abused.<br />
NOTE: The Multi Link Expansion Port must be fully engaged into the Light Source before inserting Fiber<br />
Bundle.<br />
To use the Multi Link Expansion Port perform the following operations:<br />
1. Close the light attenuator or turn the Light Source off.<br />
2. Remove, if any, Micro Link ® Fiber or fiber bundle from the Multi Link Port.<br />
3. Insert the Multi Link Expansion Port, press and turn clockwise until it locks into place.<br />
4. Connect the fiber bundle to the instrument.<br />
5. Insert, until fully engaged, the Light Source end of the fiber bundle into the Multi Link Expansion Port.<br />
6. Turn on Light Source. Adjust the light attenuator to the required illumination level.<br />
To remove the Multi Link Expansion Port perform the following operations:<br />
1. Turn the Light Source off.<br />
2. Remove the fiber bundle.<br />
3. Turn Multi Link Expansion Port counter-clockwise until unlocked and remove.<br />
LIGHT ATTENUATION CONTROL<br />
Moving the illumination wheel up + increases light output. Moving the wheel down — reduces light output.<br />
LAMP LIFE INDICATOR<br />
A yellow indicator light located on the console will light when there is approximately 50 hours<br />
remaining on the lamp. A new Replacement Lamp should be available at this point. Once the<br />
remaining hours have been exhausted the lamp will turn off.<br />
PN: LB-MAN-CLSERV Rev. A 1-7
PRINCIPLES OF OPERATION<br />
LIGHT SOURCE<br />
The Surgical Illuminators consist of an enclosure housing a high intensity lamp, proprietary optical platform, user<br />
controls and indicators, and a power supply with control electronics. Cooling is provided via internal fans. In the<br />
event that the fan(s) malfunctions or if adequate air flow is blocked and/or the internal temperature of the device<br />
exceeds the engineering specifications, an internal thermal protection mechanism will automatically shut off<br />
power to the lamp. After cooling, the Light Sources may be restarted.<br />
REPLACEMENT LAMPS<br />
The lamps are high pressure, high intensity and long life Light Sources. They are mounted into a patented lamp<br />
fixture which is designed to allow both easy and rapid exchange in the field as well as ensuring precise alignment<br />
to the optical platform.<br />
POWER SUPPLY WITH CONTROL ELECTRONICS<br />
All the electricity to the Light Source is controlled through the ON/OFF switch. Power to energize and operate the<br />
lamp, fans, and control circuitry is provided by a custom designed, wattage regulated, switching power supply.<br />
The operational life of the lamp and lamp life indicator are controlled by a lamp voltage monitoring circuit.<br />
MULTI LINK PORT AND MULTI LINK EXPANSION PORT<br />
Internal, to both the Multi Link Port and Multi Link Expansion Port, are patented coupling optics and mechanics<br />
designed to produce the highest output powers. Internal to the Light Sources are fans and heatsinks designed to<br />
reduce temperatures at the optical coupling joints thereby minimizing the possibility of damage to Micro Link ®<br />
Fiber and fiber bundles.<br />
1-8 WELCH ALLYN
SERVICE<br />
CLEANING<br />
1. Prior to cleaning, turn the power switch OFF, and disconnect power source from both the Light Source and<br />
the wall outlet.<br />
2. Clean the external surfaces by wiping with a cloth dampened with 10% bleach solution. DO NOT IMMERSE.<br />
Routinely inspect and clean all air intakes / out flows at the rear of the chassis for lint or other debris.<br />
Follow the manufacturer’s instructions when Cleaning the fiber bundles or accessories used with the light<br />
source.<br />
3. Wipe the power cord with a cloth dampened with 10% bleach solution and water. DO NOT IMMERSE. DO<br />
NOT RECONNECT WET.<br />
4. DO NOT wipe down any lenses or windows.<br />
5. DO NOT plug the power source into a wall outlet until it is thoroughly dry.<br />
SURGICAL ILLUMINATOR<br />
The console may be cleaned using a clean soft cloth with the following cleaning agents:<br />
Enzymatic Solution (Enzol)<br />
Isopropyl Alcohol<br />
Hydrogen Peroxide 3% USP<br />
2% Glutaraldehyde Solution<br />
Soap and Water<br />
10% bleach solution and water<br />
CAUTION: Do not splash cleaning agents into any openings, seams or electrical components.<br />
MULTI LINK EXPANSION PORT<br />
The outside surfaces may be cleaned with a soft cloth using the following:<br />
Isopropyl Alcohol<br />
Soap and Water<br />
The glass surfaces may be cleaned by the following methods:<br />
A cotton swab moistened with Isopropyl Alcohol<br />
Blow with dry compressed air<br />
NOTE: Use care in cleaning the optical surfaces of the Multi Link Expansion Port to prevent scratches.<br />
PN: LB-MAN-CLSERV Rev. A 1-9
TOOLS REQUIRED<br />
Slotted screwdriver, less than 6” long<br />
#1 Phillips Screwdriver, less than 6” long<br />
#2 Phillips Screwdriver, less than 6” long<br />
Open end wrench set - English or 5/16”<br />
Needle nose pliers<br />
Nut Driver Set - English or 3/16”, 1/4”, 5/16”<br />
Nut Driver Set - Metric or 10mm<br />
Deep well socket set and wrench (2) - CL 100 Surgical Illuminator<br />
Non-conductive pot adjusting tool - CL 100 Surgical Illuminator<br />
Light output power meter with head. Coherent Lasermate 1D or equivalent (meter), Head Model 1d10 - CL<br />
100 Surgical Illuminator<br />
Light output meter - Labsphere Model FIMS-400P or equivalent that measures in lumens - CL 300 Surgical Illuminator<br />
Calibrated RMS Digital Multimeter (DMM)<br />
1-10 WELCH ALLYN
TROUBLESHOOTING<br />
CL 100 SURGICAL ILLUMINATOR<br />
Symptom Cause Remedy<br />
Lamp fails to start and<br />
fans are not running.<br />
Lamp fails to start and<br />
fans are running.<br />
Lamp shuts off after<br />
operating for a few<br />
minutes and restarts after<br />
cooling.<br />
Indicator light on and<br />
lamp shuts off<br />
Replacement Lamp will<br />
not seat into Light Source<br />
No power to unit Check power supply cord and outlet<br />
Line voltage is
Symptom Cause Remedy<br />
Low light output Damaged Micro Link ® Fiber<br />
or fiber bundle<br />
Fiber bundle will not<br />
install in Light Source<br />
Audible “clicking” or<br />
arcing sound during the<br />
lamp ignition process<br />
CL 100 SURGICAL ILLUMINATOR DISASSEMBLY<br />
NOTE: For all tests, remove 9 screws from top cover.<br />
NOTE: Do not operate unit with the top cover removed for more than 5 minutes or the unit will overheat.<br />
TEST #1: BLOWN FUSES<br />
Fiber bundle not connected<br />
correctly.<br />
Check ends of Micro Link ® Fiber or fiber bundle<br />
for damage. Replace with new Micro Link ® Fiber<br />
or fiber bundle. Go to “Test #5: Micro Link® Fiber<br />
Test” on page 13.<br />
Re-insert fiber bundle correctly.<br />
Lamp near end of usable life Install a 100W replacement lamp, model 90133.<br />
Filter assembly on platform<br />
contaminated.<br />
Mirrors dirty. Clean mirrors.<br />
Broken mirrors. Replace platform.<br />
Misaligned mirrors (possible<br />
if unit suffers damage)<br />
Dirty or damaged internal<br />
module.<br />
Clean or replace filter assembly as necessary.<br />
If above steps fail to improve output, replace and<br />
retest platform.<br />
Inspect, clean, and replace if necessary.<br />
Not a compatible fiber bundle See “Operating Instructions” on page 6<br />
Use compatible bundle design<br />
Install/Remove Multi Link<br />
Expansion Port<br />
Multi Link Expansion Port<br />
installed<br />
No problem Normal operation<br />
See “Operating Instructions” on page 6<br />
Remove Multi Link Expansion Port<br />
The purpose of this test is to determine the source of a short circuit causing fuses to blow. Refer to the Block<br />
Diagram on page 47.<br />
Replace and retest the fuses. If unit functions normally, inspect fuses that were blown. If solder is melting out of<br />
the end of the fuse and the glass is not blackened, remove and replace the power entry module. This fault occurs<br />
when the prong of the fuse holder makes poor contact with the fuse. The prong will look discolored and pitted<br />
where it contacts the fuse.<br />
1-12 WELCH ALLYN
If the fuse blows again, inspect the power supply and the wiring for damaged or burnt components. Remove and<br />
replace any visually defective components.<br />
If visual inspection does not yield any evidence of damage, remove and replace power supply and retest.<br />
TEST #2: 100 WATT POWER SUPPLY<br />
Verify operating voltage is present on power supply input terminals. Connect meter and set to volts AC to J1 and<br />
J2 terminals. When power is applied to the unit, verify the operating voltage is displayed on the meter. NOTE:<br />
Verify the lamp access door is closed.<br />
If voltage is present, replace and retest power supply.<br />
If voltage is not present, inspect the fuses, wiring, power entry module, line filter, and interlock switch.<br />
TEST #3: COOLING FAN<br />
The purpose of this test is to verify the operation of the lamp cooling fan.<br />
Visually inspect for a broken fan. When the unit is powered up, look for a fan not turning. If found, remove top<br />
cover and inspect fan. Replace any broken fans.<br />
If fan is inoperative and not broken, measure using DMM set for Volts DC for 12VDC on fan connector.<br />
If voltage is present, replace and retest fan.<br />
If voltage is not present, replace and retest power supply.<br />
TEST #4: LED/OVERTEMP SWITCH<br />
The purpose of this test is to verify proper operation of the LED.<br />
Visually inspect that LED/overtemp switch harness is connected to the power supply. Verify continuity of wiring<br />
and LED with DMM set to the Diode Scale. DMM should read ≈ .7VDC.<br />
If the DMM reading does not match, replace and retest the LED harness.<br />
If DMM reading matches above, replace and retest the power supply.<br />
TEST #5: MICRO LINK® FIBER TEST<br />
The purpose of this test is to verify the operation of the Micro Link® Fiber.<br />
With the illuminator on, connect the fiber and the headlight. Over a distance of at least five feet, adjust the spot<br />
diameter to the largest size.<br />
If the intensity of light is not consistent throughout the light spot and rotating the distal end connector does<br />
not cause the shape to change, the headlight is the most likely cause of the fault.<br />
If the intensity is not consistent with alternating light and dark rings present, the fiber is broken at the distal<br />
end.<br />
Over the same distance, adjust the headlight to the smallest diameter spot. At this adjustment, the headlight is<br />
focused. If any spot irregularities are present, hold the headlight steady while rotating the distal end (black)<br />
connector.<br />
PN: LB-MAN-CLSERV Rev. A 1-13
If the location of the defects move, remove the fiber, clean the end with distilled water, reconnect the unit, and<br />
test. Replace the fiber if defects are still present.<br />
If the location of the defects remain stationary, the fault is within the headlight.<br />
TEST #6: POWER SUPPLY CALIBRATION<br />
The purpose of this test is to verify the operation of the power supply.<br />
Apply power to unit, once the lamp lights, connect the DMM (set to volts DC) to the lamp cable wires on the<br />
power supply. The positive lead of DMM to the HV+ terminal on the power supply and the negative lead of the<br />
DMM to the Lamp Return - terminal on the power supply. WARNING: Do not connect DMM to wires prior to<br />
turning the unit on. When the lamp ignites, there is approximately 25kV on the terminals which could damage the<br />
DMM. Monitor the voltage displayed on the fluke when the LED first turns on. Verify the voltage is between 17.00<br />
and 18.00v.<br />
If the voltage is less than 17.00VDC, remove and replace the power supply or return the unit for recalibration.<br />
If the voltage is between 17.00VDC and 18VDC, remove and replace the lamp fixture.<br />
If the voltage is more than 18.00DC, contact the <strong>Welch</strong> <strong>Allyn</strong> Technical <strong>Service</strong>s Department at<br />
1-315-685-2993 or 1-315-685-4233, 7:00am-3:00pm(EST).<br />
1-14 WELCH ALLYN
CL 100 SURGICAL ILLUMINATOR DISASSEMBLY<br />
POWER SUPPLY REMOVAL<br />
1. Remove the 9 screws securing the top cover and remove the cover.<br />
2. Remove the 3 screws from the bottom side of the back panel.<br />
3. Disconnect wires from J1 and J2 on the power supply. Disconnect fan connector from J4.<br />
4. Remove the 2 screws from the bottom chassis, securing the center baffle (see figure below).<br />
Screws<br />
securing center<br />
baffle to bottom<br />
chassis<br />
5. Remove the nut that secures the center baffle to the back panel.<br />
6. Pull back panel out and move to the platform side of the chassis to gain access to the back of the power<br />
supply.<br />
PN: LB-MAN-CLSERV Rev. A 1-15
7. Remove the two white lamp cable wires and disconnect the 4 wire connector. Remove the supply and baffle.<br />
8. Remove the 4 screws from the corners of the power supply. Remove supply.<br />
9. Reinstallation is the reverse process with the brown wire going to J1 and the blue wire going to J2. The longer<br />
of the two lamp cable wires attaches to the (+) lamp HV terminal and the shorter wire attaches to the (-) lamp<br />
return. Refer to “Photo 8” on page 24 to connect the HV+ and lamp return - terminals as shown.<br />
PLATFORM REMOVAL<br />
1. Remove 9 screws securing top cover and remove the cover. Remove the 5 screws securing the front bezel to<br />
the bottom chassis and pull front panel out from chassis. Remove the lamp from the platform.<br />
2. Remove the 2 screws from the fan deflector assembly.<br />
3. Remove the 4 screws from the corners of the platform.<br />
4. As necessary, remove the 2 screws from the filter assembly.<br />
5. Remove the platform. Reinstallation is the reverse process. Install the front bezel and check for proper<br />
movement of attenuator. Loosen platform screws and reposition as necessary.<br />
FRONT BEZEL REMOVAL<br />
1. Remove 9 screws securing top cover and remove the cover. Remove the 5 screws securing the front bezel to<br />
the bottom chassis and pull front panel out from chassis.<br />
2. Remove wires from power switch noting wire locations. Push on switch from the inside to remove the switch<br />
from the bezel.<br />
3. Using a sharp knife, remove the black RTV from the LED wires where it mounts to the front bezel. Once<br />
removed, apply acetone to the LED and the front bezel to weaken the glue bond and remove the LED from the<br />
front bezel.<br />
4. Installation is the reverse process. To attach the LED, ensure both panel and LED surfaces are clean. Use<br />
superglue, loctite 430 to mount the LED. Use RTV sealant Dow Corning 737 to seal the LED, preventing any<br />
light from the illuminator passing through.<br />
FAN DEFLECTOR REMOVAL<br />
1. Remove 9 screws securing top cover and remove the cover.<br />
2. Remove the 5 screws securing the front bezel to the bottom chassis and pull front panel out from chassis.<br />
3. Remove the overtemp switch from the fan deflector.<br />
4. Carefully remove the heat shrink tubing from the fan wiring harness.<br />
5. Disconnect the connector and remove it from the power supply.<br />
6. Installation is the reverse process with installing new heat shrink tubing over fan connector.<br />
1-16 WELCH ALLYN
CHASSIS FAN REMOVAL<br />
1. Remove 9 screws securing top cover and remove the cover. Remove 4 screws securing the fan to the back<br />
panel.<br />
2. Remove heat shrink tubing from the fan connector. Disconnect and remove the wire ties from the harness at<br />
the platform mounts. Remove the fan.<br />
3. Installation is the reverse process.<br />
LED/OVERTEMP HARNESS REMOVAL<br />
1. Remove 9 screws securing top cover and remove the cover. Remove the 5 screws securing the front bezel to<br />
the bottom chassis and pull front panel out from chassis.<br />
2. Remove the overtemp switch from the fan deflector assembly. Remove the wire tie from the overtemp switch<br />
harness at the platform.<br />
3. Using a sharp knife, remove the black RTV from the LED wires where it mounts to the front bezel. Once<br />
removed, apply acetone to the LED and the front bezel to weaken the glue bond and remove the LED from the<br />
front bezel.<br />
4. Remove the 3 wire ties and remove the harness.<br />
5. Installation is the reverse process. To attach the LED, ensure both the panel and the LED surfaces are clean.<br />
Use superglue (loctite 430) to mount the LED. Use RTV sealant (Dow Corning 737) to seal the LED preventing<br />
any light from the illuminator to pass through. See figure below for routing of wires.<br />
LAMP CABLE REMOVAL<br />
1. Remove 9 screws securing the top cover and remove the cover. Remove the 3 screws from the bottom of the<br />
back panel. Remove the nut securing center baffle to the back panel. Slide back panel to the side.<br />
PN: LB-MAN-CLSERV Rev. A 1-17
2. Remove the nut from the wire tie clamp securing the lamp cable to the bottom chassis. Remove the lamp<br />
cable from the power supply and remove the cable.<br />
3. Installation is the reverse process with the longer cable wire going to the HV+ terminal on the power supply<br />
and connecting the shorter wire to the Lamp Return - terminal. View the unit from the rear and compare the<br />
HV+ and the Lamp Return - are connected as shown in “Photo 8” on page 24.<br />
INTERLOCK SWITCH REMOVAL<br />
1. Remove the 9 screws securing the top cover and remove the cover.<br />
2. Disconnect the wires from the interlock switch.<br />
3. Remove the two nuts from the interlock switch and remove.<br />
4. Installation is the reverse process, connecting the wires to the terminals marked COM and NO.<br />
POWER ENTRY MODULE REMOVAL<br />
1. Remove 9 screws securing the top cover and remove the cover. Remove the 3 screws from the bottom of the<br />
back panel. Remove the nut securing center baffle to the back panel.<br />
2. Remove the 4 screws securing the chassis fan. Remove the wires from PEM.<br />
3. Remove the two nuts securing the PEM to the back panel. Remove the PEM.<br />
4. Installation is the reverse process with the following requirements:<br />
The star washer is located between the PEM flange and the painted surface side of the back panel.<br />
The flat washer is installed on the other side of the panel and is secured with the nut.<br />
Rotate the screw so that you can later install the power cord retainer.<br />
The brown wire is connected to the terminal marked as P on the PEM. The blue wire is connected to the<br />
terminal marked as N on the PEM. The green wire from the back panel is connected to the ground terminal<br />
on the PEM.<br />
1-18 WELCH ALLYN
CL 100 SURGICAL ILLUMINATOR REPAIR PARTS LIST<br />
Part Number Description Photo # Bubble # Quantity<br />
90133 100W REPLACEMENT LAMP 1<br />
LB-MAN-100W270W MANUAL, 100W/270W SOLARTEC 1<br />
A0-10756 PANEL, BOTTOM, 270W 1 1 1<br />
A0-10768 LABEL, WARNING, ILLUMINATORS 1 2 1<br />
A0-10714 SCREW, PAINTED, XLS 1 3 12<br />
101-0033 SCREW, #8-32 X 3/8, PHPS 1 4 4<br />
101-0022 SCREW, #6-32 X 1/4, PHSS 1 5 2<br />
016-0005 XLS, BUMPER, RUBBER, 5/8 1 6 4<br />
101-0068 SEMS, #6-32 X 5/16 PHPS 1 7 8<br />
A0-10683 COVER, TOP, XLS CHASSIS 2 8 1<br />
A0-10727 KAPTON TAPE, TOP COVER, XLS 2 9 1<br />
A0-10828 PANEL, FRONT, SOLARTEC 100W 3 10 1<br />
U50087 100W INTERNAL MODULE ASSEMBLY 3 11 1<br />
U50081 100W FAN DEFLECTOR ASSEMBLY 3 12 1<br />
U50085 100W FILTER ASSEMBLY 3 13 1<br />
U50075 100W ALIGNED PLATFORM 3 14 1<br />
A0-10711 FAN, CHASSIS, XLS 3 15 1<br />
A0-10856 PANEL, BACK WAVE PATTERN 3 16 1<br />
213-0017<br />
POWER ENTRY MODULE/LINE FILTER,<br />
FUSED<br />
3 17 1<br />
102-0012 KEPS, #6-32, W/CONICAL WASHER 3 18 4<br />
A4-10650 WIRE HARNESS, ON/OFF, 100W 3 19 1<br />
A4-10647 POWER SUPPLY, XLS 4 20 1<br />
A0-10746 OVERTEMP/LED SWITCH ASSEMBLY 4 21 1<br />
A0-10712 BAFFLE, CENTER, XLS 4 22 1<br />
A0-10843 FOAM, IGNITOR 4 40 1<br />
101-0062 SEMS, #6-32 X 9/16 PHPS 5 23 4<br />
207-0007 GUARD, FAN, 92MM 5 24 1<br />
105-0008 CORD, RETAINING CLAMP 5 25 1<br />
106-0011 STANDOFF, #8, .75L 5 26 4<br />
208-0016 FUSE, 5A SHEET III 6 27 2<br />
A4-10465 WIRE, PEM TO DIN 6 28 1<br />
101-0073 SCREW, #8-32 X 3/4”, PHPS 6 29 4<br />
010-0016 TUBING, HEAT SHRINK 3/4” BLACK 6 30 2.25”<br />
101-0061 SCREW, #4-40X1/4, PHPS 6 31 4<br />
101-0038 PLUG, 6/25 7 32 1<br />
PN: LB-MAN-CLSERV Rev. A 1-19
Part Number Description Photo # Bubble # Quantity<br />
104-0006 WASHER, COLOR COATED 7 33 1<br />
104-0008 WASHER, SERRATED 7 34 1<br />
104-0007 WASHER, FLAT 7 35 1<br />
102-0001 NUT, HEX 7 36 1<br />
104-0019 WASHER, #4 EXTERNAL TOOTH 7 37 2<br />
A0-10864 CABLE, LAMP, 30K 8 38 1<br />
112-0001 CABLE TIE, SMALL 4” 8 39 8<br />
1-20 WELCH ALLYN
PHOTO 1<br />
PHOTO 2<br />
9<br />
7<br />
5<br />
6<br />
PN: LB-MAN-CLSERV Rev. A 1-21<br />
3<br />
1<br />
2<br />
4<br />
8
PHOTO 3<br />
PHOTO 4<br />
19<br />
12<br />
10<br />
11<br />
7<br />
40<br />
22<br />
13<br />
20<br />
14 18 17 15<br />
1-22 WELCH ALLYN<br />
31<br />
21<br />
19<br />
16
PHOTO 5<br />
PHOTO 6<br />
23<br />
24<br />
26<br />
25<br />
PN: LB-MAN-CLSERV Rev. A 1-23<br />
18<br />
27 28<br />
29<br />
31<br />
30
PHOTO 7<br />
PHOTO 8<br />
36<br />
35<br />
34<br />
37<br />
1-24 WELCH ALLYN<br />
38<br />
32<br />
33<br />
39
CL 300 SURGICAL ILLUMINATOR<br />
Symptom Cause Remedy<br />
Lamp fails to start and<br />
fans are not running.<br />
Lamp fails to start and<br />
fans are running.<br />
Lamp shuts off after<br />
operating for a few<br />
minutes and restarts<br />
after cooling.<br />
Indicator light on and<br />
lamp shuts off<br />
Replacement Lamp will<br />
not seat into Light Source<br />
No power to unit Check power supply cord and outlet<br />
Line voltage is
Symptom Cause Remedy<br />
Low light output Filter assembly on platform<br />
contaminated.<br />
Fiber bundle will not<br />
install in Light Source<br />
Audible “clicking” or<br />
arcing sound during the<br />
lamp ignition process<br />
Mirrors are dirty. Clean the mirrors.<br />
Broken mirrors. Replace platform.<br />
Misaligned mirrors (possible<br />
if unit suffers damage)<br />
Damaged Micro Link ® Fiber<br />
or fiber bundle<br />
Fiber bundle not connected<br />
correctly.<br />
Clean or replace filters as necessary.<br />
If above steps fail to improve output, replace and<br />
retest platform.<br />
Check ends of Micro Link ® Fiber or fiber bundle<br />
for damage. Replace with new Micro Link ® Fiber<br />
or fiber bundle. Go to “Test #5: Micro Link® Fiber<br />
Test” on page 28.<br />
Re-insert fiber bundle correctly.<br />
Lamp near end of usable life Install a 270W replacement lamp, model 90125.<br />
Not a compatible fiber bundle See “Operating Instructions” on page 6<br />
Use compatible bundle design<br />
Install/Remove Multi Link<br />
Expansion Port<br />
See “Operating Instructions” on page 6<br />
Multi Link Expansion Port Remove Multi Link Expansion Port<br />
No problem Normal operation<br />
1-26 WELCH ALLYN
CL 300 SURGICAL ILLUMINATOR DISASSEMBLY<br />
NOTE: For all tests, remove 9 screws from top cover.<br />
NOTE: Do not operate unit with the top cover removed for more than 5 minutes or the unit will overheat.<br />
TEST #1: BLOWN FUSES<br />
The purpose of this test is to determine the source of a short circuit causing fuses to blow. Refer to the Block<br />
Diagram on page 48.<br />
Replace and retest the fuses. If unit functions normally, inspect fuses that were blown. If solder is melting out of<br />
the end of the fuse and the glass is not blackened, remove and replace the power entry module. This fault occurs<br />
when the prong of the fuse holder makes poor contact with the fuse. The prong will look discolored and pitted<br />
where it contacts the fuse.<br />
If visual inspection does not yield any evidence of damage, remove J2 and J3 from auxiliary board (blue and brown<br />
wires that connect PCBA auxiliary board to the power supply. Replace fuses and turn system on. Remove power<br />
and inspect fuses.<br />
If the fuses are blown, remove and replace the PCBA auxiliary board (part no. A4-10670).<br />
If fuses are fine, remove and replace the power supply.<br />
TEST #2: AUXILIARY BOARD INPUT TERMINALS<br />
Verify operating voltage is present on auxiliary board input terminals. Connect meter and set to volts AC to J1 and<br />
J4 terminals. When power is applied to the unit the operating voltage, verify it is displayed on the meter. NOTE:<br />
Verify the lamp access door is closed.<br />
If voltage is present, replace and retest auxiliary board.<br />
If voltage is not present, inspect the fuses, wiring, power entry module, line filter, and interlock switch.<br />
NOTE: If lamp is not on and voltage is present, check if the power supply is defective.<br />
TEST #3: COOLING FAN<br />
The purpose of this test is to verify the operation of the lamp cooling fan.<br />
Visually inspect for a broken fan. When the unit is powered up, look for a fan not turning. If found, remove top<br />
cover and inspect fan. Replace any broken fans.<br />
If fan is inoperative and not broken, measure using DMM set for Volts DC for 12VDC on fan connectors, J11 is for<br />
the lamp fan (exhaust) and J10 for the power supply (intake).<br />
If voltage is present, replace and retest fan.<br />
If voltage is not present, replace and re-test auxiliary board.<br />
TEST #4: LED OPERATION<br />
The purpose of this test is to verify proper operation of the LED.<br />
Visually inspect that J1 is connected to the auxiliary board. Verify continuity of wiring and LED with DMM set to<br />
the Diode Scale. DMM should read ≈ .7VDC.<br />
PN: LB-MAN-CLSERV Rev. A 1-27
If the DMM reading does not match, replace and retest the LED harness.<br />
If DMM reading matches above, replace and retest the auxiliary board.<br />
TEST #5: MICRO LINK® FIBER TEST<br />
The purpose of this test is to verify the operation of the Micro Link® Fiber.<br />
With the illuminator on, connect the fiber and the headlight. Over a distance of at least five feet, adjust the spot<br />
diameter to the largest size.<br />
If the intensity of light is not consistent throughout the light spot and rotating the distal end connector does<br />
not cause the shape to change, the headlight is the most likely cause of the fault.<br />
If the intensity is not consistent with alternating light and dark rings are present, the broken fiber is broken at<br />
the distal end.<br />
Over the same distance, adjust the headlight to the smallest diameter spot. At this adjustment, the headlight is<br />
focused. If any spot irregularities are present, hold the headlight steady while rotating the distal end (black)<br />
connector.<br />
If the location of the defects move, remove the fiber, clean the end with distilled water, reconnect the unit, and<br />
test. Replace the fiber if defects are still present.<br />
If the location of the defects remain stationary, the fault is within the headlight.<br />
1-28 WELCH ALLYN
CL 300 SURGICAL ILLUMINATOR DISASSEMBLY<br />
NOTE: All servicing requires removal of the top cover. Remove the 9 screws and remove the cover.<br />
INTERNAL MODULE REMOVAL<br />
1. Remove the top cover.<br />
2. Remove the front bezel by removing the 5 screws securing the front bezel to the bottom chassis.<br />
3. Pull the internal module out of the platform assembly.<br />
4. Installation is the reverse process with the flat edges on the gray portion of the internal module aligned so it<br />
will fit into the recessed area of the front panel and the black dot in the gray plastic to the bottom right.<br />
POWER SUPPLY REMOVAL<br />
1. Remove the top cover.<br />
2. Remove the front bezel by removing the 5 screws securing the front bezel to the bottom chassis.<br />
3. Remove the air duct strap and air duct.<br />
4. Remove the 5 wires from the PCBA auxiliary board (part no. A4-10670).<br />
5. Remove the 7 wires from the power supply.<br />
NOTE: Pull or pry the wires straight up. Rocking the wire to remove it from the power supply may damage the<br />
terminal’s solder joint on the power supply board.<br />
Pull or pry wire terminal straight up.<br />
Do not rock to remove.<br />
Use bent tip needle nose pliers to pry the terminal off. The handle of a screwdriver is used as the fulcrum.<br />
PN: LB-MAN-CLSERV Rev. A 1-29
6. Remove the 4 screws from the power supply and pull the supply out of the front to remove.<br />
7. Installation is the reverse process with the wires located as follows:<br />
P1 on power supply to J5 on PCBA (part no. A4-10670) - red wire<br />
P2A - Used to configure to 230v operation only - NOT USED<br />
P2 on power supply to J4 on PCBA (part no. A4-10670) - brown wire<br />
P3 on power supply to J1 on PCBA (part no. A4-10670) - blue wire<br />
P4 on power supply - black wire from red/black pair - housed in tubing<br />
P5 on power supply - red wire from red/black pair - housed in tubing<br />
P11 on power supply - red or white wire from red/black pair (thin wire pair)<br />
P12 on power supply - black wire from red/black pair (thin wire pair)<br />
PCBA (PART NO. A4-10670) REMOVAL<br />
1. Remove power as noted above.<br />
2. Not the location and remove connectors from J6, J7, J9, J10, J11, and J12.<br />
3. Using a short #1 screwdriver, remove the 4 screws from the corners of PCBA (part no. A4-10670) and remove<br />
PCBA.<br />
4. Installation is the reverse process. Use the block diagrams as necessary to reconnect the wires. See figure<br />
below for proper wire routing.<br />
1-30 WELCH ALLYN
IGNITOR REMOVAL<br />
1. Remove the top cover.<br />
2. Disconnect the 2 lamp cable wires and the red and black wires from the ignitor. Note the wire locations.<br />
3. Remove 4 screws, securing ignitor module to the center baffle. Screws are located on the other side of the<br />
center baffle.<br />
4. Installation is the reverse process. NOTE: because the screwdriver will not directly reach the lower screws,<br />
installing and removing the screws into the ignitor to tap the holes prior to installing the ignitor in the unit will<br />
make the task easier.<br />
5. Reconnect the wires as follows (see figure for orientation).<br />
Red wire to the lower center most terminal.<br />
Black wire to the lower outermost terminal.<br />
- lamp cable wire to the top left terminal (shorter wire).<br />
+ lamp cable wire to the top right terminal (longer wire).<br />
LINE FILTER REMOVAL<br />
1. Remove the top cover.<br />
PN: LB-MAN-CLSERV Rev. A 1-31
2. Remove the screws securing the center baffle to the back panel and the bottom chassis (see figure below).<br />
Hex head screw<br />
securing center<br />
baffle to side of<br />
bottom chassis<br />
3. Remove the wires from both ends of the line filter. Note location of wires.<br />
4. Remove the 2 screws securing the line filter and remove.<br />
5. Installation is the reverse process with the following requirements:<br />
The end of the filter with 3 terminals is on the platform side of the center baffle.<br />
The green (ground) wire goes to the terminal directly mounted to the metal surface.<br />
The blue wires go to the terminals nearest the fans on both ends. The brown wires go to the center most<br />
terminals.<br />
CHASSIS FAN REMOVAL<br />
1. Remove the top cover.<br />
Screw securing<br />
center baffle to<br />
back panel<br />
3 screws securing<br />
center baffle to<br />
bottom chassis<br />
XLS Rubber Bumper<br />
2. Remove the 4 screws securing the fan and the wire guard. NOTE: to remove the fan from the lamp side of the<br />
unit, remove the fan on the power supply side. To remove the lamp fan, push the split grommet through the<br />
center baffle, then pull the wires out of the grommet.<br />
3. Disconnect the fan connector from the PCBA Auxiliary board (part no. A4-10670) and remove.<br />
1-32 WELCH ALLYN
4. Installation is the reverse process with J11 for the fan on the lamp side and J10 for the fan on the power<br />
supply side. Route the wires as shown in figures below.<br />
Wire Routing on Ignitor and PCBA<br />
(part no. A4-10670)<br />
Chassis Fan Wire Routing<br />
The label on the lamp side fan faces out, the label on the power supply side faces in (see figure below).<br />
POWER ENTRY MODULE REMOVAL<br />
1. Remove the top cover.<br />
2. Remove the 3 screws securing the back panel to the bottom chassis and the 1 screw back panel to center<br />
baffle.<br />
3. Remove the 3 wire terminals from power entry module.<br />
4. Move back panel as necessary to gain access to nuts securing the PEM (power entry module).<br />
5. Remove nuts from the PEM and remove module.<br />
PN: LB-MAN-CLSERV Rev. A 1-33
6. Installation is the reverse process with the following requirements.<br />
The lock washer is inserted between the PEM and the painted side of the back panel.<br />
The flat washer is inserted between the non-painted side of the back panel and the nut.<br />
The green (ground) wire is connected to the terminal soldered directly to the metal surface. The blue wire<br />
is connected to the terminal labeled N and the brown wire to the terminal marked P.<br />
PLATFORM REMOVAL<br />
1. Remove the top cover and remove the lamp.<br />
2. Remove the front bezel by removing the 5 screws that secure it to the bottom chassis. Remove the internal<br />
module.<br />
3. Remove the two screws from the air duct strap and remove the duct.<br />
4. Remove the 4 screws securing the platform.<br />
5. Remove the lamp shroud from the platform.<br />
6. Remove the platform and the thermistor assembly from J12.<br />
7. Installation is the reverse process. When installing the platform, verify that the shroud duct, the strap, and the<br />
internal module are installed. Reattach the front bezel and check for attenuator wheel alignment.<br />
Rotate the wheel across its adjustment range and if the wheel moves freely, continue, if it does not move<br />
freely, loosen the platform screws and reposition the platform so the wheel rotates freely.<br />
FRONT BEZEL REMOVAL<br />
1. Remove the top cover.<br />
2. Remove the 5 screws, securing the front bezel to the bottom chassis.<br />
3. Noting the wire locations, remove the wires from the power switch. Push out the power switch.<br />
4. Using a sharp knife, remove the black RTV from the LED. Once removed, apply acetone to the area between<br />
the LED and the front panel to loosen the glue bond. Remove the LED.<br />
5. Installation is the reverse process with the LED glued to the front panel using Loctite 430 or equivalent. Once<br />
set, apply opaque sealant, Dow Corning 737 or equivalent, to the area around the LED to prevent light from<br />
the illuminator passing through the LED.<br />
BLOWER FAN REMOVAL<br />
1. Remove the top cover.<br />
2. Remove the front bezel as described previously.<br />
3. Remove the air duct strap and duct as described above.<br />
1-34 WELCH ALLYN
4. Remove electrical connector J9 from PCBA (part no. A4-10670).<br />
5. Remove the 2 nuts, screws, and spacers that mount the blower fan to the blower bracket.<br />
6. Installation is the reverse process with the following requirements:<br />
Spacers are installed on the screws between the bracket and the fan.<br />
LAMP CABLE REMOVAL<br />
1. Remove the top cover.<br />
2. Open the lamp access door, open the latch, and disconnect cable.<br />
3. Disconnect the lamp cable wires from the ignitor.<br />
4. Pull lamp cable out through the lamp access door.<br />
5. Installation is the reverse process with the following requirements.<br />
Remove the nylon wire tie from the lamp cable.<br />
Feed the wires through the space between the line filter and the center chassis.<br />
Connect the shorter wire to the top left terminal on the ignitor. Connect the longer wire to the top, right<br />
terminal. Install the terminals between the two flat washers (see figure for wire routing).<br />
Wire Routing on Ignitor and PCBA<br />
(part no. A4-10670)<br />
PN: LB-MAN-CLSERV Rev. A 1-35
CL 300 SURGICAL ILLUMINATOR REPAIR PARTS LIST<br />
Part Number Description Photo # Bubble # Quantity<br />
90125 27W REPLACEMENT LAMP 1<br />
LB-MAN-100W270W MANUAL, 100W/270W SOLARTEC 1<br />
RM-LBL-023 LABEL, PROTECTIVE EARTH GROUND 1<br />
A0-10755 BEZEL 270 1 1 1<br />
A0-10880 TOP COVER, LENGTHENED 1 2 1<br />
A0-10797 EXTERNAL MODULE HOLDER, 270W 1 3 1<br />
A0-10714 SCREW, PAINTED, XLS 1 4 18<br />
A0-10768 LABEL, WARNING, ILLUMINATORS 2 5 1<br />
101-0033 SCREW, #8-32 X 3/8, PHPS 2 6 4<br />
101-0022 SCREW, #6-32 X 1/4, PHSS 2 7 8<br />
A0-10907 CHASSIS BASE 2 8 1<br />
101-0068 SEMS, #6-32 X 5/16, PHPS 2 9 8<br />
016-0005 XLS, BUMPER, RUBBER, 5/8 2 10 4<br />
101-0062 SEMS, #6-32 X 9/16 PHPS 2 11 8<br />
207-0007 GUARD, FAN, 92MM 2 12 2<br />
105-0008 CORD, RETAINING CLAMP 2 13 1<br />
208-0016 FUSE, 5A SHEET III 1 14 2<br />
A0-10904 BACK PANEL 2 15 1<br />
213-0019 ROCKER SWITCH, ON/OFF, WHITE 3 16 1<br />
A0-10906 BLOWER BRACKET 3 17 1<br />
A0-10905 CENTER BAFFLE 3 18 1<br />
A4-10670 PCBA, AUXILIARY 3 19 1<br />
218-0003 IGNITOR, 270 WPI 3 20 1<br />
A0-10864 CABLE, LAMP, 30K 3 21 1<br />
105-0010 TENSION WIRE RETAINER 3 22 4<br />
101-0078 SCREW, 4-40 X 1/4, FHD, SLT 82DG 3 23 1<br />
A4-10680 WIRE HARNESS, LED/AUX/PS 3 24 1<br />
112-0001 CABLE TIE, SMALL 4” 3 25 1<br />
A0-10812 DUCT, NOZZLE BLOWER, 270W 4 26 1<br />
A0-10814 STRAP, AIR DUCT 4 27 1<br />
U50117 270W LAMP SHROUD SUB-ASSEMBLY 4 28 1<br />
U50111 270W ADJUSTED POWER SUPPLY 4 29 1<br />
213-0018 SWITCH, INTERLOCK, SNGL POLE 4 30 1<br />
102-0012 KEPS, #6-32, W/CONICAL WASHER 4 31 3<br />
210-0001 LINE FILTER, 6.0A, FLANGE 4 32 1<br />
1-36 WELCH ALLYN
Part Number Description Photo # Bubble # Quantity<br />
101-0059 SEMS, #6-32 X 1/4 PHPS 4 33 2<br />
213-0017<br />
POWER ENTRY MODULE / LINE FILTER,<br />
FUSED<br />
4 34 1<br />
101-0084 SCREW, #6 THD FRMG, PHPS 4 35 4<br />
U50123 270W INTERNAL MODULE SUB-ASSMB 4 36 1<br />
U50125 270W FILTER ASSEMBLY 5 37 1<br />
101-0061 SCREW, #4-40 X 1/4, PHPS 5 38 2<br />
U50115 2700W ALIGNED PLATFORM 5 39 1<br />
101-0073 SCREW, #8-32 X 3/4”, PHPS 5 40 4<br />
A4-10655 FAN, BACK, 3 WIRE, 270W 6 41 2<br />
A4-10672 WIRE HARNESS, FILTER/GROUND 6 42 1<br />
A4-10673 WIRE HARNESS, SWITCH/FILTER 6 43 1<br />
A4-10674 WIRE HARNESS, AC/FILTER 6 44 1<br />
109-0006 BUSHING, OPENED/CLOSED, .500 6 45 1<br />
A4-10675 WIRE HARNESS, AC/SWITCH 6 46 1<br />
A4-10465 WIRE, PEM TO DIN 6 47 1<br />
A4-10676 WIRE HARNESS, FILTER/PS 6 48 1<br />
A4-10678 WIRE HARNESS, AUX/PS 7 49 1<br />
A4-10677 WIRE HARNESS, ON/OFF/AUX 7 50 1<br />
101-0085 SEMS, 4-40 X 3/8, PHPS 7 51 4<br />
A4-10683 FAN, BLOWER, TEFLON WIRE 7 52 1<br />
101-0083 SCREW, 4-40 X 1 1/4”,PHPS, SS 7 53 2<br />
106-0015 SPACER, #4 UNTHRD, 1/4 od, 1/4l 7 54 2<br />
102-0008 NUT, KEP, 4-40, HEX 7 55 2<br />
106-0011 STANDOFF, #8, .75L 7 56 4<br />
102-0001 NUT, HEX 8 57 1<br />
104-0007 WASHER, FLAT 8 58 1<br />
104-0008 WASHER, SERRATED 8 59 1<br />
104-0019 WASHER, #4 EXTERNAL TOOTH 8 60 2<br />
101-0038 PLUG, 6/25 8 61 1<br />
104-0006 WASHER, COLOR COATED 8 62 1<br />
PN: LB-MAN-CLSERV Rev. A 1-37
PHOTO 1<br />
PHOTO 2<br />
9<br />
10<br />
11<br />
2 3<br />
4<br />
8 7 6 5<br />
12 13 14<br />
1-38 WELCH ALLYN<br />
15<br />
1
PHOTO 3<br />
PHOTO 4<br />
27<br />
20 18 19<br />
21<br />
26<br />
22<br />
28<br />
25 17<br />
36 31 30<br />
23 16<br />
29 35<br />
PN: LB-MAN-CLSERV Rev. A 1-39<br />
33<br />
32 34<br />
24
PHOTO 5<br />
PHOTO 6<br />
37<br />
43<br />
44<br />
42<br />
38<br />
47<br />
45<br />
1-40 WELCH ALLYN<br />
48<br />
39<br />
40<br />
46<br />
41
PHOTO 7<br />
PHOTO 8<br />
52<br />
54 53<br />
55 51<br />
9 42 50 56<br />
57<br />
PN: LB-MAN-CLSERV Rev. A 1-41<br />
59<br />
58<br />
62<br />
61
GLOSSARY OF TERMS<br />
AC Alternating Current<br />
COM Found on power connectors, switches, etc... indicating Common wire termination<br />
DMM Digital Multi Meter<br />
Fiber Optic Bundle Any of a number of light transmission devices characterized by use of multiple, hair thin<br />
strands of cladded glass fibers. Used to deliver light from illuminator box to work area.<br />
Leakage Current Usually a specified maximum amount of allowable current to pass through isolated<br />
electrical components when subjected to very high electrical potentials.<br />
LED Light Emitting Diode<br />
Metal Halide Any of a number of metallic compounds, usually iodides that are used in trace amounts in<br />
discharge light sources. Metal halides are incorporated to produce the desired spectral<br />
content of the light source.<br />
NO Normally Open, Found on switches indicating normally open termination.<br />
PC Board Printed Circuit Board<br />
PEM Power Entry Module<br />
RTV Room Temperature Vulcanizing Silicone<br />
TRMS True Root Mean Squared - used to characterize accuracy of digital multi-meters.<br />
VDC Voltage -Direct Current<br />
Xenon An elemental gas used commonly used in lighting products. Used as an evaporant<br />
suppressant in tungsten halogen lamps or light emission in gaseous discharge lamps.<br />
1-42 WELCH ALLYN
FINAL INSPECTION<br />
The purpose of preventative maintenance is to pro-actively reduce or eliminate future problems. Keeping the light<br />
source in good operating condition ensures that it will perform reliably and safely. Every six to twelve months, you<br />
should:<br />
NOTE: Perform hypot and ground continuity tests on the unit before beginning the final inspection.<br />
CL 100 SURGICAL ILLUMINATOR<br />
1. Set TIME to start. Turn on the SYSTEM. Begin the fifteen (15) minute BURN-IN period. Check for the following:<br />
Did the yellow LED light briefly?<br />
Did the lamp start? Clicking before the lamp ignites is normal (10 clicks or less).<br />
Are the fans running?<br />
2. After the fifteen (15) minute burn-in insert the POWER TEST FIBER into the Port. Open the attenuator fully<br />
and measure the light output. Rotate the proximal end to maximize power output and check the following:<br />
Does the connector insert smoothly?<br />
Does the attenuator move smoothly?<br />
Does the Light Output measure > 750 milliwatts? Light output < 375 is considered the end of the life of<br />
the lamp.<br />
Turn the system off and on again 3 more times. Does it light abruptly and properly?<br />
If testing has PASSED, continue. If unit fails testing, troubleshoot as necessary.<br />
CL 300 SURGICAL ILLUMINATOR<br />
IMPORTANT: Clicking before the LAMP ignites is normal (10 clicks or less). Do not hot re-strike in succession.<br />
The ILLUMINATOR must remain illuminated for a minimum of forty-five (45) seconds each time before turning off.<br />
Wait thirty (30) seconds between each re-strike.<br />
Turn the ILLUMINATOR off and on again three (3) more times. The ILLUMINATOR must remain illuminated for a<br />
minimum of forty-five (45) seconds each time before turning off. Using a TIMER, wait thirty (30) seconds between<br />
re-strikes. Clicking before the LAMP ignites is normal (10 clicks or less). Does it light promptly and properly?<br />
If testing has PASSED, continue. If unit fails testing, troubleshoot as necessary.<br />
1. Set TIME to start. Turn on ILLUMINATOR. Begin the fifteen (15) minute BURN-IN period. Check for the following:<br />
Did the yellow LED light briefly?<br />
Did the lamp start? Clicking before the lamp ignites is normal (10 clicks or less).<br />
Are the fans running?<br />
PN: LB-MAN-CLSERV Rev. A 1-43
2. After the fifteen (15) minute burn-in insert the POWER TEST FIBER into the Port. Open the attenuator fully<br />
and measure the light output. Rotate the proximal end to maximize power output and check the following:<br />
Does the connector insert smoothly?<br />
Does the attenuator move smoothly?<br />
Does the Light Output measure > 361 lumens? Light output < 200 is considered the end of the life of the<br />
lamp.<br />
1-44 WELCH ALLYN
SPECIFICATIONS<br />
Physical<br />
Size / Weight (CL 100) 5.5” H x 11.25” W x 11.25” D/9.0lb (140mmH x 286mmW x 286mmD/4.0kg)<br />
Size / Weight (CL 300) 5.5” H x 11.25” W x 12.75” D/11.1lb (140mmH x 286mmW x 324mmD/5.0kg)<br />
Space Requirements Minimum 2” (51mm) airspace around top, back and sides<br />
Finish Painted surfaces - polyurethane<br />
Lamp<br />
Lamp Type 100W Xenon Arc<br />
270W Short Arc DC Metal Halide<br />
Power Requirements<br />
Electrical 100-240 VAC 50/60Hz<br />
Amperage 2.5 Amps @ 120V (Surgical Illuminator CL 100)<br />
4 Amps @ 120V (Surgical Illuminator CL 300)<br />
Safety Compliance<br />
UL2601-1 2nd ed, CSA/CAN-C22.2 No. 601-1-M90,<br />
IEC601-1:1988/EN 60601-1:1990 Amend. 2,<br />
IEC601-1-2:1993/EN 60601-1-2:1993 (Class B), JIS T 1001:1992,<br />
IEC601-2-18:1996/EN 60601-2-18:1996<br />
IEC Classification<br />
Type BF, Class I<br />
Continuous Operation IPX0<br />
The CE mark on this product indicates that it has been tested to and conforms with the provisions noted<br />
within the 93/42/EEC Medical Device Directive and 89/336EEC EMC directive.<br />
EU Contact: European Regulatory Manager<br />
<strong>Welch</strong> <strong>Allyn</strong> Ltd.<br />
County Meath, Republic of Ireland<br />
Tel 353 46 67700<br />
Fax 353 46 27128<br />
PN: LB-MAN-CLSERV Rev. A 1-45
THEORY OF OPERATION<br />
LIGHT SOURCE<br />
The Light Sources consist of an enclosure housing, a high intensity lamp, proprietary optical platform, user<br />
controls and indicators, and a power supply with control electronics. Cooling is provided via internal fans. In the<br />
event that the fan(s) malfunctions or if adequate air flow is blocked and/or the internal temperature of the device<br />
exceeds the engineering specifications, an internal thermal protection mechanism will automatically shut off<br />
power to the lamp. After cooling, restart the Light Sources.<br />
REPLACEMENT LAMPS<br />
The lamps are high pressure, high intensity and long life Light Sources. They are mounted into a patented lamp<br />
fixture which is designed to allow both easy and rapid exchange in the field as well as ensuring precise alignment<br />
to the optical platform.<br />
POWER SUPPLY WITH CONTROL ELECTRONICS<br />
All the electricity to the Light Source is controlled through the ON/OFF switch. Power to energize and operate the<br />
lamp, fans, and control circuitry is provided by a custom designed, wattage regulated, switching power supply.<br />
The operational life of the lamp and the lamp life indicator are controlled by a lamp voltage monitoring circuit.<br />
MULTI LINK PORT AND MULTI LINK EXPANSION PORT<br />
Internal, to both the multi Link Port and Multi Link Expansion Port, are patented coupling optics and<br />
mechanics designed to produce the highest output powers. Internal to the Light Sources are fans and heatsinks<br />
designed to reduce temperatures at the optical coupling joints thereby minimizing the possibility of damage to<br />
Micro Link® Fiber and fiber bundles.<br />
1-46 WELCH ALLYN
CL 100 SURGICAL ILLUMINATOR CIRCUIT DIAGRAM<br />
ON/OFF<br />
SWITCH<br />
A4-10646<br />
BRN<br />
INTERLOCK<br />
SWITCH<br />
WHT<br />
LAMP<br />
ASSY<br />
1 1a 2 2a 1 2 1 2<br />
BLUE<br />
LINE<br />
FILTER<br />
L N G<br />
100-240VAC<br />
BRN<br />
BLUE<br />
BRN<br />
GRN/YEL<br />
NO<br />
NC<br />
COM<br />
EMI<br />
FILTER<br />
&<br />
FUSE<br />
GRN<br />
2 VDC @ 0.6A<br />
12 VDC<br />
POWER<br />
SUPPLY<br />
N<br />
L<br />
G<br />
HV<br />
RTN<br />
WHT<br />
POWER<br />
SUPPLY<br />
A4-10647<br />
VOLTAGE<br />
REGULATOR<br />
+<br />
-<br />
LED OVERTEMP<br />
SWITCH<br />
PN: LB-MAN-CLSERV Rev. A 1-47<br />
12V<br />
J4<br />
RED<br />
BLK<br />
RED<br />
BLK<br />
RED<br />
POWER SUPPLY BLOCK DIAGRAM<br />
150VDC<br />
BLK<br />
CURRENT<br />
REGULATOR<br />
FAULT<br />
CT<br />
A0-10713<br />
RED<br />
BLK<br />
RED<br />
BLK<br />
HV<br />
IGNITOR<br />
1 2<br />
1 2<br />
8A @ 14VDC<br />
LAMP<br />
THERMAL<br />
SWITCH<br />
100C N.C. LAMP ALERT<br />
CONTROLLER<br />
OUTPUT<br />
O.T. SHUT-DOWN<br />
INPUT<br />
LAMP<br />
FAN<br />
A0-10710<br />
CHASSIS<br />
FAN<br />
A0-10711<br />
1 2
CL 300 SURGICAL ILLUMINATOR CIRCUIT DIAGRAM<br />
THERMISTOR<br />
FIBER<br />
FAN<br />
P/S<br />
FAN<br />
LAMP<br />
FAN<br />
+ S - + S - + S - 1 2<br />
BLUE<br />
BLUE<br />
RED<br />
BLK<br />
BLK<br />
RED<br />
BLK<br />
BLK<br />
RED<br />
BLK<br />
BLK<br />
SWITCH (N.O.)<br />
INTERLOCK<br />
1 2 3 1 2 3 1 2<br />
J10 J9 J12<br />
1 2 3<br />
J11<br />
GND<br />
(STAND OFF)<br />
J13<br />
AUXILIARY<br />
BOARD<br />
A4-10670<br />
J1<br />
J2<br />
J3<br />
J4<br />
J5<br />
BLUE<br />
BLUE<br />
BRN<br />
BRN<br />
BLUE<br />
ON/OFF<br />
SWITCH<br />
LINE<br />
FILTER<br />
L<br />
N<br />
L<br />
N<br />
BRN<br />
BLUE<br />
L<br />
N<br />
L<br />
N<br />
BRN<br />
BLUE<br />
GRN/YEL<br />
L<br />
N<br />
AC/FILTER<br />
210-0001<br />
G<br />
G<br />
BRN<br />
RED<br />
J6<br />
2 1<br />
J7<br />
4 3 2 1<br />
1-48 WELCH ALLYN<br />
BLK<br />
WHT<br />
RED<br />
BRN<br />
BLUE<br />
+ -<br />
P1 P2 P3<br />
END OF<br />
LAMP LIFE<br />
LED<br />
BLK<br />
WHT<br />
P11<br />
P12<br />
WPI<br />
2250W<br />
P/S<br />
218-0002<br />
P4 P5<br />
BLK<br />
WHT<br />
BLK<br />
BRN<br />
+ -<br />
+<br />
WHT<br />
WHT<br />
+<br />
-<br />
-<br />
IGNITOR BOARD<br />
218-0003<br />
LAMP
Lighting Products Group<br />
4619 Jordan Road<br />
PO Box 187<br />
Skaneateles Falls, NY 13153-0187<br />
Telephone: 1-315-685-2993 or 1-866-801-8428<br />
FAX: 1-315-685-2999<br />
www.welchallyn.com<br />
PN: LB-MAN-CLSERV Rev. A Printed in the U.S.A.