CL100 / CL300 Service Manual - Welch Allyn
CL100 / CL300 Service Manual - Welch Allyn
CL100 / CL300 Service Manual - Welch Allyn

You also want an ePaper? Increase the reach of your titles
YUMPU automatically turns print PDFs into web optimized ePapers that Google loves.
4. Remove electrical connector J9 from PCBA (part no. A4-10670).<br />
5. Remove the 2 nuts, screws, and spacers that mount the blower fan to the blower bracket.<br />
6. Installation is the reverse process with the following requirements:<br />
Spacers are installed on the screws between the bracket and the fan.<br />
LAMP CABLE REMOVAL<br />
1. Remove the top cover.<br />
2. Open the lamp access door, open the latch, and disconnect cable.<br />
3. Disconnect the lamp cable wires from the ignitor.<br />
4. Pull lamp cable out through the lamp access door.<br />
5. Installation is the reverse process with the following requirements.<br />
Remove the nylon wire tie from the lamp cable.<br />
Feed the wires through the space between the line filter and the center chassis.<br />
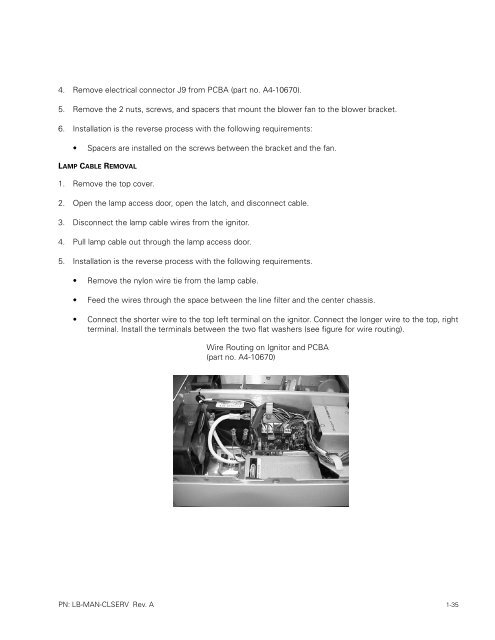
Connect the shorter wire to the top left terminal on the ignitor. Connect the longer wire to the top, right<br />
terminal. Install the terminals between the two flat washers (see figure for wire routing).<br />
Wire Routing on Ignitor and PCBA<br />
(part no. A4-10670)<br />
PN: LB-MAN-CLSERV Rev. A 1-35