Tabor Electronics Ltd. - OED
Tabor Electronics Ltd. - OED
Tabor Electronics Ltd. - OED

Create successful ePaper yourself
Turn your PDF publications into a flip-book with our unique Google optimized e-Paper software.
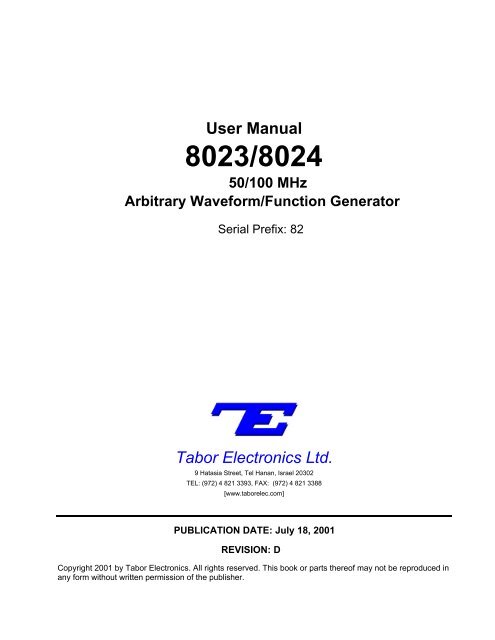
User Manual<br />
8023/8024<br />
50/100 MHz<br />
Arbitrary Waveform/Function Generator<br />
Serial Prefix: 82<br />
<strong>Tabor</strong> <strong>Electronics</strong> <strong>Ltd</strong>.<br />
9 Hatasia Street, Tel Hanan, Israel 20302<br />
TEL: (972) 4 821 3393, FAX: (972) 4 821 3388<br />
[www.taborelec.com]<br />
PUBLICATION DATE: July 18, 2001<br />
REVISION: D<br />
Copyright 2001 by <strong>Tabor</strong> <strong>Electronics</strong>. All rights reserved. This book or parts thereof may not be reproduced in<br />
any form without written permission of the publisher.
Warranty<br />
<strong>Tabor</strong> <strong>Electronics</strong>’ products are warranted against defects in material and workmanship, when<br />
used under normal operating conditions, for a period of one year after delivery. <strong>Tabor</strong><br />
<strong>Electronics</strong> will repair or replace without charge any product which proves defective during<br />
this period. Repair necessitated by misuse of the product is not covered by this warranty. No<br />
other warranties are expressed or implied, including but not limited to the implied warranties<br />
of merchantability and fitness for a particular purpose. <strong>Tabor</strong> <strong>Electronics</strong> is not liable for<br />
consequential damage.<br />
REPAIR AND CALIBRATION<br />
Prior authorization is required from <strong>Tabor</strong> <strong>Electronics</strong> before products are returned for service.<br />
All service must be performed by <strong>Tabor</strong> <strong>Electronics</strong>’ factory or an authorized service center.<br />
Please contact the factory directly for repair and re-calibration:<br />
<strong>Tabor</strong> <strong>Electronics</strong>, <strong>Ltd</strong>.<br />
9 Hatasia Street<br />
Tel Hanan, Israel 20302<br />
Tel: (972) 4 821-3393<br />
Fax: (972) 4 821-3388
<strong>Tabor</strong> <strong>Electronics</strong> <strong>Ltd</strong>.<br />
REPAIR AND CALIBRATION REQUEST FORM<br />
To allow us to better understand your repair requests, we suggest you use<br />
the following outline when calling and include a copy with your instrument<br />
to be sent to the <strong>Tabor</strong> Repair Facility.<br />
Model Serial No. Date<br />
Company Name Purchase Order #<br />
Billing Address<br />
Shipping Address<br />
City<br />
State/Province Zip/Postal Code Country<br />
City<br />
State/Province Zip/Postal Code Country<br />
Technical Contact Phone Number ( )<br />
Purchasing Contact Phone Number ( )<br />
1. Describe, in detail, the problem and symptoms you are having. Please include<br />
all set up details, such as input/output levels, frequencies, waveform details, etc.<br />
2. If problem is occurring when unit is in remote, please list the program strings used<br />
and the controller type.<br />
3. Please give any additional information you feel would be beneficial in facilitating<br />
a faster repair time (i.e., modifications, etc.)<br />
4. Is calibration data required? Yes No (please circle one)<br />
Call before shipping Ship instruments to nearest support office<br />
Note: We do not accept Iisted on back.<br />
“collect” shipments.
Safety Precautions<br />
The following safety precautions should be observed before using this product and associated<br />
computer. Although some instruments and accessories would normally be used with non-hazardous<br />
voltages, there are situations where hazardous conditions may be present. This product<br />
is intended for use by qualified personnel who recognize shock hazards and are familiar with<br />
the safety precautions required to avoid possible injury. Read the operating information<br />
carefully before using the product. Exercise extreme caution when a shock hazard is present.<br />
Lethal voltage may be present on cables, connector jacks, or test fixtures.<br />
The American National Standard Institute (ANSI) states that a shock hazard exists when<br />
voltage levels greater than 30V RMS, 42.4V peak, or 60 VDC are present. A good safety<br />
practice is to expect that hazardous voltage is present in any unknown circuit before touching<br />
or disconnecting the line cord. Before operating an instrument, make sure the line cord is<br />
connected to a properly grounded power receptacle. Inspect the connecting cables and test<br />
leads for possible wear, cracks, or breaks before each use.<br />
For maximum safety, do not touch the product, test cables, or any other of the instrument parts<br />
while power is applied to the circuit under test. ALWAYS remove power from the entire test<br />
system before connecting cables or jumpers, installing or removing cards from the computer,<br />
or making internal changes, such as changing card address. Do not touch any object that could<br />
provide a current path to the common side of the circuit under test or power line (earth) ground.<br />
Always keep dry hands while handling the instrument. If you are using test fixtures, keep the<br />
lid closed while power is applied to the device under test. Safe operation requires that the<br />
computer lid be closed at all times during operation.<br />
Carefully read the Safety Precautions instructions that are supplied with your computer.<br />
Instruments, cables, leads or cords should not be connected to humans. Before performing any<br />
maintenance, disconnect the line cord and all test cables. Finally, maintenance should be<br />
performed by qualified service personnel only. If you have no past experience in instrument<br />
servicing, we strongly recommend that installation and initial tests on the instrument be done<br />
by your dealer or by the factory itself.
We:<br />
Declaration of Conformity<br />
<strong>Tabor</strong> <strong>Electronics</strong>, <strong>Ltd</strong>.<br />
P.O. Box 404<br />
Tel Hanan, Israel 20302<br />
declare, that the Arbitrary Waveform/Function Generator<br />
Model 8023 and model 8024<br />
meets the intent of Directive 89/336/EEC for Electromagnetic Compatibility and complies with<br />
the requirements of the Low Voltage Directive 73/23/EEC. Compliance was demonstrated to<br />
the following specifications as listed in the official Journal of the European Communities:<br />
Safety:<br />
EN 61010-1<br />
IEC 1010-1 (1990) + Amendment 1 (1992)<br />
EMC:<br />
EN 50081-1 Emissions:<br />
EN 55022 - Radiated, Class B<br />
EN 55022 - Conducted, Class B<br />
EN 50082-1 Immunity:
1 General Information<br />
Table of Contents<br />
1-1. Introduction. . . . . . . . . . . . . . . . . . . . . . . . . . . . . . . . . . . . . . . . . . . . . . . . . . . . . . . . . . . . . . . . . . . . . . . . . 1-1<br />
1-2. Description . . . . . . . . . . . . . . . . . . . . . . . . . . . . . . . . . . . . . . . . . . . . . . . . . . . . . . . . . . . . . . . . . . . . . . . . . 1-1<br />
1-3. Instrument & Manual Identification . . . . . . . . . . . . . . . . . . . . . . . . . . . . . . . . . . . . . . . . . . . . . . . . . . . . 1-2<br />
1-4. Options. . . . . . . . . . . . . . . . . . . . . . . . . . . . . . . . . . . . . . . . . . . . . . . . . . . . . . . . . . . . . . . . . . . . . . . . . . . . . 1-2<br />
1-5. Safety Consideration . . . . . . . . . . . . . . . . . . . . . . . . . . . . . . . . . . . . . . . . . . . . . . . . . . . . . . . . . . . . . . . . . 1-2<br />
1-6. Supplied Accessories . . . . . . . . . . . . . . . . . . . . . . . . . . . . . . . . . . . . . . . . . . . . . . . . . . . . . . . . . . . . . . . . . 1-2<br />
1-7. Specifications . . . . . . . . . . . . . . . . . . . . . . . . . . . . . . . . . . . . . . . . . . . . . . . . . . . . . . . . . . . . . . . . . . . . . . . 1-2<br />
2 Installation<br />
2-1. Introduction. . . . . . . . . . . . . . . . . . . . . . . . . . . . . . . . . . . . . . . . . . . . . . . . . . . . . . . . . . . . . . . . . . . . . . . . . 2-1<br />
2-2. Unpacking & Initial Inspection . . . . . . . . . . . . . . . . . . . . . . . . . . . . . . . . . . . . . . . . . . . . . . . . . . . . . . . . 2-1<br />
2-3. Safety Precautions . . . . . . . . . . . . . . . . . . . . . . . . . . . . . . . . . . . . . . . . . . . . . . . . . . . . . . . . . . . . . . . . . . . 2-1<br />
2-4. Performance Checks . . . . . . . . . . . . . . . . . . . . . . . . . . . . . . . . . . . . . . . . . . . . . . . . . . . . . . . . . . . . . . . . . 2-2<br />
2-5. Power Requirements . . . . . . . . . . . . . . . . . . . . . . . . . . . . . . . . . . . . . . . . . . . . . . . . . . . . . . . . . . . . . . . . . 2-2<br />
2-6. Grounding Requirements . . . . . . . . . . . . . . . . . . . . . . . . . . . . . . . . . . . . . . . . . . . . . . . . . . . . . . . . . . . . . 2-1<br />
2-7. Installation and Mounting . . . . . . . . . . . . . . . . . . . . . . . . . . . . . . . . . . . . . . . . . . . . . . . . . . . . . . . . . . . . . 2-2<br />
2-8. Bench Mounting . . . . . . . . . . . . . . . . . . . . . . . . . . . . . . . . . . . . . . . . . . . . . . . . . . . . . . . . . . . . . . . . . . . . . 2-2<br />
2-9. Rack Mounting . . . . . . . . . . . . . . . . . . . . . . . . . . . . . . . . . . . . . . . . . . . . . . . . . . . . . . . . . . . . . . . . . . . . . . 2-3<br />
2-10. Portable Use . . . . . . . . . . . . . . . . . . . . . . . . . . . . . . . . . . . . . . . . . . . . . . . . . . . . . . . . . . . . . . . . . . . . . . . . 2-3<br />
2-11. Short Term Storage . . . . . . . . . . . . . . . . . . . . . . . . . . . . . . . . . . . . . . . . . . . . . . . . . . . . . . . . . . . . . . . . . . 2-3<br />
2-12. Long Term Storage or Re-Packing for Shipment . . . . . . . . . . . . . . . . . . . . . . . . . . . . . . . . . . . . . . . . . 2-3<br />
3 Operating Instructions<br />
3-1. Introduction. . . . . . . . . . . . . . . . . . . . . . . . . . . . . . . . . . . . . . . . . . . . . . . . . . . . . . . . . . . . . . . . . . . . . . . . . 3-1<br />
3-2. Front Panel Familiarization . . . . . . . . . . . . . . . . . . . . . . . . . . . . . . . . . . . . . . . . . . . . . . . . . . . . . . . . . . . 3-1<br />
3-3. Buttons. . . . . . . . . . . . . . . . . . . . . . . . . . . . . . . . . . . . . . . . . . . . . . . . . . . . . . . . . . . . . . . . . . . . . . . . . . . . . 3-2<br />
3-3-1. Instrument State Buttons. . . . . . . . . . . . . . . . . . . . . . . . . . . . . . . . . . . . . . . . . . . . . . . . . . . . . . . . . . . . . . 3-2<br />
3-3-2. Parameter Buttons . . . . . . . . . . . . . . . . . . . . . . . . . . . . . . . . . . . . . . . . . . . . . . . . . . . . . . . . . . . . . . . . . . . 3-2<br />
1
Table of Contents<br />
3-3-3. Cursor Control Buttons . . . . . . . . . . . . . . . . . . . . . . . . . . . . . . . . . . . . . . . . . . . . . . . . . . . . . . . . . . . . . . . 3-2<br />
3-3-4. Output Control Buttons . . . . . . . . . . . . . . . . . . . . . . . . . . . . . . . . . . . . . . . . . . . . . . . . . . . . . . . . . . . . . . . 3-3<br />
3-3-5. Instrument Setups Buttons . . . . . . . . . . . . . . . . . . . . . . . . . . . . . . . . . . . . . . . . . . . . . . . . . . . . . . . . . . . . 3-3<br />
3-4. Connectors. . . . . . . . . . . . . . . . . . . . . . . . . . . . . . . . . . . . . . . . . . . . . . . . . . . . . . . . . . . . . . . . . . . . . . . . . . 3-3<br />
3-5. Display and Indicators. . . . . . . . . . . . . . . . . . . . . . . . . . . . . . . . . . . . . . . . . . . . . . . . . . . . . . . . . . . . . . . . 3-3<br />
3-6. Rear Panel Familiarization . . . . . . . . . . . . . . . . . . . . . . . . . . . . . . . . . . . . . . . . . . . . . . . . . . . . . . . . . . . . 3-3<br />
3-7. Power-Up Procedure . . . . . . . . . . . . . . . . . . . . . . . . . . . . . . . . . . . . . . . . . . . . . . . . . . . . . . . . . . . . . . . . . 3-3<br />
3-8. Software Reset . . . . . . . . . . . . . . . . . . . . . . . . . . . . . . . . . . . . . . . . . . . . . . . . . . . . . . . . . . . . . . . . . . . . . . 3-4<br />
3-8-1. Parameter Reset . . . . . . . . . . . . . . . . . . . . . . . . . . . . . . . . . . . . . . . . . . . . . . . . . . . . . . . . . . . . . . . . . . . 3-4<br />
3-9. Display Messages . . . . . . . . . . . . . . . . . . . . . . . . . . . . . . . . . . . . . . . . . . . . . . . . . . . . . . . . . . . . . . . . . . . . 3-4<br />
3-10. Front Panel Error Indication. . . . . . . . . . . . . . . . . . . . . . . . . . . . . . . . . . . . . . . . . . . . . . . . . . . . . . . . . . . 3-5<br />
3-10-1. General Errors. . . . . . . . . . . . . . . . . . . . . . . . . . . . . . . . . . . . . . . . . . . . . . . . . . . . . . . . . . . . . . . . . . . . . 3-5<br />
3-10-2. Limit Errors . . . . . . . . . . . . . . . . . . . . . . . . . . . . . . . . . . . . . . . . . . . . . . . . . . . . . . . . . . . . . . . . . . . . . . . 3-5<br />
3-10-3. IEEE-488.2 Errors . . . . . . . . . . . . . . . . . . . . . . . . . . . . . . . . . . . . . . . . . . . . . . . . . . . . . . . . . . . . . . . . . 3-5<br />
3-11. Selecting and Modifying Parameters. . . . . . . . . . . . . . . . . . . . . . . . . . . . . . . . . . . . . . . . . . . . . . . . . . . . 3-6<br />
3-11-1. The Menu Concept . . . . . . . . . . . . . . . . . . . . . . . . . . . . . . . . . . . . . . . . . . . . . . . . . . . . . . . . . . . . . . . . . 3-6<br />
3-11-2. The Cursor & Dial Concept . . . . . . . . . . . . . . . . . . . . . . . . . . . . . . . . . . . . . . . . . . . . . . . . . . . . . . . . . 3-6<br />
3-11-3. The Displayed Read-out Concept. . . . . . . . . . . . . . . . . . . . . . . . . . . . . . . . . . . . . . . . . . . . . . . . . . . . . 3-6<br />
3-12. Generating Std. Waveforms . . . . . . . . . . . . . . . . . . . . . . . . . . . . . . . . . . . . . . . . . . . . . . . . . . . . . . . . . . . 3-7<br />
3-13. Changing Output Frequency. . . . . . . . . . . . . . . . . . . . . . . . . . . . . . . . . . . . . . . . . . . . . . . . . . . . . . . . . . . 3-7<br />
3-14. Changing Output Amplitude and Offset . . . . . . . . . . . . . . . . . . . . . . . . . . . . . . . . . . . . . . . . . . . . . . . . . 3-7<br />
3-15. Generating Arbitrary Waveforms . . . . . . . . . . . . . . . . . . . . . . . . . . . . . . . . . . . . . . . . . . . . . . . . . . . . . . 3-8<br />
3-15-1. What Are Arbitrary Waveforms . . . . . . . . . . . . . . . . . . . . . . . . . . . . . . . . . . . . . . . . . . . . . . . . . . . . . . 3-8<br />
3-15-2. Arbitrary Memory Management. . . . . . . . . . . . . . . . . . . . . . . . . . . . . . . . . . . . . . . . . . . . . . . . . . . . . . 3-8<br />
3-15-3. Partitioning The Memory . . . . . . . . . . . . . . . . . . . . . . . . . . . . . . . . . . . . . . . . . . . . . . . . . . . . . . . . . . . 3-9<br />
3-15-4. Loading Arbitrary Waveforms . . . . . . . . . . . . . . . . . . . . . . . . . . . . . . . . . . . . . . . . . . . . . . . . . . . . . . . 3-9<br />
3-15-5. Modifying Arbitrary Functions . . . . . . . . . . . . . . . . . . . . . . . . . . . . . . . . . . . . . . . . . . . . . . . . . . . . . . 3-9<br />
3-15-5-1. Generating Amplitude Modulated Functions . . . . . . . . . . . . . . . . . . . . . . . . . . . . . . . . . . . . . . . . . 3-10<br />
3-16. Changing Sampling Clock Frequency. . . . . . . . . . . . . . . . . . . . . . . . . . . . . . . . . . . . . . . . . . . . . . . . . . . 3-10<br />
3-16-1. Selecting SCLK Source . . . . . . . . . . . . . . . . . . . . . . . . . . . . . . . . . . . . . . . . . . . . . . . . . . . . . . . . . . . . . 3-10<br />
3-17 Generating Sequenced Waveforms . . . . . . . . . . . . . . . . . . . . . . . . . . . . . . . . . . . . . . . . . . . . . . . . . . . . . 3-11<br />
3-17-1. What Are Sequenced Waveforms. . . . . . . . . . . . . . . . . . . . . . . . . . . . . . . . . . . . . . . . . . . . . . . . . . . . . 3-11<br />
3-17-2. Generating a Sequence. . . . . . . . . . . . . . . . . . . . . . . . . . . . . . . . . . . . . . . . . . . . . . . . . . . . . . . . . . . . . . 3-11<br />
3-18. Disabling The Output . . . . . . . . . . . . . . . . . . . . . . . . . . . . . . . . . . . . . . . . . . . . . . . . . . . . . . . . . . . . . . . . 3-12<br />
3-19. Selecting an Operating Mode . . . . . . . . . . . . . . . . . . . . . . . . . . . . . . . . . . . . . . . . . . . . . . . . . . . . . . . . . . 3-12<br />
3-19-1. Triggered Mode . . . . . . . . . . . . . . . . . . . . . . . . . . . . . . . . . . . . . . . . . . . . . . . . . . . . . . . . . . . . . . . . . . . 3-12<br />
3-19-1-1. Internal Trigger . . . . . . . . . . . . . . . . . . . . . . . . . . . . . . . . . . . . . . . . . . . . . . . . . . . . . . . . . . . . . . . . . . 3-12<br />
3-19-1-2. Manual Trigger . . . . . . . . . . . . . . . . . . . . . . . . . . . . . . . . . . . . . . . . . . . . . . . . . . . . . . . . . . . . . . . . . 3-13<br />
3-19-2. Gated Mode . . . . . . . . . . . . . . . . . . . . . . . . . . . . . . . . . . . . . . . . . . . . . . . . . . . . . . . . . . . . . . . . . . . . . . . 3-13<br />
3-19-2-1 Manual Gate. . . . . . . . . . . . . . . . . . . . . . . . . . . . . . . . . . . . . . . . . . . . . . . . . . . . . . . . . . . . . . . . . . . . . 3-13<br />
3-19-3. Burst Mode . . . . . . . . . . . . . . . . . . . . . . . . . . . . . . . . . . . . . . . . . . . . . . . . . . . . . . . . . . . . . . . . . . . . . . . 3-13<br />
3-19-3-1. Internal Burst. . . . . . . . . . . . . . . . . . . . . . . . . . . . . . . . . . . . . . . . . . . . . . . . . . . . . . . . . . . . . . . . . . . . 3-13<br />
3-20. Using The Offset . . . . . . . . . . . . . . . . . . . . . . . . . . . . . . . . . . . . . . . . . . . . . . . . . . . . . . . . . . . . . . . . . . . . 3-13<br />
3-21. Using Front Panel Setups . . . . . . . . . . . . . . . . . . . . . . . . . . . . . . . . . . . . . . . . . . . . . . . . . . . . . . . . . . . . . 3-14<br />
3-21-1. Saving Setups . . . . . . . . . . . . . . . . . . . . . . . . . . . . . . . . . . . . . . . . . . . . . . . . . . . . . . . . . . . . . . . . . . . . . 3-14<br />
3-21-2. Recalling Setups . . . . . . . . . . . . . . . . . . . . . . . . . . . . . . . . . . . . . . . . . . . . . . . . . . . . . . . . . . . . . . . . . . . 3-14<br />
3-22. Changing GPIB Address . . . . . . . . . . . . . . . . . . . . . . . . . . . . . . . . . . . . . . . . . . . . . . . . . . . . . . . . . . . . . . 3-14<br />
3-23. Loading Waveforms Using the GPIB Interface . . . . . . . . . . . . . . . . . . . . . . . . . . . . . . . . . . . . . . . . . . . 3-14<br />
4 Remote Interface<br />
4-1. Introduction. . . . . . . . . . . . . . . . . . . . . . . . . . . . . . . . . . . . . . . . . . . . . . . . . . . . . . . . . . . . . . . . . . . . . . . . . 4-1<br />
4-2. Introduction to SCPI Language . . . . . . . . . . . . . . . . . . . . . . . . . . . . . . . . . . . . . . . . . . . . . . . . . . . . . . . . 4-1<br />
2
4-3. Command Format . . . . . . . . . . . . . . . . . . . . . . . . . . . . . . . . . . . . . . . . . . . . . . . . . . . . . . . . . . . . . . . . . . . . 4-1<br />
4-4. Command Separators . . . . . . . . . . . . . . . . . . . . . . . . . . . . . . . . . . . . . . . . . . . . . . . . . . . . . . . . . . . . . . . . . 4-2<br />
4-5. The MIN and MAX Parameters . . . . . . . . . . . . . . . . . . . . . . . . . . . . . . . . . . . . . . . . . . . . . . . . . . . . . . . . 4-2<br />
4-6. Querying Parameter Settings . . . . . . . . . . . . . . . . . . . . . . . . . . . . . . . . . . . . . . . . . . . . . . . . . . . . . . . . . . 4-2<br />
4-7. SCPI Command Terminators . . . . . . . . . . . . . . . . . . . . . . . . . . . . . . . . . . . . . . . . . . . . . . . . . . . . . . . . . . 4-2<br />
4-8. IEEE-488.2 Common Commands . . . . . . . . . . . . . . . . . . . . . . . . . . . . . . . . . . . . . . . . . . . . . . . . . . . . . . 4-2<br />
4-9. SCPI Parameter Types . . . . . . . . . . . . . . . . . . . . . . . . . . . . . . . . . . . . . . . . . . . . . . . . . . . . . . . . . . . . . . . . 4-3<br />
4-9-1. Numeric Parameters . . . . . . . . . . . . . . . . . . . . . . . . . . . . . . . . . . . . . . . . . . . . . . . . . . . . . . . . . . . . . . . . 4-3<br />
4-9-2. Discrete Parameters . . . . . . . . . . . . . . . . . . . . . . . . . . . . . . . . . . . . . . . . . . . . . . . . . . . . . . . . . . . . . . . . 4-3<br />
4-9-3 Boolean Parameters . . . . . . . . . . . . . . . . . . . . . . . . . . . . . . . . . . . . . . . . . . . . . . . . . . . . . . . . . . . . . . . . 4-3<br />
4-9-4. Arbitrary Block Parameters . . . . . . . . . . . . . . . . . . . . . . . . . . . . . . . . . . . . . . . . . . . . . . . . . . . . . . . . . 4-3<br />
4-10. Setting the GPIB Address . . . . . . . . . . . . . . . . . . . . . . . . . . . . . . . . . . . . . . . . . . . . . . . . . . . . . . . . . . . . . 4-3<br />
4-11. Selecting a Command Set . . . . . . . . . . . . . . . . . . . . . . . . . . . . . . . . . . . . . . . . . . . . . . . . . . . . . . . . . . . . . 4-3<br />
4-12. SCPI Command Summary. . . . . . . . . . . . . . . . . . . . . . . . . . . . . . . . . . . . . . . . . . . . . . . . . . . . . . . . . . . . . 4-3<br />
4-13. Output Configuration Command Summary . . . . . . . . . . . . . . . . . . . . . . . . . . . . . . . . . . . . . . . . . . . . . . 4-7<br />
4-14. Standard Waveform Command Summary. . . . . . . . . . . . . . . . . . . . . . . . . . . . . . . . . . . . . . . . . . . . . . . . 4-8<br />
4-15. Arbitrary Waveform and Sequence Command Summary. . . . . . . . . . . . . . . . . . . . . . . . . . . . . . . . . . . 4-9<br />
4-16. Modulation Command Summary . . . . . . . . . . . . . . . . . . . . . . . . . . . . . . . . . . . . . . . . . . . . . . . . . . . . . . . 4-9<br />
4-17. Trigger Command Summary. . . . . . . . . . . . . . . . . . . . . . . . . . . . . . . . . . . . . . . . . . . . . . . . . . . . . . . . . . . 4-10<br />
4-18. System-Related Command Summary . . . . . . . . . . . . . . . . . . . . . . . . . . . . . . . . . . . . . . . . . . . . . . . . . . . 4-10<br />
4-19. IEEE-488.2 Common Commands and Queries . . . . . . . . . . . . . . . . . . . . . . . . . . . . . . . . . . . . . . . . . . . 4-10<br />
4-20. The SCPI Status Registers . . . . . . . . . . . . . . . . . . . . . . . . . . . . . . . . . . . . . . . . . . . . . . . . . . . . . . . . . . . . 4-11<br />
4-20-1. The Status Byte Register (STB) . . . . . . . . . . . . . . . . . . . . . . . . . . . . . . . . . . . . . . . . . . . . . . . . . . . . . . 4-13<br />
4-20-1-1. Reading the Status Byte Register . . . . . . . . . . . . . . . . . . . . . . . . . . . . . . . . . . . . . . . . . . . . . . . . . . . 4-13<br />
4-20-1-2. Reading with a Serial Poll . . . . . . . . . . . . . . . . . . . . . . . . . . . . . . . . . . . . . . . . . . . . . . . . . . . . . . . . . 4-13<br />
4-20-1-3. Reading With the *STB? . . . . . . . . . . . . . . . . . . . . . . . . . . . . . . . . . . . . . . . . . . . . . . . . . . . . . . . . . . 4-13<br />
4-20-1-4. Clearing the Status Byte Register. . . . . . . . . . . . . . . . . . . . . . . . . . . . . . . . . . . . . . . . . . . . . . . . . . . 4-13<br />
4-20-2. Service Request Enable Register (SRE) . . . . . . . . . . . . . . . . . . . . . . . . . . . . . . . . . . . . . . . . . . . . . . . 4-13<br />
4-20-3. Standard Event Status Register (ESR) . . . . . . . . . . . . . . . . . . . . . . . . . . . . . . . . . . . . . . . . . . . . . . . . 4-14<br />
4-20-3-1. Standard Event Status Enable Register (ESE) . . . . . . . . . . . . . . . . . . . . . . . . . . . . . . . . . . . . . . . . 4-14<br />
4-21. Error Messages . . . . . . . . . . . . . . . . . . . . . . . . . . . . . . . . . . . . . . . . . . . . . . . . . . . . . . . . . . . . . . . . . . . . . . 4-15<br />
4-22. Device-Specific Commands . . . . . . . . . . . . . . . . . . . . . . . . . . . . . . . . . . . . . . . . . . . . . . . . . . . . . . . . . . . 4-15<br />
4-23. Output Configuration Commands . . . . . . . . . . . . . . . . . . . . . . . . . . . . . . . . . . . . . . . . . . . . . . . . . . . . . . 4-16<br />
4-23-1. Using the APPLy Commands . . . . . . . . . . . . . . . . . . . . . . . . . . . . . . . . . . . . . . . . . . . . . . . . . . . . . . . . 4-18<br />
4-24. Standard Waveform Commands. . . . . . . . . . . . . . . . . . . . . . . . . . . . . . . . . . . . . . . . . . . . . . . . . . . . . . . . 4-19<br />
4-25. Arbitrary Waveform Commands . . . . . . . . . . . . . . . . . . . . . . . . . . . . . . . . . . . . . . . . . . . . . . . . . . . . . . . 4-20<br />
4-25-1. High Speed Binary Waveform Transfer . . . . . . . . . . . . . . . . . . . . . . . . . . . . . . . . . . . . . . . . . . . . . . . 4-21<br />
4-26. Arbitrary Waveform Sequence Commands . . . . . . . . . . . . . . . . . . . . . . . . . . . . . . . . . . . . . . . . . . . . . . 4-22<br />
4-27. Modulation Commands . . . . . . . . . . . . . . . . . . . . . . . . . . . . . . . . . . . . . . . . . . . . . . . . . . . . . . . . . . . . . . . 4-22<br />
4-27-1. Amplitude Modulation Commands . . . . . . . . . . . . . . . . . . . . . . . . . . . . . . . . . . . . . . . . . . . . . . . . . . . 4-22<br />
4-27-2. Gate Modulation Commands . . . . . . . . . . . . . . . . . . . . . . . . . . . . . . . . . . . . . . . . . . . . . . . . . . . . . . . . 4-23<br />
4-27-3. Burst Modulation Commands . . . . . . . . . . . . . . . . . . . . . . . . . . . . . . . . . . . . . . . . . . . . . . . . . . . . . . . . 4-23<br />
4-28. Trigger Commands. . . . . . . . . . . . . . . . . . . . . . . . . . . . . . . . . . . . . . . . . . . . . . . . . . . . . . . . . . . . . . . . . . . 4-24<br />
4-29. System-Related Commands . . . . . . . . . . . . . . . . . . . . . . . . . . . . . . . . . . . . . . . . . . . . . . . . . . . . . . . . . . . 4-25<br />
5 Maintenance and Performance Tests<br />
Table of Contents<br />
4-1. Introduction. . . . . . . . . . . . . . . . . . . . . . . . . . . . . . . . . . . . . . . . . . . . . . . . . . . . . . . . . . . . . . . . . . . . . . . . . 5-1<br />
5-2. Line Voltage Selection . . . . . . . . . . . . . . . . . . . . . . . . . . . . . . . . . . . . . . . . . . . . . . . . . . . . . . . . . . . . . . . 5-1<br />
5-3. Fuse Replacement. . . . . . . . . . . . . . . . . . . . . . . . . . . . . . . . . . . . . . . . . . . . . . . . . . . . . . . . . . . . . . . . . . . . 5-1<br />
5-4. Disassembly Instructions . . . . . . . . . . . . . . . . . . . . . . . . . . . . . . . . . . . . . . . . . . . . . . . . . . . . . . . . . . . . . 5-2<br />
5-5. Special Handling of Static Sensitive Devices . . . . . . . . . . . . . . . . . . . . . . . . . . . . . . . . . . . . . . . . . . . . 5-2<br />
5-6. Cleaning. . . . . . . . . . . . . . . . . . . . . . . . . . . . . . . . . . . . . . . . . . . . . . . . . . . . . . . . . . . . . . . . . . . . . . . . . . . . 5-2<br />
3
Table of Contents<br />
5-7. Repair and Replacement . . . . . . . . . . . . . . . . . . . . . . . . . . . . . . . . . . . . . . . . . . . . . . . . . . . . . . . . . . . . . . 5-2<br />
5-8. Performance Checks . . . . . . . . . . . . . . . . . . . . . . . . . . . . . . . . . . . . . . . . . . . . . . . . . . . . . . . . . . . . . . . . . 5-2<br />
5-8-1. Environmental Conditions. . . . . . . . . . . . . . . . . . . . . . . . . . . . . . . . . . . . . . . . . . . . . . . . . . . . . . . . . . . 5-2<br />
5-8-2. Warm-Up Period. . . . . . . . . . . . . . . . . . . . . . . . . . . . . . . . . . . . . . . . . . . . . . . . . . . . . . . . . . . . . . . . . . . 5-3<br />
5-8-3. Front Panel Settings . . . . . . . . . . . . . . . . . . . . . . . . . . . . . . . . . . . . . . . . . . . . . . . . . . . . . . . . . . . . . . . . 5-3<br />
5-8-4. Recommended Test Equipment . . . . . . . . . . . . . . . . . . . . . . . . . . . . . . . . . . . . . . . . . . . . . . . . . . . . . . . . 5-3<br />
5-9 Performance Checks Procedure . . . . . . . . . . . . . . . . . . . . . . . . . . . . . . . . . . . . . . . . . . . . . . . . . . . . . . . . 5-3<br />
5-9-1. Frequency Accuracy. . . . . . . . . . . . . . . . . . . . . . . . . . . . . . . . . . . . . . . . . . . . . . . . . . . . . . . . . . . . . . . . 5-3<br />
5-9-2. Amplitude Accuracy . . . . . . . . . . . . . . . . . . . . . . . . . . . . . . . . . . . . . . . . . . . . . . . . . . . . . . . . . . . . . . . 5-4<br />
5-9-3. DC Characteristics . . . . . . . . . . . . . . . . . . . . . . . . . . . . . . . . . . . . . . . . . . . . . . . . . . . . . . . . . . . . . . . . . 5-4<br />
5-9-4. Squarewave Characteristics . . . . . . . . . . . . . . . . . . . . . . . . . . . . . . . . . . . . . . . . . . . . . . . . . . . . . . . . . 5-4<br />
5-9-5. Sine Characteristics . . . . . . . . . . . . . . . . . . . . . . . . . . . . . . . . . . . . . . . . . . . . . . . . . . . . . . . . . . . . . . . . 5-4<br />
5-9-6. Sine Flatness . . . . . . . . . . . . . . . . . . . . . . . . . . . . . . . . . . . . . . . . . . . . . . . . . . . . . . . . . . . . . . . . . . . . . . 5-5<br />
5-9-7. External Trigger, Gate, and Burst Characteristics. . . . . . . . . . . . . . . . . . . . . . . . . . . . . . . . . . . . . . . 5-5<br />
5-9-7-1. External Trigger . . . . . . . . . . . . . . . . . . . . . . . . . . . . . . . . . . . . . . . . . . . . . . . . . . . . . . . . . . . . . . . . . 5-5<br />
5-9-8. Internal Trigger and Burst Characteristics . . . . . . . . . . . . . . . . . . . . . . . . . . . . . . . . . . . . . . . . . . . . . 5-5<br />
5-9-8-1. Internal Trigger . . . . . . . . . . . . . . . . . . . . . . . . . . . . . . . . . . . . . . . . . . . . . . . . . . . . . . . . . . . . . . . . . . 5-5<br />
5-9-9. Manual Trigger, Gate, and Burst Characteristics . . . . . . . . . . . . . . . . . . . . . . . . . . . . . . . . . . . . . . . 5-5<br />
5-9-10. Arbitrary Memory Check . . . . . . . . . . . . . . . . . . . . . . . . . . . . . . . . . . . . . . . . . . . . . . . . . . . . . . . . . . . 5-6<br />
5-9-11. Sequencer Characteristics . . . . . . . . . . . . . . . . . . . . . . . . . . . . . . . . . . . . . . . . . . . . . . . . . . . . . . . . . . . 5-6<br />
6 Theory of operation<br />
6-1. What in This Chapter. . . . . . . . . . . . . . . . . . . . . . . . . . . . . . . . . . . . . . . . . . . . . . . . . . . . . . . . . . . . . . . . . 6-1<br />
6-2. Overall Functional Description . . . . . . . . . . . . . . . . . . . . . . . . . . . . . . . . . . . . . . . . . . . . . . . . . . . . . . . . 6-1<br />
6-3. Waveform Memory and D/A Circuits . . . . . . . . . . . . . . . . . . . . . . . . . . . . . . . . . . . . . . . . . . . . . . . . . . . 6-3<br />
6-4. Trigger Circuits . . . . . . . . . . . . . . . . . . . . . . . . . . . . . . . . . . . . . . . . . . . . . . . . . . . . . . . . . . . . . . . . . . . . . 6-3<br />
6-4-1. Triggered Mode. . . . . . . . . . . . . . . . . . . . . . . . . . . . . . . . . . . . . . . . . . . . . . . . . . . . . . . . . . . . . . . . . . 6-3<br />
6-4-2. Gated Mode . . . . . . . . . . . . . . . . . . . . . . . . . . . . . . . . . . . . . . . . . . . . . . . . . . . . . . . . . . . . . . . . . . . . . 6-4<br />
6-5. Trigger Input Circuit . . . . . . . . . . . . . . . . . . . . . . . . . . . . . . . . . . . . . . . . . . . . . . . . . . . . . . . . . . . . . . . . . 6-4<br />
6-6. Sample Clock Generator . . . . . . . . . . . . . . . . . . . . . . . . . . . . . . . . . . . . . . . . . . . . . . . . . . . . . . . . . . . . . . 6-4<br />
6-7. Sequence Generator . . . . . . . . . . . . . . . . . . . . . . . . . . . . . . . . . . . . . . . . . . . . . . . . . . . . . . . . . . . . . . . . . . 6-4<br />
6-8. Local CPU Circuit . . . . . . . . . . . . . . . . . . . . . . . . . . . . . . . . . . . . . . . . . . . . . . . . . . . . . . . . . . . . . . . . . . . 6-5<br />
6-8-1. Display / Keyboard Interface . . . . . . . . . . . . . . . . . . . . . . . . . . . . . . . . . . . . . . . . . . . . . . . . . . . . . . 6-6<br />
6-8-3. GPIB Interface. . . . . . . . . . . . . . . . . . . . . . . . . . . . . . . . . . . . . . . . . . . . . . . . . . . . . . . . . . . . . . . . . . . 6-6<br />
6-9. Output Amplifier . . . . . . . . . . . . . . . . . . . . . . . . . . . . . . . . . . . . . . . . . . . . . . . . . . . . . . . . . . . . . . . . . . . . 6-6<br />
6-10. Power Supply Circuit. . . . . . . . . . . . . . . . . . . . . . . . . . . . . . . . . . . . . . . . . . . . . . . . . . . . . . . . . . . . . . . . . 6-6<br />
6-10-1. Battery Back-Up Circuit . . . . . . . . . . . . . . . . . . . . . . . . . . . . . . . . . . . . . . . . . . . . . . . . . . . . . . . . . . 6-6<br />
7 Adjustments and Troubleshooting<br />
7-1. Introduction. . . . . . . . . . . . . . . . . . . . . . . . . . . . . . . . . . . . . . . . . . . . . . . . . . . . . . . . . . . . . . . . . . . . . . . . . 7-1<br />
7-2. Adjustments. . . . . . . . . . . . . . . . . . . . . . . . . . . . . . . . . . . . . . . . . . . . . . . . . . . . . . . . . . . . . . . . . . . . . . . . . 7-1<br />
7-2-1. Environmental Conditions. . . . . . . . . . . . . . . . . . . . . . . . . . . . . . . . . . . . . . . . . . . . . . . . . . . . . . . . . . . 7-1<br />
7-2-2. Warm-Up Period. . . . . . . . . . . . . . . . . . . . . . . . . . . . . . . . . . . . . . . . . . . . . . . . . . . . . . . . . . . . . . . . . . . 7-1<br />
7-2-3. Recommended Test Equipment . . . . . . . . . . . . . . . . . . . . . . . . . . . . . . . . . . . . . . . . . . . . . . . . . . . . . . 7-1<br />
7-2-4. Adjustment Procedures . . . . . . . . . . . . . . . . . . . . . . . . . . . . . . . . . . . . . . . . . . . . . . . . . . . . . . . . . . . . . 7-1<br />
7-3. Adjustment Procedure . . . . . . . . . . . . . . . . . . . . . . . . . . . . . . . . . . . . . . . . . . . . . . . . . . . . . . . . . . . . . . . . 7-2<br />
7-3-1. Pulse Response . . . . . . . . . . . . . . . . . . . . . . . . . . . . . . . . . . . . . . . . . . . . . . . . . . . . . . . . . . . . . . . . . . . . 7-2<br />
7-3-2. Amplitude Adjustment. . . . . . . . . . . . . . . . . . . . . . . . . . . . . . . . . . . . . . . . . . . . . . . . . . . . . . . . . . . . . . 7-2<br />
7-3-3. Offset Adjustment . . . . . . . . . . . . . . . . . . . . . . . . . . . . . . . . . . . . . . . . . . . . . . . . . . . . . . . . . . . . . . . . . 7-2<br />
7-4. Troubleshooting . . . . . . . . . . . . . . . . . . . . . . . . . . . . . . . . . . . . . . . . . . . . . . . . . . . . . . . . . . . . . . . . . . . . . 7-2<br />
4
7-4-1. Recommended Test Equipment . . . . . . . . . . . . . . . . . . . . . . . . . . . . . . . . . . . . . . . . . . . . . . . . . . . . . . 7-2<br />
7-4-2. Power-Up Tests. . . . . . . . . . . . . . . . . . . . . . . . . . . . . . . . . . . . . . . . . . . . . . . . . . . . . . . . . . . . . . . . . . . . 7-2<br />
7-5. Power Supply Checks . . . . . . . . . . . . . . . . . . . . . . . . . . . . . . . . . . . . . . . . . . . . . . . . . . . . . . . . . . . . . . . . 7-3<br />
7-6. Digital Circuits and Display Checks . . . . . . . . . . . . . . . . . . . . . . . . . . . . . . . . . . . . . . . . . . . . . . . . . . . . 7-3<br />
7-7. Clock Synthesizer Checks. . . . . . . . . . . . . . . . . . . . . . . . . . . . . . . . . . . . . . . . . . . . . . . . . . . . . . . . . . . . . 7-3<br />
7-8. Arbitrary Generator Checks . . . . . . . . . . . . . . . . . . . . . . . . . . . . . . . . . . . . . . . . . . . . . . . . . . . . . . . . . . . 7-3<br />
7-9. Sequence Generator Checks . . . . . . . . . . . . . . . . . . . . . . . . . . . . . . . . . . . . . . . . . . . . . . . . . . . . . . . . . . . 7-3<br />
7-10. Output Amplifier Checks . . . . . . . . . . . . . . . . . . . . . . . . . . . . . . . . . . . . . . . . . . . . . . . . . . . . . . . . . . . . . 7-4<br />
7-10-1. Amplitude and Offset Control Checks . . . . . . . . . . . . . . . . . . . . . . . . . . . . . . . . . . . . . . . . . . . . . . . . 7-5<br />
8 Parts List<br />
8-1. What in This Chapter. . . . . . . . . . . . . . . . . . . . . . . . . . . . . . . . . . . . . . . . . . . . . . . . . . . . . . . . . . . . . . . . . 8-1<br />
8-2. Ordering Information. . . . . . . . . . . . . . . . . . . . . . . . . . . . . . . . . . . . . . . . . . . . . . . . . . . . . . . . . . . . . . . . . 8-1<br />
8-3. Parts Description . . . . . . . . . . . . . . . . . . . . . . . . . . . . . . . . . . . . . . . . . . . . . . . . . . . . . . . . . . . . . . . . . . . . 8-1<br />
Appendix A<br />
A-1. Front Panel Menus as a Glance . . . . . . . . . . . . . . . . . . . . . . . . . . . . . . . . . . . . . . . . . . . . . . . . . . . . . . . . A-1<br />
A-2. FREQ Menus (STD Waveform Mode) . . . . . . . . . . . . . . . . . . . . . . . . . . . . . . . . . . . . . . . . . . . . . . . . . . A-1<br />
A-2-1. FREQ Menus (ARB & SEQ Waveform Modes) . . . . . . . . . . . . . . . . . . . . . . . . . . . . . . . . . . . . . . . . A-1<br />
A-3. AMPL Menus . . . . . . . . . . . . . . . . . . . . . . . . . . . . . . . . . . . . . . . . . . . . . . . . . . . . . . . . . . . . . . . . . . . . . . . A-1<br />
A-4. STD Menus . . . . . . . . . . . . . . . . . . . . . . . . . . . . . . . . . . . . . . . . . . . . . . . . . . . . . . . . . . . . . . . . . . . . . . . . . A-1<br />
A-5. ARB Menus. . . . . . . . . . . . . . . . . . . . . . . . . . . . . . . . . . . . . . . . . . . . . . . . . . . . . . . . . . . . . . . . . . . . . . . . . A-2<br />
A-6. SEQ Menus . . . . . . . . . . . . . . . . . . . . . . . . . . . . . . . . . . . . . . . . . . . . . . . . . . . . . . . . . . . . . . . . . . . . . . . . . A-2<br />
A-7. CONT Menus . . . . . . . . . . . . . . . . . . . . . . . . . . . . . . . . . . . . . . . . . . . . . . . . . . . . . . . . . . . . . . . . . . . . . . . A-3<br />
A-8. TRIG Menus . . . . . . . . . . . . . . . . . . . . . . . . . . . . . . . . . . . . . . . . . . . . . . . . . . . . . . . . . . . . . . . . . . . . . . . . A-3<br />
A-9. GATED Menus . . . . . . . . . . . . . . . . . . . . . . . . . . . . . . . . . . . . . . . . . . . . . . . . . . . . . . . . . . . . . . . . . . . . . . A-3<br />
A-10. BURST Menus . . . . . . . . . . . . . . . . . . . . . . . . . . . . . . . . . . . . . . . . . . . . . . . . . . . . . . . . . . . . . . . . . . . . . . A-3<br />
A-11. STORE Menus . . . . . . . . . . . . . . . . . . . . . . . . . . . . . . . . . . . . . . . . . . . . . . . . . . . . . . . . . . . . . . . . . . . . . . A-3<br />
A-12. RECALL Menus . . . . . . . . . . . . . . . . . . . . . . . . . . . . . . . . . . . . . . . . . . . . . . . . . . . . . . . . . . . . . . . . . . . . . A-3<br />
A-13. SYSTEM Menus. . . . . . . . . . . . . . . . . . . . . . . . . . . . . . . . . . . . . . . . . . . . . . . . . . . . . . . . . . . . . . . . . . . . . A-3<br />
Appendix B<br />
B-1. Device-Specific SCPI Command Summary . . . . . . . . . . . . . . . . . . . . . . . . . . . . . . . . . . . . . . . . . . . . . . B-1<br />
Appendix C<br />
Table of Contents<br />
C-1. Short-Form (std.) GPIB Command Summary . . . . . . . . . . . . . . . . . . . . . . . . . . . . . . . . . . . . . . . . . . . . C-1<br />
5
Table of Contents<br />
List of Tables<br />
1-1. Model 8024 - Specifications. . . . . . . . . . . . . . . . . . . . . . . . . . . . . . . . . . . . . . . . . . . . . . . . . . . . . . . . . . . 1-3<br />
3-1. Default State After Front Panel Reset. . . . . . . . . . . . . . . . . . . . . . . . . . . . . . . . . . . . . . . . . . . . . . . . . . . 3-5<br />
3-2. Front Panel Parameter Entry Limits . . . . . . . . . . . . . . . . . . . . . . . . . . . . . . . . . . . . . . . . . . . . . . . . . . . . 3-7<br />
3-3. Standard Waveforms and Their Ancillary Functions . . . . . . . . . . . . . . . . . . . . . . . . . . . . . . . . . . . . . . 3-8<br />
4-1. Model 8024 - SCPI Commands Summary . . . . . . . . . . . . . . . . . . . . . . . . . . . . . . . . . . . . . . . . . . . . . . . 4-4<br />
5-1. Line Fuse Selection . . . . . . . . . . . . . . . . . . . . . . . . . . . . . . . . . . . . . . . . . . . . . . . . . . . . . . . . . . . . . . . . . . 5-1<br />
5-2. Required Test Equipment . . . . . . . . . . . . . . . . . . . . . . . . . . . . . . . . . . . . . . . . . . . . . . . . . . . . . . . . . . . . . 5-3<br />
7-1. Power Supply Checks . . . . . . . . . . . . . . . . . . . . . . . . . . . . . . . . . . . . . . . . . . . . . . . . . . . . . . . . . . . . . . . . 7-3<br />
7-2. Digital Circuits and Display Checks . . . . . . . . . . . . . . . . . . . . . . . . . . . . . . . . . . . . . . . . . . . . . . . . . . . . 7-3<br />
7-3. Clock Synthesizer Checks. . . . . . . . . . . . . . . . . . . . . . . . . . . . . . . . . . . . . . . . . . . . . . . . . . . . . . . . . . . . . 7-4<br />
7-5. Sequence Generator Checks . . . . . . . . . . . . . . . . . . . . . . . . . . . . . . . . . . . . . . . . . . . . . . . . . . . . . . . . . . . 7-4<br />
7-6. Output Amplifier Checks . . . . . . . . . . . . . . . . . . . . . . . . . . . . . . . . . . . . . . . . . . . . . . . . . . . . . . . . . . . . . 7-5<br />
7-7. Amplitude and Offset Control Checks . . . . . . . . . . . . . . . . . . . . . . . . . . . . . . . . . . . . . . . . . . . . . . . . . . 7-5<br />
8-1. Model 8024 - Power Supply Circuit Parts List . . . . . . . . . . . . . . . . . . . . . . . . . . . . . . . . . . . . . . . . . . . 8-1<br />
8-2. Model 8024 - CPU Circuit Parts List . . . . . . . . . . . . . . . . . . . . . . . . . . . . . . . . . . . . . . . . . . . . . . . . . . . 8-2<br />
8-3. Model 8024 - Arbitrary Circuit Parts List . . . . . . . . . . . . . . . . . . . . . . . . . . . . . . . . . . . . . . . . . . . . . . . 8-3<br />
8-4. Model 8024 - Output Amplifier Circuit Parts List . . . . . . . . . . . . . . . . . . . . . . . . . . . . . . . . . . . . . . . . 8-5<br />
8-5. Model 8024 - Display Circuit Parts List. . . . . . . . . . . . . . . . . . . . . . . . . . . . . . . . . . . . . . . . . . . . . . . . . 8-6<br />
List of Figures<br />
2-1. Model 8024 - Outline Dimensions. . . . . . . . . . . . . . . . . . . . . . . . . . . . . . . . . . . . . . . . . . . . . . . . . . . . . . 2-3<br />
3-1. Model 8024 - Front Panel Layout . . . . . . . . . . . . . . . . . . . . . . . . . . . . . . . . . . . . . . . . . . . . . . . . . . . . . . 3-1<br />
3-2. Waveform in Segment 1 . . . . . . . . . . . . . . . . . . . . . . . . . . . . . . . . . . . . . . . . . . . . . . . . . . . . . . . . . . . . . . 3-11<br />
3-3. Waveform in Segment 2 . . . . . . . . . . . . . . . . . . . . . . . . . . . . . . . . . . . . . . . . . . . . . . . . . . . . . . . . . . . . . . 3-11<br />
3-4. Waveform in Segment 3 . . . . . . . . . . . . . . . . . . . . . . . . . . . . . . . . . . . . . . . . . . . . . . . . . . . . . . . . . . . . . . 3-11<br />
3-5. Sequenced Waveforms. . . . . . . . . . . . . . . . . . . . . . . . . . . . . . . . . . . . . . . . . . . . . . . . . . . . . . . . . . . . . . . . 3-11<br />
4-1. IEEE-488.2 Status Reporting Model . . . . . . . . . . . . . . . . . . . . . . . . . . . . . . . . . . . . . . . . . . . . . . . . . . . . 4-12<br />
6-1. Model 8024 - Block Diagram . . . . . . . . . . . . . . . . . . . . . . . . . . . . . . . . . . . . . . . . . . . . . . . . . . . . . . . . . . 6-2<br />
6-2. Model 8024 - Sequencer Block Diagram . . . . . . . . . . . . . . . . . . . . . . . . . . . . . . . . . . . . . . . . . . . . . . . . 6-5<br />
List of Schematic and Assembly Drawings<br />
D-1. Power Supply Circuit. . . . . . . . . . . . . . . . . . . . . . . . . . . . . . . . . . . . . . . . . . . . . . . . . . . . . . . . . . . . . . . . . D-1<br />
D-2. C.P.U. Circuit. . . . . . . . . . . . . . . . . . . . . . . . . . . . . . . . . . . . . . . . . . . . . . . . . . . . . . . . . . . . . . . . . . . . . . . D-2<br />
D-3. Arbitrary Wavefrom Generation Circuit. . . . . . . . . . . . . . . . . . . . . . . . . . . . . . . . . . . . . . . . . . . . . . . . . D-3<br />
D-4. Output Amplifier Circuit. . . . . . . . . . . . . . . . . . . . . . . . . . . . . . . . . . . . . . . . . . . . . . . . . . . . . . . . . . . . . . D-4<br />
D-5. Main Board Components Location . . . . . . . . . . . . . . . . . . . . . . . . . . . . . . . . . . . . . . . . . . . . . . . . . . . . . D-5<br />
D-6. Display Circuit . . . . . . . . . . . . . . . . . . . . . . . . . . . . . . . . . . . . . . . . . . . . . . . . . . . . . . . . . . . . . . . . . . . . . . D-6<br />
D-7. Display Board Components Location . . . . . . . . . . . . . . . . . . . . . . . . . . . . . . . . . . . . . . . . . . . . . . . . . . . D-7<br />
6
1-1. Introduction<br />
This manual provides operating and maintenance information<br />
for the Models 8023 and 8024 - Arbitrary Waveform<br />
Generator. Section 1 is a general description of the<br />
instrument. Sections 2 and 3 contain installation and<br />
operation instructions. IEEE-488.2 (GPIB) programming<br />
is explained in Section 4. Maintenance and performance<br />
checks are provided in section 5. The theory<br />
of operation is described in section 6. Section 7 outlines<br />
calibration and trouble shooting procedure. Section 8<br />
contain tables of replaceable parts and recommended<br />
spare parts. Appendix D, at the end of this manual,<br />
contains schematic and component location diagrams.<br />
NOTE<br />
This manual provides complete description<br />
of all features and options that are<br />
common to Model 8023 and Model 8024.<br />
Model 8023 is limited in its sampling<br />
clock to 50MHz. Sinewave and squarewave<br />
frequency in Model 8023 is limited<br />
to 25MHz. Throughout the whole manual,<br />
substitute these values where applicable.<br />
1-2. Description<br />
Model 8024 is an extremely high-performance programmable<br />
arbitrary waveform generator. Model 8024 combines<br />
two powerful instruments in one small package:<br />
1<br />
General Information<br />
function generator, and arbitrary waveform generator.<br />
It provides a variety of standard waveforms, to be used<br />
as test stimuli for different electronic devices. Model<br />
8024 is capable of generating arbitrary waveforms with<br />
sampling rates to 100 MHz and with 12 bits of vertical<br />
resolution. Microprocessor-based, Model 8024 is easy<br />
to set up for manual use. It is also simple to program in<br />
a GPIB system environments.<br />
The instrument is built in metal case for improved<br />
RFI and EMI shielding. It is housed in a size to fit<br />
half-rack enclosures. Despite its small size, Model 8024<br />
offers many features and functions, such as counted<br />
burst, internal trigger-generator, full implementation of<br />
the new IEEE-488.2 standard, SCPI language compatibility,<br />
and more. Model 8024 guarantees high quality<br />
waveforms throughout the specified frequency range,<br />
amplitude span, and operating temperature.<br />
Model 8024 covers a frequency range from 10 μHz<br />
to 100 MHz and an amplitude span from 10 mV to 20<br />
Vp-p. Such broad coverage warrants a variety of complex<br />
applications. Rapid, repeatable testing every time<br />
is assured by a non volatile memory. Up to 10 front<br />
panel setups can be stored and recalled for later use;<br />
ensuring exact duplication of previous tests and status.<br />
Its performance, programmability and economy make it<br />
equally at home in every laboratory.<br />
Besides its normal continuous mode, Model 8024<br />
offers a variety of interrupted modes. The output waveform<br />
may be gated, triggered, or may generate a counted<br />
burst of waveforms. A built-in trigger generator, which<br />
1-1
General Information<br />
has a programmable period, can replace an external<br />
trigger stimulant. The MANUAL trigger is just an additional<br />
convenience for front panel operation.<br />
Model 8024 provides an output level from 20 mV to<br />
20 Vp-p into open circuit or 10 mV to 10 Vp-p into 50<br />
Ω. DC offset plus amplitude are independently variable<br />
within three level windows: ±10 V, ±1 V and ±100 mV.<br />
This special characteristic allows generation of extremely<br />
small signals, at elevated DC levels.<br />
Model 8024 is capable of generating arbitrary waveforms<br />
with 12 bits of resolution. There are a few standard<br />
waveforms which are memory-resident. Other<br />
waveforms may be generated either manually, or downloaded<br />
from computers to the instrument using the GPIB<br />
link. Waveforms may also be generated using the Wave-<br />
CAD program. The wave generation software package<br />
- WaveCAD, is available from <strong>Tabor</strong>, contact your local<br />
representative for details.<br />
The arbitrary memory may store waveforms up to 64<br />
long. If smaller size portions are needed, the memory<br />
may be divided to 99 smaller segments. A built-in circuit<br />
controls the sequence and the number of times that<br />
each segment is replayed. The sequencing circuit, operating<br />
at a sampling rate of 100 MHz can generate extremely<br />
long waveforms which, otherwise, require<br />
much larger memory depth.<br />
1-3. Instrument & Manual<br />
Identification<br />
The serial number of the instrument is located on the<br />
rear panel of the instrument. The two most significant<br />
digits identify instrument modifications. If this prefix<br />
differs from that listed on the title page of this manual,<br />
there are differences between this manual and your<br />
instrument.<br />
Technical corrections to this manual (if any) are<br />
listed in the back of this manual on an enclosed MAN-<br />
UAL CHANGES sheet.<br />
1-4. Options<br />
Model 8024 does not offer any options. It comes complete<br />
and ready to operate with GPIB interface. Model<br />
8024 includes WaveCAD - Waveform Generation Pro-<br />
1-2<br />
gram that lets you create and edit waveforms on any<br />
personal coputer. If you did not receive WaveCAD with<br />
your instrument, please contact <strong>Tabor</strong> <strong>Electronics</strong> or<br />
your nearest representative and ask for the free Wave-<br />
CAD software package.<br />
1-5. Safety Considerations<br />
Model 8024 has been manufactured according to international<br />
safety standards. The instrument meets VDE<br />
0411/03.81 and UL 1244 standards for safety of commercial<br />
electronic measuring and test equipment for<br />
instruments with an exposed metal chassis that is directly<br />
connected to earth via the power supply cable.<br />
Before the instrument is switched on, make sure that<br />
protective earth terminal is connected to a protective<br />
earth via the power cord. Do not remove instrument<br />
covers when operating or when power cord is connected<br />
to mains.<br />
Any adjustment, maintenance and repair of the<br />
opened instrument under voltage should be avoided as<br />
much as possible, but when inevitable, should be carried<br />
out only by a skilled person who is aware of the hazard<br />
involved.<br />
1-6. Supplied Accessories<br />
Model 8024 is supplied with a power cord, instructions<br />
manual. WaveCAD software and WaveCAD manual are<br />
also included.<br />
1-7. Specifications<br />
Instrument specifications are listed in Tables 1-1. These<br />
specifications are the performance standards or limits<br />
against which the instrument is tested. For model 8023,<br />
substitute maximum sampling rate with 50 MHz.Sinewave<br />
and squarewave frequency is limited to 25MHz on<br />
Model 8023.<br />
NOTE<br />
All specifications in the following<br />
table apply under the following conditions:<br />
Output terminated into 50 Ω,<br />
after 30 minutes of warm-up time,<br />
and within a temperature range of<br />
20°C to 30°C.
Table 1-1. Model 8024 - Specifications.<br />
OUTPUT CHARACTERISTICS<br />
Output: Via front panel OUTPUT BNC terminal.<br />
Stand-by: Output Normal or Minimum signal.<br />
Impedance: 50 Ω, ±2%.<br />
Protection: Protected against continuous short to case ground.<br />
Glitch Energy: 1 nV-s at 10 Vp-p<br />
Amplitude: 20 mV to 20 Vp-p, into open circuit;<br />
10 mV to 10 Vp-p, into 50 Ω.<br />
Resolution: 3 digits.<br />
Accuracy (1 KHz): ±(2%+20 mV), from 1 V to 10 V;<br />
±(3%+4 mV), from 100 mV to 1 V;<br />
±(4%+2 mV), from 10 mV to 100 mV.<br />
Offset<br />
Dependency: Offset and Amplitude are independently adjustable within<br />
level windows:<br />
±5 V, ±500 mV, and ±50 mV.<br />
Range: 0 to ±4.50 V, within ±5 V window;<br />
0 to ±450 mV, within ±500 mV window;<br />
0 to ±45.0 mV, within ±50 mV window.<br />
Resolution: 3 digits<br />
Accuracy: ±(2% +1% of amplitude +20 mV), within 5 V window;<br />
±(3% +1% of amplitude +5 mV), within 500 mV window;<br />
±(4% +1% of amplitude +2 mV), within 50 mV window.<br />
Filters: 50 MHz 7-pole elliptic;<br />
25 MHz 7-pole elliptic;<br />
20 MHz 7-pole Gaussian.<br />
Square Wave, Pulse<br />
Rise/Fall time: 6 ns typical, 10% to 90% of amplitude.<br />
Aberration:
General Information<br />
1-4<br />
Table 1-1. Model 8024 - Specifications (continued).<br />
Gated: External signal enables generator. First output cycle<br />
synchronous with the active slope of the triggering signal.<br />
Last cycle of output waveform always completed.<br />
External Burst: Preset number of cycles stimulated by an internal, external,<br />
or manual trigger.<br />
Internal Burst: An internal timer repeatedly generates a burst of counted<br />
output cycles<br />
Trigger Frequency<br />
External: To 10 MHz, or GPIB trigger.<br />
Internal: From 20 μs to 999 s;<br />
Manual: Simulates an external trigger signal.<br />
STANDARD WAVEFORMS<br />
Frequency Range: Waveform dependent.<br />
Source: Internal synthesizer<br />
Resolution: 4 digits<br />
Accuracy: ±0.01% of reading<br />
Stability: 100 ppm<br />
Sine<br />
Frequency Range: 10 μHz to 50 MHz.<br />
Distortion:
Table 1-1. Model 8024 Specifications (continued).<br />
Gaussian Pulse<br />
Frequency Range: 10 μHz to 1 MHz.<br />
Adjustable Parameters<br />
Time Constant: 1000 to 65,535.<br />
Exponential Decaying/<br />
Rising Pulse<br />
Frequency Range: 10 μHz to 1 MHz.<br />
Adjustable Parameters<br />
Time Constant: 0 to 20.<br />
DC<br />
Range: 1% to 100% of amplitude.<br />
ARBITRARY WAVEFORMS<br />
Waveform Memory: 64 K points.<br />
Memory Segmentation<br />
Number of Segments: 1 to 99<br />
Min Segment Size: 10 point<br />
Vertical Resolution: 12 bits (4096 points).<br />
Sinewave<br />
Total Harmonic Distortion (at 4096 vertical points and sampling rate of 100 MHz):<br />
50dB, 100KHz to 1MHz;<br />
>45dB, 1MHz to 3.125MHz<br />
Sampling Clock<br />
Source: Internal synthesizer, external clock, internal reference.<br />
Range:<br />
Internal: 10 mHz to 100 MHz,<br />
External: To 100 MHz.<br />
Internal Reference: 10 MHz, fixed internal crystal clock frequency.<br />
Resolution: 4 digits<br />
Accuracy: ±0.01% of reading,<br />
Stability: 100 ppm.<br />
Built-In Utilities: Permit global operations on memory segments.<br />
Clear: Clears a selected memory segment.<br />
Fill: Fills a selected memory segment with constant data.<br />
Invert: Inverts contents of active segment..<br />
Offset: Offsets a waveform in a selected memory segment.<br />
AM: Modulates segment’s contents with a sine waveform.<br />
SEQUENCED WAVEFORMS<br />
General Information<br />
Operation: Permits division of the main memory into smaller segments.<br />
The segments may be linked and repeated to generate<br />
extremely long waveforms.<br />
Number of Sequences: From 0 to 9, front panel selection.<br />
Number of Steps: From 0 to 99 steps, each sequence.<br />
Repeated Segments: From 0 to 32767 loops, each segment.<br />
1-5
General Information<br />
1-6<br />
Table 1-3. Model 8024 - Specifications (continued).<br />
Segment Duration:<br />
Sampling Clock<br />
Minimum 100 ns for more than one loop.<br />
Source:<br />
Range:<br />
Internal synthesizer, external clock, 10 MHz internal reference.<br />
Internal: 10 mHz to 100 MHz,<br />
External: To 100 MHz.<br />
Internal Reference: 10 MHz, fixed internal crystal clock frequency.<br />
Resolution: 4 digits<br />
Accuracy: ±0.01% of reading,<br />
Stability: 100 ppm.<br />
ENVIRONMENTAL<br />
Operating Temperature: 0° to +40°C, ambient.<br />
Specified Accuracy: Within +25°C ±5°C.<br />
Storage Temperature: −40°C to +70°C.<br />
Humidity range: 80% R.H.<br />
GENERAL<br />
Display: 2 lines, 16 characters, back-lit LCD.<br />
Power: 115/230 Vac, 50 or 60 Hz, 60 VA max.<br />
Stored Set-ups: Stores 10 complete front panel set-ups.<br />
Dimensions: 3.5" x 8.3" x 15.4" (H x W x L).<br />
Rack Mount Dimensions: 3.5" x 19" (H x W).<br />
Weight: Approximately 12 Lbs.<br />
GPIB INTERFACE (IEEE-488.2)<br />
Interface Functions: Complies with IEEE-488.2 standard.<br />
Programmable controls: All front panel controls except POWER switch.<br />
Subsets: SH1, AH1, T6, TE0, L4, LE0, SR1, RL1, PP2, DC1, DT1, C0.<br />
Program Message Format: Program Message Header, Program Data (floating point<br />
and/or suffix program data), Program Message Terminator.<br />
Response Message Format: Variable length response format consisting of Response<br />
Header, Response Data (NR1, NR2, or NR3 format), and<br />
Response Message Terminator.<br />
Common Commands and Queries: *CLS, *ESE, *ESE?, *ESR, *IDN?, *OPC, *OPC?,<br />
*RCL, *RST, *SAV, *SRE, *SRE?, *STB, *TRG,<br />
*TST?, *WAI.<br />
Status Reporting: *ESR?, *STB?, and RQS - read by Serial Poll.
2-1. Introduction<br />
This section contains information and instructions necessary<br />
for the installation and shipping of the Arbitrary/<br />
Waveform generators - 8024. Details are provided for<br />
initial inspection, power connection, grounding safety<br />
requirements, installation information, and re-packing<br />
instructions for storage or shipment.<br />
2-2. Unpacking & Initial Inspection<br />
Unpacking and handling of the generator requires only<br />
the normal precautions and procedures applicable to<br />
the handling of sensitive electronic equipment. The contents<br />
of all shipping containers should be checked for<br />
included accessories and certified against the packing<br />
slip to ascertain that the shipment is complete.<br />
2-3. Safety Precautions<br />
The following safety precautions should be observed<br />
before using this product and associated computer. Although<br />
some instruments and accessories would normally<br />
be used with non-hazardous voltages, there are<br />
situations where hazardous conditions may be present.<br />
This product is intended for use by qualified personnel<br />
who recognize shock hazards and are familiar<br />
with the safety precautions required to avoid possible<br />
injury. Read the operating information carefully before<br />
using the product.<br />
Exercise extreme caution when a shock hazard is<br />
present. Lethal voltage may be present on cables, connector<br />
jacks, or test fixtures. The American National<br />
2<br />
Installation<br />
Standard Institute (ANSI) states that a shock hazard<br />
exists when voltage levels greater than 30V RMS,<br />
42.4V peak, or 60VDC are present. A good safety practice<br />
is to expect that hazardous voltage is present in<br />
any unknown circuit before touching or disconnecting<br />
the line cord.<br />
Before operating an instrument, make sure the line<br />
cord is connected to a properly grounded power receptacle.<br />
Inspect the connecting cables and test leads<br />
for possible wear, cracks, or breaks before each use.<br />
For maximum safety, do not touch the product, test<br />
cables, or any other of the instrument parts while power<br />
is applied to the circuit under test. ALWAYS remove<br />
power from the entire test system before connecting<br />
cables or jumpers, installing or removing cards from<br />
the computer, or making internal changes, such as<br />
changing card address.<br />
Do not touch any object that could provide a current<br />
path to the common side of the circuit under test or<br />
power line (earth) ground. Always keep dry hands while<br />
handling the instrument.<br />
If you are using test fixtures, keep the lid closed<br />
while power is applied to the device under test. Safe<br />
operation requires that the computer lid be closed at<br />
all times during operation. Carefully read the Safety<br />
Precautions instructions that are supplied with your<br />
computer.<br />
Instruments, cables, leads or cords should not be<br />
connected to humans. Before performing any maintenance,<br />
disconnect the line cord and all test cables.<br />
2-1
Installation<br />
Finally, maintenance should be performed by qualified<br />
service personnel only. If you have no past experience<br />
in computer servicing, we strongly recommend that installation<br />
and initial tests on the instrument be done<br />
by your computer dealer or by the factory itself. Use<br />
the enclosed Service Form when you return the instrument<br />
for service.<br />
2-4. Performance Checks<br />
The instrument was carefully inspected for mechanical<br />
and electrical performance before shipment from the<br />
factory. It should be free of physical defects and in<br />
perfect electrical order upon receipt. Check the instrument<br />
for damage in transit and perform the electrical<br />
procedures outlined in Section 5. If there is indication<br />
of damage or deficiency, see the warranty in this manual<br />
and notify <strong>Tabor</strong> <strong>Electronics</strong>.<br />
CAUTION<br />
It is recommended that the operator<br />
be fully familiar with the specifications<br />
and all sections of this manual.<br />
Failure to do so may compromise the<br />
warranty and the accuracy which<br />
Taboe <strong>Electronics</strong> has engineered<br />
into your instrument.<br />
2-5. Power Requirements<br />
The function generator may be operated from any one<br />
of the following sources: a. 103.5 to 126.5 Volts (115<br />
Volts, NOMINAL) b. 207 to 253 Volts (230 Volts,<br />
NOMINAL).<br />
The instrument operates over the power mains frequency<br />
range of 48 to 63Hz. Always verify that the<br />
operating power mains voltage is the same as that specified<br />
on the rear panel voltage selector switch.<br />
CAUTION<br />
Failure to switch the instrument to<br />
match the operating line voltage will<br />
damage the instrument and may void<br />
the warranty.<br />
The Model 8024 should be operated from a power<br />
source with its neutral at or near ground (earth potential).<br />
The instrument is not intended for operation from<br />
two phases of a multi-phase ac system or across the<br />
legs of a single-phase, three-wire ac power system.<br />
Crest factor (ratio of peak voltage to rms) should be<br />
2-2<br />
typically within the range of 1.3 to 1.6 at 10% of the<br />
nominal rms mains voltage.<br />
2-6. Grounding Requirements<br />
To insure the safety of operating personnel, the U.S.<br />
O.S.H.A. (Occupational Safety and Health) requirement<br />
and good engineering practice mandate that the instrument<br />
panel and enclosure be “earth” grounded. All of<br />
<strong>Tabor</strong>’s instruments are provided with an Underwriters<br />
Laboratories (U.L. and V.D.E) listed three-conductor<br />
power cable, which when plugged into an appropriate<br />
power receptacle, grounds the instrument. The long offset<br />
pin on the male end of the power cable carries the<br />
ground wire to the long pin of the Euro connector (DIN<br />
standard) receptacle on the rear panel of the instrument.<br />
To preserve the safety protection feature when operating<br />
the instrument from a two-contact outlet, use<br />
a three-prong to two-prong adapter and connect the<br />
green lead on the adapter to an “earth” ground.<br />
CAUTION<br />
To avoid operator shock hazard do<br />
not exceed the power mains voltage<br />
frequency rating which limits the<br />
leakage current between case and<br />
power mains. Never expose the instrument<br />
to rain, excessive moisture,<br />
or condensation.<br />
2-7. Installation and Mounting<br />
The instrument is fully solid state and dissipates only<br />
a small amount of power. No special cooling is required.<br />
However, the instrument should not be operated where<br />
the ambient temperature exceeds 40°C, when the relative<br />
humidity exceeds 80% or condensation appears<br />
anywhere on the instrument. Avoid operating the instrument<br />
close to strong magnetic fields which may<br />
be found near high power equipment such as motors,<br />
pumps, solenoids, or high power cables. Use care when<br />
rack mounting to locate the instrument away from<br />
sources of excessive heat or magnetic fields. Always<br />
leave 4 cm (1.5 inches) of ventilation space on all<br />
sides of the instrument.<br />
2-8. Bench Operation<br />
The Model 8024 is shipped with plastic feet, tilt stand<br />
in place and ready for use as a bench or portable instrument.<br />
See outline drawing Figure 2-1 for outline<br />
dimensions.
2-9. Rack Mounting<br />
The instrument may be rack mounted in a standard 19<br />
inch rack. The instrument may be rack mounted in<br />
Rack Mount Kit option -002.<br />
2-10. Portable Use<br />
The instrument may be used in applications requiring<br />
portability. A tilt stand consisting of two retractable<br />
legs is provided with each unit.<br />
2-11. Short Term Storage<br />
If the instrument is to be stored for a short period of<br />
time (less than three months), place cardboard over<br />
the panel and cover the instrument with suitable protective<br />
covering such as a plastic bag or strong craft<br />
paper. Place power cable and other accessories with<br />
the instrument. Store the covered generator in a clean<br />
dry area that is not subject to extreme temperature variations<br />
or conditions which may cause moisture to condense<br />
on the instrument.<br />
Figure 2-1. Model 8024 - Outline Dimensions.<br />
2-12. Long Term Storage or<br />
Re-Packaging For Shipment<br />
Installation<br />
If the instrument is to be stored for a long period or<br />
shipped to the factory for repair, proceed as directed<br />
below. If you have any questions contact your local<br />
<strong>Tabor</strong> representative or the <strong>Tabor</strong> Service Department<br />
at the factory.<br />
If the original <strong>Tabor</strong> supplied packaging is to be<br />
used proceed as follows:<br />
1. If the original wrappings, packing material, and<br />
container have been saved, re-pack the instrument and<br />
accessories originally shipped to you. If the original<br />
container is not available, one may be purchased<br />
through the <strong>Tabor</strong> Service Department at the factory.<br />
2. Be sure the carton is well sealed with strong<br />
tape or metal straps.<br />
3. Mark the carton with the model number and serial<br />
number with indelible marking. If it is to be shipped,<br />
show sending address and return address on two sides<br />
of the box; cover all previous shipping labels.<br />
If the original container is not available, proceed<br />
as follows:<br />
2-3
Installation<br />
1. Before packing the unit, place all accessories<br />
into a plastic bag and seal the bag.<br />
2. For extended storage or long distance shipping<br />
only, use U.S. government packing method II C and<br />
tape a two-unit bag of desiccant (per MIL-D-3464) on<br />
the rear cover.<br />
3. Place a 13 cm (5 inch) by 30 cm (12 inch) piece<br />
of sturdy cardboard over the front panel for protection.<br />
4. Place the generator into a plastic bag and seal<br />
the bag.<br />
5. Wrap the bagged instrument and accessories in<br />
one inch thick flexible cellular plastic film cushioning<br />
material (per PPP-C-795) and place in a barrier bag<br />
(per MIL-B-131). Extract the air from bag and heat<br />
seal.<br />
6. Place bagged instrument and accessories into an<br />
oversized card-board box (per PPP-B-636 type CF, class<br />
WR, variety SW, grade V3C). Fill additional spaces<br />
with rubberized hair or cellular plastic cushioning material.<br />
Close box in accordance with container specifications.<br />
Seal with sturdy water resistant tape or metal<br />
straps.<br />
2-4<br />
7. Mark container “DELICATE INSTRUMENT”,<br />
“FRAGILE”, etc. Mark instrument model and serial<br />
number and date of packaging. Affix shipping labels<br />
as required or mark according to MIL-STD-129.<br />
NOTE<br />
If the instrument is to be shipped to<br />
<strong>Tabor</strong> for calibration or repair, attach<br />
a tag to the instrument identifying<br />
the owner. Note the problem, the<br />
symptoms, and service or repair desired.<br />
Record the model and serial<br />
number of the instrument. Show the<br />
work authorization order as well as<br />
the date and method of shipment.<br />
ALWAYS OBTAIN A RETURN<br />
AUTHORIZATION NUMBER<br />
FROM THE FACTORY BEFORE<br />
SHIPPING THE INSTRUMENT TO<br />
TABOR.
3-1. Introduction<br />
Model 8024 operation is divided into two general categories:<br />
basic bench operation, and GPIB operation. Basic<br />
bench operation, which is covered in this section,<br />
explains how to use the model 8024 for generating the<br />
required waveform characteristics. GPIB programming<br />
can also be used to greatly enhance the capability of<br />
the instrument in applications such as automatic test<br />
Figure 3-1. Model 8024 - Front Panel Layout.<br />
equipment. This aspect of operation is covered in Section<br />
4.<br />
3-2. Front Panel Familiarization<br />
3<br />
Operating Instructions<br />
The front panel is generally divided into four sections:<br />
buttons, connectors, display and indicators. The following<br />
paragraphs describe the purpose of each of these<br />
items in details. Refer to the Model 8024 front panel<br />
layout throughout the following descriptions.<br />
3-1
Operating Instructions<br />
3-3. Buttons<br />
All front panel buttons except the POWER switch and<br />
the dial are momentary contact switches. Most buttons<br />
include an associated annunciator light for indication<br />
of the selected parameter and/or operating mode. Some<br />
buttons do not have an associated annunciator light.<br />
Exercising these buttons generates an immediate response<br />
on the display.<br />
Front panel buttons may be divided into five functional<br />
groups: Instrument state, Parameters, Cursor control,<br />
Output control, and Memory control. These controls<br />
are described in the following paragraphs.<br />
3-3-1. Instrument State Buttons<br />
Five buttons in this group control the state of the Model<br />
8024. They are marked: Power, System, DCL, Reset,<br />
and Trigger.<br />
POWER - The POWER switch controls the AC<br />
power to the instrument. Pressing and releasing the<br />
switch once turns the power on. Pressing and releasing<br />
the switch a second time turns the power off.<br />
SYSTEM - The SYSTEM button when pressed<br />
modifies the LCD display to read the current GPIB<br />
address setting. Press any other button to resume normal<br />
operating conditions.<br />
LOCAL/DCL - The LOCAL/DCL button when<br />
pressed, and the instrument is in remote mode (but<br />
not in remote lockout condition - LLO), will cause the<br />
instrument to go to local operating mode. When the<br />
generator is already in local operating mode, this button<br />
may be used to clear the instrument to its factory default<br />
settings. The function of DCL (Device Clear) is described<br />
later in this Section.<br />
RESET - The RESET button modifies individual<br />
parameter setting to its factory default. This button<br />
effects the displayed parameter only.<br />
TRIGGER - The TRIGGER button may be used<br />
as a manual trigger stimuli, when the instrument is<br />
operating in one of its external trigger modes.<br />
3-3-2. Parameter Buttons<br />
There are four buttons in this group. They are marked<br />
PARAMETERS, WAVEFORMS, FILTER, and MODE.<br />
These buttons control which parameter will be displayed<br />
on the LCD display. The function of each button<br />
is described in the following.<br />
3-2<br />
PARAMETER - The PARAMETER button when<br />
pressed toggles between the FREQ and AMPL menus.<br />
Selection and modification of various parameters is<br />
discussed later in this section.<br />
WAVEFORM - The WAVEFORM button controls<br />
which of three types of waveforms will be placed at<br />
the output connector. There are three types of waveforms<br />
that the Model 8024 can output: standard waveforms,<br />
arbitrary waveforms, and sequenced waveforms.<br />
The various waveform options are described later in<br />
this manual.<br />
FILTER - The FILTER button selects between filter<br />
options that may be applied to the output signal. The<br />
generator offers three low-pass filters: 20 MHz Gaussian,<br />
25 MHz Elliptical, and 50 MHz Elliptical. Each<br />
filter has a different frequency response and is used<br />
in different application. The filters and their operation<br />
is described later in this manual.<br />
MODE - The MODE button when pressed modifies<br />
the instrument’s operating mode to one of four options.<br />
It also modifies the LCD reading to display trigger<br />
parameters. The various operating modes are described<br />
later in this manual.<br />
3-3-3. Cursor Control Buttons<br />
There are six buttons and a dial in the cursor control<br />
group. These buttons control the cursor position within<br />
the menus. These buttons are described in the following.<br />
CURSOR/MENU CONTROL - There are four buttons<br />
that control the position of the cursor within each<br />
menu. These buttons are marked with arrows; pointing<br />
to four different direction. The buttons which are<br />
marked with the up and down arrows are used for scrolling<br />
through the various parameters within a specific<br />
menu. The buttons which are marked with the left and<br />
right arrows are used for placing the cursor on the<br />
data or digit which has to be modified.<br />
DIAL - The Dial is a mechanical rotary-encoder<br />
that simulates a digital potentiometer. It is used for<br />
editing the displayed parameter. The dial may rotate<br />
clockwise to increment reading or counterclockwise to<br />
decrement reading.<br />
ENTER - This button is used for executing a specific<br />
function which requires complete operators’ attention.<br />
It is normally used in conjunction with front panel<br />
settings of arbitrary parameters which, once modified,<br />
change front panel settings permanently.
DIAL LOCK - This button when pressed locks the<br />
dial to prevent accidental data modification. It toggles<br />
between lock and unlock while its associated LED turns<br />
on and off to indicate its status.<br />
3-3-4. Output Control Buttons<br />
OUTPUT - The output button enables or disables<br />
the signal at the main output connector. The light above<br />
the OUTPUT connector is associated with this button.<br />
FILTER - The FILTER button applies or removes<br />
filters from the output signal. The light left to the FIL-<br />
TER button is associated with this control.<br />
3-3-5. Instrument Setups Buttons<br />
STORE - The STORE button when pressed allows<br />
storage of front panel setups. Using this function is<br />
described later in this manual.<br />
RECALL - The RECALL button when pressed initiates<br />
recalling process of previously stored front panel<br />
setups. Using this function is described later in this<br />
manual.<br />
3-4. Connectors<br />
The connectors are used for connecting the Model 8024<br />
to the unit under test.<br />
1. SYNC OUT - The SYNC OUT connector outputs<br />
fixed amplitude pulses. In most cases, the leading edge<br />
of the SYNC output is synchronous with the leading<br />
edge at the main output connector.<br />
2. OUTPUT - The OUTPUT connector is used as<br />
the main output for the function generator. Output is<br />
driven from a 50Ω source. Special care should be taken<br />
when these outputs are connected to the device under<br />
test because these outputs are capable of delivering<br />
amplitudes up to 20Vp-p.<br />
3-5. Display and Indicators<br />
1. DISPLAY - The function of the numeric display<br />
is to indicate the value of the various parameters. The<br />
8024 is using of a 2-line, 16-character LCD display.<br />
The display is back-lit to enhance the LCD readout.<br />
The display is also used to indicate other information<br />
such as messages, errors, and more.<br />
2. INDICATORS - 25 indicators are located on<br />
the front panel. These indicators are used as pointers<br />
to a selected menu, operating modes, etc.<br />
3-6. Rear Panel Familiarization<br />
There are a number of connectors and switches on the<br />
rear panel. Their function is described in the following.<br />
AC RECEPTACLE - Power is applied through the<br />
power cord to the 3-terminal AC receptacle. Note that<br />
the selected ac line voltage is marked on the line voltage<br />
selector switch.<br />
LINE SELECT SWITCH - The LINE SELECT<br />
switch selects one of the primary voltages which are<br />
marked on both sides of the switch.<br />
LINE FUSE - The line fuse provides protection<br />
for the AC power line input. For information on replacing<br />
this fuse, refer to Section 5.<br />
IEEE-488.2 CONNECTOR - This connector is<br />
used for connecting the instrument to the IEEE-488.2<br />
bus.<br />
TRIG IN - The TRIG IN connector is used for<br />
applying an external triggering source to the function<br />
generator. This input accepts TTL signals only.<br />
CLOCK IN - The CLOCK IN is used as an input<br />
to receive a reference signal for synchronizing the<br />
Model 8024 to other instruments.<br />
3-7. Power-Up Procedure<br />
The basic procedure of powering up the Model 8024<br />
is described below.<br />
1. Connect the female end of the power cord to<br />
the AC mains receptacle on the rear panel. Connect<br />
the other end of the power cord to a grounded AC<br />
outlet.<br />
WARNING<br />
Operating Instructions<br />
Be sure the power line voltage agrees<br />
with the indicated value on the rear<br />
panel of the instrument. Failure to<br />
heed this warning may result in instrument<br />
damage. The instrument is<br />
equipped with a 3-wire power cord<br />
designed to be used with grounded<br />
outlets. When the proper connections<br />
are made, the instrument chassis is<br />
connected to the power line ground.<br />
Failure to use a properly grounded<br />
outlet may result in personal shock<br />
hazard.<br />
2. Turn on the mains power by pressing and releasing<br />
the POWER switch on the front panel.<br />
3-3
Operating Instructions<br />
3. The instrument then begins operation by performing<br />
a display and indicator test which takes approximately<br />
one second. All front panel indicators illuminate.<br />
4. After all the indicators are tested, the instrument<br />
performs internal ROM and RAM tests. Successful execution<br />
of these tests is followed by a one second readout<br />
of the installed software revision, similar to the<br />
example below:<br />
5. The model 8024 then checks which of its options<br />
are installed and displays consequent message. The installed<br />
option message will look like the following:<br />
6. If the instrument detects that the GPIB option<br />
is installed and displays the above message, the instrument<br />
proceeds with displaying its GPIB primary<br />
address. The GPIB address is set by front panel programming<br />
and is stored in the non-volatile memory.<br />
For example, with the generator programmed to address<br />
19, the display shows:<br />
7. Following these display messages, the instrument<br />
commences its normal operating mode and generates<br />
waveforms. Note that the instrument is equipped with<br />
a non-volatile memory. This memory automatically<br />
monitors front panel traffic and retains its last set-up<br />
for events such as accidental power loss. In case of<br />
power loss, or after normal power-up procedure, the<br />
instrument resumes operation with its previously programmed<br />
front panel set-up.<br />
3-4<br />
Software Rev 1.03<br />
Last update 11/94<br />
GPIB option<br />
installed<br />
GPIB address 19<br />
Commands SCPI<br />
NOTE<br />
One who does not wish to observe<br />
the power-up procedure every time<br />
that the generator is turned on, can<br />
easily remove the sequence of displayed<br />
messages. Depressing the left<br />
-pointing and the right-pointing arrows<br />
in the cursor control group, simultaneously<br />
writes a special code<br />
to the non-volatile memory. The next<br />
time the generator will be powered-<br />
up, the instrument will skip the<br />
power-up procedure and will immediately<br />
commence with displaying<br />
the front panel set-up. Repeating the<br />
sequence as above, restores normal<br />
power up procedure. Note that there<br />
are no front panel markings that indicate<br />
power-up sequence removal.<br />
Therefore, unless the instrument is<br />
being used by one person only, and<br />
to remove confusion, it is recommended<br />
that power-up sequence remains<br />
unchanged.<br />
3-8. Software Reset<br />
An operator who is not yet fully familiar with front<br />
panel operation of the function generator, may find<br />
himself locked into a “dead-end” situation where nothing<br />
operates the way it should. The fastest way of restoring<br />
the generator to a known state is by resetting<br />
its software. This may be done by pressing the [DCL]<br />
button and then acknowledging the question on the<br />
display by pressing the [ENTER] button. The instrument<br />
then resets to its factory selected defaults. Table<br />
3-1 summarizes these defaults.<br />
3-8-1. Parameter Reset<br />
As discussed in paragraph 3-9, software reset restores<br />
all front panel parameters to their factory selected values.<br />
It may, however, be required to reset one or two<br />
parameters and leave the rest intact. In that case the<br />
instrument provides additional capability besides the<br />
DCL function. Pressing the [RESET] button modifies<br />
the displayed parameter, at the cursor position, to its<br />
default value. Default values are summarized in Table<br />
3-1.<br />
NOTE<br />
Software reset has no effect on the<br />
stored front panel set-ups and on the<br />
programmed GPIB address.<br />
3-9. Display Messages<br />
Model 8024 has several display messages pertaining<br />
to its operation. The generator also displays an error<br />
indication when a front panel programming error is<br />
detected. These messages and error indications are discussed<br />
in the following. Note that the instrument has<br />
a number of additional display messages associated with<br />
IEEE-488.2 programming. These messages are discussed<br />
in section 4 of this manual.
Table 3-1. Default State After Front Panel Reset.<br />
3-10. Front Panel Error Indication<br />
In general, whenever a front panel or GPIB programming<br />
attempts to place the 8024 in an error condition,<br />
the Model 8024 responds by front panel error indication<br />
or by addressing the IEEE-488.2 service request register.<br />
Errors are categorized in four main groups:<br />
1. General errors<br />
2. Limit errors<br />
3. IEEE errors<br />
3-10-1. General Errors<br />
Errors in this group are caused by improper usage of<br />
the instrument. Such errors occur while attempting to<br />
place the instrument in an illegal mode. For example,<br />
depressing simultaneously two buttons (except [1st<br />
MENU]) has no valid definition or by depressing the<br />
MANUAL button while the instrument is in its continuous<br />
operating mode. In such cases, the instrument<br />
simply ignores this error and continues with its normal<br />
operation.<br />
3-10-2. Limit Errors<br />
Errors in this group are caused by an attempt to program<br />
values outside the legal limits of the instrument. For<br />
example, trying to program frequency value of 50 MHz<br />
for the standard triangle waveform. In this case, the<br />
LED above the OUTPUT connector starts blinking, indicating<br />
that the output waveform may not look as<br />
expected. Table 3-2 summarizes all front panel entry<br />
limits.<br />
3-10-3. IEEE-488.2 Errors<br />
Operating Instructions<br />
FUNCTION DESCRIPTION DEFAULT STATE<br />
FREQ Frequency 100.0KHz<br />
AMPL Amplitude 1.00V<br />
OFFS Offset +000mV<br />
FILTER Analog filter Auto (sine filter)<br />
TRIG_COUN Trigger counts (Burst) 00001<br />
INT_PER Internal trigger period 1.00s<br />
SOURCE Trigger source External<br />
SCLK Sampling clock 10.00Msps<br />
Reference Clock Arbitrary clock source Internal<br />
SEG01= Segment size 0<br />
STEP01= Segment size SEG01*0<br />
General Status<br />
DISPLAY Main menu parameters FREQ<br />
MODE Operating mode selection Continuous<br />
STATE GPIB status Local state<br />
WAVEFORM Output waveform Sinewave (standard)<br />
ST-BY Output stand-by mode Off<br />
In general, whenever a GPIB programming attempts<br />
to put the Model 8024 into an error condition, the function<br />
generator responds in two ways. First by displaying<br />
a front panel message and than, if programmed so, by<br />
raising an SRQ flag in its Status Byte Register. Using<br />
the Serial Poll command, the controller may then address<br />
the generator and request its status byte.<br />
The generator incorporates a number of display messages<br />
which are associated with errors involving GPIB<br />
interface programming. These messages are discussed<br />
in detail in Section 4 of this manual.<br />
There is one message however, which should be<br />
explained at this point because it may interfere with<br />
front panel operation. A remote enable or a device<br />
dependent command, sent to the instrument through<br />
the bus, turns the REMOTE light on. In this case, all<br />
front panel buttons except [LOCAL] are disabled. Pressing<br />
any button generates the following message:<br />
3-5
Operating Instructions<br />
This message indicates that the instrument expects<br />
that the [LOCAL] button be first depressed otherwise<br />
front panel operations are ignored. After the [LOCAL]<br />
button is depressed, the REMOTE light turns off and<br />
the instrument is ready to accept additional front panel<br />
programming sequences.<br />
3-11. Selecting and Modifying<br />
Parameters<br />
Parameters may be selected and modified by pressing<br />
one of four buttons: [TRIGGER], [PARAMETER],<br />
[FILTER], and [MODE]. Pressing one of these buttons<br />
enables access to a number of menus which are associated<br />
with it. Each time a button is depressed a different<br />
menu is displayed. The selected menu is indicated by<br />
an LED. Selection of the required parameter within a<br />
specific menu is done with the Cursor Control and<br />
Dial buttons. The menus are divided into functional<br />
groups; these groups are discussed in the following<br />
paragraphs.<br />
3-11-1. The Menu Concept<br />
An instrument, as complex as model 8024, would have<br />
been extremely difficult to program if the parameters<br />
would not be grouped and placed in menus. The menu<br />
concept cuts down the number of buttons which are<br />
necessary to access parameters and simplifies understanding<br />
of front panel programming.<br />
The various parameters which are required to program<br />
Model 8024 are grouped in four logical menus. The<br />
Parameter Menus include general parameters which effect<br />
the output of the generator, regardless of its selected<br />
mode of operation. The Waveform menus control the<br />
shape of the wavefrom which will be placed at the<br />
output connector. The Filter menu permits selection<br />
of a specific filter range which may be applied to an<br />
output waveform. The Mode menu controls the operating<br />
mode of the Model 8024.<br />
A specific menu is selected and displayed on the<br />
front panel readout when the light at the left of the<br />
menu name illuminates. Menus may have a minimum<br />
of one line and may have as many as 10 sub-sequent<br />
lines; each line representing a different parameter. The<br />
menus are selected by pressing one of four buttons as<br />
described before. One may then scroll through the various<br />
parameters within the selected menu by using the<br />
3-6<br />
press LOCAL to<br />
remove from RMT!<br />
dial and cursor control buttons as described in the following.<br />
The right character position on any displayed parameter<br />
is always reserved for an indication if there<br />
are additional parameters above or below the displayed<br />
parameter. This indication is done with an arrow; pointing<br />
up when more parameters are available above, or<br />
an arrow pointing down when more parameters are<br />
available below. It is possible for both arrows to show;<br />
indicating that parameters are available below and<br />
above the displayed parameter.<br />
3-11-2. The Cursor & Dial Concept<br />
The cursor can be move within menu layers and from<br />
a data character to an adjacent data character, using<br />
the cursor buttons. Press the [⇑] or [⇓] buttons to move<br />
within menu layers. The [⇐] and [⇒] buttons control<br />
the cursor position on the displayed value. When both<br />
[⇑] and [⇓] cursor keys are pressed simultaneously,<br />
the cursor jumps to the top menu. Pressing the [RESET]<br />
button forces the displayed parameter to its factory<br />
default value.<br />
The dial modifies characters at the cursor location. For<br />
instance, with an offset reading of +123mV, if the cursor<br />
is placed on 3, this digit will increment or decrement;<br />
depending on the direction that you rotate the dial. If<br />
the cursor is placed on the sign, the dial, when rotated,<br />
modifies the sign only. Placing the cursor on a suffix<br />
and then rotating the dial, increments or decrements<br />
the range. The dial may be locked to prevent accidental<br />
change of parameters by pressing the [DIAL LOCK]<br />
button.<br />
3-11-3. The Displayed Readout<br />
Concept<br />
Any parameter which is displayed on the front panel<br />
has two or three parts: Header, Data, and most times<br />
Suffix . For example, the frequency parameter is displayed<br />
as follows: FREQ 100.0MHz.<br />
The Header describes the function of the parameter,<br />
for example, FREQ, AMPL, and SCLK. The header,<br />
in most cases is not spelled in-full, but abbreviated in<br />
such a way that will make sense to the operator. The<br />
headers follow SCPI (Standard Commands for Programmable<br />
Instruments) convention.<br />
The Data is separated from the header by space(s)<br />
and may contain integer numbers, floating decimal<br />
point, and a leading plus or minus sign. The data rep
esents the value for the displayed header. Each header<br />
has different limits for its associated data. These limits<br />
are given in Table 3-2.<br />
The Suffix associates units and multipliers that modify<br />
how the data is interpreted by the device. Some headers,<br />
like BURST do not require suffix.<br />
3-11-4. Modifying Parameters<br />
There are various parameters, such as frequency, amplitude,<br />
offset, sampling rate, and others, which control<br />
the shape of the waveform at the output connector.<br />
Modification of a specific parameter is simply done<br />
by selecting the required parameter as discussed before,<br />
placing the cursor on the required digit for modification,<br />
and then rotating the dial until the correct value is<br />
displayed. Some modifications cause immediate change<br />
at the output connector. Some modification require that<br />
[ENTER] button be first pressed to acknowledge the<br />
change. The various parameters which can be displayed<br />
and modified are listed in the following.<br />
Parameters were assigned definite boundaries. The<br />
instrument was design in such a way that front panel<br />
programming, under no circumstances, may lead to an<br />
error situation by exceeding the specified limits. GPIB<br />
parameter programming errors are discussed in section<br />
4. Front panel programming permits modification of<br />
parameters within the limits shown in Table 3-2.<br />
3-12. Generating Std. Waveforms<br />
There are 8 standard waveforms built into the Model<br />
8024. The standard waveforms are active when the STD<br />
light is on. To select one of the available waveforms<br />
press the WAVEFORM button and observe that the<br />
display reads as follows:<br />
PARAMETER<br />
LOW<br />
LIMIT<br />
HIGH<br />
LIMIT<br />
Also note that the sine LED above the OUTPUT connector<br />
is on. Rotate the dial to select the required waveform.<br />
There are a number of programmable ancillary<br />
functions which are associated with the standard waveforms.<br />
These functions are available on lower menu<br />
layers. Table 3-3 lists the standard waveforms with<br />
their associated ancillary functions.<br />
3-13. Changing Output Frequency<br />
The output frequency range depends on the waveform<br />
currently selected. Note that the frequency setting for<br />
standard waveforms is not the same as for arbitrary<br />
waveforms. Table 3-3 lists the upper frequency limit<br />
for each of the standard waveforms. If you try to exceed<br />
the specified limit, the instrument responds by blinking<br />
its OUTPUT LED at a constant rate. The default frequency<br />
setting is 100 KHz for all standard waveforms.<br />
To change output frequency select the FREQ menu,<br />
place the cursor on the required data and use the dial<br />
and the cursor control buttons until you set the required<br />
frequency. You may also set the output period. To<br />
change output period select the PERIOD sub-menu,<br />
place the cursor on the required data and use the dial<br />
and the cursor control buttons until you set the period.<br />
3-14. Changing Output Amplitude<br />
and Offset<br />
The output amplitude and offset are the same for all<br />
standard output waveforms. The default amplitude setting<br />
is +5 V. The default offset setting is 0 V. Select<br />
DEFAULT<br />
VALUE REMARKS<br />
FREQ 10 mHz 50 MHz 100 KHz Std Waveforms Frequency<br />
PERIOD 20.00 ns 100.0 Ks 10.00 μs Std. waveforms period<br />
AMPL 10.0 mV 10.0 V 5.00 V Amplitude, offset dependent<br />
OFFS 0.00 V ±4.50 V +0.00 V Offset, amplitude level dependent<br />
INT PER 20 μs 999 s 1.00 s Internal trigger source period<br />
BURST 1 32767 1 Counted burst<br />
STORE 0 9 0 Save setups<br />
RECALL 0 9 0 Recall setups<br />
Table 3-2. Front Panel Parameter Entry Limits<br />
Output Waveform<br />
Sine<br />
Operating Instructions<br />
3-7
Operating Instructions<br />
Table 3-3. Standard Waveforms and Their Ancillary Functions<br />
amplitude and offset in the AMPL menu. Note that<br />
amplitude and offset are inter-related parameters which<br />
can be selected in three level windows as specified in<br />
Section 1 of this manual.<br />
3-15. Generating Arb. Waveforms<br />
In general, whenever the ARB LED above the [WAVE-<br />
FORM] button is lit, the model 8024 generates arbitrary<br />
waveforms at the output connector.<br />
3-15-1. What Are Arb. Waveforms<br />
An arbitrary waveform is generated from digital data<br />
points which are stored in a special memory. Each data<br />
point has vertical resolution of 12 bits (4094 points).<br />
So, each sample is placed on the vertical axis with<br />
precision of 1/4096.<br />
The arbitrary memory has a capacity to store up to<br />
64K horizontal of data points . Each horizontal point<br />
has a unique address; the first being 00000 and the<br />
last 64535. In cases where smaller wavelengths are<br />
required. Model 8024 makes it possible to divide the<br />
entire length to smaller segments and then to select<br />
which segment is sampled, how many times, and in<br />
what sequence.<br />
When the instrument is programmed to output arbitrary<br />
waveforms, a clock samples the data points,<br />
3-8<br />
FUNCTION<br />
ANCILLARY<br />
FUNCTION<br />
RANGE &<br />
RESOLUTION<br />
DEFAULT<br />
VALUE<br />
Sine Start Phase 0° to 360° 000° 50 MHz<br />
Power 1 to 9 1<br />
Triangle Start Phase 0° to 360° 000° 10 MHz<br />
Power 1 to 9 1<br />
Square Duty Cycle 1% to 99% 50% 50 MHz<br />
Pulse Delay Time 0.1% to 99.9% 0% 1 MHz<br />
Rise Time 0.1% to 99.9% 10%<br />
High Time 0.1% to 99.9% 10%<br />
Fall Time 0.1% to 99.9% 10%<br />
Ramp Delay Time 0.1% to 99.9% 10% 1 MHz<br />
Rise Time 0.1% to 99.9% 10%<br />
Fall Time 0.1% to 99.9% 10%<br />
Sine(x)/x Cycles 4 to 999 10 1 MHz<br />
Gaussian Time Constant 1 to 65535 1000 1 MHz<br />
Exponential Time Constant ±0.01 to ±20.00 −1.00 1 MHz<br />
DC Amplitude 0% to ±100% 0%<br />
FREQUENCY<br />
HIGH LIMITS<br />
one at a time, from address 0 to the last address. The<br />
rate of which each sample is replayed is defined by<br />
the sampling rate parameter. Model 8024 provides programmable<br />
sampling rates from 10 mHz to 50 MHz.<br />
If the Model 8024 operates in continuous mode,<br />
the sampling cycle repeats automatically. If the Model<br />
8024 is placed in triggered mode, the cycle stops at<br />
the end address. In burst mode, the cycle is repeated<br />
as many times as programmed to do so.<br />
Unlike the built-in standard waveforms, the required<br />
arbitrary waveforms are not always resident in<br />
the instrument’s memory. The reason for not always<br />
keeping the complete library resident is because of the<br />
size limitation of the arbitrary memory. Some waveforms<br />
have small length of 1K words or less, but some<br />
require much more. In cases where the arbitrary waveform<br />
is not resident, the instrument provides drivers<br />
to several communication links from which the waveform<br />
may be loaded.<br />
3-15-2. Arb. Memory Management<br />
The arbitrary memory has a fixed length of 64,535<br />
words. 1K is always reserved for the built-in standard<br />
waveforms. So, the maximum size waveform which<br />
the Model 8024 can generate is 63,536 point long. It<br />
is, however, not always necessary to utilize the com-
plete length of this memory. The Model 8024 permits<br />
partition of the arbitrary memory to smaller memory<br />
segments. It is possible to divide the memory from 1<br />
to 99 memory segments and assign different size to<br />
each segment. Minimum segment size is 10 points.<br />
3-15-3. Partitioning The Memory<br />
As discussed above, the arbitrary memory may be divided<br />
into smaller segments. So, up to 99 different<br />
arbitrary waveforms can be generated with the Model<br />
8024. The length of each segment is left totally to the<br />
user’s discretion. The arbitrary waveforms are active<br />
when the ARB light is on. To partition the arbitrary<br />
memory press the [WAVEFORM] button and observe<br />
that the display reads as follows:<br />
Output Segment<br />
01 (Empty)<br />
Segment remains empty until you assign it a size.<br />
Press the cursor button to move one menu down and<br />
observe that the display reads as follows:<br />
Move the cursor under the fourth digit and rotate<br />
the dial clockwise to increment the reading to 01000.<br />
Before you proceed, compare the display reading and<br />
make sure that it looks exactly as follows:<br />
SEG01=01000Pts<br />
64536 Pts left<br />
To complete the segment size modification process<br />
press the [ENTER] button. The instrument will prompt<br />
you with the following message:<br />
Change SEG Size?<br />
ENTER=yes<br />
If you press [ENTER], the size which you have selected<br />
will lock-in permanently and the above reading will<br />
change as follows (the same question will be asked if<br />
you’ll try to leave this menu without finalizing the<br />
process):<br />
SEG01=01000Pts<br />
63536 Pts left<br />
You may continue partitioning the memory using the<br />
same procedure to assign sizes to other segments. You<br />
may do so by incrementing SEG01.<br />
3-15-4. Loading Arb. Waveforms<br />
Model 8024, when supplied first, does not have any<br />
arbitrary waveforms loaded into its memory. The loading<br />
process can be done either from the front panel<br />
or from a GPIB station. Front panel loading of arbitrary<br />
waveforms will be discussed now, while GPIB operation<br />
is discussed in Section 4 of this manual.<br />
Assuming that you have already assigned size to<br />
at least one segment, you may proceed to load the<br />
segment with one of the standard functions that are<br />
available from the front panel. From the menu shown<br />
before, press the cursor button to go down one menu<br />
layer. The display reading will change as follows:<br />
LOAD Sine<br />
into SEG01 /ENT<br />
The cursor is placed under the Sine function indicating<br />
that this is the only parameter that may be<br />
changed. Rotate the dial to select another function, then<br />
press [ENTER] to load the selected function into the<br />
arbitrary memory.<br />
3-15-5. Modifying Arb. Functions<br />
The Model 8024 does not provide front panel editing<br />
capabilities, besides a few built-in modifiers. If you<br />
select to load, for instance, the Sine function, it will<br />
be loaded exactly as it was set up in the standard waveforms<br />
menu. Therefore, if you want to load this function<br />
with one of its ancillary function changed, do so first<br />
in the standard waveforms menu, then load it into the<br />
arbitrary memory.<br />
There are a number of modifiers built-in the ARB menu.<br />
They are: Clear, Fill, Offset, Invert, and AM. These<br />
modifiers operate globally on the entire segment. To<br />
access the modify menu, press the cursor control button<br />
to go one menu layer down. The display will change<br />
to read as follows:<br />
SEG01 MODIFY<br />
Clear<br />
Operating Instructions<br />
The cursor is positioned under the Copy function indicating<br />
that this function can be changed. Use the<br />
dial to select one of the modifier function, then move<br />
3-9
Operating Instructions<br />
menu layers down to complete the modifier operation.<br />
The final modification requires that [ENTER] button<br />
be pressed.<br />
3-15-5-1. Generating Amplitude<br />
Modulated Functions<br />
The following is an example how to generate a modulated<br />
function using the arbitrary waveforms and the<br />
AM modifier menu.<br />
1. Start this procedure from a known state by pressing<br />
[DCL] and then [ENTER]. The Model 8024 is now<br />
set to its default state.<br />
2. Press [WAVEFORM] button twice to access the<br />
ARB menu, then, press the cursor control button down<br />
to go down one menu layer.<br />
3. Change SEG01 size to 1000 points and press<br />
[ENTER] twice to confirm segment size change to 1000<br />
points, then, press the cursor control button down to<br />
go down one menu layer.<br />
4. Press [ENTER] twice to confirm sine data load.<br />
If you followed the step correctly, you should have a<br />
sine waveform at the output connector.<br />
5. Press the cursor control button down to go down<br />
one menu layer. Now, rotate dial until AM appears on<br />
the LCD display.<br />
6. Press the cursor control button down to go down<br />
one menu layer.<br />
7. The display shows LENGTH 0100 Pts. Since<br />
you assigned 1000 points to this segment, carrier frequency<br />
of 100 Pts corresponds to 1/10th of segment<br />
length. You may change this reading, but for this example<br />
leave this parameter as is.<br />
8. Press the cursor control button down to go down<br />
one menu layer. The display shows DEPTH 050%. leave<br />
this reading for now and press the cursor control button<br />
down again to go down one more menu layer.<br />
9. Press [ENTER]. The output modulates a sine<br />
carrier waveform to 100%.<br />
At this point you may push the up and down cursor<br />
control buttons, simultaneously, to jump to the first<br />
menu layer. Repeat the above steps to modulate to 100%<br />
and 200% depth and observe the results.<br />
3-16. Changing Sampling Clock<br />
Frequency<br />
As explained before, arbitrary waveforms are made of<br />
digital data points which are equally spaced on the<br />
horizontal scale. The “spacing” between the points are<br />
defined by the sampling clock frequency. The sampling<br />
clock, divided by the number of points, determine the<br />
3-10<br />
waveform frequency at the output connector. To program<br />
the sampling clock place the Model 8024 in ARB<br />
waveform mode. Then, press the [PARAMETER] button.<br />
The display should read as follows:<br />
SCLK 100.0MHz<br />
FREQ off<br />
SCLK designates sampling clock frequency. The<br />
sampling clock may be programmed within the range<br />
of 10 mHz to 100 MHz. Preset value is set to 100.0<br />
MHz.<br />
FREQ designates repetition rate at the output connector.<br />
It depends on many parameters: The sampling<br />
rate, the wavelength, and the number of times that the<br />
wave is repeated by the sequencer. The FREQ reading<br />
is set to off as long as memory remains un-partitioned.<br />
Also note that the FREQ indication is available for<br />
reference only and could not be changed.<br />
To change the sampling clock, first partition the<br />
memory and load it with data. Then, press the [PA-<br />
RAMETER] button and use the cursor control buttons<br />
and the dial to program the required sampling clock.<br />
3-16-1. Selecting SCLK Source<br />
The arbitrary waveform clock can be driven from three<br />
different clock sources: 1) From its internal synthesized<br />
clock, 2) From an internal and fixed 10 MHz crystal,<br />
and 3) From an external clock source.<br />
INT - Internal synthesized clock is the clock you<br />
normally use. Its range and accuracy equals to the frequency<br />
parameter for the standard waveforms.<br />
EXT - External clock may be applied to the generator<br />
for synchronizing it to a centralized clock system.<br />
Make sure to remove the Model 8024 from this mode<br />
whenever you are done with this mode of operation,<br />
because when you remove the external clock the Model<br />
8024 stops generating arbitrary waveforms.<br />
10 MHz Xtal - Where required, a pure 10 MHz<br />
signal which comes directly from an internal crystal<br />
clock may be used as the primary clock. This clock<br />
is especially useful in applications requiring low phase<br />
noise on the output waveform. Note that the 10 MHz<br />
signal in this case is fixed at one frequency only. So,<br />
the waveform frequency depends on the number of horizontal<br />
points which were assigned to the segment.<br />
To select the sampling clock source, from the above<br />
LCD display reading press the cursor control button<br />
to move down one menu layer. The display reading<br />
should look as follows:
Reference Clock<br />
INT<br />
Rotate the dial to select between the available clock<br />
options.<br />
3-17. Generating Sequenced<br />
Waveforms<br />
In general, whenever the SEQ LED above the [WAVE-<br />
FORM] button is lit, the model 8024 outputs a sequence<br />
of waveforms.<br />
3-17-1. What Are Seq. Waveforms<br />
In paragraph 3-16 we explained to you what are arbitrary<br />
waveforms. You may want to go back and refresh<br />
your memory on this topic. Sequenced waveforms are<br />
made of a number of arbitrary waveforms which can<br />
be linked and repeated in various manners.<br />
Sequenced waveforms can be generated from waveforms<br />
which are stored in different segments of the<br />
arbitrary memory. Before you can use output a sequence<br />
of waveforms, you must first load your arbitrary memory<br />
with the required waveforms. Waveforms can be<br />
loaded either from the front panel or through GPIB<br />
programming. Information how to partition the memory<br />
and load front panel functions is given in paragraph<br />
3-16-3 and 3-16-4. Information how to load your memory<br />
from the GPIB is given in section 4 of this manual.<br />
Figure 3-2. Waveform in Segment 1.<br />
Figure 3-3. Waveform in Segment 2.<br />
An example how sequenced waveforms work is demonstrated<br />
in the following figures. Figure 3-2 shows<br />
a sine(x)/x waveform which was loaded in segment 1.<br />
Figure 3-4. Waveform in Segment 3.<br />
Figure 3-5. Sequenced Waveforms.<br />
Figure 3-3 shows a sine waveform which was loaded<br />
into segment 2, and Figure 3-3 shows a pulse waveform<br />
which was loaded into segment 3. The sequence generator<br />
lets you link segments in user defined order and<br />
repeat each segment as many times as needed.<br />
Figure 3-4 shows a sequence of waveforms which<br />
was made of the waveforms that were stored in three<br />
different memory segments. You may notice that segment<br />
number 2 is generated first and repeated twice,<br />
segment 3 follows once, then segment 1 is repeated<br />
four times.<br />
3-17-2. Generating a sequence<br />
Assuming that you already loaded waveforms into memory<br />
segments, proceed to generate a sequence as explained<br />
in the following.<br />
Press the [WAVEFORM] button until the SEQ light<br />
turns on. Observe that the display reads as follows:<br />
Output sequence<br />
1 (Empty)<br />
Operating Instructions<br />
The “(Empty)” reading will remain until you program<br />
the first sequence. The “(Empty)” reading is associated<br />
with the sequence number - “1" which is shown<br />
on the left. It will change to ”(Loaded)" after programming<br />
a sequence.<br />
Nine different sequences can be programmed from<br />
the front panel. The sequences are selected by rotating<br />
the dial. If a selected sequence is “(Empty)” the output<br />
will generate 0 V dc level. To program the first sequence<br />
3-11
Operating Instructions<br />
press the cursor button to move one menu down and<br />
observe that the display reads as follows:<br />
STEP01 = SEG01 shows that the waveform is segment<br />
one will be output at the beginning of the sequence.<br />
If you have more than one segment loaded,<br />
you may move the cursor under SEG01 and select the<br />
required segment number by rotating the dial. Up to<br />
99 steps are available in this menu. Selection can be<br />
made from 99 different segments.<br />
REPEAT ∗ 00000 shows how many times the segment<br />
in step 1 will be repeated. The output remains<br />
at 0 V dc level as long as the REPEAT number is 0.<br />
As an exercise, load the first three segments with<br />
waveforms as shown in Figures 3-3 through 3-5. Then,<br />
program a sequence which will output a waveform as<br />
shown in Figure 3-6.<br />
3-18. Disabling The Output<br />
The Model 8024 features an output disable mode which<br />
reduces the amplitude of the output waveform to minimum.<br />
The stand-by function is especially useful in automatic<br />
test systems where the output is constantly connected<br />
to a device under test and where modification<br />
of waveform parameters may endanger this device.<br />
To place the instrument in its stand-by mode press<br />
the [OUTPUT] button. The light above the output connector<br />
turns off, indicating that the amplitude level of<br />
the output signal is lowered to its minimum level.<br />
The [OUTPUT] button toggles between output on<br />
and off. Press the [OUTPUT] button to resume normal<br />
operation.<br />
3-19. Selecting an Operating Mode<br />
Model 8024 offers four operating modes: Continuous,<br />
Triggered, Gated, and Burst. The selected waveform<br />
is repeated continuously when the instrument is set to<br />
operate in continuous mode. The continuous operating<br />
mode is selected when the CONT light above the<br />
[MODE] button illuminates. In this mode of operation,<br />
the model 8024 does not require an external source to<br />
stimulate its output cycles. Triggered, gated, and burst<br />
modes require an external source to initiate output cycles.<br />
Information how to trigger, gate, and how to output<br />
a burst of waveforms is given in the following.<br />
3-12<br />
STEP01 = SEG01<br />
REPEAT ∗ 00000<br />
3-19-1. Triggered Mode<br />
Model 8024 is set to operate in trigger mode when<br />
the TRIG light above the [MODE] button is lit. The<br />
output remains at 0 V dc level as long as the TRIG<br />
IN connector on the rear panel remains disconnected.<br />
A TTL level signals can be used to stimulate the TRIG<br />
input. The generator is sensitive to the rising edge only.<br />
So, every time that a positive transition occurs at the<br />
trigger input, the model 8024 generates one complete<br />
output waveform at the output connector. At the end<br />
of the output cycle, the output goes back to 0 V dc<br />
level.<br />
The triggered mode of operation operates equally<br />
on standard waveform, arbitrary waveform, and sequenced<br />
waveform. You should observe the limitations<br />
of the trigger signal as specified in Table 1-1. When<br />
you first select the trigger mode, the display shows<br />
the following reading:<br />
SOURCE EXT<br />
This reading indicated that the generator is ready to<br />
accept external signals at the TRIG IN connector to<br />
stimulate its output. In this mode, the model 8024 responds<br />
to a rear panel signal, to a front panel [TRIG-<br />
GER] button press, and to GPIB trigger commands.<br />
The last two options will be discussed later in this<br />
manual.<br />
3-19-1-1. Internal Trigger<br />
When an external source is not available, the operator<br />
has an option to use the built-in trigger generator.<br />
The internal trigger generator is a free running generator,<br />
asynchronous to the main output generator. The<br />
period of the internal trigger generator can be programmed<br />
from 20 μs to 999 s. When the internal trigger<br />
source is selected the TRIG IN connector is disconnected,<br />
so external signals do not effect the generator.<br />
The internal trigger generator is also available in burst<br />
mode. It has no effect in gated mode. To place the<br />
model 8024 in internal trigger mode and to program<br />
an internal trigger period rotate the dial in the above<br />
shown menu. The menu will change as follows:<br />
SOURCE INT<br />
INT PER 1.00s<br />
Now you can select the bottom menu and program<br />
the period of the internal trigger stimuli.
3-19-1-2. Manual Trigger<br />
The [TRIGGER] button simulates an external signal.<br />
When the generator is set to trigger on an external<br />
source, each time the [TRIGGER] button is pressed a<br />
single output waveform is generated. The [TRIGGER]<br />
button has no effect in continuous mode of operation<br />
or when the instrument is set to internal trigger mode.<br />
3-19-2. Gated Mode<br />
Model 8024 is set to operate in gated mode when the<br />
GATED light above the [MODE] button is lit. The<br />
output remains at 0 V dc level as long as the TRIG<br />
IN connector on the rear panel remains disconnected.<br />
A TTL level signal can be used to stimulate the TRIG<br />
input. The generator is sensitive to the rising edge only.<br />
So, the first positive going transition at the TRIG IN<br />
connector enables the generator output. The second<br />
positive going transition disables the generator output.<br />
At the end of the output cycle, the output goes back<br />
to 0 V dc level.<br />
3-19-2-1. Manual Gate<br />
The [TRIGGER] button simulates an external gating<br />
signal. When the generator is set to gated mode, output<br />
waveforms are generated as long the the [TRIGGER]<br />
button is pressed.<br />
3-19-3. Burst Mode<br />
Model 8024 is set to operate in burst mode when the<br />
BURST light above the [MODE] button is lit. The output<br />
remains at 0 V dc level as long as the TRIG IN<br />
connector on the rear panel is not connected. A TTL<br />
level signal can be used to stimulate the TRIG input.<br />
The generator is sensitive to the rising edge only. So,<br />
every time that a positive transition occurs at the trigger<br />
input, the model 8024 generates one burst of output<br />
waveforms at the output connector. At the end of the<br />
burst output cycle, the output goes back to 0 V dc<br />
level. The number of complete output waveforms which<br />
will be generated can be programmed from 1 to 32767.<br />
The counted burst mode of operation operates<br />
equally on standard waveform and arbitrary waveform.<br />
This mode can not work in conjunction with sequenced<br />
waveforms. To eliminate confusion, the model 8024<br />
does not allow you to go into burst mode if you selected<br />
SEQ waveforms. Likewise, it will also not allow you<br />
to go into burst mode if you are already generating<br />
sequenced waveforms.<br />
When you first select the burst mode, the display<br />
shows the following reading:<br />
BURST 00001<br />
SOURCE EXT<br />
This reading indicates that the generator is ready<br />
to accept external signals at the TRIG IN connector<br />
to stimulate its output. In this mode, the model 8024<br />
responds to a rear panel signal, to a front panel [TRIG-<br />
GER] button press, and to GPIB trigger commands.<br />
The last two options will be discussed later in this<br />
manual.<br />
3-19-3-1. Internal Burst<br />
When an external source is not available, the operator<br />
has an option to use the built-in trigger generator. The<br />
internal trigger generator is a free running generator,<br />
asynchronous to the main output generator. The period<br />
of the internal trigger generator can be programmed<br />
from 20 μs to 999 s. When the internal trigger source<br />
is selected the TRIG IN connector is disconnected, so<br />
external signals do not effect the generator. To place<br />
the model 8024 in internal trigger mode and to program<br />
an internal trigger period rotate the dial in the above<br />
shown menu. The menu will change as follows:<br />
BURST 00001<br />
SOURCE INT<br />
Press the cursor control down button one to move<br />
one menu layer and adjust the internal burst period as<br />
explained in paragraph 3-19-1-1.<br />
3-20. Using The Offset<br />
Operating Instructions<br />
The function generator employs three level windows;<br />
allowing amplitude and offset to be independently selected<br />
within these levels. When setting up the offset<br />
parameter, one must keep in mind that the offset is<br />
attenuated with the signal. The user has no control<br />
over the selected internal amplitude range. This may<br />
cause some confusion since, not knowing this fact, one<br />
may produce an offset error at an amplitude-offset combination<br />
that seems to be reasonable. It is therefore<br />
suggested to first set up the amplitude parameter and<br />
only then set the required offset level. An attempt to<br />
modify the offset parameter beyond the capability of<br />
the instrument will generate an error indication. Offsets<br />
and amplitudes are independently selectable within the<br />
level windows given in Table 1-1.<br />
3-13
Operating Instructions<br />
3-21. Using Front Panel Setups<br />
Setting up all parameters in a versatile instrument such<br />
as the Model 8024 takes some time. Setup time is longer<br />
when a number of tests are performed and more than<br />
one setup is required. The function generator incorporates<br />
a non-volatile memory that preserves several front<br />
panel states for a long time. The size of the non-volatile<br />
memory permits storage of up to 10 complete front<br />
panel setups. Front panel setups can be recalled one<br />
at a time.<br />
3-21-1. Saving Setups<br />
First modify front panel parameters as necessary to<br />
perform the required test. When all parameters are programmed<br />
and verified for accuracy, proceed with storing<br />
front panel state as follows:<br />
1. Press the [STORE] button and observe that the<br />
display is modified to indicate the following:<br />
“n” indicates active storage cell number. Number<br />
may range from 0 to 9. Pressing any other button, besides<br />
{ENTER] removes the generator from this mode<br />
and leaves front panel settings intact.<br />
2. Rotate the dial to select the required memory<br />
cell number and press [ENTER] to complete the process.<br />
The instrument then resumes normal operation.<br />
3. Repeat the above procedure for as many setups<br />
that are required.<br />
3-21-2. Recalling Setups<br />
The model 8024 employs a non-volatile memory<br />
(RAM). The computer circuit continuously monitors<br />
front panel traffic and saves it in a special location<br />
within the RAM. This location is separated from the<br />
stored front panel setups. After turning mains power<br />
off or in case of accidental power failure, the generator<br />
updates front panel indicators with the last state before<br />
power shut-down. To recall other stored front panel<br />
setups proceed as follows:<br />
1. Press the [RECALL] and observe that the display<br />
is modified to indicate the following:<br />
3-14<br />
STORE SETUP n<br />
Push ENT to save<br />
RECALL SETUP n<br />
Push ENT to rcl<br />
“n” indicates active storage cell number. Number<br />
may range from 0 to 9. Pressing any other button, besides<br />
{ENTER] removes the generator from this mode<br />
and leaves front panel settings intact.<br />
2. Rotate the dial to select the required memory<br />
cell number and press [ENTER] to complete the process.<br />
The instrument then resumes normal operation.<br />
3. Repeat the above procedure for as many setups<br />
that are required.<br />
3-22. Changing GPIB Address<br />
GPIB address is modified using front panel programming.<br />
The GPIB address is stored in non-volatile memory.<br />
To change the GPIB address press the [SYSTEM]<br />
button. The display reading will change as follows:<br />
GPIB address 19<br />
Commands SCPI<br />
At this point, if you want to change the GPIB address<br />
rotate the dial until the display reads the required address.<br />
To resume normal operation press any key on<br />
the front panel. The Commands menu determines the<br />
shape of the GPIB commands. The Model 8024 can<br />
accept two options: command set which is SCPI compatible<br />
or another set of short commands which make<br />
the instrument compatible with WaveCAD software.<br />
Information how to change command set is given in<br />
Section 4 of this manual.<br />
3-23. Loading Waveforms Using<br />
the GPIB Interface<br />
In general, there are no special preparations to be made<br />
before waveforms can be loaded from GPIB controllers.<br />
Model 8024 is completely programmable, therefore, a<br />
computer can place it in listen mode, download all of<br />
the required parameters to set up Model 8024, and<br />
download waveforms to a selected segment. Information<br />
on how to program Model 8024 using the GPIB<br />
interface is given in Section 4 of this manual - Remote<br />
Programming.
4-1. Introduction<br />
This section contains programming information for the<br />
Model 8024. Commands to program the instrument over<br />
the IEEE-488 interface bus are very similar to those<br />
defined by the IEEE-488.2 standard and the SCPI 1993<br />
(Standard Commands for Programmable Instruments)<br />
standard.<br />
IEEE-488.2 defines a syntax for sending data to and<br />
from instruments, how an instrument interprets this<br />
data, and what registers should exist to record the state<br />
of the instrument. The subset of commands (common<br />
commands) is used to perform basic operations, such<br />
as registers, triggering the output, and resetting the<br />
instrument.<br />
The SCPI standard defines a common language protocol.<br />
It goes one step farther than IEEE-488.2 and defines<br />
a standard set of commands to control every programmable<br />
aspect of the instrument. It also defines the format<br />
of command parameters and the format for values<br />
returned by the instrument.<br />
4-2. Introduction to SCPI Language<br />
SCPI (Standard Commands for Programmable Instruments)<br />
is an ASCII-based instrument command language<br />
designed for test and measurement instruments.<br />
SCPI commands are based on a hierarchical structure,<br />
also known as a tree system. In this system, associated<br />
commands are grouped together under a common node<br />
or root, thus forming subsystems.<br />
Throughout this manual, the following conventions are<br />
used for SCPI command syntax.<br />
• Square brackets ( [ ] ) indicates optional keywords<br />
or parameters.<br />
• Braces ( { } ) enclose parameters within a command<br />
string.<br />
• Triangle brackets ( < > ) indicate that you must<br />
substitute a value for the enclosed parameter.<br />
• A vertical bar ( | ) separates multiple parameter<br />
choices.<br />
• Bold typeface letters designate factory default values.<br />
The OUTPUT subsystem is shown below to illustrate<br />
the tree system.<br />
OUTPut<br />
:FILTer<br />
[:LPASs]<br />
:FREQuency {20MHz|25MHz|50MHz}<br />
[:STATe] OFF|ON<br />
[:STATe] OFF|ON<br />
OUTPut is the root keyword of the command, FILTer<br />
and STATe are second-level keywords, and FREQuency<br />
and STATe are third-level keywords. A colon ( : )<br />
separates a command keyword from a lower-level keyword.<br />
4-3. Command Format<br />
4<br />
Remote Interface<br />
The format used to show commands in this manual is<br />
shown below:<br />
4-1
Remote Interface<br />
FREQuency {|MINimum|MAXimum}<br />
The command syntax shows most commands (and some<br />
parameters) as a mixture of upper- and lower-case letters.<br />
The upper-case letters indicate the abbreviated<br />
spelling for the command. For shorter program lines,<br />
send the abbreviated form. For better program readability,<br />
send the long form.<br />
For example, in the above syntax statement, FREQ and<br />
FREQUENCY are both acceptable forms. You can use<br />
the upper- or lower-case letters. Therefore, FREQ, FRE-<br />
QUENCY, freq, and Freq are all acceptable. Other<br />
forms, such as FRE and FREQUEN, will generate an<br />
error.<br />
The above syntax statement shows the frequency parameter<br />
enclosed in triangle brackets. The brackets are<br />
not sent with the command string. You must specify<br />
a value for the parameter (such as “FREQ 50e+6Hz).<br />
Some parameters are enclosed in square brackets ([]).<br />
The brackets indicate that the parameter is optional<br />
and can be omitted. The brackets are not sent with the<br />
command string. If you do not specify a value for an<br />
optional parameter, the generator chooses a default<br />
value.<br />
4-4. Command Separators<br />
A colon ( : ) is used to separate a command keyword<br />
from a lower-level keyword as shown below:<br />
“SOUR:FUNC:SHAP SIN”<br />
A semicolon ( ; ) is used to separate commands within<br />
the same subsystem, and can also minimize typing.<br />
For example, sending the following command string:<br />
“TRIG:SOUR INT;STAT ON;INT:RATE 5e-3s”<br />
...is the same as sending the following three commands:<br />
“TRIG:SOUR INT”<br />
“TRIG:STAT ON”<br />
“TRIG:INT:RATE 5e-3s”<br />
You may use the colon and semicolon to link commands<br />
from different subsystems. For example, in the following<br />
command string, an error is generated if you do<br />
not use both the colon and the semicolon:<br />
“OUTP:STATE ON;:TRIG:STAT ON”<br />
4-5. The MIN and MAX Parameters<br />
One may substitute MINimum or MAXimum in place<br />
of a parameter for some commands. For example, consider<br />
the following command:<br />
4-2<br />
FREQuency {|MINimum|MAXimum}<br />
Instead of selecting a specific frequency, you can substitute<br />
MIN to set the frequency to its minimum value<br />
or MAX to set the frequency to its maximum value.<br />
4-6. Querying Parameter Settings<br />
You can query the current value of most parameters<br />
by adding a question mark ( ? ) to the command. For<br />
example, the following command sets the output function<br />
to square:<br />
“SOUR:FUNC:SHAP SQR”<br />
You can query the output function by executing:<br />
“SOUR:FUNC:SHAP?”<br />
4-6-1. Query Response Formats<br />
The response to a query depends of the command which<br />
is sent to the instrument to generate the query response.<br />
In general, response to a query do not contain header<br />
information, but current values or setting of the generator.<br />
Commands that set values can be queried about<br />
their current value of the setting. Commands that set<br />
modes of operation can be queried about their current<br />
mode setting. IEEE-488.2 defined set of common queries<br />
generate a response which is common to all instruments<br />
that are connected to the GPIB interface.<br />
4-7. SCPI Command Terminators<br />
A command string sent to the function generator must<br />
terminate with a character. The IEEE-488<br />
EOI (end-or-identify) message is interpreted as a character. A followed by a is also accepted. Command string termination<br />
will always reset the current SCPI command path to<br />
the root level.<br />
4-8. IEEE-488.2 Common Commands<br />
The IEEE-488.2 standard defines a set of common commands<br />
that perform functions like reset, trigger, and<br />
status operations. Common commands always begin<br />
with an asterisk ( * ), are four to five characters in<br />
length, and may include one or more parameters. The<br />
command keyword is separated from the first parameter<br />
by a blank space. Use a semicolon ( ; ) to separate<br />
multiple commands as shown below:<br />
“*RST; *STB?; *IDN?
4-9. SCPI Parameter Types<br />
The SCPI language defines several different data formats<br />
to be used in program messages and response<br />
messages.<br />
4-9-1. Numeric Parameters<br />
Commands that require numeric parameters will accept<br />
all commonly used decimal representations of numbers<br />
including optional signs, decimal points, and scientific<br />
notation. Special values for numeric parameters like<br />
MINimum and MAXimum are also accepted.<br />
You can also send engineering unit suffixes with numeric<br />
parameters (e.g., Mhz or Khz). If only specific<br />
numeric values are accepted, the function generator<br />
will ignore values which are not accepted and will generate<br />
an error message. The following command is an<br />
example of a command that uses a numeric parameter:<br />
“VOLT:AMPL { | MIN | MAX}<br />
4-9-2. Discrete Parameters<br />
Discrete parameters are used to program settings that<br />
have a limited number of values (like FIXed, USER,<br />
and SEQuence). They have a short form and a long<br />
form just like command keywords. You can mix upperand<br />
lower-case letter. Query responses will always return<br />
short form in all upper-case letters. The following<br />
command uses discrete parameters:<br />
SOUR:FUNC:MODE {FIXed | USER | SEQuence}<br />
4-9-3. Boolean Parameters<br />
Boolean parameters represent a single binary condition<br />
that is either true or false. For a false condition, the<br />
generator will accept “OFF” or “0". For a true condition,<br />
the generator will accept ”ON" or “1". When you query<br />
a boolean setting, the instrument will always return<br />
”0" or “1". The following command uses a boolean<br />
parameter:<br />
OUTP:FILT { OFF | ON }<br />
The same command could be written as follows:<br />
OUTP:FILT {0 | 1 }<br />
4-9-4. Arbitrary Block Parameters<br />
Arbitrary block parameters are used for loading waveforms<br />
to the generator’s memory. The Model 8024 can<br />
accept binary blocks of data, files that contain binary<br />
data, and files that contain ASCII data. The following<br />
command uses an arbitrary block parameter that is<br />
loaded as binary data:<br />
TRAC:DATA <br />
4-10. Setting the GPIB Address<br />
GPIB address is modified using front panel programming.<br />
The GPIB address is stored in the non-volatile<br />
memory. To change the address press the [SYSTEM]<br />
button. The display reading will change as follows:<br />
GPIB address 19<br />
commands SCPI<br />
At this point, if you want to change the GPIB address,<br />
rotate the dial until the display reads the required address.<br />
To resume normal operation, press any front<br />
panel key.<br />
4-11. Selecting a Command Set<br />
The Model 8024 can accept two sets of commands:<br />
SCPI commands and short-form commands. The SCPI<br />
set of commands is the default setting of the generator.<br />
The short-form commands set is available for those<br />
programmers who do not want to use the lengthy programming<br />
code that SCPI requires.<br />
The short-form command set speeds bus communications<br />
and is also required in conjunction with WaveCAD<br />
operation. Appendix C lists the short-form command<br />
set. Selection of which command set is used as GPIB<br />
protocol is done from the front panel. To change the<br />
GPIB command set press the [SYSTEM] button, then<br />
press the cursor button to move the cursor one menu<br />
down. Rotate the dial. The display toggles between<br />
“SCPI” and “std.”. Select the required command set<br />
and press any front panel key to resume normal operation.<br />
If you select to use the “std”. set of commands<br />
make sure that the generator displays the following:<br />
GPIB address 19<br />
commands std.<br />
Remote Interface<br />
4-12. SCPI Command Summary<br />
Table 4-1 summarizes the complete SCPI command<br />
tree available to program the generator over the GPIB.<br />
Tables 4-2 through Table 4-5 categorize these commands.<br />
Refer to later sections in this manual for more<br />
complete details on each command.<br />
4-3
Remote Interface<br />
Table 4-1. Model 8024 - SCPI Command Summary.<br />
4-4<br />
:FORMat<br />
:BORDer {NORMal | SWAPped}<br />
:OUTPut<br />
:FILTer<br />
[:LPASs]<br />
:FREQuency <br />
[:STATe] {OFF | ON}<br />
[:STATe] {OFF | ON}<br />
[:SOURce]<br />
:APPLy<br />
:SINusoid {[ [, [, [, [,] ]]]]}<br />
:TRIangle {[ [, [, [, [,] ]]]]}<br />
:SQUare {[ [, [, [,] ]]]}<br />
:PULSe {[[,[,[,[,[,[,]]]]]]]}<br />
:RAMP {[ [, [, [, [, [,] ]]]]]}<br />
:SINC {[ [, [, [,] ]]]}<br />
:EXPonential {[ [, [, [,] ]]]}<br />
:GAUSsian {[ [, [, [,] ]]]}<br />
:DC []<br />
:USER{[ [, [, [,] ]]]}<br />
:SEQuence{[ [, [, [,] ]]]}<br />
:FREQuency<br />
[:CW] { | MINimum | MAXimum}<br />
:RASTer { | MINimum | MAXimum}<br />
:SOURce {EXT | INT | XTAL}<br />
:VOLTage<br />
[:LEVel]<br />
[:IMMediate]<br />
[:AMPLitude] { | MINimum | MAXimum}<br />
:OFFSet {
Table 4-1. SCPI Command Summary (continued).<br />
[:SOURce] (continued)<br />
:TRANsition<br />
[:LEADing] <br />
:TRAiling <br />
:RAMP<br />
:DELay <br />
:TRANsition<br />
[:LEADing] <br />
:TRAiling <br />
:SINC<br />
:NCYCle <br />
:GAUSsian<br />
:EXPonent <br />
:EXPonential<br />
:EXPonent <br />
:DC<br />
:VOLTage<br />
[:AMPLitude] <br />
:AM<br />
[:DEPTh] <br />
:INTernal<br />
:FREQuency <br />
:EXECute<br />
:BM<br />
:NCYCles <br />
:INTernal<br />
:RATE <br />
:SOURce {EXTernal | INTernal | BUS}<br />
[:STATe] {OFF | ON}<br />
:IMMediate<br />
:GM<br />
:STATe {OFF | ON}<br />
:SEQuence<br />
:DEFine , , <br />
:DELete<br />
[:NAME] <br />
:ALL<br />
:SELect <br />
:SYSTem<br />
:ERRor?<br />
:VERSion?<br />
:LOCal<br />
:REMote<br />
Remote Interface<br />
4-5
Remote Interface<br />
Table 4-1. SCPI Command Summary (continued).<br />
4-6<br />
:TRACe<br />
[:DATA] #<br />
:DEFine {, }<br />
:DELete<br />
[:NAME] <br />
:ALL<br />
:SELect <br />
:TRIGger<br />
:SOURce {EXTernal | INTernal | BUS}<br />
:INTernal<br />
:RATE <br />
:STATe {OFF | ON}<br />
:IMMediate<br />
Common Commands<br />
*CLS Clear status command<br />
*ESE Standard event status enable command<br />
*OPC Operation complete command<br />
*RCL Recall front panel set-up command<br />
*RST Reset command<br />
*SAV Save front panel set-up command<br />
*SRE Service request enable command<br />
*TRG Trigger command<br />
*WAI Wait-to-continue command<br />
*ESE? Standard event status enable query<br />
*ESR? Standard event status register query<br />
*IDN? Identification query<br />
*OPC? Operation complete query<br />
*SRE? Service request enable query<br />
*STB? Read status byte query
4-13. Output Configuration Command Summary<br />
The Output Configuration Commands control the output function, shape, frequency, amplitude, filter, and state.<br />
The commands are presented exactly as they should be typed in your program. Optional nodes were omitted<br />
from these commands. Factory defaults after *RST or front panel reset are shown in bold typeface. Parameter<br />
low and high limits are given where applicable. Use the Standard Waveforms parameters in paragraph 4-13 for<br />
the APPLy command.<br />
Command and Parameters Low Limit<br />
High Limit<br />
Default<br />
[SOURce:]<br />
APPLy:SINusoid {[ [, [, [, [,] ]]]]}<br />
APPLy:TRIangle {[ [, [, [, [,] ]]]]}<br />
APPLy:SQUare {[ [, [, [,] ]]]}<br />
APPLy:PULSe {[ [, [, [, [, [,,<br />
[] ]]]]]]}<br />
APPLy:RAMP {[ [, [, [, [, [,] ]]]]]}<br />
APPLy:SINC {[ [, [, [,] ]]]}<br />
APPLy:EXPonential [ [, [, [, ] ]]]}<br />
APPLy:GAUSsian {[ [, [, [,] ]]]}<br />
APPLy:DC {[]}<br />
APPLy:USER {[ [, [,, [,] ]]]}<br />
APPLy:SEQuenc {[ [, [, [,] ]]]}<br />
APPLy:?<br />
APPLy?<br />
FUNCTion:MODE {FIXed | USER | SEQuence}<br />
FUNCTion:MODE?<br />
FUNCtion:SHAPe {SINusoid | TRIangle | SQUare | PULSe | RAMP | SINC | EXPonential |<br />
GAUSsian | DC }<br />
FUNCtion:SHAPe?<br />
FUNCtion:SHAPe:USER <br />
FUNCtion:SHAPe:USER?<br />
FUNCtion:SHAPe:SEQuence <br />
FUNCtion:SHAPe:SEQuence?<br />
FREQuency { | MINimum | MAXimum}. . . . . . . . . . . 10e-6hz 50e6hz 100e3hz<br />
FREQuency?<br />
FREQuency:RASTer { | MINimum | MAXimum} . . . 10e-3hz 100e6hz 100e6hz<br />
FREQuency:RASTer?<br />
FREQuency:RASter:SOURce {EXT | INT | XTAL}<br />
FREQuency:RASTer:SOURce?<br />
VOLTage {| MINimum | MAXimum} . . . . . . . . . . . . . 10e-3v 9.99v 5.00v<br />
VOLTage?<br />
VOLTage:OFFSet . . . . . . . . . . . . . . . . . . . . . . . . . . . . . . . . . . 0v 4.5v 0v<br />
VOLTage:OFFSet?<br />
OUTPut:<br />
FILTer:FREQuency {20MHz | 25MHz | 50MHz}<br />
FILTer:FREQuency?<br />
FILTer {OFF | ON}<br />
FILTer?<br />
Remote Interface<br />
4-7
Remote Interface<br />
4-14. Standard Waveform Command Summary<br />
The Standard Waveform Commands control the various parameters of the standard output functions. The commands<br />
are presented exactly as they should be typed in your program. Optional nodes were omitted from these commands.<br />
Factory defaults after *RST or front panel reset are shown in bold typeface. Parameter low and high limits are<br />
given where applicable. The Standard Waveforms parameters could be used for the APPLy command.<br />
4-8<br />
Command and Parameters Low Limit<br />
High Limit Default<br />
[SOURce:]<br />
SINusoid:PHASe . . . . . . . . . . . . . . . . . . . . . . . . . . . . . . . . . . . 0 360 0<br />
SINusoid:PHASe?<br />
SINusoid:POWer . . . . . . . . . . . . . . . . . . . . . . . . . . . . . . . . . . . 1 9 1<br />
SINusoid:POWer?<br />
TRIangle:PHASe . . . . . . . . . . . . . . . . . . . . . . . . . . . . . . . . . . . 0 360 0<br />
TRIangle:PHASe?<br />
TRIangle:POWer . . . . . . . . . . . . . . . . . . . . . . . . . . . . . . . . . . . 1 9 1<br />
TRIangle:POWer?<br />
SQUare:DCYCle . . . . . . . . . . . . . . . . . . . . . . . . . . . . . . . . . . . . 1 99 50<br />
SQUare:DCYCle?<br />
PULSe:DELay . . . . . . . . . . . . . . . . . . . . . . . . . . . . . . . . . . . . . . 0% 99.9% 10.0%<br />
PULSe:DELay?<br />
PULSe:WIDTh . . . . . . . . . . . . . . . . . . . . . . . . . . . . . . . . . . . . . 0% 99.9% 10.0%<br />
PULSe:WIDTh<br />
PULSe:TRANsition . . . . . . . . . . . . . . . . . . . . . . . . . . . . . . . . . 0% 99.9% 10.0%<br />
PULSe:TRANsition?<br />
PULSe:TRANsition:TRAiling . . . . . . . . . . . . . . . . . . . . . . . . 0% 99.9% 10.0%<br />
PULSe:TRANsition:TRAiling?<br />
RAMP:DELay . . . . . . . . . . . . . . . . . . . . . . . . . . . . . . . . . . . . . . 0% 99.9% 10.0%<br />
RAMP:DELay?<br />
RAMP:TRANsition . . . . . . . . . . . . . . . . . . . . . . . . . . . . . . . . . 0% 99.9% 10.0%<br />
RAMP:TRANsition?<br />
RAMP:TRANsition:TRAiling . . . . . . . . . . . . . . . . . . . . . . . . 0% 99.9% 10.0%<br />
RAMP:TRANsition:TRAiling?<br />
SINC:NCYCle . . . . . . . . . . . . . . . . . . . . . . . . . . . . . . . . . . . . . . 4 999 10<br />
SINC:NCYCle?<br />
GAUSsian:EXPonent . . . . . . . . . . . . . . . . . . . . . . . . . . . . . . . . 1 65535 1000<br />
GAUSsian:EXPonent?<br />
EXPonential:EXPonent . . . . . . . . . . . . . . . . . . . . . . . . . . . . . . 0.01 20.00 1.00<br />
EXPonential:EXPonent?<br />
DC . . . . . . . . . . . . . . . . . . . . . . . . . . . . . . . . . . . . . . . . . 0% 100% 100%<br />
DC?
4-15. Arbitrary Waveform and Sequence Command Summary<br />
The Arbitrary Waveform Commands control the segmentation of the arbitrary memory, the waveform shape, and<br />
the various bits each memory segment. The sequence commands control the segments which are linked and the<br />
number of times each segment is repeated in this loop. The commands are presented exactly as they should be<br />
typed in your program. Optional nodes were omitted from these commands.<br />
Command and Parameters<br />
TRACe #<br />
TRACe:DEFine {, }<br />
TRACe:DELete <br />
TRACe:DELete:ALL<br />
TRACe:SELect <br />
FORMat:BORDer {NORMal | SWAPped}<br />
FORMat:BORDer?<br />
SEQuence:DEFine , , <br />
SEQuence:DELete <br />
SEQuence:DELete:ALL<br />
SEQuence:SELect <br />
4-16. Modulation Command Summary<br />
The Modulation Commands control the various modulation modes that the generator is capable of handling. The<br />
Model 8024 can be amplitude, gate, and burst modulated from an internal or an external source. The commands<br />
are presented exactly as they should be typed in your program. Optional nodes were omitted from these commands.<br />
Factory defaults after *RST or front panel reset are shown in bold typeface. Parameter low and high limits are<br />
given where applicable.<br />
Command and Parameters Low Limit<br />
High Limit Default<br />
[SOURce:]<br />
AM . . . . . . . . . . . . . . . . . . . . . . . . . . . . . . . . . . . . . . . . . . . . . . . 0% 200% 50%<br />
AM?<br />
AM:INTernal:FREQuency . . . . . . . . . . . . . . . . . . . . . . . . . . . 10 65535 100<br />
AM:INTernal:FREQuency?<br />
AM:EXECute<br />
BM:NCYCles { | MINimum | MAXimum} . . . . . . . . . . . . . 1 32767 1<br />
BM:NCYCles?<br />
BM:INTernal:RATE . . . . . . . . . . . . . . . . . . . . . . . . . . . . . . . . . 20e-6s 999s 1s<br />
BM:INTernal:RATE?<br />
BM:SOURce {EXTernal | INTernal | BUS}<br />
BM:SOURce?<br />
BM {OFF | ON}<br />
BM?<br />
BM:IMMediate<br />
GM {OFF | ON}<br />
GM?<br />
Remote Interface<br />
4-9
Remote Interface<br />
4-17. Trigger Command Summary<br />
The Trigger Commands control the trigger modes that the generator is capable of handling. The commands are<br />
presented exactly as they should be typed in your program. Optional nodes were omitted from these commands.<br />
Factory defaults after *RST or front panel reset are shown in bold typeface. Parameter low and high limits are<br />
given where applicable.<br />
Command and Parameters Low Limit<br />
4-19. IEEE-488.2 Common<br />
Commands and Queries<br />
Since most instruments and devices in an ATE system<br />
use similar commands which perform identical functions,<br />
the IEEE-488.2 document has specified a common<br />
set of commands and queries which all device<br />
must use. This avoids the problem in which devices<br />
High Limit Default<br />
TRIGger:SOURce {EXTernal | INTernal | BUS}<br />
TRIGger:SOURce?<br />
TRIGger:INTernal:RATE . . . . . . . . . . . . . . . . . . . . . . . . . . . . . . 20e-6s 999s 1s<br />
TRIGger:INTernal:RATE?<br />
TRIGger:STATe {OFF | ON}<br />
TRIGger:STATe?<br />
TRIGger:IMMediate<br />
*TRG<br />
4-18. System-Related Command Summary<br />
The system-Related commands are not related directly to waveform generation but is an important part of operating<br />
the Model 8024. These commands control the display, error conditions, bus state, etc. The commands are presented<br />
exactly as they should be typed in your program. Optional nodes (if any) were omitted from these commands.<br />
Factory defaults after *RST or front panel reset are shown in bold typeface. Parameter low and high limits are<br />
given where applicable.<br />
4-10<br />
Command and Parameters Low Limit<br />
SYSTem:ERRor?<br />
SYSTem:VERSion?<br />
SYSTem:LOCal<br />
SYSTem:REMote<br />
*IDN?<br />
*RST<br />
High Limit Default<br />
*SAV . . . . . . . . . . . . . . . . . . . . . . . . . . . . . . . . . . . . . . . . . 0 9 0<br />
*RCL . . . . . . . . . . . . . . . . . . . . . . . . . . . . . . . . . . . . . . . . . 0 9 0<br />
from various manufacturers used a different set of commands<br />
to enable functions and report status. The IEEE-<br />
488.2 treats the common commands and queries as device<br />
dependent commands. For example, *TRG is sent<br />
over the bus to trigger the instrument. Some common<br />
commands and queries, however, are optional; most<br />
of them are mandatory. The following is a complete<br />
listing of all common commands and queries which<br />
are used in the Model 8024.
*CLS - Clear the Status Byte summary register and<br />
all event registers.<br />
*ESE - Enable bits in the Standard<br />
Event enable register. The selected bits are then reported<br />
to the status byte.<br />
*ESE? - Query the Standard Event enable register.<br />
The generator returns a decimal value which corresponds<br />
to the binary-weighted sum of all bits set in<br />
the register.<br />
*ESR? - Query the Standard Event register. The generator<br />
returns a decimal value which corresponds to<br />
the binary-weighted sum of all bits set in the register.<br />
*IDN? - Query the generator identity. The returned<br />
data is organized into four fields, separated by commas.<br />
The generator responds with its manufacturer and model<br />
number in the first two fields and may also report its<br />
serial number and options in field three and four. If<br />
the later information is not available, the device must<br />
return an ASCII 0 for each. For example, model 8024<br />
response to *IDN? is TABOR,8024,0,REV1.08.<br />
*OPC - Set the “operation complete” bit (bit 0) in the<br />
Standard Event register after the previous commands<br />
have been executed.<br />
*OPC? - Returns “1" to the output buffer after the<br />
previous commands have been executed. Used for synchronization<br />
between a controller and the instrument<br />
using the MAV bit in the Status Byte or a read of the<br />
Output Queue. The *OPC? query does not in any way<br />
affect the OPC Event bit in the Standard Event Status<br />
Register (ESR). Reading the response to the *OPC?<br />
query has the advantage of removing the complication<br />
of dealing with service requests and serial polls. However,<br />
it has the penalty that both the system bus and<br />
the controller handshake are in temporary holdoff state<br />
while the controller is waiting to read the *OPC? query<br />
response.<br />
*RCL - Recall a previously stored state. To recall a<br />
stored state, you must use the same memory cell location<br />
used previously to store the state. Note that only<br />
front panel states are stored.<br />
*RST - Reset the generator to its default state. Default<br />
values are listed in paragraphs 4-12 through 4-17.<br />
*SAV - Stores instrument configurations. Ten memory<br />
cell locations (numbered 0 to 9) are available to store<br />
instrument configurations. The generator stores front<br />
panel states and configurations only. It does not store<br />
arbitrary waveforms and sequences. To recall a stored<br />
Remote Interface<br />
state, you must use the same memory cell location used<br />
previously to store the state.<br />
*SRE - Enables bits in the Status Byte<br />
enable register.<br />
*SRE? - Query the Status Byte enable register. The<br />
generator returns a decimal value in the range of 0 to<br />
63 or 128 to 191, since bit 6 (RSQ) cannot be set.<br />
The binary_weighted sum of the number represents the<br />
value of the bits of the Service Request Enable Register.<br />
*STB? - Query the Status Byte summary register. The<br />
*STB? command is similar to a serial poll but it is<br />
processed like any other instrument command. The<br />
*STB? command returns the same result as a serial<br />
poll but the “request service” bit (bit 6) is not cleared<br />
if a serial poll has occurred.<br />
*TRG - Trigger the generator from the remote interface.<br />
This command effects the generator if it is first placed<br />
in trigger or burst mode of operation and the trigger<br />
source is set to “BUS”.<br />
*WAI - Wait for all pending operations to complete<br />
before executing any additional commands over the<br />
interface.<br />
4-20. The SCPI Status Registers<br />
The Model 8024 uses the Status Byte register group<br />
and the Standard Event register group to record various<br />
instrument conditions. Figure 4-1 shows the SCPI status<br />
system.<br />
An Event Register is a read only register that reports<br />
defined conditions within the generator. Bits in an event<br />
register are latched. When an event bit is set, subsequent<br />
state changes are ignored. Bits in an event register are<br />
automatically cleared by a query of that register or by<br />
sending the *CLS command. The *RST command or<br />
device clear will not clear bits in an event register.<br />
Querying an event register returns a decimal value<br />
which corresponds to the binary-weighted sum of all<br />
bits set in the register.<br />
An Event Register defines which bits in the corresponding<br />
event register are logically ORed together to form<br />
a single summary bit. You can read from, and write,<br />
to an enable register. Querying an enable register will<br />
not clear it. The *CLS command does not clear enable<br />
registers but it does clear the bits in the event registers.<br />
To enable bits in an enable register, you must write<br />
a decimal value which corresponds to the binary_weighted<br />
sum of the bits you wish to enable in<br />
the register.<br />
4-11
Remote Interface<br />
Figure 4-1. IEEE-488.2 Status Reporting Model<br />
4-12
4-20-1. The Status Byte Register<br />
(STB)<br />
The Status Byte summary Register contains conditions<br />
from the other registers. Query data that is waiting in<br />
the generator’s output buffer is immediately reported<br />
through the Message Available bit (bit 4). Bits in the<br />
summary register are not latched. Clearing an event<br />
register will clear the corresponding bits in the Status<br />
Byte summary Register. Description of the various bits<br />
within the Status Byte summary Register is given in<br />
the following.<br />
Bit 0 - Decimal value 1. Not used, always set to 0.<br />
Bit 1 - Decimal value 2. Not used, always set to 0.<br />
Bit 2 - Decimal value 4. Not used, always set to 0.<br />
Bit 3 - Decimal value 8. Not used, always set to 0.<br />
Bit 4 - Decimal value 16. Message Available Queue<br />
Summary Message (MAV). The state of this bit indicates<br />
whether or not the output queue is empty. The<br />
MAV summary-message is true when the output queue<br />
is not empty. This message is used to synchronize information<br />
exchange with the controller. The controller<br />
can, for example, send a query command to the device<br />
and then wait for MAV to become true. If an application<br />
program begins a read operation of the output queue<br />
without first checking for MAV, all system bus activity<br />
is held up until the device responds.<br />
Bit 5 - Decimal value 32. Standard Event Status Bit<br />
(ESB) Summary Message. Its state indicates whether<br />
or not one or more of the enabled ESB events have<br />
occurred since the last reading or clearing of the Standard<br />
Event Status Register.<br />
Bit 6 - Decimal value 64. Master Summary Status<br />
(MSS)/Request Service (RQS) Bit. Its state indicate if<br />
the device has at least one condition to request service.<br />
The MSS bit is not part of the IEEE-488.1 status byte<br />
and will not be sent in response to a serial poll. The<br />
RQS bit, however, if set, will be sent in response to<br />
a serial poll.<br />
Bit 7 - Decimal value 128. Not used, always set to 0.<br />
4-20-1-1. Reading the Status Byte<br />
Register<br />
The Status Byte summary Register can be read with<br />
either a serial poll or the *STB? common query. Both<br />
of these methods read the STB message. The value<br />
sent for the bit 6 position is, however, dependent upon<br />
the method used.<br />
Remote Interface<br />
4-20-1-2. Reading with a Serial Poll<br />
When serial polled, the generator returns the 7-bit status<br />
byte plus the single bit RQS message. The status bye<br />
and RQS message are returned to the controller as a<br />
single data byte. The RQS message is sent on line<br />
D107 (bit 6). RQS TRUE means that bit 6 line is asserted<br />
(pulled to a low voltage) when the status byte<br />
is sent. The response represents the sum of the binaryweighted<br />
values of the Status Byte Register.<br />
Reading the Status Byte Register with a serial poll<br />
sets the RQS message FALSE until a new reason for<br />
service has occurred. The STB portion of the Status<br />
Byte Register is read non-destructively. The value of<br />
the status byte is not altered by a serial poll. Once the<br />
generator has generated an RQS, its status byte should<br />
be read to clear the SRQ line so the controller can<br />
detect an SRQ from another device. Otherwise the instrument<br />
will continuously assert the SRQ line.<br />
4-20-1-3. Reading With the *STB?<br />
The *STB? common query causes the generator to send<br />
the contents of the Status Byte Register and the MSS<br />
(Master Summary Status) summary message as a single<br />
element. The response<br />
represents the sum of the binary-weighted values<br />
of the Status Byte Register. The *STB? common query<br />
does not alter the status byte.<br />
4-20-1-4. Clearing the Status Byte<br />
Register<br />
The entire Status Byte Register can be cleared by removing<br />
the reasons for service from Auxiliary Status<br />
Registers. Sending the *CLS command to the device<br />
after a SCPI command terminator and before a Query,<br />
clears the Standard Event Status Register and clears<br />
the output queue of any unread messages. With the<br />
output queue empty, the MAV summary message is<br />
set to FALSE. Methods of clearing other auxiliary status<br />
registers are discussed in the following.<br />
4-20-2. Service Request Enable<br />
Register (SRE)<br />
The Service Request Enable Register is an 8-bit register<br />
that enables corresponding summary messages in the<br />
Status Byte Register. Thus, the application programmer<br />
can select reasons for the generator to issue a service<br />
request by altering the contents of the Service Request<br />
Enable Register.<br />
4-13
Remote Interface<br />
The Service Request Enable Register is read with the<br />
*SRE? common query. The response to this query is<br />
an number that represents the sum of the binaryweighted<br />
value of the Service Request Enable Register.<br />
The value of the unused bit 6 is always zero.<br />
The Service Request Enable Register is written using<br />
the *SRE command followed by a decimal value representing<br />
the bit values of the Register. A bit value<br />
one indicates an enabled condition. Consequently, a<br />
bit value of zero indicates a disabled condition. The<br />
Service Request Enable Register is cleared by sending<br />
*SRE0. The generator always ignores the value of bit<br />
6. Summary of *SRE commands is given in the following.<br />
*SRE0 - Clears all bits in the register.<br />
*SRE1 - Not used.<br />
*SRE2 - Not used.<br />
*SRE4 - Not used.<br />
*SRE8 - Not used.<br />
*SRE16 - Service request on MAV.<br />
*SRE32 - Service request on ESB summary bit.<br />
*SRE128 - Not used.<br />
4-20-3. Standard Event Status<br />
Register (ESR)<br />
The Standard Event Status Register is a special application<br />
of the status reporting. The 8 bits of the ESR<br />
have been defined by the IEEE-488.2 as specific conditions<br />
which can be monitored and reported back to<br />
the user upon request. The Standard Event Status Register<br />
is destructively read with the *ESR? common<br />
query. The Standard Event Status Register is cleared<br />
by a *CLS common command, on power-on, and when<br />
read by *ESR?.<br />
The arrangement of the various bits within the register<br />
is firm and is required by all GPIB instruments that<br />
implement the IEEE-488.2. Description of the various<br />
bits is given in the following.<br />
Bit 0 - Operation Complete. Generated in response to<br />
the *OPC command. It indicates that the device has<br />
completed all selected and pending operations and is<br />
ready for a new command.<br />
Bit 1 - Request Control. This bit operation is disabled<br />
on the Model 8024.<br />
Bit 2 - Query Error. This bit indicates that an attempt<br />
is being made to read data from the output queue when<br />
no output is either present or pending.<br />
4-14<br />
Bit 3 - Device Dependent Error. This bit is set when<br />
an error in a device function occurs. For example, the<br />
following command will cause DDE error:<br />
VOLTage 7.25V;OFFSet 4.1V<br />
Both of the above parameters are legal and within the<br />
specified limits, however, generator is unable to generate<br />
such an amplitude and offset combination.<br />
Bit 4 - Execution Error. This bit is generated if the<br />
parameter following the command is outside of the<br />
legal input range of the generator.<br />
Bit 5 - Command Error. This bit indicates the generator<br />
received a command that was a syntax error, or a command<br />
that the device does not implement. A GET receive<br />
inside a command string will also cause a Command<br />
Error.<br />
Bit 6 - User Request. This event bit indicates that one<br />
of a set of local controls, had been activated. This<br />
event bit occurs regardless of the remote or local state<br />
of the device.<br />
Bit 7 - Power On. This bit indicates that the device’s<br />
power source was turned off, then on, since the last<br />
time that the register was read.<br />
4-20-3-1. Standard Event Status<br />
Enable Register (ESE)<br />
The Standard Event Status Enable Register allows one<br />
or more events in the Standard Event Status Register<br />
to be reflected in the ESB summary-message bit. The<br />
Standard Event Status Enable Register is an 8-bit register<br />
that enables corresponding summary messages in<br />
the Standard Event Status Register. Thus, the application<br />
programmer can select reasons for the generator<br />
to issue an ESB summary-message bit by altering the<br />
contents of the ESE Register.<br />
The Standard Event Status Enable Register is read with<br />
the *ESE? common query. The response to this query<br />
is an number that represents the sum of the binaryweighted<br />
value of the Standard Event Status Enable<br />
Register.<br />
The Standard Event Status Enable Register is written<br />
using the *ESE command followed by a decimal value<br />
representing the bit values of the Register. A bit value<br />
one indicates an enabled condition. Consequently, a<br />
bit value of zero indicates a disabled condition. The<br />
Standard Event Status Enable Register is cleared by<br />
sending *ESE0. Summary of *ESE messages is given<br />
in the following.
*ESE0 - No mask. Clears all bits in the register.<br />
*ESE1 - ESB on Operation Complete.<br />
*ESE2 - ESB on Request Control.<br />
*ESE4 - ESB on Query Error.<br />
*ESE8 - ESB on Device Dependent Error.<br />
*ESE16 - ESB on Execution Error.<br />
*ESE32 - ESB on Command Error.<br />
*ESE64 - ESB on User Request.<br />
*ESE128 - ESB Power on.<br />
4-21. Error Messages<br />
In general, whenever the generator receives an invalid<br />
SCPI command, it automatically generates an error.<br />
The error number is displayed on the LCD readout for<br />
about one second and the instrument resumes normal<br />
operation. Errors are stored in a special error queue<br />
and may be retrieved from this buffer one-at-a-time.<br />
Errors are retrieved in first-in-first-out (FIFO) order.<br />
The first order returned is the first error that was stored.<br />
When you have read all errors from the queue, the<br />
generator responds with a +0,"No error" message.<br />
If more than 30 errors have occurred, the last error<br />
stored in the queue is replaced with -350, Too many<br />
errors". No additional errors are stored until you remove<br />
errors from the queue. If no errors have occurred when<br />
you read the error queue, the generator responds with<br />
+0,"No error".<br />
The error queue is cleared when power has been shut<br />
off or after a *CLS command has been executed. The<br />
*RST command does not clear the error queue. Use<br />
the following command to read the error queue:<br />
SYSTem:ERRor?<br />
Errors have the following format (the error string may<br />
contain up to 80 characters):<br />
-102,"Syntax error"<br />
A complete listing of the errors that can be detected<br />
by the generator is given in the following.<br />
-100,"Command error". When the generator can not<br />
detect more specific errors, this is the generic syntax<br />
error used.<br />
-102,"Syntax error". Invalid syntax found in the command<br />
string.<br />
-103,"invalid separator". An invalid separator was<br />
found in the command string. You may have used a<br />
comma instead of a colon or a semicolon. In some<br />
cases where the generator can not detect a specific<br />
separator, it may return error -100 instead of this error.<br />
Remote Interface<br />
-109,"Missing parameter". Fewer parameters were received<br />
for the command. You omitted one or more<br />
parameters that are required for the command.<br />
-113."Undefined header". A command was received<br />
that is not valid for the generator. You may have misspelled<br />
the command or it may not be a valid command.<br />
-131,"Invalid suffix". A suffix was incorrectly specified<br />
for a numeric parameter. You may also have misspelled<br />
the suffix.<br />
-161,"Invalid block data". Applies only to the TRACe<br />
command. For a definite block, the number of bytes<br />
of data sent does not match the number of bytes that<br />
you specified in the block header. For an indefinitelength<br />
block, an EOI was received without an accompanying<br />
“new line” character.<br />
-221,"Setting conflict". Two conflicting parameters<br />
were received which can not be executed without generating<br />
an error. You may have sent an offset value<br />
which is outside the amplitude level window.<br />
-222,"Data out of range". Parameter data which followed<br />
a specific header could not be used because its<br />
value is outside the valid range defined by the generator.<br />
-224,"Illegal parameter value". A discrete parameter<br />
was received which was not a valid choice for the<br />
command. You may have used an invalid parameter<br />
choice.<br />
-350,"Too many errors". The error queue is full because<br />
more than 30 errors have occurred. No additional errors<br />
are stored until you remove from the queue. The error<br />
queue is cleared when power has been off, or after a<br />
*CLS command has been executed.<br />
-410,"Query INTERRUPTED". A command was received<br />
which sends data to the output buffer, but the<br />
output buffer contained data from a previous command<br />
(the previous data is not overwritten). The output buffer<br />
is cleared when power has been off, or after a device<br />
clear has been executed.<br />
4-22. Device-Specific Commands<br />
The Model 8024 conforms to the 1993.0 version of<br />
the SCPI standard. Some of the commands used are<br />
not included in the 1993.0 version of the SCPI standard.<br />
However, these commands are designed with the SCPI<br />
standard in mind and they follow all of the command<br />
syntax rules defined by the standard. Appendix B lists<br />
all device-specific commands that were designed specifically<br />
for the Model 8024.<br />
4-15
Remote Interface<br />
4-23. Output Configuration Commands<br />
This paragraph describes the low-level commands used to program the generator. Although the APPLy command<br />
provides the most straightforward method to program the generator, the low-level commands give you more<br />
flexibility to change individual parameters.<br />
FUNCtion:MODE {FIXed|USER|SEQuence}<br />
Select the output function type. The selected function type outputs one of the previously selected function shape.<br />
If you select “FIXed”, the generator outputs the standard waveform currently selected by the FUNC:SHAP command.<br />
If you select “USER”, the generator outputs the arbitrary waveform currently selected by the FUNC:SHAP:USER<br />
command. If you select “SEQuence”, the generator outputs the sequence currently selected by the FUNC:SHAP:SEQ<br />
command.<br />
FUNCtion:MODE?<br />
Query the output function type. Returns FIX, USER, or SEQ.<br />
FUNCtion:SHAPe {SINusoid|TRIangle|SQUare|PULSe| RAMP |SINC<br />
|EXPonential|GAUSsian |DC}<br />
Select a standard output function. The selected waveform is output using the previously selected frequency,<br />
amplitude, offset, and other relevant settings. The standard waveform will be output only after the FUNC:MODE:FIX<br />
commands has been selected.<br />
FUNCtion:SHAPe?<br />
Query the standard function shape. Returns SIN,TRI,SQU,PULS,RAMP,SINC,EXP, GAUS, or DC.<br />
FUNCtion:SHAPe:USER <br />
Select an arbitrary waveform. The selected arbitrary waveform is output using the previously selected sampling<br />
clock, segment size, amplitude, and dc offset. The should be programmed using the TRACe<br />
commands before it can output a waveform. The arbitrary waveform will be output only after the FUNC:SHAP:USER<br />
command has been selected.<br />
FUNCtion:SHAPe:USER?<br />
Query the active arbitrary segment number. Returns a value.<br />
FUNCtion:SHAPe:SEQuence <br />
Select a sequence of waveforms. The selected sequence is output using previously selected segments, sampling<br />
clock, amplitude, and dc offset. The should be programmed using the SEQuence commands<br />
before it can output a sequence. The sequence will be output only after the FUNC:SHAP:SEQ command has<br />
been selected.<br />
FUNCtion:SHAPe:SEQuence?<br />
Query the active sequence number. Returns a value.<br />
FREQuency {|MINimum|MAXimum}<br />
Set the output frequency for the standard functions. MIN selects the lowest frequency allowed for the currently<br />
active function. MAX selects the highest frequency allowed for the currently active function. The default frequency<br />
setting is 100KHz for all functions.<br />
FREQuency?<br />
Query the frequency setting for the standard function currently active. Returns a value in hertz.<br />
4-16
FREQuency:RASTer {|MINimum|MAXimum}<br />
Set the sampling clock frequency for the user and sequenced functions. MIN selects the lowest frequency allowed<br />
for the currently active segment or sequence. MAX selects the highest frequency allowed for the currently active<br />
segment or sequence. The default sampling clock frequency setting is 100MHz for all functions. Note that the<br />
output frequency depends on the number of points specified in the waveform. The output frequency can be<br />
computed using the following formula: Output Frequency = Sampling Clock / Segment Points. The frequency<br />
parameter is automatically computed and displayed on the LCD display. If a segment or a sequenced have not<br />
been defined, the LCD will display “FREQ off”.<br />
FREQuency:RASTer?<br />
Query the sampling clock frequency setting for the arbitrary segment or sequence currently active. Returns a<br />
value in hertz.<br />
FREQuency:RASter:SOURce {EXT|INT|XTAL}<br />
Set the sampling clock source for the user and sequenced functions. EXT selects an external clock source. The<br />
external source is applied to the rear panel CLOCK IN terminal. INT selects the internal synthesized clock<br />
generator. XTAL selects a fixed source directly from the 10 MHz crystal. The default setting is INT.<br />
FREQuency:RASTer:SOURce?<br />
Query the sampling clock source setting. Returns EXT, INT, or XTAL<br />
VOLTage {|MINimum|MAXimum}<br />
Set the peak-to-peak amplitude for the currently active function. MIN selects the smallest amplitude. MAX<br />
selects the largest amplitude. The default amplitude is 5.00 V (into 50Ω).<br />
VOLTage?<br />
Query the output amplitude for the currently selected function. Returns a value in volts.<br />
VOLTage:OFFSet <br />
Set the dc offset voltage for the currently active function. The default offset is 0 V (into 50Ω).<br />
VOLTage:OFFSet?<br />
Query the output offset for the currently selected function. Returns a value in volts.<br />
OUTPut:FILTer:FREQuency {}<br />
Set the filter frequency for the currently active function. Note that the filters can not be changed if the generator<br />
is set to output sine waveform from its standard waveform library. The filters will be activated only after the<br />
OUTP:FILT ON command. The default filter setting is 20MHz.<br />
OUTPut:FILTer:FREQuency?<br />
Query the currently selected filter setting. Returns 20MHz, 25MHz, or 50MHz.<br />
OUTPut:FILTer {OFF|ON}<br />
Turn the previously selected output filter on or off. The active filter is selected with the OUTP:FILT:FREQ<br />
command. The default filter state setting is OFF.<br />
OUTPut:FILTer?<br />
Query the output filter state. Returns “0" (OFF) or ”1" (ON).<br />
Remote Interface<br />
4-17
Remote Interface<br />
OUTPut:[STATe] {OFF|ON}<br />
Disable or enable output from the OUTPUT terminal. The default value is ON. When the output signal is disabled,<br />
the output level on the OUTPUT terminal is set to the minimum amplitude level (10 mVp-p into 50Ω).<br />
OUTPut:[STATe]?<br />
Query the state of the OUTPUT terminal. Returns “0" (OFF) or ”1" (ON).<br />
4-23-1. Using the APPLy Commands<br />
The APPLy command provides a high level language method to program the generator over the remote interface.<br />
You can select the function, frequency, amplitude, offset, and other parameters which are associated with the<br />
selected function. For example, the following statement outputs a 2 Vp-p square wave at 1 MHz with a 0 V<br />
offset and 10% duty cycle using APPLy:<br />
APPL:SQU 1e6Hz, 2V, 0V, 10%<br />
You can also query all parameters which are associated with a standard function using the APPL: ?<br />
query. For example, if you programmed the generator using the above APPLy:SQU command you can query the<br />
square wave parameters using the following query:<br />
APPL:SQU?<br />
The generator returns a string that contains all the parameters that are associated with the square function similar<br />
to the following string: “1.000e+6,2,0,10".<br />
APPLy:SINusoid {[[,[,[,[,]]]]]}<br />
Program the generator to output sine waveform with frequency, amplitude, offset, start phase, and power parameters.<br />
Parameters are optional, However, if you want to use the APPLy command as above and change just the amplitude,<br />
you must include the frequency parameter in your command. The parameters that follow could be omitted. The<br />
default setting for this function are: 100 KHz, 5 Vp-p, 0 V, 0, and 1.<br />
APPLy:TRIangle {[[,[,[,[,]]]]]}<br />
Program the generator to output triangle waveform with frequency, amplitude, offset, start phase, and power<br />
parameters. The default setting for this function are: 100 KHz, 5 Vp-p, 0 V, 0, and 1.<br />
APPLy:SQUare {[[,[,[,]]]]}<br />
Program the generator to output square waveform with frequency, amplitude, offset, and duty cycle parameters.<br />
The default setting for this function are: 100 KHz, 5 Vp-p, 0 V, and 50%.<br />
APPLy:PULSe {[[,[,[,[,<br />
[,,[]]]]]]]}<br />
Program the generator to output pulse waveform with frequency, amplitude, offset, delay, rise time, high time,<br />
and fall time parameters. The default setting for this function are: 100 KHz, 5 Vp-p, 0 V, 0%, 10%, 10%, 10%,<br />
and 10%.<br />
4-18<br />
APPLy:RAMP {[[,[,[,[,<br />
[,]]]]]]}
Program the generator to output sine(x)/x waveform with frequency, amplitude, offset, and number of cycles<br />
parameters. The default setting for this function are: 100 KHz, 5 Vp-p, 0 V, and 10.<br />
APPLy:EXPonential [[,[,[,]]]]}<br />
Program the generator to output exponential waveform with frequency, amplitude, offset, and exponent parameters.<br />
The default setting for this function are: 100 KHz, 5 Vp-p, 0 V, and 1.00.<br />
APPLy:GAUSsian {[[,[,[,]]]]}<br />
Program the generator to output gaussian waveform with frequency, amplitude, offset, and exponent parameters.<br />
The default setting for this function are: 100 KHz, 5 Vp-p, 0 V, and 1000.<br />
APPLy:DC {[]}<br />
Program the generator to output dc level. The dc level is set as percent of programmed amplitude. The default<br />
setting for this function are: 100 %.<br />
APPLy:USER {[[,[,,<br />
[,]]]]}<br />
Program the generator to output an arbitrary waveform. The specified segment number must be loaded with an<br />
arbitrary waveform before the generator can execute this command successfully. This command lets you specify<br />
segment number, sampling clock rate, amplitude and offset. The default setting for this function are: 1, 100<br />
MHz, 5 Vp-p, and 0 V.<br />
APPLy:SEQuence {[[,[,<br />
[,]]]]}<br />
Program the generator to output a sequence of waveforms. The specified sequence number must be programmed<br />
with a sequence before the generator can execute this command successfully. This command lets you specify<br />
segment number, sampling clock rate, amplitude and offset. The default setting for this function are: 1, 100<br />
MHz, 5 Vp-p, and 0 V.<br />
APPLy:?<br />
Query parameters that are associated with the specified function shape. Returns a string of values, depending<br />
on the parameters that are available for the selected function shape.<br />
APPLy?<br />
4-24. Standard Waveform Commands<br />
The Standard Waveform Commands control the various parameters for the active output function. The standard<br />
function output will be available at the OUTPUT terminal only after FUNC:MODE FIX, and FUNC:SHAP PULS<br />
commands have been executed. Parameters for the selected function shape can be modified now and will cause<br />
an effect on the output waveform.. Note that changes to a specific function do not have any effect on other<br />
functions.<br />
PULSe:DELay <br />
Remote Interface<br />
Set pulse delay in percent of pulse period. For example, if your pulse period is 100 ms, 10% will delay the first<br />
transition of the pulse by 10 ms. Delay is measured from trigger to the first turning point.<br />
4-19
Remote Interface<br />
PULSe:DELay?<br />
Query pulse delay setting. Returns a value in percent.<br />
PULSe:TRANsition <br />
Set pulse rise time in percent of pulse period. For example, if your pulse period is 100 ms, 5% rise time equals<br />
5 ms. Pulse rise time is measured between the two turning points of the first transition.<br />
PULSe:TRANsition?<br />
Query pulse rise time setting. Returns a value in percent.<br />
PULSe:WIDTh <br />
Set pulse width in percent of pulse period. For example, if your pulse period is 100 ms, 20% pulse width equals<br />
20 ms. Pulse width is measured between the two turning points on the top of the pulse.<br />
PULSe:WIDTh?<br />
Query pulse width setting. Returns a value in percent.<br />
PULSe:TRANsition:TRAiling <br />
Set pulse fall time in percent of pulse period. For example, if your pulse period is 100 ms, 15% fall time equals<br />
15 ms. Pulse fall time is measured between the two turning points of the second transition.<br />
PULSe:TRANsition:TRAiling?<br />
Query pulse fall time setting. Returns a value in percent.<br />
4-25. Arbitrary Waveform Commands<br />
The following is an overview of the arbitrary waveform commands, how to define memory segments, how to<br />
download data to the selected memory segment and how to output an arbitrary waveform over the remote interface.<br />
TRACe:DEFine {, }<br />
Assign length to a specific memory segment. The 64K non-volatile memory can be divided to 99 smaller segments.<br />
Minimum segment length is 10 points. Maximum segment length is 64,536 points. Note that total size of the<br />
non-volatile memory is 65,535 points however, 1000 points are reserved for the built-in standard waveform<br />
library. The TRAC:DEF command does not change the FUNC:MODE setting. Therefore, unless you use the<br />
FUNC:MODE USER command, TRAC:DEF will have no immediate effect on the output waveform or function.<br />
TRACe:DELete <br />
Delete contents of a specific memory segment. This command destructively modifies segment length to 0. Re-sizing<br />
a deleted segment to its previously set length does not recover its data.<br />
TRACe:DELete:ALL<br />
Delete contents of the entire non-volatile memory at once. This command destructively modifies all segment’s<br />
length to 0. Re-sizing deleted segments to their previously set length does not recover their data. Use the TRAC:DEL<br />
command to delete stored waveforms one at a time.<br />
TRACe:SELect <br />
Select a specific memory segment to be placed at the OUTPUT terminal. The generator will output the selected<br />
memory segment only after executing the FUNC:MODE USER command.<br />
4-20
4-25-1. High Speed Binary Waveform Transfer<br />
The high speed binary transfer allows any 8-bit bytes (including extended ASCII codes) to be transmitted in a<br />
message. This command is particularly useful for sending large quantities of data. Model 8024 uses this element<br />
to transmit its waveform data to the controller.<br />
There are two possible methods of using high speed binary waveform transfer commands: as part of a string<br />
of commands, regardless of the location of this command within the complete string, or at the end of a string<br />
of commands, where with the second option, the command must terminate the transmission sequence by sending<br />
NL+^END. The following command shows an example how to use the high speed binary waveform transfer<br />
command as part of a string.<br />
TRACe #42000<br />
This command will begin the transfer of 2000 bytes of data (1000) points to the active memory segment. The<br />
ASCII “#” ($23) is the start of the data block. “4" designates the number of digits that follow. ”2000" is an<br />
even number of byte to follow. The generator represents binary data as 12-bit integers, which is sent as two<br />
bytes. Therefore, the total number of bytes is always twice the number of data points in the waveform. For<br />
example, 2000 bytes are required to download a waveform with 1000 points. You may use the FORM:BORD<br />
command to select the byte order for binary transfers.<br />
NOTE<br />
The Model 8024 operates in interlaced mode where two memory cells generate one byte of<br />
data.. Segment size can be programmed in even number only. Therefore, the generator can<br />
accept binary blocks of data that divide by 4 only. For example, 2000 bytes will be an acceptable<br />
binary block; 2002 does not divide by 4, therefore, the generator will automatically adjust the<br />
size to 1002 points and generate an error message.<br />
There is another method of sending high speed binary waveform data without specifying the number of byte in<br />
the block. This format is especially useful when the length of the transmission is unknown or when transmission<br />
speed or other considerations prevent segmentation into definite length blocks. The use of this command require<br />
NL+^END and forces immediate termination of the command string. The following command shows an example<br />
how to use the high speed binary waveform transfer command without specifying the number of byte in the<br />
block.<br />
TRACe #NL+^END<br />
This command will begin the transfer of data to the active memory segment. The ASCII “#” ($23) is the start<br />
of the data block. The total number of bytes sent is always twice the number of data points in the waveform.<br />
For example, 2000 bytes are required to download a waveform with 1000 points. You may use the FORM:BORD<br />
command to select the byte order for binary transfers.<br />
FORMat:BORDer {NORMal|SWAPped}<br />
Select the byte order for binary transfers in the block mode using FORM command. The default is NORM. This<br />
command is used only for binary block transfers.<br />
FORMat:BORDer?<br />
Query the byte order configuration. Returns “NORM” or “SWAP”.<br />
Remote Interface<br />
4-21
Remote Interface<br />
4-26. Arbitrary Waveform Sequence Commands<br />
The following is an overview of the arbitrary waveform sequence commands, how to define a sequence and how<br />
to output a sequence of arbitrary waveforms over the remote interface.<br />
SEQuence:DEFine {,,}<br />
Define the links between segments and the number of repeats for each segment in a specific sequence. You can<br />
program 99 links between 99 waveforms and repeat each of the 99 waveforms 32767 times. The sequence<br />
generator steps through the steps numbers in descending order. In continuous operating mode, after the last step<br />
has been completed, the sequence is repeated automatically. When the generator is set to operate in trigger mode,<br />
the output stops at the last point of the last waveform in the sequence. In gated mode, the sequence is always<br />
completed after the gate stop signal.<br />
The SEQ:DEF command does not change the FUNC:MODE setting. Therefore, unless you use the FUNC:MODE<br />
SEQ command, SEQ:DEF will have no immediate effect on the output waveform or function.<br />
SEQuence:DELete <br />
Delete contents of a specified sequence. This command destructively modifies the selected sequence to “Empty”.<br />
Re-selecting a deleted sequence does not recover its data.<br />
SEQuence:DELete:ALL<br />
Delete contents of all sequences at once. This command destructively modifies all sequences to “Empty”. Reselecting<br />
deleted sequence does not recover its data. Use the SEQ:DEL command to delete sequences one at a<br />
time.<br />
SEQuence:SELect <br />
Select a specific sequence to be placed at the OUTPUT terminal. The generator will output the selected sequence<br />
only after executing the FUNC:MODE SEQ command.<br />
4-27. Modulation Commands<br />
The Modulation Commands control the various modulation modes that the generator is capable of handling. The<br />
Model 8024 can be amplitude, gate, and burst modulated from an internal or an external source.<br />
4-27-1. Amplitude Modulation Commands<br />
The arbitrary waveforms which are stored in memory segments are used as modulating envelop. The modulated<br />
carrier is always a sine wave with its frequency set in points. The first step in modulating a waveform is to<br />
generate an arbitrary waveform either from the internal standard functions library or download a waveform using<br />
the GPIB. The following is an overview of amplitude modulation commands.<br />
AM <br />
Set the internal modulation depth in percent. Select from 0% to 200%. The default setting for AM depth is 50%.<br />
AM?<br />
Query the modulation depth. Returns a value in percent.<br />
4-22<br />
AM:INTernal:FREQuency
Set the frequency of the carrier sine waveform. The frequency of the carrier wave is programmed in points.<br />
Select from 10 to 64535 points. The default setting for the carrier frequency is 100 points. The frequency of<br />
the carrier wave can be computed from the sampling clock frequency divided by the number of points in the<br />
active segment.<br />
AM:INTernal:FREQuency?<br />
Query the carrier frequency. Returns a value in points.<br />
AM:EXECute<br />
Enable amplitude modulation. To ensure proper operation, you should enable amplitude modulation after you<br />
have set up the other modulation parameters. Amplitude modulation can not be turned toggled on and off.<br />
Therefore, make sure that you have the original arbitrary waveform available in another memory segment for<br />
back-up.<br />
4-27-2. Gate Modulation Commands<br />
The following is an overview of the gate modulation commands. The gate modulation commands toggle the<br />
gated mode on and off.<br />
GM {OFF|ON}<br />
Enable gate modulation. The default state for the gate modulation is off. Turning gate modulation on, automatically<br />
turns trigger and burst modes off.<br />
GM?<br />
Query the gate modulation state. Returns “0" (off) or ”1" (on).<br />
4-27-3. Burst Modulation Commands<br />
When the generator is placed in burst mode, the output is idle at a voltage level from -V p-p max to + Vp-p<br />
max. Following the first burst of waveforms, the output will idle at the last point on the output waveform. The<br />
generator outputs a burst of counted waveforms after receiving a trigger signal. The trigger could come from a<br />
number of sources: from an external signal, from an internal trigger generator, and from an SCPI command. The<br />
following is an overview of the burst modulation commands.<br />
BM:NCYCles <br />
Set the number of output cycles to be output per burst. Select from 1 cycle to 32767 cycles, in 1 cycle increments.<br />
The default is 1 cycle.<br />
BM:NCYCles?<br />
Query the burst count. Returns an integer.<br />
BM:INTernal:RATE <br />
Set the burst rate for internally triggered bursts. The burst rate period defines the interval between bursts. Select<br />
from 20e-6s to 999s. The default is 1 s. The burst rate setting is used only when BM:SOUR is set to INT. The<br />
burst rate is ignored when single triggering, external, or bus source is enabled.<br />
BM:INTernal:RATE?<br />
Query the burst rate. Returns a value in seconds.<br />
Remote Interface<br />
4-23
Remote Interface<br />
BM:SOURce {EXTernal|INTernal|BUS}<br />
Select the burst modulation source. When the INT burst source is selected, the other source modes are disabled.<br />
The internal rate controls the interval between the bursts. Selecting EXT source disables the internal trigger<br />
generator and does not allow bus triggers. The BUS source allows triggering from using GPIB commands only.<br />
The default burst modulation source is EXT.<br />
BM:SOURce?<br />
Query the present burst modulation source. Returns “EXT”, “INT”, or “BUS”.<br />
BM {OFF|ON}<br />
Disable or enable burst modulation. To ensure proper operation, you should enable the burst mode after you<br />
have set up the burst parameters. Only one modulation mode can be enabled at a time. When you enable the<br />
burst mode, the previous modulation or trigger mode turn automatically off.<br />
BM?<br />
Query the state off burst modulation. Returns “0" (OFF) or ”1" (ON).<br />
BM:IMMediate<br />
Initiate one burst cycle immediately after this command. The generator will respond to this command after you<br />
select BM:SOUR BUS. If you select BM:SOUR EXT or BM:SOUR INT, the generator will ignore this command.<br />
4-28. Trigger Commands<br />
The Trigger Commands control the trigger modes that the generator is capable of handling. The following is an<br />
overview of the trigger commands.<br />
TRIGger:INTernal:RATE <br />
Set the rate for internally triggered mode. The trigger period defines the interval between triggers. Select from<br />
20e-6s to 999s. The default is 1 s. The trigger rate setting is used only when TRIG:SOUR is set to INT. The<br />
trigger rate is ignore when external or bus source is enabled.<br />
TRIGger:INTernal:RATE?<br />
Query the trigger rate. Returns a value in seconds.<br />
TRIGger:SOURce {EXTernal|INTernal|BUS}<br />
Select the trigger source. When the INT trigger source is selected, the other source modes are disabled. The<br />
internal rate controls the interval between the bursts. Selecting EXT source disables the internal trigger generator<br />
and does not allow bus triggers. The BUS source allows triggering from using GPIB commands only. The default<br />
trigger source is EXT.<br />
TRIGger:SOURce?<br />
Query the present trigger source. Returns “EXT”, “INT”, or “BUS”.<br />
TRIGger:STATe {OFF|ON}<br />
Disable or enable trigger mode. To ensure proper operation, you should enable the trigger mode after you have<br />
set up the trigger parameters. Only one trigger mode can be enabled at a time. When you enable the trigger<br />
mode, the previous trigger mode turn automatically off.<br />
TRIGger:STATe?<br />
Query the state off burst modulation. Returns “0" (OFF) or ”1" (ON).<br />
4-24
TRIGger:IMMediate<br />
Initiate one trigger cycle immediately after this command. The generator will respond to this command after<br />
you select TRIG:SOUR BUS. If you select TRIG:SOUR INT, the generator will ignore this command.<br />
*TRG<br />
Trigger the generator from the remote interface. This command is equivalent to the TRIG:IMM command. The<br />
generator will respond to this command after you select TRIG:SOUR BUS. If you select TRIG:SOUR EXT or<br />
TRIG:SOUR INT, the generator will ignore this command.<br />
4-29. System-Related Commands<br />
System-related commands are used to place the instrument in a specific state, clear the instrument to its defaults,<br />
query the generator on errors and its identity. Use these commands to save and recall front panel setups. The<br />
following is an overview of the system-related commands.<br />
SYSTem:ERRor?<br />
Read one error from the error queue. A record of up to 30 errors can be stored in the generator’s error queue.<br />
Errors are retrieved in first-in-first-out (FIFO) order. The first error returned is the first error that was stored.<br />
When you have read all errors from the queue, the generator returns +0, “No error”.<br />
If more than 30 errors have occurred, the last error stored in the queue (the most current error) is replaced with<br />
-350,"Too many errors". No additional errors are stored until you remove errors from the queue. The error queue<br />
is cleared when power has been off or after a *CLS command has been executed. The *RST command does not<br />
clear the error queue.<br />
SYST:ERR? returns a string with following format: -102,"Syntax error"<br />
SYSTem:VERSion?<br />
Query the generator to determine the present SCPI revision. Returns a string similar to “1993.0"<br />
SYSTem:LOCal<br />
Turns the remote LED off and changes generator state to local operation. All key on the front panel are fully<br />
functional.<br />
SYSTem:REMote<br />
Turns the remote LED on and changes generator state to remote operation. All keys on the front panel, except<br />
the LOCAL key, are disabled.<br />
*IDN?<br />
Remote Interface<br />
Read the generator’s identification string. The generator returns four field separated by commas. The first field<br />
is the manufacturer’s name, the second field is the model number, the third field is not used (always “0"), and<br />
the fourth field is the firmware version number. The command returns ”<strong>Tabor</strong>,8024,0,1.08".<br />
*RST<br />
Reset the generator to its default state. The *RST command has no effect on status registers, GPIB bus states,<br />
GPIB address, and GPIB command set.<br />
4-25
Remote Interface<br />
*SAV <br />
10 memory locations (numbered 0 to 9) are available to store instrument configurations. The state storage feature<br />
remembers a complete front panel configuration. To recall a stored state, you must use the same memory location<br />
used previously to store the state. Arbitrary waveforms downloaded to the generator are not remembered. The<br />
default memory cell location is “0".<br />
When power is turned off, the generator automatically stores its state to a separate memory cell that is not one<br />
of the cells used to store front panel states. When power is restored, the instrument updates its front panel to<br />
the last state before the power turned off. In this case, the arbitrary waveforms that were downloaded to the<br />
generator are remembered.<br />
*RCL <br />
Recall a previously stored state. To recall a state, you must use the same memory location used previously to<br />
store the state. The default memory cell location is “0".<br />
4-26
5-1. Introduction<br />
This section provides maintenance, service information,<br />
and performance tests for the Model 8024. Fuse replacement<br />
procedure, line voltage selection and disassembly<br />
procedure are also included.<br />
WARNING<br />
The procedures described in this section<br />
are for use only by qualified service<br />
personnel. Do not perform these<br />
procedures unless qualified to do so.<br />
Many of the steps covered in this section<br />
may expose the individual to potentially<br />
lethal voltages that could result<br />
in personal injury or death, if normal<br />
safety precautions are not observed.<br />
5-2. Line Voltage Selection<br />
The Model 8024 may be operated from either 115 Vac<br />
or 230 Vac, nominal, 50 - 60 Hz power sources. A<br />
special transformer may be installed for 100 Vac and<br />
200 Vac ranges. Unless otherwise specified, the instrument<br />
was shipped from the factory set for an operating<br />
voltage of 230 Vac. To change the line voltage, proceed<br />
as follows:<br />
WARNING<br />
Disconnect the Model 8024 from the<br />
power cord and all other sources before<br />
changing the line voltage setting.<br />
1. Using a flat-blade screwdriver, place the line voltage<br />
selection switch in the desired position. The selected<br />
voltage is marked on the selection switch.<br />
2. Install a power line fuse consistent with the operating<br />
voltage. See paragraph 5.3<br />
CAUTION<br />
The correct fuse type must be used to<br />
maintain proper instrument protection.<br />
5-3. Fuse Replacement<br />
The Model 8024 has a line fuse to protect the instrument<br />
from excessive current. This fuse may be replaced by<br />
using the procedure described in the following:<br />
WARNING<br />
Disconnect the instrument from the<br />
power line and from other equipment<br />
before replacing the fuse.<br />
5<br />
Maintenance and<br />
Performance Tests<br />
1. Place the end of a flat-blade screwdriver into the slot<br />
in the LINE FUSE holder on the rear panel. Push in and<br />
rotate the fuse carrier. The holder and its internal spring<br />
will push the fuse and the carrier out of the holder.<br />
POWER LINE VOLTAGE FUSE TYPE<br />
90 - 125 V 0.4 A, 250 V 5 x 20 mm<br />
195 - 250 V 0.8 A, 250 V 5 x 20 mm<br />
Table 5-1. Line Fuse Selection<br />
5-1
Maintenance And Performance Tests<br />
2. Remove the fuse and replace it with the proper type<br />
using Table 5-1 as a guide.<br />
CAUTION<br />
Do not use a fuse with a rating higher<br />
than specified, or instrument damage<br />
may occur. If the instrument persistently<br />
blows fuses, a problem may exist<br />
within the instrument. If so, the problem<br />
must be rectified before continuing<br />
operation.<br />
5-4. Disassembly Instructions<br />
If it is necessary to troubleshoot the instrument or replace<br />
a component, use the following disassembly procedure<br />
to remove the top cover:<br />
1. Remove the four screws that secure the top cover to<br />
the side bars.<br />
2. Grasp the top cover at its sides and carefully lift it off<br />
the instrument.<br />
3. When replacing the top cover, reverse the above<br />
procedure.<br />
5-5. Special Handling of Static<br />
Sensitive Devices<br />
MOS devices are designed to operate at a very high<br />
impedance levels for low power consumption. As a<br />
result, any normal static charge that builds up on your<br />
person or clothing may be sufficient to destroy these<br />
devices if they are not handled properly. When handling<br />
such devices, use precautions which are described in the<br />
following to avoid damaging them.<br />
1. The MOS ICs should be transported and handled only<br />
in special containers designed to prevent static build-up.<br />
Typically, these parts will be received in static-protected<br />
containers of plastic or foam. Keep these devices<br />
in their original containers until ready for installation.<br />
2. Remove the devices from the protective containers<br />
only at a properly grounded work station. Also ground<br />
yourself with a suitable wrist strap.<br />
3. Remove the devices only by the body; do not touch<br />
the pins.<br />
4. Any printed circuit board into which the device is to<br />
be inserted must also be grounded to the bench or table.<br />
5. Use only anti-static type solder sucker.<br />
6. Use only grounded soldering irons.<br />
7. Once the device is installed on the PC board, the<br />
device is normally adequately protected, and normal<br />
handling may resume.<br />
5-2<br />
5-6. Cleaning<br />
Model 8024 should be cleaned as often as operating<br />
conditions require. Thoroughly clean the inside and the<br />
outside of the instrument. Remove dust from inaccessible<br />
areas with low pressure compressed air or vacuum<br />
cleaner. Use alcohol applied with a cleaning brush to<br />
remove accumulation of dirt or grease from connector<br />
contacts and component terminals.<br />
Clean the exterior of the instrument and the front panel<br />
with a mild detergent mixed with water, applying the<br />
solution with a soft, lint-free cloth<br />
5-7. Repair and Replacement<br />
Repair and replacement of electrical and mechanical<br />
parts must be accomplished with great care and caution.<br />
Printed circuit boards can become warped, cracked or<br />
burnt from excessive heat or mechanical stress. The<br />
following repair techniques are suggested to avoid inadvertent<br />
destruction or degradation of parts and assemblies.<br />
Use ordinary 60/40 solder and temperature controlled<br />
35 to 40 watt pencil type soldering iron on the circuit<br />
board. The tip of the iron should be clean and properly<br />
tinned for best heat transfer to the solder joint. A higher<br />
wattage soldering iron may separate the circuit from the<br />
base material. Keep the soldering iron in contact with<br />
the PC board for a minimum time to avoid damage to<br />
the components or printed conductors.<br />
To de-solder components use a commercial “solder sipper”,<br />
or better, solder removing SOLDER - WICK, size<br />
3. Always replace a component with its exact duplicate<br />
as specified in the parts list.<br />
5-8. Performance Checks<br />
The following performance checks verify proper operation<br />
of the instrument, and should normally be used:<br />
1. As part of incoming inspection of instrument<br />
specifications;<br />
2. As part of troubleshooting procedure;<br />
3. After any repair or adjustment, before returning instrument<br />
to regular service.<br />
5-8-1. Environmental Conditions<br />
Tests should be performed under laboratory conditions<br />
having an ambient temperature of 25⎡ ⎛5⎡C and a relative<br />
humidity of less than 80%. If the instrument has<br />
been subjected to conditions outside these ranges, allow<br />
at least one additional hour for the instrument to stabilize<br />
before beginning the adjustment procedure.
5-8-2. Warm-Up Period<br />
Most equipment is subject to at least a small amount of<br />
drift when it is first turned on. To ensure accuracy, turn<br />
on the power to the Model 8024 and allow it to warm-up<br />
for at least 30 minutes before beginning the performance<br />
tests procedure.<br />
5-8-3. Front Panel Settings<br />
To avoid confusion as to front panel settings, it is required<br />
that front panel set-up be reset to factory default<br />
values at the beginning of each of the performance tests.<br />
To reset front panel to factory default values press<br />
[DCL] and then [ENTER] buttons.<br />
5-8-4. Recommended Test<br />
Equipment<br />
Recommended test equipment for troubleshooting, calibration<br />
and performance checking is listed in table 5-2.<br />
Test instruments other than those listed may be used<br />
only if their specifications equal or exceed the required<br />
characteristics.<br />
5-9. Performance Checks<br />
Procedure<br />
5-9-1. Frequency Accuracy<br />
Accuracy specifications: ⎛0.01% of reading to 50.00<br />
MHz; .<br />
Equipment: Counter<br />
1. Set 8024 as follows:<br />
CONTROL POSITION<br />
OUTPUT Square<br />
PARAMETER FREQ<br />
2. Set counter to frequency measurement.<br />
3. Connect 8024 output to counter input. Set 8024 frequency<br />
and verify frequency reading on the counter<br />
display as follows:<br />
8024 SETTING COUNTER READING<br />
10.00 Hz 9.999 Hz - 10.001 Hz<br />
100.0 Hz 99.99 Hz - 100.01 Hz<br />
1.000 KHz 999.9 Hz - 1.0001 KHz<br />
10.00 KHz 9.999 KHz - 10.001 KHz<br />
100.0 KHz 99.99 KHz - 100.01 KHz<br />
1.000 MHz 999.9 KHz - 1.0001 MHz<br />
10.00 MHz 9.999 MHz - 10.001 MHz<br />
50.00 MHz 49.995 MHz - 50.005 MHz<br />
5-9-2. Amplitude Accuracy<br />
Accuracy specifications (1KHz):<br />
⎛(4% of reading +2 mV), to 100 mV;<br />
⎛(3% of reading +4 mV), to 1 V;<br />
⎛(2% of reading +20 mV), to 10 V.<br />
Equipment: DMM, 50Ω feedthrough termination.<br />
Instrument Recommended Specifications Use (*)<br />
Model<br />
Counter <strong>Tabor</strong> 6010/6020 100 MHz Universal P,A,T<br />
DMM <strong>Tabor</strong> 4121 0.1 V - 100 Vac, DC P,A,T<br />
Pulse/Function Generator <strong>Tabor</strong> 8021 1 mHz - 20 MHz P<br />
Synthesizer Marconi 2019 80 KHz - 1040 MHz P,A<br />
DC power supply Fluke 341A 0 V - 30 V 0.1% P,A<br />
Oscilloscope Tek 2465B 400 MHz band width P,A,T<br />
Distortion analyzer K-H 6900 100 Hz - 1 MHz P,A<br />
Spectrum analyzer HP 182T/8557A 10 KHz - 350 MHz P<br />
Feedthrough Termination Tek 011-0129-00 50Ω, 2W, 0.1% P,A<br />
20dB feedthrough Attenuator Tek 011-0086-00 50Ω, 2W, 2% P<br />
(*) P= Performance Test, A= Adjustments, T= Troubleshooting<br />
Table 5-2. Required Test Equipment.<br />
Maintenance And Performance Tests<br />
5-3
Maintenance And Performance Tests<br />
1. Set 8024 as follows:<br />
CONTROL POSITION<br />
OUTPUT Sine<br />
FREQ 1.000 KHz<br />
PARAMETER AMPL<br />
2. Set DMM to ACV measurements (RMS).<br />
3. Connect 8024 output to DMM input. Terminate the<br />
output with a 50Ω feedthrough termination. Set amplitude<br />
and verify DMM reading as follows:<br />
8024 SETTING DMM READING<br />
9.99 V 3.441 V - 3.621 V<br />
5.00 V 1.822 V - 1.712 V<br />
1.00 V 407.5 mV - 326.5 mV<br />
500 mV 185.7 mV - 167.7 mV<br />
50.0 mV 20.37 mV - 14.97 mV<br />
5-9-3. DC Characteristics<br />
Accuracy specifications:<br />
⎛(4% of reading +1% of amplitude +2mV), to .045V;<br />
⎛(3% of reading +1% of amplitude +5mV), to .45V;<br />
⎛(2% of reading +1% of amplitude +20mV), to 4.5V.<br />
Equipment: DMM, 50Ω feedthrough termination.<br />
1. Set 8024 as follows:<br />
CONTROL POSITION<br />
AMPL 1 V<br />
MODE TRIG’D<br />
PARAMETER OFFS<br />
2. Set DMM to DCV measurements.<br />
3. Connect 8024 output to DMM input. Terminate the<br />
output with a 50Ω feedthrough termination. Set 8024<br />
offset and verify DMM reading as follows:<br />
OFFS SETTING DMM READING<br />
⎛4.50 V ⎛4.39 V to ⎛4.61 V<br />
⎛3.00 V ⎛2.92 V to ⎛3.08 V<br />
⎛1.00 V ⎛0.96 V to ⎛1.04 V<br />
4. Change 8024 AMPL setting to 100 mV. Set OFFS and<br />
verify DMM reading as follows:<br />
OFFS SETTING DMM READING<br />
⎛450 mV ⎛432 mV to ⎛468 mV<br />
5. Change 8024 AMPL setting to 10.0 mV. Set OFFS<br />
and verify DMM reading as follows:<br />
5-4<br />
OFFS SETTING DMM READING<br />
⎛45.0 mV ⎛41.2 mV to ⎛48.8 mV<br />
5-9-4. Squarewave Characteristics<br />
Specified transition time: 5 ns typical (10% to<br />
90% of amplitude).<br />
Specified aberration:
FREQ SETTING HARMONICS LEVEL<br />
5.000 MHz
Maintenance And Performance Tests<br />
5-9-8-2. Internal Burst<br />
1. Set 8024 as follows:<br />
CONTROL POSITION<br />
FREQ 10.00 KHz<br />
MODE BURST<br />
SOURCE INT<br />
INT PER 10 ms<br />
BURST 10<br />
2. Set oscilloscope and verify on the oscilloscope that<br />
8024 outputs repetitive bursts of 10 complete output<br />
waveforms.<br />
5-9-9. Manual Trig, Gate, Burst<br />
Characteristics<br />
Specifications: [TRIGGER] button simulates external<br />
stimulant.<br />
Equipment: Oscilloscope, universal counter/timer<br />
(6020).<br />
5-9-9-1. Manual Trigger<br />
1. Set 8024 as follows:<br />
CONTROL POSITION<br />
FREQ 10.00 Hz<br />
MODE TRIG<br />
SOURCE EXT<br />
2. Connect 8024 output to the oscilloscope input. Set<br />
oscilloscope time base to 1 ms.<br />
3. Press the [TRIGGER] button a few times and verify<br />
that you get a single sinewave waveform on the oscilloscope<br />
every time that the [TRIGGER] button is depressed.<br />
Leave 8024 output connected to the oscilloscope<br />
for the next test.<br />
5-9-9-2. Manual Gate<br />
1. Set 8024 as follows:<br />
CONTROL POSITION<br />
FREQ 10.00 KHz<br />
MODE GATED<br />
2. Press the [TRIGGER] button a few times and verify<br />
that you get a gated sinewave waveform on the oscilloscope<br />
every time that the [TRIGGER] button is depressed.<br />
Remove 8024 output from the oscilloscope for<br />
the next test.<br />
5-6<br />
5-9-9-3. Manual Burst<br />
1. Set 8024 as follows:<br />
CONTROL POSITION<br />
FREQ 10.00 MHz<br />
MODE BURST<br />
SOURCE EXT<br />
BURST 32767<br />
2. Connect 8024 output to the universal counter/timer<br />
input. Set counter to Totaling measurement mode. Reset<br />
counter.<br />
3. Press the [TRIGGER] button once and verify that<br />
counter reading is exactly 32767 counts.<br />
5-9-10. Arbitrary Memory Check<br />
Specifications: Memory length 64535 points. Memory<br />
can be divided to 99 smaller segments.<br />
Equipment: Distortion Analyzer, 50Ω feedthrough termination.<br />
1. Connect 8024 output to distortion analyzer input.<br />
2. Set 8024 waveform to ARB. Program 6 segments to<br />
have 10,000 points each and load sine waveform to each<br />
of the six segments. Program segment number 7 to have<br />
4536 points and load sine waveform to segment 7.<br />
3. Set distortion analyzer to % distortion measurements<br />
and verify distortion reading of less than 0.1% for each<br />
of the seven segments.<br />
5-9-11. Sequencer Characteristics<br />
Specifications: Number of steps - 99. Each step<br />
repeated 32767 times.<br />
Equipment: Oscilloscope.<br />
1. Set 8024 as follows:<br />
CONTROL POSITION<br />
WAVEFORM SEQ<br />
1. Program three segments, each with 1000 points. Load<br />
sine, triangle, and square in segment 1, 2, and 3, respectively.<br />
2. Change STEP01 to repeat SEG01 x 1 time, change<br />
STEP02 to repeat SEG02 x 1 time, and then change<br />
STEP03 to repeat SEG03 x 1 time.<br />
3. Connect 8024 output to the oscilloscope input. Set<br />
oscilloscope and verify that Model 8024 outputs a periodical<br />
waveform that contains sine, triangle, and square<br />
waveforms.<br />
4. Change the number of repeats and observe that the<br />
selected segment is multiplied accordingly.
6-1 What in This Chapter<br />
This chapter contains an overall functional description<br />
of the instrument, as well as, detailed theory of operation<br />
of the Model 8024. Information is arranged in a<br />
logical order that guides you through the various circuits<br />
of the 8024. It also provides functional description<br />
of individual circuit block. As an aid to understanding,<br />
the descriptions are keyed to a block diagram. Detailed<br />
schematics and component layout drawings can be<br />
found at the end of this manual. It is suggested that you<br />
read previous chapters first to make yourself familiar<br />
with the instrument’s functions, features and capabilities.<br />
6-2. Overall Functional Description<br />
Figure 6-1 is a general block diagram of the Model<br />
8024. Refer to this figure throughout the following<br />
description.<br />
The Model 8024 is a bench-type waveform generator.<br />
It is an extremely high-performance waveform generator<br />
that combines two powerful instruments in one<br />
small package: function generator, and arbitrary waveform<br />
generator. The instrument provides a variety of<br />
standard waveforms, to be used as test stimuli for different<br />
electronic devices. Model 8024 is also capable of<br />
generating arbitrary waveforms with sampling rates to<br />
100 MHz at 12 bits of vertical resolution.<br />
Despite its small size, Model 8024 offers many features<br />
and functions, such as counted burst, internal triggergenerator,<br />
sequence generator and more. The instrument<br />
6<br />
Theory of Operation<br />
generates high quality, high accuracy waveforms<br />
throughout the specified frequency range, amplitude<br />
span, and operating temperature.<br />
The Model 8024 generates standard waveforms at frequencies<br />
ranging from 10 mHz to 50 MHz. Arbitrary<br />
waveforms are generated with clock rates ranging from<br />
10 μHz to 100 MHz. Output amplitude may be programmed<br />
within the range of 20 mV to 20 Vp-p into<br />
open circuit and 10 mV to 10V into 50Ω. Its wide<br />
ranges, high performance, programmability and economy<br />
make the Model 8024 at home in every laboratory.<br />
Besides normal continuous mode, Model 8024 offers a<br />
variety of interrupted modes. The output waveform may<br />
be gated, triggered, or generate a counted burst of waveforms.<br />
A built-in trigger generator, having a programmable<br />
period, can replace an external trigger stimulant.<br />
The Model 8024 generates arbitrary waveforms with 12<br />
bits of resolution. There are a few standard waveforms<br />
which are memory-resident. Other waveforms may be<br />
generated either manually, or downloaded from slot 0 to<br />
the instrument using shared memory or standard data<br />
bus transfer. Waveforms may also be generated using<br />
the WaveCAD program. The wave generation software<br />
package - WaveCAD, is available from <strong>Tabor</strong> <strong>Electronics</strong>.<br />
Contact your local representative for details.<br />
The Model 8024 waveform generator is a digital instrument.<br />
Besides its standard waveforms, any waveform<br />
that it generates, must be first loaded into its arbitrary<br />
6-1
Theory of operation<br />
Figure 6-1. Model 8024 - Block Diagram.<br />
6-2
waveform memory. The arbitrary waveform memory<br />
is a bank of 12-bit words. Each word represents a point<br />
on the waveform. Each word has an horizontal address<br />
that can range from 0 to 64535 and a vertical address<br />
that can range from -2047 to +2048 (12 bits). Using an<br />
high-speed clocking circuit, the digital contents of the<br />
arbitrary waveform memory is extracted and routed to<br />
the D/A converter. The D/A converts the digital data to<br />
an analog signal and the output amplifier completes the<br />
task by amplifying or attenuating the signal at the output<br />
connector.<br />
Arbitrary waveform addresses are advanced by the address<br />
counter. In normal operating mode, the address<br />
counter sweeps the waveform memory addresses between<br />
start and stop addresses continuously. In triggered<br />
mode, the address counter sweeps the waveform<br />
memory addresses once. In gated mode, this operation<br />
is repeated until the end of the gating signal. In burst<br />
mode, the operation is repeated for a number of times<br />
that is set by the burst count parameter.<br />
The Model 8024 can be set to operate in sequence mode.<br />
In this mode, memory segments are linked and looped<br />
in user programmable fashion. In this case, the address<br />
counter sweeps from start address to stop address according<br />
to the programmable link and loop sequence.<br />
This procedure is explained in details in the following<br />
paragraphs.<br />
6-3. Waveform Memory and D/A<br />
Circuits<br />
Addresses for the waveform memory are generated by<br />
the address counter. The address counter is a synchronous<br />
counter and is made of U65, U66, U70, and U71.<br />
Fifteen lines are routed from the sequence generator and<br />
are connected to the preset inputs of the counter IC’s.<br />
These 15 lines set the start address for the arbitrary<br />
waveform. A sampling clock (SCLK) signal is applied<br />
to the input of the address counter. This clock causes the<br />
address counter to increment from start address (first<br />
waveform point) to stop address (last waveform point).<br />
The SCLK is routed to the address counter through a<br />
divide by 2 circuit - U113a, ECL-to-TTL converter<br />
U68a, and U69a gate.<br />
The output bits of the waveform memory contain 3 bits<br />
which are used as control signals and 24 bits form the<br />
digital data for the arbitrary waveform; the remaining 5<br />
bits are not used. The STP2 bit is routed to a synchronizer<br />
circuit which is comprised of “D” flip-flops U64a,<br />
and U64b. The synchronizer circuit function is to synchronize<br />
the control bit with the sampling clock signal.<br />
The three control bits are used as follows:<br />
• The STP2 bit detects the last point of the waveform<br />
and sets true the preset enable inputs of the address<br />
counters. When the preset enable inputs are set true,<br />
the next clock transition presets the address counters<br />
to their original start address. This is done by<br />
applying STP2 signal to the D input of U64a. STP2<br />
bit is also applied to the D input of U64b. In continuous<br />
mode, U64b is reset, preventing STP2 from<br />
doing any action. In all other modes, the reset input<br />
of U64b is set false. As the address counter increments,<br />
and this bit is sensed “1", the next clock sets<br />
the complement output of U64b to ”0", blocking the<br />
gate - U69a which, in turn, blocks the sampling<br />
clock from accessing the address counter.<br />
• The Sync bit (TRG) is used for external synchronization<br />
to the main output waveform. This signal can<br />
be qualified with other signals to generate the required<br />
sync output signal at the SYNC output BNC.<br />
• The MRK bit is used as a MARKER output.<br />
The outputs of the address counter are applied to the<br />
address inputs of the waveform memory IC’s. Every<br />
waveform memory address contains data for 2 waveform<br />
points (24 bits). One point (12 bits) forms the odd<br />
part of the word, the other point (remaining 12 bits)<br />
forms the even part of the word. The odd and even bits<br />
are latched by U49, U50, and U51. The latched outputs<br />
are applied to a 12-bit selector which is made of U108,<br />
U109, and U110. The output of the 12-bit selector alternates<br />
between the odd and even bits which were applied<br />
to its inputs. The outputs of the selector are converted<br />
from TTL to ECL logic levels by U39, U42, and U46<br />
and then are applied to the D/A converter - U45.<br />
The current output of the D/A is converted to voltage<br />
using a differential amplifier made of U41 and its associated<br />
components. The various control signals that are<br />
used for the latches and selectors are derived from a<br />
delayed sampling clock signal. The sampling clock is<br />
delayed by U37, U38, U112, U114, and DL1 through<br />
DL4.<br />
6-4. Trigger Circuits<br />
The following paragraphs will explain the function of<br />
circuits in trigger mode of operation.<br />
6-4-1. Triggered Mode<br />
Theory of Operation<br />
In triggered mode of operation the reset input of U64b<br />
is set to “1". At this time, as was explained before, the<br />
address counter will stop when STP2 will be sensed ”1".<br />
6-3
Theory of operation<br />
Upon a trigger event, the trigger circuit generates a short<br />
negative going pulse that resets U64b. The complement<br />
output of U64b then opens the gate in U69a, allowing<br />
the sampling clocks to reach the address counter. This<br />
action will advance the address counter until STP2 turns<br />
“1" again. At this point the address counter will stop.<br />
6-4-2. Gated Mode<br />
In gated mode of operation the trigger circuit generates<br />
a negative going pulse, having the same duration as the<br />
external gating signal, at the reset input of U64b. When<br />
the gating pulse is applied, U64b is reset, hence allowing<br />
the sampling clock signal to reach the address<br />
counter. When the gating pulse returns to “1", the address<br />
counter stops, however, only when the STP2 bit<br />
turns ”1".<br />
6-5. Trigger Input Circuit<br />
The trigger input circuit accepts TTL level, positive-going<br />
transitions at the TRIG IN rear panel connector.<br />
Rear panel trigger signals are routed through R15 to the<br />
gate U92a. The gates U92c and U92d form a differentiation<br />
circuit for the trigger signal, before it is applied<br />
to the Clear input of U64b. When placed in internal<br />
trigger mode, the CPU generates the trigger signals from<br />
one of its ports.<br />
6-6. Sample Clock Generator<br />
The heart of the sample clock generator is a phase<br />
locked loop. The loop is closed around a VCO circuit<br />
that oscillates in the range of 50 MHz to 100 MHz. The<br />
oscillator is made of U96, varicap diode - CR13, L15<br />
and associated components. The PLL circuit sets the<br />
voltage level on the diode as a function of the programmed<br />
sample clock.<br />
U95 is a monolithic synthesizer which contains two<br />
internal programmable dividers (one, for the reference<br />
frequency, and the other for the VCO frequency which<br />
is divided by 4 by U101), and phase detector. The phase<br />
detector senses the difference between the two frequencies<br />
and generates a signal with a proportional amplitude.<br />
This signal is then amplified and filtered by U91<br />
and its associated components. The output of U91 is fed<br />
to the varicap diode - CR13 which corrects the VCO<br />
frequency. The VCO frequency is divided by U101 and<br />
the chain of x2 dividers - U104, U105, and U106.<br />
The output frequency is selected by the selectors U97<br />
through U100, and U102. This selector is also used for<br />
selecting between three sample clock options: Internal<br />
6-4<br />
clock generator, External reference input and 10 MHz<br />
crystal oscillator.<br />
Reference frequency for the Model 8024 is internally<br />
generated by the synthesizer U95 and the crystal oscillator<br />
Y1. U100 outputs the clock generator signal<br />
through a TTL-to-ECL converter - U115.<br />
6-7. Sequence Generator<br />
The sequence generator circuit lets you link and repeat<br />
memory segments in user definable fashion, thereby<br />
generating extremely long waveform which otherwise<br />
would have required very long memory bank. In continuous<br />
mode, the sequence of waveform is repeated<br />
continuously from start to stop as long as this function<br />
is selected. In triggered mode, and after the 8024 has<br />
been triggered, the sequence is generated once and the<br />
generator will stop at the last point of the last step.<br />
A sequence is made of one or more steps. The sequence<br />
advances automatically from one step to the next step.<br />
Block diagram of the sequence generator is given in<br />
Figure 6-2. Refer to this block diagram and to the schematic<br />
drawings in the back of this manual throughout<br />
the following descriptions.<br />
The start address is written in the start address memory<br />
which is made of U73 and U77. The number of repeats<br />
is written in the repeat memory - U81 and U85. Sequence<br />
memory address is advanced by a counter circuit<br />
which is comprised of U89 and U90. This counter receives<br />
clocks which are derived from the preset input of<br />
the memory address counter. Note that this preset signal<br />
(TARB) is generated every time that the address counter<br />
reaches the last point on the waveform.<br />
When the last step sequence is reached, the control bit<br />
in the start address memory - STSQ turns “0". This<br />
signal is applied to the D input of U74b. The next clock<br />
to the sequence address counter which is applied<br />
through the gate U62d to the clock input of U74b produces<br />
a short positive going pulse at the complement<br />
output of U74b. This pulse resets the sequence address<br />
counter which, in turn, resets the sequence address to its<br />
first address (0). The sequence address counter then<br />
resumes a new cycle from address 0.<br />
When one of the sequence steps is to be repeated, the<br />
repeat memory is programmed with the REP bit set to<br />
“1" at the address that contains the start address of the<br />
segment to be repeated. This bit is applied to the D input<br />
of U74a. The clock that is applied to the clock input of<br />
U74a sets U74a which together with U63d block the<br />
clocks to the sequence address counter, keeping the
Figure 6-2. Model 8024 - Sequencer Block Diagram.<br />
sequence address counter intact while in repeat mode.<br />
U74a enables the gates U63a and U63b to apply the<br />
clocks to the repeat counter which is made of U82, U83,<br />
U86, and U87. When the repeat counter has reached its<br />
terminal count (sensed by U79a), U78b is reset. The<br />
complement output of U78b is differentiated by U75a<br />
and U75b and applied to the reset input of U74a, thereby<br />
enabling clocks throughput to the sequence address<br />
counter and blocking the clock inputs to the repeat<br />
counter.<br />
6-8. Local CPU Circuit<br />
The Model 8024 operation is supervised by an internal<br />
microprocessor (CPU). The CPU controls parameter<br />
selection, GPIB traffic, memory download and upload<br />
operation, internal trigger generation front panel<br />
switching, and more. All of these tasks are performed<br />
Theory of Operation<br />
under software supervision. This section briefly describes<br />
the operation of the various sections of the microprocessor<br />
and its associated digital circuitry. For<br />
more complete circuit details refer to the schematics at<br />
the end of this manual.<br />
Circuit operation centers around the microprocessor<br />
unit (CPU) U6. The CPU is an 8-bit microprocessor<br />
capable of directly addressing up to 64K bytes of program<br />
memory (ROM) and up to another 64K bytes of<br />
data memory (RAM). 10 MHz clock for the microprocessor<br />
is derived from a crystal oscillator Y1. Temporary<br />
storage is provided by RAM U10 which can store up to<br />
128K bytes.<br />
Software for the CPU is programmed into one EPROM<br />
- U9 containing 128K bytes of memory space. Since the<br />
CPU is capable of directly addressing only 64K bytes,<br />
6-5
Theory of operation<br />
the Model 8024 is using memory banks of 32K each.<br />
The banks are switched in and out automatically to<br />
address the correct address in the memory. Bank switching<br />
is done with CPU ports.<br />
6-8-1. Display / Keyboard Interface<br />
Interfacing between the CPU, the keyboard and the<br />
display is performed by the Keyboard/Display interface<br />
U2. U1 multiplex the LED’s and drive the high current<br />
transistors Q1 through Q4 which, in turn, drive the<br />
anodes of the appropriate LED. The sense lines S0, S1,<br />
and S2 determine which of the front panel push-buttons<br />
were depressed. The information for the 16 character x<br />
2 line LCD module is buffer by U14.<br />
DE1 (front panel assy.) is a digital encoder that converts<br />
rotary movement to incremental parameter steps. Since<br />
DE1 is a mechanical switch, its bounces are being debounced<br />
by U4. U2 and U3 detect the direction that DE1<br />
is being rotated to. The direction signal is routed to one<br />
of the CPU ports. The pulses from the digital encoder<br />
DE1 are applied to the timer input of the CPU.<br />
6-8-2. GPIB Interface<br />
The instrument has a built in GPIB interface bus (complies<br />
with IEEE-488.2) that permits remote control<br />
through a system controller. The GPIB interface is made<br />
of U15, (General Purpose Interface Adapter), U17 and<br />
U18 interface bus drivers. On the CPU side of the GPIB,<br />
data transmission is handled much like any other bus<br />
transaction. The output of the U15 is standard GPIB<br />
format and is buffered by the two GPIB drivers U17 and<br />
U18. The bus drivers are necessary for enhancing the<br />
drive capability of the interface. Up to 15 devices may<br />
be connected in parallel to the 8024.<br />
6-9. Output Amplifier<br />
The signal to the input of the output amplifier is fed<br />
from through the pre-amplifier U41. Before this signal<br />
is applied to the output amplifier, it can be pre-attenuated<br />
by K3 and its associated components and filtered<br />
by K1, K2, and K6 and their associated components. K3<br />
switches a 10 dB attenuator. K6 selects a 20 MHz<br />
Gaussian response filter. K2 and K1 select elliptical<br />
filters, 50 MHz and 25 MHz respectively.<br />
The output amplifier circuit operates in current mode<br />
feedback that provides an extremely wide bandwidth at<br />
high slew rates (approximately 3000V/(s). The signal<br />
from the pre-amplifier is applied through R13 and R18<br />
to the emitters of Q12 and Q13. Their collector signals<br />
6-6<br />
are buffered by Q14 and Q15 and are fed to a gain stage<br />
which is made of Q16 and Q19. The output of this gain<br />
stage is buffered all the way through to the output of the<br />
output amplifier by Q16, Q17, Q19, Q20, and their<br />
associated components. Q22 with R40, R41, and R42<br />
provide the bias for the buffer class AB stage.<br />
The amplifier’s offset voltage is compensated by a low<br />
frequency loop which is comprised of U29. R62 equalizes<br />
the low frequency gain with the high frequency<br />
gain. Operational amplifier - U30 compensates for the<br />
offset current at the input stage.<br />
The amplified signal at the output can be attenuated by<br />
two 20 dB attenuators that are switched with K4 and K5.<br />
Note that all relays that are mentioned in this description<br />
are set to their off position during power up.<br />
6-10. Power Supply Circuit<br />
Refer to the power supply schematic at the end of this<br />
manual for the following discussions. The power supply<br />
consists of a main power transformer, two bridge rectifiers,<br />
two integrated regulators, +5 V, and −5.2 V linear<br />
power supply. The LINE fuse and the Line Selector are<br />
accessible from the rear panel. The LINE VOLTAGE<br />
SELECT switch select 115V or 230V operation.<br />
CR9 is used as a full-wave rectifier to provide a sufficient<br />
DC voltage for the −17 V and +17 V regulators<br />
U23 and U24 respectively. CR14 is used as a full-wave<br />
rectifier to provide a sufficient DC voltage for the −5 V<br />
and +5 V supplies. The +5 V linear power supply is<br />
made of power transistor Q10, control amplifier U25b,<br />
Q8, and overload protection Q7 and R103. The −5 V<br />
linear supply is made of power transistor Q11, control<br />
amplifier U25a, Q6, and overload protection Q5 and<br />
R102.<br />
6-10-1. Battery Back-up Circuit<br />
Model 8024 contains battery back-up circuit that is<br />
comprised of two NI-CAD batteries BT1, BT2, and<br />
associated components. The battery serves two purposes:<br />
1) Back-up the RAM’s during power off, and 2)<br />
Charge the batteries during power on.<br />
When the instrument is powered from the mains line,<br />
the RAM’s receive their power from the +5V supply<br />
through CR3. At power OFF, CR3 is revered-biased<br />
and CR1 provides a path from the battery back-up to the<br />
RAM’s. The battery charging circuit consists of an operational<br />
amplifier U19, Q4 and their associated components.
7-1. INTRODUCTION<br />
This section contains information necessary to adjust<br />
and troubleshoot the Model 8024 waveform generator.<br />
WARNING<br />
The procedures described in this section<br />
are for use only by qualified service<br />
personnel. Do not perform these<br />
procedures unless qualified to do so.<br />
Many of the steps covered in this section<br />
may expose the individual to potentially<br />
lethal voltages that could result<br />
in personal injury or death if normal<br />
safety precautions are not observed.<br />
7-2. ADJUSTMENTS<br />
7-2-1. Environmental Conditions<br />
Adjustments should be performed under laboratory conditions<br />
having an ambient temperature of 24 ∋5C and a<br />
relative humidity of less than 70%. If the instrument has<br />
been subjected to conditions outside these ranges, allow<br />
at least one additional hour for the instrument to stabilize<br />
before beginning the adjustment procedure. Between<br />
adjustments, Always leave top cover on the unit<br />
to keep internal temperature as stable as possible.<br />
7-2-2. Warm-Up Period<br />
Most equipment is subject to at least a small amount of<br />
drift when it is first turned on. To ensure long-term<br />
calibration accuracy, turn on the power to the Model<br />
8024 and allow it to warm-up for at least 30 minutes<br />
before beginning the adjustment procedure.<br />
7-2-3. Recommended Test<br />
Equipment<br />
Recommended test equipment for calibration is listed in<br />
Chapter 5. Test instruments other than those listed may<br />
be used only if their specifications equal or exceed the<br />
required characteristics.<br />
7-2-4. Adjustment Procedures<br />
All adjustments are performed with the POWER switch<br />
ON. The top cover should be removed to allow access<br />
to test points and adjustments.<br />
WARNING<br />
Take special care to prevent contact<br />
with live circuits or power line area<br />
which could cause electrical shock resulting<br />
in serious injury or death. Use<br />
an isolated tool when making adjustments.<br />
7<br />
Adjustments &<br />
Troubleshooting<br />
When necessary, refer to the component layouts for<br />
determining adjustment points. Follow the procedure in<br />
7-1
Adjustments and Troubleshooting<br />
the sequence indicated because some of the adjustments<br />
are interrelated and dependent on the proceeding steps.<br />
Verify that the waveform generator is functioning according<br />
to the performance checks. Make sure that all<br />
results are within, or close to, the range of the required<br />
specifications, otherwise refer to the troubleshooting<br />
procedures given later in this section.<br />
Perform the following adjustment procedure. If an adjustment<br />
can not be made to obtain a specific result,<br />
refer to the troubleshooting procedures in this Chapter.<br />
NOTE<br />
If not otherwise specified, set Model<br />
8024 parameters to factory defaults before<br />
every adjustment, by depressing<br />
[DCL] and [ENT] in sequence. Always<br />
connect the output BNC connector<br />
through a 50Ω feedthrough termination.<br />
7-3. ADJUSTMENT PROCEDURE<br />
7-3-1. Pulse Response<br />
Equipment: Oscilloscope (2465B), 20dB Attenuator<br />
1. Change 8024 Frequency setting to 1.000 MHz, amplitude<br />
setting to 10.0 V, and output waveform to<br />
squarewave.<br />
2. Connect the 8024 output through 20dB attenuator to<br />
the oscilloscope input. Set oscilloscope input impedance<br />
to 50Ω.<br />
3. Set oscilloscope vertical gain and time base, and<br />
adjust output board trimmer R38 and C39 for best pulse<br />
response.<br />
4. Change 8024 frequency setting to 10.00 KHz, amplitude<br />
setting to 10.0 V, and output waveform to squarewave.<br />
5. Set oscilloscope vertical gain and time base, and<br />
adjust R52 for best pulse flatness.<br />
6. Change 8024 frequency setting to 1.000 KHz and<br />
re-touch R52 for best flatness in this range.<br />
7. Repeat steps 8 and 9 until best result is obtained in<br />
both steps.<br />
7-3-2. Amplitude Adjustment<br />
Equipment: DMM, 50 Ω Feedthrough termination<br />
1. Change 8024 Frequency setting to 1.000 KHz, amplitude<br />
setting to 10.0 V, and output waveform to Sine.<br />
7-2<br />
2. Connect 8024 output to DMM input through the 50Ω<br />
Feedthrough termination. Set DMM to ACV measurements<br />
and 20 V range.<br />
3. Adjust R47 until DMM reading is 3.535 V ∋40 mV.<br />
7-3-3. Offset Adjustment<br />
Equipment: DMM, 50 Ω Feedthrough termination<br />
1. Change 8024 Offset setting to +4.5 V and amplitude<br />
setting to 1.00 V.<br />
2. Connect 8024 output to DMM input through the 50Ω<br />
Feedthrough termination. Set DMM to DCV measurements<br />
and 20 V range.<br />
3. Adjust R44 until DMM reading is 4.500 V ∋45 mV.<br />
7-4. Troubleshooting<br />
Troubleshooting procedure should be initiated whenever<br />
the generator fails to perform either completely or<br />
partially. It is also required to troubleshoot Model 8024<br />
whenever the instrument fails to fully comply with its<br />
published specifications. The information given in the<br />
following do not intend to replace full scale troubleshooting,<br />
but merely to direct the service engineer to<br />
the area were the source of the trouble is located.<br />
The troubleshooting instructions contained in this section<br />
are intended for qualified personnel having basic<br />
understanding of analog and digital circuitry. The individual<br />
should also be experienced at using typical test<br />
equipment as well as ordinary troubleshooting procedures.<br />
The information presented here has been written<br />
to assist in isolating a defective circuit, or circuit section;<br />
isolation of the specified component is left to the<br />
technician.<br />
7-4-1. Recommended Test Equipment<br />
The success or failure in troubleshooting a complex<br />
piece of equipment, like the Model 8024, depends not<br />
only on the skills of the technician, but also relies<br />
heavily on accurate, reliable test equipment. Recommended<br />
test equipment for troubleshooting and adjustment<br />
of the Model 8024 are listed in Chapter 5. Other<br />
equipment such as logic analyzer, and in-circuit emulator<br />
etc., could also be helpful in difficult situation.<br />
7-4-2. Power-Up Tests<br />
Upon power-up the Model 8024 performs a set of tests.<br />
If the instrument locks up after power on you should<br />
proceed with the troubleshooting procedure as given in<br />
the following.
7-5. Power Supply Checks<br />
It is highly suggested that the first step in troubleshooting<br />
the Model 8024, would be to check the power supply.<br />
If the various supply voltages within the instrument<br />
are not within the required limits, troubleshooting the<br />
remaining circuits can be very difficult. Table 7-1<br />
shows several checks that can be made to the power<br />
supplies.<br />
In addition to the normal voltage checks, it is also a<br />
good idea to check the various supplies with an oscilloscope<br />
to make sure that no noise, ripple, or ringing are<br />
present. In case of a “dead short” between one of the<br />
supplies to the common ground, it would be best to<br />
disconnect the entire supply section from the remaining<br />
of the circuits, and then determine whether the problem<br />
is in the power supply or elsewhere. Model 8024 is<br />
equipped with such quick-disconnect points, which are<br />
located at the bottom side of the main PC board. To<br />
access these points, it is necessary to remove the bottom<br />
cover, and then to remove the solder layer from these<br />
points.<br />
Table 7-1. Power Supply Checks.<br />
Test Point Expected Result<br />
+5V +5V, ±0.1V<br />
-5.2V -5.2V, ±0.1V<br />
+17V +17V, ±0.3V<br />
-17V -17V, ±0.3V<br />
-2V -2V, ±0.05V<br />
7-6. Digital Circuits and Display<br />
Checks<br />
The most important section, to be verified after the<br />
power supply checks, is the digital section with its<br />
various clocks. Problems with the digital circuitry could<br />
cause erratic operation or erroneous display readings.<br />
Table 7-2. Digital Circuits and Display Checks.<br />
Adjustments and Troubleshooting<br />
Problems in the clock generator for the C.P.U. and the<br />
digital circuit may cause a complete malfunction of the<br />
entire instrument. The C.P.U. would not even start generating<br />
the control lines. This makes it impossible to<br />
troubleshoot the remaining of the circuits. Check the<br />
various components which are associated with the digital<br />
circuitry, clocks, and the IEEE-488.2 interface, using<br />
the information given in Table 7-2.<br />
7-7. Clock Synthesizer Checks<br />
Problems with the clock synthesizer circuits can be<br />
detected if the 8024 accepts front panel commands and<br />
responds correctly to GPIB queries, however, fails to<br />
output the correct waveform frequency. If you suspect<br />
that you have a problem with the clock synthesizer<br />
circuit proceed with the checks given in Table 7-3.<br />
Make sure you reset the 8024 to its factory defaults<br />
before you start with the following procedure.<br />
7-8. Arbitrary Generator Checks<br />
Problems with the arbitrary generator circuit may cause<br />
generation of distorted waveforms. The arbitrary generator<br />
is comprised of fast memory chips, addressing and<br />
controlling circuits that closely operate together. Each<br />
part has to be tested and its operation verified to make<br />
sure that there are no inter-related problems between the<br />
various circuits on the board. If your generator fails to<br />
generate arbitrary waveforms correctly, proceed by<br />
checking the test points in Table 7-4. Before you start<br />
your tests, set-up 8024 to factory defaults and change<br />
frequency setting to 1 KHz.<br />
7-9. Sequence Generator Checks<br />
Problems with the sequence generator circuits can be<br />
detected if the 8024 accepts front panel commands and<br />
responds correctly to GPIB queries, however, fails to<br />
output sequences or bursts. If you suspect that you have<br />
Test Point Description Expected Result<br />
U6 (18) CPU Clock 10 MHz TTL level signal<br />
U6 (30) ALE TTL, Positive going pulses; period 6 μs, pulse width 2 μs<br />
U6 (29) PSEN TTL, Square wave; period 6 μs<br />
U6 (16,17) RD, WR Signals TTL, Negative going pulses; pulse width o.6 μs<br />
U2 (3) Display Clock TTL, Square wave; frequency 1.25 MHz<br />
U16 (3) GPIB Clock TTL, Square wave; frequency 5 MHz<br />
U2 (24,27,28,29,31) Display Sweep Lines TTL, Positive going pulses; period 10 ms, pulse width 0.5<br />
ms<br />
7-3
Adjustments and Troubleshooting<br />
Table 7-3. Clock Synthesizer Checks.<br />
Test Point Description Expected Result<br />
U98 (3) 100 MHz source 100 MHz ECL level square waveform<br />
U101 (5) Divided clock 50 MHz TTL level square waveform<br />
U95 (8) Divided clock 25 MHz TTL level square waveform<br />
U95 (14) Divided clock 10 MHz TTL level square waveform<br />
U95 (13) Divided clock 2 KHz TTL, pulse width 0.1 μs<br />
U95 (3) Divided clock 2 KHz TTL, pulse width 40 ns<br />
U115 (14) Clock 100 MHz ECL level square waveform<br />
U115 (14) Change frequency to 10 KHz 10 MHz ECL level square waveform<br />
U115 (14) Change frequency to 1 KHz 1 MHz ECL level square waveform<br />
Table 7-4. Arbitrary Generator Checks.<br />
Test Point Description Expected Result<br />
U82,83,86,87 (2) TTL, Square wave; frequency 0.5 MHz<br />
U82,83,86,87 (9) TTL, Negative going pulses; period 1 ms, pulse width 2 μs<br />
U49,50,51 (11) TTL, Square wave; frequency 0.5 MHz<br />
U108,109,110 (1) TTL, Square wave; frequency 0.5 MHz<br />
U45 (26) ECL, Negative going pulses; period 1 μs, pulse width 5 ns<br />
U41 (6) 500 mVp-p, sine waveform; frequency 1 KHz<br />
Change operating Apply 500 Hz, TTL level signal to the TRIG IN<br />
mode to triggered BNC connector<br />
U64 (2,12) TTL, Positive going pulses; period 2 ms, pulse width 2 μs<br />
U64 (5,8) TTL, Square wave; frequency 500 Hz<br />
U69 (1) 500 KHz bursts; burst period 2 ms, burst width 1 ms<br />
a problem with the sequence generator circuit proceed<br />
with the checks given in Table 7-5.<br />
Make sure you reset the 8024 to its factory defaults<br />
before you start with the following procedure. Configure<br />
the 8024 to sequenced output mode, and load two<br />
different waveforms - 10 points long, to segments and<br />
2 respectively. Program each step to repeat once.<br />
Change SCLK setting to 10 MHz.<br />
Table 7-5. Sequence Generator Checks.<br />
7-10. Output Amplifier and<br />
Amplitude Control Checks<br />
Problems with the output amplifier and amplitude control<br />
circuits can be detected if the 8024 accepts front<br />
panel settings and responds correctly to GPIB queries,<br />
however, fails to output the required waveform, or fails<br />
to output the waveform with its correct amplitude and<br />
offset levels. If you suspect that you have a problem<br />
Test Point Description Expected Result<br />
U89 (5) TTL, Negative going pulses; period 2 μs, pulse width 200 ns<br />
U74 (12) 500 KHz TTL level square waveform<br />
U89 (14) TTL, Positive going pulses; period 2 μs, pulse width 50 ns<br />
7-4
with the output amplifier proceed with the checks given<br />
in Table 7-6. Proceed with Table 7-7 to check the amplitude<br />
and offset control circuits.<br />
Table 7-6. Output Amplifier Checks.<br />
Before you start with the following procedure, reset the<br />
8024 to its factory defaults and change amplitude setting<br />
to 9.99V.<br />
Test Point Expected Result<br />
Junction of R13 and R18 1.2 Vp-p, 100 KHz sine waveform<br />
Across R22 Approximately 1.5 Vdc<br />
Across R26 Approximately 1.5 Vdc<br />
Q19 Collector Approximately 11 Vp-p, 100 KHz sine waveform<br />
Q16 Collector Approximately 11 Vp-p, 100 KHz sine waveform<br />
U29 (6) 0 Vdc ±100 mV<br />
Junction of R60 and R61 Approximately 10 Vp-p, 100 KHz sine waveform<br />
Table 7-7. Amplifier and Offset Control Checks.<br />
Test Point Expected Result<br />
U40 (2) +1.2 V ±50 mV<br />
U40 (7) -8.77 V ±100 mV<br />
U40 (1,3) -1.11 V ±50 mV<br />
U40 (6,8) +4.40 V ±100 mV<br />
U33 (6) +360 mV ±20 mV<br />
Change amplitude setting to 1V and offset to +4.50V<br />
U40 (6,8) +8.217 V ±100 mV<br />
U32 (6) -7.6 V ±100 mV<br />
Adjustments and Troubleshooting<br />
7-5
Adjustments and Troubleshooting<br />
7-6<br />
This page intentially left blank
8.1 What in This Chapter<br />
This chapter contains information for ordering replacement<br />
parts. the replacement parts are available from<br />
<strong>Tabor</strong> <strong>Electronics</strong>.<br />
8.2 Ordering Information<br />
When ordering replacement parts, always include the<br />
following information:<br />
a) Instrument Model number.<br />
b) Instrument Serial number.<br />
Table 8-1. Model 8024 - Power Supply Circuit Parts List.<br />
c) <strong>Tabor</strong> part number.<br />
d) Part description.<br />
e) Circuit designation (where applicable)<br />
.<br />
8.3 Parts Description<br />
8<br />
Parts List<br />
In the following Parts List Tables, unless otherwise<br />
noted, resistance is given in Ω, capacitance is given in<br />
μF, inductance is given in μH, resistors tolerance is 5%,<br />
capacitor tolerance is 20%, and inductance tolerance is<br />
10%.<br />
Quantity Part Reference Description Part Number<br />
2 C17,C16 100/25V 1533-0107<br />
2 C15,C14 10000/16V 1532-0109<br />
2 C19,C10 220/16V 1535-0227<br />
1 C20 3300/35V 1534-0338<br />
1 C21 3300/35 1534-0338<br />
2 CR17,CR6 1N4151 0300-0040<br />
2 CR4,CR5 ICTE-5 0400-9040<br />
2 CR9,CR14 KBU-6A 0400-5020<br />
1 Q8 2N2219 0400-4010<br />
1 Q6 2N2905 0400-0150<br />
1 Q5 2N3904 0400-0120<br />
1 Q7 2N3906 0400-0134<br />
1 Q10 MJE2955 0400-4030<br />
1 Q11 MJE3055 0400-4040<br />
8-1
Parts List<br />
Table 8-1. Model 8024 - Power Supply Circuit Parts List (continued)<br />
Quantity Part Reference Description Part Number<br />
2 R103,R102 0.27/2W 0103-0R27<br />
2 R104,R105 33 0100-0330<br />
1 R118 121, 1% 0104-1210<br />
1 R116 237, 1% 0104-2370<br />
4 R101,R100,R111,R112 1K 0100-0102<br />
1 R117 1.5k, 1% 0104-1501<br />
1 R115 3.01k, 1% 0104-2011<br />
1 R106 4.64K, 1% 0104-4641<br />
1 R107 4.99K, 1% 0104-4991<br />
1 R108 8.66K, 1% 0104-8661<br />
1 R109 10K, 1% 0104-1002<br />
1 U25 LM1458N 0500-5650<br />
1 U24 LM337T 0500-5350<br />
1 U23 LM317T 0500-5360<br />
Table 8-2. Model 8024 - CPU Circuit Parts List<br />
8-2<br />
Quantity Part Reference Description Part Number<br />
1 C8 3.3/25V 1540-0335<br />
2 C4,C3 1/25V 1540-0105<br />
11 C1,C2,C5,C6,C7,C9,<br />
C10, C11,C12,C13,C121 0.1 1500-0104<br />
2 Q1,Q3 2N3904 0400-0120<br />
1 Q2 2N4401 0400-0181<br />
1 R3 680 0100-0681<br />
1 R2 1K 0100-0102<br />
1 R1 3.3K 0100-0332<br />
1 R5 10K 0100-0103<br />
1 R4 100K 0100-0104<br />
1 RN1 15 x 8 0109-0150<br />
1 U9 27C010 0500-2129<br />
2 U5,U12 74LS00 0510-0010<br />
1 U13 74LS02 0510-0011<br />
1 U3 74LS138 0510-0270<br />
1 U8 74LS373 0510-0365<br />
1 U7 74HC4040 0520-0700<br />
1 U14 74HCT245 0520-0780<br />
1 U18 75160A 0500-2151<br />
1 U17 75161A 0500-2152<br />
1 U1 L204 0500-1160<br />
1 U10 MT5C-2568 0500-2116<br />
1 U6 P80C32 0500-2143<br />
1 U2 P8279 0500-2070<br />
1 U16 P8291A 0500-2130<br />
1 U4 TL7705 0500-5638
Table 8-3. Model 8024 - Arbitrary Circuit Parts List.<br />
Quantity Part Reference Description Part Number<br />
1 BT1,BT2 NI-CAD 1.2V 2600-0010<br />
1 C98 18n 1500-0183<br />
3 C87,C83,C90 33p 1500-0330<br />
2 C104,C106 47p 1500-0470<br />
1 C84 100p 1500-0101<br />
1 C49 1n 1500-0102<br />
1 C92 10n 1500-0103<br />
64 C47,C22,C30,C45,C48,C54,<br />
C55,C56,C59,C60,C61,C62,<br />
C63,C64,C65,C68,C69,C70,<br />
C72,C73,C74,C75,C76,C77,<br />
C78,C79,C80,C81,C82,C85,<br />
C86,C88,C89,C93,C94,C95,<br />
C96,C99,C100,C101,C102,<br />
C104,C105,C107,C108,C109,<br />
C110,C112,C118,C119,C123,<br />
C124,C126,C128,C130,C133,<br />
C134,C135,C136,C137,C138,<br />
C139,C140, 100n 1500-0104<br />
1 C97 180n 1500-0184<br />
7 C91,R6,C66,C113,C127,<br />
C129,C151 10 1540-0106<br />
1 C111 68 1540-1686<br />
1 CR11 1N746A 0300-2000<br />
2 CR2,CR10 1N4151 0300-0040<br />
1 CR3 1N5820 0300-9080<br />
1 CR1 5082-2810 0300-1020<br />
1 CR13 MV1404 0301-0015<br />
5 DL1,DL2,DL3,DL4,DL5 4ns 0600-1030<br />
1 L15 0.33 0600-1R33<br />
3 L7,L5,L6 0.1 0600-0R10<br />
2 L13,L14 3.3 0600-0333<br />
2 Q9,Q26 2N3904 0400-0120<br />
1 Q4 2N3906 0400-0134<br />
1 Q25 2N3646 0400-0020<br />
1 R69 22 0100-0220<br />
5 R9,R34,R99,R113,R121 33 0100-0330<br />
1 R15 47 0100-0470<br />
8 R65,R66,R125,R128,R136,<br />
R138,R139, R141 49.9,1% 0104-49R9<br />
1 R146 82 0100-0820<br />
3 R83,R119,R120 100 0100-0101<br />
1 R145 130 0100-0131<br />
1 R73 180 0100-0181<br />
2 R67,R68 200,1% 0104-2000<br />
1 R89 220 0100-0221<br />
3 R7,R60,R61 499,1% 0104-4990<br />
Parts List<br />
8-3
Parts List<br />
Table 8-3. Model 8024 - Arbitrary Circuit Parts List (continued).<br />
8-4<br />
Quantity Part Reference Description Part Number<br />
3 R77,R130,R142 560 0100-0561<br />
7 R44,R47,R86,R87,R88,<br />
R98,R144 1K 0100-0102<br />
1 R135 1.8K 0100-0182<br />
1 R35 2.2K 0100-0272<br />
1 R134 2.7K 0100-4021<br />
1 R8 4.02K,1% 0104-2391<br />
1 R51 2.49K,1% 0104-2491<br />
1 R27 5.11K,1% 0104-5111<br />
1 R72 6.81K,1% 0104-6811<br />
1 R49 4.99K,1% 0104-4991<br />
7 R14,R84, R85,R90,R92,<br />
R97,R124, 10K 0100-0103<br />
1 R58 10K,1% 0104-1002<br />
1 R33 15K,1% 0104-1502<br />
1 R94 18K 0100-0183<br />
2 R31,R40 20K,1% 0104-2002<br />
3 R91,R93,R95 22K 0100-0223<br />
1 R57 75K,1% 0104-7502<br />
1 R21 82.5K 0104-8252<br />
2 R55,R56 100K,1% 0104-1003<br />
2 R200,R201 *<br />
2 U63,U75 74F00 0500-1190<br />
1 U69 74F02 0500-1200<br />
2 U53,U62 74F08 0500-1250<br />
1 U48 74F10 0500-1240<br />
4 U64,U74,U78,U101 74F74 0500-1260<br />
1 U52 74F132 0500-1265<br />
5 U97,U98,U99,U100,U102 74F151 0500-1280<br />
2 U89,U90 74F193 0500-1270<br />
3 U49,U50,U51 74F574 0500-1285<br />
2 U44,U10 74LS00 0510-0010<br />
1 U79 74LS13 0510-0033<br />
1 U47 74LS32 0510-0051<br />
1 U92 74LS132 0510-0260<br />
4 U87,U82,U83,U86 74LS161 0500-0311<br />
3 U108,U109,U110 74FCT157 0506-0010<br />
1 U26 74HCT125 0520-0745<br />
1 U11 74HCT154 0520-0750<br />
4 U54,U55,U56,U59 74HCT245 0520-0780<br />
4 U72,U76,U80,U84 74HCT541 0520-0810<br />
2 U88,U93 74HCT574 0520-0080<br />
4 U65,U66,U70,U71 74FCT2161 0506-0000<br />
3 U104,U105,U106 74HC4040 0520-0700<br />
4 U73,U77,U81,U85 6116 0500-2114<br />
1 U45 AD9712BAN 0500-6040
Table 8-3. Model 8024 - Arbitrary Circuit Parts List (continued).<br />
Quantity Part Reference Description Part Number<br />
3 U20,U27,U103 CA4094N 0540-0110<br />
1 U41 CLC404 0560-0030<br />
1 U34 ULN2004N 0500-1160<br />
2 U19,U33 LM741N 0500-5631<br />
1 U91 LM1458N 0500-5650<br />
1 U40 MAX532LCPE 0560-0087<br />
1 U96 MC1648P 0540-0150<br />
4 U37,U38,U112,U114 MC10102P 0500-4094<br />
4 U39,U42,U46,U115 MC10124P 0500-4086<br />
2 U68,U94 MC10H125P 0500-4580<br />
2 U111,U113 MC10231P 0500-4094<br />
1 U95 MC145157-2P 0520-0660<br />
3 U57,U58,U61 MT5C2568-15L 0500-2113<br />
1 U60 MT5C2568-12L 0500-2115<br />
1 U32 OP07CN 0500-5633<br />
1 U43 OP-200GP 0500-5635<br />
1 Y1 10MHz Crystal 0800-0000<br />
Table 8-4. Model 8024 - Output Amplifier Circuit Parts List.<br />
Quantity Part Reference Description Part Number<br />
2 C42,C44 100/25 1533-0107<br />
2 C46,C40 10/25 1540-0106<br />
2 C133,C132 0.1,CHIP 1560-0104<br />
1 C39 2-8P 1550-0000<br />
1 C45 47P 1500-0470<br />
2 C37,C31 470P 1500-0471<br />
6 C53,C32,C33,C34,C35,C41<br />
17 C27,C28,C29,C30,C43,<br />
C57,C58,C141,C142,C143,<br />
C144,C145,C146,C147,<br />
C148,C149,C150 100n 1500-0104<br />
2 C36,C40 10 1540-0106<br />
1 C52 82P 1500-0820<br />
4 CR18,CR19,CR20,CR21 1N4151 0300-0040<br />
10 K1,K2,K3,K4,K5,K6 R4-5W 0900-0070<br />
8 L20,L21,L22,L23,L24,L25,<br />
L26,L27 BEAD 4200-0000<br />
1 L1 0.22 0600-R220<br />
2 L2,L3 0.1 0600-R100<br />
2 L11,L12 0.33 0600-R330<br />
2 L13,L14 0.27 0600-R270<br />
2 Q11,Q22 PN3904 0400-0120<br />
1 Q10 PN3906 0400-0134<br />
2 Q12,Q14 MPS3640 0400-0010<br />
2 Q13,Q15 MPSN3646 0400-0020<br />
3 Q16,Q20,Q21 2N3866A 0400-0161<br />
3 Q17,Q18,Q19 2N5160 0400-0080<br />
Parts List<br />
8-5
Parts List<br />
Table 8-4. Model 8024 - Output Amplifier Circuit Parts List. (continued)<br />
Quantity Part Reference Description Part Number<br />
2 R60,R61 10,1% 0104-10R0<br />
2 R39,R43 10,1/2W 0101-0100<br />
1 R29 33 0100-0330<br />
1 R35 47 0100-0470<br />
3 R24,R36,R37 49.9 0104-49R9<br />
4 R59,R71,R73,R75 61.9,1/2W 0104-61R9<br />
1 R10 82.5 0104-82R5<br />
2 R52,R53 95.3 0104-95R3<br />
1 R38 100 0100-0101<br />
2 R64,R63 100,1%,1/2W 0101-1011<br />
4 R13,R18,R70,R74 249,1% 0104-2490<br />
1 R12 270 0100-0271<br />
2 R22,R26 301,1% 0104-3010<br />
1 R41 390 0100-0391<br />
1 R50 499,1% 0104-4990<br />
1 R54 745,1% 0104-7450<br />
4 R28,R30,R32,R42 1K 0100-0102<br />
1 R62 2K 0100-0202<br />
2 R33,R34 2.49K,1% 0104-2491<br />
2 R23,R25 10K 0100-0103<br />
7 R11,R16,R17,R19,R20<br />
R45,R46 10K, 1% 0104-1002<br />
1 R48 4.02K,1% 0104-4021<br />
1 R31 2K,1/2W 0101-0202<br />
1 R40 Selected value<br />
2 U29,U30 OP07 0500-5633<br />
Table 8-5. Model 8024 - Display Circuit Parts List.<br />
8-6<br />
Quantity Part Reference Description Part Number<br />
1 C1 470/16V 1532-0477<br />
1 C2 560P 1500-0561<br />
3 CR1,CR2,CR3 1N4151 0300-0040<br />
1 DE1 Rotary Encoder 0205-9200<br />
26 DS1-DS26 3mm LED 1000-0100<br />
1 LCD1 16x2 LCD Display 1200-0010<br />
4 Q1,Q2,Q3,Q4 2N4403 0400-0180<br />
4 R2,R3,R4,R5 220 0100-0221<br />
1 R1 680 0100-0681<br />
1 R5 1.5K 0100-0152<br />
18 S1-S18 Key Switch 2000-6160<br />
1 U1 74LS138 0510-0270<br />
1 U2 74LS74 0510-0110<br />
1 U3 74LS00 0510-0010
A-1. Front Panel Menus at a Glance<br />
Front panel menus are organized in a logical way to make it easy to access and modify parameters. Information<br />
how to access and modify parameters is given in Section 3 of this manual. The following is a summary<br />
of all menus that can be accessed from the front panel.<br />
A-2. FREQ Menus (STD Waveform mode)<br />
1: FREQ [value] > 2: PERIOD [value]<br />
A-2-1. FREQ Menus (ARB & SEQ Waveform mode)<br />
1: SCLK (option)<br />
Options: FREQ off(all memory segment length = 0), FREQ<br />
[value]<br />
FREQ [value]<br />
FREQ [value] > 1: Reference clock (option)<br />
Options: INT, EXT, 10MHz Xtal<br />
A-3. AMPL Menus<br />
1: AMPL [value] > 2: OFFS [value]<br />
A-4. STD Menus<br />
1: Output waveform (option)<br />
Options: Sine, Triangle, Square, Pulse, Ramp Sinc, Gauss, Expon,<br />
DC<br />
Sine > 1: STA PHASE [value] > 2: POWER [value]<br />
Triangle > 1: STA PHASE [value] > 2: POWER [value]<br />
Square > 1: DUTY CYCLE [value]<br />
Menus Summary<br />
Appendix A<br />
A-1
Menus Summary<br />
A-4. STD Menus (continued)<br />
1: Output waveform (option)<br />
Options: Sine, Triangle, Square, Pulse, Ramp, Sinc, Gauss, Exponent’l,<br />
DC<br />
Pulse > 1: DELAY [value] > 2: RISE [value] >><br />
>> HIGH [value] > FALL [value]<br />
Ramp > 1: DELAY [value] > 2: RISE [value]> 3: FALL<br />
[value]<br />
Sine(x)/x > 1: # CYCLES [value]<br />
Gauss > 1: T CONST [value]<br />
Exponent’l > 1: T CONST [value]<br />
DC > 1: [value]% (of ampl)<br />
Values are function dependent. Value limits are given in<br />
Table 3-3.<br />
A-5. ARB Menus<br />
1: Output segment (option)<br />
Options: Empty, Loaded<br />
nn (Empty)<br />
1: SEG01=[value]<br />
nn (Loaded)<br />
A-6. SEQ Menus<br />
1: SEG01= > 2: Load (function) 3: MODIFY (option)<br />
Functions: Sine, Triangle, Square, Pulse, Ramp,<br />
Sinc, Guass, Exponent’l, DC (no lower layers below<br />
function selection)<br />
Options: Clear, Fill, Offset, Invert, AM<br />
1: Output sequence (option)<br />
Options: Empty, Loaded<br />
A-2<br />
Clear > 1: push ENT to clr<br />
Fill > 1: with > 2: push ENT to fill<br />
Offset > 1: offs by > 2: push ENT to offs<br />
Invert > 1: push ENT to inv<br />
AM > 1: LENGTH > 2: DEPTH 3: push ENT to modu<br />
1: STEP01 = SEG01 > 2: REPEAT ∗ [value]
A-7. CONT Menus<br />
1: Continuous Mode<br />
A-8. TRIG Menus<br />
1: SOURCE (option)<br />
Options: EXT, INT, BUS<br />
EXT<br />
INT > 1: INT PER [value]<br />
A-9. GATED Menus<br />
1: Gated Mode<br />
A-10. BURST Menus<br />
1: BURST [value] > 2: SOURCE (option)<br />
Options: EXT, INT<br />
EXT<br />
INT > 1: INT PER [value]<br />
A-11. STORE Menus<br />
1: STORE SETUP [value] > 2: Push ENT to save<br />
A-12. RECALL Menus<br />
1: RECALL SETUP [value] > 2: Push ENT to rcl<br />
A-13. SYSTEM Menus<br />
1: GPIB address [value] > 2: Commands (option)<br />
Option: SCPI, Std.<br />
Menus Summary<br />
A-3
Menus Summary<br />
A-4<br />
This page intentially left blank
B-1. Device-Specific SCPI Command Summary<br />
The Model 8024 conforms to the 1993 version of the SCPI standard. Some of the commands used are not<br />
included in the 1993 version of the SCPI standard. However, these commands are designed with the SCPI<br />
standard in mind and they follow all of the command syntax rules defined by the standard. This Appendix<br />
lists all non-SCPI commands only that were designed specifically for the Model 8024. A complet e list of<br />
SCPI commands is given in Section 4.<br />
[SOURce:]<br />
APPLy:SINusoid {[ [, [, [, [,] ]]]]}<br />
APPLy:TRIangle {[ [, [, [, [,] ]]]]}<br />
APPLy:SQUare {[ [, [, [,] ]]]}<br />
APPLy:PULSe {[ [, [, [, [, [,,<br />
[] ]]]]]]}<br />
APPLy:RAMP {[ [, [, [, [, [,] ]]]]]}<br />
APPLy:SINC {[ [, [, [,] ]]]}<br />
APPLy:EXPonential [ [, [, [, ] ]]]}<br />
APPLy:GAUSsian {[ [, [, [,] ]]]}<br />
APPLy:DC {[]}<br />
APPLy:USER {[ [, [,, [,] ]]]}<br />
APPLy:SEQuenc {[ [, [, [,] ]]]}<br />
APPLy:?<br />
APPLy?<br />
FREQuency:RASTer { | MINimum | MAXimum}<br />
FREQuency:RASTer?<br />
FREQuency:RASter:SOURce {EXT | INT | XTAL}<br />
FREQuency:RASTer:SOURce?<br />
SINusoid:PHASe <br />
SINusoid:PHASe?<br />
SINusoid:POWer <br />
SINusoid:POWer?<br />
Non-SCPI Commands<br />
Appendix B<br />
B-1
Non-SCPI Commands<br />
B-2<br />
[SOURce:] (continued)<br />
TRIangle:PHASe <br />
TRIangle:PHASe?<br />
TRIangle:POWer <br />
TRIangle:POWer?<br />
SQUare:DCYCle <br />
SQUare:DCYCle?<br />
RAMP:DELay <br />
RAMP:DELay?<br />
RAMP:TRANsition <br />
RAMP:TRANsition?<br />
RAMP:TRANsition:TRAiling <br />
RAMP:TRANsition:TRAiling?<br />
SINC:NCYCle <br />
SINC:NCYCle?<br />
GAUSsian:EXPonent <br />
GAUSsian:EXPonent?<br />
EXPonential:EXPonent <br />
EXPonential:EXPonent?<br />
DC <br />
DC?<br />
AM:EXECute<br />
BM:NCYCles { | MINimum | MAXimum}<br />
BM:NCYCles?<br />
BM:INTernal:RATE <br />
BM:INTernal:RATE?<br />
BM:SOURce {EXTernal | INTernal | BUS}<br />
BM:SOURce?<br />
BM {OFF | ON}<br />
BM?<br />
BM:IMMediate<br />
GM {OFF | ON}<br />
GM?<br />
SEQuence:DEFine , , <br />
SEQuence:DELete[:NAME] <br />
SEQuence:DELete:ALL<br />
SEQuence:SELect <br />
SYSTem:LOCal<br />
SYSTem:REMote<br />
TRACe:SELect
C-1. Short-Form (std.) GPIB Commands Summary<br />
The Model 8024 can accept two sets of commands: SCPI command set and short-form commands. The<br />
SCPI set of commands is the default setting of the generator. The short-form commands set is available for<br />
those programmers who do not want to use the lengthy programming code that SCPI requires.<br />
The short-form command set speeds bus communications and is also required in conjunction with WaveCAD<br />
operation. This Appendix lists the short-form command set. Selection of which command set is used as GPIB<br />
protocol is done from the front panel. To change the GPIB command set press the [SYSTEM] button, then<br />
press the cursor button to move the cursor one menu down. Rotate the dial. The display toggles between<br />
“SCPI” and “std.”. Select the required command set and press any front panel key to resume normal operation.<br />
PROGRAM & QUERY GENERAL MODES<br />
OPERATING MODE<br />
TRIGGER SOURCE<br />
MODE 0 Normal continuous mode<br />
MODE 1 Trigger Mode<br />
MODE 2 Gated Mode<br />
MODE 3 Burst<br />
MODE?<br />
TRIG_SRC EXT External source<br />
TRIG_SRC INT Internal source<br />
TRIG_SRC?<br />
OUTPUT WAVEFORMS<br />
WAVE 0 Sinewave<br />
WAVE 1 Triangle<br />
WAVE 2 Squarewave<br />
WAVE 3 Pulse<br />
WAVE 4 Ramp<br />
WAVE 5 Sinc<br />
Short Form (std.) GPIB Command Summary<br />
Appendix C<br />
C-1
Short Form (std.) GPIB Command Summary<br />
WAVE 6 Gaussian<br />
WAVE 7 Exponential<br />
WAVE 8 DC<br />
WAVE?<br />
OUTPUT FUNCTION SHAPE<br />
OUT 0 Standard waveforms<br />
OUT 1 Arbitrary waveforms<br />
OUT 2 Sequenced waveforms<br />
OUT?<br />
STAND-BY MODE<br />
ST_BY 0 Output On<br />
ST_BY 1 Output Off<br />
ST_BY?<br />
PROGRAM PARAMETERS<br />
FREQ MHZ, HZ, KHZ, MAHZ<br />
FREQ?<br />
SCLK MHZ, HZ, KHZ, MAHZ<br />
SCLK?<br />
AMPL MV, V<br />
AMPL?<br />
OFFS MV, V<br />
OFFS?<br />
BURST Program burst count<br />
BURST?<br />
INT_PER NS,US,MS,S<br />
INT_PER?<br />
FILTER 0 No filter<br />
FILTER 1 20MHz Gaussian<br />
FILTER 2 25MHz Elliptical<br />
FILTER 3 50MHz Elliptical<br />
FILTER?<br />
RST_FUNC Reset function generator parameters<br />
PROGRAM ARBITRARY WAVEFORMS AND SEQUENCE<br />
C-2<br />
SEG01=d Assign memory size (d) to segment 01<br />
SEG01? Interrogate segment size<br />
STEP01=SEG01*d Assign multiplier (d) to segment 01 in sequencer step 01<br />
STEP01? Interrogate step<br />
SEG01_DATA#d Send complete arbitrary waveform string to segment 01,<br />
as part of <br />
SEG01_DATA#0 Send complete arbitrary waveform string to segment 01,<br />
terminated with NL+^END
RESPONSE MESSAGE FORMAT<br />
COMMON COMMANDS<br />
COMMON QUERIES<br />
X0 Response header OFF<br />
X1 Response header ON<br />
Z0 New line (LF), END (EOI) terminator<br />
Z1 New line (LF) terminator<br />
Z2 END (EOI) terminator<br />
*CLS Clear status command<br />
*ESE Standard event status enable command<br />
*OPC Operation complete command<br />
*RCL Recall front panel set-up command<br />
*RST Reset command<br />
*SAV Save front panel set-up command<br />
*SRE Service request enable command<br />
*TRG Trigger command<br />
*WAI Wait-to-continue command<br />
*ESE? Standard event status enable query<br />
*ESR? Standard event status register query<br />
*IDN? Identification query<br />
*OPC? Operation complete query<br />
*SRE? Service request enable query<br />
*STB? Read status byte query<br />
STANDARD EVENT STATUS ENABLE REGISTER MASK<br />
*ESE0 No mask<br />
*ESE1 ESB bit set on operation complete<br />
*ESE2 Not used<br />
*ESE4 ESB bit set on query error<br />
*ESE8 ESB bit set on device dependent error<br />
*ESE16 ESB bit set on execution error<br />
*ESE32 ESB bit set on command error<br />
*ESE64 ESB bit set on user request<br />
*ESE128 SB bit set on power on<br />
SERVICE REQUEST ENABLE REGISTER MASK<br />
Short Form (std.) GPIB Command Summary<br />
*SRE0 No mask<br />
*SRE1 RQS/MSS bit set on ERR bit<br />
*SRE2 No mask<br />
*SRE4 No mask<br />
*SRE8 No mask<br />
*SRE16 RQS/MSS bit set on MAV bit (message available)<br />
*SRE32 RQS/MSS bit set on ESB bit (standard event status register)<br />
*SRE128 Not used<br />
C-3
Short Form (std.) GPIB Command Summary<br />
C-4<br />
This page intentionally left blank
Schematics and Component Location Diagrams<br />
Appendix D