
Create successful ePaper yourself
Turn your PDF publications into a flip-book with our unique Google optimized e-Paper software.
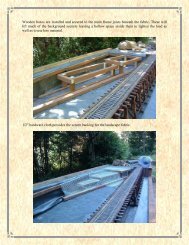
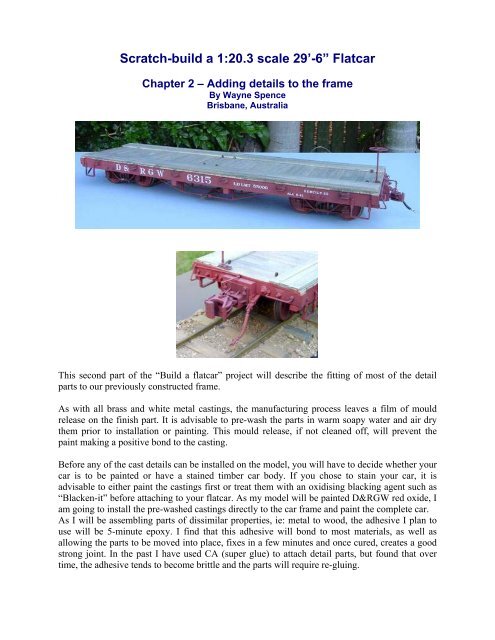
Scratch-build a 1:20.3 scale 29’-6” Flatcar<br />
Chapter 2 – Adding details to the frame<br />
By <strong>Wayne</strong> <strong>Spence</strong><br />
Brisbane, Australia<br />
This second part of the “Build a flatcar” project will describe the fitting of most of the detail<br />
parts to our previously constructed frame.<br />
As with all brass and white metal castings, the manufacturing process leaves a film of mould<br />
release on the finish part. It is advisable to pre-wash the parts in warm soapy water and air dry<br />
them prior to installation or painting. This mould release, if not cleaned off, will prevent the<br />
paint making a positive bond to the casting.<br />
Before any of the cast details can be installed on the model, you will have to decide whether your<br />
car is to be painted or have a stained timber car body. If you chose to stain your car, it is<br />
advisable to either paint the castings first or treat them with an oxidising blacking agent such as<br />
“Blacken-it” before attaching to your flatcar. As my model will be painted D&RGW red oxide, I<br />
am going to install the pre-washed castings directly to the car frame and paint the <strong>com</strong>plete car.<br />
As I will be assembling parts of dissimilar properties, ie: metal to wood, the adhesive I plan to<br />
use will be 5-minute epoxy. I find that this adhesive will bond to most materials, as well as<br />
allowing the parts to be moved into place, fixes in a few minutes and once cured, creates a good<br />
strong joint. In the past I have used CA (super glue) to attach detail parts, but found that over<br />
time, the adhesive tends to be<strong>com</strong>e brittle and the parts will require re-gluing.