
You also want an ePaper? Increase the reach of your titles
YUMPU automatically turns print PDFs into web optimized ePapers that Google loves.
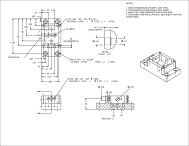
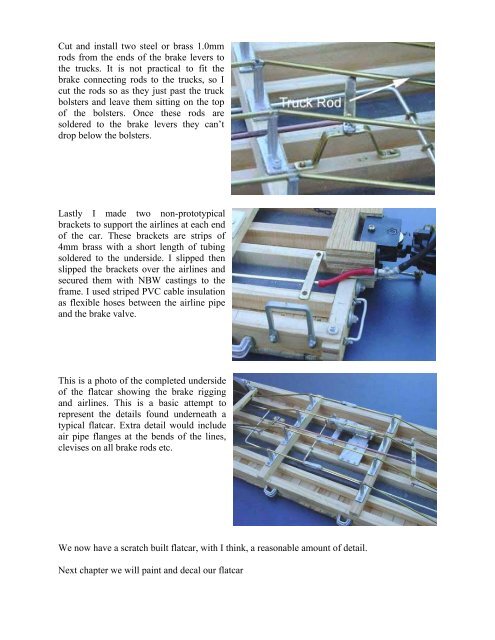
Cut and install two steel or brass 1.0mm<br />
rods from the ends of the brake levers to<br />
the trucks. It is not practical to fit the<br />
brake connecting rods to the trucks, so I<br />
cut the rods so as they just past the truck<br />
bolsters and leave them sitting on the top<br />
of the bolsters. Once these rods are<br />
soldered to the brake levers they can’t<br />
drop below the bolsters.<br />
Lastly I made two non-prototypical<br />
brackets to support the<br />
airlines at each end<br />
of<br />
the car. These brackets are strips of<br />
4mm<br />
brass with a short length of tubing<br />
soldered to the underside. I slipped then<br />
slipped the brackets over the airlines and<br />
secured them with NBW castings to the<br />
frame. I used striped PVC cable insulation<br />
as flexible hoses between the airline pipe<br />
and the brake valve.<br />
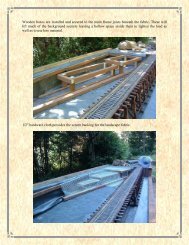
This<br />
is a photo of the <strong>com</strong>pleted underside<br />
of<br />
the flatcar showing the brake rigging<br />
and<br />
airlines. This is a basic attempt to<br />
represent<br />
the details found underneath a<br />
typical<br />
flatcar. Extra detail would include<br />
air<br />
pipe flanges at the bends of the lines,<br />
clevises<br />
on all brake rods etc.<br />
We now have a scratch built flatcar, with I think,<br />
a reasonable amount of detail.<br />
Next<br />
chapter we will paint and decal our flatcar