
You also want an ePaper? Increase the reach of your titles
YUMPU automatically turns print PDFs into web optimized ePapers that Google loves.
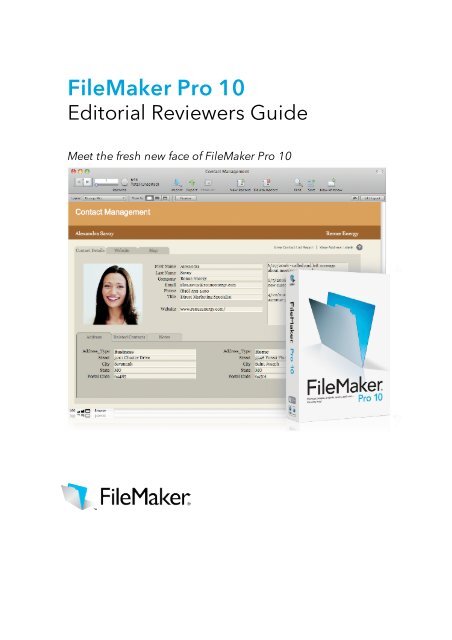
<strong>FileMaker</strong> <strong>Pro</strong> <strong>10</strong><br />
Edi<strong>to</strong>rial Reviewers Guide<br />
Meet the fresh new face of <strong>FileMaker</strong> <strong>Pro</strong> <strong>10</strong>
Contents<br />
<strong>Welcome</strong> <strong>to</strong> <strong>FileMaker</strong> <strong>Pro</strong> <strong>10</strong>! .................................................................................................... 3<br />
Fast facts......................................................................................................................................... 4<br />
U.S. reseller pricing..................................................................................................................... 4<br />
System requirements ................................................................................................................... 4<br />
About <strong>FileMaker</strong> ......................................................................................................................... 5<br />
Part 1: New features drilldown.................................................................................................... 7<br />
Create databases from existing Excel or Ben<strong>to</strong> 2 files................................................................ 7<br />
Updated Starter Solutions............................................................................................................ 8<br />
<strong>10</strong> new themes............................................................................................................................. 8<br />
Status Toolbar ............................................................................................................................. 9<br />
Re-use saved and recent Finds .................................................................................................. <strong>10</strong><br />
Find omitted records.................................................................................................................. 11<br />
Dynamic reports ........................................................................................................................ 11<br />
Script triggers ............................................................................................................................ 12<br />
Send mail via SMTP ................................................................................................................. 14<br />
Modify Table View on the fly................................................................................................... 15<br />
More great features.................................................................................................................... 15<br />
Part 2: Hands-on exercises ......................................................................................................... 16<br />
Exercise 1: Create a new <strong>FileMaker</strong> <strong>Pro</strong> database from a Ben<strong>to</strong> 2 or Excel file ...................... 16<br />
Exercise 2: Find records and save your Find <strong>to</strong> re-use later ..................................................... 24<br />
Exercise 3: Create a dynamic report with subgroups................................................................ 26<br />
Exercise 4: Add script triggers based on ordinary user actions ................................................ 35<br />
© 2008 <strong>FileMaker</strong>, Inc. All rights reserved. <strong>FileMaker</strong> and Ben<strong>to</strong> are trademarks of <strong>FileMaker</strong>, Inc.<br />
registered in the U.S. and other countries. The file folder logo and the Ben<strong>to</strong> logo are trademarks of<br />
<strong>FileMaker</strong>, Inc. All other trademarks are the property of their respective owners. The screen shot<br />
examples, including people, companies, domain names, and email addresses are purely fictitious, and<br />
any resemblance <strong>to</strong> existing people, companies, domain names and email addresses are coincidental.<br />
2
<strong>Welcome</strong> <strong>to</strong> <strong>FileMaker</strong> <strong>Pro</strong> <strong>10</strong>!<br />
You’ll immediately notice two major changes in <strong>FileMaker</strong>® <strong>Pro</strong> <strong>10</strong>:<br />
• A sleek, intuitive new interface: We’ve redesigned the interface so that you can perform<br />
common tasks with the fewest mouse clicks and <strong>to</strong> unlock even more of the hidden power<br />
of <strong>FileMaker</strong> without sacrificing any of the product’s inherent ease-of-use.<br />
• New features that make <strong>FileMaker</strong> <strong>Pro</strong> <strong>10</strong> applications more powerful. One example<br />
is Dynamic Reports, which allows you <strong>to</strong> make changes as you’re viewing them, without<br />
switching modes. Another is the ability <strong>to</strong> trigger <strong>FileMaker</strong> <strong>Pro</strong> Scripts (which are<br />
similar <strong>to</strong> spreadsheet macros) based on user actions, such as exiting a field or loading a<br />
layout.<br />
To save you time in writing your review, we have summarized only those features that are<br />
new since <strong>FileMaker</strong> <strong>Pro</strong> 9. If you’re new <strong>to</strong> <strong>FileMaker</strong> <strong>Pro</strong>, we recommend that you start with<br />
the <strong>FileMaker</strong> <strong>Pro</strong> 9 Reviewers’ Guide, which has installation instructions and other fundamental<br />
information you’ll need <strong>to</strong> get going. If you are already familiar with <strong>FileMaker</strong> and just want <strong>to</strong><br />
see what’s new, dive in!<br />
We are very interested in your feedback on the new features and how we can make this guide<br />
even more helpful <strong>to</strong> you. Please contact Kevin Mallon for additional information, including<br />
access <strong>to</strong> technical support.<br />
Kevin Mallon<br />
(408) 987-7227<br />
kevin_mallon@filemaker.com<br />
3
Fast facts<br />
<strong>FileMaker</strong> <strong>Pro</strong> <strong>Pro</strong>duct Family<br />
<strong>FileMaker</strong> <strong>Pro</strong><br />
<strong>10</strong><br />
Sleek new<br />
intuitive interface;<br />
Dynamic<br />
reporting; Script<br />
Triggers; Faster<br />
SMTP direct<br />
emailing; Saved<br />
Finds; and more.<br />
$299/Upgrade<br />
$179 *<br />
<strong>FileMaker</strong> <strong>Pro</strong><br />
<strong>10</strong> Advanced<br />
Wide set of <strong>to</strong>ols<br />
(debugging<br />
scripts, cus<strong>to</strong>m<br />
menus, runtime<br />
engine and more)<br />
for higher end<br />
users and<br />
developers.<br />
$499/Upgrade<br />
$299*<br />
<strong>FileMaker</strong><br />
Server <strong>10</strong><br />
Fast, reliable,<br />
easy-<strong>to</strong>-manage<br />
server software<br />
for groups of<br />
<strong>FileMaker</strong> <strong>Pro</strong><br />
users that lets<br />
users securely<br />
share databases<br />
over a network,<br />
or on the web<br />
$999/Upgrade<br />
$599*<br />
<strong>FileMaker</strong><br />
Server <strong>10</strong><br />
Advanced<br />
All the features in<br />
<strong>FileMaker</strong> Server<br />
<strong>10</strong> plus Instant<br />
Web Publishing<br />
capabilities,<br />
ODBC/JDBC<br />
connectivity and<br />
higher <strong>FileMaker</strong><br />
<strong>Pro</strong> connection<br />
limits.<br />
$2999/Upgrade<br />
$1799*<br />
*U.S., SRP, Volume License Agreement (VLA), Education Volume License Agreement<br />
(EVLA) and Non-<strong>Pro</strong>fit pricing is available.<br />
System requirements<br />
Operating System Requirements<br />
Windows XP SP2 Pentium III 700MHz or higher<br />
256MB RAM<br />
CD and hard disk drive<br />
Super VGA (<strong>10</strong>24 x 768) or higher-resolution<br />
video adapter and display<br />
Windows Vista SP1, “Works with Windows<br />
Vista” achievement<br />
Pentium III 800MHz or higher<br />
512MB RAM<br />
CD and hard disk drive<br />
4
Super VGA (<strong>10</strong>24 x 768) or higher-resolution<br />
video adapter and display<br />
Mac OS X <strong>10</strong>.4.11 Tiger PowerPC, G4 or G5<br />
Intel -based Mac<br />
256MB RAM<br />
CD and hard disk drive<br />
Mac OS X <strong>10</strong>.5 Leopard PowerPC G4 (867MHz+) G5 Intel-based<br />
Mac - 512MB RAM<br />
CD and hard disk drive<br />
Changes in system requirements since <strong>FileMaker</strong> <strong>Pro</strong> 9<br />
<strong>FileMaker</strong> <strong>Pro</strong> <strong>10</strong> and <strong>FileMaker</strong> <strong>Pro</strong> <strong>10</strong> Advanced require:<br />
• Super VGA (<strong>10</strong>24 x 768) video<br />
Additional New Features in <strong>FileMaker</strong> <strong>Pro</strong> <strong>10</strong><br />
The following are additional new features offered in <strong>FileMaker</strong> <strong>Pro</strong> <strong>10</strong> but are not detailed in<br />
this Guide:<br />
For End Users<br />
•Enhanced Quick Start Screen<br />
•Ben<strong>to</strong> 2 integration<br />
•New Resource Center with video tu<strong>to</strong>rials<br />
•Supports Excel 2007 data (.xlsx)<br />
For Developers<br />
•More SQL Support<br />
•File Recovery Enhancements<br />
•Set Field By Name<br />
•IPv6 support<br />
•Insert Tab order<br />
•Set field by name script step<br />
About <strong>FileMaker</strong><br />
<strong>FileMaker</strong>, Inc. develops award-winning database software. Its products include the legendary<br />
<strong>FileMaker</strong> <strong>Pro</strong> product line for Windows, Mac and the Web, and Ben<strong>to</strong>®, the personal<br />
database for Mac. <strong>FileMaker</strong> <strong>Pro</strong> won 49 awards, more than its next eight competi<strong>to</strong>rs<br />
combined, from 2003-2008 in the U.S., and a <strong>to</strong>tal of 130 awards worldwide during this time.<br />
Millions of cus<strong>to</strong>mers, from individuals <strong>to</strong> large organizations, rely on <strong>FileMaker</strong>, Inc.<br />
software <strong>to</strong> manage, analyze and share information. <strong>FileMaker</strong>, Inc. is a wholly owned<br />
subsidiary of Apple Inc.<br />
Contact information<br />
<strong>FileMaker</strong>, Inc.<br />
5201 Patrick Henry Drive<br />
Santa Clara, CA 95054-1171<br />
Sales: 800-325-2747<br />
5
Switchboard: 408-987-7000<br />
General: www.filemaker.com<br />
Web s<strong>to</strong>re: s<strong>to</strong>re.filemaker.com<br />
Media resources: filemaker.com/company/newsroom/news/press.html<br />
Year founded<br />
1998<br />
Relationship <strong>to</strong> Apple<br />
<strong>FileMaker</strong> is a wholly owned subsidiary of Apple Inc.<br />
Media contact<br />
Kevin Mallon, Senior Public Relations Manager<br />
408-987-7227<br />
Kevin_mallon@filemaker.com<br />
6
Part 1: New features drilldown<br />
Create databases from existing Excel or Ben<strong>to</strong> 2 files<br />
Summary<br />
<strong>FileMaker</strong> <strong>Pro</strong> <strong>10</strong> makes it easier <strong>to</strong> create a database from an Excel spreadsheet, and also lets<br />
you start with a Ben<strong>to</strong> 2 file.<br />
What’s Changed<br />
In previous versions of <strong>FileMaker</strong> <strong>Pro</strong>, you had three choices for starting a database:<br />
• Use a Starter Solution<br />
• Define the schema by providing field names, table names, and more. Many new<br />
users didn’t have the time or inclination <strong>to</strong> learn how <strong>to</strong> do this.<br />
• Drag an Excel spreadsheet icon over the <strong>FileMaker</strong> <strong>Pro</strong> icon. But who knew?<br />
• Create a new database or import records from the File Menu<br />
Now, right at launch, you can just click a but<strong>to</strong>n <strong>to</strong> start with an existing Excel or<br />
Ben<strong>to</strong> 2 file. By leveraging organizational and data entry work already done in Excel<br />
or Ben<strong>to</strong> 2, <strong>FileMaker</strong> <strong>Pro</strong> has become more useful <strong>to</strong> more people.<br />
Where <strong>to</strong> Find the Quick Start Screen<br />
Just launch <strong>FileMaker</strong> <strong>Pro</strong>.<br />
7
Updated Starter Solutions<br />
All of 30 Starter Solutions in the new <strong>FileMaker</strong> <strong>Pro</strong> <strong>10</strong> now have a fresh look <strong>to</strong> match the<br />
newest browsers and productivity applications.<br />
In addition, <strong>FileMaker</strong> made significant enhancements <strong>to</strong> 13 of the most popular Starter<br />
Solutions, including Contact Management, Inven<strong>to</strong>ry, and Expense Report. For example, the<br />
Contact Management Starter Solution now includes a built-in Web Viewer for URLs in your<br />
database, Google Maps for your addresses, and mailing labels for addresses. These features<br />
were introduced in <strong>FileMaker</strong> <strong>Pro</strong> 9, but you had <strong>to</strong> learn how <strong>to</strong> add them. Now they’re builtin<br />
<strong>to</strong> the popular Starter Solutions, making them accessible even <strong>to</strong> novice users.<br />
Where <strong>to</strong> Find:<br />
To look at the Starter Solutions, choose File > New Database, and select the but<strong>to</strong>n for Starter<br />
Solutions. Starter Solution names appear in the left of the dialog box. They also can be<br />
accessed from the “Create Database” tab in the Quick Start Screen.<br />
<strong>10</strong> new themes<br />
<strong>FileMaker</strong> <strong>Pro</strong> <strong>10</strong> has <strong>10</strong> new themes for colors and fonts that you can use <strong>to</strong> make your<br />
forms visually appealing—with just a couple of clicks.<br />
8
Where <strong>to</strong> Find:<br />
To see the new Themes, go <strong>to</strong> Layout Mode, choose Layouts > New Layout/Report, and then<br />
click Next a couple of times.<br />
Status Toolbar<br />
The redesigned Status Toolbar puts commonly used <strong>FileMaker</strong> <strong>Pro</strong> features, previously only<br />
accessible from the main menu, right at your fingertips, for streamlined navigation, better<br />
workflow, and timesaving shortcuts.<br />
It looks just like the <strong>to</strong>olbars on the newest browsers, email, and productivity applications,<br />
making <strong>FileMaker</strong> <strong>Pro</strong> more familiar or novice users.<br />
Full layout name<br />
appears<br />
Pie Chart for found<br />
records<br />
Record View, List<br />
View, Table View<br />
Click here <strong>to</strong> change the<br />
fields that appear in Table<br />
View without affecting<br />
your layouts.<br />
Details<br />
Highlights of the new Status Toolbar include:<br />
• Room for longer names in the Layout pull-down menu: Previous versions only<br />
displayed the first eight characters.<br />
• List View: Just click an icon <strong>to</strong> go directly <strong>to</strong> List View instead of unearthing it from<br />
the File menu. List View lets you scroll through your records in Record format rather<br />
than clicking through them one by one.<br />
• Cus<strong>to</strong>mization: You can cus<strong>to</strong>mize the <strong>to</strong>olbar by dragging and dropping the features<br />
you use most from a screen that has all of the icons. If you frequently save reports in<br />
PDF format, for example, you can drop the Save as PDF icon right on<strong>to</strong> the Status<br />
Toolbar. (Try it Out: View > Cus<strong>to</strong>mize Status Toolbar)<br />
9
• Pie charts showing found/unfound records: When you perform a find, a clickable<br />
pie chart shows the percentage of records found. You can just click the pie chart again<br />
<strong>to</strong> see all records not found.<br />
Why It’s Important<br />
Common <strong>FileMaker</strong> <strong>Pro</strong> commands are now right in front of you on the Status<br />
Toolbar. When you’re in Browse Mode, you see icons for New, Delete, Find, and<br />
Sort. When you’re in Preview Mode, you see icons for Print, Page Setup, Save as<br />
Excel, and Save as PDF. Layout Mode also has a Manage Database icon on the<br />
Status Bar for all the functions that you used <strong>to</strong> have <strong>to</strong> get <strong>to</strong> with File > Manage.<br />
Fewer mouse movements save time!<br />
Experienced <strong>FileMaker</strong> <strong>Pro</strong> users can continue <strong>to</strong> use menu commands the same<br />
way they always have, even while new users have a more intuitive option. It’s part of<br />
<strong>FileMaker</strong>’s mantra: “Work the way you like <strong>to</strong> work.”<br />
Where <strong>to</strong> Find:<br />
The Status Toolbar appears at the <strong>to</strong>p of all databases, including all 30 Starter Solutions.<br />
To cus<strong>to</strong>mize the Status Toolbar, choose View > Cus<strong>to</strong>mize Status Toolbar.<br />
Re-use saved and recent Finds<br />
Summary<br />
Now you can easily save any Find request so that you can use it again later. This is great for<br />
doing routine Finds. For example, maybe you want <strong>to</strong> save a Find for cus<strong>to</strong>mers in California<br />
who have spent more than $<strong>10</strong>00 in the past year but have not ordered in the last three<br />
months. Or all assets in New York, New Jersey, and Connecticut whose maintenance contract<br />
will expire before December 31.<br />
Details<br />
• Click the Find icon on the Status Toolbar.<br />
• You’ll see a list of fields in your database, each with a magnifying glass. Enter search<br />
criteria in one or more fields.<br />
• Click the Perform Find icon.<br />
• Click Saved Finds icon on the Status bar <strong>to</strong> name your find. Perform the same find<br />
operation again at any time by clicking the Saved Finds icon and choosing the name.<br />
The <strong>10</strong> most recent Finds also appear in that menu, whether or not you saved them.<br />
Each Saved Find is designed specifically for the file you designed it for. Saved Finds are by<br />
account, so you only see the finds you save and use.<br />
What’s Changed<br />
With previous version of <strong>FileMaker</strong> <strong>Pro</strong>, <strong>to</strong> re-use a set of Find criteria you’d have <strong>to</strong><br />
create a script, a prospect that could scare off new users. Now you can save Finds<br />
with a simple menu command and reuse them whenever you want.<br />
<strong>10</strong>
Find omitted records<br />
Summary<br />
When <strong>FileMaker</strong> <strong>Pro</strong> returns the results of the Find, a pie chart showing the percentage of<br />
your records that met the criteria is presented. Sometimes it’s just as interesting <strong>to</strong> see the<br />
omitted records. Just click the pie chart <strong>to</strong> see the records that did not match the criteria.<br />
Toggle back and forth.<br />
The sample screen shot below shows the results of a Find for cus<strong>to</strong>mers who paid their<br />
membership fee. If you clicked the pie chart, you’d get another list of cus<strong>to</strong>mers who have not<br />
paid.<br />
Where <strong>to</strong> Find:<br />
Click the Find icon on the Status Toolbar and type in your search criteria. When you get your<br />
results, the pie chart will be at the upper left, as shown.<br />
Dynamic Reports<br />
Summary<br />
Now <strong>FileMaker</strong> <strong>Pro</strong> <strong>10</strong> provides dynamic reporting capability, a huge time saver. When<br />
you’re in List View or Table View, you can make changes <strong>to</strong> your grouped data on the fly and<br />
your change will show up immediately, without your even having <strong>to</strong> switch views.<br />
Say you have a grouped report sorted by a contact’s state or an asset’s value. If you change a<br />
value while in Table View or List View, the record will immediately move <strong>to</strong> the appropriate<br />
section of the report. Your records are updated live as you manipulate the data.<br />
Details<br />
• You can choose the fields whose contents you want <strong>to</strong> sort by. In Exercise 3, you’ll<br />
sort contacts by State and by Company. When you add a new record <strong>to</strong> a sorted found<br />
set, or when you change a record, it appears in the correct position as soon as you<br />
commit the record.<br />
11
• Optionally keep your records sorted. In Exercise 4, you’ll add a script trigger so that<br />
loading a new layout triggers a grouped report that you created earlier.<br />
What’s Changed<br />
<strong>FileMaker</strong> <strong>Pro</strong> has been able <strong>to</strong> create grouped (sub-summary) reports since several<br />
versions ago. However, you could only view them in Preview mode and, as a result,<br />
could not interact with the data by clicking but<strong>to</strong>ns or changing field values. If you<br />
wanted <strong>to</strong> change a record, you had <strong>to</strong> find it, change it, and then return <strong>to</strong> Preview<br />
mode <strong>to</strong> see how the report looked.<br />
Now you can make changes on the fly and see them take effect immediately.<br />
Where <strong>to</strong> Find This Feature<br />
When you are looking at a grouped report in List View or Table View, you’ll notice the<br />
feature when you edit fields.<br />
Script Triggers<br />
Summary<br />
Now you can specify that a <strong>FileMaker</strong> Script (akin <strong>to</strong> a spreadsheet macro) should run<br />
whenever users take a specified action in Browse Mode or Find Mode, such as clicking in a<br />
field or exiting a viewing mode. <strong>FileMaker</strong> <strong>Pro</strong> comes with five object-based Script Triggers<br />
and seven layout-based Script Triggers.<br />
Object-based Script Triggers Layout-based Script Triggers<br />
Click in a field<br />
Click out of a field<br />
Modify a field value<br />
Save a field value<br />
Press one or more specified keys<br />
Load a record<br />
Commit a record<br />
Revert <strong>to</strong> the previous record<br />
Press one or more specified keys, not in an<br />
object<br />
Load a layout<br />
Enter a new mode<br />
Exit a mode<br />
Script Triggers are especially powerful for grouped reports. In the past, users had <strong>to</strong> go <strong>to</strong><br />
Preview mode, and then click a but<strong>to</strong>n or choose a menu command <strong>to</strong> see the report. Now,<br />
with Format > Set Script Triggers, you can specify that the report will be regenerated<br />
whenever the user changes data in a particular field. They were going <strong>to</strong> do this anyway, so<br />
both the developer and user save time.<br />
What’s Changed<br />
With previous versions, developers had <strong>to</strong> do a lot of work <strong>to</strong> set up triggers, such as<br />
adding but<strong>to</strong>ns and text <strong>to</strong> make them noticeable. There was always a chance the<br />
user wouldn’t take the hoped-for action. Now you can trigger scripts from actions that<br />
users would take anyway, such as clicking in fields or changing viewing modes.<br />
Let’s say you develop a database with a Find function. You can add a Script Trigger<br />
<strong>to</strong> perform the find whenever the user enters the information (OnObjectSave). There’s<br />
no need <strong>to</strong> add a Find but<strong>to</strong>n or Find command.<br />
12
Where <strong>to</strong> Find:<br />
To set Layout object triggers, go <strong>to</strong> Layout mode, select the object, then choose Format >Set<br />
Script Trigger.<br />
To set Layout-level triggers, go <strong>to</strong> Layout mode and then choose Layouts > Layout Setup and<br />
select the Script Triggers tab.<br />
13
Send Mail via SMTP<br />
Summary<br />
If you have a database containing email addresses, you can now save time by sending email<br />
directly from <strong>FileMaker</strong> <strong>Pro</strong> instead of having <strong>to</strong> open your email client. This is convenient<br />
whether you’re sending a single email from a current record, such as when a cus<strong>to</strong>mer<br />
requested a follow up, or you’re sending one email for each record in a found set, such as<br />
when you’re announcing an event. For example, say you use <strong>FileMaker</strong> <strong>Pro</strong> as the back-end<br />
database for a commercial website where cus<strong>to</strong>mers place orders. You can create a script <strong>to</strong><br />
check for new orders every 30 minutes and send confirmation emails.<br />
What’s Changed<br />
Before, emails were pushed in<strong>to</strong> your email outbox one by one, which could take a<br />
long time for big distribution lists. Now email is sent directly <strong>to</strong> your email server,<br />
bypassing your email client. In fact, you don’t even need an email client <strong>to</strong> send email<br />
from <strong>FileMaker</strong> <strong>Pro</strong>!<br />
<strong>FileMaker</strong> <strong>Pro</strong> <strong>10</strong> also makes it easier <strong>to</strong> au<strong>to</strong>mate email distribution <strong>to</strong> your contacts<br />
and cus<strong>to</strong>mers. Say you want <strong>to</strong> find records that meet your criteria and then send<br />
emails <strong>to</strong> those contacts at midnight. Before, you would need <strong>to</strong> know how <strong>to</strong> use<br />
AppleScript or ActiveX. Now you can just write a script in <strong>FileMaker</strong> <strong>Pro</strong> <strong>to</strong> find the<br />
records that meet your criteria, and then send the email using the new SMTP email<br />
option.<br />
Where <strong>to</strong> Find<br />
File > Send Mail<br />
14
Modify Table View on the fly<br />
Summary<br />
Now you can modify Table View on the fly by deleting fields, without switching <strong>to</strong> Layout<br />
View. In Table View, just click the Modify but<strong>to</strong>n at the upper right of the screen <strong>to</strong> see a list<br />
of fields, and then deselect the fields you don’t want in your layout. The modifications do not<br />
appear in Form View, which means a user can’t accidentally make unwanted changes <strong>to</strong> a<br />
layout.<br />
What’s Changed<br />
Previously, if you wanted <strong>to</strong> change a field name or whether it appeared, you had <strong>to</strong><br />
switch <strong>to</strong> Layout View and then come back <strong>to</strong> Table View. And you needed edit<br />
privileges <strong>to</strong> do this. Now you can just click the Modify but<strong>to</strong>n and add or delete fields<br />
until the report looks just right for your purposes. It’s a much friendlier approach for<br />
new users.<br />
Where <strong>to</strong> Find<br />
In Table View, click the Modify but<strong>to</strong>n in the upper right corner of the window.<br />
More great features<br />
• Support for additional External SQL Sources (ESS): Now you can display, access,<br />
and use data from even more SQL sources, including SQL tables in Microsoft SQL<br />
Server 2008, Oracle 11g, and MySQL 5.1 Community Edition. Define value lists<br />
using fields in ODBC data source tables. Use Windows authentication (single sign-on)<br />
<strong>to</strong> access ODBC data from Microsoft SQL Server. And accurately access SQLsupported<br />
timestamp data from ODBC data sources.<br />
• File recovery enhancements: Perform a consistency check on files you suspect might<br />
be damaged, select specific file components <strong>to</strong> be recovered, and view information<br />
about the file’s status. View a detailed file recovery log both during and after the file<br />
recovery process.<br />
• Windows platform deployment enhancements for SMS (Software Management<br />
Services): Now you can remotely deploy <strong>FileMaker</strong> <strong>Pro</strong> <strong>to</strong> multiple users’ desk<strong>to</strong>ps<br />
rather than installing it on each user’s workstation individually.<br />
• Set field by name: Use a calculation <strong>to</strong> dynamically specify a field name in a script<br />
instead of specifying each possible field name in an if-else construction.<br />
15
• IPv6 support: Most <strong>FileMaker</strong> dialog boxes that ask for IPv4 addresses now also<br />
support IPv6 addresses as well. IPv6 is the "next generation" pro<strong>to</strong>col designed by the<br />
<strong>to</strong> replace the current version Internet <strong>Pro</strong><strong>to</strong>col, IP Version 4 ("IPv4").<br />
Part 2: Hands-on exercises<br />
Exercise 1: Create a new <strong>FileMaker</strong> <strong>Pro</strong> database from a Ben<strong>to</strong> 2 or<br />
Excel file<br />
What you’ll do:<br />
• Create a new <strong>FileMaker</strong> <strong>Pro</strong> database from an existing Ben<strong>to</strong> 2 source or Excel file (.xls or<br />
.xlsx).<br />
• Cus<strong>to</strong>mize the Status Toolbar by adding an icon <strong>to</strong> create a new layout.<br />
• Apply a new visual theme <strong>to</strong> your new database.<br />
• View your data in Form, List, and Table View.<br />
What you’ll need: For this exercise you’ll need an existing Ben<strong>to</strong> library or an Excel<br />
spreadsheet (either .xls or .xlsx) containing contacts. If you don’t already have contacts from<br />
three different states, each with three different companies and three different job titles, go<br />
ahead and add a few records <strong>to</strong> use for this exercise.<br />
1. Start <strong>FileMaker</strong> <strong>Pro</strong> and select the Create Database icon at the left of the Quick<br />
Start screen.<br />
2. Select the but<strong>to</strong>n for “Create a database from an existing:” and choose one of the<br />
following:<br />
• Ben<strong>to</strong> Source<br />
• Excel workbook (.xlsx)<br />
16
• Excel 95-2004 workbook (.xls)<br />
Click OK.<br />
Continue with Step 3 if you are starting with a Ben<strong>to</strong> file. If you are starting with an<br />
Excel file, skip <strong>to</strong> Step 4.<br />
3. Ben<strong>to</strong> found all your libraries and collections without your having <strong>to</strong> specify their<br />
location. Select a Ben<strong>to</strong> Library from the list at the left of the dialog. (If you are<br />
starting with an Excel file, not a Ben<strong>to</strong> 2 file, skip <strong>to</strong> step 4.)<br />
• At the left of the dialog, select either Address Book or Contacts.<br />
• At the right of window, select the Entire Library or one of your collections. Make<br />
sure the Library or Collection contains contacts from three or more states and three<br />
or more companies.<br />
• Click Continue.<br />
• Now go <strong>to</strong> Step 5.<br />
4. If you are starting with an Excel file, select your Excel Contacts file and click Open.<br />
17
• In the First Row Option dialog, indicate whether the first row of your spreadsheet<br />
contains field names or data, and then click OK.<br />
The remaining steps in this exercise are the same whether you started with a Ben<strong>to</strong> 2 or<br />
Excel file.<br />
5. When prompted, name your new <strong>FileMaker</strong> <strong>Pro</strong> file and click Save.<br />
6. Admire your new <strong>FileMaker</strong> <strong>Pro</strong> <strong>10</strong> database, which <strong>to</strong>ok advantage of the work you<br />
already did when you created your Excel or Ben<strong>to</strong> 2 file!<br />
You’ve saved yourself all the trouble of creating a new schema.<br />
18
Choose<br />
your<br />
layout from<br />
this menu.<br />
7. See how easy it is <strong>to</strong> switch between Layouts<br />
• Right now you’re in Layout #2, Table View. You can click any column heading <strong>to</strong><br />
sort based on the values in that field.<br />
• Choose Layout #1 <strong>to</strong> see your records in Form View. You saved time by not<br />
having <strong>to</strong> first go <strong>to</strong> the View menu and then choose Go <strong>to</strong> Layout, which had<br />
been necessary in previous versions of <strong>FileMaker</strong> <strong>Pro</strong>. You can also click <strong>to</strong><br />
choose the view you want by clicking on the new View icons on the <strong>to</strong>olbar.<br />
19
8. Experience how easy it is <strong>to</strong> cus<strong>to</strong>mize the Status Toolbar.<br />
You can add your frequently used <strong>FileMaker</strong> operations <strong>to</strong> the <strong>to</strong>olbar so that you<br />
don’t have <strong>to</strong> take the time <strong>to</strong> choose them from menus. To try it out, add an icon <strong>to</strong><br />
create a new layout.<br />
• Choose View > Cus<strong>to</strong>mize Status Toolbar.<br />
• Drag the New Layout/Report icon next <strong>to</strong> the Sort icon in the Status Toolbar area.<br />
Add other icons, <strong>to</strong>o, if you’d like.<br />
• Click Done.<br />
• The interface will look different depending on whether you’re using a Mac or PC,<br />
as shown below.<br />
20
9. Since you now have the New Layout/Report icon right in front of you, go ahead and<br />
try it out.<br />
• Click the New Layout/Report icon. You’ll see the New Layout Report dialog.<br />
• In the Layout Name field, enter a name like “Contacts.” Keep the default<br />
“Standard Form” for the layout type, and click Next.<br />
• Select each field you want <strong>to</strong> appear on the layout and then click Move. To<br />
complete the remaining exercises you’ll want at least the First Name, Last Name,<br />
Company, Title, and State fields.<br />
• Click Next.<br />
21
<strong>10</strong>. Now choose one of the <strong>10</strong> new visual themes added in <strong>FileMaker</strong> <strong>10</strong>.<br />
• Select any theme <strong>to</strong> see a preview.<br />
• When you find one you like, click Finish.<br />
• Click the Exit Layout but<strong>to</strong>n in the upper right of the window.<br />
11. Now check out how easy it is <strong>to</strong> look at your data in Form, List, and Table Views.<br />
• After the last step you should be in Form View.<br />
• Click the forward and back arrows at the <strong>to</strong>p left <strong>to</strong> navigate between records.<br />
22
• Click the middle of the three View As icons <strong>to</strong> see your database in List View. Use<br />
the scroll bar at the right <strong>to</strong> scroll through all of your records. Or use the<br />
navigation controls at the <strong>to</strong>p <strong>to</strong> navigate one record at a time.<br />
• Click the rightmost View As icon <strong>to</strong> see your records in Table View.<br />
You’ve now completed Exercise 1, <strong>to</strong> create a new <strong>FileMaker</strong> <strong>Pro</strong> database from an existing<br />
Excel or Ben<strong>to</strong> source.<br />
23
Exercise 2: Find records and save your Find <strong>to</strong> re-use later<br />
What You’ll Do:<br />
• Enter search criteria and view the found records.<br />
• Also view the records omitted from the search, in one click!<br />
• Save and name the Find.<br />
• Perform the Find from Browse mode, without even taking the time <strong>to</strong> switch <strong>to</strong> Find mode.<br />
1. Open the same database you created in Exercise 1.<br />
2. From any view, click the Find icon in the Status Toolbar.<br />
A magnifying glass appears in every field.<br />
3. Enter the data you want <strong>to</strong> match in one or more fields. How about entering a State<br />
or Company name that you know is in your database. Then click Perform Find on<br />
the Status Toolbar.<br />
• Look at the records that match your criteria. You can switch between Form View,<br />
Table View, and List View.<br />
• Notice the pie chart in the upper left of the window, which shows how many<br />
records your search found out of all records.<br />
• Now click the Pie Chart icon <strong>to</strong> see all the records omitted from the search, a<br />
useful feature. If you searched for all records in California, clicking the Pie Chart<br />
will show you all the records outside of California.<br />
24
• Click the Pie Chart icon again <strong>to</strong> return <strong>to</strong> the found set of records.<br />
4. Save your search.<br />
• Return <strong>to</strong> Find mode by clicking the Find icon in the Status Toolbar.<br />
• Click the Saved Finds icon in the <strong>to</strong>p right corner of<br />
the Status Toolbar and take a look at the menu that<br />
appears:<br />
• Select one of the Recent Finds that you entered during this exercise.<br />
• Click the Saved Finds icon again.<br />
• Choose Save Current Find.<br />
• Enter a name for the Find in the dialog box that appears and click Save.<br />
5. Try out your new saved Find.<br />
• Click the Cancel Find icon on the Status Toolbar <strong>to</strong> return <strong>to</strong> Browse mode.<br />
• Hold down the mouse on the Find icon <strong>to</strong> see the Saved Finds menu.<br />
25
• Choose your Saved Find from the menu <strong>to</strong> see the records right away, without<br />
having <strong>to</strong> go <strong>to</strong> Find mode first.<br />
You’ve now completed Exercise 2, saving Finds and reusing them with a simple menu<br />
command.<br />
Exercise 3: Create a dynamic report with subgroups<br />
What you’ll do:<br />
• Create a grouped report.<br />
• Organize your contacts by State and Company.<br />
• Add a Summary field <strong>to</strong> the report <strong>to</strong> show the number of records for each State.<br />
• Add headers and footers<br />
• Create a script for the report, in just one click!<br />
1. Create a grouped report<br />
• From Browse mode, click the New Layout/<br />
Report icon at the <strong>to</strong>p right of the Status Toolbar.<br />
You added this icon <strong>to</strong> the <strong>to</strong>olbar in Exercise 1.<br />
• Name your report “Contacts by State.”<br />
• Select the List/Report layout type and click Next.<br />
26
• For the report layout type, select “Report with grouped data” and select the<br />
checkbox <strong>to</strong> include sub<strong>to</strong>tals. Click Next.<br />
The icon shows<br />
the groupings on<br />
your report<br />
• Select the fields you want <strong>to</strong> appear in your new report and click Move. For this<br />
exercise, you can just click Move All. Click Next.<br />
27
3. Now indicate how you want <strong>to</strong> group your records.<br />
For this exercise, group your records by State.<br />
• Select State and click Move.<br />
• Click Next.<br />
Preview of<br />
report<br />
groupings<br />
• You could s<strong>to</strong>p with grouping records by State, but <strong>to</strong> show the power of this<br />
feature, let’s also create Title subgroups within each State. This would be helpful<br />
if you wanted <strong>to</strong> mail a product or service offer <strong>to</strong> all engineers in the northwest,<br />
for example.<br />
• Select Title and click Move.<br />
28
• Click Next again. You’ll see the following dialog.<br />
29
4. Now create a Summary field that will show sub<strong>to</strong>tals for each State.<br />
• Click the Specify but<strong>to</strong>n at the <strong>to</strong>p left of the dialog box <strong>to</strong> call up the Specify<br />
Field dialog:<br />
• If you already had a State Summary field in your database you could just select it<br />
from the list. But since it’s not in your database, you can conveniently create it<br />
now.<br />
• Select the pop-up menu at the <strong>to</strong>p of the Specify Field dialog box and choose<br />
Manage Database.<br />
• Type “State Summary” in the Field Name field near the bot<strong>to</strong>m.<br />
30
• Choose Summary from the “Type” menu at the bot<strong>to</strong>m right, and then click the<br />
Create but<strong>to</strong>n at the bot<strong>to</strong>m left. You’ll see a dialog box where you can select<br />
summary field options:<br />
• Select the “Count of” but<strong>to</strong>n and choose State in the Available Fields list. Keep the<br />
other options as they are and click OK. You’ll see the Manage Database dialog<br />
again, this time showing your new “State Summary” field.<br />
• Click OK. You’ll see the Specify Field dialog.<br />
• Select the new Contacts by State field and click OK.<br />
• Click OK again and you’ll see the Specify Sub<strong>to</strong>tals dialog.<br />
31
5. Now specify where the new State Summary field will appear on your report.<br />
• Select the State Summary field you just created and click OK. You’ll see the<br />
Specify Sub<strong>to</strong>tals dialog again.<br />
• From the “Sub<strong>to</strong>tal placement” pop-up, choose “Above record group.”<br />
• Click the Add Sub<strong>to</strong>tal but<strong>to</strong>n.<br />
• Click Next.<br />
6. Select a visual theme for your report and click Next.<br />
7. Add headers.<br />
Here we’ve chosen Large Cus<strong>to</strong>m Text for the <strong>to</strong>p left header. Type the header name,<br />
such as Contacts by State. Click OK.<br />
8. Create a script for the report—in just one click!<br />
32
The script name will already be suggested (Contacts by State). Select the Create a<br />
Script but<strong>to</strong>n and click Next. You’ll use the script in the next exercise..<br />
9. You’re finished!<br />
• Click Finish <strong>to</strong> view your new grouped report in Browse mode.<br />
33
<strong>10</strong>. Admire your report, with contacts grouped by State and Company. The number of<br />
records appears at the <strong>to</strong>p right of each category, as you specified.<br />
State<br />
groupings<br />
11. Add, edit, and delete records without even leaving Browse mode.<br />
Why it’s Important<br />
<strong>FileMaker</strong> <strong>10</strong> is the first version with Dynamic Reports. You no longer need <strong>to</strong> switch<br />
<strong>to</strong> Find Mode <strong>to</strong> locate the records for the data you want <strong>to</strong> change and then re-run<br />
the report. Instead, you can make changes right from Browse mode and see them<br />
take effect instantly. This is a big time-saver and makes <strong>FileMaker</strong> easier <strong>to</strong> learn.<br />
• Change the State for one of your contacts and then click outside of the field.<br />
You’ll see the record au<strong>to</strong>matically move <strong>to</strong> the appropriate place in the report.<br />
• Change the State back <strong>to</strong> the original name and see it move again.<br />
• Try the same thing with Company names.<br />
You’ve now completed Exercise 3 <strong>to</strong> create a Dynamic Report with subgroups. Instead of<br />
going <strong>to</strong> Find mode <strong>to</strong> change a record, you can make changes on the fly and see them take<br />
effect immediately.<br />
Count for each<br />
grouping<br />
34
Exercise 4: Add Script Triggers based on user actions<br />
What you’ll do:<br />
• Add a script <strong>to</strong> check spelling.<br />
• Set it up so that saving a record triggers the check-spelling script.<br />
• Set it up so that loading a layout triggers the Dynamic Report you just created.<br />
1. Create a script <strong>to</strong> check spelling.<br />
• Open the database you’ve been working with in the previous exercises.<br />
• Choose Scripts > Manage Scripts. You’ll see the name of the script you set up in<br />
the last exercise when you created the Contacts by State report.<br />
• To create a new script, click the New but<strong>to</strong>n at the bot<strong>to</strong>m left of the dialog.<br />
35
• Choose a script from the list at the left of the dialog. For this exercise, scroll way<br />
down <strong>to</strong> the Spelling section, select “Check Selection,” and click Move.<br />
• Name your script something like “Check Spelling” in the Script Name field.<br />
• To specify the field whose spelling you want <strong>to</strong> check, click the Specify but<strong>to</strong>n at<br />
the right side of the dialog. You’ll see a list of fields in your Contacts database.<br />
• Select the Title field and click OK.<br />
• With the Edit Script dialog still open, choose Scripts > Save Script.<br />
Close the Edit Script dialog.<br />
2. See the names of your two scripts—Contacts by State and Check Spelling—and then<br />
close the dialog.<br />
3. Now specify the Script Triggers, which are the actions that will trigger your scripts.<br />
• First specify the trigger for the Spell Check script. From your Contacts by State<br />
layout in List View, click the Edit Layout but<strong>to</strong>n on the far right of the Status<br />
Toolbar.<br />
• Select the Title field.<br />
36
• Choose Format > Set Script Triggers.<br />
• Select the OnObjectSave checkbox. The Specify Script dialog box appears:<br />
37
• Select the Check Spelling script and click OK. The Set Script Triggers dialog<br />
appears. Click OK.<br />
• You have just attached the Script Trigger <strong>to</strong> the Title field.<br />
• Click the Exit Layout but<strong>to</strong>n at the <strong>to</strong>p right of the Layout Status Toolbar.<br />
• When prompted <strong>to</strong> save changes <strong>to</strong> the layout, click Save.<br />
4. Try out the spelling Script Trigger.<br />
• In the Title field, edit somebody’s title so that it’s misspelled. In the screen shot<br />
below we have typed “Techh Support.”<br />
• Now trigger the script by clicking somewhere else on the layout.<br />
• You’ll see the Spelling dialog box.<br />
38
You have just created a script, attached it <strong>to</strong> a trigger, and tried it out. You can end this<br />
exercise here, or you can continue on <strong>to</strong> attach a trigger <strong>to</strong> the Contacts by State script.<br />
5. First take a look at how your application behaves without the Script Trigger.<br />
• From the same Contacts by State layout you’ve been<br />
working with, go <strong>to</strong> Find mode.<br />
• Navigate away from your Reports Layout. Here’s one way: Search for all titles in<br />
your contacts by typing an asterisk (*) in the Title field and then clicking the<br />
Perform Find icon in the Status Toolbar.<br />
• You’ll see that your Contacts by State report no longer appears.<br />
39
6. Now set up a Script Trigger <strong>to</strong> display your Contacts by State report every time you<br />
load the Contacts by State layout.<br />
• Click the Edit Layout but<strong>to</strong>n at the far right of the Status Toolbar.<br />
• Click the Pencil icon at the left of the Status Toolbar, just next <strong>to</strong> the Layout popup<br />
list. You’ll see the Layout Setup dialog.<br />
• In the Layout Setup dialog box, select the Script Triggers tab and select<br />
OnLayoutLoad.<br />
• When the Specify Script dialog appears, select the Contacts by State script and<br />
click OK.<br />
• Click OK again on the Script Trigger Layout Setup dialog.<br />
• Click the Exit Layout but<strong>to</strong>n at the <strong>to</strong>p right portion of the Layout Status Toolbar.<br />
When prompted <strong>to</strong> save changes <strong>to</strong> the layout, click Save.<br />
• Your Contacts by State layout will appear au<strong>to</strong>matically because reloading the<br />
layout triggered the script <strong>to</strong> display your grouped report.<br />
40
7. Put your new Script Trigger <strong>to</strong> the test! Whenever you navigate away from your<br />
Contacts by State Layout and back, your grouped report will always reappear.<br />
• Choose another layout from the Layout pop-up menu. Then choose Contacts by<br />
State again.<br />
• Try it a different way. Click the Find icon in the Status Toolbar and find all<br />
records (by entering * in one of the fields) or a subset of records, such as those<br />
from a particular state. Whatever you do, your contacts will continue <strong>to</strong> appear in<br />
groups by state because loading a new layout triggers the script.<br />
You’ve now completed the final exercise. Adding Script Triggers based on user actions gives<br />
developers more control over how their applications behave and helps people save time when<br />
using <strong>FileMaker</strong> <strong>Pro</strong> <strong>10</strong>. This concludes the hand-on exercises.<br />
41