MAX S92+ HDMI_EN_v1.0.indd - FTE Maximal
MAX S92+ HDMI_EN_v1.0.indd - FTE Maximal
MAX S92+ HDMI_EN_v1.0.indd - FTE Maximal

Create successful ePaper yourself
Turn your PDF publications into a flip-book with our unique Google optimized e-Paper software.
ev 1.0<br />
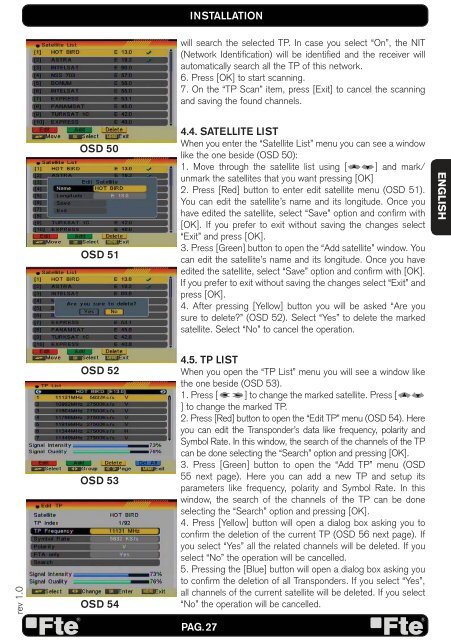
OSD 50<br />
OSD 51<br />
OSD 52<br />
OSD 53<br />
OSD 54<br />
INSTALLATION<br />
will search the selected TP. In case you select “On”, the NIT<br />
(Network Identifi cation) will be identifi ed and the receiver will<br />
automatically search all the TP of this network.<br />
6. Press [OK] to start scanning.<br />
7. On the “TP Scan” item, press [Exit] to cancel the scanning<br />
and saving the found channels.<br />
4.4. SATELLITE LIST<br />
When you enter the “Satellite List” menu you can see a window<br />
like the one beside (OSD 50):<br />
1. Move through the satellite list using [ ] and mark/<br />
unmark the satellites that you want pressing [OK]<br />
2. Press [Red] button to enter edit satellite menu (OSD 51).<br />
You can edit the satellite’s name and its longitude. Once you<br />
have edited the satellite, select “Save” option and confi rm with<br />
[OK]. If you prefer to exit without saving the changes select<br />
“Exit” and press [OK].<br />
3. Press [Green] button to open the “Add satellite” window. You<br />
can edit the satellite’s name and its longitude. Once you have<br />
edited the satellite, select “Save” option and confi rm with [OK].<br />
If you prefer to exit without saving the changes select “Exit” and<br />
press [OK].<br />
4. After pressing [Yellow] button you will be asked “Are you<br />
sure to delete?” (OSD 52). Select “Yes” to delete the marked<br />
satellite. Select “No” to cancel the operation.<br />
4.5. TP LIST<br />
When you open the “TP List” menu you will see a window like<br />
the one beside (OSD 53).<br />
1. Press [ ] to change the marked satellite. Press [<br />
] to change the marked TP.<br />
2. Press [Red] button to open the “Edit TP” menu (OSD 54). Here<br />
you can edit the Transponder’s data like frequency, polarity and<br />
Symbol Rate. In this window, the search of the channels of the TP<br />
can be done selecting the “Search” option and pressing [OK].<br />
3. Press [Green] button to open the “Add TP” menu (OSD<br />
55 next page). Here you can add a new TP and setup its<br />
parameters like frequency, polarity and Symbol Rate. In this<br />
window, the search of the channels of the TP can be done<br />
selecting the “Search” option and pressing [OK].<br />
4. Press [Yellow] button will open a dialog box asking you to<br />
confi rm the deletion of the current TP (OSD 56 next page). If<br />
you select “Yes” all the related channels will be deleted. If you<br />
select “No” the operation will be cancelled.<br />
5. Pressing the [Blue] button will open a dialog box asking you<br />
to confi rm the deletion of all Transponders. If you select “Yes”,<br />
all channels of the current satellite will be deleted. If you select<br />
“No” the operation will be cancelled.<br />
PAG. 27<br />
<strong>EN</strong>GLISH