LASS user manual - audio concepts
LASS user manual - audio concepts
LASS user manual - audio concepts

Create successful ePaper yourself
Turn your PDF publications into a flip-book with our unique Google optimized e-Paper software.
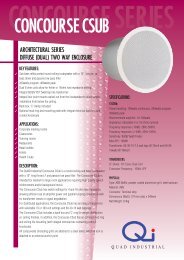
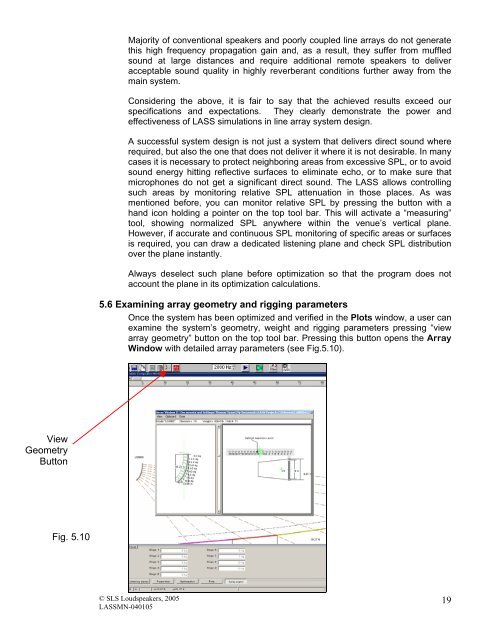
View<br />
Geometry<br />
Button<br />
Fig. 5.10<br />
Majority of conventional speakers and poorly coupled line arrays do not generate<br />
this high frequency propagation gain and, as a result, they suffer from muffled<br />
sound at large distances and require additional remote speakers to deliver<br />
acceptable sound quality in highly reverberant conditions further away from the<br />
main system.<br />
Considering the above, it is fair to say that the achieved results exceed our<br />
specifications and expectations. They clearly demonstrate the power and<br />
effectiveness of <strong>LASS</strong> simulations in line array system design.<br />
A successful system design is not just a system that delivers direct sound where<br />
required, but also the one that does not deliver it where it is not desirable. In many<br />
cases it is necessary to protect neighboring areas from excessive SPL, or to avoid<br />
sound energy hitting reflective surfaces to eliminate echo, or to make sure that<br />
microphones do not get a significant direct sound. The <strong>LASS</strong> allows controlling<br />
such areas by monitoring relative SPL attenuation in those places. As was<br />
mentioned before, you can monitor relative SPL by pressing the button with a<br />
hand icon holding a pointer on the top tool bar. This will activate a “measuring”<br />
tool, showing normalized SPL anywhere within the venue’s vertical plane.<br />
However, if accurate and continuous SPL monitoring of specific areas or surfaces<br />
is required, you can draw a dedicated listening plane and check SPL distribution<br />
over the plane instantly.<br />
Always deselect such plane before optimization so that the program does not<br />
account the plane in its optimization calculations.<br />
5.6 Examining array geometry and rigging parameters<br />
Once the system has been optimized and verified in the Plots window, a <strong>user</strong> can<br />
examine the system’s geometry, weight and rigging parameters pressing “view<br />
array geometry” button on the top tool bar. Pressing this button opens the Array<br />
Window with detailed array parameters (see Fig.5.10).<br />
© SLS Loudspeakers, 2005<br />
<strong>LASS</strong>MN-040105<br />
19