HR6 Series.pdf - Genius
HR6 Series.pdf - Genius
HR6 Series.pdf - Genius

You also want an ePaper? Increase the reach of your titles
YUMPU automatically turns print PDFs into web optimized ePapers that Google loves.
Service<br />
Guide<br />
ColorPage-<strong>HR6</strong>/<strong>HR6</strong> V2/<strong>HR6</strong>X series<br />
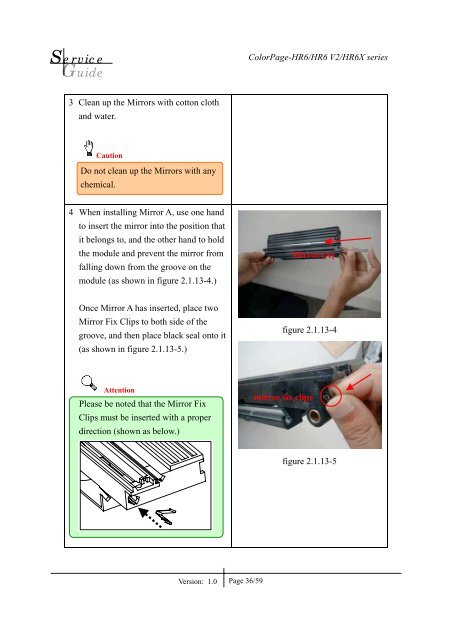
3 Clean up the Mirrors with cotton cloth<br />
and water.<br />
Caution<br />
Do not clean up the Mirrors with any<br />
chemical.<br />
4 When installing Mirror A, use one hand<br />
to insert the mirror into the position that<br />
it belongs to, and the other hand to hold<br />
the module and prevent the mirror from<br />
falling down from the groove on the<br />
module (as shown in figure 2.1.13-4.)<br />
Mirror [A]<br />
Once Mirror A has inserted, place two<br />
Mirror Fix Clips to both side of the<br />
groove, and then place black seal onto it<br />
(as shown in figure 2.1.13-5.)<br />
figure 2.1.13-4<br />
Attention<br />
Please be noted that the Mirror Fix<br />
Clips must be inserted with a proper<br />
direction (shown as below.)<br />
mirror fix clips<br />
figure 2.1.13-5<br />
Version: 1.0<br />
Page 36/59