
Create successful ePaper yourself
Turn your PDF publications into a flip-book with our unique Google optimized e-Paper software.
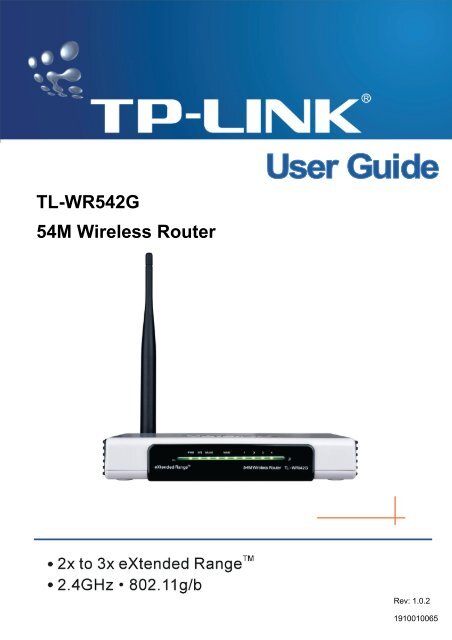
<strong>TL</strong>-<strong>WR542G</strong><br />
54M Wireless Router<br />
Rev: 1.0.2<br />
1910010065
COPYRIGHT & TRADEMARKS<br />
Specifications are subject to change without notice.<br />
is a registered<br />
trademark of <strong>TP</strong>-LINK TECHNOLOGIES CO., LTD. Other brands and product names are<br />
trademarks or registered trademarks of their respective holders.<br />
No part of the specifications may be reproduced in any form or by any means or used to<br />
make any derivative such as translation, transformation, or adaptation without permission<br />
from <strong>TP</strong>-LINK TECHNOLOGIES CO., LTD. Copyright © 2008 <strong>TP</strong>-LINK TECHNOLOGIES<br />
CO., LTD. All rights reserved.
FCC STATEMENT<br />
This equipment has been tested and found to comply with the limits for a Class B digital<br />
device, pursuant to part 15 of the FCC Rules. These limits are designed to provide<br />
reasonable protection against harmful interference in a residential installation. This<br />
equipment generates, uses and can radiate radio frequency energy and, if not installed<br />
and used in accordance with the instructions, may cause harmful interference to radio<br />
communications. However, there is no guarantee that interference will not occur in a<br />
particular installation. If this equipment does cause harmful interference to radio or<br />
television reception, which can be determined by turning the equipment off and on, the<br />
user is encouraged to try to correct the interference by one or more of the following<br />
measures:<br />
• Reorient or relocate the receiving antenna.<br />
• Increase the separation between the equipment and receiver.<br />
• Connect the equipment into an outlet on a circuit different from that to which the<br />
receiver is connected.<br />
• Consult the dealer or an experienced radio/ TV technician for help.<br />
This device complies with part 15 of the FCC Rules. Operation is subject to the following<br />
two conditions:<br />
1) This device may not cause harmful interference.<br />
1) This device must accept any interference received, including interference that may<br />
cause undesired operation.<br />
FCC RF Radiation Exposure Statement<br />
This equipment complies with FCC RF radiation exposure limits set forth for an<br />
uncontrolled environment. This device and its antenna must not be co-located or<br />
operating in conjunction with any other antenna or transmitter.<br />
“To comply with FCC RF exposure compliance requirements, this grant is applicable to<br />
only Mobile Configurations. The antennas used for this transmitter must be installed to<br />
provide a separation distance of at least 20 cm from all persons and must not be
co-located or operating in conjunction with any other antenna or transmitter.”<br />
CE Mark Warning<br />
This is a class B product. In a domestic environment, this product may cause radio<br />
interference, in which case the user may be required to take adequate measures.
National Restrictions<br />
2400.0-2483.5 MHz<br />
Country Restriction Reason/remark<br />
Bulgaria<br />
France<br />
Italy<br />
Outdoor use limited to<br />
10 mW e.i.r.p. within<br />
the band 2454-2483.5<br />
MHz<br />
General authorization required for outdoor<br />
use and public service<br />
Military Radiolocation use. Refarming of<br />
the 2.4 GHz band has been ongoing in<br />
recent years to allow current relaxed<br />
regulation. Full implementation planned<br />
2012<br />
If used outside of own premises, general<br />
authorization is required<br />
Luxembourg None General authorization required for network<br />
and service supply(not for spectrum)<br />
Norway Implemented This subsection does not apply for the<br />
geographical area within a radius of 20 km<br />
from the centre of Ny-Ålesund<br />
Russian<br />
Federation<br />
Only for indoor applications<br />
Note:It’s not used outdoors in France.
Package Contents<br />
The following contents should be found in your box:<br />
‣ One <strong>TL</strong>-<strong>WR542G</strong> 54Mbps Wireless Router<br />
‣ One AC power Adapter for <strong>TL</strong>-<strong>WR542G</strong> 54Mbps Wireless Router<br />
‣ Quick Installation <strong>Guide</strong><br />
‣ One Resource CD for <strong>TL</strong>-<strong>WR542G</strong> 54Mbps Wireless Router, including:<br />
• This <strong>Guide</strong><br />
• Other Helpful Information<br />
Note:<br />
Make sure that the package contains the above items. If any of the listed items are<br />
damaged or missing, please contact with your distributor.<br />
Conventions<br />
The router or <strong>TL</strong>-<strong>WR542G</strong> mentioned in this guide stands for <strong>TL</strong>-<strong>WR542G</strong> 54Mbps<br />
Wireless Router without any explanation.
CONTENTS<br />
Chapter 1. Introduction..............................................................................1<br />
1.1 Overview of the Router.................................................................................... 1<br />
1.2 Features .......................................................................................................... 1<br />
1.3 Panel Layout ................................................................................................... 2<br />
1.3.1 The Front Panel ....................................................................................... 2<br />
1.3.2 The Rear Panel........................................................................................ 3<br />
Chapter 2. Connecting the Router ............................................................5<br />
2.1 System Requirements ..................................................................................... 5<br />
2.2 Installation Environment Requirements........................................................... 5<br />
2.3 Connecting the Router .................................................................................... 5<br />
Chapter 3. Quick Installation <strong>Guide</strong>..........................................................7<br />
3.1 TCP/IP configuration ....................................................................................... 7<br />
3.2 Quick Installation <strong>Guide</strong> .................................................................................. 9<br />
Chapter 4. Configuring the Router..........................................................12<br />
4.1 Login ............................................................................................................. 12<br />
4.2 Status............................................................................................................ 13<br />
4.3 Quick Setup................................................................................................... 14<br />
4.4 Network ......................................................................................................... 15<br />
4.4.1 LAN ........................................................................................................ 15<br />
4.4.2 WAN....................................................................................................... 15<br />
4.4.3 MAC Clone............................................................................................. 27<br />
4.5 Wireless ........................................................................................................ 28<br />
4.5.1 Wireless Settings ................................................................................... 28<br />
4.5.2 MAC Filtering ......................................................................................... 33<br />
4.5.3 Wireless Statistics .................................................................................. 36<br />
4.6 DHCP ............................................................................................................ 37<br />
4.6.1 DHCP Settings....................................................................................... 37<br />
4.6.2 DHCP Clients List .................................................................................. 38<br />
4.6.3 Address Reservation.............................................................................. 39<br />
4.7 Forwarding .................................................................................................... 40<br />
4.7.1 Virtual Servers........................................................................................ 40<br />
4.7.2 Port Triggering ....................................................................................... 42<br />
4.7.3 DMZ ....................................................................................................... 44<br />
4.7.4 UPnP...................................................................................................... 45<br />
4.8 Security ......................................................................................................... 46<br />
4.8.1 Firewall................................................................................................... 46<br />
4.8.2 IP Address Filtering................................................................................ 47<br />
4.8.3 Domain Filtering..................................................................................... 50
4.8.4 MAC Filtering ......................................................................................... 51<br />
4.8.5 Remote Management............................................................................. 53<br />
4.8.6 Advanced Security ................................................................................. 54<br />
4.9 IP & MAC Binding Setting ............................................................................. 56<br />
4.9.1 Binding Setting....................................................................................... 56<br />
4.9.2 ARP List ................................................................................................. 58<br />
4.10 Static Routing................................................................................................ 59<br />
4.11 DDNS ............................................................................................................ 60<br />
4.11.1 Dyndns.org DDNS.................................................................................. 60<br />
4.11.2 Oray.net DDNS ...................................................................................... 61<br />
4.11.3 Comexe.cn DDNS.................................................................................. 61<br />
4.12 System Tools ................................................................................................ 62<br />
4.12.1 Time ....................................................................................................... 63<br />
4.12.2 Firmware ................................................................................................ 64<br />
4.12.3 Factory Defaults..................................................................................... 65<br />
4.12.4 Backup and Restore............................................................................... 65<br />
4.12.5 Reboot ................................................................................................... 66<br />
4.12.6 Password ............................................................................................... 66<br />
4.12.7 Log ......................................................................................................... 67<br />
4.12.8 Statistics................................................................................................. 68<br />
Appendix A: FAQ .........................................................................................70<br />
Appendix B: Configuring the PC ................................................................75<br />
Appendix C: Specifications ........................................................................79<br />
Appendix D: Glossary .................................................................................80
<strong>TL</strong>-<strong>WR542G</strong><br />
54Mbps Wireless Router <strong>User</strong> <strong>Guide</strong><br />
Chapter 1. Introduction<br />
Thank you for choosing <strong>TL</strong>-<strong>WR542G</strong> 54Mbps Wireless Router.<br />
1.1 Overview of the Router<br />
The <strong>TL</strong>-<strong>WR542G</strong> 54Mbps Wireless Router integrates 4-port Switch, Firewall, NAT-router and<br />
Wireless AP. Its design is dedicated to Small Office/Home Office (SOHO) wireless network solutions.<br />
The <strong>TL</strong>-<strong>WR542G</strong> 54Mbps Wireless Router will allow you to connect your network wirelessly better<br />
than ever, sharing Internet Access, files and fun, easily and securely.<br />
In the most attentive wireless security, the <strong>TL</strong>-<strong>WR542G</strong> 54Mbps Wireless Router provides<br />
multiple protection measures. It can be set to turn off wireless network name (SSID) broadcast so<br />
that only stations that have the SSID can be connected. The router provides wireless LAN<br />
64/128/152-bit WEP encryption security, and WPA/WPA2 and WPA-PSK/WPA2-PSK<br />
authentication, as well as TKIP/AES encryption security. It also supports VPN pass-through for<br />
sensitive data secure transmission.<br />
The <strong>TL</strong>-<strong>WR542G</strong> 54Mbps Wireless Router complies with the IEEE 802.11g and IEEE 802.11b<br />
standards so that the data transmission rate is up to 54Mbps. It adopts 2x to 3x eXtended Range <br />
WLAN transmission technology so that the transmission distance is 2-3 times of traditional IEEE<br />
802.11g and IEEE 802.11b solutions, up to a distance of 855.36m tested in China. The transmission<br />
range is extended to 4-9 times. It is compatible with all IEEE 802.11g and IEEE 802.11b products.<br />
The <strong>TL</strong>-<strong>WR542G</strong> 54Mbps Wireless Router provides flexible access control so that parents or network<br />
administrators can establish restricted access policies for children or staff. It has built-in NAT and<br />
DHCP server supporting static IP address distributing. It also supports Virtual Server and DMZ host<br />
for Port Triggering needs, and remote management and log so that network administrators can<br />
manage and monitor the network in real time. This device supports Bridge mode which can make<br />
two APs communicate with each other wirelessly.<br />
The <strong>TL</strong>-<strong>WR542G</strong> 54Mbps Wireless Router is easy-to-manage. Quick Setup is supported and<br />
friendly help messages are provided for every step. So you can configure it quickly and share<br />
Internet access, files and fun.<br />
1.2 Features<br />
‣ Complies with IEEE 802.11g, IEEE 802.11b, IEEE 802.3, IEEE 802.3u standards.<br />
‣ 1 10/100M Auto-Negotiation RJ45 WAN port, 4 10/100M Auto-Negotiation RJ45 LAN ports,<br />
supporting Auto MDI/MDIX.<br />
1
<strong>TL</strong>-<strong>WR542G</strong><br />
54Mbps Wireless Router <strong>User</strong> <strong>Guide</strong><br />
‣ Adopts 2x to 3x eXtended Range wireless LAN transmission technology.<br />
‣ Supports 54/48/36/24/18/12/9/6Mbps or 11/5.5/3/2/1Mbps data transfer rates.<br />
‣ Provides WPA/WPA2, WPA-PSK/WPA2-PSK authentication, TKIP/AES encryption security.<br />
‣ Shares data and Internet access for users, supporting PPPoE, Dynamic IP, Static IP, L2<strong>TP</strong>,<br />
PP<strong>TP</strong>, Big Pond Cable Internet access.<br />
‣ Supports Virtual Server, Special Application and DMZ host.<br />
‣ Supports UPnP, Dynamic DNS, Static Routing, VPN Pass-through.<br />
‣ Detachable reverse SMA connector Antenna.<br />
‣ Connecting Internet on demand and disconnecting from the Internet when idle for PPPoE.<br />
‣ Built-in NAT and DHCP server supporting static IP address distributing.<br />
‣ Built-in firewall supporting IP address filtering, Domain Name filtering, and MAC address<br />
filtering.<br />
‣ Supports connecting/disconnecting from the Internet on a specified time of day.<br />
‣ Supports access control, parents and network administrators can establish restricted access<br />
policies based on time of day for children or staff.<br />
‣ Provides 64/128/152-bit WEP encryption security and wireless LAN ACL (Access Control<br />
List).<br />
‣ Supports Flow Statistics.<br />
‣ Supports ICMP-FLOOD, UDP-FLOOD, and TCP-SYN-FLOOD filter.<br />
‣ Ignores Ping packets from WAN or LAN ports.<br />
‣ Supports firmware upgrade.<br />
‣ Supports Web management.<br />
1.3 Panel Layout<br />
1.3.1 The Front Panel<br />
The Router’s LEDs are located on the front panel (View from left to right). Table 1-1 describes the<br />
LEDs on the front panel of the router.<br />
2
<strong>TL</strong>-<strong>WR542G</strong><br />
54Mbps Wireless Router <strong>User</strong> <strong>Guide</strong><br />
Figure 1-1 Front Panel sketch<br />
Name Status Indication<br />
PWR<br />
SYS<br />
WLAN<br />
WAN,1-4<br />
Off<br />
On<br />
On<br />
Flashing<br />
Off<br />
Off<br />
Flashing<br />
Off<br />
On<br />
Flashing<br />
Power off<br />
Power on<br />
The router is initializing or maybe has a system error.<br />
The router is working properly<br />
The router has a hardware error<br />
There is no wireless device linked to the router<br />
The Wireless function is enabled<br />
There is no device linked to the corresponding port<br />
There is a device linked to the corresponding port but no<br />
activity<br />
There is an active device linked to the corresponding port<br />
Table 1-1 The LEDs description<br />
1.3.2 The Rear Panel<br />
The following parts are located on the rear panel (View from left to right).<br />
3
<strong>TL</strong>-<strong>WR542G</strong><br />
54Mbps Wireless Router <strong>User</strong> <strong>Guide</strong><br />
‣ AC power socket:<br />
‣ LAN 1,2,3,4:<br />
‣ WAN:<br />
Please use the power adapter which is supplied with the <strong>TL</strong>-<strong>WR542G</strong><br />
54Mbps Wireless Router only, the use of a different adapter may result<br />
in product damage.<br />
Four 10/100Mbps RJ45 LAN ports for connecting the router to the local<br />
PC(s)<br />
This WAN port is where you will connect the cable/DSL Modem, or<br />
Ethernet<br />
‣ Reset button:<br />
There are two ways to reset the router's factory defaults:<br />
1) Use the Factory Defaults function on System Tools -> Factory Defaults page in the<br />
router's Web-based Utility.<br />
2) Use the Factory Default Reset button: First, turn off the router's power. Second, press<br />
and hold the default reset button then turn on the router's power, until the SYS LED lights<br />
up (about 3 seconds). Last, release the reset button and wait for the router to reboot.<br />
Note: Ensure the router is powered on before it restarts completely.<br />
‣ Wireless antenna<br />
Figure 1-2 Rear Panel sketch<br />
4
<strong>TL</strong>-<strong>WR542G</strong><br />
54Mbps Wireless Router <strong>User</strong> <strong>Guide</strong><br />
Chapter 2. Connecting the Router<br />
2.1 System Requirements<br />
‣ Broadband Internet Access Service (DSL/Cable/Ethernet)<br />
‣ One DSL/Cable modem that has an RJ45 connector (you do not need it if you connect the<br />
router to the Ethernet)<br />
‣ Each PC in the LAN needs a working Ethernet Adapter and an Ethernet cable with RJ45<br />
connectors<br />
‣ TCP/IP protocol must be installed on each PC<br />
‣ Web browser, such as Microsoft Internet Explorer 5.0 or later, Netscape Navigator 6.0 or later<br />
2.2 Installation Environment Requirements<br />
‣ Do not place in direct sunlight or near a heater or heating vent<br />
‣ Do not cluttered or crowded. There should be at least 2 inches (5 cm) of clear space on all<br />
sides of the router<br />
‣ Well ventilated (especially if it is in a closet)<br />
‣ Operating temperature: 0 ℃ ~40 ℃ (32 ℉ ~104 ℉ )<br />
‣ Operating Humidity: 10%~90%RH, Non-condensing<br />
2.3 Connecting the Router<br />
Before you install the router, you should connect your PC to the Internet through your broadband<br />
service successfully. If there is any problem, please contact your ISP. After that, please install the<br />
router according to the following steps. Don't forget to pull out the power plug and keep your<br />
hands dry.<br />
1. Power off your PC, Cable/DSL Modem, and the router.<br />
2. Locate an optimum location for the router. The best place is usually near the center of the<br />
area in which your PC will connect wirelessly. The place must accord with the Installation<br />
Environment Requirements.<br />
3. Adjust the direction of the antenna. Normally, upright is a good direction.<br />
4. Connect the PC(s) and each Switch/Hub in your LAN to the LAN Ports on the router, shown<br />
5
<strong>TL</strong>-<strong>WR542G</strong><br />
54Mbps Wireless Router <strong>User</strong> <strong>Guide</strong><br />
in Figure 2-1. (If you have the wireless NIC and want to use wireless function, you can skip<br />
this step.)<br />
5. Connect the DSL/Cable Modem to the WAN port on the router, shown in Figure 2-1.<br />
6. Connect the AC power adapter to the AC power socket on the router, and the other end into<br />
an electrical outlet. The router will start to work automatically.<br />
7. Power on your PC and Cable/DSL Modem.<br />
Figure 2-1 Hardware Installation of the <strong>TL</strong>-<strong>WR542G</strong> 54Mbps Wireless Router<br />
6
<strong>TL</strong>-<strong>WR542G</strong><br />
54Mbps Wireless Router <strong>User</strong> <strong>Guide</strong><br />
Chapter 3. Quick Installation <strong>Guide</strong><br />
After connecting the <strong>TL</strong>-<strong>WR542G</strong> Router into your network, you should configure it. This chapter<br />
describes how to configure the basic functions of your <strong>TL</strong>-<strong>WR542G</strong> Wireless Router. These<br />
procedures only take you a few minutes. You can access the Internet via the router immediately<br />
after successfully configuring.<br />
3.1 TCP/IP configuration<br />
The default IP address of the <strong>TL</strong>-<strong>WR542G</strong> 54Mbps Wireless Router is 192.168.1.1. And the<br />
default Subnet Mask is 255.255.255.0. These values can be seen from the LAN. They can be<br />
changed as you desire, as an example we use the default values for description in this guide.<br />
Connect the local PC to the LAN ports of the router. There are then two ways to configure the IP<br />
address for your PC.<br />
‣ Configure the IP address manually<br />
1) Set up the TCP/IP Protocol for your PC. If you need instructions as to how to do this,<br />
please refer to Appendix B: "Configuring the PC."<br />
2) Configure the network parameters. The IP address is 192.168.1.xxx ("xxx" is from 2 to<br />
254), Subnet Mask is 255.255.255.0, and Gateway is 192.168.1.1 (The router's default<br />
IP address)<br />
‣ Obtain an IP address automatically<br />
1) Set up the TCP/IP Protocol in "Obtain an IP address automatically" mode on your PC.<br />
If you need instructions as to how to do this, please refer to Appendix B: "Configuring the<br />
PC."<br />
2) Power off the router and PC. Then turn on the router and restart the PC. The built-in<br />
DHCP server will assign IP address for the PC.<br />
Note: For Windows 98 OS or earlier, the PC and router may need to be restarted.<br />
Now, you can run the Ping command in the command prompt to verify the network connection<br />
between your PC and the router. The following example is in Windows 2000 OS.<br />
Open a command prompt, and type ping 192.168.1.1, and then press Enter.<br />
If the result displayed is similar to that shown in Figure 3-1, the connection between your PC and<br />
the router has been established.<br />
7
<strong>TL</strong>-<strong>WR542G</strong><br />
54Mbps Wireless Router <strong>User</strong> <strong>Guide</strong><br />
Figure 3-1 Success result of Ping command<br />
If the result displayed is similar to that shown in Figure 3-2, it means that your PC has not<br />
connected to the router.<br />
Figure 3-2 Failure result of Ping command<br />
Please check the connection following these steps:<br />
1. Is the connection between your PC and the router correct?<br />
Note:<br />
The 1/2/3/4 LEDs of LAN port which you link to on the router and LEDs on your PC's adapter<br />
should be lit.<br />
2. Is the TCP/IP configuration for your PC correct?<br />
8
<strong>TL</strong>-<strong>WR542G</strong><br />
54Mbps Wireless Router <strong>User</strong> <strong>Guide</strong><br />
Note:<br />
If the router's IP address is 192.168.1.1, your PC's IP address must be within the range of<br />
192.168.1.2 ~ 192.168.1.254, the gateway must be 192.168.1.1.<br />
3.2 Quick Installation <strong>Guide</strong><br />
With a Web-based (Internet Explorer or Netscape ® Navigator) utility, it is easy to configure and<br />
manage the <strong>TL</strong>-<strong>WR542G</strong> 54Mbps Wireless Router. The Web-based utility can be used on any<br />
Windows, Macintosh or UNIX OS with a Web browser.<br />
Connect to the router by typing http://192.168.1.1 in the address field of Web browser.<br />
Figure 3-3 Login the router<br />
After a moment, a login window will appear similar to that shown in Figure 3-4. Enter admin for<br />
the <strong>User</strong> Name and Password, both in lower case letters. Then click the OK button or press the<br />
Enter key.<br />
Figure 3-4 Login Windows<br />
Note:<br />
If the above screen does not pop-up, it means that your Web-browser has been set to a proxy. Go<br />
to Tools menu>Internet Options>Connections>LAN Settings, in the screen that appears, cancel<br />
the Using Proxy checkbox, and click OK to finish it.<br />
If the <strong>User</strong> Name and Password are correct, you can configure the router using the Web browser.<br />
Please click the Quick Setup link on the left of the main menu and the Quick Setup screen will<br />
appear.<br />
9
<strong>TL</strong>-<strong>WR542G</strong><br />
54Mbps Wireless Router <strong>User</strong> <strong>Guide</strong><br />
Figure 3-5 Quick Setup<br />
Click Next, and then Choose WAN Connection Type page will appear, shown in Figure 3-6.<br />
Figure 3-6 Choose WAN Connection Type<br />
The router supports three popular ways to connect to Internet. Please select one compatible with<br />
your ISP. Click Next to enter the necessary network parameters.<br />
If you choose "PPPoE", you will see this page shown in Figure 3-7:<br />
Figure 3-7 Quick Setup - PPPoE<br />
‣ Account Name and Password - Enter the Account Name and Password provided by your<br />
ISP. These fields are case sensitive. If you have difficulty with this process, please contact<br />
your ISP.<br />
If you choose "Dynamic IP", the router will automatically receive the IP parameters from your ISP<br />
without needing to enter any parameters.<br />
If you Choose "Static IP", the Static IP settings page will appear, shown in Figure 3-8:<br />
10
<strong>TL</strong>-<strong>WR542G</strong><br />
54Mbps Wireless Router <strong>User</strong> <strong>Guide</strong><br />
Figure 3-8 Quick Setup - Static IP<br />
Note: The IP parameters should have been provided by your ISP.<br />
‣ IP Address - This is the WAN IP address as seen by external users on the Internet (including<br />
your ISP). Enter the IP address into the field.<br />
‣ Subnet Mask - The Subnet Mask is used for the WAN IP address, it is usually 255.255.255.0<br />
‣ Default Gateway - Enter the gateway IP address into the box if required.<br />
‣ Primary DNS - Enter the DNS Server IP address into the boxes if required.<br />
‣ Secondary DNS - If your ISP provides another DNS server, enter it into this field.<br />
After you complete the above, click Next, the Wireless settings page will appear, shown in Figure<br />
3-9.<br />
Figure 3-9 Quick Setup - Wireless settings<br />
In this page, you can configure the following wireless parameters:<br />
‣ Wireless Radio - Indicates whether the Access Point feature of the router is enabled or<br />
disabled. If disabled, the WLAN LED on the front panel will not be lit and the wireless<br />
stations will not be able to access the router. If enabled, the WLAN LED will be lit up and<br />
wireless stations will be able to access the router.<br />
11
<strong>TL</strong>-<strong>WR542G</strong><br />
54Mbps Wireless Router <strong>User</strong> <strong>Guide</strong><br />
‣ SSID - Enter a value of up to 32 characters. The same SSID must be assigned to all<br />
wireless devices on your network. The default SSID is <strong>TP</strong>-LINK. This value is case-sensitive.<br />
For example, <strong>TP</strong>-LINK is NOT the same as tp-link.<br />
‣ Region - Select your region from the pull-down list. This field specifies the region where the<br />
wireless function of the router can be used. It may be illegal to use the wireless function of the<br />
router in a region other than one of those specified in this field.<br />
‣ Channel - The current channel in use. This field determines which operating frequency will<br />
be used.<br />
‣ Mode - Indicates the current mode 54Mbps (802.11g), 11Mbps (802.11b). If you select<br />
54Mbps (802.11g), it is compatible with 11Mbps (802.11b).<br />
These settings are only for basic wireless parameters, for advanced settings, please refer to<br />
Section 4.5: "Wireless."<br />
Note:<br />
The change of wireless settings won't take effect until the router reboots! You can reboot it<br />
manually. If you need instructions as to how to do this, please refer to Section 4.12.5: "Reboot”.<br />
Click the Next button. You will then see the Finish page:<br />
Figure 3-10 Quick Setup - Finish<br />
After finishing all configurations of basic network parameters, please click Finish button to exit<br />
this Quick Setup.<br />
Chapter 4. Configuring the Router<br />
This chapter describes each Web page's key functions.<br />
4.1 Login<br />
After your successful login, you can configure and manage the router. There are ten main menus<br />
on the left of the Web-based utility. Submenus will be available after you click one of the main<br />
menus. The eleven main menus are: Status, Quick Setup, Network, Wireless, DHCP,<br />
Forwarding, Security, IP & MAC Binding Setting, Static Routing, DDNS and System Tools.<br />
12
<strong>TL</strong>-<strong>WR542G</strong><br />
54Mbps Wireless Router <strong>User</strong> <strong>Guide</strong><br />
On the right of the Web-based utility, there are the detailed explanations and instructions for the<br />
corresponding page. To apply any settings you have altered on the page, please click the Save<br />
button.<br />
The detailed explanations for each Web page key’s function are listed below.<br />
4.2 Status<br />
The Status page displays the router's current status and configuration. All information is<br />
read-only.<br />
1. LAN<br />
This field displays the current settings or information for the LAN, including the MAC address,<br />
IP address and Subnet Mask.<br />
2. Wireless<br />
This field displays basic information or status for wireless function, including Wireless Radio,<br />
SSID, Channel, Mode, Wireless MAC address, and IP address.<br />
3. WAN<br />
These parameters apply to the WAN port of the router, including MAC address, IP address,<br />
Subnet Mask, Default Gateway, DNS server and WAN connection type. If PPPoE is<br />
chosen as the WAN connection type, the Disconnect button will be shown here while you<br />
are accessing the Internet. You can also cut the connection by clicking the button. If you have<br />
not connected to the Internet, just click Connect to establish the connection.<br />
Traffic Statistics<br />
This field displays the router's traffic statistics.<br />
4. System Up Time<br />
The total up time of the router from when it was switched on or reset.<br />
13
<strong>TL</strong>-<strong>WR542G</strong><br />
54Mbps Wireless Router <strong>User</strong> <strong>Guide</strong><br />
Figure 4-1 Router Status<br />
4.3 Quick Setup<br />
Please refer to Section 3.2: "Quick Installation <strong>Guide</strong>."<br />
14
<strong>TL</strong>-<strong>WR542G</strong><br />
54Mbps Wireless Router <strong>User</strong> <strong>Guide</strong><br />
4.4 Network<br />
Figure 4-2 the Network menu<br />
There are three submenus under the Network menu (shown in Figure 4-2): LAN, WAN and MAC<br />
Clone. Click any of them, and you will be able to configure the corresponding function. The<br />
detailed explanations for each submenu are provided below.<br />
4.4.1 LAN<br />
You can configure the IP parameters of LAN on this page.<br />
Figure 4-3 LAN<br />
‣ MAC Address - The physical address of the router, as seen from the LAN. The value can't<br />
be changed.<br />
‣ IP Address - Enter the IP address of your router in dotted-decimal notation (factory default:<br />
192.168.1.1).<br />
‣ Subnet Mask - An address code that determines the size of the network. Normally use<br />
255.255.255.0 as the subnet mask.<br />
Note:<br />
If you change the IP Address of LAN, you must use the new IP Address to login the router.<br />
If the new LAN IP Address you set is not in the same subnet, the IP Address pool of the DHCP<br />
server will not take effect, until they are re-configured.<br />
If the new LAN IP Address you set is not in the same subnet, the Virtual Server and DMZ Host will<br />
change accordingly at the same time.<br />
4.4.2 WAN<br />
You can configure the WAN port parameters on this page.<br />
15
<strong>TL</strong>-<strong>WR542G</strong><br />
54Mbps Wireless Router <strong>User</strong> <strong>Guide</strong><br />
First, please choose the WAN Connection Type (Dynamic IP/Static IP/PPPoE/802.1X + Dynamic<br />
IP/802.1X + Static IP/Big Pond Cable/L2<strong>TP</strong>/PP<strong>TP</strong>) for Internet. The default type is Dynamic IP. If<br />
you aren’t given any login parameters (fixed IP Address, logging ID, etc), please select Dynamic<br />
IP. If you are given a fixed IP (static IP), please select Static IP. If you are given a user name and<br />
a password, please select the type of your ISP provided (PPPoE/BigPond/L2<strong>TP</strong>/PP<strong>TP</strong>). If you<br />
are not sure which connection type you use currently, please contact your ISP to obtain the<br />
correct information.<br />
1. If you choose Dynamic IP, the router will automatically get IP parameters from your ISP.<br />
You can see the page as follows (Figure 4-4):<br />
Figure 4-4 WAN – Dynamic IP<br />
This page displays the WAN IP parameters assigned dynamically by your ISP, including IP<br />
address, Subnet Mask, Default Gateway, etc. Click the Renew button to renew the IP<br />
parameters from your ISP. Click the Release button to release the IP parameters.<br />
MTU Size - The normal MTU (Maximum Transmission Unit) value for most Ethernet networks<br />
is 1500 Bytes. For some ISPs you need to reduce the MTU. But this is rarely required, and<br />
should not be done unless you are sure it is necessary for your ISP connection.<br />
If your ISP gives you one or two DNS addresses, select Use These DNS Servers and enter<br />
the primary and secondary addresses into the correct fields. Otherwise, the DNS servers will<br />
be assigned dynamically from your ISP.<br />
16
<strong>TL</strong>-<strong>WR542G</strong><br />
54Mbps Wireless Router <strong>User</strong> <strong>Guide</strong><br />
Note:<br />
If you get address and find error when you go to a Web site, it is likely that your DNS servers<br />
are set up improperly. You should contact your ISP to get DNS server addresses.<br />
Get IP with Unicast DHCP - A few ISPs' DHCP servers do not support the broadcast<br />
applications. If you cannot get the IP Address normally, you can choose this option. (This is<br />
rarely required.)<br />
2. If you choose Static IP, you should have fixed IP Parameters specified by your ISP. The<br />
Static IP settings page will appear, shown in Figure 4-5:<br />
Figure 4-5 WAN - Static IP<br />
You should type the following parameters into the spaces provided:<br />
‣ IP Address - Enter the IP address in dotted-decimal notation provided by your ISP.<br />
‣ Subnet Mask - Enter the subnet Mask in dotted-decimal notation provided by your ISP,<br />
usually is 255.255.255.0.<br />
‣ Default Gateway - (Optional) Enter the gateway IP address in dotted-decimal notation<br />
provided by your ISP.<br />
‣ MTU Size - The normal MTU (Maximum Transmission Unit) value for most Ethernet<br />
networks is 1500 Bytes. For some ISPs you may need to modify the MTU. But this is rarely<br />
required, and should not be done unless you are sure it is necessary for your ISP<br />
connection.<br />
‣ Primary DNS - (Optional) Enter the DNS address in dotted-decimal notation provided by<br />
your ISP.<br />
‣ Secondary DNS - (Optional) Type another DNS address in dotted-decimal notation provided<br />
17
<strong>TL</strong>-<strong>WR542G</strong><br />
54Mbps Wireless Router <strong>User</strong> <strong>Guide</strong><br />
by your ISP if provided.<br />
3. If you choose PPPoE, you should enter the following parameters (Figure 4-6):<br />
Figure 4-6 WAN - PPPoE<br />
‣ <strong>User</strong> Name/Password - Enter the <strong>User</strong> Name and Password provided by your ISP. These<br />
fields are case-sensitive.<br />
‣ Connect on Demand - You can configure the router to disconnect your Internet connection<br />
after a specified period of inactivity (Max Idle Time). If your Internet connection has been<br />
terminated due to inactivity, Connect on Demand enables the router to automatically<br />
re-establish your connection as soon as you attempt to access the Internet again. If you wish<br />
to activate Connect on Demand, click the radio button. If you want your Internet connection<br />
to remain active at all times, enter 0 in the Max Idle Time field. Otherwise, enter the number<br />
of minutes you want to have elapsed before your Internet connection terminates.<br />
Caution: Sometimes the connection cannot be disconnected although you specify a time to<br />
Max Idle Time, since some applications is visiting the Internet continually in the background.<br />
‣ Connect Automatically - Connect automatically after the router is disconnected. To use this<br />
option, click the radio button.<br />
‣ Time-based Connecting - You can configure the router to make it connect or disconnect<br />
based on time. Enter the start time in HH:MM format for connecting and end time in HH:MM<br />
format for disconnecting in the Period of Time fields.<br />
Note:<br />
18
<strong>TL</strong>-<strong>WR542G</strong><br />
54Mbps Wireless Router <strong>User</strong> <strong>Guide</strong><br />
Only when you have configured the system time on System Tools -> Time page, will the<br />
Time-based Connecting function can take effect.<br />
‣ Connect Manually - You can configure the router to make it connect or disconnect manually.<br />
After a specified period of inactivity (Max Idle Time), the router will disconnect from the<br />
Internet connection, and you will not be able to re-establish your connection automatically as<br />
soon as you attempt to access the Internet again. To use this option, click the radio button. If<br />
you want your Internet connection to remain active at all times, enter "0" in the Max Idle Time<br />
field. Otherwise, enter the number time in minutes that you wish to have the Internet<br />
connecting last unless a new link is requested.<br />
Caution: Sometimes the connection cannot be disconnected although you specify a time to<br />
Max Idle Time, since some applications are visiting the Internet continually in the background.<br />
Click the Connect button to connect immediately. Click the Disconnect button to disconnect<br />
immediately.<br />
Click the Advanced Settings button to set up the advanced option, the page shown in Figure<br />
4-7 will then appear:<br />
Figure 4-7 PPPoE Advanced Settings<br />
‣ Packet MTU - The default MTU size is 1480 bytes, which value is usually fine. For some<br />
ISPs, you need modify the MTU. This should not be done unless you are sure it is necessary<br />
for your ISP.<br />
‣ Service Name/AC Name - The service name and AC (Access Concentrator) name, these<br />
should not be configured unless you are sure it is necessary for your ISP.<br />
19
<strong>TL</strong>-<strong>WR542G</strong><br />
54Mbps Wireless Router <strong>User</strong> <strong>Guide</strong><br />
‣ ISP Specified IP Address - If you know that your ISP does not automatically transmit your IP<br />
address to the router during login, click “Use the IP Address specified by ISP” check box<br />
and enter the IP Address in dotted-decimal notation, which your ISP provided.<br />
‣ Detect Online Interval - The default value is 0, you can input the value between 0 and 120.<br />
The router will detect Access Concentrator online at every interval between seconds. If the<br />
value is 0, it means, do not detect.<br />
‣ DNS IP address - If you know that your ISP does not automatically transmit DNS addresses<br />
to the router during login, click “Use the following DNS servers” checkbox and enter the IP<br />
address in dotted-decimal notation of your ISP’s primary DNS server. If a secondary DNS<br />
server address is available, enter it as well.<br />
Click the Save button to save your settings.<br />
4. If you choose 802.1X + Dynamic IP, you should enter the follow parameters(Figure 4-8) :<br />
Figure 4-8 802.1X + Dynamic IP Settings<br />
‣ <strong>User</strong> Name - Enter the user name for 802.1X authentication provided by your ISP<br />
‣ Password - Enter the password for 802.1X authentication provided by your ISP.<br />
Click Login to start 802.1X authentication.<br />
20
<strong>TL</strong>-<strong>WR542G</strong><br />
54Mbps Wireless Router <strong>User</strong> <strong>Guide</strong><br />
Click Logout to end 802.1X authentication.<br />
‣ Host Name - This field is required to be filled by some service provider.<br />
5. If you choose 802.1X + Static IP, you should enter the follow parameters(Figure 4-9) :<br />
Figure 4-9 802.1X + Static IP Settings<br />
‣ <strong>User</strong> Name - Enter the user name for 802.1X authentication provided by your ISP<br />
‣ Password - Enter the password for 802.1X authentication provided by your ISP.<br />
Click Login to start 802.1X authentication.<br />
Click Logout to end 802.1X authentication.<br />
‣ IP Address - Enter the IP address in dotted-decimal notation provided by your ISP.<br />
‣ Subnet Mask - Enter the subnet Mask in dotted-decimal notation provided by your ISP.<br />
‣ Default Gateway - (Optional) Enter the default gateway IP address in dotted-decimal<br />
notation provided by your ISP.<br />
6. If you choose Big Pond Cable, you should enter the following parameters (Figure 4-10):<br />
21
<strong>TL</strong>-<strong>WR542G</strong><br />
54Mbps Wireless Router <strong>User</strong> <strong>Guide</strong><br />
Figure 4-10 Big Pond Settings<br />
‣ <strong>User</strong> Name/Password - Enter the <strong>User</strong> Name and Password provided by your ISP. These<br />
fields are case-sensitive.<br />
‣ Auth Server - Enter the authenticating server IP address or host name.<br />
‣ Auth Domain - Type in the domain suffix server name based on your location. E.g.,<br />
NSW / ACT - nsw.bigpond.net.au<br />
VIC / TAS / WA / SA / NT - vic.bigpond.net.au<br />
QLD - qld.bigpond.net.au<br />
‣ Connect on Demand - You can configure the router to disconnect from your Internet<br />
connection after a specified period of inactivity (Max Idle Time). If your Internet connection<br />
has been terminated due to inactivity, Connect on Demand enables the router to<br />
automatically re-establish your connection as soon as you attempt to access the Internet<br />
again. If you wish to activate Connect on Demand, click the radio button. If you want your<br />
Internet connection to remain active at all times, enter 0 in the Max Idle Time field. Otherwise,<br />
enter the number of minutes you want to have elapsed before your Internet connection<br />
terminates.<br />
Caution: Sometimes the connection cannot be disconnected although you specify a time to<br />
Max Idle Time, since some applications are visiting the Internet continually in the<br />
background.<br />
22
<strong>TL</strong>-<strong>WR542G</strong><br />
54Mbps Wireless Router <strong>User</strong> <strong>Guide</strong><br />
‣ Connect Automatically - Connect automatically after the router is disconnected. To use this<br />
option, click the radio button.<br />
‣ Connect Manually - You can configure the router to make it connect or disconnect manually.<br />
After a specified period of inactivity (Max Idle Time), the router will disconnect from your<br />
Internet connection, and you will not be able to re-establish your connection automatically as<br />
soon as you attempt to access the Internet again. To use this option, click the radio button. If<br />
you want your Internet connection to remain active at all times, enter "0" in the Max Idle Time<br />
field. Otherwise, enter the number in minutes that you wish to have the Internet connecting<br />
last unless a new link is requested.<br />
Caution: Sometimes the connection cannot be disconnected although you specify a time to<br />
Max Idle Time, since some applications are visiting the Internet continually in the background.<br />
Click the Connect button to connect immediately. Click the Disconnect button to disconnect<br />
immediately.<br />
7. If you choose L2<strong>TP</strong>, you should enter the following parameters (Figure 4-11):<br />
23
<strong>TL</strong>-<strong>WR542G</strong><br />
54Mbps Wireless Router <strong>User</strong> <strong>Guide</strong><br />
Figure 4-11 L2<strong>TP</strong> Settings<br />
‣ <strong>User</strong> Name/Password - Enter the <strong>User</strong> Name and Password provided by your ISP. These<br />
fields are case-sensitive.<br />
‣ Dynamic IP/ Static IP – Choose either as you are given by your ISP.<br />
Click the Connect button to connect immediately. Click the Disconnect button to disconnect<br />
immediately.<br />
‣ Connect on Demand - You can configure the router to disconnect from your Internet<br />
connection after a specified period of inactivity (Max Idle Time). If your Internet connection<br />
has been terminated due to inactivity, Connect on Demand enables the router to<br />
automatically re-establish your connection as soon as you attempt to access the Internet<br />
again. If you wish to activate Connect on Demand, click the radio button. If you want your<br />
Internet connection to remain active at all times, enter 0 in the Max Idle Time field. Otherwise,<br />
enter the number of minutes you want to have elapsed before your Internet connection<br />
terminates.<br />
24
<strong>TL</strong>-<strong>WR542G</strong><br />
54Mbps Wireless Router <strong>User</strong> <strong>Guide</strong><br />
Caution: Sometimes the connection cannot be disconnected although you specify a time to<br />
Max Idle Time, since some applications is visiting the Internet continually in the background.<br />
‣ Connect Automatically - Connect automatically after the router is disconnected. To use this<br />
option, click the radio button.<br />
‣ Connect Manually - You can configure the router to make it connect or disconnect manually.<br />
After a specified period of inactivity (Max Idle Time), the router will disconnect from your<br />
Internet connection, and you will not be able to re-establish your connection automatically as<br />
soon as you attempt to access the Internet again. To use this option, click the radio button. If<br />
you want your Internet connection to remain active at all times, enter "0" in the Max Idle Time<br />
field. Otherwise, enter the number in minutes that you wish to have the Internet connecting<br />
last unless a new link is requested.<br />
Caution: Sometimes the connection cannot be disconnected although you specify a time to<br />
Max Idle Time, since some applications is visiting the Internet continually in the background.<br />
8. If you choose PP<strong>TP</strong>, you should enter the following parameters (Figure 4-12):<br />
25
<strong>TL</strong>-<strong>WR542G</strong><br />
54Mbps Wireless Router <strong>User</strong> <strong>Guide</strong><br />
Figure 4-12 PP<strong>TP</strong> Settings<br />
‣ <strong>User</strong> Name/Password - Enter the <strong>User</strong> Name and Password provided by your ISP. These<br />
fields are case-sensitive.<br />
‣ Dynamic IP/ Static IP – Choose either as you are given by your ISP and enter the ISP’s IP<br />
address or the domain name.<br />
If you choose static IP and enter the domain name, you should also enter the DNS assigned<br />
by your ISP. And click the Save button.<br />
Click the Connect button to connect immediately. Click the Disconnect button to disconnect<br />
immediately.<br />
‣ Connect on Demand - You can configure the router to disconnect from your Internet<br />
connection after a specified period of inactivity (Max Idle Time). If your Internet connection<br />
has been terminated due to inactivity, Connect on Demand enables the router to<br />
automatically re-establish your connection as soon as you attempt to access the Internet<br />
again. If you wish to activate Connect on Demand, click the radio button. If you want your<br />
26
<strong>TL</strong>-<strong>WR542G</strong><br />
54Mbps Wireless Router <strong>User</strong> <strong>Guide</strong><br />
Internet connection to remain active at all times, enter 0 in the Max Idle Time field. Otherwise,<br />
enter the number of minutes you want to have elapsed before your Internet connection<br />
terminates.<br />
Caution: Sometimes the connection cannot be disconnected although you specify a time to<br />
Max Idle Time, since some applications are visiting the Internet continually in the<br />
background.<br />
‣ Connect Automatically - Connect automatically after the router is disconnected. To use this<br />
option, click the radio button.<br />
‣ Connect Manually - You can configure the router to make it connect or disconnect manually.<br />
After a specified period of inactivity (Max Idle Time), the router will disconnect from your<br />
Internet connection, and you will not be able to re-establish your connection automatically as<br />
soon as you attempt to access the Internet again. To use this option, click the radio button. If<br />
you want your Internet connection to remain active at all times, enter "0" in the Max Idle Time<br />
field. Otherwise, enter the number in minutes that you wish to have the Internet connecting<br />
last unless a new link is requested.<br />
Caution: Sometimes the connection cannot be disconnected although you specify a time to<br />
Max Idle Time, since some applications are visiting the Internet continually in the background.<br />
4.4.3 MAC Clone<br />
You can configure the MAC address of the WAN port on this page, Figure 4-13:<br />
Figure 4-13 MAC Address Clone<br />
Some ISPs require that you register the MAC Address of your adapter, which is connected to your<br />
cable/DSL Modem or Ethernet during installation. Changes are rarely needed here.<br />
‣ WAN MAC Address - This field displays the current MAC address of the WAN port, which is<br />
used for the WAN port. If your ISP requires that you register the MAC address, please enter<br />
the correct MAC address into this field. The format for the MAC Address is<br />
XX-XX-XX-XX-XX-XX (X is any hexadecimal digit).<br />
‣ Your PC's MAC Address - This field displays the MAC address of the PC that is managing<br />
the router. If the MAC address is required, you can click the Clone MAC Address button<br />
and this MAC address will fill in the WAN MAC Address field.<br />
27
<strong>TL</strong>-<strong>WR542G</strong><br />
54Mbps Wireless Router <strong>User</strong> <strong>Guide</strong><br />
Click Restore Factory MAC to restore the MAC address of WAN port to the factory default<br />
value.<br />
Click the Save button to save your settings.<br />
Note:<br />
1) Only the PC on your LAN can use the MAC Address Clone feature.<br />
2) If you click the Save button, the router will prompt you to reboot.<br />
4.5 Wireless<br />
Figure 4-14 Wireless menu<br />
There are three submenus under the Wireless menu (shown in Figure 4-14): Wireless Settings,<br />
MAC Filtering and Wireless Statistics. Click any of them, and you will be able to configure the<br />
corresponding function. The detailed explanations for each submenu are provided below.<br />
4.5.1 Wireless Settings<br />
The basic settings for the wireless network are set on this page, Figure 4-15:<br />
28
<strong>TL</strong>-<strong>WR542G</strong><br />
54Mbps Wireless Router <strong>User</strong> <strong>Guide</strong><br />
Figure 4-15 Wireless Settings<br />
‣ SSID - Enter a value of up to 32 characters. The same name (SSID) must be assigned to all<br />
wireless devices in your network. The default SSID is <strong>TP</strong>-LINK, but it is recommended<br />
strongly that you change your networks name (SSID) to a different value. This value is<br />
case-sensitive. For example, <strong>TP</strong>-LINK is NOT the same as tp-link.<br />
‣ Region - Select your region from the pull-down list. This field specifies the region where the<br />
wireless function of the router can be used. It may be illegal to use the wireless function of<br />
the router in a region other than one of those specified in this field. If your country or region<br />
is not listed, please contact your local government agency for assistance.<br />
The default region is United States. When you select your local region from the pull-down list.<br />
Click the Save button, then the Note Dialog appears. Click OK.<br />
29
<strong>TL</strong>-<strong>WR542G</strong><br />
54Mbps Wireless Router <strong>User</strong> <strong>Guide</strong><br />
Note Dialog<br />
Note:<br />
Limited by local law regulations, version for North America does not have region selection<br />
option.<br />
‣ Channel - This field determines which operating frequency will be used. It is not necessary<br />
to change the wireless channel unless you notice interference problems with another nearby<br />
access point.<br />
‣ Mode - Select the desired wireless mode. The options are:<br />
• 54Mbps (802.11g) - Both 802.11g and 802.11b wireless stations can connect to the<br />
router.<br />
• 11Mbps (802.11b) - Only 802.11b wireless stations can connect to the router.<br />
Note:<br />
The default is "54Mbps (802.11g)", which allows both 802.11g and 802.11b wireless stations to<br />
connect to the router.<br />
‣ Enable Wireless Router Radio - The wireless radio of this Router can be enabled or<br />
disabled to allow wireless stations access. If enabled, wireless stations will be able to<br />
access the router. Otherwise, wireless stations will not be able to access.<br />
‣ Enable SSID Broadcast - If you select the Enable SSID Broadcast checkbox, the Wireless<br />
Router SSID will broadcast its name (SSID) on the air.<br />
‣ Enable Bridges – If you select the Enable Bridges checkbox, you can input MAC address<br />
of other APs to communicate with them wirelessly in Bridge mode.<br />
• MAC of AP (1-6): Input the MAC address of the AP which you want to communicate<br />
with. There are six entries can be configured.<br />
The APs can communicate with each other in Bridge mode unless they know each other’s<br />
MAC address. For example, if the router whose MAC address is 00-13-56-A8-9E-1A wants<br />
to communicate with an AP whose MAC address is 00-13-56-A8-9E-1B in Bridge mode, you<br />
should do as following:<br />
1. Select Enable Bridges and input 00-13-56-A8-9E-1B as following screen shown.<br />
30
<strong>TL</strong>-<strong>WR542G</strong><br />
54Mbps Wireless Router <strong>User</strong> <strong>Guide</strong><br />
2. Access the AP's Web-based utility and configure the AP under Bridge mode, then input<br />
00-13-56-A8-9E-1A in corresponding Blank.<br />
‣ Enable Wireless Security – The wireless security function can be enabled or disabled. If<br />
disabled, the wireless stations will be able to connect the router without encryption. It is<br />
recommended strongly that you choose this option to encrypt your wireless network. The<br />
encryption settings are described below.<br />
‣ Authentication Type - You can select one of the following authentication types:<br />
• WEP - Select WEP authentication type based on 802.11 authentications.<br />
• WPA-PSK/WPA2-PSK - Select WPA/WPA2 authentication type based on pre-shared<br />
passphrase.<br />
• WPA /WPA2 - Select WPA/WPA2 authentication type based on Radius Server.<br />
‣ Authentication Options - You can select one of the following authentication options:<br />
• When you select WEP for authentication type you can select the following<br />
authentication options:<br />
• Automatic - Select Shared Key or Open System authentication type automatically<br />
based on the wireless station request.<br />
• Shared Key - Select 802.11 Shared Key authentication.<br />
• Open System - Select 802.11 Open System authentication.<br />
• When you select WPA-PSK/WPA2-PSK for authentication type you can select<br />
Automatic, WPA –PSK or WPA2-PSK as authentication options.<br />
• When you select WPA/WPA2 as an authentication type you can select Automatic<br />
WPA or WPA2 as authentication option.<br />
‣ WEP Key Format - You can select ASCII or Hexadecimal format. ASCII Code Format<br />
stands for any combination of keyboard characters in the specified length. Hexadecimal<br />
31
<strong>TL</strong>-<strong>WR542G</strong><br />
54Mbps Wireless Router <strong>User</strong> <strong>Guide</strong><br />
format stands for any combination of hexadecimal digits (0-9, a-f, A-F) in the specified<br />
length.<br />
‣ WEP Key settings - Select which of the four keys will be used and enter the matching WEP<br />
key information for your network in the selected key radio button. These values must be<br />
identical on all wireless stations in your network.<br />
‣ Key Type - You can select the WEP key length (64-bit, or 128-bit, or 152-bit) for encryption.<br />
"Disabled" means the WEP key entry is invalid.<br />
• For 64-bit encryption - You can enter 10 hexadecimal digits (any combination of 0-9, a-f,<br />
A-F, zero key is not permitted) or 5 ASCII characters.<br />
• For 128-bit encryption - You can enter 26 hexadecimal digits (any combination of 0-9,<br />
a-f, A-F, zero key is not permitted) or 13 ASCII characters.<br />
• For 152-bit encryption - You can enter 32 hexadecimal digits (any combination of 0-9,<br />
a-f, A-F, zero key is not permitted) or 16 ASCII characters.<br />
‣ Encryption - When you select WPA-PSK/WPA2-PSK or WPA/WPA2 for Authentication<br />
Type you can select Automatic, TKIP or AES as Encryptions.<br />
Figure 4-16 WPA-PSK/WPA2-PSK<br />
‣ WPA-PSK/WPA2-PSK Passphrase - You can enter a WPA or WPA2 passphrase between<br />
8 and 63 characters long.<br />
‣ Group Key Update Period - Specify the group key update interval in seconds. The value<br />
can be either 0 seconds or from 30 seconds and up, 1-29 seconds are not usable figures.<br />
Enter 0 to disable the update.<br />
32
<strong>TL</strong>-<strong>WR542G</strong><br />
54Mbps Wireless Router <strong>User</strong> <strong>Guide</strong><br />
Figure 4-17 WPA/WPA2<br />
‣ Radius Server IP - Enter the IP address of the Radius Server<br />
‣ Radius Port - Enter the port number that the radius service used.<br />
‣ Radius Password - Enter the password for the Radius Server.<br />
Be sure to click the Save button to save your settings on this page.<br />
Note: The router will reboot automatically after you click save.<br />
4.5.2 MAC Filtering<br />
The Wireless MAC Filtering for wireless networks is set on this page, Figure 4-18:<br />
Figure 4-18 Wireless MAC address Filtering<br />
The Wireless MAC Address Filtering feature allows you to control wireless stations accessing the<br />
router, which depend on the station's MAC addresses.<br />
‣ MAC Address - The wireless station's MAC address that you want to access.<br />
‣ Status - The status of this entry either Enabled or Disabled.<br />
33
<strong>TL</strong>-<strong>WR542G</strong><br />
54Mbps Wireless Router <strong>User</strong> <strong>Guide</strong><br />
‣ Privilege - Select the privileges for this entry. You may select one of the following Allow /<br />
Deny / 64-bit / 128-bit / 152-bit.<br />
‣ Description - A simple description of the wireless station.<br />
‣ WEP Key - Specify a unique WEP key (in Hexadecimal format) to access the router.<br />
To set up an entry, follow these instructions:<br />
First, you must decide whether the unspecified wireless stations can access the router or not. If<br />
you desire that the unspecified wireless stations can access the router, please select the radio<br />
button Allow the stations not specified by any enabled entries in the list to access,<br />
otherwise, select the radio button Deny the stations not specified by any enabled entries in<br />
the list to access.<br />
To Add a Wireless MAC Address filtering entry, click the Add New… button. The "Add or Modify<br />
Wireless MAC Address Filtering entry" page will appear, shown in Figure 4-19:<br />
Figure 4-19 Add or Modify Wireless MAC Address Filtering entry<br />
To add or modify a MAC Address Filtering entry, follow these instructions:<br />
1. Enter the appropriate MAC Address into the MAC Address field. The format of the MAC<br />
Address is XX-XX-XX-XX-XX-XX (X is any hexadecimal digit). For example:<br />
00-0A-EB-B0-00-0B.<br />
2. Enter a simple description of the wireless station in the Description field. For example:<br />
Wireless station A.<br />
3. Privilege - Select the privileges for this entry, one of Allow / Deny / 64-bit / 128-bit / 152-bit.<br />
4. WEP Key - If you select 64-bit, 128-bit or 152-bit in the Privilege field, enter any<br />
combination of hexadecimal digits (0-9, a-f, A-F) in the specified length. For example:<br />
2F34D20BE2.<br />
5. Status - Select Enabled or Disabled for this entry on the Status pull-down list.<br />
6. Click the Save button to save this entry.<br />
34
<strong>TL</strong>-<strong>WR542G</strong><br />
54Mbps Wireless Router <strong>User</strong> <strong>Guide</strong><br />
To add additional entries, repeat steps 1-6.<br />
Note: When 64-bit, or 128-bit, or 152-bit is selected, WEP Key will be enabled.<br />
To modify or delete an existing entry:<br />
1. Click the Modify in the entry you want to modify. If you want to delete the entry, click the<br />
Delete.<br />
2. Modify the information.<br />
3. Click the Save button.<br />
Click the Enable All button to make all entries enabled<br />
Click the Disabled All button to make all entries disabled.<br />
Click the Delete All button to delete all entries<br />
Click the Next button to go to the next page and click the Previous button to return to the<br />
previous page.<br />
For example: If you desire that the wireless station A with MAC address 00-0A-EB-00- 07-BE be<br />
able to access the router. The wireless station B with MAC address 00-0A-EB- 00-07-5F not be able<br />
to access the router, and the wireless station C with MAC address 00-0A-EB-00-07-8A be able to<br />
access the router when its WEP key is 2F34D20BE2E 54B326C5476586A, while all other wireless<br />
stations cannot access the router, you should configure the Wireless MAC Address Filtering list<br />
by following these steps:<br />
1. Click the Enable button to enable this function.<br />
2. Select the radio button: Deny the stations not specified by any enabled entries in the list<br />
to access for Filtering Rules.<br />
3. Delete all or disable all entries if there are any entries already.<br />
4. Click the Add New... button and enter the MAC address 00-0A-EB-00-07-BE in the MAC<br />
Address field, enter wireless station A in the Description field, select Allow in the Privilege<br />
pull-down list and select Enabled in the Status pull-down list. Click the Save and the Return<br />
button.<br />
5. Click the Add New... button and enter the MAC address 00-0A-EB-00-07-5F in the MAC<br />
Address field, enter wireless station B in the Description field, select Deny in the Privilege<br />
pull-down list and select Enabled in the Status pull-down list. Click the Save and the Return<br />
button.<br />
6. Click the Add New... button and enter the MAC address 00-0A-EB-00-07-8A in the MAC<br />
Address field, enter wireless station C in the Description field, select 128-bit in the Privilege<br />
35
<strong>TL</strong>-<strong>WR542G</strong><br />
54Mbps Wireless Router <strong>User</strong> <strong>Guide</strong><br />
pull-down list, enter 2F34D20BE2E54B326C5476586A in the WEP Key field and select<br />
Enabled in the Status pull-down list. Click the Save and the Return button.<br />
The filtering rules that configured should be similar to the following list:<br />
Note:<br />
a) If you select the radio button Allow the stations not specified by any enabled entries<br />
in the list to access for Filtering Rules, the wireless station B will still not be able to<br />
access the router, however, other wireless stations that are not in the list will be able to<br />
access the router.<br />
b) If you enable the function and select the Deny the stations not specified by any<br />
enabled entries in the list to access for Filtering Rules, and there are not any enable<br />
entries in the list, thus, no wireless stations can access the router.<br />
4.5.3 Wireless Statistics<br />
This page shows MAC Address, Current Status, Received Packets and Sent Packets for each<br />
connected wireless station.<br />
Figure 4-20 The router attached wireless stations<br />
‣ MAC Address - The connected wireless station's MAC address<br />
‣ Current Status - The connected wireless station's running status, one of STA-AUTH /<br />
STA-ASSOC / AP-UP / WPA / WPA-PSK /WPA2/WPA2-PSK/None<br />
‣ Received Packets - Packets received by the station<br />
‣ Sent Packets - Packets sent by the station<br />
You cannot change any of the values on this page. To update this page and to show the current<br />
connected wireless stations, click on the Refresh button.<br />
If the numbers of connected wireless stations go beyond one page, click the Next button to go to<br />
the next page and click the Previous button to return the previous page.<br />
36
<strong>TL</strong>-<strong>WR542G</strong><br />
54Mbps Wireless Router <strong>User</strong> <strong>Guide</strong><br />
Note: This page will be refreshed automatically every 5 seconds.<br />
4.6 DHCP<br />
Figure 4-21 The DHCP menu<br />
There are three submenus under the DHCP menu (shown in Figure 4-21): DHCP Settings,<br />
DHCP Clients List and Address Reservation. Click any of them, and you will be able to<br />
configure the corresponding function. The detailed explanations for each submenu are provided<br />
below.<br />
4.6.1 DHCP Settings<br />
The router is set up by default as a DHCP (Dynamic Host Configuration Protocol) server, which<br />
provides the TCP/IP configuration for all the PC(s) that are connected to the router on the LAN.<br />
The DHCP Server can be configured on the page (shown in Figure 4-22):<br />
Figure 4-22 DHCP Settings<br />
‣ DHCP Server - Enable or Disable the DHCP server. If you disable the Server, you must<br />
have another DHCP server within your network or else you must manually configure the<br />
computer.<br />
‣ Start IP Address - This field specifies the first of the addresses in the IP address pool.<br />
192.168.1.100 is the default start address.<br />
‣ End IP Address - This field specifies the last of the addresses in the IP address pool.<br />
37
<strong>TL</strong>-<strong>WR542G</strong><br />
54Mbps Wireless Router <strong>User</strong> <strong>Guide</strong><br />
192.168.1.199 is the default end address.<br />
‣ Address Lease Time - The Address Lease Time is the amount of time in which a network<br />
user will be allowed connection to the router with their current dynamic IP Address. Enter the<br />
amount of time, in minutes. The user will be "leased" this dynamic IP Address. The range of<br />
the time is 1 ~ 2880 minutes. The default value is 120 minutes.<br />
‣ Default Gateway - (Optional.) Suggest to input the IP address of the LAN port of the router,<br />
default value is 192.168.1.1<br />
‣ Default Domain - (Optional.) Input the domain name of your network.<br />
‣ Primary DNS - (Optional.) Input the DNS IP address provided by your ISP. Or consult your<br />
ISP.<br />
‣ Secondary DNS - (Optional.) Input the IP address of another DNS server if your ISP<br />
provides two DNS servers.<br />
Note:<br />
To use the DHCP server function of the router, you must configure all computers on the LAN as<br />
"Obtain an IP Address automatically" mode. This function will take effect until the router reboots.<br />
4.6.2 DHCP Clients List<br />
This page shows Client Name, MAC Address, Assigned IP and Lease Time for each DHCP<br />
Client attached to the router (Figure 4-23):<br />
Figure 4-23 DHCP Clients List<br />
‣ Index - The index of the DHCP Client<br />
‣ Client Name - The name of the DHCP client<br />
‣ MAC Address - The MAC address of the DHCP client<br />
‣ Assigned IP - The IP address that the router has allocated to the DHCP client.<br />
‣ Lease Time - The time of the DHCP client leased. Before the time is up, DHCP client will<br />
request to renew the lease automatically.<br />
38
<strong>TL</strong>-<strong>WR542G</strong><br />
54Mbps Wireless Router <strong>User</strong> <strong>Guide</strong><br />
You cannot change any of the values on this page. To update this page and to show the current<br />
attached devices, click on the Refresh button.<br />
4.6.3 Address Reservation<br />
When you specify a reserved IP address for a PC on the LAN, that PC will always receive the<br />
same IP address each time when it accesses the DHCP server. Reserved IP addresses should<br />
be assigned to servers that require permanent IP settings. This page is used for address<br />
reservation (shown in Figure 4-24).<br />
Figure 4-24 Address Reservation<br />
‣ MAC Address - The MAC address of the PC of which you want to reserve IP address.<br />
‣ Assigned IP Address - The IP address of the router reserved.<br />
‣ Status - The status of this entry either Enabled or Disabled.<br />
To Reserve IP addresses:<br />
1. Click the Add New button. (Pop-up Figure 4-25)<br />
2. Enter the MAC address (The format for the MAC Address is XX-XX-XX-XX-XX-XX.) and IP<br />
address in dotted-decimal notation of the computer you wish to add.<br />
3. Click the Save button when finished.<br />
To modify or delete an existing entry:<br />
Figure 4-25 Add or Modify an Address Reservation Entry<br />
39
<strong>TL</strong>-<strong>WR542G</strong><br />
54Mbps Wireless Router <strong>User</strong> <strong>Guide</strong><br />
1. Click the Modify in the entry you want to modify. If you want to delete the entry, click the<br />
Delete.<br />
2. Modify the information.<br />
3. Click the Save button.<br />
Click the Enable All button to make all entries enabled<br />
Click the Disabled All button to make all entries disabled.<br />
Click the Delete All button to delete all entries<br />
Click the Next button to go to the next page and Click the Previous button to return the previous<br />
page.<br />
Note: The function won't take effect until the router reboots.<br />
4.7 Forwarding<br />
Figure 4-26 The Forwarding menu<br />
There are four submenus under the Forwarding menu (shown in Figure 4-26): Virtual Servers,<br />
Port Triggering, DMZ and UPnP. Click any of them, and you will be able to configure the<br />
corresponding function. The detailed explanations for each submenu are provided below.<br />
4.7.1 Virtual Servers<br />
Virtual servers can be used for setting up public services on your LAN, such as DNS, Email and<br />
F<strong>TP</strong>. A virtual server is defined as a service port, and all requests from the Internet to this service<br />
port will be redirected to the computer specified by the server IP. Any PC that was used for a<br />
virtual server must have a static or reserved IP Address because its IP Address may change<br />
when using the DHCP function. You can set up virtual servers on this page, shown in Figure<br />
4-27:<br />
40
<strong>TL</strong>-<strong>WR542G</strong><br />
54Mbps Wireless Router <strong>User</strong> <strong>Guide</strong><br />
Figure 4-27 Virtual Servers<br />
‣ Service Port - The numbers of External Ports. You can type a service port or a range of<br />
service ports (the format is XXX – YYY, XXX is the start port, YYY is the end port).<br />
‣ IP Address - The IP Address of the PC providing the service application.<br />
‣ Protocol - The protocol used for this application, either TCP, UDP, or All (all protocols<br />
supported by the router).<br />
‣ Status - The status of this entry either Enabled or Disabled.<br />
To setup a virtual server entry:<br />
1. Click the Add New button. (pop-up Figure 4-28)<br />
2. Select the service you want to use from the Common Service Port list. If the Common<br />
Service Port list does not have the service that you want to use, type the number of the<br />
service port or service port range in the Service Port box.<br />
3. Type the IP Address of the computer in the Server IP Address box.<br />
4. Select the protocol used for this application, either TCP or UDP, or All.<br />
5. Select the Enable checkbox to enable the virtual server.<br />
6. Click the Save button.<br />
Figure 4-28 Add or Modify a Virtual Server Entry<br />
41
<strong>TL</strong>-<strong>WR542G</strong><br />
54Mbps Wireless Router <strong>User</strong> <strong>Guide</strong><br />
Note:<br />
It is possible that you have a computer or server that has more than one type of available service.<br />
If so, select another service, and enter the same IP Address for that computer or server.<br />
To modify or delete an existing entry:<br />
1. Click the Modify in the entry you want to modify. If you want to delete the entry, click the<br />
Delete.<br />
2. Modify the information.<br />
3. Click the Save button.<br />
Click the Enable All button to make all entries enabled<br />
Click the Disabled All button to make all entries disabled.<br />
Click the Delete All button to delete all entries<br />
Click the Next button to go to the next page and Click the Previous button to return the previous<br />
page.<br />
Note:<br />
If you set the virtual server of service port as 80, you must set the Web management port on<br />
Security –> Remote Management page to be any value except 80 such as 8080. Or else there<br />
will be a conflict to disable the virtual server.<br />
4.7.2 Port Triggering<br />
Some applications require multiple connections, like Internet games, video conferencing, Internet<br />
calling and so on. These applications cannot work with a pure NAT router. Port Triggering is<br />
used for some of these applications that can work with an NAT router. You can set up Port<br />
Triggering on this page shown in Figure 4-29:<br />
Figure 4-29 Port Triggering<br />
Once configured, operation is as follows:<br />
1. A local host makes an outgoing connection using a destination port number defined in the<br />
42
<strong>TL</strong>-<strong>WR542G</strong><br />
54Mbps Wireless Router <strong>User</strong> <strong>Guide</strong><br />
Trigger Port field.<br />
2. The router records this connection, opens the incoming port or ports associated with this<br />
entry in the Port Triggering table, and associates them with the local host.<br />
3. When necessary the external host will be able to connect to the local host using one of the<br />
ports defined in the Incoming Ports field.<br />
‣ Trigger Port - The port for outgoing traffic. An outgoing connection using this port will<br />
"Trigger" this rule.<br />
‣ Trigger Protocol - The protocol used for Trigger Ports, either TCP, UDP, or All (all<br />
protocols supported by the router).<br />
‣ Incoming Ports Range - The port or port range used by the remote system when it<br />
responds to the outgoing request. A response using one of these ports will be forwarded to<br />
the PC that triggered this rule. You can input at most 5 groups of ports (or port section).<br />
Every group of ports must be set apart with ",". For example, 2000-2038, 2050-2051, 2085,<br />
3010-3030.<br />
‣ Incoming Protocol - The protocol used for Incoming Ports Range, either TCP or UDP, or<br />
ALL (all protocols supported by the router).<br />
‣ Status - The status of this entry either Enabled or Disabled.<br />
To add a new rule, enter the following data on the Port Triggering screen.<br />
1. Click the Add New button. (pop-up Figure 4-30)<br />
2. Enter a port number used by the application when it generates an outgoing request.<br />
3. Select the protocol used for Trigger Port from the pull-down list, either TCP, UDP, or All.<br />
4. Enter the range of port numbers used by the remote system when it responds to the PC's<br />
request.<br />
5. Select the protocol used for Incoming Ports Range from the pull-down list, either TCP or<br />
UDP, or All.<br />
6. Select the Enable checkbox to enable.<br />
7. Click the Save button to save the new rule.<br />
43
<strong>TL</strong>-<strong>WR542G</strong><br />
54Mbps Wireless Router <strong>User</strong> <strong>Guide</strong><br />
Figure 4-30 Add or Modify a Triggering Entry<br />
There are many popular applications in the Popular Application list. You can select it, and the<br />
application will fill in the Trigger Port, incoming Ports Range boxes and select the Enable<br />
checkbox. It has the same effect as adding a new rule.<br />
To modify or delete an existing entry:<br />
1. Click the Modify in the entry you want to modify. If you want to delete the entry, click the<br />
Delete.<br />
2. Modify the information.<br />
3. Click the Save button.<br />
Click the Enable All button to make all entries enabled<br />
Click the Disabled All button to make all entries disabled.<br />
Click the Delete All button to delete all entries.<br />
Note:<br />
1. When the trigger connection is released, the according opening ports will be closed.<br />
2. Each rule allowed to be used only by one host on LAN synchronously. The trigger connection<br />
of other hosts on LAN will be refused.<br />
3. Incoming Port Range cannot overlap each other.<br />
4.7.3 DMZ<br />
The DMZ host feature allows one local host to be exposed to the Internet for a special-purpose<br />
service such as Internet gaming or videoconferencing. DMZ host forwards all the ports at the<br />
same time. Any PC whose port is being forwarded must have its DHCP client function disabled<br />
and should have a new static IP Address assigned to it because its IP Address may change when<br />
using the DHCP function. You can set up DMZ host on this page shown in Figure 4-31:<br />
44
<strong>TL</strong>-<strong>WR542G</strong><br />
54Mbps Wireless Router <strong>User</strong> <strong>Guide</strong><br />
Figure 4-31 DMZ<br />
To assign a computer or server to be a DMZ server:<br />
1. Click the Enable radio button<br />
2. Enter the local host IP Address in the DMZ Host IP Address field<br />
3. Click the Save button.<br />
Note: After you set the DMZ host, the firewall related to the host will not work.<br />
4.7.4 UPnP<br />
The Universal Plug and Play (UPnP) feature allows the devices, such as Internet computers, to<br />
access the local host resources or devices as needed. UPnP devices can be automatically<br />
discovered by the UPnP service application on the LAN. You can configure UPnP on this page<br />
that shown in Figure 4-32:<br />
Figure 4-32 UPnP Settings<br />
‣ Current UPnP Status - UPnP can be enabled or disabled by clicking the Enable or Disable<br />
button. As allowing this may present a risk to security, this feature is disabled by default.<br />
‣ Current UPnP Settings List - This table displays the current UPnP information.<br />
• App Description – The description provided by the application in the UPnP request<br />
• External Port - External port, which the router opened for the application.<br />
• Protocol – Shows which type of protocol is opened.<br />
45
<strong>TL</strong>-<strong>WR542G</strong><br />
54Mbps Wireless Router <strong>User</strong> <strong>Guide</strong><br />
• Internal Port - Internal port, which the router opened for local host.<br />
• IP Address - The UPnP device that is currently accessing the router.<br />
• Status - Either Enabled or Disabled, “Enabled” means that port is still active. Otherwise,<br />
the port is inactive.<br />
Click Refresh to update the Current UPnP Settings List.<br />
4.8 Security<br />
Figure 4-33 The Security menu<br />
There are six submenus under the Security menu (shown in Figure 4-33): Firewall, IP Address<br />
Filtering, Domain Filtering, MAC Filtering, Remote Management and Advanced Security.<br />
Click any of them, and you will be able to configure the corresponding function. The detailed<br />
explanations for each submenu are provided below.<br />
4.8.1 Firewall<br />
Using the Firewall page (shown in Figure 4-34), you can turn the general firewall switch on or off.<br />
The default setting for the switch is off. If the general firewall switch is off, even if IP Address<br />
Filtering, DNS Filtering and MAC Filtering are enabled, their settings are ineffective.<br />
46
<strong>TL</strong>-<strong>WR542G</strong><br />
54Mbps Wireless Router <strong>User</strong> <strong>Guide</strong><br />
Figure 4-34 Firewall Settings<br />
‣ Enable Firewall - the general firewall switch is on or off.<br />
‣ Enable IP Address Filtering - set IP Address Filtering is enabled or disabled. There are two<br />
default filtering rules of IP Address Filtering, either Allow or Deny passing through the router.<br />
‣ Enable Domain Filtering - set Domain Filtering is enabled or disabled.<br />
‣ Enable MAC Filtering - set MAC Address Filtering is enabled or disabled. You can select the<br />
default filtering rules of MAC Address Filtering, either Allow or Deny accessing the router.<br />
4.8.2 IP Address Filtering<br />
The IP address Filtering feature allows you to control Internet Access by specific users on your<br />
LAN based on their IP addresses. The IP address filtering is set on this page, Figure 4-35:<br />
47
<strong>TL</strong>-<strong>WR542G</strong><br />
54Mbps Wireless Router <strong>User</strong> <strong>Guide</strong><br />
Figure 4-35 IP address Filtering<br />
To disable the IP Address Filtering feature, keep the default setting, Disabled. To set up an IP<br />
Address Filtering entry, click Enable Firewall and Enable IP Address Filtering on the Firewall<br />
page, and click the Add New… button. The page "Add or Modify an IP Address Filtering entry"<br />
will appear shown in Figure 4-36:<br />
Figure 4-36 Add or Modify an IP Address Filtering Entry<br />
To create or modify an IP Address Filtering entry, please follow these instructions:<br />
1. Effective Time - Enter a range of time in HHMM format, which point to the range time for the<br />
entry to take effect. For example, 0803 - 1705, the entry will take effect from 08:03 to 17:05.<br />
2. LAN IP Address - Enter a LAN IP Address or a range of LAN IP addresses in the field, in<br />
dotted-decimal notation format. For example, 192.168.1.20 - 192.168.1.30. Keep the field<br />
open, which means all LAN IP Addresses have been put into the field.<br />
3. LAN Port - Enter a LAN Port or a range of LAN ports in the field. For example, 1030 - 2000.<br />
48
<strong>TL</strong>-<strong>WR542G</strong><br />
54Mbps Wireless Router <strong>User</strong> <strong>Guide</strong><br />
Keep the field open, which means all LAN ports have been put into the field.<br />
4. WAN IP Address - Enter a WAN IP Address or a range of WAN IP Addresses in the field, in<br />
dotted-decimal notation format. For example, 61.145.238.6 – 61.145.238.47. Keep the field<br />
open, which means all WAN IP Addresses have been put into the field.<br />
5. WAN Port -Enter a WAN Port or a range of WAN Ports in the field. For example, 25 – 110.<br />
Keep the field open, which means all WAN Ports have been put into the field.<br />
6. Protocol - Select which protocol is to be used, either TCP, UDP, or All (all protocols<br />
supported by the router).<br />
7. Action - Select either Allow or Deny through the router.<br />
8. Status - Select Enabled or Disabled for this entry on the Status pull-down list.<br />
9. Click the Save button to save this entry.<br />
To modify or delete an existing entry:<br />
1. Click the Modify in the entry you want to modify. If you want to delete the entry, click the<br />
Delete.<br />
2. Modify the information.<br />
3. Click the Save button.<br />
Click the Enable All button to make all entries enabled<br />
Click the Disabled All button to make all entries disabled.<br />
Click the Delete All button to delete all entries<br />
You can change the entry’s order as desired. Fore entries are before hind entries. Enter the ID<br />
number in the first box you want to move and another ID number in second box you want to move<br />
to, and then click the Move button to change the entry’s order.<br />
Click the Next button to the next page and click the Previous button to return to the previous<br />
page.<br />
For example: If you desire to block E-mail received and sent by the IP Address 192.168.1.7 on<br />
your local network, and to make the PC with IP Address 192.168.1.8 unable to visit the website of<br />
IP Address 202.96.134.12, while other PC(s) have no limit you should specify the following IP<br />
address filtering list:<br />
49
4.8.3 Domain Filtering<br />
<strong>TL</strong>-<strong>WR542G</strong><br />
54Mbps Wireless Router <strong>User</strong> <strong>Guide</strong><br />
The Domain Filtering page (shown in Figure 4-37) allows you to control access to certain websites<br />
on the Internet by specifying their domains or key words.<br />
Figure 4-37 Domain Filtering<br />
Before adding a Domain Filtering entry, you must ensure that Enable Firewall and Enable<br />
Domain Filtering have been selected on the Firewall page. To Add a Domain filtering entry, click<br />
the Add New… button. The page "Add or Modify a Domain Filtering entry" will appear, shown<br />
in Figure 4-38:<br />
Figure 4-38 Add or Modify a Domain Filtering entry<br />
To add or modify a Domain Filtering entry, follow these instructions:<br />
1. Effective Time - Enter a range of time in HHMM format specifying the time for the entry to<br />
take effect. For example, if you enter: 0803 - 1705, than the entry will take effect from 08:03<br />
to 17:05.<br />
2. Domain Name - Type the domain or key word as desired in the field. A blank in the domain<br />
field means all websites on the Internet. For example: www.xxyy.com.cn, .net.<br />
3. Status - Select Enabled or Disabled for this entry on the Status pull-down list.<br />
4. Click the Save button to save this entry.<br />
50
<strong>TL</strong>-<strong>WR542G</strong><br />
54Mbps Wireless Router <strong>User</strong> <strong>Guide</strong><br />
To modify or delete an existing entry:<br />
1. Click the Modify in the entry you want to modify. If you want to delete the entry, click the<br />
Delete.<br />
2. Modify the information.<br />
3. Click the Save button.<br />
Click the Enabled All button to make all entries enabled.<br />
Click the Disabled All button to make all entries disabled.<br />
Click the Delete All button to delete all entries<br />
Click the Next button to go to the next page and the Previous button to return to the previous<br />
page.<br />
For example, if you want to block the PC(s) on your LAN to access websites www.xxyy.com.cn,<br />
www.aabbcc.com and websites with .net in the end on the Internet while no limit for other<br />
websites, you should specify the following Domain filtering list:<br />
4.8.4 MAC Filtering<br />
Like the IP Address Filtering page, the MAC Address Filtering page (shown in Figure 4-39) allows<br />
you to control access to the Internet by users on your local network based on their MAC Address.<br />
51
<strong>TL</strong>-<strong>WR542G</strong><br />
54Mbps Wireless Router <strong>User</strong> <strong>Guide</strong><br />
Figure 4-39 MAC address Filtering<br />
Before setting up MAC Filtering entries, you must ensure that Enable Firewall and Enable MAC<br />
Filtering have been selected on the Firewall page. To Add a MAC Address filtering entry, clicking<br />
the Add New… button. The page "Add or Modify a MAC Address Filtering entry" will appear,<br />
shown in Figure 4-40:<br />
Figure 4-40 Add or Modify a MAC Address Filtering entry<br />
To add or modify a MAC Address Filtering entry, follow these instructions:<br />
1. Enter the appropriate MAC Address into the MAC Address field. The format of the MAC<br />
Address is XX-XX-XX-XX-XX-XX (X is any hexadecimal digit). For example:<br />
00-0E-AE-B0-00-0B.<br />
2. Type the description of the PC in the Description field. Fox example: John’s PC.<br />
3. Status - Select Enabled or Disabled for this entry on the Status pull-down list.<br />
4. Click the Save button to save this entry.<br />
To add additional entries, repeat steps 1-4.<br />
When finished, click the Return button to return to the MAC Address Filtering page.<br />
52
<strong>TL</strong>-<strong>WR542G</strong><br />
54Mbps Wireless Router <strong>User</strong> <strong>Guide</strong><br />
To modify or delete an existing entry:<br />
1. Click the Modify in the entry you want to modify. If you want to delete the entry, click the<br />
Delete.<br />
2. Modify the information.<br />
3. Click the Save button.<br />
Click the Enable All button to make all entries enabled.<br />
Click the Disabled All button to make all entries disabled.<br />
Click the Delete All button to delete all entries<br />
Click the Next button to go to the next page and click the Previous button to return to the<br />
previous page.<br />
Fox example: If you want to block the PC with MAC addresses 00-0A-EB-00-07-BE and<br />
00-0A-EB-00-07-5F to access the Internet, first, enable the Firewall and MAC Address Filtering<br />
on the Firewall page, then, you should specify the Default MAC Address Filtering Rule "Deny<br />
these PC(s) with effective rules to access the Internet" on the Firewall page and the following<br />
MAC address filtering list on this page:<br />
4.8.5 Remote Management<br />
You can configure the Remote Management function on this page shown in Figure 4-41. This<br />
feature allows you to manage your Router from a remote location, via the Internet.<br />
Figure 4-41 Remote Management<br />
‣ Web Management Port - Web browser access normally uses the standard HT<strong>TP</strong> service<br />
port 80. This router’s default remote management Web port number is 80. For greater<br />
security, you can change the remote management Web interface to a custom port by<br />
entering that number in this box provided. Choose a number between 1024 and 65534, but<br />
do not use the number of any common service port.<br />
53
<strong>TL</strong>-<strong>WR542G</strong><br />
54Mbps Wireless Router <strong>User</strong> <strong>Guide</strong><br />
‣ Remote Management IP Address - This is the current address you will use when<br />
accessing your router from the Internet. The default IP Address is 0.0.0.0. It means this<br />
function is disabled. To enable this function, change the default IP Address to another IP<br />
Address as desired.<br />
To access the router, you will type your router's WAN IP Address into your browser's Address<br />
(in IE) or Location (in Navigator) box, followed by a colon and the custom port number. For<br />
example, if your Router's WAN address is 202.96.12.8 and you use port number 8080, enter in<br />
your browser: http://202.96.12.8:8080. You will be asked for the router's password. After<br />
successfully entering the password, you will be able to access the router's Web-based utility.<br />
Note: Be sure to change the router's default password to a very secure password.<br />
4.8.6 Advanced Security<br />
Using Advanced Security page (shown in Figure 4-42), you can protect the router from being<br />
attacked by TCP-SYN Flood, UDP Flood and ICMP-Flood from LAN.<br />
Figure 4-42 Advanced Security settings<br />
‣ Packets Statistic interval (5 ~ 60) - The default value is 10. Select a value between 5 and<br />
60 seconds in the pull-down list. The Packets Statistic interval value indicates the time<br />
section of the packets statistic. The result of the statistic used for analysis by SYN Flood,<br />
UDP Flood and ICMP-Flood.<br />
‣ DoS protection - Enable or Disable the DoS protection function. Only when it is enabled,<br />
54
<strong>TL</strong>-<strong>WR542G</strong><br />
54Mbps Wireless Router <strong>User</strong> <strong>Guide</strong><br />
will the flood filters be effective.<br />
‣ Enable ICMP-FLOOD Attack Filtering - Enable or Disable the ICMP-FLOOD Attack<br />
Filtering.<br />
‣ ICMP-FLOOD Packets threshold: (5 ~ 3600) - The default value is 50. Enter a value<br />
between 5 ~ 3600 packets. When the current ICMP-FLOOD Packets number sis beyond the<br />
set value, the router will start up the blocking function immediately.<br />
‣ Enable UDP-FLOOD Filtering - Enable or Disable the UDP-FLOOD Filtering.<br />
‣ UDP-FLOOD Packets threshold: (5 ~ 3600) - The default value is 50. Enter a value<br />
between 5 ~ 3600 packets. When the current UPD-FLOOD Packets numbers is beyond the<br />
set value, the router will start up the blocking function immediately.<br />
‣ Enable TCP-SYN-FLOOD Attack Filtering - Enable or Disable the TCP-SYN- FLOOD<br />
Attack Filtering.<br />
‣ TCP-SYN-FLOOD Packets threshold: (5 ~ 3600) - The default value is 50. Enter a value<br />
between 5 ~ 3600 packets. When the current TCP-SYN-FLOOD Packets numbers is<br />
beyond the set value, the router will start up the blocking function immediately.<br />
‣ Ignore Ping Packet from WAN Port - Enable or Disable ignore ping packet from WAN port.<br />
The default is disabled. If enabled, the ping packet from the Internet cannot access the<br />
router.<br />
‣ Forbid Ping Packet from LAN Port - Enable or Disable forbidding Ping Packet to access<br />
the router from the LAN port. The default value is disabled. If enabled, the ping packet from<br />
the LAN port cannot access the router. (Defends against some viruses)<br />
Click the Save button to save the settings.<br />
Click the Blocked DoS Host Table button to display the DoS host table by blocking. The page<br />
will appear that shown in Figure 4-43:<br />
Figure 4-43 Thwarted DoS Host Table<br />
This page shows Host IP Address and Host MAC Address for each host blocked by the router.<br />
‣ Host IP Address- The IP address that blocked by DoS are displayed here.<br />
55
<strong>TL</strong>-<strong>WR542G</strong><br />
54Mbps Wireless Router <strong>User</strong> <strong>Guide</strong><br />
‣ Host MAC Address - The MAC address that blocked by DoS are displayed here.<br />
To update this page and to show the current blocked host, click on the Refresh button.<br />
Click the Clear All button to clear all displayed entries. After the table is empty the blocked host<br />
will regain the capability to access Internet.<br />
Click the Return button to return to the Advanced Security page<br />
4.9 IP & MAC Binding Setting<br />
Figure 4-44 the IP & MAC Binding menu<br />
There are two submenus under the IP &MAC Binding menu (shown in Figure 4-44): Binding<br />
Setting and ARP List. Click any of them, and you will be able to scan or configure the<br />
corresponding function. The detailed explanations for each submenu are provided below.<br />
4.9.1 Binding Setting<br />
This page displays the IP & MAC Binding Setting table; you can operate it in accord with your<br />
desire. (shown in Figure 4-45).<br />
Figure 4-45 IP & MAC Binding Setting<br />
• MAC Address - The MAC address of the controlled computer in the LAN.<br />
• IP Address - The assigned IP address of the controlled computer in the LAN.<br />
• Bind - Whether or not enable the arp binding.<br />
• Modify - Edit or delete item.<br />
56
<strong>TL</strong>-<strong>WR542G</strong><br />
54Mbps Wireless Router <strong>User</strong> <strong>Guide</strong><br />
When you want to add or modify an IP & MAC Binding entry, you can click the Add New button<br />
or Modify button, and then you will go to the next page. This page is used for adding or<br />
modifying an IP & MAC Binding entry (shown in Figure 4-46).<br />
Figure 4-46 IP & MAC Binding Setting (Add & Modify)<br />
To add IP & MAC Binding entries:<br />
1. Click the Add New... button.<br />
2. Enter the MAC Address and IP Address.<br />
3. Select the Bind checkbox.<br />
4. Click the Save button to save it.<br />
To modify or delete an existing entry:<br />
1. Find the desired entry in the table.<br />
2. Click Modify or Delete as desired on the Modify column.<br />
To find an existing entry:<br />
1. Click the Find button (shown in Figure 4-45).<br />
2. Enter the MAC Address or IP Address.<br />
3. Enter the Find button in the next page (shown in Figure 4-47).<br />
57
<strong>TL</strong>-<strong>WR542G</strong><br />
54Mbps Wireless Router <strong>User</strong> <strong>Guide</strong><br />
Figure 4-47 Find IP & MAC Binding Entry<br />
Click the Enable All button to make all entries enabled.<br />
Click the Delete All button to delete all entries.<br />
4.9.2 ARP List<br />
To manage the computer, you could observe the computers in the LAN by checking the<br />
relationship of MAC address and IP address on the ARP list, and you could configure the items on<br />
the ARP list also. This page displays the ARP List; it shows all the existing IP & MAC Binding<br />
entries (shown in Figure 4-48).<br />
Figure 4-48 ARP List<br />
• MAC Address - The MAC address of the controlled computer in the LAN.<br />
• IP Address - The assigned IP address of the controlled computer in the LAN.<br />
• Status - Enabled or Disabled of the MAC address and IP address binding.<br />
• Configure - Load or delete item.<br />
• Load - Load the item to the IP & MAC Binding list.<br />
• Delete - Delete the item.<br />
Click the Bind All button to bind all the current items, available after enable.<br />
Click the Load All button to load all items to the IP & MAC Binding list.<br />
Click the Refresh button to refresh all items.<br />
Note:<br />
An item could not be loaded to the IP & MAC Binding list if the IP address of the item has been<br />
loaded before. Error warning will prompt as well. Likewise, "Load All" only loads the items without<br />
interference to the IP & MAC Binding list.<br />
58
<strong>TL</strong>-<strong>WR542G</strong><br />
54Mbps Wireless Router <strong>User</strong> <strong>Guide</strong><br />
4.10 Static Routing<br />
A static route is a pre-determined path that network information must travel to reach a specific<br />
host or network. To add or delete a route, work in the area under the Static Routing page (shown<br />
in Figure 4-49).<br />
Figure 4-49 Static Routing<br />
To add static routing entries:<br />
1. Click the Add New button. (pop-up Figure 4-50)<br />
2. Enter the following data:<br />
‣ Destination IP Address - The Destination IP Address is the address of the network or host<br />
that you want to assign to a static route.<br />
‣ Subnet Mask - The Subnet Mask determines which portion of an IP Address is the network<br />
portion, and which portion is the host portion.<br />
‣ Gateway - This is the IP Address of the gateway device that allows for contact between the<br />
router and the network or host.<br />
3. Select Enabled or Disabled for this entry on the Status pull-down list.<br />
4. Click the Save button to save it.<br />
To modify or delete an existing entry:<br />
Figure 4-50 Add or Modify a Static Route Entry<br />
59
<strong>TL</strong>-<strong>WR542G</strong><br />
54Mbps Wireless Router <strong>User</strong> <strong>Guide</strong><br />
1. Click the Modify in the entry you want to modify. If you want to delete the entry, click the<br />
Delete.<br />
2. Modify the information.<br />
3. Click the Save button.<br />
Click the Enable All button to make all entries enabled.<br />
Click the Disabled All button to make all entries disabled.<br />
Click the Delete All button to delete all entries<br />
4.11 DDNS<br />
The router offers a Dynamic Domain Name System (DDNS) feature. DDNS lets you assign a fixed<br />
host and domain name to a dynamic Internet IP Address. It is useful when you are hosting your<br />
own website, F<strong>TP</strong> server, or other server behind the router. Before using this feature, you need to<br />
sign up for DDNS service providers such as www.dyndns.org, www.oray.net or<br />
www.comexe.cn. The Dynamic DNS client service provider will give you a password or key.<br />
To set up for DDNS, follow these instructions:<br />
4.11.1 Dyndns.org DDNS<br />
If your selected dynamic DNS Service Provider is www.dyndns.org, the page will appear as<br />
shown in Figure 4-51:<br />
Figure 4-51 Dyndns.org DDNS Settings<br />
To set up for DDNS, follow these instructions:<br />
1. Type the domain names your dynamic DNS service provider gave.<br />
2. Type the <strong>User</strong> Name for your DDNS account.<br />
60
<strong>TL</strong>-<strong>WR542G</strong><br />
54Mbps Wireless Router <strong>User</strong> <strong>Guide</strong><br />
3. Type the Password for your DDNS account.<br />
4. Click the Login button to login to the DDNS service.<br />
‣ Connection Status -The status of the DDNS service connection is displayed here.<br />
Click Logout to logout of the DDNS service.<br />
4.11.2 Oray.net DDNS<br />
If your selected dynamic DNS Service Provider is www.oray.net, the page will appear as<br />
shown in Figure 4-52:<br />
Figure 4-52 Oray.net DDNS Settings<br />
To set up for DDNS, follow these instructions:<br />
1. Type the <strong>User</strong> Name for your DDNS account.<br />
2. Type the Password for your DDNS account.<br />
3. Click the Login button to login the DDNS service.<br />
‣ Connection Status - The status of the DDNS service connection is displayed here.<br />
‣ Domain Name - The domain names are displayed here.<br />
Click Logout to logout the DDNS service.<br />
4.11.3 Comexe.cn DDNS<br />
If your selected dynamic DNS Service Provider is www.comexe.cn, the page will appear as<br />
shown in Figure 4-53:<br />
61
<strong>TL</strong>-<strong>WR542G</strong><br />
54Mbps Wireless Router <strong>User</strong> <strong>Guide</strong><br />
Figure 4-53 Comexe.cn DDNS Settings<br />
To set up for DDNS, follow these instructions:<br />
1. Type the domain names your dynamic DNS service provider gave.<br />
2. Type the <strong>User</strong> Name for your DDNS account.<br />
3. Type the Password for your DDNS account.<br />
4. Click the Login button to login to the DDNS service.<br />
‣ Connection Status -The status of the DDNS service connection is displayed here.<br />
Click Logout to logout of the DDNS service.<br />
4.12 System Tools<br />
Figure 4-54 The System Tools menu<br />
62
<strong>TL</strong>-<strong>WR542G</strong><br />
54Mbps Wireless Router <strong>User</strong> <strong>Guide</strong><br />
There are eight submenus under the System Tools menu (shown in Figure 4-54): Time,<br />
Firmware, Factory Defaults, Backup and Restore, Reboot, Password, Log and Statistics.<br />
Click any of them, and you will be able to configure the corresponding function. The detailed<br />
explanations for each submenu are provided below.<br />
4.12.1 Time<br />
You can set time manually or get GMT from the Internet for the router on this page (shown in<br />
Figure 4-55):<br />
Figure 4-55 Time settings<br />
‣ Time Zone - Select your local time zone from this pull down list.<br />
‣ Date - Enter your local date in MM/DD/YY into the right blanks.<br />
‣ Time - Enter your local time in HH/MM/SS into the right blanks.<br />
Time setting follows these steps below:<br />
1. Select your local time zone.<br />
2. Enter date and time in the right blanks<br />
3. Click Save.<br />
Click the Get GMT button to get GMT time from Internet if you have connected to Internet.<br />
If you’re using Daylight saving time, please follow the steps below.<br />
1. Select using daylight saving time.<br />
63
<strong>TL</strong>-<strong>WR542G</strong><br />
54Mbps Wireless Router <strong>User</strong> <strong>Guide</strong><br />
2. Enter daylight saving beginning time and end time in the right blanks.<br />
3. Click Save.<br />
Note:<br />
1. This setting will be used for some time-based functions such as firewall. You must specify<br />
your time zone once you login to the router successfully, if not, the time limited on these<br />
functions will not take effect.<br />
2. The time will be lost if the router is turned off.<br />
3. The router will obtain GMT automatically from Internet if it has already connected to Internet.<br />
4.12.2 Firmware<br />
The page (shown in Figure 4-56) allows you to upgrade the latest version firmware to keep your<br />
router up-to-date.<br />
Figure 4-56 Firmware Upgrade<br />
New firmware is posted at www.tp-link.com and can be downloaded for free. If the router is not<br />
experiencing difficulties, there is no need to upgrade firmware, unless the new firmware supports<br />
a new feature you need.<br />
Note:<br />
When you upgrade the router's firmware, you will lose current configuration settings, so make<br />
sure you backup the router’s settings before you upgrade its firmware.<br />
To upgrade the router's firmware, follow these instructions:<br />
1. Download the latest firmware upgrade file from the <strong>TP</strong>-LINK website (www.tp-link.com).<br />
2. Click Browse to view the folders and select the downloaded file.<br />
3. Click the Upgrade button.<br />
‣ Firmware Version - Displays the current firmware version.<br />
‣ Hardware Version - Displays the current hardware version. The hardware version of the<br />
upgrade file must accord with the current hardware version.<br />
Note:<br />
64
<strong>TL</strong>-<strong>WR542G</strong> 54Mbps Wireless Router <strong>User</strong> <strong>Guide</strong><br />
1. Do not turn off the router or press the Reset button while the firmware is being upgraded.<br />
2. The router will reboot after the Upgrading has been finished.<br />
4.12.3 Factory Defaults<br />
This page (shown in Figure 4-57) allows you to restore the factory default settings for the router.<br />
Figure 4-57 Restore Factory Default<br />
Click the Restore button to reset all configuration settings to their default values.<br />
• The default <strong>User</strong> Name: admin<br />
• The default Password: admin<br />
• The default IP Address: 192.168.1.1<br />
• The default Subnet Mask: 255.255.255.0<br />
Note: Any settings you have saved will be lost when the default settings are restored.<br />
4.12.4 Backup and Restore<br />
This page (shown in Figure 4-58) allows you to save current configuration of router as backup or<br />
restore the configuration file you saved before.<br />
Figure 4-58 Backup and Restore Configuration<br />
‣ Click the Backup button to save all configuration settings as a backup file in your local<br />
computer.<br />
‣ To restore the router's configuration, follow these instructions:<br />
• Click the Browse button to select the backup file which you want to restore.<br />
• Click the Restore button.<br />
65
<strong>TL</strong>-<strong>WR542G</strong><br />
54Mbps Wireless Router <strong>User</strong> <strong>Guide</strong><br />
Note:<br />
The current configuration will be covered with the uploading configuration file. The restoration<br />
process lasts for 20 seconds and the router will restart automatically. Keep the router on during<br />
the restoring process, to prevent any damage.<br />
4.12.5 Reboot<br />
This page (shown in Figure 4-59) allows you to reboot the router.<br />
Figure 4-59 Reboot the router<br />
Click the Reboot button to reboot the router.<br />
Some settings of the router will take effect only after rebooting, which include:<br />
• Change LAN IP Address. (System will reboot automatically)<br />
• MAC Clone (system will reboot automatically)<br />
• DHCP service function.<br />
• Static address assignment of DHCP server.<br />
• Web Service Port of the router.<br />
• Upgrade the firmware of the router (system will reboot automatically).<br />
• Restore the router's settings to factory default (system will reboot automatically).<br />
4.12.6 Password<br />
This page (shown in Figure 4-60) allows you to change the factory default user name and<br />
password of the router.<br />
66
<strong>TL</strong>-<strong>WR542G</strong><br />
54Mbps Wireless Router <strong>User</strong> <strong>Guide</strong><br />
Figure 4-60 Password<br />
It is recommended strongly that you change the factory default user name and password of the<br />
router. All users who try to access the router's Web-based utility or Quick Setup will be prompted<br />
for the router's user name and password.<br />
Note:<br />
The new user name and password must not exceed 14 characters in length and must not include<br />
any spaces. Enter the new Password twice to confirm it.<br />
Click the Save button when finished.<br />
Click the Clear All button to clear all.<br />
4.12.7 Log<br />
This page (shown in Figure 4-61) allows you to query the logs of the router.<br />
Figure 4-61 System Log<br />
The router can keep logs of all traffic. You can query the logs to find what happened to the router.<br />
Click the Refresh button to refresh the logs.<br />
Click the Clear Log button to clear all the logs.<br />
67
4.12.8 Statistics<br />
<strong>TL</strong>-<strong>WR542G</strong><br />
54Mbps Wireless Router <strong>User</strong> <strong>Guide</strong><br />
The Statistics page (shown in Figure 4-62) displays the network traffic of each PC in LAN,<br />
including total traffic and traffic of the last Packets Statistic interval seconds.<br />
Figure 4-62 Statistics<br />
‣ Current Statistics Status - Enable or Disable. The default value is disabled. To enable, click<br />
the Enable button. If disabled, the function of DoS protection in Security settings will be<br />
ineffective.<br />
‣ Packets Statistics Interval - The default value is 10. Select a value between 5 and 60<br />
seconds in the pull-down list. The Packets Statistic interval indicates the time section of the<br />
packets statistic.<br />
‣ Sorted Rules - Here displays sort as desired.<br />
Statistics Table:<br />
IP Address<br />
The IP Address displayed with statistics<br />
Total<br />
Packets<br />
Bytes<br />
The total amount of packets received and transmitted by the router.<br />
The total amount of bytes received and transmitted by the router.<br />
Current<br />
Packets<br />
The total amount of packets received and transmitted in the last Packets<br />
Statistic interval seconds.<br />
Bytes<br />
ICMP<br />
Tx<br />
The total amount of bytes received and transmitted in the last Packets<br />
Statistic interval seconds.<br />
The total amount of the ICMP packets transmitted to WAN in the last<br />
Packets Statistic interval seconds.<br />
68
<strong>TL</strong>-<strong>WR542G</strong><br />
54Mbps Wireless Router <strong>User</strong> <strong>Guide</strong><br />
UDP<br />
Tx<br />
TCP<br />
SYN<br />
Tx<br />
The total amount of the UDP packets transmitted to WAN in the last<br />
Packets Statistic interval seconds.<br />
The total amount of the TCP SYN packets transmitted to WAN in the last<br />
Packets Statistic interval seconds.<br />
Click the Save button to save the Packets Statistic interval value.<br />
Click the Auto-refresh checkbox to refresh automatically.<br />
Click the Refresh button to refresh immediately.<br />
69
<strong>TL</strong>-<strong>WR542G</strong><br />
54Mbps Wireless Router <strong>User</strong> <strong>Guide</strong><br />
Appendix A: FAQ<br />
1. How do I configure the router to access Internet by ADSL users?<br />
1) First, configure the ADSL Modem configured in RFC1483 bridge model.<br />
2) Connect the Ethernet cable from your ADSL Modem to the WAN port on the router. The<br />
telephone cord plugs into the Line port of the ADSL Modem.<br />
3) Login to the router, click the “Network” menu on the left of your browser, and click "WAN"<br />
submenu. On the WAN page, select “PPPoE” for WAN Connection Type. Type user<br />
name in the “<strong>User</strong> Name” field and password in the “Password” field, finish by clicking<br />
“Connect”.<br />
Figure A-1 PPPoE Connection Type<br />
4) If your ADSL lease is in “pay-according-time” mode, select “Connect on Demand” or<br />
“Connect Manually” for Internet connection mode. Type an appropriate number for “Max<br />
Idle Time” to avoid wasting paid time. Otherwise, you can select “Auto-connecting” for<br />
Internet connection mode.<br />
Figure A-2 PPPoE Connection Mode<br />
Note:<br />
i. Sometimes the connection cannot be disconnected although you specify a time to Max Idle<br />
Time, since some applications is visiting the Internet continually in the background.<br />
ii. If you are a Cable user, please configure the router following the above steps.<br />
70
<strong>TL</strong>-<strong>WR542G</strong><br />
54Mbps Wireless Router <strong>User</strong> <strong>Guide</strong><br />
2. How do I configure the router to access Internet by Ethernet users?<br />
1) Login to the router, click the “Network” menu on the left of your browser, and click "WAN"<br />
submenu. On the WAN page, select “Dynamic IP” for "WAN Connection Type", finish by<br />
clicking “Save”.<br />
2) Some ISPs require that you register the MAC Address of your adapter, which is<br />
connected to your cable/DSL Modem during installation. If your ISP requires MAC<br />
register, login to the router and click the "Network" menu link on the left of your browser,<br />
and then click "MAC Clone" submenu link. On the "MAC Clone" page, if your PC’s MAC<br />
address is proper MAC address, click the "Clone MAC Address" button and your PC’s<br />
MAC address will fill in the "WAN MAC Address" field. Or else, type the MAC Address<br />
into the "WAN MAC Address" field. The format for the MAC Address is<br />
XX-XX-XX-XX-XX-XX. Then click the "Save" button. It will take effect after rebooting.<br />
Figure A-3 MAC Clone<br />
3. I want to use Netmeeting, what do I need to do?<br />
1) If you start a Netmeeting as a host, no configuration is needed but entering the invitee’s<br />
IP address.<br />
2) If you start a Netmeeting as an invitee, you need to configure Virtual Server or DMZ Host<br />
first.<br />
3) How to configure Virtual Server: Login to the router, click the “Forwarding” menu on the<br />
left of your browser, and click "Virtual Servers" submenu. On the "Virtual Server" page,<br />
click Add New, then on the “Add or Modify a Virtual Server” page, enter “1720” into the<br />
blank behind the “Service Port”, and your IP address behind the IP Address, assuming<br />
192.168.1.169 for an example, remember to “Enable” and “Save”.<br />
Figure A-4 Virtual Servers<br />
71
<strong>TL</strong>-<strong>WR542G</strong><br />
54Mbps Wireless Router <strong>User</strong> <strong>Guide</strong><br />
Figure A-5 Add or Modify a Virtual server Entry<br />
Note: Your opposite side should call your WAN IP, which is displayed on the<br />
“Status” page.<br />
4) How to enable DMZ Host: Login to the router, click the “Forwarding” menu on the left of<br />
your browser, and click "DMZ" submenu. On the "DMZ" page, click “Enable” radio and<br />
type your IP address into the “DMZ Host IP Address” field, using 192.168.1.169 as an<br />
example, remember to click the "Save” button.<br />
Figure A-6 DMZ<br />
4. I want to build a WEB Server on the LAN, what should I do?<br />
1) Because the WEB Server port 80 will interfere with the WEB management port 80 on the<br />
router, you must change the WEB management port number to avoid interference.<br />
2) To change the WEB management port number: Login to the router, click the “Security”<br />
menu on the left of your browser, and click "Remote Management" submenu. On the<br />
"Remote Management" page, type a port number except 80, such as 88, into the "Web<br />
Management Port" field. Click “Save” and reboot the router.<br />
72
<strong>TL</strong>-<strong>WR542G</strong><br />
54Mbps Wireless Router <strong>User</strong> <strong>Guide</strong><br />
Figure A-7 Remote Management<br />
Note:<br />
If the above configuration takes effect, to configure to the router by typing<br />
http://192.168.1.1:88 (the router’s LAN IP address: Web Management Port) in the address<br />
field of the Web browser.<br />
3) Login to the router, click the “Forwarding” menu on the left of your browser, and click the<br />
"Virtual Servers" submenu. On the "Virtual Server" page, click Add New, then on the<br />
“Add or Modify a Virtual Server” page, enter “80” into the blank behind the “Service Port”,<br />
and your IP address behind the IP Address, assuming 192.168.1.188 for an example,<br />
remember to “Enable” and “Save”.<br />
Figure A-8 Virtual Servers<br />
Figure A-9 Add or Modify a Virtual server Entry<br />
5. The wireless stations cannot connect to the router.<br />
1) Make sure the "Wireless Router Radio" is enabled.<br />
73
<strong>TL</strong>-<strong>WR542G</strong><br />
54Mbps Wireless Router <strong>User</strong> <strong>Guide</strong><br />
2) Make sure that the wireless stations' SSID accord with the router's SSID.<br />
3) Make sure the wireless stations have right KEY for encryption when the router is<br />
encrypted.<br />
4) If the wireless connection is ready, but you can’t access the router, check the IP Address<br />
of your wireless stations.<br />
74
<strong>TL</strong>-<strong>WR542G</strong><br />
54Mbps Wireless Router <strong>User</strong> <strong>Guide</strong><br />
Appendix B: Configuring the PC<br />
In this section, we’ll introduce how to install and configure the TCP/IP correctly in Windows XP.<br />
First make sure your Ethernet Adapter is working, refer to the adapter’s manual if needed.<br />
1. Install TCP/IP component<br />
1) On the Windows taskbar, click the Start button, point to Settings, and then click Control<br />
Panel.<br />
2) Click the Network and Internet Connections icon, and then click on the Network<br />
Connections tab in the appearing window.<br />
3) Right click the icon that showed below, select Properties on the prompt page.<br />
Figure 1<br />
4) In the prompt page that showed below, double click on the Internet Protocol (TCP/IP).<br />
75
<strong>TL</strong>-<strong>WR542G</strong><br />
54Mbps Wireless Router <strong>User</strong> <strong>Guide</strong><br />
Figure 2<br />
5) The following TCP/IP Properties window will display and the IP Address tab is open on<br />
this window by default.<br />
Now you have two ways to configure the TCP/IP protocol below:<br />
‣ Setting IP address automatically<br />
Select Obtain an IP address automatically, Choose Obtain DNS server automatically, as<br />
shown in the Figure below:<br />
76
<strong>TL</strong>-<strong>WR542G</strong><br />
54Mbps Wireless Router <strong>User</strong> <strong>Guide</strong><br />
Figure 3<br />
‣ Setting IP address manually<br />
1 Select Use the following IP address radio button. And the following items available<br />
2 If the router's LAN IP address is 192.168.1.1, type IP address is 192.168.1.x (x is from 2 to<br />
254), and Subnet mask is 255.255.255.0.<br />
3 Type the router’s LAN IP address (the default IP is 192.168.1.1) into the Default gateway<br />
field.<br />
4 Select Use the following DNS server addresses radio button. In the Preferred DNS<br />
Server field you can type the DNS server IP address, which has been provided by your ISP<br />
77
<strong>TL</strong>-<strong>WR542G</strong><br />
54Mbps Wireless Router <strong>User</strong> <strong>Guide</strong><br />
Figure 4<br />
78
<strong>TL</strong>-<strong>WR542G</strong><br />
54Mbps Wireless Router <strong>User</strong> <strong>Guide</strong><br />
Appendix C: Specifications<br />
General<br />
Standards IEEE 802.3, 802.3u, 802.11b and 802.11g<br />
Protocols<br />
TCP/IP, PPPoE, DHCP, ICMP, NAT, SN<strong>TP</strong><br />
Ports One 10/100M Auto-Negotiation WAN RJ45 port, Four 10/100M<br />
Auto-Negotiation LAN RJ45 ports supporting Auto MDI/MDIX<br />
Cabling Type 10BASE-T: U<strong>TP</strong> category 3, 4, 5 cable (maximum 100m)<br />
EIA/TIA-568 100Ω S<strong>TP</strong> (maximum 100m)<br />
100BASE-TX: U<strong>TP</strong> category 5, 5e cable (maximum 100m)<br />
EIA/TIA-568 100Ω S<strong>TP</strong> (maximum 100m)<br />
Radio Data Rate<br />
54/48/36/24/18/12/9/6Mbps or 11/5.5/3/2/1Mbps<br />
LEDs Power, SYS, WLAN, WAN, 1-4<br />
Safety & Emissions<br />
FCC, CE<br />
Environmental and Physical<br />
Operating Temp. 0℃~40℃ (32 ℉ ~104℉)<br />
Operating Humidity<br />
Dimensions (W×D×H)<br />
10% - 90% RH, Non-condensing<br />
6.9×4.4×1.2 in. (174×111×30 mm) (without antenna)<br />
79
<strong>TL</strong>-<strong>WR542G</strong><br />
54Mbps Wireless Router <strong>User</strong> <strong>Guide</strong><br />
Appendix D: Glossary<br />
‣ 2x to 3x eXtended Range WLAN Transmission Technology - The WLAN device with 2x<br />
to 3x eXtended Range WLAN transmission technology make its sensitivity up to 105 dB,<br />
which gives users the ability to have robust, longer-range wireless connections. With this<br />
range-enhancing technology, a 2x to 3x eXtended Range based client and access point can<br />
maintain a connection at as much as three times the transmission distance of traditional<br />
802.11b and 802.11g products, for a coverage area that is up to nine times greater. A<br />
traditional 802.11b and 802.11g product transmission distance is about 300m, a 2x to 3x<br />
eXtended Range based client and access point can maintain a connection transmission<br />
distance may be up to 830m.<br />
‣ 802.11b - The 802.11b standard specifies a wireless networking at 11 Mbps using<br />
direct-sequence spread-spectrum (DSSS) technology and operating in the unlicensed radio<br />
spectrum at 2.4GHz, and WEP encryption for security. 802.11b networks are also referred to<br />
as Wi-Fi networks.<br />
‣ 802.11g - specification for wireless networking at 54 Mbps using direct-sequence<br />
spread-spectrum (DSSS) technology, using OFDM modulation and operating in the<br />
unlicensed radio spectrum at 2.4GHz, and backward compatibility with IEEE 802.11b devices,<br />
and WEP encryption for security.<br />
‣ DDNS (Dynamic Domain Name System) - The capability of assigning a fixed host and<br />
domain name to a dynamic Internet IP Address.<br />
‣ DHCP (Dynamic Host Configuration Protocol) - A protocol that automatically configure the<br />
TCP/IP parameters for the all the PC(s) that are connected to a DHCP server.<br />
‣ DMZ (Demilitarized Zone) - A Demilitarized Zone allows one local host to be exposed to the<br />
Internet for a special-purpose service such as Internet gaming or videoconferencing.<br />
‣ DNS (Domain Name System) – An Internet Service that translates the names of websites into<br />
IP addresses.<br />
‣ Domain Name - A descriptive name for an address or group of addresses on the Internet.<br />
‣ DoS (Denial of Service) - A hacker attack designed to prevent your computer or network from<br />
operating or communicating.<br />
‣ DSL (Digital Subscriber Line) - A technology that allows data to be sent or received over<br />
existing traditional phone lines.<br />
‣ ISP (Internet Service Provider) - A company that provides access to the Internet.<br />
80
<strong>TL</strong>-<strong>WR542G</strong><br />
54Mbps Wireless Router <strong>User</strong> <strong>Guide</strong><br />
‣ MTU (Maximum Transmission Unit) - The size in bytes of the largest packet that can be<br />
transmitted.<br />
‣ NAT (Network Address Translation) - NAT technology translates IP addresses of a local area<br />
network to a different IP address for the Internet.<br />
‣ PPPoE (Point to Point Protocol over Ethernet) - PPPoE is a protocol for connecting remote<br />
hosts to the Internet over an always-on connection by simulating a dial-up connection.<br />
‣ SSID - A Service Set Identification is a thirty-two character (maximum) alphanumeric key<br />
identifying a wireless local area network. For the wireless devices in a network to<br />
communicate with each other, all devices must be configured with the same SSID. This is<br />
typically the configuration parameter for a wireless PC card. It corresponds to the ESSID in<br />
the wireless Access Point and to the wireless network name.<br />
‣ WEP (Wired Equivalent Privacy) - A data privacy mechanism based on a 64-bit or 128-bit or<br />
152-bit shared key algorithm, as described in the IEEE 802.11 standard.<br />
‣ Wi-Fi - A trade name for the 802.11b wireless networking standard, given by the Wireless<br />
Ethernet Compatibility Alliance (WECA, see http://www.wi-fi.net), an industry standards<br />
group promoting interoperability among 802.11b devices.<br />
‣ WLAN (Wireless Local Area Network) - A group of computers and associated devices<br />
communicate with each other wirelessly, which network serving users are limited in a local<br />
area.<br />
http://www.tp-link.com<br />
81