Create successful ePaper yourself
Turn your PDF publications into a flip-book with our unique Google optimized e-Paper software.
39 English<br />
Contour Setup<br />
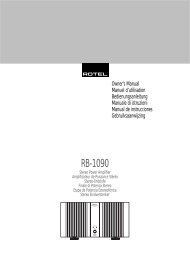
CONTOUR SETUP<br />
SPEAKER:Front<br />
DEFEAT:On<br />
HF CONTOUR:+5<br />
LF CONTOUR: 0<br />
MAIN MENU<br />
The CONTOUR SETUP menu allows digital<br />
adjustment of the bass and treble response of<br />
each group of speakers in the system. For<br />
example, if your center channel speaker sounds<br />
too bright, you could roll off the extreme high<br />
frequencies.<br />
SPEAKER (front/center/surround/center<br />
back/all): Select which speaker or group<br />
of speakers to adjust. Selecting ALL permits<br />
adjustment of the entire system as a whole.<br />
DEFEAT (on/off): Selecting the ON setting<br />
defeats the contour adjustment, bypassing the<br />
contour processing entirely for that speaker<br />
or group of speakers.<br />
HF CONTOUR: Adjusts the extreme high frequency<br />
slope over a range of -6dB (MIN) to<br />
+6dB (MAX). Negative number settings reduce<br />
the high frequency output; positive number<br />
settings increase it.<br />
LF CONTOUR: Adjusts the extreme low frequency<br />
slope over a range of -6dB (MIN) to<br />
+6dB (MAX). Negative number settings reduce<br />
the low frequency output; positive number<br />
settings increase it.<br />
The contour adjustments are designed to work<br />
at the frequency extremes and be relatively<br />
subtle so that they do not have a negative impact<br />
on midrange sounds. We recommend acclimating<br />
to the sound of the system with the<br />
contour adjustments defeated and then making<br />
adjustments, if necessary, to address specific<br />
speaker response issues or personal taste.<br />
NOTE: You can also make temporary contour<br />
adjustments using the TONE and UP/DOWN<br />
buttons on the remote. See the Contour/Tone<br />
Settings section of this manual for details.<br />
Miscellaneous Settings<br />
Other Options<br />
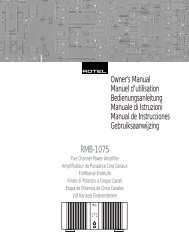
OTHER OPTIONS<br />
RECORD:Source<br />
TURN ON VOL:Last<br />
MAX VOL:Max<br />
VOL SPEED:Slow<br />
POWER:Standby<br />
LANGUAGE:English<br />
VIDEO:NTSC<br />
OSD:On<br />
PROGRESSIVE:NO<br />
MAIN MENU<br />
This OTHER OPTIONS menu, accessed from<br />
the MAIN menu, provides access to several<br />
miscellaneous settings as follows:<br />
RECORD: Select which source signal to be<br />
sent to the recording outputs by choosing one<br />
of the input sources. The options are: CD, TAPE,<br />
TUNER, VIDEO 1–5, and SOURCE. You can<br />
either select a specific component or select<br />
SOURCE which will send the signal to the<br />
record outputs from whatever source is selected<br />
for listening.<br />
TURN ON VOL: Specifies a default volume<br />
level to be used each time the <strong>RSP</strong>-<strong>1068</strong> is<br />
activated. You can select LAST to have the<br />
<strong>RSP</strong>-<strong>1068</strong> power up with the last previously<br />
used volume setting. Or, you specify a volume<br />
from MIN (full mute) to MAX, in 1dB increments.<br />
Note that this setting cannot exceed the MAX<br />
VOL established in the next line of the menu.<br />
MAX VOL: Specifies the maximum volume<br />
level for the <strong>RSP</strong>-<strong>1068</strong>. The volume cannot be<br />
adjusted above this level. Settings range from<br />
MIN to MAX, in 1dB increments.<br />
VOL SPEED: Provides three options for how<br />
rapidly the volume control responds to inputs.<br />
The SLOW setting adjusts the volume 1dB with<br />
each control input. The MID setting adjusts in<br />
2dB increments. The FAST setting adjusts in<br />
3dB increments.<br />
POWER: This setting determines how the<br />
<strong>RSP</strong>-<strong>1068</strong> powers up.<br />
With the default STANDBY setting, the unit<br />
powers up in standby mode when AC is applied<br />
and the rear panel POWER button is ON.<br />
The unit must be activated using the front panel<br />
STANDBY button or the remote ON/OFF<br />
buttons.<br />
With the DIRECT setting, the unit is fully activated<br />
when AC power is applied and the rear<br />
panel POWER button is ON; however, it may<br />
be put in standby mode using the front panel<br />
STANDBY button or the remote ON/OFF<br />
buttons.<br />
In ALWAYS-ON mode, the unit remains fully<br />
active whenever AC is present and the rear<br />
panel POWER button is ON; the front panel<br />
STANDBY button and the remote ON/OFF<br />
buttons are disabled and the unit cannot be<br />
put in standby mode.<br />
LANGUAGE: Selects a language for the On<br />
Screen Display.<br />
VIDEO: Specifies whether an NTSC or PAL<br />
television monitor is connected to the TV<br />
MONITOR outputs of the <strong>RSP</strong>-<strong>1068</strong>. This setting<br />
must be correct for the upconversion and<br />
OSD menus to work properly.<br />
OSD ON/OFF: Select whether or not status<br />
information (such as the volume setting) is<br />
displayed on the TV monitor.<br />
PROGRESSIVE: The OSD menus cannot be<br />
displayed on the TV monitor when progressive<br />
scan or 1080i HDTV video signals are<br />
being used at the Component Video inputs.<br />
This setting enables a feature that allows the<br />
display of the main OSD setup menus (but not<br />
the information displays such as volume, etc.)<br />
on the TV monitor by interrupting the progressive<br />
scan video signal and restoring it after the OSD<br />
menus are cancelled. Choose the video input<br />
or combination of video inputs for progressive<br />
scan or HDTV video signals (480p, 720p,<br />
1080i). All other video inputs will be assigned<br />
as standard interlaced video inputs. Video 4<br />
and 5 cannot be assigned as progressive scan<br />
inputs.<br />
NOTE: When a video input or inputs are selected<br />
for progressive mode, the conversion<br />
from composite or S-Video to Component<br />
Video output is not available for those inputs.<br />
The conversion from composite or S-VIDEO<br />
to Component Video output is only available<br />
for the other video inputs. For example, if<br />
Video 1 and Video 2 are selected for progressive<br />
scan signals (V1+V2), conversion<br />
from composite or S-Video is only available<br />
for Video 3, 4, and 5.