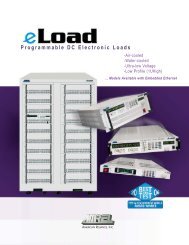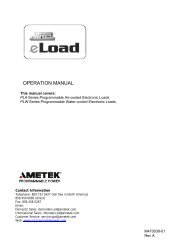
PEL-60-60-10 - Physical Instruments
PEL-60-60-10 - Physical Instruments
PEL-60-60-10 - Physical Instruments

You also want an ePaper? Increase the reach of your titles
YUMPU automatically turns print PDFs into web optimized ePapers that Google loves.
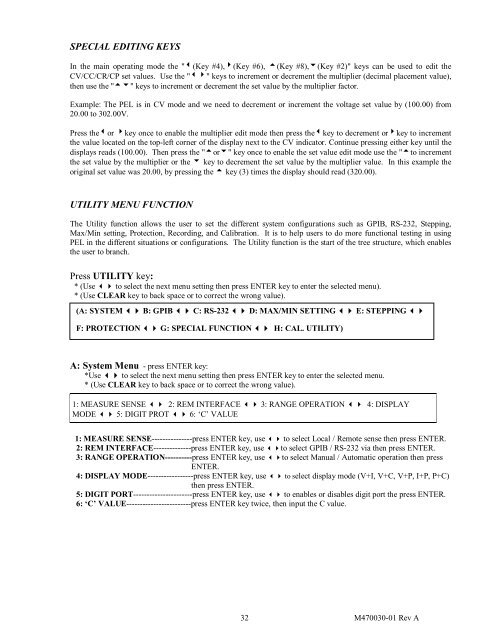
SPECIAL EDITING KEYS<br />
In the main operating mode the "(Key #4),(Key #6), (Key #8),(Key #2)" keys can be used to edit the<br />
CV/CC/CR/CP set values. Use the "" keys to increment or decrement the multiplier (decimal placement value),<br />
then use the "" keys to increment or decrement the set value by the multiplier factor.<br />
Example: The <strong>PEL</strong> is in CV mode and we need to decrement or increment the voltage set value by (<strong>10</strong>0.00) from<br />
20.00 to 302.00V.<br />
Press theor key once to enable the multiplier edit mode then press thekey to decrement orkey to increment<br />
the value located on the top-left corner of the display next to the CV indicator. Continue pressing either key until the<br />
displays reads (<strong>10</strong>0.00). Then press the "or" key once to enable the set value edit mode use the "to increment<br />
the set value by the multiplier or the key to decrement the set value by the multiplier value. In this example the<br />
original set value was 20.00, by pressing the key (3) times the display should read (320.00).<br />
UTILITY MENU FUNCTION<br />
The Utility function allows the user to set the different system configurations such as GPIB, RS-232, Stepping,<br />
Max/Min setting, Protection, Recording, and Calibration. It is to help users to do more functional testing in using<br />
<strong>PEL</strong> in the different situations or configurations. The Utility function is the start of the tree structure, which enables<br />
the user to branch.<br />
Press UTILITY key:<br />
* (Use to select the next menu setting then press ENTER key to enter the selected menu).<br />
* (Use CLEAR key to back space or to correct the wrong value).<br />
(A: SYSTEM B: GPIB C: RS-232 D: MAX/MIN SETTING E: STEPPING <br />
F: PROTECTION G: SPECIAL FUNCTION H: CAL. UTILITY)<br />
A: System Menu - press ENTER key:<br />
*Use to select the next menu setting then press ENTER key to enter the selected menu.<br />
* (Use CLEAR key to back space or to correct the wrong value).<br />
1: MEASURE SENSE 2: REM INTERFACE 3: RANGE OPERATION 4: DISPLAY<br />
MODE 5: DIGIT PROT 6: ‘C’ VALUE<br />
1: MEASURE SENSE---------------press ENTER key, use to select Local / Remote sense then press ENTER.<br />
2: REM INTERFACE--------------press ENTER key, use to select GPIB / RS-232 via then press ENTER.<br />
3: RANGE OPERATION----------press ENTER key, use to select Manual / Automatic operation then press<br />
ENTER.<br />
4: DISPLAY MODE-----------------press ENTER key, use to select display mode (V+I, V+C, V+P, I+P, P+C)<br />
then press ENTER.<br />
5: DIGIT PORT----------------------press ENTER key, use to enables or disables digit port the press ENTER.<br />
6: ‘C’ VALUE------------------------press ENTER key twice, then input the C value.<br />
32 M470030-01 Rev A