Star Trek V: The Final Frontier Star Trek VI: The ... - Roddenberry.com
Star Trek V: The Final Frontier Star Trek VI: The ... - Roddenberry.com
Star Trek V: The Final Frontier Star Trek VI: The ... - Roddenberry.com

You also want an ePaper? Increase the reach of your titles
YUMPU automatically turns print PDFs into web optimized ePapers that Google loves.
8<br />
#PRP1777 - St a r Tr e k V a n d <strong>VI</strong> As s a u l t Ph a s e r Pr o p Kit As s e m b l y Ma n u a l<br />
MAIN PISTOL BODY:<br />
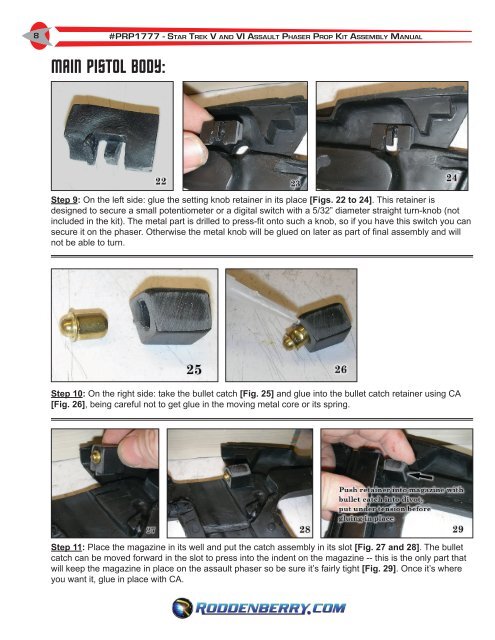
Step 9: On the left side: glue the setting knob retainer in its place [Figs. 22 to 24]. This retainer is<br />
designed to secure a small potentiometer or a digital switch with a 5/32” diameter straight turn-knob (not<br />
included in the kit). <strong>The</strong> metal part is drilled to press-fit onto such a knob, so if you have this switch you can<br />
secure it on the phaser. Otherwise the metal knob will be glued on later as part of final assembly and will<br />
not be able to turn.<br />
Step 10: On the right side: take the bullet catch [Fig. 25] and glue into the bullet catch retainer using CA<br />
[Fig. 26], being careful not to get glue in the moving metal core or its spring.<br />
Step 11: Place the magazine in its well and put the catch assembly in its slot [Fig. 27 and 28]. <strong>The</strong> bullet<br />
catch can be moved forward in the slot to press into the indent on the magazine -- this is the only part that<br />
will keep the magazine in place on the assault phaser so be sure it’s fairly tight [Fig. 29]. Once it’s where<br />
you want it, glue in place with CA.