


You also want an ePaper? Increase the reach of your titles
YUMPU automatically turns print PDFs into web optimized ePapers that Google loves.
2<br />
#PRP1750 - St a r Tr e k “Bo o m e r a n g” Ph a s e r Pr o p Kit As s e m b l y Ma n u a l<br />
BASIC LAYOUT AND INVENTORY<br />
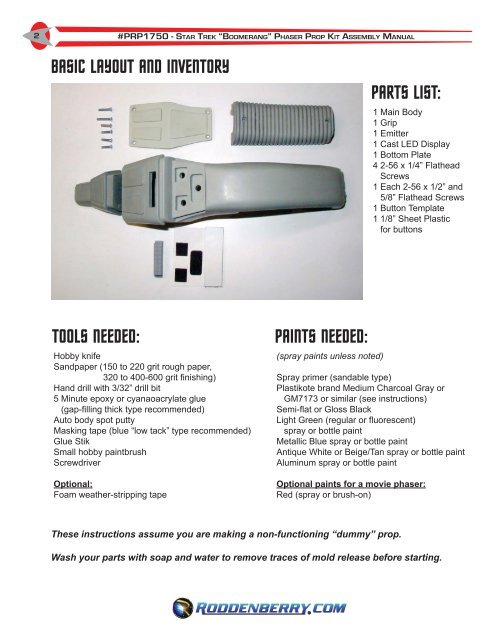
Parts List:<br />
1 Main Body<br />
1 Grip<br />
1 Emitter<br />
1 Cast LED Display<br />
1 Bottom Plate<br />
4 2-56 x 1/4” Flathead<br />
Screws<br />
1 Each 2-56 x 1/2” and<br />
5/8” Flathead Screws<br />
1 Button Template<br />
1 1/8” Sheet Plastic<br />
for buttons<br />
Tools Needed:<br />
Hobby knife<br />
Sandpaper (150 to 220 grit rough paper,<br />
320 to 400-600 grit finishing)<br />
Hand drill with 3/32” drill bit<br />
5 Minute epoxy or cyanaoacrylate glue<br />
(gap-filling thick type re<strong>com</strong>mended)<br />
Auto body spot putty<br />
Masking tape (blue “low tack” type re<strong>com</strong>mended)<br />
Glue Stik<br />
Small hobby paintbrush<br />
Screwdriver<br />
Optional:<br />
Foam weather-stripping tape<br />
PAINTS Needed:<br />
(spray paints unless noted)<br />
Spray primer (sandable type)<br />
Plastikote brand Medium Charcoal Gray or<br />
GM7173 or similar (see instructions)<br />
Semi-flat or Gloss Black<br />
Light Green (regular or fluorescent)<br />
spray or bottle paint<br />
Metallic Blue spray or bottle paint<br />
Antique White or Beige/Tan spray or bottle paint<br />
Aluminum spray or bottle paint<br />
Optional paints for a movie phaser:<br />
Red (spray or brush-on)<br />
These instructions assume you are making a non-functioning “dummy” prop.<br />
Wash your parts with soap and water to remove traces of mold release before starting.


