You also want an ePaper? Increase the reach of your titles
YUMPU automatically turns print PDFs into web optimized ePapers that Google loves.
4<br />
#PRP1750 - St a r Tr e k “Bo o m e r a n g” Ph a s e r Pr o p Kit As s e m b l y Ma n u a l<br />
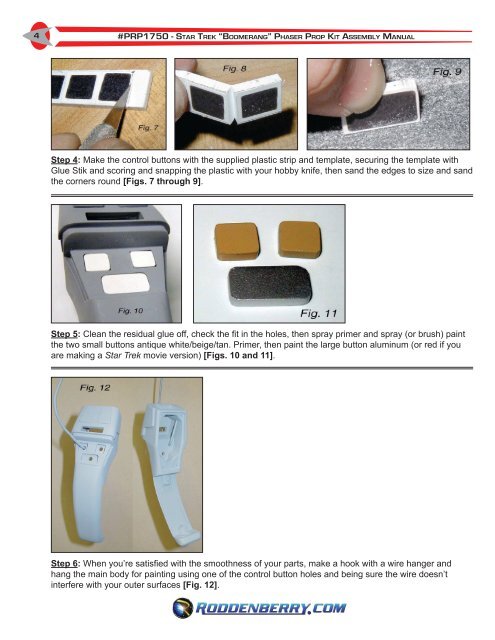
Step 4: Make the control buttons with the supplied plastic strip and template, securing the template with<br />
Glue Stik and scoring and snapping the plastic with your hobby knife, then sand the edges to size and sand<br />
the corners round [Figs. 7 through 9].<br />
Step 5: Clean the residual glue off, check the fit in the holes, then spray primer and spray (or brush) paint<br />
the two small buttons antique white/beige/tan. Primer, then paint the large button aluminum (or red if you<br />
are making a <strong>Star</strong> <strong>Trek</strong> movie version) [Figs. 10 and 11].<br />
Step 6: When you’re satisfied with the smoothness of your parts, make a hook with a wire hanger and<br />
hang the main body for painting using one of the control button holes and being sure the wire doesn’t<br />
interfere with your outer surfaces [Fig. 12].


