


You also want an ePaper? Increase the reach of your titles
YUMPU automatically turns print PDFs into web optimized ePapers that Google loves.
8<br />
#PRP1750 - St a r Tr e k “Bo o m e r a n g” Ph a s e r Pr o p Kit As s e m b l y Ma n u a l<br />
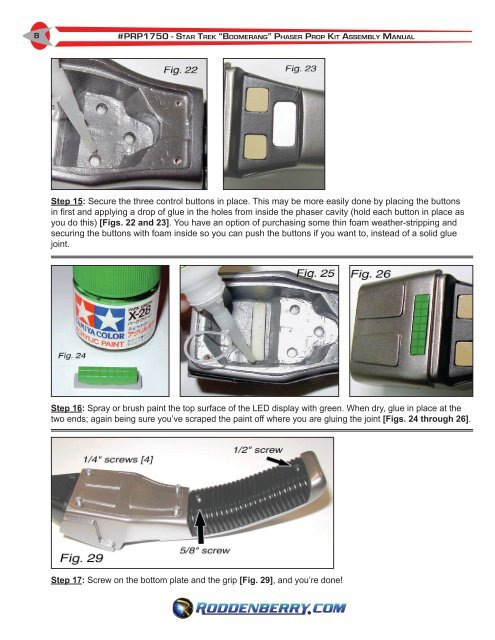
Step 15: Secure the three control buttons in place. This may be more easily done by placing the buttons<br />
in first and applying a drop of glue in the holes from inside the phaser cavity (hold each button in place as<br />
you do this) [Figs. 22 and 23]. You have an option of purchasing some thin foam weather-stripping and<br />
securing the buttons with foam inside so you can push the buttons if you want to, instead of a solid glue<br />
joint.<br />
Step 16: Spray or brush paint the top surface of the LED display with green. When dry, glue in place at the<br />
two ends; again being sure you’ve scraped the paint off where you are gluing the joint [Figs. 24 through 26].<br />
Step 17: Screw on the bottom plate and the grip [Fig. 29], and you’re done!


