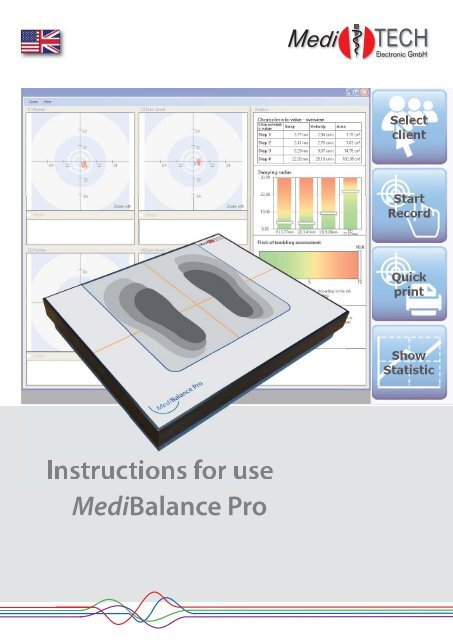
Anleitung-MediBalance Pro MBP 1-3-GB.indd - MediTECH ...
Anleitung-MediBalance Pro MBP 1-3-GB.indd - MediTECH ...
Anleitung-MediBalance Pro MBP 1-3-GB.indd - MediTECH ...

You also want an ePaper? Increase the reach of your titles
YUMPU automatically turns print PDFs into web optimized ePapers that Google loves.
Instructions for use<br />
<strong>MediBalance</strong> <strong>Pro</strong>
Introduction – Chapter 1<br />
Table of content<br />
1. Introduction ............................................................................................................................................3<br />
1.1 What will the user get? ..............................................................................................................3<br />
1.2 Scope of supply ..........................................................................................................................3<br />
1.3 Necessary and optional accessory ..........................................................................................3<br />
2. Safety notes ...........................................................................................................................................4<br />
3. Device view ............................................................................................................................................5<br />
3.1 Frontview ....................................................................................................................................5<br />
3.2 Vies ot the interface side ...........................................................................................................5<br />
4. Installation ..............................................................................................................................................6<br />
4.1 Software installation .................................................................................................................6<br />
4.2 How to connect the <strong>MediBalance</strong> <strong>Pro</strong> platform to the computer ...........................................6<br />
5. How to use the software: recordings, exercise and analysis ............................................................7<br />
5.1 Software elements......................................................................................................................7<br />
5.2 Client manager ...........................................................................................................................8<br />
5.3 Recording module .................................................................................................................... 11<br />
5.3.1 Measuring arrangement of the components .................................................................11<br />
5.3.2 How to prepare the recording: calibration .....................................................................11<br />
5.3.3 Standard scripts with the quick task bar ...................................................................... 12<br />
5.3.4 How to record - standard script (4 step protocol) ........................................................ 12<br />
5.3.5 End of recording and analysis ..................................................................................... 15<br />
5.3.6 Abnormal termination of a recording step .................................................................... 16<br />
5.3.7 Print results .................................................................................................................. 16<br />
5.3.8 Recording variations .................................................................................................... 17<br />
5.4 Exercise module .......................................................................................................................19<br />
5.4.1 General execution of an exercise ................................................................................ 19<br />
5.4.2 Conditions for terminating the exercise ....................................................................... 19<br />
5.4.3 Diffi culty level ............................................................................................................... 20<br />
5.4.4 Exercises ..................................................................................................................... 20<br />
5.5 Analysis module .......................................................................................................................27<br />
5.6 Fault location ............................................................................................................................31<br />
6. Technology and maintenance.............................................................................................................32<br />
6.1 Repair and maintenance ..........................................................................................................32<br />
6.2 Cleaning ....................................................................................................................................32<br />
6.3 Maintenance and storage ........................................................................................................33<br />
6.4 Transport ...................................................................................................................................33<br />
6.5 Disposal ....................................................................................................................................33<br />
6.6 Rating plate ...............................................................................................................................34<br />
6.7 Technical data ..........................................................................................................................34<br />
6.8 Electromagnetic compatibility – Guidance and manufacturer‘s declaration .....................35<br />
7. Service .................................................................................................................................................39<br />
7.1 Contact data of producer .........................................................................................................39<br />
7.2 Warranty ....................................................................................................................................39<br />
7.2 EC declaration of conformity ..................................................................................................39<br />
2
Chapter 1 – Introduction<br />
1. Introduction<br />
This manual of the complete <strong>MediBalance</strong> <strong>Pro</strong> system was written for otorhinolaryngologists, ophthalmologists,<br />
orthopaedists, therapists and other professionals dealing with symptoms of dizziness, equilibrium<br />
and coordination, stability in everyday life, motion rehabilitation and motion support.<br />
This manual will inform you about how to install and operate this device and the software: recordings,<br />
exercise, analysis.<br />
1.1 What will the user get?<br />
The <strong>MediBalance</strong> <strong>Pro</strong> software is receiving measuring data recorded during an <strong>MediBalance</strong> <strong>Pro</strong> platform<br />
session and displaying these results as graphics and statistics:<br />
• the recording module measures functions like equilibrium or coordination with open and closed<br />
eyes, so that they can be objectively evaluated.<br />
• the client can exercise balance, equilibrium, perception and control of the body or various other<br />
motor skills in coordination and concentration on six exercise screens - without perceiving at all<br />
that he or she is exercising. The client may pursue circles, aim at various changing positions,<br />
catch balls with a basket, move as a player at the base line of a tennis court or protect a princess<br />
from evil robber barons.<br />
A Client management stores data and results to make them available for analysis.<br />
The therapist supervises recordings and exercises.<br />
1.2 Scope of supply<br />
<strong>Pro</strong>duct<br />
Item number<br />
(for repeat orders)<br />
• <strong>MediBalance</strong> <strong>Pro</strong> platform 2542<br />
• <strong>MediBalance</strong> <strong>Pro</strong> software (on CD-ROM)*<br />
2546-<strong>GB</strong><br />
• USB insulator (to connect the <strong>MediBalance</strong> <strong>Pro</strong> platform to the computer) 2548<br />
• USB cable connection (USB-a to USB-a) B 01381<br />
• USB cable connection (USB-a to USB b) 9897<br />
• Instructions 5030<br />
• Transport bag 2545<br />
• Balance cushions (add-on cushion for recording and exercise) 2506<br />
• Supporting rack (folding and adjustable in height to save space) -<br />
2519<br />
intended purpose: clients can hold on to it if they feel dizzy or are afraid of Noteing over.<br />
* You may fi nd the most recent versions and patches of the software online at www.download.meditech.de.<br />
Please, note that these updates are available to our services and maintenance contract customers.<br />
Attention! Use only the provided accessory or - in case of damage or loss - the spare parts listed<br />
above. Other articles may cause more powerful emission or reduce the immunity of the<br />
<strong>MediBalance</strong> <strong>Pro</strong>.<br />
Read and understand the instructions before use!<br />
1.3 Necessary and optional accessory<br />
A computer (workstation or notebook) is necessary to use the <strong>MediBalance</strong> <strong>Pro</strong> test system. For<br />
the least standards which said computer has to meet, please, see the chapter Technology and<br />
maintenance.<br />
If your computer and the <strong>MediBalance</strong> <strong>Pro</strong> platform are located far from each other, you will need<br />
an USB extension cable that is long enough to meet your demands. Please, contact us.<br />
Manufacturer requirements: <strong>MediBalance</strong> <strong>Pro</strong> maintenance contract - for specifi c information,<br />
please, see chapter Technology and maintenance.<br />
3
Safety notes – Chapter 2<br />
2. Safety notes<br />
The purpose of the <strong>MediBalance</strong> <strong>Pro</strong> system is to monitor certain skills of a client, to document them and to<br />
exercise them:<br />
• equilibrium, balance and stability<br />
• body perception and control<br />
• vertigo symptomatology<br />
• coordination and concentration<br />
The <strong>MediBalance</strong> <strong>Pro</strong> system is suitable for the following clients:<br />
• clients weighing up to 125 kg<br />
• clients who are able to stand without aid (walking frame, walkers etc.)<br />
The <strong>MediBalance</strong> <strong>Pro</strong> system is to a limited extent suitable for the following clients:<br />
• The recorded results are affected by certain conditions, like signifi cant motor restlessness, obligatory<br />
support on aids or hypocathexis. They cannot be compared to the reference values then, therefore, equilibrium,<br />
balance, coordination, dizziness etc. cannot be objectively assessed with regard to the reference<br />
values. The exercising functions, of course, can be used to convey motion patterns to clients, to improve<br />
concentration and proprioception and to exercise body control and equilibrium.<br />
• Extensive hyperactivity. The results could be impaired by hyperactivity.<br />
• Clients who cannot stand without aid. The results are impaired by support on aids.<br />
The <strong>MediBalance</strong> <strong>Pro</strong> is a medical electrical device and, hence, subject to special precautions concerning<br />
electromagnetic compatibility. The device may be put into operation only according to the notes given in this<br />
manual (page 35 +). Follow all the steps described in this manual to use the <strong>MediBalance</strong> <strong>Pro</strong>. Any other,<br />
non-compliant use of the device is offending against the regulations and, hence, not permitted. Observe the<br />
following safety notes when using the <strong>MediBalance</strong> <strong>Pro</strong> system:<br />
Attention! Do not use the device in the rooms containing ignitable mixtures, such as mixtures of anaesthetics<br />
and air or oxygen or laughing gas.<br />
Attention! Avoid any contact of the device with ultrasonic baths, fl owing water or chemical cleaners,<br />
such as diluents, alcohol, etc. The device might be damaged or destroyed.<br />
Attention! Note that cables of additional devices may not be 'torn out' of the device sockets.<br />
Attention! Do not open the enclosure of the <strong>MediBalance</strong> <strong>Pro</strong> platform. You or other persons might be<br />
injured. Moreover, the device could be permanently and profoundly damaged. Opening the<br />
device will compromise liability and warranty.<br />
Attention! Operate the <strong>MediBalance</strong> <strong>Pro</strong> system preferably in dry rooms and on a rather level, swept<br />
fl oor, if possible. Carefully protect the computer and the connections - whether operating<br />
or switched off - against moisture and humidity that might cause permanent damage to the<br />
devices and the blue cushions. This could entail impairments of the users or other persons.<br />
Advice: Portable and mobile radio frequency communication facilities can infl uence medical electrical<br />
devices. Do not use any mobile phones or similar products near the <strong>MediBalance</strong> <strong>Pro</strong>.<br />
Advice: The <strong>MediBalance</strong> <strong>Pro</strong> system may be entered only in socks or stockings. Bare-footed entry<br />
is not allowed for reasons of hygiene. Testing and exercising in shoes can falsify the results<br />
and, hence, is not advisable. Besides, the sensibility of the feet is affected by shoes.<br />
Advice: The life expectance of the <strong>MediBalance</strong> <strong>Pro</strong> device is set to be 5 years.<br />
Advice:<br />
Advice:<br />
Use only the supplied transport bag for storage or transport of the platform. <strong>Pro</strong>tect the platform<br />
sufficiently against vibration shocks during transport.<br />
<strong>MediTECH</strong> does not assume any warranty or liability for actions that offend against these<br />
safety notes and the instructions given in this document.<br />
Read and understand these instructions before use!<br />
4
Chapter 3 – Device view<br />
3. Device view<br />
The following images illustrate the <strong>MediBalance</strong> <strong>Pro</strong> platform.<br />
3.1 Front view<br />
The printed feet are intended as a guidance for the client. The intersection of the orange lines is the<br />
horizontal and vertical centre of the platform. This is another guidance.<br />
3.2 View of the interface side<br />
The upper edge of the <strong>MediBalance</strong> <strong>Pro</strong> platform has an interface socket. Connect to the computer<br />
that will save the recordings of the platform by plugging a USB cable into this socket.<br />
Connection to the computer<br />
5
Installation – Chapter 4<br />
6<br />
4. Installation<br />
This chapter will inform you how to install on your computer the software required for working with the Medi-<br />
Balance <strong>Pro</strong> system and how to connect the <strong>MediBalance</strong> <strong>Pro</strong> platform to your computer.<br />
4.1 Software installation*<br />
Install the <strong>MediBalance</strong> <strong>Pro</strong> software on your computer before fi rst connecting to the platform, so<br />
that you can use the <strong>MediBalance</strong> <strong>Pro</strong> system.<br />
Important: Before beginning to install, make sure that Microsoft‘s .NET Frameworks Version 3.5.1 is<br />
installed (available free of charge at: http://www.microsoft.com/en-us/download/details.<br />
aspx?id=25150. If .NET Frameworks has to be installed, the installation of the <strong>MediBalance</strong><br />
<strong>Pro</strong> software may take more than 5 minutes.<br />
To install the <strong>MediBalance</strong> <strong>Pro</strong> software, proceed as follows:<br />
1. Boot the computer and put the CD into its CD drive. The set-up wizard of the <strong>MediBalance</strong> <strong>Pro</strong><br />
software will start automatically.<br />
2. Follow the steps given by the wizard and confi rm each step with the button <strong>Pro</strong>ceed:<br />
• Select the installation language, English.<br />
• In the licence agreement query, click ‚I accept the agreement‘.<br />
• ... various other steps...<br />
• The last step is to display the window Exit the <strong>MediBalance</strong> <strong>Pro</strong> set-up wizard.<br />
3. Click the button Finish to close the set-up wizard.<br />
If you connect the <strong>MediBalance</strong> <strong>Pro</strong> platform to your computer for the fi rst time, the driver set-up wizard<br />
might open - that depends on your Windows ® version.<br />
• If you are asked whether a connection to Windows Update should be established, choose ‚No,<br />
not this time‘ and proceed.<br />
• If the software is already installed, select ‚Install software automatically‘. (If you want to install<br />
the driver before the software, select ‚Install software from a list or particular source‘, insert the<br />
CD and, on request, select the ‚INF‘ directory from the CD.)<br />
• If a note is displayed that the driver has not passed the Windows ® logo test, select ‚Continue<br />
installation‘. The driver is fully operatable and compatible with Windows.<br />
Click the Finish button to close the wizard. The driver is installed.<br />
* Find the most current versions and patches of the software online at www.download.meditech.de. Please, note<br />
that these updates are available to our service and maintenance contract customers.<br />
4.2 How to connect the <strong>MediBalance</strong> <strong>Pro</strong> platform to the computer<br />
The connection of computer and <strong>MediBalance</strong> <strong>Pro</strong> platform serves the data transfer from the <strong>MediBalance</strong><br />
<strong>Pro</strong> platform to the computer, so that you may record and evaluate with the help of the <strong>MediBalance</strong> <strong>Pro</strong><br />
software. Follow the sequence as stated here.<br />
1. Plug one of the USB plugs type A of the cable with two type A plugs into the USB socket<br />
at the <strong>MediBalance</strong> <strong>Pro</strong> platform (upper edge).<br />
2. Plug the other plug of this cable into the type A socket of the USB insulator.<br />
3. Plug the USB plug type B of the cable with different plugs into the type B socket of the<br />
USB insulator.<br />
4. Plug the USB plug type A of this cable into a free USB plug type A at the computer on<br />
which the <strong>MediBalance</strong> <strong>Pro</strong> software has been installed<br />
5. Start the <strong>MediBalance</strong> <strong>Pro</strong> software.<br />
The computer will automatically recognise the <strong>MediBalance</strong> <strong>Pro</strong> platform.<br />
Now you can use the system.<br />
Important: The <strong>MediBalance</strong> <strong>Pro</strong> is a medical electrical device and,<br />
hence, subject to special precautions concerning electromagnetic<br />
compatibility. The device may be put into operation only according<br />
to the notes given in this manual (page 35 +).
5. How to use the software: recordings, exercise and analysis<br />
Chapter 5 – How to use<br />
This manual is intended to facilitate the usage of the <strong>MediBalance</strong> <strong>Pro</strong> system. It will enable you to understand<br />
the functions of the system and to use them after a short time<br />
5.1 Software elements<br />
Head bar<br />
Menu bar<br />
(see below)<br />
Menu fi eld<br />
here: client manager<br />
In general<br />
Menu bar<br />
Quickstart bar<br />
(see Chapter:<br />
Recording module)<br />
In der Menüleiste fi nden Sie alle Elemente, mit denen Sie die <strong>MediBalance</strong> <strong>Pro</strong> Software steuern. Die Benutzung<br />
dieser Elemente wird auf den nächsten Seiten dieser <strong>Anleitung</strong> erläutert.<br />
Quick<br />
exit from<br />
the programme<br />
Function<br />
not discussed<br />
in this<br />
manual.<br />
Manage clients‘<br />
master data:<br />
• Enter<br />
• Edit<br />
• Delete...<br />
•<br />
See chapter<br />
Client manager<br />
Acquire standard<br />
and advanced<br />
recordings<br />
See<br />
chapter Recording<br />
module<br />
Perform exercises:<br />
Select, change<br />
settings (demands<br />
and diffi culty level)<br />
Start and stop<br />
See chapter Therapy<br />
module<br />
Display performed<br />
and stored recording<br />
and exercising<br />
sessions – assess<br />
results<br />
See chapter<br />
Analysis module<br />
Find zero<br />
point:<br />
Necessary<br />
whenever<br />
the<br />
<strong>MediBalance</strong><br />
<strong>Pro</strong><br />
platform<br />
has been<br />
reconnected<br />
to<br />
the computer<br />
On-line<br />
help and<br />
information<br />
about<br />
the programme<br />
version<br />
Quick task bar<br />
The quick-task bar facilitates processes of the recording module and, hence, will be thoroughly discussed in<br />
the corresponding section.<br />
7
How to use – Chapter 5<br />
Client manager<br />
5.2 Client manager<br />
This chapter will inform you about how to manage clients in the <strong>MediBalance</strong> <strong>Pro</strong> software.<br />
Advice: You can also use the Client manager when the <strong>MediBalance</strong> <strong>Pro</strong> platform is not connected to<br />
the computer. You can enter client data in advance, for example - when the appointment for a<br />
recording was already scheduled.<br />
1. Open the Client manager:<br />
• Click the Select client button in the<br />
quick-task bar.<br />
• Click the Client manager button in the<br />
menu bar.<br />
The Client manager window opens. If clients<br />
have already been entered in the database,<br />
they are shown now. For purposes of anonymity,<br />
the surnames of any clients who are not<br />
clicked on are abbreviated.<br />
The Client manager provides the following options:<br />
Option<br />
Search<br />
New<br />
Edit<br />
Delete<br />
Enable<br />
Disable<br />
Meaning<br />
Look for entered clients<br />
Enter new clients<br />
Edit entered and saved data (e.g., update of surname or address, size or weight …)<br />
Delete entered and stored clients (irrevocable deletion of client data - including all recordings<br />
and exercise sessions)<br />
Select a client from the database who will perform a test or an exercise (other option: double<br />
click the surname)<br />
Unselect if you want to carry out a recording or an exercise without assigning data to a<br />
client (e.g., for a demo)<br />
Click any button of the Client manager window to carry out the desired step:<br />
8
Enter new client<br />
Chapter 5 – How to use<br />
Client manager<br />
1. Click the New button. The New client window opens.<br />
2. Now you can enter the respective client data at your computer<br />
keyboard. Switch from one entry fi eld to another by:<br />
• using the tab button of your keyboard to proceed to the next<br />
fi eld (recommended).<br />
• clicking the next fi eld.<br />
3. Enter data:<br />
• Surname (any text)<br />
• First name (any text)<br />
• Date of birth - here you have the following options:<br />
• Click the data (day, month, year) one after another and<br />
enter at the keyboard.<br />
• Another option is to click the tick next to the date. A<br />
calendar sheet opens which allows you to click the date<br />
of birth. If the right month of the right year is not shown,<br />
click on the left or right arrows to change the month.<br />
• Sex (select male or female with the tick next to the entry. Another option is to type m for male<br />
or f for female on your keyboard)<br />
• Client ID (e.g., the keyword that the client management of your practise is using for this<br />
client)<br />
• Street no. (any text - use keyboard)<br />
• Postal code/town (any text - use keyboard)<br />
• Size (cm) *<br />
• Weight (kg) *<br />
Important: The <strong>MediBalance</strong> <strong>Pro</strong> platform may be loaded with not more than 125 kg (maximum load).<br />
Recordings and exercise sessions of heavier clients are not allowed for safety reasons.<br />
Damages from too high mass load are not covered by the liability or warranty of the manufacturer.<br />
* This information is important to compare recorded values to the reference data.<br />
4. Click OK after validating the data entered. Else, enter any necessary corrections, then click OK.<br />
The data are saved in the Client manager. They are now available for recordings, exercises and<br />
analyses.<br />
Click Cancel if you do not want to save the data.<br />
Edit client data<br />
(e.g., update of surname or address, size or weight …)<br />
1. In the Client manager, click any client whose data you would like to<br />
edit.<br />
2. Click on the Edit button. The Edit client data window opens.<br />
3. Click on the fi eld containing the entry of the client you would like to<br />
edit.<br />
4. Update the entry at your computer keyboard.<br />
5. If you want to update further entries, click the next desired fi eld and<br />
edit.<br />
6. If you have made all necessary or desired updates, click the OK button.<br />
The window closes and you have saved the updates. .<br />
9
How to use – Chapter 5<br />
Client manager<br />
Delete client data<br />
1. In the Client manager, click any client whose data you would like to delete defi nitely.<br />
2. Click the Delete button. The Confi rm deletion window opens. This is a safety query to verify whether<br />
you really want to delete those data:<br />
• Click OK if you want to delete the data defi nitely.<br />
• Click Cancel if you want to cancel and keep the data.<br />
Note: You can delete several client datasets at once. Click any client entry whose data you would<br />
like to delete.<br />
• Press the Ctrl key at your keyboard, keep it pressed and click another client to select a<br />
second, a third or more clients.<br />
• Press the Shift key and click another client.<br />
All clients listed by the Client manager between the two selected clients are selected as<br />
well.<br />
Click the Delete button.<br />
Use this option very carefully, because you will delete the data defi nitely.<br />
Enable clients/working with a client<br />
1. Click any client in the Client manager to whom you want to assign<br />
the next recordings and exercise data.<br />
2. Click the Enable button.<br />
Another option is to click the client‘s surname twice to enable him or her.<br />
Now the selected client is enabled. You can tell this from the title bar of the software. In the present<br />
case, the client Tobias Musterklient is enabled. All test and exercise records will now be associated to<br />
him until another client is enabled.<br />
Select no clients/<strong>MediBalance</strong> <strong>Pro</strong> demo mode<br />
You can use this option during the learning phase or for demo purposes,<br />
e.g., to explain the functions to a client or during an open house<br />
day when the results should not be saved.<br />
If you start any recordings and exercises, the fact will be pointed out to you another time.<br />
1. Click the Disable button. Now no client is enabled. You can tell this from the title bar of the software.<br />
How to search a client among many clients<br />
1. Using the keyboard, enter in the search fi eld the surname, fi rst name or client ID of the client whose<br />
master data you would like to call or enable.<br />
2. Click Search. If the client is already entered into the database, his or her data will be displayed against<br />
blue background fi elds. Now you can look at the data and edit, delete or enable them.<br />
Exit the Client manager<br />
Click on the red x in the upper corner of the Client manager to exit.<br />
10
Chapter 5 – How to use<br />
Recording module<br />
5.3 Recording module<br />
In this module you may carry out the recordings.<br />
Advice: To use this module it is necessary that the Medi-<br />
Balance <strong>Pro</strong> platform is connected to the computer.<br />
5.3.1 Measuring arrangement of the components<br />
• When you arrange the computer relative to the <strong>MediBalance</strong><br />
<strong>Pro</strong> platform, please, make sure that the client cannot see<br />
the display during any recordings. The recordings should<br />
represent the natural motions and their control. If the client<br />
can see the record, he or she will consciously or unconsciously<br />
try to perform specifi c balance motions, to keep the<br />
‚measuring point‘ in the centre of the measuring fi eld. But this<br />
is neither intended nor welcome during recording, because<br />
then a comparison with the reference data will not yield a<br />
plausible result.<br />
• When your clients are very prone to dizziness or falling, set<br />
up the supporting rack around the platform in such a way<br />
that the client can step upon the platform from behind. Adapt<br />
the height of the supporting rack to the client‘s body size. Note that two of the recording steps will be<br />
performed with an additionally placed cushion. Set the height, hence, rather a little bit too high, because<br />
the probability that the client will need the supporting rack is higher during steps 3 and 4 (with<br />
cushion).<br />
• Keep the cushion close to you, so that you have it ready after step 2 and can place it quickly on the<br />
<strong>MediBalance</strong> <strong>Pro</strong> platform.<br />
• You may switch on the computer sound output or connect loudspeakers, if you prefer. Then the client<br />
will receive an acoustic note when a recording step has been completed.<br />
• Attach a fi xation dot within the view of the client which the clients can focus on.<br />
5.3.2 How to prepare the recording: calibration<br />
Recalibrate the recording unit (computer software and <strong>MediBalance</strong> <strong>Pro</strong> platform connection) before carrying<br />
out the fi rst recording after (re)connecting the <strong>MediBalance</strong> <strong>Pro</strong> platform or rebooting the computer. The<br />
sensors report the zero point of the platform to the software.<br />
This step is necessary because the highly sensitive sensors registering the client‘s motions respond to<br />
changes of position.<br />
1. Click the Calibrate button in the menu bar.<br />
The calibration will take only a few seconds.<br />
The <strong>MediBalance</strong> <strong>Pro</strong> platform may not be loaded during this time, so that the zero point can be<br />
found. A window will point that out to you.<br />
The calibration is fi nished when the red dot is in the middle of the crossline.<br />
11
How to use – Chapter 5<br />
Recording module<br />
5.3.3 Standard scripts with the quick task bar<br />
In the quick task bar you will fi nd all the elements that you need for executing a Standard script (4 step protocol).<br />
You may use either these elements or those provided in the Recording window. If you may click any<br />
elements of the quick task bar, too, this option will be stated.<br />
If you click the Select client button, the Client manager opens and you may select a client<br />
for recording.<br />
Click this button to start recording. The standard script consists of four individual steps.<br />
In the following chapter, How to record, you may read more about the sequence of recordings,<br />
advise on how to instruct the client and about the steps that you, as the therapist,<br />
will have to carry out during recording.<br />
Click on this button to print out the results of the recording so that you may give them to<br />
the client or add to the client fi le.<br />
Click on this button to display the analysis of the previously fi nished recording.<br />
Please, fi nd advise on analysis at the end of this chapter, End of recording.<br />
1. Select a client for recording. Click in the Beginner tab of the Recording window the tick<br />
behind Client and select the desired client from the list. If the client has not yet been<br />
saved in the Client manager yet, enter him or her according to the chapter Client<br />
manager.<br />
Attention! For each measurement, and each training: It must be prevented that the client can collapse<br />
or fall over. Make sure that he or she can access the supporting rack and can be caught by a<br />
specialist. This particularly applies to measurements and training that require an inclination of<br />
the body.<br />
5.3.4 How to record - standard script (4 step protocol)<br />
The standard script consists of four steps which are performed in a sequence preset by the software. All the<br />
four steps will be successively carried out, unless you cancel a recording step on purpose. How to cancel a<br />
recording step will be described at the end of this chapter.<br />
Step sequence during recording:<br />
Step Eyes Cushions<br />
1 Eyes open Without cushion<br />
2 Eyes closed Without cushion<br />
3 Eyes open With cushion<br />
4 Eyes closed With cushion<br />
12<br />
In the grey boxes of the individual steps you will fi nd advice to help instruct the client properly. After a short<br />
time you will be experienced in instructing, and you will no longer need this advice. Of course you can change<br />
the texts to match situation and age.<br />
Ask the client to put off the shoes and to position him- or herself on the <strong>MediBalance</strong> <strong>Pro</strong> platform.<br />
Tell him or her to correct the position until the red dot is centred in the crossline.
Chapter 5 – How to use<br />
Recording module<br />
We will test your equilibrium now, and your ability to stand quiet. The recording will take about five minutes.<br />
It will tell us about your sway response and how all the components are working together that are<br />
contributing to your equilibrium. That will allow us to draw conclusions. The recording will consist of four<br />
steps. I will tell you precisely each time what you will have to do.<br />
For each step, stand very quiet, easy and relaxed on the platform. Each test step will already be finished<br />
after 30 seconds.<br />
If you should need a short break after any step, just tell me, please. We are not doing a stress test. This is<br />
a balance and coordination test.<br />
Please, take off your shoes now. We have to do that to get very precise values that we can properly evaluate.<br />
Now step on the platform, right in the middle, please, and centre your weight very steadily on your feet. I<br />
can see a dot on this screen. It tells me whether you have centred your weight right in the middle.<br />
WHEN NEEDED: Please, shift your weight a bit more to the left/right/forward/backward. Or: put your<br />
left/right foot/feet a little more to the left/right/forward/backward.<br />
Recording 1<br />
1. Click Start recording. A window reminds you to perform the steps just carried out.<br />
In this first step, you will stand on the platform and look straight ahead, please. When I say, ‚Now‘,<br />
the recording will begin. When I say, ‚Finished‘, the recording is complete. Nothing can happen to<br />
you. If you should start to feel dizzy, grab the clutches of the supporting rack.<br />
Do you have any further questions about the recording?<br />
2. When you have answered any further questions, confi rm the reminder with OK. If that was agreed<br />
before, say Now.<br />
A countdown from 5 to 1 announces the beginning of recording. The recording begins. The red dot<br />
moves synchronous with the client‘s motions.<br />
3. Your task during the next 30 seconds will be to observe the running recording and to make sure that<br />
the client does not sway too much or even tip over. But correct him or her only when inevitable, if the<br />
lines are shifting too much, so that the result of the recording will not be<br />
impaired.<br />
The countdown and the receding green bar on the display will tell you<br />
how much time is left till the end of the recording.<br />
If the time has run out, a window will appear:<br />
4. Tell the client in the agreed manner that the fi rst step is completed.<br />
13
How to use – Chapter 5<br />
Recording module<br />
Recording 2<br />
In the second step you may just go on stand as relaxed and calm as before. Just close your eyes during recording,<br />
please. Nothing can happen to you. If you feel dizzy or think you might tip over, you can support<br />
yourself at the rack and hold tight to it. As before, when I say, ‚Now‘, the recording begins. When I say,<br />
‚Finished‘, the recording is finished.<br />
1. Confi rm the note on the screen with OK. The countdown begins. Say Now. The recording begins and<br />
ends automatically 30 seconds later. The following window will appear.<br />
Recording 3<br />
1. Ask the client to step down from the platform. Place the add-on cushion on the platform and ask the<br />
client to step up on the platform again.<br />
Please, step down from the platform. We will modify the conditions a little, but<br />
your task will be the same. I will put a cushion on the platform and you will<br />
step up on it. You will find that your stepping ground will be a little less stable<br />
than before. That‘s perfectly alright.<br />
In this third step you will stand on the platform as you did in the first step. Just look straight ahead. When I<br />
say, ‚Now‘, the recording begins. When I say, ‚Finished‘, the recording is completed. Nothing can happen<br />
to you. If you should start to feel dizzy, grab the clutches of the supporting rack.<br />
2. Confi rm the note with OK. Tell the client when the countdown is running. At the end of the recording,<br />
the following window will be shown. Tell that to the client as agreed.<br />
Recording 4<br />
In the fourth step, finally, you may stay as relaxed and calm as before. You may guess it, I presume: Close<br />
your eyes again before the recording starts and keep them closed. Nothing can happen to you. If you should<br />
feel dizzy or think you might tip over, you can support yourself at the rack and hold tight to it. As before,<br />
when I say, ‚Now‘, the recording begins. When I say, ‚Finished‘, the recording is completed.<br />
1. Confi rm the note with OK and tell the client when the countdown is running. At the end of the recording,<br />
the following window will be shown:<br />
14
Chapter 5 – How to use<br />
Recording module<br />
5.3.5 End of recording and analysis<br />
The recording session is now completed.<br />
That‘s the end of the recording. Excellent. You have made it.<br />
1. Click the Show statistics button. The overview of the four recordings and an analysis<br />
will appear. You may interpret them as follows:<br />
Left part: The lines in the four crosslines represent the motions during recording. The greater the<br />
area, the less stable the client was standing, and the more balance motions he or she had to carry<br />
out to stand ‚quiet‘. The heading indicates which image corresponds to which recording step.<br />
In the right part of the display you will fi nd the analysis of the recording:<br />
• The Characteristic value - overview table gives statistics on sway, velocity of the sway and the<br />
area in which the client has moved – distinguished by recording step. The lower the values, the<br />
less the sways and motions were noticable.<br />
• The Swaying radius image depicts the characteristic values of the sway. The bars indicate<br />
whether the sways were normal, borderline or conspicuous in comparison to other persons of<br />
similar age, size and weight:<br />
Evaluation<br />
Conspicuous<br />
Conclusion<br />
Exercise is imminent.<br />
Borderline<br />
Exercise should be considered.<br />
Normal<br />
Exercise makes sense to maintain the skills. However, it is not<br />
obligatory.<br />
• The assessment of the fall risk informs by a similar colour code about the probability of falling.<br />
High values or a bar in the yellow, orange or even red range will recommend exercise. Further<br />
prophylactic measures against falling should be considered or initiated.<br />
• The Romberg quotient designates the quotient of the area recorded for closed eyes and the<br />
area recorded for open eyes. It backs up the swaying analyses and the assessment of the fall<br />
risk with clues on the values recorded with open eyes compared to those recorded with closed<br />
eyes. The higher the values, the more imminently exercise and further examinations are indicated,<br />
esp. of the visual supporting function.<br />
15
How to use – Chapter 5<br />
Recording module<br />
5.3.6 Abnormal termination of a recording step<br />
When you have started a recording step, it will automatically end 30 seconds later. You should continue<br />
recording until this automatic end, to acquire plausible measuring results.<br />
Nevertheless, circumstances may occur which require an interruption or an abnormal termination, to avoid<br />
implausible analysis results that might lead to wrong conclusions:<br />
• Coughing or any other physical impairment of the client (a cramp in the leg, for example). Powerful<br />
motions are recorded then that would not appear at rest.<br />
• <strong>Pro</strong>found detraction by people entering the room, phone, or other. This can impact concentration<br />
and, hence, the client‘s motions for a longer period, so that the recordings are not plausible any<br />
more.<br />
In these cases you should terminate the recording step or the whole recording and start again when the<br />
interference has been removed.<br />
How to terminate and restart a step<br />
1. Click ‚Stop recording‘ during the recording step to terminate the currently active test step. The data<br />
recorded so far will not be saved.<br />
2. Click ‚Start recording‘ again to restart the incomplete recording step.<br />
How to terminate the entire recording<br />
1. Click the red cross in the upper right corner of the Recording module window to terminate the whole<br />
recording. No results will be saved.<br />
Important: Use the termination option carefully and only as an exception. Mention it to the client<br />
only when needed.<br />
5.3.7 Print results<br />
If you want to add the results of the recording to the client fi les or if your client asks for a printout, you may<br />
preview and print the graphic report discussed in the chapter End of recording and analysis.<br />
1. Click the Quick print button.<br />
The Preview window appears.<br />
2. Click the Printer icon. The computer will print out the pages on the default printer, provided<br />
that any is connected, switched on and fi lled<br />
with suffi cient paper. You will need two sheets of paper<br />
for a printout.<br />
3. Close the Preview window as soon as the<br />
printing was successfully concluded by<br />
clicking the red x in the upper right corner.<br />
16
Chapter 5 – How to use<br />
Recording module<br />
5.3.8 Recording variations<br />
You can carry out particular tests in the <strong>Pro</strong> tab. You can adapt them to the individual client with regard to<br />
Setting Value range Application area Specific features<br />
Time before<br />
start<br />
1 to 10 seconds<br />
(The countdown<br />
is<br />
different from<br />
the standard<br />
recording.)<br />
Duration 15 to 300<br />
seconds (= 6<br />
minutes)<br />
(The countdown<br />
is<br />
different from<br />
the standard<br />
recording.)<br />
Recording<br />
type: eyes<br />
closed<br />
Recording<br />
type: cushions<br />
Recording<br />
type:<br />
platform<br />
turned<br />
On/off<br />
(at least 30<br />
seconds)<br />
On/off<br />
On/off<br />
Short term, if<br />
• the client is very impatient.<br />
• the time which the client needs to improve the balance<br />
reaction shall be recorded and displayed as well.<br />
Long term (with short recording time), if<br />
• you want to record only a short period within an extended<br />
time span.<br />
• the client has trouble with the balance reaction and<br />
needs much time to improve, This time, however, shall<br />
not be recorded and displayed.<br />
Shorten if you want to examine the immediate effect of a<br />
preceding load on the balance (controlled balance reactions).<br />
At least 30 seconds if you want to record the transition<br />
from controlled to automated balance reactions.<br />
Extend the duration if you want to examine and display<br />
effects on the stress resistance of the client‘s balance<br />
reactions.<br />
As a specifi c test when visually conditioned problems are<br />
present, to check whether the exercise was successful.<br />
A special measure if the results of the recording with cushion<br />
were very conspicuous.<br />
Ask the client to<br />
close the eyes.<br />
Put the cushion on<br />
the platform.<br />
Recalibrate before<br />
recording.<br />
You can combine the settings at will<br />
View during a recording<br />
You can change the monitoring display in the Options<br />
tab.<br />
Background:<br />
Here you can change the background on which the<br />
recording is displayed.<br />
Here you may select from (see margin)<br />
• No background<br />
• Cross<br />
• Crossline<br />
Click on the desired background display.<br />
Option View Example<br />
No<br />
Cross<br />
Crossline<br />
17
How to use – Chapter 5<br />
Recording module<br />
Display:<br />
Here you can change the display of the recording.<br />
Option Example Specifi c feature<br />
Line graph<br />
Display the whole course of the recording. Certain sways<br />
will be much better visible.<br />
Density<br />
Clearer optical display of the motion density. Increasing<br />
repetition of certain positions is indicated by the display<br />
changing from blue (= position was briefl y touched –<br />
most often when moving –) via turquoise, green, yellow<br />
to red (= position kept very long/long term).<br />
No visual feedback<br />
If the installation does not allow preventing the client from<br />
looking at the monitor or if you do not want to be infl u-<br />
enced by the display of results.<br />
In the opening fi eld, click on the desired display type.<br />
The line graph or the density display shall be larger or smaller depicted:<br />
Values Meaning Recommendation for application<br />
Low values<br />
(1 – 10)<br />
Medium values<br />
(16 – 20)<br />
High values<br />
(28 – 32)<br />
Wide area,<br />
superfi cial display<br />
Medium-sized area,<br />
normal display.<br />
Small area, very<br />
precise display.<br />
Very restlessly or unsteadily standing clients who may need the<br />
whole measuring area for the display.<br />
Expectably very quietly standing clients whose minute motions<br />
shall be displayed as well.<br />
In the opening fi eld, click on the desired zoom factor.<br />
Notes on the accomplished recording<br />
In the Notes tab you can record any notes, conspicuities, specifi c features or other remarks on a specifi c<br />
recording.<br />
Click the empty fi eld and enter any text at the keyboard. You do not need to save the input.<br />
18
5.4 Exercise module<br />
Chapter 5 – How to use<br />
Exercise module – in general<br />
This chapter will inform you how to select available exercises, how to use them, how to instruct the client<br />
and how to customise them to his or her needs.<br />
The exercises require that the client can see the computer screen head-on, so that he or she can accomplish<br />
the tasks by purposefully shifting the weight. Please, make sure that the display is set up high enough (at<br />
about chest level).<br />
Note: If you have the means to project the screen display on a clear surface with a beamer, the exercise<br />
will be very pleasant for the client.<br />
You may:<br />
• set criteria for terminating an exercise (e.g., achieved score or end of a defi ned period)<br />
• set the diffi culty level<br />
• control the exercise<br />
to structure the exercise more diverse and more demanding during any new appointment.<br />
5.4.1 General execution of an exercise<br />
The general execution of an exercise follows this structure:<br />
Step<br />
Place of setting<br />
1. Select a client Module: Client manager<br />
2. Select an exercise Tab: Exercise<br />
– and if desired or necessary:<br />
Tab: Exercise settings<br />
A. Set Conditions for terminating the exercise<br />
B. Set Diffi culty level<br />
C. Customise options<br />
3. Instruct the client about the exercise See the respective exercise:<br />
Client instructions<br />
4. Click Start Tab: Exercise<br />
5. Wait until the condition for terminating the exercise is Tab: Exercise or ESC key<br />
achieved or manually terminate<br />
5.4.2 Conditions for terminating the exercise<br />
Here you can defi ne when an exercise should be terminated:<br />
Condition Requirement to terminate the exercise Measurable/plausible result<br />
compare to other clients/former results, too<br />
None*<br />
= no entry<br />
for Score/period<br />
Score<br />
Period<br />
Score and period<br />
The exercise is terminated either by the<br />
Stop button on the display or the ESC<br />
key at the keyboard. It is not automatically<br />
terminated.<br />
Set score has been achieved<br />
(1 to 100 points).<br />
Set period has expired<br />
(any period).<br />
The fi rst condition met will terminate the<br />
exercise.<br />
General evaluation of the results<br />
using the values.<br />
Time required to achieve the score.<br />
Score achieved within the period.<br />
Can the client achieve the set score<br />
within the set time?<br />
19
How to use – Chapter 5<br />
Exercise module – in general<br />
5.4.3 Difficulty level<br />
You may select any of three manufacturer‘s settings or a ‚user-defi ned‘ diffi culty level.<br />
Defi nition<br />
Easy<br />
Medium<br />
Hard<br />
User-defi ned *<br />
Suitable for the following clients<br />
Clients who exercise for the fi rst time and clients who had trouble with this exercise<br />
last time.<br />
Clients who have successfully accomplished the EASY level.<br />
Clients who have successfully accomplished the MEDIUM level.<br />
Clients for whom the transition from EASY to MEDIUM or MEDIUM to HARD ... or<br />
who need to advance beyond HARD.<br />
* In this selection you can select any available option. If you modify any option, the ‚Diffi culty level‘ selection<br />
changes to user-defi ned. Please, read about the consequences of specifi c settings in the description of the<br />
respective exercise.<br />
Note: You can make the tasks much harder when you have the exercises performed on the add-on<br />
cushion. This is recommended for clients who are already experienced in the exercises and the<br />
individual diffi culty levels. In addition, you can raise the diffi culty level by appointing additional<br />
tasks, for example, eye motions, eye tracking motions, ball game, recumbent eight, lateral exercise<br />
etc.<br />
1. Click on the Exercises tab to select from the exercises.<br />
2. Click on the Exercise settings tab if you want to modify the parameters of the selected exercise.<br />
5.4.4 Exercises<br />
This chapter will describe the individual exercises and specify settings you may modify. Again, you will be<br />
provided advise on how to instruct the client.<br />
The following exercises are available:<br />
Name Category Meaning<br />
Target area Static Static means that the client has to aim at an immobile object. If he<br />
Target circles Static<br />
or she has hit it, it will change position and the client has to aim at<br />
the new position.<br />
Follow circles Dynamic Dynamic means that the client has to react to constantly changing<br />
Catch balls Dynamic situations or aim at moving objects.<br />
Tennis<br />
Dynamic<br />
Save the princess Dynamic<br />
1. Select the desired exercise from the Exercises tab.<br />
On the following pages you will get descriptions of the specifi c exercises.<br />
20
Chapter 5 – How to use<br />
Exercise module – Exercise: Target area<br />
Exercise: Target area<br />
You have selected the Target area exercise for the currently<br />
enabled client.<br />
What the client has to do:<br />
The client controls a red cursor on the display by shifting<br />
the mass centre of his or her body. He or she has to try<br />
and move the cursor into the coloured area. Once this<br />
is achieved, the area will change position and the client<br />
has to try again to aim at the now coloured area.<br />
The areas grow with their distance from the centre,<br />
however, it is harder to aim at them.<br />
Purpose of the exercise: This exercise helps to improve<br />
balance reactions by shifting the mass centre into any<br />
direction of motion. Directed motions with little demand<br />
for targeted motion are addressed.<br />
Accessible exercise settings:<br />
In the user-defi ned setting you can change the following options:<br />
Option Option od choice Effect<br />
Centre balance Tick = on<br />
If on: the client has to move the cursor again into the<br />
No tick = off<br />
middle of the exercise area once a target has been<br />
met, and so, he or she has to align him- or herself<br />
again. This is an additional difficulty level.<br />
Circle size 1 to 4<br />
The smaller the number, the smaller is the centre<br />
(only applicable if the Balance<br />
circle and the higher is the challenge to the client.<br />
centre option is ticked)<br />
Rings<br />
Inner, middle, outer ring – the<br />
target areas will appear in these<br />
rings<br />
It is harder to aim at areas in the outer ring than in the<br />
middle ring. These again are more diffi cult to target<br />
than areas in the inner ring.<br />
Client instruction - sample text<br />
In this game you will control a small red cursor and score by moving it into the coloured area.<br />
The area will change position as soon as you have touched it with the cursor. Then try to move the<br />
cursor to the new position of the area.<br />
Purpose: to win the game, you have to achieve a certain score within a given time.<br />
21
How to use – Chapter 5<br />
Exercise module – Exercise: Target circles<br />
Exercise: Target circles<br />
You have selected the Target circles exercise for the<br />
currently enabled client.<br />
What the client has to do:<br />
The client controls a small red cursor that is supposed<br />
to hit a static circle. As soon as the circle was touched,<br />
it will change position and the client will try to aim at its<br />
new position.<br />
The smaller the circle, the more challenging is this<br />
exercise.<br />
Purpose of the exercise: This exercise helps to improve<br />
purposeful motions in the horizontal and vertical plane.<br />
The difference to Target areas is that here the targets are<br />
much smaller (adjustable) and demand different tasks<br />
from the brain by their rotation.<br />
Accessible exercise settings:<br />
In the user-defi ned setting you can change the following options:<br />
Option Option od choice Effect<br />
Circle size<br />
(target circle)<br />
1 to 10<br />
How wide is the circle that shall be<br />
targeted?<br />
The smaller the target circle, the more challenging<br />
the task.<br />
Ringe Ring 1 (inner ring), ring 2, ring 3,<br />
ring 4 (outer ring):<br />
On which rings (= lines) shall the<br />
target circle be drawn?<br />
Zieldrehrichtung • Clockwise<br />
• Counter-clockwise<br />
• No rotation<br />
The more the target circle is removed from the<br />
centre, the more challenging is the task.<br />
The task is not different when the direction of<br />
rotation changes. The diffi culty level changes<br />
by the mental challenge to the client: clockwise<br />
rotation demands other capacities than counterclockwise<br />
rotation.<br />
Client instruction - sample text<br />
You will have to move the red cursor which you control into the rotating crossline. When you<br />
achieved that, you will score one point, and the crossline will change position.<br />
Purpose: to win the game, you have to achieve a certain score within a given time.<br />
22
Chapter 5 – How to use<br />
Exercise module – Exercise: Follow circles<br />
Exercise: Follow circles<br />
You have selected the Follow circles exercise for the<br />
currently enabled client.<br />
What the client has to do:<br />
The client controls the small red cursor with specific<br />
motions and shifts of his or her mass centre in such<br />
a way that the cursor will stay as long as possible in<br />
the crossline. As long as the cursor moves with the<br />
crossline, the crossline rotates and the client scores.<br />
The crossline moves along the ring lines, and once<br />
a certain score has been achieved, it jumps to other<br />
rings, changing its speed. The client should follow the<br />
motions.<br />
Purpose of the exercise: This exercise helps to improve<br />
specific quiet, smooth motions in the horizontal and the<br />
vertical plane. .<br />
Accessible exercise settings:<br />
In the user-defi ned setting you can change the following options:<br />
Option Option of Choice Effect<br />
Direction of motion • Clockwise<br />
• Counter-clockwise<br />
• Alternating<br />
If the direction keeps alternating, the task is more<br />
challenging.<br />
Speed 1 to 10 The faster the circle is running along the ring,<br />
the more challenging is the task. Clients with<br />
cerebellum symptoms will fi nd the slow tasks<br />
more difficult, because they are having trouble<br />
with slowing down their motion.<br />
Rings Ring 1 (inner ring), ring 2, ring 3,<br />
ring 4 (outer ring):<br />
On which rings (= lines) shall the<br />
target circle be drawn?<br />
Target rotation • Clockwise<br />
• Counter-clockwise<br />
• No rotation<br />
Target switch position<br />
Client instruction - sample text<br />
By time or score<br />
values of 1 to 10,000<br />
The more the target circle is removed from the<br />
centre, the more challenging is the task.<br />
The task is not different when the direction of<br />
rotation changes. The diffi culty level changes<br />
by the mental challenge to the client: clockwise<br />
rotation demands other capacities than counterclockwise<br />
rotation.<br />
The less steady the target circle, the more challenging<br />
is the task.<br />
In this game you will have to follow the moving crossline with the cursor. Move your red dot<br />
into the crossline and keep it there. When the crossline starts to rotate, you have reached the right<br />
position of the cursor.<br />
Purpose: the purpose of the game is to attain a given score within a certain time. You will achieve<br />
it by keeping the red dot within the crossline as long as possible.<br />
23
How to use – Chapter 5<br />
Exercise module – Exercise: Catch balls<br />
Exercise: Catch balls<br />
You have selected the Catch balls exercise for the currently<br />
enabled client.<br />
What the client has to do:<br />
The basketball player at the upper edge of the fi eld is<br />
throwing balls from various positions. The client should<br />
catch them at the lower edge of the fi eld by controlling<br />
the basket with specific left/right coordinating movements<br />
and lateral shifts of the body mass centre. Every ball<br />
caught will score.<br />
Purpose of the exercise: This exercise helps to improve<br />
specifi c, quick motions in the horizontal level, quick<br />
reactions to adapt the balance to lateral changes of the<br />
body mass centre and good reactivity.<br />
Accessible exercise settings:<br />
In the user-defi ned setting you can change the following options:<br />
Option Option of choice Effect<br />
Ball speed<br />
1 (= slow) to<br />
The faster the balls are thrown, the more<br />
(throw speed)<br />
10 (= fast)<br />
challenging is the task with regard to the<br />
speed of reaction.<br />
Ball frequency<br />
1 to 10 The more balls are thrown at the same<br />
(number of balls thrown at the<br />
time, the more challenging is the task<br />
same time)<br />
with regard to the speed of reaction and<br />
eye-hand coordination.<br />
Left half<br />
(Left border of the fi eld in which<br />
the balls are thrown<br />
Right half<br />
(Right border of the fi eld in which<br />
the balls are thrown)<br />
Slider from 0 (wide)<br />
to 30 (narrow)<br />
Slider from 0 (wide)<br />
to 30 (narrow)<br />
You can set with the left half/right half settings whether the balls are thrown across<br />
the full width of the display or whether you want to delimit the zone on the left or on<br />
the right. More exercise in a certain target zone can be indicated for clients who are<br />
showing unilateral conspicuities<br />
Throwing zone with 0 left/0 right setting<br />
Throwing zone with 0 left/15 right setting<br />
Throwing zone with 15 left/30 right setting<br />
For specifi c exercise of weight shifting<br />
in a defi ned zone: if the balls are thrown<br />
farther to the left, the task is more challenging<br />
with regard to the amplitude of<br />
motion.<br />
For specifi c exercise of weight shifting<br />
in a defi ned zone: if the balls are thrown<br />
farther to the right, the task is more challenging.<br />
Client instruction - sample text<br />
In this game you will move the basket. You will have to catch the balls by moving on the platform<br />
to shift the basket at the lower edge of the field to the right or to the left. The balls are always<br />
thrown from top to bottom and they always start at the player‘s position.<br />
Purpose: to win the game, you have to achieve a certain score in a given time.<br />
24
Chapter 5 – How to use<br />
Exercise module – Exercise: Tennis<br />
Exercise: Tennis<br />
You have selected the Tennis exercise for the currently<br />
enabled client.<br />
What the client has to do:<br />
The client controls the red tennis racquet on the left side of<br />
the court and tries with specifi c forward/backward movements<br />
to dodge the balls that are fl ying up from the right.<br />
The client scores by hitting the ball. The blue racquet is<br />
controlled by the computer and returns the dodged balls.<br />
Forward or backward areas can be exercised by limiting<br />
the target zone.<br />
Purpose of the exercise: This exercise helps to improve<br />
specifi c quick motions in the vertical plane, balance reactions<br />
to adapt to forward or backward shift of the body<br />
mass centre and good reactivity.<br />
Accessible exercise settings:<br />
In the user-defi ned setting you can change the following options:<br />
Option Option of choice Effect<br />
Ball speed<br />
(airspeed)<br />
Opponent‘s speed<br />
(speed of reaction of the<br />
opponent‘s ‚racquet‘)<br />
Upper half<br />
(limitation of the upper<br />
court)<br />
Lower half<br />
(limitation of the lower<br />
court)<br />
1 (= slow) to 10 (=<br />
fast)<br />
The faster the balls are fl ying, the more challenging<br />
is the task with regard to the speed of reaction.<br />
1 to 10 The faster the opponent, the higher is his chance<br />
to hit the ball, and scoring is more diffi cult.<br />
Slider from 0 (wide) to<br />
30 (narrow)<br />
Slider from 0 (wide) to<br />
30 (narrow)<br />
You can set with the upper half/lower half settings whether the ball<br />
shall fl y in across the entire court or whether you want to delimit the<br />
court at the top and/or bottom. More exercise in a certain target zone<br />
can be indicated for clients who are showing conspicuities in forward<br />
or backward coordination.<br />
Target zone with 0 top/0 bottom setting<br />
Target zone with 15 top/0 bottom setting<br />
Target zone with 30 top/15 bottom setting<br />
For specifi c exercise of the balance reaction to<br />
shifting the body weight forwards – in a defi ned<br />
zone: the higher the ball has to be hit, the more<br />
challenging is the task.<br />
For specifi c exercise of the balance reaction in a<br />
defi ned zone: the higher the ball has to be hit, the<br />
more challenging is the task.<br />
Client instruction - sample text<br />
In this game you are the tennis player with the red racquet at the left side of the court. You will<br />
have to prevent the ball from flying across the left edge of your court. To do that, you move your<br />
racquet into the path of the ball. The ball will bounce off the racquet and be returned to your opponent.<br />
You can move only at the left edge of the court. In the upper part of the display you will<br />
see the score: on the left are your points and on the right are your opponents‘ points. In addition,<br />
you will see the time that has already passed.<br />
Purpose: to win the game, you will either have to score higher than your opponent within a given<br />
time or you will have to achieve a certain score.<br />
25
How to use – Chapter 5<br />
Exercise module – Exercise: Saving the princess<br />
Exercise: Saving the princess<br />
You have selected the Saving the princess exercise for<br />
the currently enabled client.<br />
What the client has to do:<br />
The client controls the knight marked by a blue shield<br />
and belt who is appointed to protect the princess from<br />
the red robber barons. The red knights can be driven<br />
away by simply touching them. The client scores one<br />
point for any touch of a red knight. He or she can freely<br />
move on the fi eld and use the whole spectrum of motion<br />
and coordination. In this manner he or she can exercise<br />
balance reactions by shifting the body mass centre into<br />
any direction.<br />
If a red knight touches the princess for the fi rst time, however,<br />
she gets a fright and loses one ‚life‘. If she is touched for the second time, she is horrifi ed and loses<br />
her second ‚life‘. The third touch terminates the game. The purpose is to keep the red knights away from the<br />
princess as long as possible, to score as many points as possible.<br />
According to the settings, several red knights can approach the princess at increasing speed.<br />
Purpose of the exercise: This exercise helps to improve specifi c, quick motions in the horizontal and vertical<br />
plane and good reactivity.<br />
Accessible exercise settings:<br />
In der benutzerdefi nierten Einstellung können Sie folgende Optionen verändern:<br />
Option Option of Choice Effect<br />
Max. number of opponents<br />
(number of red knights on the<br />
fi eld at the same time)<br />
Opponents‘ speed<br />
(How fast the knights are running)<br />
Time between opponents<br />
(Period after which a new knight<br />
appears)<br />
1 to 10 (knights) The more knights have to be fended off at<br />
the same time, the more demanding are<br />
the task and the requirements for eye-hand<br />
coordination.<br />
1 (= slow) to<br />
10 (= fast)<br />
1 (= quick sequence) to<br />
10 (= longer waiting<br />
period)<br />
The faster the knights are approaching the<br />
princess, the more challenging it is to fend<br />
them off, the higher are the demands for the<br />
speed of reaction.<br />
The faster the knights are showing up, the<br />
more challenging it is to fend them off.<br />
Client instruction - sample text<br />
In this game you will control the blue knight by shifting your body mass centre on the platform.<br />
The blue knight has to protect the princess from the red robber barons. You may do this by moving<br />
your blue knight to the red knights and touching them. The princess may be touched by no more<br />
than two red knights. The third knight will kidnap her and you have lost the game. The currently<br />
permissible number of touches is indicated top right. You will score for every robber baron whom<br />
you have driven away.<br />
Purpose: the purpose of the game is to protect the princess for a certain period or to fend off a<br />
certain number of red robber barons.<br />
26
Chapter 5 – How to use<br />
Analysis module<br />
5.5 Analysis module<br />
This chapter will inform you how to call up and interpret the<br />
data analysis (recordings and exercises).<br />
The saved data are associated to the client who was enabled<br />
at the time of recording. The storage is accordingly arranged<br />
in levels:<br />
Level 1: by client<br />
Level 2: by type<br />
(standard recordings/advanced recordings/<br />
exercises)<br />
Level 3: by time<br />
(sorted by date and time)<br />
Level 4: steps of a standard script (4 step protocol)<br />
(sorted by date and time)<br />
1. Click Analysis module in the menu bar. The Analysis module window opens. The clients are alphabetically<br />
listed. If there is a plus icon in front of a client, this means that there are recordings present<br />
for this client.<br />
2. Click the plus icon in front of the client whose recordings you would like to call up. The list of recordings<br />
types available for this client is shown.<br />
3. Click on the plus sign in front of the recordings type you would like to call up. The list of saved recordings<br />
of this type is shown.<br />
4. Click twice on the entry that you would like to see. The desired analysis will automatically open after<br />
a few seconds.<br />
Advice: Notes on the analysis of a full standard script (4 step protocol) you may fi nd in the chapter<br />
End of recording and analysis.<br />
Supplement for measuring scripts: You can call up an analysis of each individual recording step of a 4-step<br />
standard script.<br />
5. Click on the plus icon in front of the recording that is interesting you. The list of advanced recordings<br />
is shown.<br />
6. Click twice on the entry of the recording step that you would like to see. The desired analysis will<br />
automatically open after a few seconds.<br />
27
How to use – Chapter 5<br />
Analysis module<br />
Analysis of individual results:<br />
• Individual step of a standard script<br />
• Advanced<br />
• Exercise<br />
This analysis contains a display of the data in six different ways that you can individually view or blank.<br />
Note: If you want to change the number of types, click on the Display cascade menu item. All display<br />
types from which you may select are listed there. The ticked types are currently shown.<br />
Display in the menu<br />
Example of a screen display<br />
Recording progression<br />
Density<br />
Sway progression<br />
Data<br />
Sway analysis<br />
Area<br />
Recording progression<br />
Density<br />
Sway progression<br />
Data<br />
Sway analysis<br />
Area<br />
28
Chapter 5 – How to use<br />
The following table will show you which display types are available and what kind of statements you will get<br />
from them.<br />
Type Example Statement<br />
Recording progression<br />
Analysis module<br />
Full trace of the motions during recording – displayed<br />
as a continuous line.<br />
Density<br />
Sway progression<br />
Frequency of positions in a motion<br />
during recording. About 120 measuring<br />
points per second are recorded and<br />
saved.<br />
Very quick motions are displayed as a<br />
sequence of dots. A continuous line of<br />
dots represents slower motion.<br />
Changing colour marks the frequency/period<br />
that a client has spent at a<br />
place.<br />
How did the client‘s sway response change during<br />
recording? In advanced recordings, i. e. a nonchanging<br />
task, the sway response should be more<br />
or less stable.<br />
Data<br />
Here the statistics of individual measuring results<br />
are shown.<br />
29
How to use – Chapter 5<br />
Analysis module<br />
Sway analysis<br />
Graphics of different features are shown here:<br />
• Average swaying radius<br />
• Average sway<br />
• (vertical/horizontal)<br />
• Maximum swaying radius<br />
• Maximum sway (vertical/horizontal)<br />
• Mass centre during recording<br />
Click the right mouse button on the field.<br />
Area<br />
You may either<br />
• dview or blank the swaying radius<br />
• view or blank the sway<br />
• view or blank the curve<br />
The tick indicates that this option is already displayed.<br />
Here the whole sway area is displayed.<br />
Note on the analysis of exercises<br />
It is normal for exercises that the sway response will change with rising diffi culty level, because the client has<br />
to react on varying tasks and positions of elements (areas, circles, balls, …). Consider this when examining<br />
the analysis by graphical representation.<br />
30
Chapter 5 – How to use<br />
Fault location<br />
5.6 Fault location<br />
This chapter will inform you about what to do in case of problems with the <strong>MediBalance</strong> <strong>Pro</strong>.<br />
Fault<br />
After notes were entered<br />
(in the Notes tab), the<br />
Beginner tab has disappeared.<br />
The standard<br />
script cannot be carried<br />
out any more.<br />
The red measuring dot<br />
has disappeared after a<br />
recording step.<br />
The recordings for analysis<br />
take a long time to<br />
open (some seconds)<br />
There are errors in my<br />
software version.<br />
The surface of the blue<br />
cushion is cracked or<br />
dyed.<br />
The blue cushion has<br />
dents.<br />
or<br />
The blue cushion is<br />
brittle and hardened.<br />
<strong>Pro</strong>posal for a solution<br />
The control bar was made very narrow, so that as large a space as possible<br />
is available for the recording window.<br />
Click on ‚Advanced‘ and press the left arrow key at your keyboard or click the<br />
left blue arrow to the right of the Notes tab. The Beginner tab will reappear.<br />
The plug connection from the platform to the computer may have been interrupted<br />
for a short time or the <strong>MediBalance</strong> <strong>Pro</strong> platform was moved jerkily or<br />
violently.<br />
Close the software (any recordings were automatically saved!), remove the<br />
plug, replug into the socket and open the software once more. The connection<br />
will be recognised again. Recalibrate. The <strong>MediBalance</strong> <strong>Pro</strong> system is<br />
operational again.<br />
Many data may have been saved, according to how long the recording/exercise<br />
session has been. They have to be read to display the analysis.<br />
Here we will simply ask for patience.<br />
Perhaps an update or patch of your software has been made available since<br />
you have installed it. Compare your software version number (Help menu --><br />
Info item) to the most recent version available online at<br />
www.download.meditech.de. Install the most recent version. If the error is<br />
still present, please, contact the customer service.<br />
Please, note that these updates are available only to our service and maintenance<br />
contract customers.<br />
Information by the cushion manufacturer:<br />
The special production process by which the softness and the ‚wobbling<br />
effect‘ are achieved may cause some imperfections to the cushions, such as<br />
a few minor surface bubbles, little deviances from the size tolerance or slight<br />
discolouring. Their use is in no manner impaired.<br />
Information by the cushion manufacturer:<br />
To avoid dents, keep any objects from lying on the cushion for a longer time.<br />
Avoid continuous pressure strain for more than approx. 12 hours. Bending<br />
during storage (e.g., on a clothesline) may leave visible dents that do not<br />
fully go away any more.<br />
Continuous water absorption or extended direct solar irradiation will shorten<br />
the calendar life of the products because the surface may after some time<br />
turn brittle and stiff.<br />
Did any other questions, faults or problems occur when working with the <strong>MediBalance</strong> <strong>Pro</strong> software, platform<br />
or overall system?<br />
Please, contact our technical customer support: +49-(0) 5130-97778-55<br />
We will discuss further measures together!<br />
Advice: We strongly recommend to have the <strong>MediBalance</strong> <strong>Pro</strong> system once per year maintained<br />
by the manufacturer. You can sign a maintenance contract. Please, fi nd it online at<br />
www.wartung.meditech.de<br />
31
Technology and maintenance – Chapter 6<br />
6 Technology and maintenance<br />
The following chapter will inform you about the technical data of the <strong>MBP</strong> system and the technical accessory<br />
and about the notes on the rating plate of the device. In addition, you will be instructed on how to<br />
clean the device, how to keep it in good condition, how to store it and how to properly dispose of it.<br />
6.1 Repair and maintenance<br />
Attention!<br />
Important:<br />
Repair and maintenance may be carried out only by the manufacturer or by authorised<br />
service staff.<br />
Opening the glued blue cushion or any unauthorised attempts to repair technical<br />
parts are inadmissible and will compromise liability and warranty of the manufacturer.<br />
Manufacturer specifications: The <strong>MediBalance</strong> <strong>Pro</strong> platform has to be maintained once per year by<br />
the manufacturer. On this occasion it has to be calibrated using reference values..<br />
Note: It is advisable to sign a maintenance contract, including not only maintenance but<br />
other <strong>MediBalance</strong> <strong>Pro</strong> services, too.<br />
6.2 Cleaning<br />
1. Remove the plug of the cable connection to the computer before cleaning.<br />
2. Use lint-free cloth, damped with any customary disinfectant, to clean the supporting rack, the<br />
black enclosure of the platform and, above all, the grey tread before reuse and after use.<br />
Attention!<br />
Attention!<br />
For cleaning, strictly observe the usage and safety notes of the respective disinfectant<br />
manufacturer.<br />
Avoid any contact of the device with ultrasonic baths, fl owing water or chemical<br />
cleaners, such as diluents, alcohol, etc. The device might be damaged or destroyed.<br />
The manufacturer of the cushions recommends for cleaning the blue cushions (either the fi rmly<br />
installed cushion under the black upper shell or the add-on cushion)::<br />
1. Preferably remove dirt of any kind with a soft brush and lukewarm soap water.<br />
Attention!<br />
Blotches and similar dirt may not be treated with petrol or stain remover. The blue<br />
soft foam could be damaged.<br />
2. If disinfection is required, use any customary disinfectant, like Merfen, Desogen or Chromium.<br />
3. The following is recommended to prolong the calendar life: rinse the add-on cushion after use<br />
with clear water, shake out the water and let the cushion dry in the air (not over heaters etc., as<br />
they might cause dents).<br />
4. Airex® soft foamed plastics are equipped with SANITIZED® and, hence, offer effective longterm<br />
protection against bacteria and fungus.<br />
Important: Sterilisation with superheated steam (autoclave sterilisation) or hot water is not permissible.<br />
The foamed plastic could be damaged!<br />
32
Chapter 6 – Technology and maintenance<br />
6.3 Maintenance and storage<br />
1. If the <strong>MediBalance</strong> <strong>Pro</strong> platform will not be used for some time, it should be economically and<br />
safely stored in the proper transport bag that came with the scope of supply, to save space and<br />
to avoid tripping.<br />
2. The supporting rack can also be folded up and stowed away to save space.<br />
3. Keep device, cushion and bag at room temperature in a dry space.<br />
Contact us if the device does not function properly any more.<br />
Attention!<br />
The user may not try to repair a fault of the platform, the supporting rack or the<br />
add-on cushion. The components could be damaged. Any unauthorised attempts to<br />
repair will compromise liability and warranty of the respective manufacturer.<br />
The manufacturer recommends for storing the blue add-on cushion:<br />
1. The cushion is ideally stored either lying fl at or in the wrapping. To avoid dents, keep any<br />
objects from lying on the cushion for a longer time. Avoid continuous pressure strain for more<br />
than approx. 12 hours.<br />
2. Bending during storage (e.g., on a clothesline) may leave visible dents that do not fully go away<br />
any more. Continuous water absorption or extended direct solar irradiation will shorten the<br />
calendar life of the products because the surface may after some time turn brittle and stiff.<br />
3. For reasons of hygiene, you should not store wet products in cloakroom cupboards or stacks.<br />
6.4 Transport<br />
1. Transport the platform economically and safely in the transport bag that came with the scope of<br />
supply. The platform will be safe inside.<br />
2. Transport the blue add-on cushion in the wrapping that you can strap down with the black belts<br />
at the outside of the transport and storage bag.<br />
3. Transport the supporting rack folded up, for reasons of space and stability.<br />
6.5 Disposal<br />
Pull the plug of the cable connection to the computer from the <strong>MediBalance</strong> <strong>Pro</strong> platform.<br />
Advice:<br />
The <strong>MediBalance</strong> <strong>Pro</strong> platform may not be disposed<br />
of in domestic waste because it includes<br />
electronic parts. Deliver the device to a refuse<br />
processing company for electronic parts or send it<br />
(with a short note about the intended purpose) to:<br />
<strong>MediTECH</strong> Electronic GmbH<br />
Langer Acker 7<br />
30900 Wedemark<br />
Telefon: +49-(0)5130/97778-0<br />
You can dispose of the cushion and the blue add-on cushion in the same way.<br />
33
Technology and maintenance – Chapter 6<br />
6.6 Rating plate<br />
Year of production<br />
<strong>Pro</strong>ducer (Name and contact data)<br />
Article number<br />
Name of device / type<br />
Serial number<br />
-- Explanation see below --<br />
Advice according to the maximal clients weight<br />
Applied part:<br />
This icon means that the usage of the <strong>MediBalance</strong> <strong>Pro</strong> platform requires additional ‚applied<br />
parts‘ which are not included in the scope of supply. This means a computer, for example.<br />
Attention, read and understand the instructions before use!<br />
Environmental disposal classification<br />
(see chapter Disposal<br />
6.7 Technical data<br />
Power supply<br />
Power consumption<br />
Calendar life<br />
Size<br />
Width x height x depth<br />
Weight<br />
Specifi c features<br />
The power supply is established by the USB cable when it is connected<br />
to the switched-on computer.<br />
Up to 110 mA at 5 V<br />
Approx. 10 years<br />
The production year is noted on the rating plate.<br />
47.7 cm x 6.6 cm x 39.5 cm<br />
(seen from the upper edge – from the USB connection socket)<br />
3.65 kg (without add-on cushion)<br />
Slip-resistant surface below the fi rmly installed cushion<br />
Operation<br />
Ambient temperature +5 °C to +40 °C<br />
Relative air humidity 40% - 65%<br />
Atmospheric pressure 700 - 1060 hPa<br />
Storage and transport<br />
Ambient temperature -20 °C to +50 °C<br />
Relative air humidity 20% - 95%<br />
Atmospheric pressure 700 - 1060 hPa<br />
34
Chapter 6 – Technology and maintenance<br />
6.8 Electromagnetic compatibility – Guidance and manufacturer‘s declaration<br />
Electromagnetic compatibility<br />
DIN EN 60601-1-2:2011 (IEC 60601-1-2:2011)<br />
Medical electrical devices are subject to special precautionary measures in particular regarding the EMC<br />
with the installation and the operation.<br />
Portable and mobile HF-communication devices e.g. mobile phonecan affect medical electrical devices.<br />
A use of other accessories and lines than the indicated, can lead to an increased sending or a reduced<br />
noise immunity of the equipment. The equipment has to be operated exclusively with original accessories.<br />
The device should not be used adjacent to or stacked with other equipment. If adjacent or stacked use<br />
is necessary, the device should be observed to verify normal operation in the confi guration in which it<br />
will be used.<br />
Electromagnetic emissions<br />
<strong>MediBalance</strong> <strong>Pro</strong> is intended for use in the electromagnetic environment specifi ed below. The customer<br />
or the user of the <strong>MediBalance</strong> <strong>Pro</strong> should assure that it is uded in such environment.<br />
Emission test Compliance Electromagnetic environment - guidance<br />
RF emissions CISPR 11 Group 1 The <strong>MediBalance</strong> <strong>Pro</strong> uses RF energy<br />
only for its internal function. Therefore, its<br />
RF emissions are very low and are not<br />
likely to cause any interference in nearby<br />
electronic equipment.<br />
RF emissions nach CISPR 11 Class B The <strong>MediBalance</strong> <strong>Pro</strong> is suitable for use<br />
Harmonic emissions IEC 61000-3-2 not applicable in all establishments, inluding domestic<br />
establishments and those directly connected<br />
to the public low-voltage power<br />
Voltage fl uctuations / fl icker emissions<br />
IEC 61000-3-3<br />
not applicable<br />
supply network that supplies buildings<br />
udes for domestic purposes.<br />
35
Technology and maintenance – Chapter 6<br />
Electromagnetic immunity I<br />
The <strong>MediBalance</strong> <strong>Pro</strong> is intended for use in the electromagnetic environment specifi ed below. The customer<br />
or the user of the <strong>MediBalance</strong> <strong>Pro</strong> should assure that it is used in such environment.<br />
Immunity test IEC 60601 test<br />
level<br />
Compliance level Electromagnetic environment -<br />
guidance<br />
Electrostatic discharge<br />
(ESD) IEC 61000-4-2<br />
Electrical fast transient<br />
/ burst IEC 61000-4-4<br />
6 kV contact<br />
8 kV air<br />
2 kV for power<br />
supply lines<br />
1 kV for input /<br />
output lines<br />
Surge IEC 61000-4-5 1 kV common<br />
mode<br />
2 kV differential<br />
mode<br />
Voltage dips, short interruptions<br />
and voltage<br />
variations on power<br />
supply input lines IEC<br />
61000-4-11<br />
Power frequency<br />
(50/60 Hz) magnetic<br />
fi eld IEC 61000-4-8<br />
< 5 % U T<br />
(> 95% dip of U T<br />
)<br />
for 1/2 cycle<br />
40 % U T<br />
(60 % dip of U T<br />
)<br />
for 5 cycle<br />
70 % U T<br />
(30 % dip of U T<br />
)<br />
for 25 cycle<br />
95 % dip of U T<br />
)<br />
for 5 s<br />
6 kV contact<br />
8 kV air<br />
not applicable<br />
not applicable<br />
not applicable<br />
Floors should be wood, concrete or<br />
ceramic tile. If fl oors are covered with<br />
synthetic material, the relative humidity<br />
shall be al least 30 %.<br />
Mains power quality should be similar<br />
to that of a typical commercial or hospital<br />
environment.<br />
Mains power quality should be similar<br />
to that of a typical commercial or hospital<br />
environment.<br />
Mains power quality should be similar<br />
to that of a typical commercial or<br />
hospital environment. When the user<br />
of the <strong>MediBalance</strong> <strong>Pro</strong> continued<br />
function also calls in the envent of<br />
disruption of supply, it is recommended<br />
the <strong>MediBalance</strong> <strong>Pro</strong> form an<br />
uninterruptible power supply.<br />
3 A/m 3 A/m Power frequency magnetic fi elds<br />
should be at leves characteristic of a<br />
typical location in a typical emmercial<br />
or hospital environment.<br />
Note: U T<br />
is the ac mains voltage prior to application of the test level.<br />
36
Chapter 6 – Technology and maintenance<br />
Electromagnetic immunity II<br />
The <strong>MediBalance</strong> <strong>Pro</strong> is intended for use in the electromagnetic environment specifi ed below. The customer<br />
or the user of the <strong>MediBalance</strong> <strong>Pro</strong> should assure that it is used in such environment.<br />
Immunity test IEC 60601 test<br />
level<br />
Compliance level Electromagnetic environment - guidance<br />
Conducted RF<br />
IEC 61000-4-6<br />
Radiated RF<br />
IEC 61000-4-3<br />
3 V eff<br />
150 kHz to 80 MHz<br />
3 V/m<br />
80 MHz to 2.5 GHz<br />
3 V eff<br />
150 kHz to 80 MHz<br />
3 V/m<br />
80 MHz to 2.5 GHz<br />
Portable and mobile RF communication<br />
equipment should be used no closer<br />
to any part of the <strong>MediBalance</strong> <strong>Pro</strong>,<br />
including cables, than the recommended<br />
sparation distance calculated from the<br />
equation applicable to the frequency of<br />
the transmitter.<br />
Recommended separation distance:<br />
d = 3,5/3 P<br />
d = 3,5/3 P 80 MHz to 800 MHz<br />
d = 7/3 P 800 MHz to 2,5 GHz<br />
Where P is the maximum output power<br />
rating of the transmitter in watts (W) according<br />
to the recommended separation<br />
distance in meters (m).<br />
Field strength form fi xed RF transmitters,<br />
as determined by an electromagnetic<br />
site surway A , should be less than<br />
the compliance level in each frequency<br />
range B .<br />
Interference may occur in the vicinity<br />
of equipment marked withthe following<br />
symbol:<br />
Note 1:<br />
Note 2:<br />
A<br />
B<br />
At 80 MHz and 800 MHz the higher frequency range applies.<br />
These guidances may not apply in all situations. Electromagnetic propagation is affected by<br />
absorption an refl ection from structures, objects and people.<br />
Field strenghts from fi ced transmitters, such as base stations for radio (cellular / cordless) telephones<br />
and land mobile radios, amateur radio, AM and FM radio broadcast and TV broadcast<br />
cannot be predicted theoretically with accuracy.<br />
To access the electromagnetic environment due to fi xed RF transmitters, an electromagnetic<br />
site survey should be considered. If the measued fi eld strength in the location in which the <strong>MediBalance</strong><br />
<strong>Pro</strong> is used exceeds the applicable RF compliance level above, the <strong>MediBalance</strong> <strong>Pro</strong><br />
should be observed to verify normal operation.<br />
If abnormal performance is observed, additional measures may be necessary, such as reorienting<br />
or relocating the <strong>MediBalance</strong> <strong>Pro</strong>.<br />
Over the frequency range 150 kHz to 80 MHz, fi eld strengths should be less than 10 V/m.<br />
37
Technology and maintenance – Chapter 6<br />
Recommended separation distances for portable and mobile RF communication equipment and<br />
the <strong>MediBalance</strong> <strong>Pro</strong><br />
The <strong>MediBalance</strong> <strong>Pro</strong> is intendes for the use in the electromagnetic environment in which radiated RF<br />
disturbances are controlled. The customer or user of the <strong>MediBalance</strong> <strong>Pro</strong> can help to prevent electromagnetic<br />
interference by maintaining a minimum distance between porable and mobile RF communication<br />
equipment (transmitters) and the <strong>MediBalance</strong> <strong>Pro</strong> as recommended below, according to the<br />
maximum output power of the communications equipment.<br />
Rate maximum output<br />
power of tranmitter<br />
W<br />
Separation distance according to frequency of transmitter<br />
m<br />
150 kHz to 80 MHz<br />
d = 1.2 P<br />
80 MHz to 800 MHz<br />
d = 1.2 P<br />
0.01 0.12 0.12 0.23<br />
0.1 0.37 0.37 0.74<br />
1 1.17 1.17 2.33<br />
10 3.69 3.69 7.38<br />
100 11.67 11.67 23.33<br />
800 MHz to 2,5 GHz<br />
d = 2.3 P<br />
For transmitters rated at a maximum output power not listed above, the recommended separation distance<br />
d in meters (m) can be determined using the equation applicalbe to the frequency of the transmitter, where<br />
P is the maximum output power ratin of the transmitter is watts (W) according to the transmitter manufacturer.<br />
Note 1:<br />
Note 2:<br />
At 80 MHz and 800 MHz the higher frequency range allies.<br />
These guidelines may not apply in all situations. Electromagnetic propagation is affected by<br />
absorption and refl ection from structures, objects and peoples.<br />
38
Chapter 7 – Service<br />
7 Service<br />
7.1 Contact data of producer<br />
<strong>MediTECH</strong> Electronic GmbH<br />
Langer Acker 7<br />
D-30900 Wedemark<br />
Tel.: +49-(0)5130-97778-0<br />
Fax: +49-(0)5130-97778-22<br />
Mail: service@meditech.de<br />
Internet: www.meditech.de<br />
7.2 Warranty<br />
After acquiring the <strong>MediBalance</strong> <strong>Pro</strong> system from <strong>MediTECH</strong> Electronic GmbH you are granted a warranty<br />
claim for faultless operation of the device that will expire after two years. Malfunction and damage<br />
from improper use are excluded.<br />
Beside this warranty, we are supplying a hotline service for any questions and problems ‚concerning<br />
balance exercise‘ for all the time you will be working with the system.<br />
You may call the hotline at the phone number:<br />
+49-(0) 5130 - 97778-0<br />
Of course you may also send your questions in written form:<br />
by fax: +49-(0)5130 - 97778-22<br />
by Email:<br />
service@meditech.de<br />
7.3 EC declaration of conformity<br />
Please, fi nd the current EC declaration of conformity of this product at www.ce.meditech.de.<br />
39
If you have questions about use, in case of problems, if you want to tell us about your experiences with<br />
the system or if you are looking for further information – please do not hesitate to contact us:<br />
<strong>MediTECH</strong> Electronic GmbH<br />
Langer Acker 7<br />
D-30900 Wedemark (Region Hannover)<br />
Tel.: +49 - (0) - 51 30 - 9 77 78-0<br />
Fax: +49 - (0) - 51 30 - 9 77 78-22<br />
Email: service@meditech.de<br />
Internet: www.meditech.de<br />
<strong>GB</strong>A - <strong>MediBalance</strong> <strong>Pro</strong>-<strong>GB</strong> - V1.4 - 11.03.2013