2013 Buick Verano Infotainment System
2013 Buick Verano Infotainment System
2013 Buick Verano Infotainment System

Create successful ePaper yourself
Turn your PDF publications into a flip-book with our unique Google optimized e-Paper software.
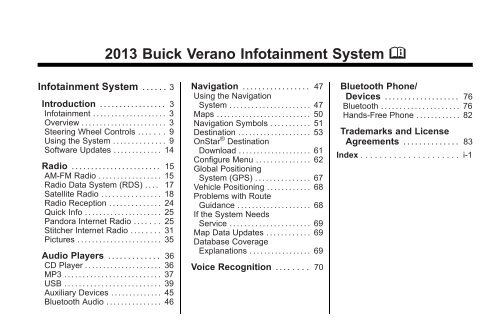
<strong>2013</strong> <strong>Buick</strong> <strong>Verano</strong> <strong>Infotainment</strong> <strong>System</strong> M<br />
<strong>Infotainment</strong> <strong>System</strong> . . . . . . 3<br />
Introduction . . . . . . . . . . . . . . . . . 3<br />
<strong>Infotainment</strong> . . . . . . . . . . . . . . . . . . . . 3<br />
Overview . . . . . . . . . . . . . . . . . . . . . . . 3<br />
Steering Wheel Controls . . . . . . . 9<br />
Using the <strong>System</strong> . . . . . . . . . . . . . . 9<br />
Software Updates . . . . . . . . . . . . . 14<br />
Radio . . . . . . . . . . . . . . . . . . . . . . . 15<br />
AM-FM Radio . . . . . . . . . . . . . . . . . 15<br />
Radio Data <strong>System</strong> (RDS) . . . . 17<br />
Satellite Radio . . . . . . . . . . . . . . . . 18<br />
Radio Reception . . . . . . . . . . . . . . 24<br />
Quick Info . . . . . . . . . . . . . . . . . . . . . 25<br />
Pandora Internet Radio . . . . . . . 25<br />
Stitcher Internet Radio . . . . . . . . 31<br />
Pictures . . . . . . . . . . . . . . . . . . . . . . . 35<br />
Audio Players . . . . . . . . . . . . . 36<br />
CD Player . . . . . . . . . . . . . . . . . . . . . 36<br />
MP3 . . . . . . . . . . . . . . . . . . . . . . . . . . 37<br />
USB . . . . . . . . . . . . . . . . . . . . . . . . . . 39<br />
Auxiliary Devices . . . . . . . . . . . . . . 45<br />
Bluetooth Audio . . . . . . . . . . . . . . . 46<br />
Navigation . . . . . . . . . . . . . . . . . 47<br />
Using the Navigation<br />
<strong>System</strong> . . . . . . . . . . . . . . . . . . . . . . 47<br />
Maps . . . . . . . . . . . . . . . . . . . . . . . . . . 50<br />
Navigation Symbols . . . . . . . . . . . 51<br />
Destination . . . . . . . . . . . . . . . . . . . . 53<br />
OnStar ® Destination<br />
Download . . . . . . . . . . . . . . . . . . . . 61<br />
Configure Menu . . . . . . . . . . . . . . . 62<br />
Global Positioning<br />
<strong>System</strong> (GPS) . . . . . . . . . . . . . . . 67<br />
Vehicle Positioning . . . . . . . . . . . . 68<br />
Problems with Route<br />
Guidance . . . . . . . . . . . . . . . . . . . . 68<br />
If the <strong>System</strong> Needs<br />
Service . . . . . . . . . . . . . . . . . . . . . . 69<br />
Map Data Updates . . . . . . . . . . . . 69<br />
Database Coverage<br />
Explanations . . . . . . . . . . . . . . . . . 69<br />
Voice Recognition . . . . . . . . 70<br />
Bluetooth Phone/<br />
Devices . . . . . . . . . . . . . . . . . . . 76<br />
Bluetooth . . . . . . . . . . . . . . . . . . . . . 76<br />
Hands-Free Phone . . . . . . . . . . . . 82<br />
Trademarks and License<br />
Agreements . . . . . . . . . . . . . . 83<br />
Index . . . . . . . . . . . . . . . . . . . . . i-1
Introduction<br />
<strong>Infotainment</strong><br />
The names, logos, emblems,<br />
slogans, vehicle model names, and<br />
vehicle body designs appearing in<br />
this manual including, but not limited<br />
to, GM, the GM logo, BUICK, the<br />
BUICK Emblem, and the name<br />
<strong>Verano</strong>, are registered trademarks<br />
of General Motors Corporation LLC,<br />
its subsidiaries, affiliates,<br />
or licensors.<br />
The information in this manual<br />
supplements the owner manual.<br />
This manual includes the latest<br />
information available at the time it<br />
was printed. We reserve the right to<br />
make changes in the product after<br />
that time without notice. For<br />
vehicles first sold in Canada,<br />
substitute the name General Motors<br />
of Canada Limited for <strong>Buick</strong> Motor<br />
Division, wherever it appears in this<br />
manual.<br />
Keep this manual with the owner<br />
manual in the vehicle, so it will be<br />
there if it is needed. If the vehicle is<br />
sold, leave this manual in the<br />
vehicle.<br />
Overview<br />
Read the following pages to<br />
become familiar with the<br />
infotainment system features.<br />
<strong>Infotainment</strong> <strong>System</strong> 3<br />
{ WARNING<br />
Taking your eyes off the road for<br />
extended periods could cause a<br />
crash resulting in injury or death<br />
to you or others. Do not give<br />
extended attention to infotainment<br />
tasks while driving.<br />
The infotainment system has built-in<br />
features intended to help with this<br />
by disabling some functions when<br />
driving. A grayed-out function is not<br />
available when the vehicle is<br />
moving.<br />
All functions are available when the<br />
vehicle is parked. Before driving:<br />
. Become familiar with the<br />
infotainment system operation,<br />
buttons on the faceplate, and<br />
touch-sensitive screen buttons.<br />
Litho in U.S.A.<br />
Part No. 22926524 A First Printing<br />
©<br />
2012 General Motors LLC. All Rights Reserved.
4 <strong>Infotainment</strong> <strong>System</strong><br />
. Set up the audio by presetting<br />
favorite stations, setting the<br />
tone, and adjusting the<br />
speakers.<br />
. Set up phone numbers in<br />
advance so they can be called<br />
easily by pressing a single<br />
button or a single voice<br />
command for vehicles equipped<br />
with phone capability.<br />
{ WARNING<br />
Taking your eyes off the road too<br />
long or too often while using the<br />
navigation system could cause a<br />
crash and you or others could be<br />
injured or killed. Focus your<br />
attention on driving and limit<br />
glances at the moving map on the<br />
navigation screen. Use voice<br />
guidance whenever possible.<br />
See “Defensive Driving” in the Index<br />
of the vehicle owner manual for<br />
more information.<br />
The vehicle has Retained<br />
Accessory Power (RAP). With RAP,<br />
the audio system can be played<br />
even after the ignition is turned off.<br />
See “Retained Accessory Power<br />
(RAP)” in the owner manual.<br />
Customer Assistance<br />
Assistance is available to help with<br />
Bluetooth pairing, application<br />
downloading and installation, other<br />
mobile device interface, and<br />
operation support of the<br />
infotainment system. Specialists are<br />
available when calling this<br />
Customer Assistance number: U.S.<br />
(855) 4 SUPPORT (478-7767).<br />
<strong>Infotainment</strong> <strong>System</strong> Overview<br />
The infotainment system is<br />
controlled by using the buttons,<br />
touch screen, steering wheel<br />
controls, and voice recognition.<br />
See Using the <strong>System</strong> on page 9.
<strong>Infotainment</strong> <strong>System</strong> 5<br />
Radio without Navigation<br />
12. / BACK<br />
13. TUNE/MENU Knob<br />
14. CONFIG (Configuration)<br />
15. INFO (Information)<br />
16. Z (Eject)<br />
17. H (Clock)<br />
18. AS 1-2 (Autostore)<br />
1. Home<br />
2. Preset Buttons 1−6<br />
3. s © (Seek Previous/Reverse)<br />
4. O VOL (Power/Volume)<br />
5. ¨ \ (Seek Next/Forward)<br />
6. FAV 1-2-3 (Favorites)<br />
7. SRCE (Source)<br />
8. J (Play/Pause)<br />
9. V /8 (Phone/Mute)<br />
10. CD Slot<br />
11. TONE
6 <strong>Infotainment</strong> <strong>System</strong><br />
Radio with Navigation
<strong>Infotainment</strong> <strong>System</strong> 7<br />
1. SRCE (Source)<br />
2. Home<br />
3. s © (Seek Previous/Reverse)<br />
4. Preset Buttons 1−6<br />
5. DEST/NAV (Destination<br />
Navigation)<br />
6. O VOL (Power/Volume)<br />
7. ¨ \ (Seek Next/Forward)<br />
8. k (Play/Pause)<br />
9. FAV 1-2-3 (Favorites)<br />
10. AS 1-2 (Autostore)<br />
11. NAV (Navigation)<br />
12. V /8 (Phone/Mute)<br />
13. RPT/NAV (Repeat Navigation)<br />
14. / BACK<br />
15. Inner Rocker Knob<br />
16. TUNE/MENU Knob<br />
17. INFO (Information)<br />
18. CONFIG (Configuration Menu)<br />
19. Z (Eject)<br />
20. H (Clock)<br />
<strong>Infotainment</strong> Control Buttons<br />
The buttons on the faceplate are<br />
used to start primary functions while<br />
using the infotainment system.<br />
SRCE (Source): Press to change<br />
the audio source to AM, FM, XM (if<br />
equipped), Pandora (if equipped),<br />
Stitcher, CD, USB, AUX,<br />
or Bluetooth Audio.<br />
Home: Press to go to the Home<br />
Page. See “Home Page” in this<br />
section.<br />
s © (Seek Previous/Reverse):<br />
.<br />
CD, USB, Bluetooth Audio:<br />
Press to seek to the beginning of<br />
the current or previous track.<br />
. CD, USB, Bluetooth Audio:<br />
Press and hold to quickly<br />
reverse through a track. Release<br />
the button to return to playing<br />
speed. See CD Player on<br />
page 36, USB on page 39,<br />
or Bluetooth Audio on page 46.<br />
. AM, FM, XM (if equipped): Press<br />
to seek to the previous strong<br />
station.<br />
Preset Buttons 1–6: The preset<br />
buttons numbered one through six<br />
can be used to select stored AM,<br />
FM, and XM (if equipped) stations.<br />
DEST/NAV (Destination<br />
Navigation):<br />
. Press to enter a destination.<br />
. If a destination has already been<br />
entered, press to access the<br />
Destination Menu. See<br />
Destination on page 53.<br />
O VOL (Power/Volume):<br />
. Press to turn the system on<br />
and off.<br />
. Turn to adjust the volume.<br />
¨ \ (Seek Next/Forward):<br />
. CD, USB, Bluetooth Audio:<br />
Press to seek the next track.
8 <strong>Infotainment</strong> <strong>System</strong><br />
. CD, USB, Bluetooth Audio:<br />
Press and hold to fast forward<br />
through a track. Release the<br />
button to return to playing<br />
speed. See CD Player on<br />
page 36, USB on page 39,<br />
or Bluetooth Audio on page 46.<br />
. AM, FM, XM (if equipped): Press<br />
to seek to the previous strong<br />
station.<br />
k (Play/Pause): Press to pause<br />
or resume playback. See CD Player<br />
on page 36, USB on page 39,<br />
or Bluetooth Audio on page 46.<br />
TONE: Press to access the Tone<br />
Settings menu screen to adjust<br />
Bass, Mid (Midrange), Treble, EQ,<br />
Fade, and Balance. Tone settings<br />
are specific to each source. See<br />
AM-FM Radio on page 15.<br />
FAV 1-2-3 (Favorites): Press to<br />
display the current favorite page<br />
number above the preset buttons.<br />
Keep pressing to scroll through the<br />
favorites pages. The stored stations<br />
for each list displays on the bottom<br />
of the screen. The number of preset<br />
Favorite Pages can be changed by<br />
pressing the Config button on the<br />
Home Page, then pressing Radio<br />
Settings, and then pressing Number<br />
of Favorite Pages.<br />
AS 1-2 (Autostore): See<br />
“Autostore” in this section.<br />
NAV (Navigation):<br />
. Press to view the vehicle’s<br />
current position on the map<br />
screen.<br />
. Continue pressing to cycle<br />
through the full map and split<br />
screens.<br />
V /8 (Phone/Mute)<br />
.<br />
Press to enter the phone main<br />
screen. See Bluetooth on<br />
page 76, Hands-Free Phone on<br />
page 82, or “OnStar” in the<br />
owner manual.<br />
. Press and hold to mute or<br />
unmute the infotainment system.<br />
RPT/NAV (Repeat Navigation):<br />
Press to repeat the last voice<br />
guidance prompt.<br />
/ BACK: Press to return to the<br />
previous screen in a menu.<br />
Inner Rocker Knob (Navigation):<br />
Move the rocker knob in different<br />
directions to navigate through the<br />
map display only.<br />
TUNE/MENU Knob:<br />
1. Turn to change a radio station.<br />
See AM-FM Radio on page 15.<br />
2. Turn to highlight a feature within<br />
a menu. Press the outer<br />
diameter (chrome ring) of the<br />
TUNE/MENU knob to activate<br />
the highlighted feature.<br />
INFO (Information): Press to<br />
toggle through an audio or<br />
navigation information screen.<br />
CONFIG (Configuration Menu):<br />
Press to adjust features for<br />
Languages, Time and Date, Radio<br />
Settings, Phone Settings, Display<br />
Settings, and Vehicle Settings.<br />
Z (Eject): Press to eject a disc<br />
from the CD player. See CD Player<br />
on page 36.
<strong>Infotainment</strong> <strong>System</strong> 9<br />
H (Clock): Press to open the<br />
clock menu.<br />
Autostore<br />
To use Autostore:<br />
1. Press SRCE to select FM or AM.<br />
2. Press the AS 1-2 button for<br />
two seconds.<br />
3. The radio searches and<br />
automatically stores the six<br />
strongest stations.<br />
Press the AS 1-2 button to alternate<br />
between the Autostore stations and<br />
favorites.<br />
Autostore does not delete<br />
previously stored favorite stations.<br />
Autostore does not function with XM<br />
radio stations.<br />
Touch Screen Buttons<br />
Touch screen buttons are on the<br />
screen and highlighted when a<br />
feature is available. Some toggle<br />
screen buttons highlight when active<br />
and gray out when inactive.<br />
Steering Wheel Controls<br />
Depending on the vehicle options,<br />
some audio functions can be<br />
controlled through the steering<br />
wheel controls.<br />
b / g (Push to Talk): Press to<br />
interact with Bluetooth or voice<br />
recognition. See Bluetooth on<br />
page 76 or Voice Recognition on<br />
page 70.<br />
$ / i (Mute/End Call): Press to<br />
decline an incoming call, or to end a<br />
current call. Press to silence the<br />
vehicle speakers while using the<br />
infotainment system. Press again to<br />
turn the sound on. Press to cancel<br />
voice recognition.<br />
_ SRC ^ (Thumbwheel Control):<br />
Press to select an audio source.<br />
Use the thumbwheel to select the<br />
next or previous favorite radio<br />
station, CD, MP3 track, USB, and<br />
Bluetooth Audio.<br />
Use _ SRC to skip to the next song<br />
or show using Pandora or Stitcher.<br />
See Pandora Internet Radio on<br />
page 25 or Stitcher Internet Radio<br />
on page 31.<br />
+ x − (Volume): Press + to<br />
increase the volume. Press − to<br />
decrease.<br />
See “Steering Wheel Controls” in<br />
the owner manual.<br />
Using the <strong>System</strong><br />
The infotainment system is<br />
controlled by touching the screen;<br />
by using the knobs, and other<br />
buttons.<br />
Voice recognition, through the<br />
steering wheel controls, can be<br />
used to control the infotainment<br />
features.<br />
Press b / g on the steering wheel<br />
controls to begin voice recognition.<br />
See Voice Recognition on page 70.
10 <strong>Infotainment</strong> <strong>System</strong><br />
Home Page<br />
Touch Screen Buttons<br />
The Home Page allows access to<br />
many of the features.<br />
Back: Press to return to the<br />
previous page.<br />
Home: Press to go back to the<br />
Home Page.<br />
Fav: Press to display a page of<br />
stored (favorite) AM, FM, or XM (if<br />
equipped) stations. Keep pressing<br />
Fav to scroll through the favorite<br />
pages.<br />
More r : Press to go to the<br />
next page.<br />
Home Page Customization<br />
The first Home Page can be<br />
customized.<br />
To add screen buttons:<br />
1. Press Menu.<br />
2. Press Customize.<br />
3. Press a screen button to add or<br />
remove from the first Home<br />
Page. A h indicates it will be<br />
displayed. The maximum<br />
number of buttons on Home<br />
Page 1 is eight.<br />
4. Press Done.<br />
To move screen buttons:<br />
1. Press Sort.<br />
2. Press to select an icon to move<br />
and swap with another icon on<br />
the first Home Page only.<br />
3. Press Done.<br />
To restore Home Page 1 defaults:<br />
1. Press Menu.<br />
2. Press Restore Home Page<br />
Defaults.<br />
3. Press Yes or Cancel.<br />
Home Page Features<br />
Touch screen buttons are<br />
highlighted when a feature is<br />
available.<br />
Various functions are disabled when<br />
the vehicle is moving.<br />
Press the Now Playing screen<br />
button to display the active source<br />
page. The sources available are
<strong>Infotainment</strong> <strong>System</strong> 11<br />
AM, FM, XM (if equipped), CD,<br />
USB/iPod, Pandora (if equipped),<br />
Stitcher, and AUX.<br />
See AM-FM Radio on page 15,<br />
Satellite Radio on page 18, CD<br />
Player on page 36, Pandora Internet<br />
Radio on page 25, Stitcher Internet<br />
Radio on page 31, and Auxiliary<br />
Devices on page 45.<br />
Press the Destination screen button<br />
to display the Destination Entry<br />
home page or the Destination Menu.<br />
The available screen buttons<br />
provide easy access to a variety of<br />
ways to enter a destination. See<br />
Destination on page 53.<br />
Press the Config screen button to<br />
display the Config main page. From<br />
this display, adjust features such as<br />
time and date, radio, phone,<br />
navigation, vehicle, and display. See<br />
Configure Menu on page 62.<br />
Press the Navigation screen button<br />
to display a map of your current<br />
vehicle position. See Using the<br />
Navigation <strong>System</strong> on page 47,<br />
Maps on page 50, Navigation<br />
Symbols on page 51, and Configure<br />
Menu on page 62.<br />
Press the Phone screen button to<br />
display the Phone main page. See<br />
Bluetooth on page 76 and<br />
Hands-Free Phone on page 82.<br />
Press the Tone screen button to<br />
display the Tone main page. Adjust<br />
the tone and speakers by pressing<br />
the screen buttons to change the<br />
levels of sound for treble, midrange,<br />
bass, fade, and balance. See<br />
AM-FM Radio on page 15.
12 <strong>Infotainment</strong> <strong>System</strong><br />
Press the Pictures screen button to<br />
view pictures on your USB drive or<br />
SD card. Pictures on the SD card<br />
can only be viewed through a USB<br />
adapter. See Pictures on page 35.<br />
Press the AM screen button to<br />
display the AM main page and play<br />
the current or last tuned AM station.<br />
See AM-FM Radio on page 15.<br />
Press the Pandora (if equipped)<br />
screen button to display the<br />
Pandora home page and streams<br />
personalized radio stations based<br />
on artists, songs, genres, and<br />
comedians. See Pandora Internet<br />
Radio on page 25.<br />
Press the FM screen button to<br />
display the FM main page and play<br />
the current or last tuned FM station.<br />
See AM-FM Radio on page 15.<br />
Press the XM screen button (if<br />
equipped) to display the XM main<br />
page and play the current or last<br />
tuned SiriusXM channel. See<br />
AM-FM Radio on page 15 and<br />
Satellite Radio on page 18.<br />
Press the Stitcher screen button (if<br />
equipped) to display the Stitcher<br />
home page and streams news,<br />
sports, and entertainment shows<br />
through the audio system. See<br />
Stitcher Internet Radio on page 31.
<strong>Infotainment</strong> <strong>System</strong> 13<br />
Press the AUX screen button to<br />
access any connected auxiliary<br />
device. See Auxiliary Devices on<br />
page 45.<br />
Press the CD screen button to<br />
display the CD main page and play<br />
the current or last CD track<br />
selected. See CD Player on<br />
page 36.<br />
Press the E Bluetooth screen button<br />
to display the Bluetooth Audio main<br />
page to play music through a<br />
Bluetooth device. See Bluetooth<br />
Audio on page 46.<br />
Press the iPod screen button to<br />
display the iPod main page and play<br />
the current or last track selected.<br />
See Auxiliary Devices on page 45.<br />
Press the USB screen button to<br />
display the USB main page and play<br />
the current or last track selected.<br />
See Auxiliary Devices on page 45.<br />
Press the Weather screen button (if<br />
equipped) to display the weather<br />
main page. Select other<br />
weather-related options from that<br />
list. See “Weather (If Equipped)”<br />
under Satellite Radio on page 18.
14 <strong>Infotainment</strong> <strong>System</strong><br />
Press the Fuel screen button (if<br />
equipped) to display detailed<br />
nationwide fuel price. See “Fuel<br />
Pricing” under Satellite Radio on<br />
page 18<br />
Press the Movies screen button (if<br />
equipped) to show detailed of local<br />
movie theater listings, start times,<br />
and ratings if available. See “Movie<br />
Listings” in Satellite Radio on<br />
page 18.<br />
Press the Quick Info screen button<br />
to access information on Audio<br />
playing, OnStar Turn-by-Turn route<br />
(if equipped), 5-day forecast,<br />
Nearby Fuel Stations, and Movie<br />
Showtimes. See Quick Info on<br />
page 25.<br />
Cleaning High Gloss Surfaces<br />
and Vehicle Information and<br />
Radio Displays<br />
For vehicles with high gloss<br />
surfaces or vehicle displays, use a<br />
microfiber cloth to wipe surfaces.<br />
Before wiping the surface with the<br />
microfiber cloth, use a soft bristle<br />
brush to remove dirt that could<br />
scratch the surface. Then use the<br />
microfiber cloth by gently rubbing to<br />
clean. Never use window cleaners<br />
or solvents. Periodically hand wash<br />
the microfiber cloth separately,<br />
using mild soap. Do not use bleach<br />
or fabric softener. Rinse thoroughly<br />
and air dry before next use.<br />
Notice: Do not attach a device<br />
with a suction cup to the display.<br />
This may cause damage and<br />
would not be covered by the<br />
warranty.<br />
Software Updates<br />
See the websites for more<br />
information.<br />
Website Information<br />
In the U.S., see www.buick.com<br />
In Canada, see www.buick.gm.ca<br />
In Mexico, www.buick.com.mx
Radio<br />
AM-FM Radio<br />
Playing the Radio<br />
VOL/ O (Volume/Power):<br />
. Press to turn the radio on or off.<br />
. Turn to increase or decrease the<br />
volume of the active source.<br />
The steering wheel controls can<br />
also be used to adjust the volume.<br />
See Steering Wheel Controls on<br />
page 9.<br />
Radio Operation<br />
The radio will work when the key is<br />
in ON/RUN or ACC/<br />
ACCESSORY. When the key is<br />
turned from ON/RUN to LOCK/OFF,<br />
the radio will continue to work for<br />
10 minutes or until the driver door is<br />
opened.<br />
The radio can be turned on by<br />
pressing the power button on the<br />
radio and will stay on for<br />
10 minutes. Opening the driver door<br />
will not turn the radio off when<br />
pressing the power button.<br />
Some radios may stay on longer<br />
and reset the time for 10 minutes if<br />
there are any additional presses of<br />
the radio button.<br />
The radio can be turned off at any<br />
time by pressing the power button.<br />
Audio Source<br />
Press SRCE or SRC on the steering<br />
wheel controls to display and scroll<br />
through the available sources AM,<br />
FM, XM (if equipped), Pandora (if<br />
equipped), Stitcher, CD, USB, AUX,<br />
and Bluetooth Audio.<br />
<strong>Infotainment</strong> <strong>System</strong> 15<br />
<strong>Infotainment</strong> <strong>System</strong> Settings<br />
Tone Settings<br />
To access the tone settings, press<br />
TONE or the Tone Settings button<br />
on the Home Page. Tone settings<br />
are specific to each source.<br />
To adjust the settings:<br />
.<br />
Bass: Press + or − to change<br />
the level.<br />
. Mid (Midrange): Press + or − to<br />
change the level.<br />
. Treble: Press + or − to change<br />
the level.<br />
. EQ: Press or turn the TUNE/<br />
MENU knob to cycle through the<br />
preset EQ options.<br />
. Fade: Press the F or R button<br />
for more sound from the front or<br />
rear speakers. The middle<br />
position balances the sound<br />
between the front and rear<br />
speakers.
16 <strong>Infotainment</strong> <strong>System</strong><br />
. Balance: Press the L or R button<br />
for more sound from the left or<br />
right speakers. The middle<br />
position balances the sound<br />
between the left and right<br />
speakers.<br />
Finding a Station<br />
Press SRCE or SRC on the steering<br />
wheel controls to select AM, FM,<br />
XM (if equipped), Pandora (if<br />
equipped), Stitcher, CD, USB, AUX,<br />
and Bluetooth Audio.<br />
Turn the TUNE/MENU knob to find<br />
a radio station. To select a preset<br />
station, press FAV to scroll through<br />
the favorite pages and then press a<br />
preset button on the radio or the<br />
screen button.<br />
Seeking a Station<br />
Press s © or¨ \ to search for a<br />
station.<br />
AM<br />
1. Press the AM screen button on<br />
the Home Page or select AM by<br />
pressing SRCE or SRC on the<br />
steering wheel controls, or say<br />
“Tune AM” or “AM” through voice<br />
recognition.<br />
2. Press the Menu screen button to<br />
display the AM stations or<br />
categories.<br />
3. Press to select an option. To<br />
update the station list, press<br />
Refresh.<br />
FM<br />
1. Press the FM screen button on<br />
the Home Page or select FM by<br />
pressing SRCE or SRC on the<br />
steering wheel controls, or say<br />
“Tune FM” or “FM” through voice<br />
recognition.<br />
2. Press the Menu screen button to<br />
display the FM stations or<br />
categories.<br />
3. Press to select an option. To<br />
update the station list, press<br />
Refresh.
<strong>Infotainment</strong> <strong>System</strong> 17<br />
XM (If Equipped)<br />
1. Press the XM screen button on<br />
the Home Page or select XM by<br />
pressing SRCE or SRC on the<br />
steering wheel controls, or say<br />
“Tune XM” or “XM” through voice<br />
recognition.<br />
2. Press the Menu screen button to<br />
display the XM categories.<br />
3. Press a category and then turn<br />
the TUNE/MENU knob to scroll<br />
the station list. Press to select<br />
an option.<br />
Storing Radio Station Presets<br />
Up to 36 preset stations can be<br />
stored. AM, FM, and XM (if<br />
equipped) can be mixed.<br />
1. From the AM, FM, or XM main<br />
page, press and hold any of the<br />
1−6 buttons or one of the preset<br />
screen buttons at the bottom of<br />
the screen. After a few seconds,<br />
a beep is heard and the new<br />
preset information displays on<br />
that screen button.<br />
2. Repeat for each preset.<br />
Mixed-Band Presets<br />
Each favorite page can store<br />
six preset stations. The presets<br />
within a page can be different radio<br />
bands.<br />
To scroll through the pages, press<br />
FAV or the Fav screen button on the<br />
top bar. The current page number<br />
displays above the preset buttons.<br />
The stored stations for each favorite<br />
page display on the preset buttons.<br />
To change the number of favorite<br />
pages displayed:<br />
1. Press Config on the<br />
Home Page.<br />
2. Press Radio Settings.<br />
3. Press Number of Favorite<br />
Pages.<br />
Recalling a Preset Station<br />
To recall a preset station from a<br />
favorites page, do one of the<br />
following:<br />
. Press the Fav screen button at<br />
the top bar to display the preset<br />
pop-up. Press one of the preset<br />
screen buttons to go to the<br />
selected preset station.<br />
. In the AM, FM, or XM (if<br />
equipped) main page, press one<br />
of the preset screen buttons to<br />
go to the selected preset station.<br />
Radio Data <strong>System</strong> (RDS)<br />
RDS features are available for use<br />
only on FM stations that broadcast<br />
RDS information. With RDS, the<br />
radio can:<br />
. Seek to stations broadcasting<br />
the selected type of<br />
programming.
18 <strong>Infotainment</strong> <strong>System</strong><br />
. Receive announcements<br />
concerning local and national<br />
emergencies.<br />
. Display messages from radio<br />
stations.<br />
This system relies on receiving<br />
specific information from these<br />
stations and only works when the<br />
information is available. It is<br />
possible that a radio station could<br />
broadcast incorrect information that<br />
causes the radio features to work<br />
improperly. If this happens, contact<br />
the radio station.<br />
When information is broadcast from<br />
the current FM station, the station<br />
name or call letters display on the<br />
audio screen. RDS can provide a<br />
program type (PTY) for current<br />
programming and the name of the<br />
program being broadcasted.<br />
Satellite Radio<br />
SiriusXM® Satellite Radio<br />
Vehicles with a valid SiriusXM<br />
satellite radio subscription can<br />
receive SiriusXM programming.<br />
SiriusXM satellite radio has a wide<br />
variety of programming and<br />
commercial-free music, coast to<br />
coast, and in digital-quality sound.<br />
See www.siriusxm.com or call<br />
1-866-635-2349 (U.S.) and<br />
www.sirius.ca or call<br />
1-877-209-0079 (Canada).<br />
When SiriusXM is active, the station<br />
name, number, category name,<br />
song title, and artist display on the<br />
screen. SiriusXM may update the<br />
background picture at any time.<br />
TuneSelect<br />
An alert will be sent when the radio<br />
sees that search criteria on any XM<br />
channel is met and offer the option<br />
to tune to that song or artist. Up to<br />
ten artists and songs can be saved<br />
in the TuneSelect list.<br />
To store an Artist or Song:<br />
1. Press Menu when the Artist or<br />
Song is on XM.<br />
2. Select TuneSelect.
<strong>Infotainment</strong> <strong>System</strong> 19<br />
3. Select Save Alert for Artist<br />
Playing or Save Alert for Song<br />
Playing.<br />
4. Press OK to confirm.<br />
To turn TuneSelect On or Off<br />
1. Press Menu when in XM.<br />
2. Select TuneSelect.<br />
3. Select Alerts Active to turn the<br />
alerts on or off.<br />
To delete TuneSelect Alerts:<br />
1. Press Menu when in XM.<br />
2. Press Manage TuneSelect.<br />
3. Press Delete Alerts.<br />
4. Select the alert to delete.<br />
5. Press OK to confirm.<br />
SiriusXM Categories<br />
SiriusXM stations are organized in<br />
categories.<br />
Adding or Removing XM<br />
Categories<br />
To customize which SiriusXM<br />
categories are used and displayed<br />
in the system:<br />
1. Press CONFIG or the Config<br />
screen button on the<br />
Home Page.<br />
2. Select Radio Settings from the<br />
Settings Menu list.<br />
3. Select XM Categories.<br />
4. Select or deselect any category<br />
to be used in XM mode.<br />
A checkmark will indicate that<br />
the category is selected.<br />
Press Show All XM Categories to<br />
restore all SiriusXM categories.<br />
SiriusXM Channel Graphics<br />
SiriusXM provides updated category<br />
background graphics and the radio<br />
will automatically update the screen.<br />
SiriusXM may send updated<br />
category graphics to the vehicle.<br />
When this happens, the background<br />
graphics may appear to be incorrect<br />
but the radio will update once all of<br />
the graphics have been downloaded<br />
from SiriusXM.<br />
To turn XM channel graphics on<br />
or off:<br />
1. Press HOME on the faceplate.<br />
2. Select XM.<br />
3. Press Menu on the XM Now<br />
Playing Screen.<br />
4. Press the XM Channel Art to<br />
turn on or off.
20 <strong>Infotainment</strong> <strong>System</strong><br />
SiriusXM Messages<br />
XL (Explicit Language<br />
Channels): These stations, or any<br />
others, can be blocked by request,<br />
by calling 1-866-635-2349 (U.S.)<br />
and 1-877-209-0079 (Canada).<br />
XM Updating: The encryption code<br />
in the receiver is being updated. No<br />
action is required.<br />
Loading XM: The audio system is<br />
acquiring and processing audio and<br />
text data. No action is needed.<br />
Channel Off Air: This station is not<br />
currently in service.<br />
Channel Unauth: This station is<br />
blocked or cannot be received.<br />
Channel Unavailable: This<br />
previously assigned station is no<br />
longer assigned.<br />
No Artist Info: No artist<br />
information is available at this time<br />
on this station.<br />
No Title Info: No song title<br />
information is available at this time<br />
on this station.<br />
No CAT Info: No category<br />
information is available at this time<br />
on this station.<br />
No Information: No text or<br />
informational messages are<br />
available at this time on this station.<br />
No XM Signal: The vehicle may be<br />
in a location where the SiriusXM<br />
signal is being blocked. When the<br />
vehicle is moved into an open area,<br />
the signal should return.<br />
CAT Not Found: There are no<br />
stations available for the selected<br />
category.<br />
XM Radio ID: If tuned to station 0,<br />
this message alternates with the<br />
SiriusXM radio eight-digit radio ID<br />
label. This label is needed to<br />
activate the service.<br />
Unknown: If this message is<br />
received when tuned to station 0,<br />
there could be a receiver fault.<br />
Consult with your dealer.<br />
Check Antenna: If this message<br />
does not clear within a short period<br />
of time, the receiver could have a<br />
fault. Consult with your dealer.<br />
XM Not Available: If this message<br />
does not clear within a short period<br />
of time, the receiver could have a<br />
fault. Consult with your dealer.<br />
NavTraffic® (If Equipped)<br />
The navigation system might have a<br />
SiriusXM NavTraffic receiver. It is a<br />
subscription service provided<br />
through SiriusXM Satellite Radio.<br />
A service fee is required to receive<br />
the SiriusXM NavTraffic service.<br />
Real-time traffic information is<br />
provided to fully integrate the<br />
navigation system to display current<br />
traffic conditions for the chosen<br />
route. See “Traffic Settings” in this<br />
section for more information.<br />
A screen displays to indicate that<br />
the SiriusXM NavTraffic subscription<br />
is not activated.
<strong>Infotainment</strong> <strong>System</strong> 21<br />
If activated, traffic information<br />
displays:<br />
. Unscheduled traffic incident<br />
data, such as accidents and<br />
disabled vehicles.<br />
. Scheduled traffic incident data,<br />
such as road construction and<br />
road closures.<br />
. Traffic flow information (rate of<br />
speed data). Flow data might not<br />
be available in all markets.<br />
Traffic information is delivered to the<br />
vehicle by the SiriusXM Radio<br />
satellites. SiriusXM NavTraffic<br />
provides continuously updated<br />
traffic information.<br />
SiriusXM NavTraffic currently<br />
broadcasts the traffic information for<br />
many markets nationally. The<br />
service may be available in more<br />
cities in the future. Visit<br />
www.xmnavtraffic.com for more<br />
details on local coverage.<br />
To access the traffic features, press<br />
the Traffic button from the<br />
Navigation Menu or map screen.<br />
All Traffic Events: Press to view a<br />
list of reported traffic conditions for<br />
up to approximately 100 km (70 mi).<br />
It could take some time to display<br />
the information received.<br />
The information is displayed with an<br />
arrow and distance. The arrow<br />
indicates the distance is a straight<br />
line and the direction of the event<br />
from the vehicle's current position.<br />
Traffic Events on Route: Press to<br />
display a list of reported traffic<br />
conditions on the current route. The<br />
button is toned down if no route is<br />
active.<br />
Traffic Settings: Press to<br />
customize traffic options.<br />
Travel Link (If Available)<br />
The infotainment system may have<br />
SiriusXM Travel Link®. It is a<br />
subscription service provided<br />
through SiriusXM Satellite Radio.<br />
A service fee is required to receive<br />
the SiriusXM Travel Link service.<br />
When subscribed to SiriusXM Travel<br />
Link, one or more services may be<br />
available.<br />
. Travel Link Fuel Prices: Detailed<br />
nation wide fuel price information<br />
may be available.<br />
. Travel Link Movie Listings:<br />
Detailed local movie theater<br />
listings, start times, and ratings<br />
may be available.<br />
.<br />
Travel Weather: National and<br />
Local Weather gives current and<br />
forecasted weather.<br />
For more detailed information and<br />
coverage details on SiriusXM Travel<br />
Link go to www.siriusxm.com.
22 <strong>Infotainment</strong> <strong>System</strong><br />
Fuel Pricing<br />
When SiriusXM Travel Link<br />
information is available, the system<br />
will display a list of fuel stations<br />
close to the vehicle location. The list<br />
will include fuel station name,<br />
direction, distance and price. The<br />
list can be sorted by distance or<br />
price and there are four different<br />
fuel types to choose from. As the<br />
vehicle is moving a direction arrow<br />
and distance to fuel station will<br />
update. The arrow represents the<br />
direction to the gas station from the<br />
current vehicle position. The<br />
distance represents the straight line<br />
distance between the vehicle<br />
location and the fuel station.<br />
From the Home Page, press the<br />
SiriusXM® Fuel button. The system<br />
displays the current weather page.<br />
To change the fuel information on<br />
screen press the Fuel Menu<br />
Button to:<br />
. Sort Fuel Stations By Price or By<br />
Distance: The default sort<br />
method is by distance.<br />
. Choose Fuel Type: The fuel<br />
available fuel types are Regular<br />
(unleaded), Mid-Range,<br />
Premium, and Diesel.<br />
For more information on the fuel<br />
station, select the fuel station name.<br />
The screen will show the fuel station<br />
name, address, phone number,<br />
distance, amenities and the last<br />
time the fuel price was updated. If a<br />
fuel station does not appear in the<br />
list it may be new or the price may<br />
not have been updated in the past<br />
24 hours.<br />
If equipped with Navigation when<br />
the fuel station is selected, see<br />
Destination on page 53 for more<br />
information of navigation routing<br />
features.<br />
Allow up to 5 minutes after turning<br />
on the vehicle for the fuel<br />
information to appear.<br />
Movie Listings<br />
When SiriusXM Travel Link<br />
information is available the movie<br />
feature provides movie show time<br />
and theater information for movies<br />
close to the vehicle location. The<br />
Movie feature provides detailed<br />
theater and movie information<br />
including showtimes.<br />
From the Home Page, press the<br />
SiriusXM® Movie button. The<br />
system displays the Movie and<br />
Theater search page.<br />
To search movies:<br />
. Select the Movie field to choose<br />
a movie name.<br />
. Select the Theater field to<br />
choose a specific theater.<br />
. Select the Date field to choose<br />
which date to search movie and/<br />
or theaters.<br />
. Press the Search button to view<br />
a list of movies or theaters.<br />
When searching by movie, a list will<br />
display movies to select. When a<br />
movie is selected a theater list will<br />
appear with a direction arrow and<br />
distance from the current vehicle<br />
location. The direction and distance<br />
will update every ten seconds as the<br />
vehicle is moving. The direction
<strong>Infotainment</strong> <strong>System</strong> 23<br />
arrow represents the location of the<br />
theater from the current vehicle<br />
location. The distance represents<br />
the straight line distance between<br />
the vehicle location and the theater.<br />
Movie details are available when a<br />
movie is selected. The details<br />
include Cast, Synopsis, and Theater<br />
Information. Select the appropriate<br />
button to display more information.<br />
Cast and Synopsis:<br />
. Playtime<br />
. Rating (G, PG-13, R, etc.)<br />
. Theater Name<br />
. Showtimes<br />
Theater information includes<br />
address, phone number, distance,<br />
and amenities.<br />
National and Local Weather<br />
Whether near home or on a long<br />
road trip, detailed weather<br />
information is available. SiriusXM<br />
Travel Link Weather uses the same<br />
sources that professional pilots and<br />
mariners rely on.<br />
From the Home Page, press the<br />
SiriusXM Weather screen button.<br />
The system displays the current<br />
weather page.<br />
Current Condition<br />
The current weather page shows<br />
the current weather condition in the<br />
city of the vehicle's current position.<br />
On this page, select the Menu<br />
screen button to access other<br />
weather options, such as Extended<br />
Forecast, Weather Along the Route,<br />
Weather Around Other Cities, and<br />
Weather Alerts. Some options may<br />
only be present on vehicles<br />
equipped with navigation.<br />
Allow approximately 15 minutes for<br />
the current weather in the area to<br />
display.<br />
Extended Forecast<br />
Press to show the extended<br />
forecast.<br />
Weather Along the Route
24 <strong>Infotainment</strong> <strong>System</strong><br />
If a destination is set, there is the<br />
option to view weather conditions<br />
for up to three locations along the<br />
route:<br />
.<br />
Current vehicle position.<br />
. Midway point from current<br />
position to final destination.<br />
. Current weather condition of the<br />
destination city.<br />
Weather Alerts<br />
From the XM Weather Menu, press<br />
the Weather Alerts screen button to<br />
display any current weather<br />
advisory warnings in effect near the<br />
current position.<br />
Weather Around Other Cities<br />
Select this option to view weather<br />
conditions around or in a specific<br />
city entered by name or selected<br />
from the map.<br />
Restore to Current Location<br />
Press the Restore Current Location<br />
screen button to display the weather<br />
condition for the city where the<br />
vehicle is currently located, if the<br />
system was modified to view<br />
weather conditions in another city.<br />
Troubleshooting<br />
XM Travel Link services use the<br />
SiriusXM® Satellite Signal and GPS<br />
Satellite Signal to provide this<br />
feature.<br />
When the vehicle is started, it can<br />
take up to five minutes for the radio<br />
to receive the Travel Link services.<br />
Travel Link Messages<br />
No GPS Signal: Move the vehicle<br />
into a position that is visible to<br />
the sky.<br />
Acquiring Signal: Radio is<br />
downloading the activation<br />
information or not receiving a good<br />
signal. Move the vehicle to open sky<br />
and restart the vehicle.<br />
No XM Signal: Reception is<br />
blocked. Move the vehicle into<br />
open sky.<br />
Radio Reception<br />
Frequency interference and static<br />
can occur during normal radio<br />
reception if items such as cell phone<br />
chargers, vehicle convenience<br />
accessories, and external electronic<br />
devices are plugged into the<br />
accessory power outlet. If there is<br />
interference or static, unplug the<br />
item from the accessory power<br />
outlet.<br />
FM<br />
FM signals only reach about 16 to<br />
65 km (10 to 40 mi). Although the<br />
radio has a built-in electronic circuit<br />
that automatically works to reduce<br />
interference, some static can occur,<br />
especially around tall buildings or<br />
hills, causing the sound to fade in<br />
and out.<br />
AM<br />
The range for most AM stations is<br />
greater than for FM, especially at<br />
night. The longer range can cause<br />
station frequencies to interfere with<br />
each other. Static can occur when
<strong>Infotainment</strong> <strong>System</strong> 25<br />
things like storms and power lines<br />
interfere with radio reception. When<br />
this happens, try reducing the treble<br />
on the radio.<br />
SiriusXM® Satellite Radio<br />
Service<br />
SiriusXM Satellite Radio Service<br />
gives digital radio reception from<br />
coast to coast in the 48 contiguous<br />
United States, and in Canada. Just<br />
as with FM, tall buildings or hills can<br />
interfere with satellite radio signals,<br />
causing the sound to fade in and<br />
out. In addition, traveling or standing<br />
under heavy foliage, bridges,<br />
garages, or tunnels may cause loss<br />
of the SiriusXM signal for a period<br />
of time.<br />
Cellular Phone Usage<br />
Cellular phone usage can cause<br />
interference with the vehicle's radio.<br />
Quick Info<br />
Quick Info gives access to quick<br />
information on Audio playing,<br />
OnStar Turn-by-Turn route (if<br />
equipped), 5-day forecast, Nearby<br />
Fuel Stations, and Movie Show<br />
Times.<br />
To access, press Quick Info on the<br />
Home Page or the INFO button on<br />
the faceplate. Depending on the<br />
system and if the options are<br />
available for that region, some<br />
options may be grayed out.<br />
Audio Info: Displays information<br />
on current item playing.<br />
OnStar Turn-by-Turn: Displays the<br />
next maneuver in a route. See<br />
OnStar ® Destination Download on<br />
page 61.<br />
5-day Forecast: Displays the<br />
5-day forecast for the weather<br />
station closest to the current<br />
location. See “Weather (If<br />
Equipped)” in Satellite Radio on<br />
page 18.<br />
Nearby Fuel Stations: Displays<br />
fuel prices and distances for close<br />
fuel stations. See “Fuel Pricing”<br />
under “Travel Link (If Available)” in<br />
Satellite Radio on page 18.<br />
Movie Showtimes: Displays a list<br />
of movies playing in the theaters<br />
closest to current location. See<br />
“Movie Listings” in Satellite Radio<br />
on page 18.<br />
Pandora Internet Radio<br />
Pandora® is a free Internet radio<br />
service that streams personalized<br />
radio stations based on artists,<br />
songs, genres, and comedians.<br />
Create stations using the Pandora
26 <strong>Infotainment</strong> <strong>System</strong><br />
website or smartphone application,<br />
then use - (thumbs up) or ,<br />
(thumbs down) to personalize<br />
stations. To set up an account, or for<br />
more information, go to<br />
www.pandora.com. Pandora may<br />
not be available in Canada or<br />
Mexico.<br />
A phone or tablet with Internet<br />
connection and the Pandora<br />
application installed is required.<br />
Personal cell phone data plans are<br />
used. Make sure the latest version<br />
is installed on the device and the<br />
volume is turned up.<br />
To install Pandora:<br />
. On an Android phone or<br />
Android Tablet, go to the Android<br />
Play Store, search for Pandora.<br />
Install to the phone, not to the<br />
SD card.<br />
. On a BlackBerry® phone, go to<br />
the BlackBerry App World and<br />
search for Pandora.<br />
. On an iPhone®, iPad®, or iPod<br />
touch®, go to the iTunes® Store<br />
and search for Pandora.<br />
Launching Pandora<br />
Connect the iPhone, iPad, or iPod<br />
touch to the USB port, or connect<br />
an Android or BlackBerry through<br />
Bluetooth. See Auxiliary Devices on<br />
page 45 or Bluetooth on page 76.<br />
For first-time use, set up stations<br />
before connecting to the vehicle.<br />
The Pandora icon will be available<br />
on the Home Page and the source<br />
pop-up displays if the latest<br />
application is installed on the<br />
device.<br />
Using the iPhone, iPod Touch,<br />
or iPad<br />
1. Plug the device into the USB<br />
port. The phone screen must be<br />
unlocked.<br />
2. To launch, do one of the<br />
following:<br />
. Launch the application on<br />
the device.<br />
. Press Pandora on the<br />
Home Page.<br />
. Press b / g and say<br />
“Pandora” or “Tune<br />
Pandora.”<br />
To relaunch Pandora, press SRCE,<br />
or SRC on the steering wheel<br />
controls.<br />
If nothing happens when the<br />
available Pandora screen button is<br />
pressed, download the latest<br />
Pandora application and retry.<br />
Pandora will always be highlighted<br />
on the Home Page when an iPhone,<br />
iPad, or iPod touch is connected<br />
using the USB port. To use, log into<br />
your account.<br />
If the “Please See Device” message<br />
is shown, the login screen may<br />
display on the device.<br />
If the vehicle is shutoff while tuned<br />
to Pandora and the iPhone, iPad,<br />
or iPod touch is left connected to<br />
the USB port before the next ignition<br />
cycle, the radio will start playing<br />
Pandora when the vehicle is started.
<strong>Infotainment</strong> <strong>System</strong> 27<br />
If Pandora is shut down on the<br />
phone or another audio app is used,<br />
Pandora may not start on the next<br />
ignition cycle. If iPod source is<br />
selected, it may show iPod and then<br />
switch to Pandora.<br />
Using an Android Phone<br />
1. Pair the Android phone using<br />
Bluetooth.<br />
2. Use one of the following to<br />
launch:<br />
. Launch the application on<br />
the device.<br />
. Press Pandora on the<br />
Home Page.<br />
. Press b / g and say<br />
“Pandora” or “Tune<br />
Pandora.”<br />
After Pandora has been launched,<br />
press SRCE, or SRC on the<br />
steering wheel controls to access<br />
Pandora features.<br />
If nothing happens when the<br />
available Pandora screen button is<br />
pressed, download the latest<br />
Pandora application and retry.<br />
If the “Please See Device” message<br />
is shown, the login screen may<br />
display on the device.<br />
If the “Please unlock your phone or<br />
restart the app” message is shown<br />
then your phone may be locked.<br />
Unlock the phone, close the app,<br />
and then restart the app to ensure<br />
proper communication.<br />
Using a BlackBerry Phone<br />
The phone must be unlocked. To<br />
launch Pandora service:<br />
1. Pair the BlackBerry phone using<br />
Bluetooth.<br />
2. Use one of the following to<br />
launch:<br />
. Launch the application on<br />
the device.<br />
. Press Pandora on the<br />
Home Page.<br />
. Press b / g and say<br />
“Pandora” or “Tune<br />
Pandora.”<br />
After Pandora has been launched,<br />
press SRCE, or SRC on the<br />
steering wheel controls to access<br />
Pandora features.<br />
If nothing happens when the<br />
available Pandora screen button is<br />
pressed, download the latest<br />
Pandora application and retry.<br />
If the “Please See Device” message<br />
is shown, the login screen may<br />
display on the device.<br />
If the “Please unlock your phone or<br />
restart the app” message is shown,<br />
then your phone may be locked.<br />
Unlock the phone, close the app,<br />
then restart the app to ensure<br />
proper communication.
28 <strong>Infotainment</strong> <strong>System</strong><br />
Pandora Menus<br />
Press Menu on the Pandora<br />
main page.<br />
Pandora has a menu system with<br />
the following:<br />
Shuffle: Press to play the stations<br />
in random order.<br />
User-Created Stations: Press to<br />
play a user-created station.<br />
Pandora Features<br />
Pandora has features to rate tracks,<br />
skip tracks, or change stations.<br />
} (Bookmarks): Press while<br />
playing a track to bookmark either<br />
the track or the artist. Bookmarks<br />
are viewable on www.pandora.com.<br />
, (Thumbs Down): When<br />
pressed, Pandora stores the<br />
information, changes to the next<br />
track, and does not play the track on<br />
this station again. This helps<br />
Pandora choose which tracks<br />
should not play on this station. This<br />
feature is only available on user<br />
created stations.<br />
- (Thumbs Up): When pressed,<br />
Pandora stores this information and<br />
- is highlighted for the remainder of<br />
the track. This helps Pandora<br />
choose which tracks should play on<br />
this station.<br />
d (Next Track): When pressed,<br />
Pandora changes to the next track.<br />
k (Play/Pause): Press on the<br />
radio to pause playback. Press<br />
again to resume.<br />
Tuning Pandora Stations: When<br />
Pandora is playing, use the b / g<br />
button on the steering wheel to tune<br />
to any Pandora station on the<br />
device.<br />
1. Press the b / g button on the<br />
steering wheel.<br />
2. Say “Tune Pandora Radio.”<br />
Pandora voice control will not work<br />
until Pandora is launched the first<br />
time during that ignition cycle.
Pandora Skip Limit<br />
Pandora limits the number of skips<br />
allowed on their service. When the<br />
skip limit is reached, , will not skip<br />
the currently playing track, but ,<br />
feedback will be recorded.<br />
Pandora Advertisement<br />
Pandora may display<br />
advertisements. Artist name and<br />
track title will not be displayed and<br />
the skip track button is not<br />
available.<br />
Switching Between Pandora and<br />
Stitcher<br />
To switch between Pandora and<br />
Stitcher, press the application icon<br />
on the iPhone, iPod touch, or iPad.<br />
This is not required for Android<br />
devices. See Stitcher Internet Radio<br />
on page 31.<br />
Pandora Troubleshooting<br />
Unable to Connect Device to<br />
Vehicle<br />
If the device is unable to connect to<br />
the USB or Bluetooth:<br />
1. Turn the vehicle off.<br />
2. Remove the key from the<br />
ignition.<br />
3. Open and close the driver door,<br />
wait about 30 seconds, and try<br />
to connect the device again.<br />
Unable to Start Pandora<br />
If the device is unable to launch<br />
Pandora:<br />
. Check that the latest version of<br />
Pandora is installed.<br />
.<br />
Check that there is an active<br />
account logged into Pandora.<br />
. Have at least one station<br />
created.<br />
<strong>Infotainment</strong> <strong>System</strong> 29<br />
. For Android and BlackBerry<br />
devices, check that the device is<br />
paired with the vehicle, and the<br />
Bluetooth icon on the display is<br />
highlighted.<br />
. For iPhone, iPod touch, or iPad<br />
devices, check that the USB<br />
cable is connected to the USB<br />
port and the screen is unlocked.<br />
. Close Pandora on the device<br />
and launch again. Devices that<br />
allow multitasking may require<br />
an extra step to quit the Pandora<br />
application. See the cell phone<br />
manufacturer's user guide.<br />
Thumbs Up or Thumbs Down<br />
Error<br />
If there is an error trying to rate a<br />
track with the , or - buttons, the<br />
message “Thumbs Down Error” or<br />
“Thumbs Up Error” will display.<br />
Press OK to retry.
30 <strong>Infotainment</strong> <strong>System</strong><br />
Loss of Audio<br />
Loss of Pandora audio can happen<br />
in different ways:<br />
. Weak or lost data connection.<br />
. Device needs to be charged.<br />
. Application needs to be<br />
relaunched.<br />
. Connection between phone and<br />
radio lost.<br />
. If any iPhone, iPod touch,<br />
or iPad is connected to<br />
Bluetooth and the dock<br />
connector, go to the Airplay icon<br />
on the device and select dock<br />
connector or disconnect and<br />
reconnect the dock connector on<br />
the device.<br />
.<br />
The volume is too low. Turn up<br />
the volume on the device.<br />
. The battery saver and task<br />
manager applications on the<br />
phone can cause Pandora to<br />
function incorrectly. Remove<br />
those apps from the phone or<br />
remove Pandora and Bluetooth<br />
from the task lists.<br />
If the connection is lost between the<br />
application and device, a message<br />
“Please unlock your phone or restart<br />
the phone app and try again” will<br />
display. Press OK to retry.<br />
If pressing OK does not clear the<br />
issue on the phone, see "Please<br />
Unlock Your Phone or Restart<br />
Phone App and Try Again” under<br />
"Common Pandora Messages"<br />
following.<br />
Common Pandora Messages<br />
Please See Device: When not<br />
logged in or when authentication<br />
failed, see the device. Press OK to<br />
continue.<br />
Paused or Audio Paused:<br />
Playback is paused on the radio or<br />
on the device. Press k or play on<br />
the device.<br />
No Stations Found: Logged in but<br />
no stations have been created.<br />
Press OK to continue.<br />
Please Unlock Your Phone or<br />
Restart Phone App and Try<br />
Again: Communication failure<br />
between the radio and the phone<br />
application or the device is locked.<br />
Devices that allow multitasking may<br />
require an extra step to quit the<br />
Pandora application. Close Pandora<br />
on the device and launch again.<br />
Unlock the phone and check that<br />
Home Page is shown on the phone/<br />
device.<br />
See the cell phone manufacturer's<br />
user guide.<br />
See www.pandora.com/help for<br />
more information. If the service will<br />
not work, see your dealer for<br />
assistance.
Stitcher Internet Radio<br />
Stitcher SmartRadio is an Internet<br />
radio service that streams news,<br />
sports, and entertainment shows<br />
through the audio system. Create<br />
personalized, on-demand stations or<br />
discover new shows through<br />
Stitcher's preset stations. To set up<br />
an account, download the<br />
application from the Android Market<br />
or iTunes Store, or go to<br />
www.stitcher.com.<br />
A phone or tablet with Internet<br />
connection is required for this<br />
application. Personal cell phone<br />
data plans are used. Make sure the<br />
latest version is installed on the<br />
device and the volume on the<br />
device is turned up.<br />
BlackBerry phones are not<br />
supported for this application.<br />
To install Stitcher:<br />
. On an Android phone or Tablet<br />
with Internet connection, go to<br />
the Android Play Store, search<br />
for Stitcher, and install to the<br />
phone, not to the SD card.<br />
. On an iPhone, iPad, or iPod<br />
touch, go to the iTunes store<br />
and search for Stitcher.<br />
Launching Stitcher<br />
Connect the iPhone, iPad, or iPod<br />
touch to the USB port, or connect<br />
Android through Bluetooth. See<br />
Auxiliary Devices on page 45 or<br />
Bluetooth on page 76. For first-time<br />
use, set up the stations before<br />
connecting to the vehicle. The<br />
Stitcher icon will be available on the<br />
Home Page and source pop-up<br />
displays if the latest application is<br />
installed on the device.<br />
Using the iPhone, iPod Touch,<br />
or iPad<br />
1. Plug the device into the USB<br />
port. The phone screen must be<br />
unlocked.<br />
<strong>Infotainment</strong> <strong>System</strong> 31<br />
2. Use one of the following to<br />
launch:<br />
. Press the application on the<br />
device.<br />
.<br />
Press Stitcher on the<br />
Home Page.<br />
.<br />
Press b / g and say<br />
“Stitcher” or “Tune Stitcher.”<br />
3. If Stitcher does not begin<br />
playing, select a category and<br />
then a station.<br />
After Stitcher has been launched,<br />
press SRCE, or SRC on the<br />
steering wheel controls to access<br />
Stitcher features.<br />
If nothing happens when the<br />
available Stitcher screen button is<br />
pressed, download the latest<br />
Stitcher application and retry.<br />
Stitcher will always be highlighted<br />
on the Home Page when an iPhone,<br />
iPad, or iPod touch is connected<br />
using the USB port. To use, log into<br />
your account.
32 <strong>Infotainment</strong> <strong>System</strong><br />
If the “Please See Device” message<br />
is shown, the login screen may<br />
display on the device.<br />
If the “Please unlock your phone or<br />
restart the app” message is shown,<br />
then the phone may be locked.<br />
Unlock the phone, close the app,<br />
then restart the app and make sure<br />
the home page is visible on the<br />
phone/device.<br />
Using an Android Phone<br />
1. Pair the Android phone using<br />
Bluetooth.<br />
2. Use one of the following to<br />
launch:<br />
. Press the application on the<br />
device.<br />
. Press Stitcher on the<br />
Home Page.<br />
. Press b / g and say<br />
“Stitcher” or “Tune Stitcher.”<br />
3. If Stitcher does not begin<br />
playing, select a category and<br />
then a station.<br />
After Stitcher has been launched,<br />
press SRCE, or SRC on the<br />
steering wheel controls to access<br />
Stitcher features.<br />
If nothing happens when the<br />
available Stitcher screen button is<br />
pressed, download the latest<br />
Stitcher application and retry.<br />
If the “Please See Device” message<br />
is shown, the login screen may<br />
display on the device.<br />
If the “Please unlock your phone or<br />
restart the app” message is shown,<br />
then your phone may be locked.<br />
Unlock the phone, close the app,<br />
then restart the app to ensure<br />
proper communication.<br />
Stitcher Menus<br />
Press Menu on the Stitcher<br />
main page.<br />
Stitcher has a menu system with the<br />
following:<br />
My On Demand Stations: Displays<br />
a list of favorite stations and shows.<br />
Select and store programs as<br />
favorites on the device. Favorite<br />
station lists can be created to<br />
include favorite shows which can be<br />
accessed through My On Demand<br />
Stations.<br />
Stitcher Station Categories:<br />
Displays categories by topic.
<strong>Infotainment</strong> <strong>System</strong> 33<br />
When a category then sub-category<br />
is selected, the radio will start<br />
playing the first program in that<br />
sub-category.<br />
Turn the TUNE/MENU knob to<br />
display the first 24 stations of that<br />
sub-category.<br />
Current Station Playlist: While<br />
listening to a show, turn the TUNE/<br />
MENU knob to display the menu list<br />
of shows available for the current<br />
station.<br />
Stitcher Features<br />
Stitcher service has features to rate<br />
or skip shows, or change stations.<br />
q (Favorites): When pressed, the<br />
current show is added to the<br />
favorites station.<br />
, (Thumbs Down): When<br />
pressed, Stitcher changes to the<br />
next show. This helps Stitcher<br />
provide a personalized listening<br />
experience.<br />
- (Thumbs Up): When pressed,<br />
Stitcher stores this information and<br />
- is highlighted for the remainder of<br />
the show. This helps Stitcher<br />
provide a personalized listening<br />
experience.<br />
d (Next Show): When pressed,<br />
Stitcher changes to the next show.<br />
k (Play/Pause): Press on the<br />
radio to pause playback. Press<br />
again to resume.<br />
Stitcher Advertisement<br />
Stitcher may display<br />
advertisements. Artist name and title<br />
may not display and the skip track<br />
button is not available.<br />
Switching Between Pandora and<br />
Stitcher<br />
To switch between Pandora and<br />
Stitcher, press the application icon<br />
on the iPhone, iPod touch, or iPad.<br />
This is not required for Android<br />
devices. See Pandora Internet<br />
Radio on page 25.<br />
Stitcher Troubleshooting<br />
Unable to Connect Device to<br />
Vehicle<br />
If the device is unable to connect to<br />
the USB or Bluetooth:<br />
1. Turn the vehicle off.<br />
2. Remove the key from the<br />
ignition.<br />
3. Open and close the driver door,<br />
wait about 30 seconds, and try<br />
to connect the device again.<br />
The battery saver and task manager<br />
applications on the phone can<br />
cause Stitcher to function<br />
incorrectly. Remove those apps<br />
from the phone or remove Stitcher<br />
and Bluetooth from the task lists.
34 <strong>Infotainment</strong> <strong>System</strong><br />
Unable to Start Stitcher<br />
If the device is unable to launch<br />
Stitcher:<br />
. Check that the latest version of<br />
Stitcher is installed.<br />
. Check that there is an active<br />
account logged into Stitcher.<br />
. For Android devices, check that<br />
the device is paired with the<br />
vehicle, and the Bluetooth icon<br />
on the display is highlighted.<br />
. For iPhone, iPod touch, or iPad<br />
devices, check that the USB<br />
cable is connected to the USB<br />
port and the screen is unlocked<br />
and the Home Page is showing.<br />
. Close Stitcher on the device and<br />
launch again. Devices that allow<br />
multitasking may require an<br />
extra step to quit the Stitcher<br />
application. See the cell phone<br />
manufacturer's user guide.<br />
Loss of Audio<br />
Loss of Stitcher audio can happen<br />
due to:<br />
. Weak or lost data connection.<br />
. Device needs to be charged.<br />
. Application needs to be<br />
relaunched.<br />
. Connection between phone and<br />
radio is lost.<br />
. If any iPhone, iPod touch,<br />
or iPad is connected to<br />
Bluetooth and the dock<br />
connector, go to the Airplay icon<br />
on the device and select dock<br />
connector or disconnect and<br />
reconnect the dock connector on<br />
the device.<br />
.<br />
The volume is too low. Turn up<br />
the volume on the device.<br />
If the connection is lost between the<br />
application and device, a message<br />
“Please unlock your phone or restart<br />
the phone app and try again” will<br />
display. Press OK to retry.<br />
If pressing OK does not clear the<br />
issue, see “Please unlock your<br />
phone or restart phone app and try<br />
again” under “Common Stitcher<br />
Messages” following.<br />
Common Stitcher Messages<br />
Please Try Again Later: A general<br />
error has occurred. A data<br />
connection may be unavailable due<br />
to a weak or lost signal or the<br />
Stitcher service being temporarily<br />
down. Press OK to continue.<br />
Paused or Audio Paused:<br />
Playback is paused on the radio or<br />
on device. Press k or play on the<br />
device.<br />
Please See Device: When user is<br />
not logged in or when authentication<br />
failed, see the device. Press OK to<br />
continue. Disconnect the phone<br />
from the radio and follow the<br />
Stitcher account login process on<br />
the phone.<br />
No Stations Found: Logged in but<br />
no stations have been created.<br />
Press OK to continue.
<strong>Infotainment</strong> <strong>System</strong> 35<br />
Please Choose a New Station:<br />
The end of the station has been<br />
reached and there is no more<br />
content to play. Select a new station<br />
through the Stitcher menu.<br />
Please Unlock Your Phone or<br />
Restart Phone App and Try<br />
Again: Communication failure<br />
between the radio and the phone<br />
application or the device is locked.<br />
See www.stitcher.com/help for more<br />
information. If the service will not<br />
work, send an e-mail to<br />
feedback@stitcher.com or see your<br />
dealer for assistance.<br />
Pictures<br />
Pictures can only be viewed using<br />
USB devices. If pictures are on an<br />
SD card, transfer to a USB device<br />
or use a USB-SD adapter. File sizes<br />
above approximately four mega<br />
pixels may not show. Only jpeg,<br />
bmp, gif, and png files are<br />
supported.<br />
1. Press the Pictures screen button<br />
on the Home Page.<br />
2. The system does a search to<br />
find the picture folders.<br />
A “Please wait” message<br />
displays until the search is<br />
finished.<br />
3. A list displays. Select a picture<br />
to view.<br />
4. Once a picture displays, the<br />
following options are available:<br />
Info: Press to turn file name<br />
information on or off.<br />
S : Press to display a previous<br />
picture if not in slide show mode.<br />
r : Press to toggle between slide<br />
show mode and manual mode.<br />
T : Press to display a next picture<br />
if not in slide show mode.<br />
E : Press to manually rotate a<br />
picture 90 degrees<br />
counterclockwise.<br />
Menu: Press to open the Picture<br />
Viewer Settings screen. Slide<br />
Picture Viewer Main, Slideshow<br />
Timer, and Shuffle Images display<br />
as options for configuring the view<br />
of images stored in the system.<br />
If the displayed picture screen is not<br />
used within six seconds, the upper<br />
and lower bar options will disappear.<br />
Touch-tap the screen to re-display<br />
the upper and lower bar.
36 <strong>Infotainment</strong> <strong>System</strong><br />
Audio Players<br />
CD Player<br />
The CD player is capable of playing:<br />
. Most audio CDs<br />
. CD-R<br />
. CD-RW<br />
. MP3, unprotected WMA, and<br />
AAC formats<br />
When playing any compatible<br />
recordable disc, the sound quality<br />
may be reduced due to the disc, the<br />
method of recording, the quality of<br />
the music recorded, or how the disc<br />
has been handled.<br />
There may be increased skipping,<br />
difficulty reading recorded tracks,<br />
finding tracks, and/or loading and<br />
ejecting. If these problems occur,<br />
check the disc for damage or try a<br />
known good disc.<br />
To avoid damage to the CD player:<br />
. Do not use scratched or<br />
damaged discs.<br />
. Do not apply labels to discs. The<br />
labels could get caught in the<br />
player.<br />
. Insert only one disc at a time.<br />
. Keep the loading slot free of<br />
foreign materials, liquids, and<br />
debris.<br />
. Use a marking pen to label the<br />
top of the disc.<br />
Loading and Ejecting Discs<br />
To load a disc:<br />
1. Turn the vehicle on.<br />
2. Insert a disc into the slot, right<br />
side up. The player pulls it in the<br />
rest of the way. If the disc is<br />
damaged or improperly loaded,<br />
there is an error and the disc<br />
ejects.<br />
The disc automatically plays once<br />
loaded.<br />
Press Z to eject a disc from the<br />
CD player. If the disc is not removed<br />
within a short period of time, it is<br />
automatically pulled back into the<br />
player.<br />
Playing an Audio CD<br />
1. Press the CD screen button on<br />
the Home Page or select CD<br />
from the source pop-up to<br />
display the CD main page.<br />
2. Press the Menu screen button to<br />
display the menu options.<br />
3. Press to select the option.
<strong>Infotainment</strong> <strong>System</strong> 37<br />
On the CD main page, the track<br />
number displays and the Song,<br />
Artist, and Album information<br />
displays when available.<br />
Use the following radio controls to<br />
play the disc:<br />
k (Play/Pause): Use to pause or<br />
resume play.<br />
s © (Seek Previous/Reverse):<br />
. Press to seek to the beginning of<br />
the current or previous track.<br />
If the track has been playing for<br />
less than five seconds, it seeks<br />
to the previous track. If longer<br />
than five seconds, the current<br />
track starts from the beginning.<br />
. Press and hold to fast reverse<br />
through a track. Release the<br />
button to return to playing<br />
speed. Elapsed time displays.<br />
¨ \ (Seek Next/Forward):<br />
. Press to seek to the next track.<br />
. Press and hold to fast forward<br />
through a track. Release the<br />
button to return to playing<br />
speed. Elapsed time displays.<br />
TUNE/MENU Knob: Turn to the<br />
right or left to select the next or<br />
previous track. Press the outer ring<br />
of this knob to select from the list.<br />
If a track is selected from the menu,<br />
the system plays the track and<br />
returns to the CD screen.<br />
Error Messages<br />
If Disc Error displays and/or the disc<br />
comes out, it could be due to:<br />
. The disc has an invalid or<br />
unknown format.<br />
. The disc is very hot. Try the disc<br />
again when the temperature<br />
returns to normal.<br />
.<br />
The road is very rough. Try the<br />
disc again when the road is<br />
smoother.<br />
. The disc is dirty, scratched, wet,<br />
or upside down.<br />
. The air is very humid. Try the<br />
disc again later.<br />
.<br />
There was a problem while<br />
burning the disc.<br />
. The label is caught in the CD<br />
player.<br />
If the CD is not playing correctly, try<br />
a known good CD.<br />
If any error continues, contact your<br />
dealer.<br />
MP3<br />
Playing an MP3 CD<br />
To play an MP3 CD, follow the same<br />
instructions as “Playing a CD or<br />
MP3 CD.”<br />
The following guidelines must be<br />
met when creating an MP3 disc,<br />
otherwise the CD might not play:<br />
.<br />
Sampling rate: 16 kHz,<br />
22.05 kHz, 24 kHz, 32 kHz,<br />
44.1 kHz, and 48 kHz.
38 <strong>Infotainment</strong> <strong>System</strong><br />
. Bit rates supported: 8, 16, 24,<br />
32, 40, 48, 56, 64, 80, 96, 112,<br />
128, 144, 160, 192, 224, 256,<br />
and 320 kbps.<br />
. Maximum number of folders:<br />
eight folders with 255 files per<br />
folder.<br />
. Maximum of 1,000 files on<br />
a disc.<br />
. Recorded on a CD-R or CD-RW.<br />
. The Artist/Album/Song Titles/<br />
Genre information requires a CD<br />
to be fully scanned before the<br />
music navigator works with<br />
these menus.<br />
MP3 Music Menu<br />
Press the Menu screen button while<br />
that source is active to access<br />
the menu.<br />
Press any of the following buttons<br />
on the MP3 Menu:<br />
Shuffle Songs: Press to play the<br />
tracks randomly. Press again to stop<br />
shuffle.<br />
Playlists: Press to view the<br />
playlists stored on the disc. Select a<br />
playlist to view the list of all songs in<br />
that playlist. There might be a delay<br />
before the list displays. Select a<br />
song from the list to begin playback.<br />
Artists: Press to view the list of<br />
artists stored on the disc. Select an<br />
artist name to view a list of all songs<br />
by the artist. There might be a delay<br />
before the list displays. Select a<br />
song from the list to begin playback.<br />
Albums: Press to view the albums<br />
on the disc. Select the album to<br />
view a list of all songs on the album.<br />
There might be a delay before the<br />
list displays. Select a song from the<br />
list to begin playback.<br />
Song Titles: Press to display a list<br />
of all songs on the disc. Songs are<br />
displayed as stored on the disc.<br />
There might be a delay before the<br />
list displays. To begin playback,<br />
select a song from the list.<br />
Genres: Press to view the genres.<br />
Select a genre to view a list of all<br />
songs of that genre. Select a song<br />
from the list to begin playback.<br />
Folders: Press to open a folder list<br />
to access the files within the folder<br />
structure.<br />
Root Directory<br />
The root directory is treated as a<br />
folder. All files contained directly<br />
under the root directory are<br />
accessed prior to any root directory<br />
folders.<br />
Empty Folders<br />
If a root directory or folder is empty<br />
or contains only folders, the player<br />
advances to the next folder in the<br />
file structure that contains a<br />
compressed audio file. The empty<br />
folder(s) are not displayed or<br />
numbered.
<strong>Infotainment</strong> <strong>System</strong> 39<br />
No Folder<br />
When the CD only contains<br />
compressed audio files without any<br />
folders or playlists, all files are<br />
under the root folder.<br />
File <strong>System</strong> and Naming<br />
The song titles, artists, albums, and<br />
genres are taken from the file's ID3<br />
tag and are only displayed if present<br />
in the tag. If a song title is not<br />
present in the ID3 tag, the radio<br />
displays the file name as the<br />
track name.<br />
Preprogrammed Playlists<br />
The radio recognizes<br />
preprogrammed playlists; however,<br />
there is no editing capability. These<br />
playlists are treated as special<br />
folders containing compressed<br />
audio song files.<br />
USB<br />
Playing from a USB<br />
A USB mass storage or Certified<br />
Windows Vista®/Media Transfer<br />
Protocol (MTP) device can be<br />
connected to the USB port.<br />
The USB port is in the center<br />
console.<br />
The USB icon displays when the<br />
USB device is connected.<br />
USB Media Formats<br />
The USB port will support the<br />
following media formats:<br />
. MP3<br />
.<br />
Unprotected WMA<br />
. Unprotected AAC<br />
Gracenote®<br />
Gracenote technology embedded<br />
into the radio helps manage and<br />
navigate the USB device music<br />
collection. When a USB device is<br />
connected to the radio, Gracenote<br />
identifies the music collection and<br />
delivers the correct album, artist<br />
name, genres, and cover art on the<br />
screen. If information is missing,<br />
Gracenote will fill it in.<br />
Searching Music Library Using<br />
Voice Recognition<br />
Voice Recognition: Gracenote<br />
improves music search and<br />
navigation by identifying bands,<br />
artists, and albums names that may<br />
be hard to pronounce, irregular<br />
spellings, and nicknames. For<br />
example, Gracenote helps the<br />
system understand artist names like<br />
“INXS” or “Mötley Crüe.” It also<br />
allows the use of names like: “The<br />
Boss,” “G.N.R,” “The Fab Four,” and<br />
thousands of other famous artist<br />
nicknames as voice commands to<br />
access music. See Voice<br />
Recognition on page 70.<br />
Normalization: If equipped,<br />
normalization helps to improve the<br />
voice recognition accuracy for titles<br />
that sound similar. It also helps<br />
group long lists of genres into 10<br />
common genres. For example, there
40 <strong>Infotainment</strong> <strong>System</strong><br />
may be multiple rock genres in the<br />
media library; normalization will<br />
group all those into one rock Genre.<br />
Normalization default is off.<br />
To turn Normalization on:<br />
1. Press CONFIG or Config on the<br />
Home Page.<br />
2. Press Radio Settings, then press<br />
Gracenote Options.<br />
3. Press Normalization to turn on<br />
or off.<br />
Cover Art: The Gracenote<br />
embedded database contains cover<br />
art or album art information for the<br />
music on the USB device. If the<br />
music is recognized by Gracenote<br />
and does have cover art, Gracenote<br />
will use the cover art found in the<br />
embedded database and display it<br />
on the radio. User predefined cover<br />
art will always be used first. If no<br />
cover art is found Gracenote will<br />
use generic Genre graphics or<br />
images of artists.<br />
More Like This<br />
The Gracenote database contains<br />
attributes for Music, such as genre,<br />
era of music, region, artist type,<br />
mood, etc. Use this to create a<br />
playlist of up to 30 songs "more like"<br />
currently listened to song. This<br />
playlist will be stored in the Playlist<br />
Menu when the device is<br />
reconnected. If songs are removed<br />
from the device, the system will<br />
simply skip over those songs and<br />
play the next available song.<br />
Use the touch screen or voice<br />
recognition to create a More Like<br />
This Playlist. See “Voice<br />
Recognition Commands” in Voice<br />
Recognition on page 70.<br />
Gracenote Indexing<br />
While Gracenote is indexing,<br />
infotainment features are available<br />
including selecting music from the<br />
menu. Voice recognition music will<br />
not be available until the radio has<br />
completed indexing the device.<br />
Devices with more music may take<br />
longer to index. The device will<br />
index when plugged into the radio<br />
for the first time. When Indexing is<br />
removed from the screen, the radio<br />
is ready to support music search.<br />
On the next connection or ignition<br />
cycle, Indexing will show briefly on<br />
the screen. The radio is searching<br />
for changes to the device and<br />
preparing the music list. If there are<br />
no changes, the voice recognition<br />
music search will be available. The<br />
radio will index and store two<br />
devices with up to 10,000 songs on<br />
each device.
<strong>Infotainment</strong> <strong>System</strong> 41<br />
USB MP3 Player and USB Drives<br />
. The USB MP3 players and USB<br />
drives connected must comply<br />
with the USB Mass Storage<br />
Class specification (USB MSC).<br />
. Hard disk drives are not<br />
supported.<br />
. The radio will not be able to play<br />
back write-protected music.<br />
. File systems supported: FAT32,<br />
NTFS, Linux, and HFS+.<br />
. The following restrictions apply<br />
for the data stored on a USB<br />
MP3 player or USB device:<br />
‐ Maximum folder structure<br />
depth: 8 levels.<br />
‐ Maximum number of MP3/<br />
WMA files that can be<br />
displayed: 10,000.<br />
‐ Playlist entries must be in the<br />
form of relative paths.<br />
‐ The system attribute for<br />
folders/files that contain audio<br />
data must not be set.<br />
To play a USB device, do one of the<br />
following:<br />
. Connect the USB and it begins<br />
to play.<br />
.<br />
Press the Now Playing screen<br />
button on the Home Page.<br />
. Press SRCE to scroll until the<br />
USB source screen is available.<br />
. Press b / g on the steering<br />
wheel controls to play CD, Artist,<br />
Album, Song Title, or Song<br />
Genre. See Voice Recognition<br />
on page 70.<br />
The following playlist formats are<br />
supported:<br />
. M3U (Standard and Extended)<br />
. iTunes<br />
. PLS (Standard)<br />
. WAX<br />
. ASX<br />
. RMP<br />
The radio supports plugging a cell<br />
phone in as a USB drive as long as<br />
the cell phone supports USB mass<br />
storage class or has USB disc drive<br />
support enabled.<br />
While the USB source is active, use<br />
the following to operate USB<br />
function:<br />
TUNE/MENU Knob: Turn to scroll<br />
through the list. Turn quickly to fast<br />
scroll alphabetically through large<br />
lists.<br />
k (Play/Pause): Press to start,<br />
pause, or resume play of the current<br />
media source.<br />
s © (Seek Previous/Reverse):<br />
. Press to seek to the beginning of<br />
the current or previous track.<br />
If the track has been playing for<br />
less than five seconds, the<br />
previous track plays. If playing<br />
longer than five seconds, the<br />
current track restarts.
42 <strong>Infotainment</strong> <strong>System</strong><br />
. Press and hold to reverse<br />
quickly through playback.<br />
Release to return to playing<br />
speed. Elapsed time displays.<br />
¨ \ (Seek Next/Forward):<br />
. Press to seek to the next track.<br />
. Press and hold to advance<br />
quickly through playback.<br />
Release to return to playing<br />
speed. Elapsed time displays.<br />
USB Menu<br />
The following are available through<br />
the USB Menu:<br />
Shuffle: Press to play the tracks<br />
randomly. Press again to stop<br />
shuffle.<br />
Play More Like This:<br />
1. Press to automatically create a<br />
playlist of songs that are like the<br />
song currently playing.<br />
2. The radio will show "Playlist<br />
Creation Succeeded" and<br />
continue playing the<br />
current song.<br />
Playlist Creation Failed may<br />
appear if a song is not found in<br />
the Gracenote Database.<br />
Delete Automatic Playlist: Press<br />
to delete a More Like This playlist.<br />
Folders: Press to open a folder list<br />
to access the files within the folder<br />
structure.<br />
Playlists:<br />
1. Press to view the playlists on<br />
the USB.<br />
2. Select a playlist to view the list<br />
of all songs in that playlist.<br />
3. Select a song from the list to<br />
begin playback.<br />
Artists:<br />
1. Press to view the list of artists<br />
on the USB.<br />
2. Select an artist name to view a<br />
list of all albums by the artist.<br />
3. To select a song, press All<br />
Songs or press an album and<br />
then select a song from the list.<br />
Albums:<br />
1. Press to view the albums on<br />
the USB.<br />
2. Select the album to view a list of<br />
all songs on the album.<br />
3. Select a song from the list to<br />
begin playback.<br />
Genres:<br />
1. Press to view the genres on<br />
the USB.<br />
2. Select a genre to view a list of<br />
all songs of that genre.<br />
3. Select a song from the list to<br />
begin playback.<br />
Songs:<br />
1. Press to display a list of all<br />
songs on the USB.<br />
2. Songs are displayed as they are<br />
stored on the disc. To begin<br />
playback, select a song from<br />
the list.
<strong>Infotainment</strong> <strong>System</strong> 43<br />
File <strong>System</strong> and Naming<br />
The songs, artists, albums, and<br />
genres are taken from the file’s<br />
song information and are only<br />
displayed if present. The radio<br />
displays the file name as the track<br />
name if the song information is not<br />
available.<br />
Playing from an iPod®<br />
This feature supports the following<br />
iPod models:<br />
. iPod classic® (6th generation)<br />
.<br />
iPod nano® (3G, 4G, 5G,<br />
and 6G)<br />
. iPod touch® (1G, 2G, 3G,<br />
and 4G)<br />
. iPhone® (2G, 3G, 3GS, and 4S)<br />
. iPad®<br />
There may be problems with the<br />
operation and function in the<br />
following situations:<br />
. When connecting an iPod on<br />
which a more recent version of<br />
the firmware is installed than is<br />
supported by the infotainment<br />
system.<br />
. When connecting an iPod on<br />
which firmware from other<br />
providers is installed.<br />
To connect an iPod:<br />
1. Connect one end of the standard<br />
iPod USB cable to the iPod's<br />
dock connector.<br />
2. Connect the other end to the<br />
USB port in the center console.<br />
iPod music information displays on<br />
the radio’s display and begins<br />
playing through the vehicle’s audio<br />
system.<br />
The iPod battery recharges<br />
automatically while the vehicle is on.<br />
The iPod shuts off and stops<br />
charging when the vehicle is<br />
shut off.<br />
If the iPod is an unsupported model,<br />
it can still be listened to in the<br />
vehicle by connecting to the<br />
auxiliary input jack using a standard<br />
3.5 mm (1/8 in) stereo cable.<br />
iPod Menu<br />
Use the iPod Menu to select:<br />
Shuffle: Press to play the tracks<br />
randomly. Press again to stop<br />
shuffle.<br />
Play More Like This: Allows the<br />
radio to create playlists with song/<br />
tracks that are similar to what is<br />
being listen to. The radio will create<br />
a playlist with up to 30 similar
44 <strong>Infotainment</strong> <strong>System</strong><br />
songs. The playlist will appear in the<br />
Playlist category of the menu for<br />
future listening.<br />
1. Press to automatically create a<br />
playlist of songs that are More<br />
Like the song currently playing.<br />
2. The radio will show “Playlist<br />
Creation Succeeded” and<br />
continue playing the<br />
current song.<br />
Delete Automatic Playlists: Press<br />
to delete a More Like this playlist.<br />
Playlists:<br />
1. Press to view the playlists on<br />
the iPod.<br />
2. Select a playlist name to view a<br />
list of all songs in the playlist.<br />
3. Select the song from the list to<br />
begin playback.<br />
Artists:<br />
1. Press to view the artists on<br />
the iPod.<br />
2. Select an artist name to view a<br />
list of all albums with songs by<br />
the artist.<br />
3. Select an album.<br />
4. Select the song from the list to<br />
begin playback.<br />
Albums:<br />
1. Press to view the albums on<br />
the iPod.<br />
2. Select an album name to view a<br />
list of all songs on the album or<br />
select All Songs to view all<br />
songs on the iPod.<br />
3. Select the song from the list to<br />
begin playback.<br />
Genres:<br />
1. Press to view the genres on<br />
the iPod.<br />
2. Select a genre name to view a<br />
list of artists of that genre.<br />
3. Select an artist to view albums<br />
or All Albums to view all albums<br />
of that genre.<br />
4. Select Artist to view albums.<br />
5. Select Album to view songs.<br />
6. Select the song from the list to<br />
begin playback.<br />
Songs:<br />
1. Press to view a list of all songs<br />
on the iPod.<br />
2. Select the song from the list to<br />
begin playback.<br />
Podcasts:<br />
1. Press to view the podcasts on<br />
the iPod.<br />
2. Select a podcast name to begin<br />
playback.<br />
Composers:<br />
1. Press to view the composers on<br />
the iPod.<br />
2. Select the composer to view a<br />
list of songs by that composer.<br />
3. Select a song from the list to<br />
begin playback.<br />
Audiobooks:<br />
1. Press to view the audio books<br />
on the iPod.
<strong>Infotainment</strong> <strong>System</strong> 45<br />
2. Select the audio book from the<br />
list to begin playback.<br />
Playing from an iPhone<br />
or iPad®<br />
This feature supports iPhone 3G,<br />
iPhone 3GS, iPhone 4S, and iPad.<br />
Follow the same instructions as<br />
stated earlier for using an iPod. To<br />
use voice recognition to play music,<br />
say “Play USB,” “Play Artist,” “Play<br />
Album,” “Play Song,” or “Play<br />
Genre.” See Voice Recognition on<br />
page 70.<br />
iPhone, iPod Touch and iPad<br />
Troubleshooting<br />
When an iPhone, iPod touch,<br />
or iPad are connected through USB<br />
and Bluetooth, the audio may not be<br />
heard when the iPod source on the<br />
radio is selected. If a phone call is<br />
received while listening to the iPod<br />
source and there is no audio for the<br />
iPod after the source, then go to the<br />
Airplay icon on the device and<br />
select dock connector or disconnect<br />
and reconnect the dock connector<br />
on the device.<br />
Some functionality may differ based<br />
on operating system version on<br />
device.<br />
USB Troubleshooting<br />
If the device is not being recognized<br />
or the music is missing screen<br />
information, restore the radio<br />
defaults:<br />
1. Press Config.<br />
2. Press Vehicle Settings.<br />
3. Press Return to Factory<br />
Settings.<br />
4. Press Yes.<br />
Pair the phone again and the device<br />
will have to index again.<br />
Bluetooth Audio and Voice<br />
Recognition<br />
See Bluetooth Audio on page 46<br />
and Voice Recognition on page 70<br />
for information using voice<br />
recognition with Bluetooth audio.<br />
Make sure all devices have the<br />
latest software downloaded.<br />
Auxiliary Devices<br />
This vehicle has an auxiliary input<br />
jack in the center console. Possible<br />
auxiliary audio sources include:<br />
. Laptop computer<br />
. MP3 player<br />
. Tape player<br />
This jack is not an audio output. Do<br />
not plug headphones into the<br />
auxiliary input jack. Set up any<br />
auxiliary device while the vehicle is<br />
in P (Park).<br />
Connect a 3.5 mm (1/8 in) cable<br />
from the auxiliary device to the<br />
auxiliary input jack. When a device<br />
is connected, the system<br />
automatically begins playing audio<br />
from the device over the vehicle<br />
speakers.
46 <strong>Infotainment</strong> <strong>System</strong><br />
If an auxiliary device has already<br />
been connected, but a different<br />
source is currently active, do one of<br />
the following:<br />
.<br />
Press SRCE to scroll all of the<br />
available audio source screens,<br />
until the AUX source screen is<br />
selected.<br />
. Say “Play Front AUX” using<br />
voice recognition to play the<br />
auxiliary device . See Voice<br />
Recognition on page 70.<br />
Bluetooth Audio<br />
If equipped, music may be played<br />
from a paired Bluetooth device. See<br />
“Pairing a Phone/Device” under<br />
Bluetooth on page 76.<br />
To play music through a Bluetooth<br />
device:<br />
1. Power on the device, pair, and<br />
connect the device.<br />
2. Music can be launched by doing<br />
one of the following:<br />
. Press the Bluetooth Audio<br />
screen button on the<br />
Home Page.<br />
. Press SRCE until Bluetooth<br />
Audio is selected.<br />
. Press the SRC button on<br />
the steering wheel controls<br />
until Bluetooth Audio is<br />
selected. See Steering<br />
Wheel Controls on page 9.<br />
. Use voice recognition. See<br />
Voice Recognition on<br />
page 70.<br />
The music can be controlled by<br />
either the infotainment controls or<br />
the controls on the device.<br />
When a phone is connected to the<br />
system through Bluetooth Audio the<br />
phone notifications and sounds may<br />
not be heard on the phone until<br />
Bluetooth is disconnected.<br />
Notification features may vary based<br />
on the phone. Check the phone<br />
manufacturer’s information for<br />
notification support.<br />
Bluetooth Audio Menu<br />
Press the Menu screen button and<br />
the following may display:<br />
Shuffle: Press the outer ring of the<br />
TUNE/MENU knob to turn shuffle on<br />
or off. Not all devices support the<br />
shuffle feature.<br />
When selecting Bluetooth audio, the<br />
Bluetooth device internal music<br />
player may not open depending on<br />
the status of the device. All devices<br />
launch and play back audio<br />
differently. Make sure the correct<br />
audio source is playing on the<br />
device for Bluetooth audio playback<br />
on the radio. When the vehicle is<br />
not moving, use the device to begin<br />
playback.<br />
When selecting Bluetooth audio as<br />
a source, the radio may source to<br />
the Bluetooth Audio Paused screen<br />
with no audio playing. Press play on<br />
the device or push k to begin
playback. This may happen<br />
depending on how the device<br />
communicates over Bluetooth.<br />
Some phones support sending<br />
Bluetooth music information to<br />
display on the radio. When the radio<br />
receives this information, it will<br />
check to see if any album art is<br />
available and display it.<br />
When playing music on the radio<br />
from a Bluetooth device, make sure<br />
the Bluetooth device is unlocked<br />
and the intended music application<br />
is showing on the home screen.<br />
For iPhone/iPod touch and iPad<br />
devices, Bluetooth Audio will not<br />
work if the device is connected<br />
through the USB and Bluetooth at<br />
the same time.<br />
As new devices are introduced, see<br />
“Website Information” under<br />
Software Updates on page 14.<br />
Navigation<br />
Using the Navigation<br />
<strong>System</strong><br />
Use the NAV button on the<br />
faceplate or Home Page to access<br />
the navigation map.<br />
Press the NAV button again to<br />
change between alternative views of<br />
the normal split and full map views.<br />
<strong>Infotainment</strong> <strong>System</strong> 47<br />
The Menu screen button at the<br />
bottom right side of the display<br />
accesses the Navigation Menu.<br />
The touch-sensitive buttons<br />
available are:
48 <strong>Infotainment</strong> <strong>System</strong><br />
Heading Indicator<br />
Map Modes<br />
An alternative method to change the<br />
view of the maps would be to press<br />
the map mode icon.<br />
Traffic<br />
Press Heading Indicator to display<br />
the Map View. There are three<br />
indicator settings:<br />
. 2D North Up: Displays North at<br />
the top of the map screen<br />
regardless of the direction the<br />
vehicle is traveling.<br />
. 2D Heading Up: Displays the<br />
direction the vehicle is traveling.<br />
The shaded triangle icon points<br />
North.<br />
.<br />
3D Heading Up: Is the same as<br />
2D Heading Up, but the map is<br />
in 3D.<br />
Press to change the view of the<br />
maps while using the navigation<br />
function. The system offers a variety<br />
of full and split views. Some views<br />
are only selectable when route<br />
guidance is active.<br />
Press Traffic to display the Traffic<br />
Menu. Press the desired option.<br />
Options available are:<br />
.<br />
All Traffic Events: Press to view<br />
all reported traffic events while<br />
on or off a planned route.<br />
. Traffic Events on Route: Press<br />
to view traffic events while on a<br />
planned route.<br />
. Traffic Settings: Press to<br />
customize traffic options. This<br />
feature can also be accessed by
<strong>Infotainment</strong> <strong>System</strong> 49<br />
pressing the traffic light screen<br />
button displayed at the left lower<br />
side of the map screen. See<br />
Configure Menu on page 62 in<br />
this section.<br />
POIs Nearby<br />
Press to display a search list of<br />
nearby POIs. Select the<br />
desired POI.<br />
POIs Along Route<br />
Press to display a search list of<br />
POIs that lie along or near the route<br />
to the destination. Select the<br />
desired POI.<br />
Show POIs on Map<br />
Press to customize which major POI<br />
categories are displayed on<br />
the map.<br />
Switch Route Time/Destination<br />
Press to customize the Arrival/<br />
Travel time and Waypoint/<br />
Destination information displayed in<br />
the main map screen.<br />
Current Position Information<br />
Press to display a split screen<br />
showing detailed information about<br />
the vehicle position. This feature<br />
can also be accessed by pressing<br />
the vehicle information tab on the<br />
lower center of the display. The<br />
location can be saved to the<br />
Address Book by pressing Save in<br />
the split screen.<br />
Destination Information<br />
Press to display a split map screen<br />
showing the next waypoint/<br />
destination.<br />
Map Adjustments<br />
The system lets you adjust the scale<br />
of view on the map. Also, as you<br />
drive, the map scrolls automatically<br />
based on the direction of travel.<br />
Map Scales
50 <strong>Infotainment</strong> <strong>System</strong><br />
There are two methods to change<br />
the map scale:<br />
. Turn the TUNE/MENU knob<br />
clockwise or counterclockwise to<br />
zoom out or in.<br />
. Press the Map Scale + or −<br />
button on the bottom corners of<br />
the map screen to change the<br />
zoom level.<br />
The map scale bar times out if<br />
the zoom level is not changed<br />
within a few seconds.<br />
The scale can be configured for<br />
English or metric units. To change<br />
from English to metric, see “Driver<br />
Information Center (DIC)” in the<br />
owner manual for more information.<br />
Scroll Features<br />
. To scroll within the map, touch<br />
anywhere on the map screen<br />
and the scroll symbol displays.<br />
. Tap the map to center at that<br />
location on the screen.<br />
. Press and hold the screen in any<br />
direction outside the scroll<br />
symbol to scroll the map in that<br />
direction.<br />
. Scroll speed increases when<br />
touching closer to the edge of<br />
the screen.<br />
. Press NAV on the faceplate to<br />
exit map scrolling and return to<br />
the current vehicle location on<br />
the map.<br />
Press the cycling arrows located at<br />
the top of the map screen to toggle<br />
from the normal top bar (Home and<br />
Fav) to the audio information bar.<br />
Maps<br />
This section includes basic<br />
information about the map<br />
database.<br />
The maps are stored in an internal<br />
flash memory that is used in the<br />
navigation system.<br />
Detailed Areas<br />
Road network attributes are<br />
contained in the map database for<br />
detailed areas. Attributes include<br />
information such as street names,<br />
street addresses, and turn<br />
restrictions. A detailed area includes<br />
all major highways, service roads,<br />
and residential roads. The detailed<br />
areas include points of interest
<strong>Infotainment</strong> <strong>System</strong> 51<br />
(POIs) such as restaurants, airports,<br />
banks, hospitals, police stations,<br />
gas stations, tourist attractions, and<br />
historical monuments. The map<br />
database may not include data for<br />
newly constructed areas or map<br />
database corrections after the<br />
production of the infotainment<br />
system. The navigation system<br />
provides full route guidance in the<br />
detailed map areas.<br />
Navigation Symbols<br />
Following are the most common<br />
symbols that appear on a map<br />
screen.<br />
The vehicle symbol indicates the<br />
current position and heading<br />
direction of the vehicle on the map.<br />
The destination symbol marks the<br />
final destination after a route has<br />
been planned.<br />
The waypoint symbol marks one or<br />
more set waypoints.<br />
A waypoint is a stopover destination<br />
point added to the planned route.<br />
The estimated time and distance to<br />
the destination are displayed.<br />
If waypoints have been added to the<br />
current route, each waypoint<br />
destination displays estimated time<br />
and distance.<br />
This symbol indicates that the map<br />
view is North up: North up displays<br />
North at the top of the map screen<br />
regardless of the direction the<br />
vehicle is traveling.
52 <strong>Infotainment</strong> <strong>System</strong><br />
Select this screen symbol to change<br />
the view to Heading up or 3D.<br />
This symbol indicates that the map<br />
view is Heading up.<br />
Heading up view displays the<br />
direction the vehicle is traveling at<br />
the top of the map screen. The<br />
shaded triangle indicates North.<br />
Press this screen symbol to change<br />
to 3D mode.<br />
The 3D symbol is the same as the<br />
Heading up symbol, but the map is<br />
in 3D.<br />
The No GPS symbol appears when<br />
there is no Global Positioning<br />
<strong>System</strong> (GPS) satellite signal.<br />
This symbol at the bottom of a map<br />
screen changes the current map<br />
mode screen.<br />
This symbol on the right of the map<br />
screen displays the speed limit<br />
while on a route. The speed limit<br />
may not be accurate due to<br />
changes from the Department of<br />
Transportation, the local<br />
municipalities, or older map data.<br />
Always follow the posted speed limit<br />
on the road.<br />
Driving on a Route<br />
Urgent Maneuver Alert<br />
The system will give an indication<br />
that the next maneuver is close.<br />
Driving on a Highway
<strong>Infotainment</strong> <strong>System</strong> 53<br />
Driving on a Residential Road<br />
Destination<br />
If route guidance is not activated,<br />
press the Destination Entry screen<br />
button on the Home Page to access<br />
the Destination Entry screen.<br />
Several options can be selected to<br />
plan a route by entering<br />
destinations. Some destination entry<br />
items such as Previous<br />
Destinations, Address Book, and My<br />
Home may be grayed out if no<br />
destination was previously entered<br />
or saved.<br />
Alpha-Numeric Keyboard<br />
Letters of the alphabet, symbols,<br />
punctuation, and numbers, when<br />
available, display on the navigation<br />
screen as alpha/numeric keyboards.<br />
The alpha keyboard displays when<br />
data needs to be entered.<br />
QWERTY or ABCDEF: Press to<br />
toggle between QWERTY or<br />
ABCDEF keyboard character<br />
layouts.<br />
Symbols: Use to select symbols.<br />
Space: Use to enter a space<br />
between characters or the words of<br />
a name.<br />
Delete: Press to delete an incorrect<br />
character that has been selected.<br />
Address Entry<br />
Press the Address screen button to<br />
display the Enter Address screen.<br />
Set a route by entering the state<br />
name, city name, street name,<br />
house number, and intersection.<br />
If no state or province has been<br />
entered previously, the city and<br />
state fields are not available. Press<br />
the screen button at the right of the<br />
city name to select a state or<br />
province.<br />
If the state or province was<br />
previously set and is displayed,<br />
press the screen button at the right<br />
of the city name to change the<br />
selected state or province.
54 <strong>Infotainment</strong> <strong>System</strong><br />
To make name selection easier, the<br />
system highlights only characters<br />
that are available after the<br />
previously entered one.<br />
State: Enter a state name.<br />
City: Enter a city name.<br />
Street: Enter a street name.<br />
House No.: Enter a valid address<br />
number.<br />
Intersection: Enter a street name<br />
that intersects with the selected<br />
street.<br />
Entering the city name first:<br />
1. Enter the city name.<br />
2. Enter the street name. Use the<br />
Delete screen button to delete<br />
an incorrectly entered character.<br />
A list displays if six or fewer<br />
names are available. If there are<br />
more than six, there is a match<br />
counter with a number of<br />
available streets. Press the List<br />
screen button to view the list and<br />
select the street.<br />
3. Enter the house number.<br />
4. Press the Done screen button at<br />
any time and the system tries to<br />
resolve a destination based on<br />
the entered information, then<br />
displays it on the Destination<br />
Confirmation screen.<br />
5. Press the Start Guidance screen<br />
button and the route calculates.<br />
Points of Interest (POI)<br />
Press the Points of Interest screen<br />
button on the Destination Entry<br />
page. Several options can be<br />
selected to plan a route.<br />
The POI entry list allows selection of<br />
a destination search by category,<br />
name, or number.
<strong>Infotainment</strong> <strong>System</strong> 55<br />
Entering by POI name:<br />
Address Book<br />
1. Select Search by Name.<br />
2. Make sure the correct country,<br />
state, city are present, then<br />
select Search.<br />
3. Enter the POI name.<br />
4. Select a few of the characters or<br />
spell the name in full, by using<br />
the alpha keyboard.<br />
5. Press the List screen button,<br />
or if the list has six or fewer<br />
items, a list of POIs will<br />
immediately display.<br />
6. Press the desired POI.<br />
7. Press the Start Guidance screen<br />
button and the route calculates.<br />
Previous Destinations<br />
Select a destination from the<br />
Previous Destination List. Up to<br />
15 points that have been previously<br />
entered can be recalled. If the list is<br />
full, the oldest destinations are<br />
automatically deleted once the<br />
newest destinations are added.<br />
If no destination is saved to the<br />
address book, save a destination:<br />
1. Press Destination on the<br />
Home Page.<br />
2. Enter an address using any of<br />
the destination methods<br />
(Address Entry, POI Entry, etc.).<br />
3. On the Destination Confirmation<br />
screen, select Save.<br />
4. The system displays the options<br />
Name, Number, Icon, and Done.<br />
Press Done to save the<br />
destination.<br />
5. To customize the address book<br />
entry, select Name, Number,<br />
or Icon.
56 <strong>Infotainment</strong> <strong>System</strong><br />
If a destination is already saved to<br />
the address book, press Destination<br />
Entry on the Home Page to display<br />
the Address Book screen button.<br />
Choose a destination by selecting<br />
an address that has been stored in<br />
the address book.<br />
1. Press the Address Book screen<br />
button. A list displays the<br />
address book entries.<br />
2. Select the destination from<br />
the list.<br />
3. Press the Start Guidance screen<br />
button and the route calculates.<br />
To edit Address Book entries:<br />
1. Select an item from the<br />
address book.<br />
2. On the Destination Confirmation<br />
screen, select Edit.<br />
3. The system displays the options<br />
Name, Number, Icon, and<br />
Delete. Press Delete to delete<br />
the destination from the<br />
address book.<br />
4. To customize the address book<br />
entry, select Name, Number,<br />
or Icon.<br />
Latitude/Longitude Coordinates<br />
Choose a destination based on<br />
latitudinal and longitudinal<br />
coordinates.<br />
To enter the location as coordinates,<br />
latitude and longitude:<br />
1. Press Destination on the Home<br />
Page. Press the Latitude and<br />
Longitude screen button to<br />
display the screen above.<br />
2. Select Latitude or Longitude to<br />
change. Enter the coordinates in<br />
degrees, minutes, and seconds.<br />
Then press Back to save<br />
and exit.<br />
3. Press the Search screen button<br />
if the information is correct.<br />
4. Press the Start Guidance screen<br />
button. The route calculates.<br />
Favorite Routes
<strong>Infotainment</strong> <strong>System</strong> 57<br />
Adding a Favorite Route:<br />
1. Press the Home Page<br />
Destination Entry button to<br />
display the Favorite Routes<br />
screen button.<br />
2. Press the Favorite Routes<br />
screen button to display Add<br />
Favorite Route.<br />
3. Select Add Favorite Route and<br />
enter a favorite route name.<br />
4. Press OK and the display<br />
returns to the favorite routes list.<br />
5. Select the favorite route and add<br />
a waypoint using any of the<br />
destination methods, such as<br />
address entry, POI entry, etc.<br />
Selecting a Favorite Route:<br />
1. Press the Home Page<br />
Destination Entry button to<br />
display the Favorite Routes<br />
screen button.<br />
2. Press the Favorite Routes<br />
screen button to display a list of<br />
available favorite routes.<br />
3. Scroll and select a favorite route.<br />
4. Press the Start Guidance screen<br />
button. The route calculates.<br />
Deleting a favorite route:<br />
1. Press the Home Page<br />
Destination Entry button to<br />
display the Favorite Routes<br />
screen button. Press this button<br />
to display the list of available<br />
favorite routes.<br />
2. Scroll and select the route to be<br />
deleted.<br />
3. Press Edit.<br />
4. Press Delete Favorite Route.<br />
Changing the route name:<br />
1. Press the Home Page<br />
Destination Entry button to<br />
display the Favorite Routes<br />
screen button. Press this button<br />
to display the list of available<br />
favorite routes.<br />
2. Press the Edit screen button.<br />
3. Select Edit Name.<br />
4. Using the keypad, enter<br />
the name.<br />
5. Press the Done screen button.<br />
The new name will be in the<br />
Favorite Routes Menu.<br />
My Home<br />
If no home destination is entered,<br />
save a destination by pressing the<br />
Home Page Destination Entry<br />
button. Enter a destination using<br />
any of the destination entry methods<br />
(Address Entry, POI Entry, etc.).<br />
Select Save as Home from the<br />
Destination Confirmation screen.<br />
If a destination is already saved as<br />
home, press the Home Page<br />
Destination Entry button to display<br />
the My Home screen button. Press<br />
this button to start route guidance.
58 <strong>Infotainment</strong> <strong>System</strong><br />
Select from Map<br />
.<br />
Press the Home Page<br />
Destination Entry button to<br />
display the Select from Map<br />
screen button. Press this button<br />
to display the map screen with a<br />
scroll symbol centered on<br />
the map.<br />
. Press the Zoom in/out button on<br />
the screen and press the map to<br />
locate the destination to select.<br />
Press and hold a finger on the<br />
map to activate fast scrolling.<br />
. Press the Go button on the<br />
bottom of the screen to display<br />
the Destination Confirmation<br />
screen.<br />
. Press the Start Guidance screen<br />
button. The route calculates.<br />
Destination Confirmation<br />
Multiple options are available on the<br />
Destination Confirmation screen:<br />
Start Guidance: Press to start a<br />
route calculation to the displayed<br />
destination.<br />
Show on Map: Press to switch to<br />
the map view with the displayed<br />
destination centered on the map.<br />
Route Options: Press to change<br />
route options. See “Route Options”<br />
following.<br />
Call: Press to initiate a phone call<br />
to the displayed phone number,<br />
if phone capability is available.<br />
Save as Home: Press to save the<br />
displayed destination as your home<br />
destination. The home destination<br />
will be stored at the top of the list of<br />
destinations in the address book.<br />
Save/Edit: Press to save the<br />
displayed destination into the<br />
address book. If the displayed<br />
destination is already stored in the<br />
address book, Edit will show as the<br />
menu item.<br />
Route Options<br />
Press to display various route<br />
options.<br />
Alternative Routes: If enabled, the<br />
system will provide an additional<br />
screen after Start Guidance has<br />
been selected. Select Fastest,<br />
Shortest, or Eco calculated routes<br />
before selecting GO.<br />
Fastest: This calculates for the<br />
quickest route.<br />
Shortest: This calculates for the<br />
shortest route.<br />
Eco: This calculates for the most<br />
fuel efficient route based on speed<br />
and distance.
<strong>Infotainment</strong> <strong>System</strong> 59<br />
Under the Route Options menu,<br />
there are route preferences that by<br />
default are all enabled.<br />
A checkmark placed next to each<br />
preference indicates this. All of<br />
these preferences are used when<br />
calculating the route. If any of these<br />
preferences are unselected, the<br />
route will be calculated without<br />
including these preferences.<br />
Use Highways: Deselect to avoid<br />
major roads.<br />
Use Toll Roads: Deselect to avoid<br />
toll roads.<br />
Use Ferries: Deselect to avoid<br />
ferries.<br />
Use Tunnels: Deselect to avoid<br />
tunnels.<br />
Use Time Restricted: Deselect to<br />
avoid time restricted roads.<br />
Use Car Train: Deselect to avoid<br />
car trains.<br />
Menu with Route Guidance<br />
Active<br />
Several functions can be performed<br />
after a destination has been<br />
entered. Press the Home Page<br />
Destination Entry screen button or<br />
the DEST faceplate button to<br />
access the Destination Menu<br />
screen.<br />
Cancel Guidance<br />
Press Cancel Guidance to cancel<br />
the current route.<br />
Destination List<br />
Select Destination List to view<br />
options for organizing waypoints.<br />
Turn List<br />
Select Turn List to view a list of<br />
maneuvers for the entire route.<br />
Press the Avoid screen button next<br />
to one of the turn maneuvers to
60 <strong>Infotainment</strong> <strong>System</strong><br />
avoid a segment of roads.<br />
A maximum of 8 avoided segments<br />
are allowed.<br />
Avoid List<br />
Select Avoid List to display a list of<br />
avoided road segments with the<br />
option to remove the avoided items<br />
from the list.<br />
Detour<br />
Press Detour to display the route<br />
detour options. Select to detour the<br />
whole route or by a specific<br />
distance.<br />
Route Options<br />
This feature can be accessed from<br />
the Destination Confirmation Menu<br />
and Destination Menu with Route<br />
Guidance Active. See “Destination<br />
Confirmation” for more information.<br />
Voice Prompt<br />
Select Voice Prompt to view options<br />
to disable or manage navigation<br />
voice prompts and traffic alert<br />
prompts.<br />
Waypoints<br />
Up to three waypoints can be added<br />
to the current route. The waypoints<br />
can be sorted (moved) or deleted.<br />
To add a waypoint:<br />
1. From the Destination List menu,<br />
press Add Waypoint.<br />
2. Enter the waypoint by any of the<br />
add destination methods. The<br />
system calculates and highlights<br />
the route and the route can be<br />
started.<br />
3. To add more waypoints, press<br />
Add Waypoint to add the<br />
waypoint in the order desired on<br />
the route.<br />
To delete a waypoint:<br />
1. From the Destination menu,<br />
press Waypoint List.<br />
2. Press Delete Waypoints.<br />
3. Select the waypoints to be<br />
deleted. Press the Delete screen<br />
button.<br />
The Sort Waypoint feature allows<br />
reorganization of the destination list.<br />
To sort a waypoint:<br />
1. From the Destination menu,<br />
press Destination List.<br />
2. Press Sort Waypoints.<br />
3. Select the waypoint to move.
<strong>Infotainment</strong> <strong>System</strong> 61<br />
4. Select the location to move the<br />
waypoint to.<br />
Instead of deleting individual<br />
waypoints, select Delete All<br />
Waypoints to delete all waypoints at<br />
the same time.<br />
To save a destination list as a<br />
favorite route, select Save as<br />
Favorite Route.<br />
OnStar ® Destination<br />
Download<br />
The destination download lets an<br />
OnStar® subscriber ask an OnStar<br />
Advisor to download a destination to<br />
the navigation system. OnStar will<br />
send address information and<br />
location coordinates of the<br />
destination into the navigation<br />
system.<br />
Using Destination Download<br />
If the navigation radio screen is<br />
turned off before a download, the<br />
system automatically turns the<br />
screen on and displays a download<br />
confirmation message. The radio<br />
remains on after the download.<br />
The navigation system displays<br />
“Please wait” as the address is<br />
searched within the map database.<br />
If the address is not found within the<br />
map database, the system may use<br />
latitude and longitude coordinates to<br />
locate the destination.<br />
If the system is unable to locate the<br />
address, the Destination Not Found<br />
screen displays.<br />
Route Guidance Not Active<br />
If an OnStar destination is<br />
downloaded while route guidance is<br />
not activated, the navigation system<br />
displays a pop-up screen with the<br />
following screen functions:<br />
Start Guidance: Press to start<br />
route calculation to the<br />
destination(s) received.<br />
Show on Map: Press to display the<br />
Map Screen.<br />
Call: Press to initiate a call with<br />
Bluetooth Phone (if available) or<br />
OnStar Hands-Free Calling.<br />
Save as Home: Press to set an<br />
address as a home destination.
62 <strong>Infotainment</strong> <strong>System</strong><br />
Save: Press to save the<br />
downloaded destination to the<br />
address book.<br />
Route Guidance Active<br />
If an OnStar destination is<br />
downloaded while route guidance is<br />
already active, the system displays<br />
a pop-up screen with the following<br />
screen function:<br />
. Press Start Guidance; the<br />
navigation system adds the<br />
downloaded destination before<br />
the next waypoint of the existing<br />
route (closest to the current<br />
vehicle position).<br />
. All other buttons on the pop-up<br />
screen operate as described<br />
under “Route Guidance Not<br />
Active.”<br />
Previous Destinations<br />
Previously downloaded OnStar<br />
destinations are saved under<br />
Previous Destinations in the<br />
navigation system, where they can<br />
be accessed or saved to the<br />
Address Book.<br />
Configure Menu<br />
The Configuration Menu is used to<br />
adjust features and preferences,<br />
such as Sound, Radio, Nav<br />
(Navigation), Display, or Time<br />
Settings.<br />
1. Press the Config screen button<br />
on the Home Page or the<br />
CONFIG button on the faceplate.<br />
2. Touch-tap the scroll bar until the<br />
desired option displays. Select<br />
the desired settings to change.<br />
See the owner manual for<br />
information on adjusting most<br />
vehicle settings. See “Navigation<br />
Settings” and “Navigation<br />
Settings Button” in this section.<br />
Languages<br />
Press the Config button on the<br />
Home Page or the CONFIG button<br />
on the faceplate to enter the menu<br />
options. Turn the TUNE/MENU knob<br />
or touch-tap the scroll bar to scroll<br />
through the available options. Press<br />
the TUNE/MENU knob or press<br />
Languages to display the<br />
languages. Select the desired<br />
language.
<strong>Infotainment</strong> <strong>System</strong> 63<br />
Time and Date Settings<br />
From the Time and Date Settings<br />
screen button, press to display the<br />
Time and Date Settings menu.<br />
Set Time: Press the + or − to<br />
increase or decrease the Hours and<br />
Minutes displayed on the clock.<br />
Set Date: Press the + and − to<br />
increase or decrease the day.<br />
Set Time Format: Press the 12<br />
Hour screen button for standard<br />
time; press the 24 Hour screen<br />
button for military time.<br />
Press the Back screen button to<br />
save the adjustments.<br />
Radio Settings<br />
Press the Config button on the<br />
Home Page or the CONFIG button<br />
on the faceplate to enter the menu<br />
options. Turn the TUNE/MENU knob<br />
or touch-tap the scroll bar to scroll<br />
through the available options. Press<br />
the TUNE/MENU knob or press<br />
Radio Settings to display the radio<br />
settings menu. Press this feature to<br />
make changes for radio information<br />
displayed, preset pages, Auto<br />
Volume Control, and XM Categories<br />
Restore. See Satellite Radio on<br />
page 18, for more information about<br />
XM Categories.<br />
The Radio Settings are:<br />
Auto Volume: Select OFF, Low,<br />
Medium, or High sensitivity to<br />
automatically adjust the volume to<br />
minimize the effects of unwanted<br />
background noise that can result<br />
from changing road surfaces, driving<br />
speeds, or open windows. This<br />
feature works best at lower volume<br />
settings where background noise is<br />
typically louder than the sound<br />
system volume.<br />
Gracenote Options: Press to<br />
enable/disable Normalization used<br />
to improve voice recognition and<br />
media groupings. See CD Player on<br />
page 36, USB on page 39, Auxiliary<br />
Devices on page 45, and Bluetooth<br />
Audio on page 46.<br />
XM Channel Graphics: Press to<br />
enable/disable the XM Audio page<br />
background on the XM Channel<br />
display.<br />
Startup Volume: Press to set the<br />
maximum volume level for startup<br />
that will be used even if a higher<br />
volume had been set when the radio<br />
was turned off.<br />
Number of Favorite Pages: Press<br />
to select the number of FAV pages<br />
to be displayed.<br />
XM Categories: Press to<br />
customize which available XM<br />
Categories are used and displayed.
64 <strong>Infotainment</strong> <strong>System</strong><br />
Software Version Information:<br />
Press to display information about<br />
the system and update software if<br />
available.<br />
Phone Settings<br />
See Bluetooth on page 76 in the<br />
“Phone” section for more<br />
information on phone settings.<br />
Navigation Settings<br />
Press the Config button on the<br />
Home Page to enter the setup<br />
menu. Turn the TUNE/MENU knob<br />
or touch-tap the scroll bar until the<br />
Navigation Settings option displays.<br />
Select this feature to make changes<br />
to Voice Prompt, Traffic Settings,<br />
Guidance Alert, Bread Crumbs, and<br />
Delete Saved Destinations.<br />
Navigation Settings Button<br />
Various navigation system settings<br />
are available through the<br />
Configuration Menu. Some options<br />
are only available after a route is<br />
planned.<br />
Press Navigation Settings to access<br />
the navigation system settings.<br />
Voice Prompt<br />
The Voice Prompt Menu allows<br />
changes to the voice prompt<br />
features.<br />
Navigation Voice Prompts: Select<br />
the On or Off button to turn the<br />
voice instructions on or off while<br />
traveling on a planned route.<br />
Traffic Alert Prompts: Select the<br />
On or Off button to turn the traffic<br />
voice prompt on or off while<br />
traveling on a planned route.<br />
Navigation Voice: Select<br />
Navigation Voice Volume to change<br />
the volume of the navigation<br />
prompts.
Traffic Settings<br />
Press to display the Traffic<br />
Settings menu.<br />
Traffic Events (On/Off): Press to<br />
enable or disable the traffic feature.<br />
Traffic Alert Prompts (On/Off):<br />
Press to enable or disable the traffic<br />
voice prompts.<br />
Alert if Better Route Available:<br />
Press to prompt an alert if a better<br />
route is available.<br />
Sort Method: Press to display a<br />
submenu of sort options.<br />
. Sort by Distance: Press to<br />
display traffic events in order of<br />
distance with the closest event<br />
shown first.<br />
. Sort by Name: Press to display<br />
traffic events in alphabetical<br />
order.<br />
Show Traffic Events on Map:<br />
Press to display traffic icons on<br />
the map.<br />
. All Traffic Events On: Press to<br />
enable display of all traffic icons<br />
on the map.<br />
. All Traffic Events Off: Press to<br />
disable display of all traffic icons<br />
on the map.<br />
. User Defined Events: Press to<br />
define the individual types of<br />
icons that are displayed for<br />
traffic flow and traffic conditions.<br />
<strong>Infotainment</strong> <strong>System</strong> 65<br />
Traffic Flow<br />
The traffic flow status will display in<br />
green, yellow, or red lines beside<br />
the road.<br />
. Red indicates significantly<br />
impaired traffic flow with average<br />
speed less than 40 km/h<br />
(25 mph).<br />
. Yellow indicates slightly impaired<br />
traffic flow with average speed<br />
between 40 and 73 km/h (25 and<br />
45 mph).<br />
. Green indicates normal traffic<br />
flow with average speed above<br />
73 km/h (45 mph).<br />
Closed Roads, Traffic Delays,<br />
Roadwork, Incidents, and<br />
Advisories<br />
Select the traffic event group for<br />
display on the map screen. Some<br />
events may cover more than one<br />
traffic condition. See the following<br />
traffic conditions.
66 <strong>Infotainment</strong> <strong>System</strong><br />
Traffic Conditions<br />
The following traffic condition icons<br />
may display:<br />
Alert<br />
Road Condition<br />
Press to delete all saved<br />
destinations. A Delete Saved<br />
Destinations submenu displays.<br />
Select the desired options for<br />
deletion and press delete at the<br />
bottom to continue. A confirmation<br />
screen displays requesting to delete<br />
or cancel.<br />
Stopped Traffic<br />
Traffic Jam<br />
Guidance Alerts<br />
Road Visibility<br />
Other<br />
Accident<br />
Road Closed<br />
Delete Saved Destinations<br />
Lane Narrows<br />
Road Work,<br />
Construction<br />
Press to enable the guidance alert<br />
pop-up to be viewed on the map or<br />
on the main screens such as audio,<br />
weather, phone, etc. A checkmark<br />
appears to indicate the guidance<br />
alert mode is on.
Vehicle Settings<br />
See “Vehicle Personalization” in the<br />
Index of the vehicle owner manual<br />
for more information.<br />
Display Settings<br />
Press the Config button on the<br />
Home Page or the CONFIG button<br />
on the faceplate, then select Display<br />
Settings from the list.<br />
The following options may display:<br />
Select Buttons for First Home<br />
Page: Press to customize the first<br />
page of the Home Page.<br />
Display Off: Press to turn off the<br />
display. The display will return when<br />
any radio buttons are pressed or the<br />
screen is touched (if equipped).<br />
Map Settings: Press to enter the<br />
submenu to change Automatic<br />
Zoom, enable Speed Limit display<br />
on map, and change Map Display<br />
settings.<br />
Map Display: Press to change the<br />
screen background.<br />
. The Automatic setting adjusts<br />
the screen background<br />
automatically depending on the<br />
exterior lighting conditions.<br />
.<br />
The Day setting brightens the<br />
map background.<br />
. The Night setting darkens the<br />
map background.<br />
To change the overall brightness<br />
setting for the display, use the<br />
vehicle interior lighting instrument<br />
panel illumination control.<br />
<strong>Infotainment</strong> <strong>System</strong> 67<br />
Global Positioning<br />
<strong>System</strong> (GPS)<br />
The position of the vehicle is<br />
determined by using satellite<br />
signals, various vehicle signals, and<br />
map data.<br />
At times, other interference such as<br />
the satellite condition, road<br />
configuration, condition of the<br />
vehicle, and/or other circumstances<br />
can affect the navigation system's<br />
ability to determine the accurate<br />
position of the vehicle.<br />
The GPS shows the current position<br />
of the vehicle using signals sent by<br />
GPS Satellites. When the vehicle is<br />
not receiving signals from the<br />
satellites, a symbol appears on the<br />
map screen. See Navigation<br />
Symbols on page 51.<br />
This system might not be available<br />
or interference can occur if any of<br />
the following are true:<br />
. Signals are obstructed by tall<br />
buildings, trees, large trucks,<br />
or a tunnel.
68 <strong>Infotainment</strong> <strong>System</strong><br />
. Satellites are being repaired or<br />
improved.<br />
For more information if the GPS is<br />
not functioning properly, see<br />
Problems with Route Guidance on<br />
page 68 and If the <strong>System</strong> Needs<br />
Service on page 69.<br />
Vehicle Positioning<br />
At times, the position of the vehicle<br />
on the map could be inaccurate due<br />
to one or more of the following<br />
reasons:<br />
.<br />
The road system has changed.<br />
. The vehicle is driving on slippery<br />
road surfaces such as sand,<br />
gravel, or snow.<br />
.<br />
The vehicle is traveling on<br />
winding roads or long straight<br />
roads.<br />
. The vehicle is approaching a tall<br />
building or a large vehicle.<br />
. The surface streets run parallel<br />
to a freeway.<br />
. The vehicle has been transferred<br />
by a vehicle carrier or a ferry.<br />
.<br />
The current position calibration<br />
is set incorrectly.<br />
. The vehicle is traveling at high<br />
speed.<br />
. The vehicle changes directions<br />
more than once, or the vehicle is<br />
turning on a turn table in a<br />
parking lot.<br />
. The vehicle is entering and/or<br />
exiting a parking lot, garage, or a<br />
lot with a roof.<br />
.<br />
The GPS signal is not received.<br />
. A roof carrier is installed on the<br />
vehicle.<br />
. Tire chains have been installed.<br />
.<br />
The tires are replaced or worn.<br />
. The tire pressure for the tires is<br />
incorrect.<br />
. This is the first navigation use<br />
after the map data is updated.<br />
. The 12-volt battery is<br />
disconnected for several days.<br />
. The vehicle is driving in heavy<br />
traffic where driving is at low<br />
speeds, and the vehicle is<br />
stopped and started repeatedly.<br />
Problems with Route<br />
Guidance<br />
Inappropriate route guidance can<br />
occur under one or more of the<br />
following conditions:<br />
. The turn was not made on the<br />
road indicated.<br />
. Route guidance might not be<br />
available when using automatic<br />
rerouting for the next right or<br />
left turn.<br />
. The route might not be changed<br />
when using automatic rerouting.<br />
. There is no route guidance when<br />
turning at an intersection.<br />
. Plural names of places might be<br />
announced occasionally.<br />
. It could take a long time to<br />
operate automatic rerouting<br />
during high-speed driving.
<strong>Infotainment</strong> <strong>System</strong> 69<br />
. Automatic rerouting might<br />
display a route returning to the<br />
set waypoint if heading for a<br />
destination without passing<br />
through a set waypoint.<br />
. The route prohibits the entry of a<br />
vehicle due to a regulation by<br />
time or season or any other<br />
regulation which may be given.<br />
. Some routes might not be<br />
searched.<br />
. The route to the destination<br />
might not be shown if there are<br />
new roads, if roads have<br />
recently changed, or if certain<br />
roads are not listed in the map<br />
data. See Maps on page 50.<br />
To recalibrate the vehicle's position<br />
on the map, park with the vehicle<br />
running for two to five minutes, until<br />
the vehicle position updates. Make<br />
sure the vehicle is parked in a<br />
location that is safe and has a clear<br />
view of the sky and away from large<br />
obstruction.<br />
If the <strong>System</strong> Needs<br />
Service<br />
If the navigation system needs<br />
service and the steps listed here<br />
have been followed but there are<br />
still problems, see your dealer for<br />
assistance.<br />
Map Data Updates<br />
The map data in the vehicle is the<br />
most up-to-date information<br />
available when the vehicle was<br />
produced. The map data is updated<br />
periodically, provided that the map<br />
information has changed.<br />
For questions about the operation of<br />
the navigation system or the update<br />
process, contact the GM Nav Disc<br />
Center toll-free phone number,<br />
1-877-NAV-DISC (1-877-628-3472)<br />
or go to the center’s website,<br />
www.gmnavdisc.com. If updates are<br />
needed, call the GM Nav Disc<br />
Center or order a new Map Update<br />
online. To order map data, have the<br />
vehicle’s Vehicle Identification<br />
Number (VIN) available. See<br />
“Vehicle Identification Number<br />
(VIN)” in the owner manual.<br />
After receiving the updated map<br />
data, see Maps on page 50.<br />
Database Coverage<br />
Explanations<br />
Coverage areas vary with respect to<br />
the level of map detail available for<br />
any given area. Some areas feature<br />
greater levels of detail than others.<br />
If this happens, it does not mean<br />
there is a problem with the system.<br />
As the map data is updated, more<br />
detail can become available for<br />
areas that previously had limited<br />
detail. See Map Data Updates on<br />
page 69.
70 <strong>Infotainment</strong> <strong>System</strong><br />
Voice Recognition<br />
Voice recognition allows for<br />
hands-free operation of the<br />
infotainment system features.<br />
Voice recognition can be used when<br />
the radio is on or when Retained<br />
Accessory Power (RAP) is active.<br />
See “Retained Accessory Power<br />
(RAP)” in the owner manual. The<br />
system maintains a minimum<br />
volume level.<br />
Using Voice Recognition<br />
1. Press b / g on the steering<br />
wheel. The audio system mutes.<br />
A voice prompt states, “Please<br />
say a command.” Wait until the<br />
tone is heard before speaking.<br />
If there is no tone, make sure<br />
that the volume is turned up.<br />
While voice recognition is active,<br />
the system displays a g symbol<br />
in the top right of the screen.<br />
2. Clearly speak one of the<br />
commands listed later in this<br />
section.<br />
Press b / g twice on the steering<br />
wheel to skip the voice prompt<br />
messages.<br />
Canceling Voice Recognition<br />
1. Press and release $ / i on<br />
the steering wheel control to<br />
cancel a command, if the system<br />
response does not match the<br />
voice command, or say<br />
“Goodbye” or “Cancel.”<br />
2. The system replies, “Goodbye.”<br />
Helpful Hints for Speaking<br />
Commands<br />
. When multiple commands are<br />
available, choose the command<br />
that works best for you.<br />
. Words in parentheses are<br />
optional. For example, for the<br />
command “Tune FM<br />
(frequency),” saying “Tune FM<br />
87.7” or “Tune FM” are both<br />
valid commands.<br />
. When the command is<br />
recognized, the system will<br />
either perform the function or<br />
ask to confirm the choice.<br />
. When the system does not<br />
recognize the command, the<br />
system says “pardon.”<br />
. If experiencing difficulty with the<br />
system recognizing a command,<br />
confirm that the command is<br />
correct. Try saying the command<br />
clearly or wait for a brief moment<br />
after the tone.<br />
. Background noise such as a<br />
climate control fan positioned on<br />
high, open windows, and very<br />
loud outside noises, even if the<br />
windows are closed, can cause<br />
voice commands to be<br />
misunderstood.<br />
. The system is able to recognize<br />
commands in different<br />
languages, such as English,
Canadian French, and Spanish.<br />
The system only recognizes<br />
commands based on the<br />
language selected.<br />
.<br />
To increase or decrease the<br />
voice volume during a voice<br />
recognition session, turn the<br />
volume knob of the radio,<br />
or press the volume steering<br />
wheel control. If the volume is<br />
adjusted during a voice<br />
recognition session, a Volume<br />
bar appears on the screen<br />
showing the voice volume level<br />
as it is being adjusted. This also<br />
changes the volume of the<br />
guidance prompts.<br />
. When using navigation<br />
commands, take the time to<br />
become familiar with the<br />
address. Long delays when<br />
giving the address can result in<br />
the system not recognizing the<br />
address or routing to different<br />
location than intended.<br />
. When providing the house<br />
number portion of the address,<br />
the system recognizes both digit<br />
format and numerical text. An<br />
example would be to say,<br />
“3-0-0-0-1” or “Thirty<br />
Thousand One.”<br />
. If the system provides<br />
destination in another country on<br />
several attempts, say the<br />
“Change Country” command and<br />
say the country of interest. The<br />
country default is the United<br />
States. To enter a destination in<br />
Canada or Mexico, the country<br />
will first have to be changed in<br />
the system.<br />
Voice Recognition Help<br />
To enter the help playback session,<br />
clearly speak one of the help<br />
commands.<br />
Help: The system plays back more<br />
specific help commands such as<br />
Radio Settings for the user to<br />
choose from.<br />
<strong>Infotainment</strong> <strong>System</strong> 71<br />
Radio: Use this command to learn<br />
about how to select a band (AM,<br />
FM, or XM), and how to change<br />
radio stations by speaking<br />
frequency numbers.<br />
Phone: Use this command to learn<br />
about how to dial, pair a device,<br />
or delete a device.<br />
My Media: Use this command to<br />
learn how to play specific tracks,<br />
artists, albums, devices connected<br />
to the USB port, or to change<br />
sources.<br />
Settings: Use this command to<br />
learn about how to turn Verbose on<br />
or off, or set the language.<br />
Voice Recognition Commands<br />
The following list shows the voice<br />
commands available for the<br />
infotainment system with a brief<br />
description of each. The commands<br />
are listed with the optional words in<br />
parentheses. To use the voice<br />
commands, see the previous<br />
instructions.
72 <strong>Infotainment</strong> <strong>System</strong><br />
Radio Commands<br />
Tune AM, Tune FM, Tune XM,<br />
Tune Pandora, Tune Stitcher:<br />
Instructs the system to go to the<br />
specific band and the last station.<br />
Tune AM (frequency), Tune FM<br />
(frequency), Tune XM (station<br />
number), or Tune XM (station<br />
name): Instructs the system to go<br />
to the specific station.<br />
Thumbs Up: Instructs the system<br />
to give the current song or station a<br />
thumbs up in Pandora or Stitcher.<br />
Thumbs Down: Instructs the<br />
system to give the current song or<br />
station a thumbs down in Pandora<br />
or Stitcher.<br />
Phone Commands<br />
Dial or Call (phone number or<br />
contact): Instructs the system to<br />
start a phone call. For example, say<br />
“Dial 1 248 123 4567.” To call a<br />
phone book contact, say “Dial” or<br />
“Call,” say the name and location,<br />
and then say “Dial.” For example,<br />
say “Call John at Home” or “Call<br />
John at Work.” If a number is not<br />
recognized, the first number in the<br />
list will be called.<br />
Pair or Connect: Instructs the<br />
system to begin pairing a device.<br />
Digit Dial: Instructs the system to<br />
dial a phone number one digit at a<br />
time. After saying the digits,<br />
say “Dial.”<br />
Redial or Redial Last Number:<br />
Instructs the system to dial the last<br />
phone number called.<br />
Select Device or Change Phone:<br />
Instructs the system to switch to a<br />
different paired device. The device<br />
must be selected from the screen or<br />
using the TUNE/MENU knob.<br />
Delete Device: Instructs the<br />
system to delete a paired device.<br />
My Media Commands<br />
CD, AUX, USB, or Bluetooth<br />
Audio: Instructs the system to<br />
change the source.<br />
Play CD: Instructs the system to<br />
play a CD. For example, say<br />
“Play CD.”<br />
The following commands only apply<br />
to USB, iPod, iPhone sources. They<br />
are supported after the device has<br />
been indexed.<br />
Play Artist (artist name): Instructs<br />
the system to play songs by a<br />
specific artist. For example, say<br />
“Play Artist .”<br />
Play Album (album title): Instructs<br />
the system to play a specific album.<br />
Play Song (song title): Instructs<br />
the system to play a specific song.<br />
Play Genre (genre name):<br />
Instructs the system to play songs<br />
of a particular genre.<br />
Search Artist (artist name):<br />
Instructs the system to show a list of<br />
all songs by a specific artist. For<br />
example, say "Search Artist<br />
.”
<strong>Infotainment</strong> <strong>System</strong> 73<br />
Search Composer (composer<br />
name): Instructs the system to<br />
show a list of all songs by a specific<br />
composer. For example, say<br />
"Search Composer<br />
.”<br />
Search Album (album name):<br />
Instructs the system to show a list of<br />
all songs by a specific album. For<br />
example, say "Search Album<br />
.”<br />
Search Genre (genre name):<br />
Instructs the system to show a list of<br />
all songs for a specific genre. For<br />
example, say "Search Genre<br />
.”<br />
Search Folder (folder name):<br />
Instructs the system to show a list of<br />
all songs in a specific folder. For<br />
example, say "Search folder<br />
.”<br />
Search Playlist (playlist name):<br />
Instructs the system to show a list of<br />
all songs in a specific playlist. For<br />
example, say "Search playlist<br />
.”<br />
Search Audiobook (audiobook<br />
name): Instructs the system to<br />
show a list of all tracks in a specific<br />
audiobook. For example, say<br />
"Search audiobook<br />
.”<br />
Search Playlist (playlist name):<br />
Instructs the system to show a list of<br />
all songs in a specific playlist. For<br />
example, say "Search playlist<br />
.”<br />
Search Podcast (podcast name):<br />
Instructs the system to show a list of<br />
all tracks in a specific podcast. For<br />
example, say "Search podcast<br />
.”<br />
More Like This: Instructs the<br />
system to create a playlist of tracks<br />
similar to the current track playing.<br />
Settings Commands<br />
Verbose (set) on (mode), Verbose<br />
(set) off (mode): Instructs the<br />
system to turn voice prompts on or<br />
off. When off, this feature turns off<br />
voice prompts.<br />
Language (language): Instructs<br />
the system to set the language.<br />
List Devices: Instructs the system<br />
to give a list of devices to use.<br />
Other Commands<br />
Goodbye: Instructs the system to<br />
end a phone call or voice<br />
recognition.<br />
Cancel: Instructs the system to<br />
cancel an action.<br />
Go Back, Back, Previous:<br />
Instructs the system to go back to a<br />
prior menu.<br />
Main Menu: Instructs the system to<br />
go to the main menu.<br />
Yes, Yep, Yup, Ya, Sure, Right,<br />
Correct, OK, Positive, You Got it,<br />
Probably, You Bet: These can be<br />
used to say “Yes.”<br />
No, Nope, Na, No way, Wrong,<br />
Incorrect, Negative, Not really, No<br />
I said, No I Did Not, No I Do Not:<br />
These can be used to say “No.”
74 <strong>Infotainment</strong> <strong>System</strong><br />
Next Page, Page Down: Instructs<br />
the system to scroll forward one<br />
page in a list.<br />
Previous Page, Page Up: Instructs<br />
the system to scroll back one page<br />
in a list.<br />
Navigation Commands (If<br />
Equipped)<br />
To activate the navigation voice<br />
recognition:<br />
1. Press b / g on the steering<br />
wheel. The audio system mutes.<br />
A voice prompt says, “Please<br />
say a command.” Wait until the<br />
tone is heard before speaking.<br />
If there is no tone, make sure<br />
the volume is turned up.<br />
While voice recognition is active,<br />
the system displays a symbol in<br />
the top right of the screen.<br />
2. Clearly speak the command<br />
“Navigation.”<br />
3. Clearly speak one of the<br />
commands in this section.<br />
The following commands only apply<br />
once the Navigation command is<br />
given.<br />
Change Country: Changes the<br />
country origin to input a destination<br />
from that region. The system will<br />
accept United States, Canada,<br />
or Mexico.<br />
Address or Destination: Allows<br />
an address to be stated as a<br />
one-shot method. The system will<br />
recognize the address if stated all at<br />
once or say a city center. An<br />
example is to say, “200<br />
Renaissance Street, Detroit,<br />
Michigan” or “Detroit, Michigan.”<br />
Directed Address: Allows an<br />
address to be stated one step at a<br />
time. The format will be State, City,<br />
Street, then House Number.<br />
Intersection: Allows an<br />
Intersection to be stated as the<br />
destination. The format will be<br />
State, City, Street, then Junction.<br />
Home: Instructs the system to start<br />
guidance to address saved as<br />
My Home.<br />
Contact: When a phone is paired<br />
to the system, which contains<br />
Address Information stored for<br />
contacts, the address associated<br />
with that contact can become a<br />
route. If the system cannot resolve<br />
the address, an error displays.<br />
Points of Interest or POI: Allows a<br />
Point of Interest to be stated as a<br />
destination. Become familiar with<br />
the POI categories and<br />
sub-categories in the system by<br />
pressing Destination from the Home<br />
Page or DEST from the faceplate,<br />
then selecting Point of Interest. POI<br />
commands for Along Route and<br />
Around Destination will be available<br />
if route guidance is active.<br />
Add Waypoint: Allows addition of<br />
individual waypoints or the<br />
destination. The system will ask for<br />
the choice of entry method to<br />
continue. An example is to say, “POI<br />
Along Route” or “Intersection.”
<strong>Infotainment</strong> <strong>System</strong> 75<br />
Delete Waypoint: When guidance<br />
is activate, this command allows the<br />
deletion of individual waypoints or<br />
the destination. If guidance is not<br />
active the system will indicate the<br />
destination list is empty.<br />
Where Am I?, My Location,<br />
or Current Position: Instructs the<br />
system to give the current position<br />
of the vehicle.<br />
Help: The system plays back more<br />
specific help commands associated<br />
with Navigation or a Navigation<br />
sub-feature.<br />
OnStar Command (If Equipped)<br />
To activate OnStar voice<br />
recognition, press = on the mirror<br />
or press b / g on the steering<br />
wheel and say “OnStar” after the<br />
beep. This will active the OnStar<br />
voice control. See OnStar in the<br />
owner manual.<br />
OnStar (If Equipped)<br />
Command<br />
To activate OnStar voice<br />
recognition, press = on the mirror.<br />
See “OnStar” in the owner manual.<br />
OnStar: These commands can be<br />
used after the OnStar button is<br />
pressed.<br />
Help Commands<br />
. Help<br />
. Hands-Free Calling<br />
. Turn-by-Turn Directions<br />
. OnStar Info<br />
After each list of help commands,<br />
the following are available:<br />
. Go Back<br />
. Repeat<br />
. Cancel<br />
. Help<br />
.<br />
Goodbye<br />
Hands-Free Calling<br />
. Call<br />
. Store<br />
. Commands<br />
‐ Call<br />
‐ Store<br />
‐ My Number<br />
‐ Minutes<br />
‐ Store Last Number<br />
‐ Digit Dial<br />
‐ Redial<br />
‐ Dial<br />
‐ Number Recall<br />
‐ Directory<br />
‐ Digit Store<br />
Turn-by-Turn Directions<br />
. Directory<br />
. Plan Route<br />
.<br />
Commands<br />
‐ Directory
76 <strong>Infotainment</strong> <strong>System</strong><br />
‐ Store Destination<br />
‐ Plan Route<br />
‐ Delete Destination<br />
‐ Mute Directions<br />
OnStar Info<br />
.<br />
Messages<br />
. Minutes<br />
. My Number<br />
. Commands<br />
‐ Messages<br />
‐ Virtual Advisor<br />
‐ My Number<br />
‐ Minutes<br />
‐ Number Recall<br />
‐ Advisor Playback<br />
. Virtual Advisor<br />
Virtual Advisor<br />
Choose this option to connect to a<br />
live Advisor.<br />
Bluetooth Phone/<br />
Devices<br />
Bluetooth<br />
Overview<br />
For vehicles equipped with<br />
Bluetooth capability, the system can<br />
interact with many cell phones and<br />
devices, allowing:<br />
. Placing and receiving hands-free<br />
calls.<br />
. Sharing of the cell phone’s<br />
address book or contact list with<br />
the vehicle. The phone book will<br />
only display when that phone is<br />
connected.<br />
. Placing outgoing calls by voice<br />
recognition.<br />
The system can be used while in<br />
ON/RUN, ACC/ACCESSORY,<br />
or Retained Accessory Power<br />
(RAP). The range of the Bluetooth<br />
system can be up to 9.1 m (30 ft).<br />
The radio can connect to most<br />
Bluetooth-enabled phones.<br />
Available features and functions<br />
may be dependent on the device.<br />
Bluetooth Controls<br />
Use the buttons on the infotainment<br />
system and the steering wheel to<br />
operate the Bluetooth system.<br />
Steering Wheel Controls<br />
b / g (Push to Talk): Press to<br />
answer incoming calls and start<br />
voice recognition.<br />
$ / i (Mute/End Call): Press to<br />
end a call, decline an incoming call,<br />
or cancel voice recognition.<br />
+ x − (Volume): Press + or − to<br />
increase or decrease the volume.<br />
<strong>Infotainment</strong> <strong>System</strong> Controls<br />
For information about how to<br />
navigate the menu system using the<br />
infotainment controls, see Overview<br />
on page 3.<br />
V / $ (Phone/Mute): Press to<br />
enter the Phone main menu. Press<br />
and hold to mute or unmute.
Voice Recognition<br />
The voice recognition system uses<br />
commands to control the system<br />
and dial phone numbers.<br />
When using voice recognition:<br />
. The system may not recognize<br />
voice commands if there is too<br />
much background noise.<br />
. A tone sounds to indicate that<br />
the system is ready for a voice<br />
command. Wait for the tone and<br />
then speak.<br />
. Speak clearly in a calm and<br />
natural voice.<br />
See Voice Recognition on page 70.<br />
Audio <strong>System</strong><br />
Sound comes through the vehicle's<br />
front audio system speakers and<br />
overrides the audio system. Use the<br />
O /VOL knob during a call to<br />
change the volume level. The<br />
adjusted volume level remains in<br />
memory for later calls. The system<br />
maintains a minimum volume level.<br />
See Voice Recognition on page 70.<br />
Bluetooth Audio<br />
See Bluetooth Audio on page 46.<br />
Pairing with <strong>Infotainment</strong><br />
Controls<br />
A Bluetooth-enabled cell phone<br />
must be paired and then connected<br />
to the vehicle before it can be used.<br />
See your cell phone manufacturer's<br />
user guide for Bluetooth functions<br />
before pairing the cell phone. If a<br />
Bluetooth phone is not connected,<br />
calls will be made using OnStar<br />
Hands-Free Calling, if available.<br />
See “OnStar” in the owner manual.<br />
Pairing Information<br />
. A Bluetooth-enabled phone and<br />
an audio playback device can be<br />
paired to the system at the<br />
same time.<br />
. Up to five devices can be paired<br />
to the Bluetooth system.<br />
. The pairing process is disabled<br />
when the vehicle is moving.<br />
<strong>Infotainment</strong> <strong>System</strong> 77<br />
. Pairing only needs to be<br />
completed once, unless the<br />
pairing information on the cell<br />
phone changes or the cell phone<br />
is deleted from the system.<br />
. Only one paired cell phone can<br />
be connected to the Bluetooth<br />
system at a time.<br />
. If multiple paired cell phones are<br />
within range of the system, the<br />
radio will connect to the first<br />
phone in the list or to the phone<br />
that was previously connected.<br />
Pairing a Phone/Device<br />
1. Press the CONFIG button<br />
or V / $.<br />
2. Select Phone Settings.<br />
3. Select Pair Device (Phone). The<br />
radio displays “Please start<br />
Bluetooth search on your phone.<br />
Confirm or enter number:.” If the<br />
device supports a four-digit<br />
Personal Identification Number<br />
(PIN), it will display. The PIN is<br />
used in Step 5.
78 <strong>Infotainment</strong> <strong>System</strong><br />
4. Start the pairing process on the<br />
cell phone to be paired to the<br />
vehicle. See the cell phone<br />
manufacturer's user guide.<br />
5. Locate and select the device<br />
named after the vehicle make<br />
and model in the list on the cell<br />
phone. Follow the instructions<br />
on the cell phone to enter the<br />
PIN provided in Step 4, or to<br />
confirm the six-digit code<br />
matches. The system recognizes<br />
the new connected phone after<br />
the pairing process is complete.<br />
6. If the phone prompts to accept<br />
connection or allow phone book<br />
download, select always accept<br />
and allow. The phone book may<br />
not be available if not accepted.<br />
Some phones will put<br />
connection request or<br />
phonebook request in a pull<br />
down task bar at the top of the<br />
screen. Drag down the task bar<br />
and look for connection/<br />
phonebook request and accept.<br />
7. Repeat to pair additional<br />
phones.<br />
Listing All Paired and Connected<br />
Phones/Devices<br />
1. Press the CONFIG button.<br />
2. Select Phone Settings.<br />
3. Select Device List.<br />
Deleting a Paired Phone/Device<br />
1. Press the CONFIG button.<br />
2. Select Phone Settings.<br />
3. Select Device List.<br />
4. Select the phone to delete and<br />
follow the screen prompts.<br />
Connecting to a Different Phone<br />
To connect to a different phone, the<br />
new phone must be in the vehicle<br />
and available to be connected to the<br />
Bluetooth system before the<br />
process is started.<br />
1. Press the CONFIG button.<br />
2. Select Phone Settings.<br />
3. Select Device List.<br />
4. Select the new phone to connect<br />
to and follow the screen<br />
prompts.<br />
Pairing with Voice Recognition<br />
A Bluetooth-enabled cell phone<br />
must be paired and then connected<br />
to the vehicle before it can be used.<br />
See the cell phone manufacturer's<br />
user guide for Bluetooth functions<br />
before pairing the cell phone. If a<br />
Bluetooth phone is not connected,<br />
calls will be made using OnStar<br />
Hands-Free Calling, if available.<br />
See “OnStar” in the owner manual<br />
for more information.<br />
Pairing a Phone<br />
1. Press b / g. The system<br />
responds “Please Say a<br />
Command,” followed by a tone.<br />
2. Say “Pair.” The system responds<br />
with “Please search for<br />
Bluetooth devices on your<br />
phone, select your vehicle,<br />
confirm and enter the PIN<br />
provided on the screen.”
<strong>Infotainment</strong> <strong>System</strong> 79<br />
3. Start the search for Bluetooth<br />
devices on the phone. Then<br />
select the device and follow the<br />
instructions on the phone by<br />
either entering the four-digit PIN<br />
or confirming the six-digit<br />
passcode. The PIN is used in<br />
Step 4.<br />
4. Locate and select the device<br />
named after the vehicle make<br />
and model in the list on the cell<br />
phone. Follow the instructions<br />
on the cell phone to enter the<br />
PIN provided in Step 3 or to<br />
confirm the six-digit code<br />
matches. The system responds<br />
“successfully paired.”<br />
5. Repeat Steps 1−4 to pair<br />
additional phones.<br />
Listing All Paired and Connected<br />
Phones<br />
The system can list all cell phones<br />
paired to it. If a paired cell phone is<br />
also connected to the vehicle, the<br />
system responds with “is connected”<br />
after that phone name.<br />
1. Press b / g. The system<br />
responds “Please Say a<br />
Command,” followed by a tone.<br />
2. Say “Device List.”<br />
Deleting a Paired Phone<br />
If the phone name to delete is<br />
unknown, see “Listing All Paired<br />
and Connected Phones.”<br />
1. Press b / g. The system<br />
responds “Please Say a<br />
Command,” followed by a tone.<br />
2. Say “Delete Device.”<br />
3. The system responds with: “To<br />
delete a device, please touch its<br />
name on the screen.” Select the<br />
device to delete on the display<br />
and it will be removed.<br />
To cancel this command, press $ /<br />
i on the steering wheel control or<br />
press the / BACK button on the<br />
radio faceplate.<br />
Connecting to a Different Phone<br />
or Device<br />
To connect to a different cell phone,<br />
the system looks for the next<br />
available cell phone. Depending on<br />
the cell phone to be connected, this<br />
command may need to be repeated.<br />
1. Press b / g. The system<br />
responds “Please Say a<br />
Command,” followed by a tone.<br />
2. Say “Change Phone.”<br />
. To select a device, press<br />
the name on the display.<br />
. If another cell phone is not<br />
found, the original phone<br />
remains connected.<br />
Making a Call Using Phone<br />
Book and <strong>Infotainment</strong><br />
Controls<br />
For cell phones that support the<br />
phone book feature, the Bluetooth<br />
system can use the contacts stored<br />
on the cell phone to make calls. See<br />
the cell phone manufacturer‘s user
80 <strong>Infotainment</strong> <strong>System</strong><br />
guide or contact the wireless<br />
provider to find out if this feature is<br />
supported.<br />
When a cell phone supports the<br />
phone book feature, the Phone<br />
Book and Call Lists menus are<br />
automatically available.<br />
The Phone Book menu allows<br />
access to the phone book stored in<br />
the cell phone to make a call.<br />
The Call Lists menu allows access<br />
to the phone numbers from the<br />
Incoming Calls, Outgoing Calls, and<br />
Missed Calls menus on the cell<br />
phone to make a call.<br />
The radio will display the first 1,000<br />
contacts and the phone numbers for<br />
each contact including Home, Work,<br />
Mobile, and Other.<br />
To make a call using the Phone<br />
Book menu:<br />
1. Press V / $ once on the radio<br />
or the Phone screen button.<br />
2. Select Phone Book.<br />
3. Select the letter group of the<br />
phone book entry to scroll<br />
through the list of names/<br />
numbers.<br />
4. Select the name.<br />
5. Select the number to call.<br />
To make a call using the Call<br />
Lists menu:<br />
1. Press V / $ once on the radio<br />
or the Phone screen button.<br />
2. Select Call Lists.<br />
3. Select the Incoming Calls,<br />
Outgoing Calls, or Missed<br />
Calls list.<br />
4. Select the name or number<br />
to call.<br />
Making a Call Using the<br />
<strong>Infotainment</strong> Controls<br />
To make a call:<br />
1. Press V / $ once on the radio<br />
or the Phone screen button.<br />
2. Press Enter Number.<br />
3. Enter the phone number.<br />
4. Select OK to start dialing the<br />
number.<br />
5. Select Call to place the call.<br />
To make a call using voice<br />
recognition, see “Making a Call”<br />
under Hands-Free Phone on<br />
page 82.<br />
Accepting or Declining a Call<br />
When an incoming call is received,<br />
the infotainment system mutes and<br />
a ring tone is heard in the vehicle.<br />
Using the <strong>Infotainment</strong> Controls<br />
Turn the TUNE/MENU knob to<br />
“Answer” or “Decline” and press the<br />
outer ring of the TUNE/MENU knob<br />
or press Accept or Decline on the<br />
screen.<br />
Using Steering Wheel Controls<br />
Press b / g to answer or $ / i to<br />
decline the call.
Call Waiting Using the<br />
<strong>Infotainment</strong> Controls<br />
Call waiting must be supported on<br />
the Bluetooth phone and enabled by<br />
the wireless service carrier to work.<br />
Switching Between Calls (Call<br />
Waiting Calls Only)<br />
To switch between calls turn and<br />
press the outer ring of the TUNE/<br />
MENU knob and select Switch Call<br />
or select Switch Call on the screen.<br />
Call Waiting Using Steering<br />
Wheel Controls<br />
Call waiting must be supported on<br />
the cell phone and enabled by the<br />
wireless service carrier.<br />
.<br />
Press b / g to answer an<br />
incoming call when another call<br />
is active. The original call is<br />
placed on hold.<br />
. Press b / g again to return to<br />
the original call.<br />
. To decline answering the<br />
incoming call, press Decline on<br />
the screen or take no action.<br />
. Press $ / i to disconnect the<br />
current call and switch to the call<br />
on hold.<br />
Conference Calling Using the<br />
<strong>Infotainment</strong> Controls<br />
Conference calling and three-way<br />
calling must be supported on the<br />
Bluetooth phone and enabled by the<br />
wireless service carrier to work. This<br />
feature is only supported when the<br />
vehicle is not moving.<br />
To start a conference while in a<br />
current call:<br />
1. Turn and press the outer ring of<br />
the TUNE/MENU knob and<br />
select Enter Number.<br />
2. Enter the phone number and<br />
select OK.<br />
3. After the call has been placed,<br />
turn the TUNE/MENU knob and<br />
choose Merge Calls.<br />
<strong>Infotainment</strong> <strong>System</strong> 81<br />
4. To add more callers to the<br />
conference call, repeat<br />
Steps 1−3. The number of<br />
callers that can be added is<br />
limited by your wireless service<br />
carrier.<br />
Ending a Call<br />
Using the <strong>Infotainment</strong> Controls<br />
Turn and press the outer ring of the<br />
TUNE/MENU knob and select Hang<br />
Up or press Hang Up on the screen.<br />
Using Steering Wheel Controls<br />
Press $ / i.<br />
Muting a Call<br />
During a call, all sounds from inside<br />
the vehicle can be muted so that the<br />
person on the other end of the call<br />
cannot hear them.<br />
Using the <strong>Infotainment</strong> Controls<br />
Turn and press the outer ring of the<br />
TUNE/MENU knob and select Mute<br />
Call. Press again to cancel mute.
82 <strong>Infotainment</strong> <strong>System</strong><br />
Transferring a Call<br />
Audio can be transferred between<br />
the Bluetooth system and the cell<br />
phone.<br />
The cell phone must be paired and<br />
connected with the Bluetooth<br />
system before a call can be<br />
transferred.<br />
To Transfer Audio from the<br />
Bluetooth <strong>System</strong> to a Cell Phone<br />
During a call with the audio in the<br />
vehicle, press the Transfer Call<br />
button on the screen or press and<br />
hold the b / g button on the<br />
steering wheel.<br />
To Transfer Audio to the Bluetooth<br />
<strong>System</strong> from a Cell Phone<br />
Use the audio transfer feature on<br />
the cell phone. See your cell phone<br />
manufacturer's user guide for more<br />
information. Press the Transfer call<br />
button on the screen or press and<br />
hold the b / g button on the<br />
steering wheel.<br />
Dual Tone Multi-Frequency<br />
(DTMF) Tones<br />
The in-vehicle Bluetooth system can<br />
send numbers during a call. This is<br />
used when calling a menu-driven<br />
phone system.<br />
Using the <strong>Infotainment</strong> Controls<br />
1. Turn and press the outer ring of<br />
the TUNE/MENU knob and<br />
select Enter Number.<br />
2. Enter the phone number,<br />
or select Enter Number on the<br />
screen and select digits, then<br />
press OK.<br />
Hands-Free Phone<br />
Using Bluetooth Voice<br />
Recognition<br />
To use voice recognition, press the<br />
b / g button on the steering wheel.<br />
Use the commands below for the<br />
various voice features. For<br />
additional information, say “Help”<br />
while in a voice recognition menu.<br />
Making a Call<br />
Calls can be made using the<br />
following commands.<br />
Dial or Call: These commands can<br />
be used interchangeably to dial a<br />
phone number.<br />
Digit Dial: This command allows a<br />
phone number to be dialed by<br />
entering the digits one at a time.<br />
Re-dial: This command dials the<br />
last number used on the cell phone.<br />
Using the “Dial” or “Call”<br />
Command<br />
To call a number:<br />
1. Press b / g. The system<br />
responds “Please Say a<br />
Command,” followed by a tone.<br />
2. Say “Dial” or “Call.”<br />
3. Say the entire number without<br />
pausing, followed by “Dial.”<br />
Once connected, the person called<br />
will be heard through the audio<br />
speakers.
To call using a name tag:<br />
1. Press b / g. The system<br />
responds “Please Say a<br />
Command,” followed by a tone.<br />
2. Say “Dial” or “Call” and then say<br />
the name tag. For example “Call<br />
John at Work.”<br />
Once connected, the person called<br />
will be heard through the audio<br />
speakers.<br />
Using the “Digit Dial” Command<br />
This allows a phone number to be<br />
dialed by entering the digits one at<br />
a time.<br />
1. Press b / g. The system<br />
responds “Please Say a<br />
Command,” followed by a tone.<br />
2. Say “Digit Dial.”<br />
3. Say each digit, one at a time, to<br />
dial. After each digit is entered,<br />
the system repeats back the<br />
digit it heard followed by a tone.<br />
After the last digit has been<br />
entered, say “Dial.”<br />
If an unwanted number is repeated<br />
back, say “Clear” to clear the last<br />
number.<br />
Once connected, the person called<br />
will be heard through the audio<br />
speakers.<br />
Using the “Re-dial” Command<br />
1. Press b / g. The system<br />
responds “Please Say a<br />
Command,” followed by a tone.<br />
2. After the tone, say “Re-dial.” The<br />
system dials the last number<br />
called from the connected cell<br />
phone.<br />
Once connected, the person called<br />
will be heard through the audio<br />
speakers.<br />
Clearing the <strong>System</strong><br />
Unless information is deleted out of<br />
the vehicle Bluetooth system, it will<br />
be retained. This includes phone<br />
pairing information. For directions<br />
on how to delete this information,<br />
see “Deleting a Paired Phone/<br />
Device.”<br />
<strong>Infotainment</strong> <strong>System</strong> 83<br />
Trademarks and<br />
License Agreements<br />
FCC Information<br />
See “Radio Frequency Statement”<br />
in the owner manual for information<br />
regarding Part 15 of the Federal<br />
Communications Commission (FCC)<br />
rules and with Industry Canada<br />
Standards RSS-GEN/210/220/310.<br />
Mexico:<br />
“La operación de este equipo está<br />
sujeta a las siguientes dos<br />
condiciones: (1) es posible que este<br />
equipo o dispositivo no cause<br />
interferencia perjudicial y (2) este<br />
equipo o dispositivo debe aceptar<br />
cualquier interferencia, incluyendo<br />
la que pueda causar su operación<br />
no deseada.”
84 <strong>Infotainment</strong> <strong>System</strong><br />
“Made for iPod” and “Made for<br />
iPhone” mean that an electronic<br />
accessory has been designed to<br />
connect specifically to iPod or<br />
iPhone and has been certified by<br />
the developer to meet Apple<br />
performance standards.<br />
iPod and iPhone are trademarks of<br />
Apple Computer, Inc., registered in<br />
the U.S. and other countries.<br />
Fees and Taxes: Subscription fee,<br />
taxes, one time activation fee, and<br />
other fees may apply. Subscription<br />
fee is consumer only. All fees and<br />
programming subject to change.<br />
Subscriptions subject to Customer<br />
Agreement available at<br />
www.siriusxm.com. SiriusXM®<br />
service only available in the<br />
48 contiguous United States and<br />
Canada.<br />
In Canada: Some deterioration of<br />
service may occur in extreme<br />
northern latitudes. This is beyond<br />
the control of SiriusXM® Satellite<br />
Radio.<br />
Explicit Language Notice: Channels<br />
with frequent explicit language are<br />
indicated with an “XL” preceding the<br />
channel name. Channel blocking is<br />
available for SiriusXM Satellite<br />
Radio receivers by notifying<br />
SiriusXM:<br />
. USA: 866-635-2349 or see<br />
www.siriusxm.com.<br />
. Canada: 877-209-0079 or see<br />
www.xmradio.ca.<br />
It is prohibited to copy, decompile,<br />
disassemble, reverse engineer,<br />
hack, manipulate, or otherwise<br />
make available any technology or<br />
software incorporated in receivers<br />
compatible with the SiriusXM<br />
Satellite Radio <strong>System</strong> or that<br />
support the SiriusXM website, the<br />
Online Service or any of its content.<br />
Furthermore, the AMBER voice<br />
compression software included in<br />
this product is protected by<br />
intellectual property rights including<br />
patent rights, copyrights, and trade<br />
secrets of Digital Voice<br />
<strong>System</strong>s, Inc.<br />
General Requirements:<br />
1. A License Agreement from<br />
SiriusXM is required for any<br />
product that incorporates<br />
SiriusXM Technology and/or for<br />
use of any of the SiriusXM<br />
marks to be manufactured,<br />
distributed, or marketed in the<br />
SiriusXM Service Area.<br />
2. For products to be distributed,<br />
marketed, and/or sold in<br />
Canada, a separate agreement
<strong>Infotainment</strong> <strong>System</strong> 85<br />
is required with Canadian<br />
Satellite Radio Inc. (operating as<br />
XM Canada).<br />
Gracenote<br />
Gracenote®, Gracenote logo and<br />
logotype, and the "Powered by<br />
Gracenote" logo are either a<br />
registered trademark or a trademark<br />
of Gracenote, Inc. in the United<br />
States and/or other countries.<br />
Bluetooth<br />
The Bluetooth® word mark and<br />
logos are owned by the Bluetooth®<br />
SIG, Inc. and any use of such marks<br />
by General Motors is under license.<br />
Other trademarks and trade names<br />
are those of their respective owners.<br />
Pandora (If Equipped)<br />
Pandora is a registered trademark<br />
of Pandora Media, Inc., used under<br />
license.<br />
Manufactured under license from<br />
Dolby Laboratories. Dolby and the<br />
double-D symbol are trademarks of<br />
Dolby Laboratories.<br />
Map End User License<br />
Agreement (Optional<br />
Equipment Applies Where<br />
Equipped)<br />
END USER TERMS<br />
The Map Data (“Data”) is provided<br />
for your personal, internal use only<br />
and not for resale. It is protected by<br />
copyright, and is subject to the<br />
following terms (this “End User<br />
License Agreement”) and conditions<br />
which are agreed to by you, on the<br />
one hand, and NAVTEQ North<br />
America, LLC (“NT”) and its<br />
licensors (including their licensors<br />
and suppliers) on the other hand.<br />
The Data for areas of Canada<br />
includes information taken with<br />
permission from Canadian<br />
authorities, including: © Her Majesty<br />
the Queen in Right of Canada,<br />
© Queen's Printer for Ontario,<br />
© Canada Post Corporation,<br />
GeoBase®.<br />
NT holds a nonexclusive license<br />
from the United States Postal<br />
Service® to publish and sell ZIP+4®<br />
information.<br />
© United States Postal Service®<br />
2012. Prices are not established,<br />
controlled, or approved by the<br />
United States Postal Service®. The<br />
following trademarks and<br />
registrations are owned by the<br />
USPS: United States Postal<br />
Service, USPS, and ZIP+4.<br />
TERMS AND CONDITIONS<br />
Personal Use Only: You agree to<br />
use this Data for the solely<br />
personal, noncommercial purposes<br />
for which you were licensed, and<br />
not for service bureau, timesharing<br />
or other similar purposes. Except as
86 <strong>Infotainment</strong> <strong>System</strong><br />
otherwise set forth herein, you<br />
agree not to otherwise reproduce,<br />
copy, modify, decompile,<br />
disassemble or reverse engineer<br />
any portion of this Data, and may<br />
not transfer or distribute it in any<br />
form, for any purpose, except to the<br />
extent permitted by mandatory laws.<br />
You may transfer the Data and all<br />
accompanying materials on a<br />
permanent basis if you retain no<br />
copies and the recipient agrees to<br />
the terms of this End User License<br />
Agreement. Multi-disc sets may only<br />
be transferred or sold as a complete<br />
set as provided to you and not as a<br />
subset thereof.<br />
Restrictions<br />
Except where you have been<br />
specifically licensed to do so by NT<br />
and without limiting the preceding<br />
paragraph, you may not (a) use this<br />
Data with any products, systems,<br />
or applications installed or otherwise<br />
connected to or in communication<br />
with vehicles capable of vehicle<br />
navigation, positioning, dispatch,<br />
real time route guidance, fleet<br />
management or similar applications;<br />
or (b) with, or in communication<br />
with, including without limitation,<br />
cellular phones, palmtop and<br />
handheld computers, pagers, and<br />
personal digital assistants or PDAs.<br />
Warning<br />
This Data may contain inaccurate or<br />
incomplete information due to the<br />
passage of time, changing<br />
circumstances, sources used, and<br />
the nature of collecting<br />
comprehensive geographic data,<br />
any of which may lead to incorrect<br />
results.<br />
No Warranty<br />
This Data is provided to you “as is,”<br />
and you agree to use it at your own<br />
risk. NT and its licensors (and their<br />
licensors and suppliers) make no<br />
guarantees, representations,<br />
or warranties of any kind, express or<br />
implied, arising by law or otherwise,<br />
including but not limited to, content,<br />
quality, accuracy, completeness,<br />
effectiveness, reliability, fitness for a<br />
particular purpose, usefulness, use<br />
or results to be obtained from this<br />
Data, or that the Data or server will<br />
be uninterrupted or error free.<br />
Disclaimer of Warranty<br />
THE DATABASE IS PROVIDED ON<br />
AN “AS IS” AND “WITH ALL<br />
FAULTS BASIS” AND BOSCH<br />
(AND THEIR LICENSORS AND<br />
SUPPLIERS) EXPRESSLY<br />
DISCLAIM ALL OTHER<br />
WARRANTIES, EXPRESS OR<br />
IMPLIED, INCLUDING BUT NOT<br />
LIMITED TO, THE IMPLIED<br />
WARRANTIES OF<br />
NON-INFRINGEMENT,<br />
MERCHANTABILITY,<br />
SATISFACTORY QUALITY,<br />
ACCURACY, TITLE AND FITNESS<br />
FOR A PARTICULAR PURPOSE.<br />
NO ORAL OR WRITTEN ADVICE<br />
OR INFORMATION PROVIDED BY<br />
BOSCH (OR ANY OF THEIR<br />
LICENSORS, AGENTS,<br />
EMPLOYEES, OR THIRD PARTY<br />
PROVIDERS) SHALL CREATE A<br />
WARRANTY, AND YOU ARE NOT<br />
ENTITLED TO RELY ON ANY<br />
SUCH ADVICE OR INFORMATION.
<strong>Infotainment</strong> <strong>System</strong> 87<br />
THIS DISCLAIMER OF<br />
WARRANTIES IS AN ESSENTIAL<br />
CONDITION OF THIS<br />
AGREEMENT.<br />
Disclaimer of Liability<br />
NT AND ITS LICENSORS<br />
(INCLUDING THEIR LICENSORS<br />
AND SUPPLIERS) SHALL NOT BE<br />
LIABLE TO YOU IN RESPECT OF<br />
ANY CLAIM, DEMAND OR<br />
ACTION, IRRESPECTIVE OF THE<br />
NATURE OF THE CAUSE OF THE<br />
CLAIM, DEMAND OR ACTION<br />
ALLEGING ANY LOSS, INJURY<br />
OR DAMAGES, DIRECT OR<br />
INDIRECT, WHICH MAY RESULT<br />
FROM THE USE OR POSSESSION<br />
OF THIS DATA; OR FOR ANY<br />
LOSS OF PROFIT, REVENUE,<br />
CONTRACTS OR SAVINGS, OR<br />
ANY OTHER DIRECT, INDIRECT,<br />
INCIDENTAL, SPECIAL OR<br />
CONSEQUENTIAL DAMAGES<br />
ARISING OUT OF YOUR USE OF<br />
OR INABILITY TO USE THIS DATA,<br />
ANY DEFECT IN THIS DATA, OR<br />
THE BREACH OF THESE TERMS<br />
OR CONDITIONS, WHETHER IN<br />
AN ACTION IN CONTRACT OR<br />
TORT OR BASED ON A<br />
WARRANTY, EVEN IF NT OR ITS<br />
LICENSORS HAVE BEEN<br />
ADVISED OF THE POSSIBILITY<br />
OF SUCH DAMAGES. Some<br />
States, Territories, and Countries do<br />
not allow certain liability exclusions<br />
or damages limitations, so to that<br />
extent the above may not apply<br />
to you.<br />
Export Control<br />
You agree not to export from<br />
anywhere any part of the Data<br />
provided to you or any direct<br />
product thereof except in<br />
compliance with, and with all<br />
licenses and approvals required<br />
under, applicable export laws, rules<br />
and regulations. Entire Agreement:<br />
These terms and conditions<br />
constitute the entire agreement<br />
between NT (and its licensors,<br />
including their licensors and<br />
suppliers) and you pertaining to the<br />
subject matter hereof, and<br />
supersedes in their entirety any and<br />
all written or oral agreements<br />
previously existing between us with<br />
respect to such subject matter.<br />
Governing Law<br />
The above terms and conditions<br />
shall be governed by the laws of the<br />
State of Illinois, without giving effect<br />
to (i) its conflict of laws provisions,<br />
or (ii) the United Nations Convention<br />
for Contracts for the International<br />
Sale of Goods, which is explicitly<br />
excluded. You agree to submit to<br />
the jurisdiction of the State of Illinois<br />
for any and all disputes, claims, and<br />
actions arising from or in connection<br />
with the Data provided to you<br />
hereunder.
88 <strong>Infotainment</strong> <strong>System</strong><br />
Government End Users<br />
If the Data is being acquired by or<br />
on behalf of the United States<br />
government or any other entity<br />
seeking or applying rights similar to<br />
those customarily claimed by the<br />
United States government, this Data<br />
is a “commercial item” as that term<br />
is defined at 48 C.F.R. (“FAR”)<br />
2.101, is licensed in accordance<br />
with this End User License<br />
Agreement, and each copy of Data<br />
delivered or otherwise furnished<br />
shall be marked and embedded as<br />
appropriate with the following<br />
“Notice of Use,” and be treated in<br />
accordance with such Notice:<br />
NOTICE OF USE<br />
CONTRACTOR (MANUFACTURER/<br />
SUPPLIER)<br />
NAME:<br />
NAVTEQ<br />
CONTRACTOR (MANUFACTURER/<br />
SUPPLIER)<br />
ADDRESS:<br />
425 West Randolph Street,<br />
Chicago, IL 60606.<br />
This Data is a commercial item as<br />
defined in FAR 2.101 and is subject<br />
to the End User License Agreement<br />
under which this Data was provided.<br />
© 2012 NAVTEQ. All rights<br />
reserved.<br />
If the Contracting Officer, federal<br />
government agency, or any federal<br />
official refuses to use the legend<br />
provided herein, the Contracting<br />
Officer, federal government agency,<br />
or any federal official must notify<br />
NAVTEQ prior to seeking additional<br />
or alternative rights in the Data.<br />
END USER NOTICE<br />
The marks of companies displayed<br />
by this product to indicate business<br />
locations are the marks of their<br />
respective owners. The use of such<br />
marks in this product does not imply<br />
any sponsorship, approval,<br />
or endorsement by such companies<br />
of this product.
A<br />
Accepting or Declining a Call . . . . 80<br />
Adding or Removing XM<br />
Categories . . . . . . . . . . . . . . . . . . . . . 19<br />
AM . . . . . . . . . . . . . . . . . . . . . . . . . . . . . . 24<br />
AM-FM Radio . . . . . . . . . . . . . . . . . . . . 15<br />
Audio<br />
Bluetooth . . . . . . . . . . . . . . . . . . . . . . .46<br />
Audio Players . . . . . . . . . . . . . . . . . . . 36<br />
CD . . . . . . . . . . . . . . . . . . . . . . . . . . . . .36<br />
MP3 . . . . . . . . . . . . . . . . . . . . . . . . . . . .37<br />
Audio <strong>System</strong> . . . . . . . . . . . . . . . . . . . . 77<br />
Radio Reception . . . . . . . . . . . . . . . .24<br />
Autostore . . . . . . . . . . . . . . . . . . . . . . . . . 9<br />
Auxiliary<br />
Devices . . . . . . . . . . . . . . . . . . . . . . . . .45<br />
B<br />
Bluetooth . . . . . . . . . . . . . . . . . . . . 76, 85<br />
Bluetooth Audio . . . . . . . . . . . . . . . . . 46<br />
Bluetooth Controls . . . . . . . . . . . . . . . 76<br />
C<br />
Call Waiting Using Steering<br />
Wheel Controls . . . . . . . . . . . . . . . . . 81<br />
Call Waiting Using the<br />
<strong>Infotainment</strong> Controls . . . . . . . . . . 81<br />
Canceling Voice Recognition . . . . 70<br />
CD Player . . . . . . . . . . . . . . . . . . . . . . . 36<br />
Cellular Phone Usage . . . . . . . . . . . 25<br />
Cleaning High Gloss Surfaces<br />
and Vehicle Information and<br />
Radio Displays . . . . . . . . . . . . . . . . . 14<br />
Clearing the <strong>System</strong> . . . . . . . . . . . . . 83<br />
Conference Calling Using the<br />
<strong>Infotainment</strong> Controls . . . . . . . . . . 81<br />
Configure Menu . . . . . . . . . . . . . . . . . 62<br />
Controls<br />
Steering Wheel . . . . . . . . . . . . . . . . . . 9<br />
Customer Assistance . . . . . . . . . . . . . 4<br />
D<br />
Database Coverage<br />
Explanations . . . . . . . . . . . . . . . . . . . 69<br />
Destination Download,<br />
OnStar ® . . . . . . . . . . . . . . . . . . . . . . . . 61<br />
Destination, Navigation . . . . . . . . . . 53<br />
Detailed Areas . . . . . . . . . . . . . . . . . . . 50<br />
INDEX i-1<br />
Devices<br />
Auxiliary . . . . . . . . . . . . . . . . . . . . . . . .45<br />
USB . . . . . . . . . . . . . . . . . . . . . . . . . . . .39<br />
Display Settings . . . . . . . . . . . . . . . . . 67<br />
Driving on a Route . . . . . . . . . . . . . . . 52<br />
Dual Tone Multi-Frequency<br />
(DTMF) Tones . . . . . . . . . . . . . . . . . . 82<br />
E<br />
Ending a Call . . . . . . . . . . . . . . . . . . . . 81<br />
Error Messages . . . . . . . . . . . . . . . . . 37<br />
F<br />
Finding a Station . . . . . . . . . . . . . . . . 16<br />
FM . . . . . . . . . . . . . . . . . . . . . . . . . . . . . . 24<br />
G<br />
Global Positioning<br />
<strong>System</strong> (GPS) . . . . . . . . . . . . . . . . . . 67<br />
Gracenote . . . . . . . . . . . . . . . . . . . . . . . 85<br />
Gracenote® . . . . . . . . . . . . . . . . . . . . . 39
i-2 INDEX<br />
H<br />
Hands-Free Phone . . . . . . . . . . . . . . 82<br />
Helpful Hints for Speaking<br />
Commands . . . . . . . . . . . . . . . . . . . . . 70<br />
Home Page . . . . . . . . . . . . . . . . . . . . . . 10<br />
Home Page Customization . . . . . . 10<br />
Home Page Features . . . . . . . . . . . . 10<br />
I<br />
Info<br />
Quick . . . . . . . . . . . . . . . . . . . . . . . . . . .25<br />
<strong>Infotainment</strong> . . . . . . . . . . . . . . . . . . . . . . 3<br />
<strong>Infotainment</strong> Control Buttons . . . . . . 7<br />
<strong>Infotainment</strong> <strong>System</strong> Overview . . . 4<br />
<strong>Infotainment</strong> <strong>System</strong> Settings . . . . 15<br />
L<br />
Languages . . . . . . . . . . . . . . . . . . . . . . 62<br />
Launching Pandora . . . . . . . . . . . . . . 26<br />
Launching Stitcher . . . . . . . . . . . . . . . 31<br />
Loading and Ejecting Discs . . . . . . 36<br />
M<br />
Making a Call . . . . . . . . . . . . . . . . . . . . 82<br />
Making a Call Using Phone<br />
Book and <strong>Infotainment</strong><br />
Controls . . . . . . . . . . . . . . . . . . . . . . . . 79<br />
Making a Call Using the<br />
<strong>Infotainment</strong> Controls . . . . . . . . . . 80<br />
Map Adjustments . . . . . . . . . . . . . . . . 49<br />
Map Data Updates . . . . . . . . . . . . . . . 69<br />
Map End User License<br />
Agreement (Optional<br />
Equipment Applies Where<br />
Equipped) . . . . . . . . . . . . . . . . . . . . . . 85<br />
Map Scales . . . . . . . . . . . . . . . . . . . . . . 49<br />
Maps . . . . . . . . . . . . . . . . . . . . . . . . . . . . 50<br />
Menu<br />
Configure . . . . . . . . . . . . . . . . . . . . . . .62<br />
Menu with Route Guidance<br />
Active . . . . . . . . . . . . . . . . . . . . . . . . . . 59<br />
Mixed-Band Presets . . . . . . . . . . . . . 17<br />
MP3 . . . . . . . . . . . . . . . . . . . . . . . . . . . . . 37<br />
Muting a Call . . . . . . . . . . . . . . . . . . . . 81<br />
My Media Commands . . . . . . . . . . . 72<br />
N<br />
Navigation<br />
Destination . . . . . . . . . . . . . . . . . . . . .53<br />
Symbols . . . . . . . . . . . . . . . . . . . . . . . .51<br />
Using the <strong>System</strong> . . . . . . . . . . . . . . .47<br />
Navigation Commands (If<br />
Equipped) . . . . . . . . . . . . . . . . . . . . . . 74<br />
Navigation Settings . . . . . . . . . . . . . . 64<br />
Navigation Settings Button . . . . . . 64<br />
NavTraffic® (If Equipped) . . . . . . . . 20<br />
O<br />
OnStar (If Equipped)<br />
Command . . . . . . . . . . . . . . . . . . . . . . 75<br />
OnStar ® Destination<br />
Download . . . . . . . . . . . . . . . . . . . . . . 61<br />
Other Commands . . . . . . . . . . . . . . . . 73<br />
Overview . . . . . . . . . . . . . . . . . . . . . . . . 76<br />
Overview, <strong>Infotainment</strong> <strong>System</strong> . . . 3
P<br />
Pairing with <strong>Infotainment</strong><br />
Controls . . . . . . . . . . . . . . . . . . . . . . . . 77<br />
Pairing with Voice Recognition . . . 78<br />
Pandora (If Equipped) . . . . . . . . . . . 85<br />
Pandora Troubleshooting . . . . . . . . 29<br />
Phone<br />
Bluetooth . . . . . . . . . . . . . . . . . . . . . . .76<br />
Hands-Free . . . . . . . . . . . . . . . . . . . . .82<br />
Phone Commands . . . . . . . . . . . . . . . 72<br />
Phone Settings . . . . . . . . . . . . . . . . . . 64<br />
Pictures . . . . . . . . . . . . . . . . . . . . . . . . . 35<br />
Playing an Audio CD . . . . . . . . . . . . 36<br />
Playing an MP3 CD . . . . . . . . . . . . . . 37<br />
Playing from a USB . . . . . . . . . . . . . . 39<br />
Playing from an iPhone<br />
or iPad® . . . . . . . . . . . . . . . . . . . . . . . 45<br />
Playing from an iPod® . . . . . . . . . . . 43<br />
Playing the Radio . . . . . . . . . . . . . . . . 15<br />
Problems with Route<br />
Guidance . . . . . . . . . . . . . . . . . . . . . . 68<br />
Q<br />
Quick Info . . . . . . . . . . . . . . . . . . . . . . . 25<br />
R<br />
Radio Commands . . . . . . . . . . . . . . . 72<br />
Radio Settings . . . . . . . . . . . . . . . . . . . 63<br />
Radio with Navigation . . . . . . . . . . . . 6<br />
Radio without Navigation . . . . . . . . . 5<br />
Radios<br />
AM-FM Radio . . . . . . . . . . . . . . . . . . .15<br />
Reception . . . . . . . . . . . . . . . . . . . . . .24<br />
Satellite . . . . . . . . . . . . . . . . . . . . . . . . .18<br />
Route Options . . . . . . . . . . . . . . . . . . . 58<br />
S<br />
Satellite Radio . . . . . . . . . . . . . . . . . . . 18<br />
Scroll Features . . . . . . . . . . . . . . . . . . 50<br />
Settings Commands . . . . . . . . . . . . . 73<br />
SiriusXM Categories . . . . . . . . . . . . . 19<br />
SiriusXM Messages . . . . . . . . . . . . . 20<br />
SiriusXM® Satellite Radio . . . . . . . 18<br />
SiriusXM® Satellite Radio<br />
Service . . . . . . . . . . . . . . . . . . . . . . . . . 25<br />
Software Updates . . . . . . . . . . . . . . . 14<br />
Steering Wheel Controls . . . . . . . . . . 9<br />
Stitcher Troubleshooting . . . . . . . . . 33<br />
Storing Radio Station Presets . . . 17<br />
Symbols, Navigation . . . . . . . . . . . . . 51<br />
INDEX i-3<br />
<strong>System</strong><br />
<strong>Infotainment</strong> . . . . . . . . . . . . . . . . . . . . . 3<br />
<strong>System</strong> Needs Service, If . . . . . . . . 69<br />
T<br />
Time and Date Settings . . . . . . . . . . 63<br />
Touch Screen Buttons . . . . . . . . . . . . 9<br />
Transferring a Call . . . . . . . . . . . . . . . 82<br />
Travel Link (If Available) . . . . . . . . . 21<br />
TuneSelect . . . . . . . . . . . . . . . . . . . . . . 18<br />
U<br />
Updates<br />
Map Data . . . . . . . . . . . . . . . . . . . . . . .69<br />
Software . . . . . . . . . . . . . . . . . . . . . . . .14<br />
USB . . . . . . . . . . . . . . . . . . . . . . . . . . . . . 39<br />
USB Media Formats . . . . . . . . . . . . . 39<br />
USB Troubleshooting . . . . . . . . . . . . 45<br />
Using Bluetooth Voice<br />
Recognition . . . . . . . . . . . . . . . . . . . . 82<br />
Using Destination Download . . . . . 61<br />
Using the <strong>System</strong> . . . . . . . . . . . . . . . . . 9<br />
Using Voice Recognition . . . . . . . . . 70
i-4 INDEX<br />
V<br />
Vehicle<br />
Positioning . . . . . . . . . . . . . . . . . . . . .68<br />
Vehicle Settings . . . . . . . . . . . . . . . . . 67<br />
Viewing<br />
Pictures . . . . . . . . . . . . . . . . . . . . . . . .35<br />
Voice Recognition . . . . . . . . . . . 70, 77<br />
Voice Recognition Commands . . . 71<br />
Voice Recognition Help . . . . . . . . . . 71<br />
W<br />
Website Information . . . . . . . . . . . . . 14