TA+PPX - Stollmann
TA+PPX - Stollmann
TA+PPX - Stollmann

Create successful ePaper yourself
Turn your PDF publications into a flip-book with our unique Google optimized e-Paper software.
09/09.2007<br />
TA manual<br />
Introduction<br />
<strong>TA+PPX</strong><br />
ISDN Terminal Adapter<br />
User manual<br />
Version r09<br />
Date 09.2007<br />
© <strong>Stollmann</strong> E+V GmbH<br />
Component name: TA User manual<br />
Article No.: 621-51993<br />
Page 1 of 44
TA manual<br />
Introduction<br />
r09/09.2007<br />
Exclusion of Liability<br />
The present manual by <strong>Stollmann</strong> E+V GmbH (hereinafter referred to as <strong>Stollmann</strong>)<br />
reflects the present state of the art of the products described therein. We have<br />
endeavored to give a description that is as complete and clear as possible in order<br />
to make work with our products as easy as possible for you. All the same, the<br />
manual may contain technical inaccuracies and typing errors. As a result of the<br />
rapid advance in the art, we must also reserve the right to incorporate technical<br />
alterations and developments without separate advance notice.<br />
That is why <strong>Stollmann</strong> does not give any warranty for the contents of the manual<br />
and for its continuing applicability.<br />
Nor is <strong>Stollmann</strong> liable for any loss of information or any incorrect use of information<br />
that might result from consultation of the manual. Particularly, <strong>Stollmann</strong> is not liable<br />
for damage, nor indirect damage (including damage caused by financial loss, delays<br />
affecting business transactions or interruptions of business and similar<br />
consequences), arising from the use or improper use of this manual, not even in the<br />
case where it was pointed out to <strong>Stollmann</strong> or an agent of <strong>Stollmann</strong> that such<br />
damage might be sustained. This does not, of course, affect our legal liability for<br />
damages based on any intent or gross negligence.<br />
With respect to the data given in this manual, <strong>Stollmann</strong> does not warrant the nonexistence<br />
of industrial property rights (trademarks, patents, utility models, etc.). Nor<br />
are trade names, brand names, company names and product names in general use<br />
but are subject to the relevant trademark, patent, utility model and registered design<br />
rights.<br />
The information must neither in whole nor even in part be copied, translated,<br />
reproduced or in any other way transferred to or stored on any electronic medium or<br />
other machine.<br />
The purchase and use of software are governed by the General Conditions of<br />
Delivery and Payment as well as the Terms of License of <strong>Stollmann</strong>.<br />
If any of the provisions on the exclusion of liability or on use are or become<br />
ineffective for statutory reasons, this will not affect the other provisions.<br />
Page 2 of 44
09/09.2007<br />
TA manual<br />
Introduction<br />
Table of contents<br />
1 Introduction.....................................................................................................5<br />
1.1 Product description......................................................................................5<br />
1.2 Internet Access ............................................................................................6<br />
1.3 AOL/CompuServe Access............................................................................6<br />
1.4 T-Online.......................................................................................................6<br />
1.5 Remote LAN Access....................................................................................6<br />
1.6 Service.........................................................................................................6<br />
1.7 License.........................................................................................................7<br />
2 Installation.......................................................................................................8<br />
2.1 Contents.......................................................................................................8<br />
2.2 Installation procedure...................................................................................8<br />
2.3 Windows 9x/ME/2000/XP Software Installation...........................................8<br />
2.3.1 Preparation (Windows9x/ME/2000/XP)....................................................9<br />
2.3.2 Installation (Windows9x/ME/2000/XP).....................................................9<br />
2.3.3 Uninstallation............................................................................................9<br />
2.4 Windows NT 4.0 Software Installation.......................................................10<br />
2.4.1 Preparation (WindowsNT4.0).................................................................10<br />
2.4.2 Installation (WindowsNT4.0)..................................................................10<br />
2.5 Display and control elements.....................................................................11<br />
3 Using the TA with Application Software........................................................13<br />
3.1 Configuration for Internet...........................................................................13<br />
3.1.1 Configuration under Windows 9x/ME/2000/XP ......................................13<br />
3.2 Configuration for AOL/CompuServe...........................................................14<br />
4 Configuring the TA........................................................................................15<br />
4.1 AT command set........................................................................................15<br />
Page 3 of 44
TA manual<br />
Introduction<br />
r09/09.2007<br />
4.1.1 ISDN specific AT commands..................................................................23<br />
4.1.2 AT command S register set....................................................................26<br />
4.1.3 AT result codes.......................................................................................26<br />
4.2 Subaddressing...........................................................................................27<br />
4.3 Using Multilink PPP....................................................................................29<br />
4.3.1 Restrictions on Windows95....................................................................29<br />
4.3.2 Call Bumping..........................................................................................30<br />
4.3.3 Bandwidth on demand ("BOD"), AO/DI (special firmware required).......30<br />
4.4 Software update.........................................................................................31<br />
4.4.1 Software update......................................................................................31<br />
5 Diagnostic and error messages....................................................................32<br />
5.1 Error messages from AT command set......................................................32<br />
5.2 Table of ISDN causes and their explanation (DSS1).................................32<br />
5.3 CAPI causes and their explanation............................................................34<br />
6 Appendix.......................................................................................................36<br />
A1: Technical data:...........................................................................................36<br />
A2: LED displays..............................................................................................37<br />
A3: Pinout of the ISDN connector.....................................................................38<br />
A4: Pinout of the V.24/V.28 interface TA (DSUB 9)..........................................38<br />
A5: Pinout of the V.24/V.28 interface TA (DSUB 25):.......................................38<br />
A6: Cable layout for connection of terminals with 25 pin connectors (male or<br />
female) to a TA..............................................................................................40<br />
A7: Cable layout to connect a PC with 9 pin male plug through a serial COMport<br />
to a TA...................................................................................................41<br />
7 Declaration of conformity..............................................................................42<br />
8 History...........................................................................................................43<br />
Page 4 of 44
09/09.2007<br />
TA manual<br />
Introduction<br />
1 Introduction<br />
We are very pleased to see that you have bought a <strong>Stollmann</strong> product and would<br />
like to express our appreciation.<br />
This documentation is valid for the product:<br />
• <strong>TA+PPX</strong> hardware version V1.0 or higher<br />
Software version V7.011 or higher<br />
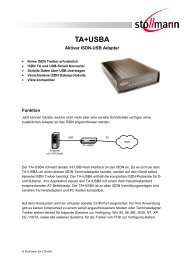
1.1 Product description<br />
• The <strong>TA+PPX</strong> connects a PC (or other device with serial port) to the<br />
ISDN. It gives access to online services as the Internet,<br />
AOL/CompuServe and T-Online and is also suitable for remote LAN<br />
access. You can see it as a digital replacement for an analogue<br />
modem.<br />
• To work with TA you need an ISDN Basic Rate Interface (BRI)<br />
(replacing an analogue telephone line). The basic rate access can be<br />
ordered by your local telephone company or PTT.<br />
• a PC with online software for a modem (see chapter 3)<br />
The serial port of the PC should be capable of a data rate of up to 115.2 kbps<br />
(230.4 kbps for Multilink PPP to increase performance). This might require an<br />
additional PC card for older PCs.<br />
Page 5 of 44
TA manual<br />
Introduction<br />
r09/09.2007<br />
1.2 Internet Access<br />
There are three ways to access the Internet via ISDN:<br />
• by synchronous PPP or Multilink PPP<br />
• by bit rate adaptation V.120<br />
• by B channel protocol X.75<br />
It depends on the access facilities of your Internet service provider (ISP) or<br />
Point-of-presence (POP) which one you may use (see figure 1).<br />
PC with<br />
Online Software<br />
async<br />
V.24<br />
TA+DAA<br />
ISDN<br />
Basic<br />
Rate<br />
Access<br />
ISDN network<br />
Online (POP) Access Server<br />
CompuServe Access Server<br />
T-Online Host System<br />
Figure 1: Usage of the TA to access an Online Service<br />
1.3 AOL/CompuServe Access<br />
AOL/CompuServe is accessed via ISDN by the protocol V.120 or X.75 (see picture<br />
1). It depends on the access facilities of your AOL/CompuServe access point which<br />
one you have to use (see figure 1). The increasingly common protocol used is X.75.<br />
1.4 T-Online<br />
T-Online (German Online Service) is accessed via ISDN by the protocol<br />
synchronous PPP (see figure 1).<br />
1.5 Remote LAN Access<br />
To access a LAN remotely via ISDN you have to choose the appropriate protocol<br />
that is used by the ISDN router on the LAN.<br />
1.6 Service<br />
<strong>Stollmann</strong> has installed a Windows-NT-Server just for test purposes. The Server<br />
supports the RAS (Remote Access Service) with full 64 kbps in one single B<br />
Page 6 of 44
09/09.2007<br />
TA manual<br />
Introduction<br />
channel. The RAS service gives the possibility to connect PC's using Windows-<br />
2000/NT or Windows9x/ME with each other.<br />
You have to install on your Windows PC the Dialup Networking – see the Windows<br />
helpdesk how to install and use. Please select at your machine the protocol stack<br />
TCP/IP.<br />
The TA has to be set to HDLC async to sync (like the configuration for Internet<br />
access) by selecting the Modem “TA Internet PPP”.<br />
The ISDN number is ++49 40 89088 328.<br />
Please use the username "guest" and password "guest".<br />
1.7 License<br />
The TA has the following license number for the connection to the PSTN according<br />
to CTR3/A1:<br />
CE-0682 X<br />
for Europe (EC), Switzerland, Norway.<br />
TA is conforming to the European safety requirements IEC 60 950. Please use only<br />
the delivered power supply or an original replacement from <strong>Stollmann</strong>. Connect the<br />
TA only to the S0-interfaces with SELV (Safety Extra Low Voltage) related to<br />
EN60950.<br />
The TA is conforming to the European rules of EMC. EN50081-1, here EN55022<br />
Class B, for electromagnetic field emission and EN50082-1 for immunity against<br />
electromagnetic interference.<br />
Page 7 of 44
TA manual<br />
Installation<br />
r09/09.2007<br />
2 Installation<br />
2.1 Contents<br />
This packet contains the following items:<br />
• ISDN Terminal adapter TA in desktop box<br />
• Mains plug power supply adapter<br />
• ISDN interface cable<br />
• DTE interface serial cable<br />
• Disk/CD-ROM with installation software Windows9x/ME/2000/NT4/XP<br />
• This user manual<br />
2.2 Installation procedure<br />
• Connect the serial port (DTE) of the TA to the serial port (COM-port) of the<br />
PC by using the supported DTE interface serial cable.<br />
Please make sure that the COM-port of the PC is not used for other purposes<br />
or by other communication programs.<br />
• Connect the ISDN port of the TA to the basic rate interface (BRI) of the ISDN<br />
using the delivered ISDN cable.<br />
• Connect the power supply with the TA and plug it into mains.<br />
Please reference to page 11 for selecting the correct plug for interfacing.<br />
Now the power-up sequence described in chapter 2.5 should appear.<br />
The TA is now ready for use; please refer to the next chapter for the configuration to<br />
use the PC together with the TA.<br />
2.3 Windows 9x/ME/2000/XP Software Installation<br />
This chapter describes the installation, configuration and usage of the TA for the<br />
operating system Windows 9x/ME/2000/XP.<br />
The following components will be installed:<br />
• Modem driver into the modem list<br />
• CAPI 2.0 driver<br />
• Configuration program<br />
Page 8 of 44
09/09.2007<br />
TA manual<br />
Installation<br />
2.3.1 Preparation (Windows9x/ME/2000/XP)<br />
Please check the following requirements before installing the software for<br />
Windows9x/ME/2000/XP:<br />
• PC-System with connected TA.<br />
• Installed Microsoft Windows 9x/ME/2000/XP operation system<br />
• Windows 9x CD-ROM (typically not required for ME/2000/XP)<br />
• Installation Disk/CD-ROM<br />
2.3.2 Installation (Windows9x/ME/2000/XP)<br />
1. When the TA is connected and power up while booting your PC with<br />
Windows9x/ME/2000/XP, the Plug and Play feature of the TA will get active,<br />
so Windows9x/ME/2000/XP will request an installation Disk/CD-ROM/folder.<br />
If you want to install manually the TA driver, execute the program<br />
SETUP.EXE from the installation Disk/CD-ROM/folder. This program leads<br />
you through the installation.<br />
The configuration of the TA will be described in the following section. You<br />
can skip the configuration of the TA now, if information is missing. The<br />
configuration can be done later by using the ISDN configuration generator.<br />
The installation program creates in addition a program folder with the<br />
following program icons:<br />
• “ISDN TA Manager”<br />
(configuration program for the ISDN TA)<br />
• “Readme”<br />
(shows actual information and changes of the product release)<br />
• “Server Access”<br />
(shows the path to the ftp server with latest software files)<br />
• “<strong>TA+PPX</strong> Manual”<br />
(Manual of <strong>TA+PPX</strong>)<br />
• “Loopback Test”<br />
(The Loopback Test is a simple program to check your ISDN adapter<br />
installation and your ISDN line.<br />
• “Uninstall ...” icon<br />
(to uninstall the actual software and delete the modems from the modem<br />
list)<br />
2.3.3 Uninstallation<br />
Page 9 of 44
TA manual<br />
Installation<br />
r09/09.2007<br />
If you want to delete the software of the TA from your hard disk, please click on the<br />
icon “Uninstall ...” from the program folder.<br />
2.4 Windows NT 4.0 Software Installation<br />
This chapter describes the installation, configuration and usage of the TA for the<br />
operating system Windows NT 4.0.<br />
The following components will be installed:<br />
• CAPI 2.0 driver<br />
• Configuration program<br />
2.4.1 Preparation (WindowsNT4.0)<br />
Please check the following requirements before installing the software for<br />
WindowsNT4.0:<br />
• PC-System with connected TA.<br />
• Installed Microsoft Windows NT operation system<br />
• Windows NT4.0 CD-ROM (typically not required)<br />
• Installation Disk/CD-ROM<br />
2.4.2 Installation (WindowsNT4.0)<br />
1. Execute the program SETUP.EXE from the installation disk. This program<br />
leads you through the installation.<br />
2. The configuration of the TA will be described in the following section. You<br />
can skip the configuration of the TA now, if information is missing. The<br />
configuration can be done later by using the TA ISDN Manager.<br />
3. Now you have to add new Modems manually. Please go to<br />
START -> SETTINGS -> CONTROL PANEL -> MODEMS<br />
Select ADD and activate the button "Don’t detect my modem, I will select it<br />
from a list".<br />
Please choose via the DISKETTE button the path to the TA installation<br />
Disk/CD-ROM/folder and open the file “mdmstppx.inf”.<br />
You can select the following TA modems:<br />
TA Internet PPP<br />
TA Internet ML-PPP<br />
TA V.120<br />
TA X.75<br />
Please note, that every modem has to be installed separately.<br />
4. Select the used COM port and finish to end the installation procedure.<br />
Page 10 of 44
09/09.2007<br />
TA manual<br />
Installation<br />
Configuration<br />
Using the <strong>TA+PPX</strong> Manager the configuration parameter of the TA will be set up. If<br />
you don’t know the correct parameter please contact the provider of your ISDN<br />
basic rate interface (telephone company).<br />
Please make sure, the TA is connected to the serial interface and powered.<br />
After providing the settings you can leave the configurator. The TA is now ready to<br />
be used with Modem applications (i.e. Microsoft Dial-Up Networking) or CAPI<br />
compatible application programs.<br />
2.5 Display and control elements<br />
You can control the status of the <strong>TA+PPX</strong> via 8 LEDs at the front side<br />
.<br />
Fig. 2: Front view of the desktop model <strong>TA+PPX</strong><br />
At the back of the <strong>TA+PPX</strong> you will find the connectors for the following devices:<br />
Fig. 3: Back view of the desktop model <strong>TA+PPX</strong><br />
PWR:<br />
ISDN:<br />
DTE:<br />
external power supply<br />
ISDN interface.<br />
V.24 interface for DTE, i.e. a PC<br />
The 4 LEDs at the right show the status of the serial interface to the PC:<br />
R : shows activity of receiving data from the TA and ISDN line<br />
T : shows activity of transmitted data from the terminal<br />
Page 11 of 44
TA manual<br />
Installation<br />
r09/09.2007<br />
DTR : shows the status of DTR line, i.e. the terminal is trying to connect via<br />
the TA<br />
DCD : represents the status of the DCD line (V.24); shows normally the<br />
connection to an access server.<br />
Both LEDs, B1 and B2, show the connection state of the ISDN B channels:<br />
If ON this B channel is occupied due to an incoming or outgoing connection (data or<br />
voice).<br />
Both of the LEDs, L1 and L2, show the overall status of the TA in coded form. The<br />
following list describes the view for an error free power on sequence of the TA.<br />
Status L1 L2<br />
1. Power-On-Phase, wait ⊗ Θ (about 2 sec)<br />
2. Active phase, ISDN ok ⊗ O<br />
3. Connected, ISDN data connection established ⊗ ⊗<br />
LED Legend: ⊗ On<br />
Θ<br />
O<br />
Continuously blinking<br />
Off<br />
A complete list you can find in the appendix "LED displays"<br />
Page 12 of 44
09/09.2007<br />
TA manual<br />
Using the TA with Application Software<br />
3 Using the TA with Application Software<br />
To use the TA with different application software and access points you have to look<br />
for the following items:<br />
• Usually you need a contract with the service provider. They can help<br />
you to get an appropriate application program to run on a PC.<br />
• The service provider will also supply you with the ISDN access number<br />
to call (has to be entered in the application program).<br />
• The TAs parameter must fit the characteristics of the access point<br />
which be recommended in the next chapters.<br />
3.1 Configuration for Internet<br />
To access the Internet via ISDN you have to have a contract with an Internet service<br />
provider (ISP) who runs an ISDN access. To configure the TA you need the<br />
following information from the ISP:<br />
• ISDN access number (to be entered at the PC program)<br />
• Layer two protocol, usually the protocol PPP by selecting Modem TA<br />
Internet PPP.<br />
• Access protocol (to be entered at the PC system software or Internet<br />
software)<br />
To configure the Internet access software on the PC it may be necessary that you<br />
need some additional information like TCP/IP address, user name, password etc.<br />
Please refer to the software manual.<br />
3.1.1 Configuration under Windows 9x/ME/2000/XP<br />
The configuration of the TA can be dependent of the type of access the Internet<br />
provider is supporting. The following types of access are mostly used for public<br />
ISDN access.<br />
• HDLC async to sync conversion<br />
This protocol has to be set up, if the service provider uses an access point<br />
where the protocol PPP is running.<br />
Please get more information from your Internet provider if necessary.<br />
Page 13 of 44
TA manual<br />
Using the TA with Application Software<br />
r09/09.2007<br />
3.2 Configuration for AOL/CompuServe<br />
You need a contract with AOL/CompuServe to access the AOL/CompuServe<br />
network via ISDN. To configure the TA you need the following information from<br />
AOL/CompuServe:<br />
• ISDN access number<br />
• Layer two protocol, usually the protocol-type X.75 by selecting Modem<br />
TA X.75. Some accesses still use B channel protocol V.120 (select<br />
Modem TA V.120).<br />
How to select the modem see also page 9.<br />
You can use a CompuServe access by running the CIM software package. For AOL<br />
use the AOL software.<br />
Page 14 of 44
09/09.2007<br />
TA manual<br />
Configuring the TA<br />
4 Configuring the TA<br />
The settings of the TA for the V.24 interface and the S 0 interface are called<br />
configuration. The TA is delivered with a set of pre-set values. In the following<br />
section it will be shown how, by using the configuration commands, you can<br />
examine the configuration of the TA and if necessary change it. The values can be<br />
stored in non volatile memory; this means they´ll remain unchanged even if the<br />
power supply is disconnected.<br />
You can configure the TA in the following ways:<br />
• by using the AT command set entered by the locally connected PC.<br />
• by using TA configuration commands entered by the locally connected PC.<br />
• by using TA configuration commands entered via the ISDN line (remote<br />
configuration).<br />
Normally the configuration via AT commands is sufficient.<br />
4.1 AT command set<br />
All parameter can be changed by using an extended AT command set described in<br />
this chapter.<br />
Please check if the factory setting will fit with your environment. The factory setting<br />
is described (highlighted) in the parameter list shown in chapter "AT command set"<br />
(see below).<br />
If you want another configuration as set in the factory default setting, please do the<br />
following steps:<br />
• Connect the TA to ISDN interface<br />
• Connect the com-port from the PC to the DTE interface of the TA.<br />
• Connect the power supply to the mains socket.<br />
• Start a terminal emulation on your PC, please verify that the baudrate setting<br />
of the terminal emulation fits those of the TA.<br />
• Set up the parameter of the TA from the terminal emulation and save the<br />
parameter using the AT command set.<br />
Example:<br />
To change the used B channel protocol to X.75 please enter the<br />
following commands:<br />
ATB10 (set protocol to X.75)<br />
AT&W (save the new configuration)<br />
• Leave your terminal emulation and start your application program.<br />
Page 15 of 44
TA manual<br />
Configuring the TA<br />
r09/09.2007<br />
With the exception of the command A/ (Repeat command) all commands begin with<br />
the prefix AT and are terminated with . Corrections in a command line are done<br />
with . A command line has a maximum of 80 characters. The<br />
command line is automatically cancelled by longer input. Blanks are ignored,<br />
capital/small letters are not significant.<br />
The parameter settings of the TA obtained when using the AT commands can be<br />
permanently stored (AT&W) and are not lost by resetting or by leaving the AT<br />
command mode.<br />
To enter the AT command mode during an active data connection you must use the<br />
following sequence ("Escape sequence"):<br />
at least 1 sec pause 1 sec pause<br />
The time gap between all three plus signs may not exceed 1 sec.<br />
The escape sequence is transmitted transparent to the remote device.<br />
By using initialization strings to configure the TA which includes more than one<br />
parameter to be configured please follow the examples below:<br />
• Initialization string includes standard AT commands:<br />
AT&F&D2&C1E0&W<br />
By using a special configuration command (at**) in the initialization string you<br />
have to set a semicolon in case that additional commands will follow.<br />
• Initialization string includes special AT commands:<br />
AT&F**BR=8;&D2&C1E0&W<br />
Supported commands:<br />
A/ Repeat last command line<br />
This command repeats the commands of the last entered command line.<br />
Note: No prefix AT is required.<br />
A/<br />
A<br />
Accept incoming call<br />
Using this command you can accept an incoming call, if automatic call acceptance is<br />
not set (Register S0 = 0). An incoming call is displayed by the message “RING“ or<br />
the code “2“.<br />
Must be the last command in an AT command line.<br />
ATA<br />
Page 16 of 44
09/09.2007<br />
TA manual<br />
Configuring the TA<br />
B<br />
B channel protocol<br />
Transmission protocol for data communication in the B channel.<br />
ATB0 : Async V.110<br />
ATB3 : HDLC async to sync conversion<br />
(PPP asynchronous, single link PPP, default<br />
i.e. for Internet / dial-up network access)<br />
ATB4 : HDLC transparent (octets are packed into HDLC frames)<br />
ATB5 : Byte transparent (raw B channel data)<br />
ATB10 : X.75-NL (i.e. for BBS access)<br />
ATB13 : V.120<br />
(for AOL/CompuServe access)<br />
ATB22 : T.70-NL-CEPT (for T-Online (videotex) access)<br />
ATB23 : T.90-NL<br />
ATB31 : Multilink PPP (ML-PPP)<br />
ATB32 : AO/DI and Multilink PPP (optional)<br />
ATB33 : X.75 B-channel bundling (optional)<br />
%B Set local baudrate<br />
Sets the local baudrate of the TA to the desired value (fix value) or to autodetection.<br />
When autodetection is set, the TA will recognize the desired baudrate with every<br />
newly entered AT command by the terminal equipment (PC). With all other settings<br />
the PC must use the same baudrate.<br />
Must be the last command in an AT command line.<br />
AT%B0 Automatic local baudrate detection enabled (autobauding,<br />
default)<br />
AT%B1 Local baudrate set to 1200 bit/s<br />
AT%B2 Local baudrate set to 2400 bit/s<br />
AT%B3 Local baudrate set to 4800 bit/s<br />
AT%B4 Local baudrate set to 9600 bit/s<br />
AT%B5 Local baudrate set to 19200 bit/s<br />
AT%B6 Local baudrate set to 38400 bit/s<br />
AT%B7 Local baudrate set to 57600 bit/s<br />
AT%B8 Local baudrate set to 115200 bit/s<br />
AT%B9 Local baudrate set to 230400 bit/s<br />
Note: If autobauding is selected (default) and after powering on the TA+POC no AT<br />
command is entered, a response from the TA (i.e. RING) will be sent with the<br />
baudrate 115200 bit/s.<br />
CONF<br />
Enter TA+Configurator<br />
Page 17 of 44
TA manual<br />
Configuring the TA<br />
r09/09.2007<br />
Enters directly into the TA+Configurator, the configuration prompt "#" will be<br />
displayed. Leave the TA+Configurator with the command "quit".<br />
ATCONF<br />
&C<br />
DCD control<br />
Selects the behavior of the DCD control line from the TA.<br />
AT&C TA control line DCD is always ON<br />
AT&C1 DCD ON indicates ISDN connection is established and<br />
synchronized (default)<br />
#C Received bearer service<br />
Shows the bearer service that is received with an incoming call in hexadecimal<br />
coding hbhb.<br />
The value for hbhb (word) is the CIP value as defined in the CAPI 2.0 specification, ,<br />
also to be found via <strong>Stollmann</strong> URL http:\\www.stollmann.de.<br />
AT#C<br />
#C1=hbhb<br />
Select bearer service outgoing<br />
Selects the bearer service that will be sent with an outgoing call<br />
The value for hbhb (word) is the CIP value as defined in the CAPI 2.0 specification<br />
(default 0000).<br />
Example: an outgoing call as a voice call: AT#C1=0004.<br />
#C2=hbhbhbhb<br />
Select bearer service incoming<br />
Selects the bearer services that can be accepted with an incoming call. The<br />
definition of hbhbhbhb (double word) is the CIP mask as defined in the CAPI 2.0<br />
specification (default 00000004).<br />
Example:<br />
AT#C2=00030012 : Accept analogue incoming calls<br />
AT#C2=00000001 : Accept all incoming calls.<br />
Note: Before issuing an outgoing call the command AT#C1 has to be set.<br />
To use the predefined services please setup factory defaults (AT&F).<br />
D<br />
Initiate outgoing call<br />
Page 18 of 44
09/09.2007<br />
TA manual<br />
Configuring the TA<br />
Dials the number (D for Dial). The dial modifier "W", ">", "T", ";", "@" can be freely<br />
inserted in the dial string; they have no influence on the dial procedure of the TA.<br />
Must be the last command in AT command line.<br />
Any character input while the TA is dialing will cancel the dialing procedure.<br />
ATD[/]<br />
CALLEDnumber: ISDN call number for a dialled B channel connection<br />
subaddr dialled subaddress<br />
ATDe Make a call for remote management (see note).<br />
Note1: To setup the own subaddress see configuration command sub.<br />
Note1: Adding an "e" to CALLEDnumber indicates that a connection to the internal<br />
remote access of a TA shall be performed, the protocol X.75 (ATB10) has to<br />
be used.<br />
&D<br />
DTR control<br />
Selects the behavior of the TA, when the DTE control line DTR changes from ON to<br />
OFF.<br />
AT&D DTE control line DTR setting is ignored<br />
AT&D2 DTE control line DTR is evaluated: dropping the DTR line by<br />
the DTE will disconnect an existing ISDN connection (default).<br />
An incoming call will accepted only with DTR active.<br />
E<br />
Local echo<br />
Selects the local echo in command mode.<br />
ATE No local echo<br />
ATE1 Local echo on in command phase (default)<br />
&F<br />
Load factory defaults<br />
Factory default will be loaded, ISDN protocol setting and msn´s will not be<br />
overwritten. (for storing in non volatile memory please use the command AT&W).<br />
AT&F setup all parameter concerning data port<br />
AT&F1 setup all parameter including ISDN protocols, msn settings and<br />
passwords.<br />
Page 19 of 44
TA manual<br />
Configuring the TA<br />
r09/09.2007<br />
H<br />
Disconnect<br />
Disconnects existing ISDN data connection, after issuing the Escape sequence (see<br />
page 16).<br />
ATH<br />
I<br />
Display version information<br />
Displays different information about version number and settings:<br />
ATI Returns the "Modem"-type; name of the terminal adapter (“TA“)<br />
ATI1 Returns internal checksum (“64“)<br />
ATI2 Returns “OK“<br />
ATI3 Returns version string: "V7.xyz"<br />
ATI4 Returns manufacturers name: "<strong>Stollmann</strong> E+V GmbH"<br />
ATI5 Returns ISDN selected protocol: "0 - DSS1"<br />
ATI6 Returns copyright string: "(c) Copyright <strong>Stollmann</strong> GmbH"<br />
ATI7 Returns “OK“<br />
ATI8 Returns “ERROR”<br />
ATI9 Returns plug and play ID string<br />
ATI77 Returns Bootloader version string<br />
ATI99 Returns software creation date<br />
&K<br />
Flowcontrol<br />
Selects the flow control behavior of the TA while in data communication phase.<br />
AT&K No local flow control between the DTE and TA is used<br />
AT&K3 Local flow control is set to hardware handshake RTS/CTS (default)<br />
AT&K4 Local flow control is set to software handshake XON/XOFF<br />
#M Received CLID<br />
Shows the called line identification (CLID) that is received with an incoming call –<br />
this is the number of the called party addressed on the local S-bus (selected msn).<br />
AT#M<br />
O<br />
Return to online state<br />
If the TA is in command mode after issuing an escape sequence out of an existing<br />
connection, ATO brings the TA back to data phase.<br />
Must be the last command in AT command line.<br />
ATO<br />
Page 20 of 44
09/09.2007<br />
TA manual<br />
Configuring the TA<br />
#O Received CLIP<br />
Shows the calling line identification (CLIP) that is received with an incoming call –<br />
number of the calling party.<br />
AT#O<br />
Q<br />
Suppress results<br />
With this command result codes or messages can be suppressed.<br />
ATQ Returns status - codes after command input (default)<br />
ATQ1 No result codes are returned<br />
&R<br />
CTS control<br />
Selects the behavior of the CTS control line from the TA.<br />
AT&R TA control line CTS is following all changes of RTS<br />
AT&R1 CTS is always ON (default)<br />
S<br />
Display and set internal S register<br />
ATSnn?<br />
ATSnn=xx<br />
Show actual values (decimal) of selected register nn<br />
Set selected register nn to the decimal value xx.<br />
&S<br />
DSR control<br />
Selects the behavior of the DSR control line from the TA.<br />
AT&S TA control line DSR is always ON (default)<br />
AT&S1 DSR ON indicates ISDN connection is established and<br />
synchronized<br />
V<br />
Result format<br />
ATV<br />
ATV1<br />
Result is presented as numbers (followed by )<br />
Result is presented as text (default)<br />
&V<br />
Display configuration<br />
AT&V<br />
Displays the actual configuration of AT command setting<br />
Page 21 of 44
TA manual<br />
Configuring the TA<br />
r09/09.2007<br />
AT&V1<br />
including stored ISDN numbers<br />
Displays the actual configuration of extended AT command<br />
setting<br />
W<br />
Extended result codes<br />
ATW<br />
ATW1<br />
Result is presented without extended result codes<br />
Result is presented with extended result codes<br />
RING and CONNECT including ISDN address, all others<br />
include error causes.<br />
Message RINGING will be displayed.<br />
&W<br />
Store active configuration<br />
The active configuration will be stored in non volatile memory.<br />
AT&W<br />
X<br />
Reduce result messages<br />
Reduces the number of result messages after trying to set up a connection<br />
ATX0 "CONNECT" only (without line speed)<br />
ATX1 "CONNECT" with line speed, "BUSY", "NO DIALTONE" not used<br />
ATX2 "CONNECT" with line speed, "BUSY" not used<br />
ATX3 "CONNECT" with line speed, "NO DIALTONE" not used<br />
ATX4 "CONNECT" with line speed, all messages used (default).<br />
Z<br />
Load stored settings<br />
The active configuration will be reset to the stored configuration.<br />
Must be the last command in an AT command line.<br />
ATZ<br />
#Z Define own msn<br />
Defines the msni and msno nn (multiple subscriber number) for the data port.<br />
Page 22 of 44
09/09.2007<br />
TA manual<br />
Configuring the TA<br />
If the number is set to “*“ (default), all incoming calls are acceptable.<br />
The msn can be displayed by command AT&V.<br />
AT#Z=nn set msni and msno to nn<br />
The msn is automatically stored to non volatile ram (without issuing command<br />
AT&W).<br />
Note: If 1TR6 D channel protocol is selected, only one or the last digit is valid.<br />
**DBITS Number of data bits x asynchronous chars (7,8)<br />
Number of data bits x for asynchronous character (7,default: 8)<br />
AT**DBITS=x<br />
**PRTY<br />
Parity asynchronous chars<br />
Selects the parity for asynchronous characters.<br />
0: no parity; 1: even parity; 2: odd parity<br />
AT**PRTY=0 No parity (default)<br />
AT**PRTY=1 Even parity<br />
AT**PRTY=2 Odd parity<br />
4.1.1 ISDN specific AT commands<br />
Setting up special ISDN parameter:<br />
(only one command is allowed per AT command)<br />
**msni<br />
Define own msn incoming calls<br />
Defines the msn nn (multiple subscriber number) for incoming calls to the data port.<br />
If the number is set to “*“ (default), all incoming calls are acceptable.<br />
AT**msni=nn set msn to nn<br />
AT**msni shows currently set msn number.<br />
The msni is automatically stored to non volatile ram (without issuing command<br />
AT&W).<br />
**msno<br />
Define own msn outgoing calls<br />
Defines the msn nn (multiple subscriber number) for outgoing calls from the data<br />
Page 23 of 44
TA manual<br />
Configuring the TA<br />
r09/09.2007<br />
port. This number is presented at the called side.<br />
If the number is set to blank (default), the presented number is the main number of<br />
the ISDN access.<br />
AT**msno=nn<br />
AT**msno<br />
set msn to nn<br />
shows currently set msn number.<br />
The msno is automatically stored to non volatile ram (without issuing command<br />
AT&W).<br />
**BSIZE<br />
Set B channel block size<br />
Defines the maximum length x of a data block transmitted or received in B channel<br />
(default: BSIZE = 2048).<br />
AT**BSIZE=x<br />
Note: The value will be changed by setting the B channel protocol (ATBx).<br />
**DTE<br />
Set B channel Layer 2 address<br />
Selects the Layer 2 link addresses. Only valid for protocols that are HDLC based<br />
(X.75, LAPB).<br />
AT**DTE=0 Calling side reacts as DTE,<br />
called side reacts as DCE (default, X.75 standard)<br />
AT**DTE=1 TA reacts as DTE (own adr = 01)<br />
AT**DTE=3 TA reacts as DCE (own adr = 03)<br />
Note: The value will be changed by setting the B channel protocol (ATBx).<br />
**ISDN<br />
Select D channel protocol<br />
Selects ISDN D channel protocol to the ISDN line. The protocol must fit the protocol<br />
running on the ISDN line otherwise a connection cannot be set up.<br />
Note: after changing and storing the ISDN protocol the TA has to be reset by<br />
powering it off and on (alternately you can use the command<br />
AT&W**RESET).<br />
AT**ISDN=0 Select DSS1 (Euro-ISDN) (default)<br />
AT**ISDN=5 Select Bellcore National ISDN-1/2 (USA) (optional)<br />
AT**ISDN=6 Select NTT INS-NET (Japan) (optional)<br />
AT**ISDN=7 Select AT&T 5ESS (USA) (optional)<br />
AT**ISDN=8 Select VN-4 (France) (optional)<br />
AT**ISDN Show selected ISDN protocol<br />
Page 24 of 44
09/09.2007<br />
TA manual<br />
Configuring the TA<br />
AT**?ISDN<br />
Show available ISDN protocols<br />
**G711LAW<br />
Set coding for voice connections<br />
Selects the coding for voice type connections.<br />
AT**G711LAW=0 automatic durch D channel protocol<br />
AT**G711LAW=1 coding fix to a-law<br />
AT**G711LAW=2 coding fix to µ-law<br />
Note: changing the isdn protocol sets up the g711law to a predefined default:<br />
isdn = 0,8 : coding = a-law<br />
isdn = 5,6,7 : coding = µ-law<br />
AT&F does not change the setting of g711law.<br />
**K<br />
Set Layer 2 windowsize<br />
Sets windowsize x layer 2 protocol B channel: x = 1 ..7, default: 7<br />
AT**K=x<br />
The default value is dependent of the selected B channel protocol.<br />
**PTP<br />
AT**PTP=0<br />
AT**PTP=1<br />
**RPWD<br />
Set ISDN interface type<br />
select multipoint mode (to connect ISDN terminals,<br />
default)<br />
select point to point mode (to connect ISDN switching<br />
systems)<br />
Password remote configuration<br />
Sets password for remote configuration to nn (1..32 chars)<br />
AT**RPWD=nn<br />
Default: empty.<br />
**SPID1, SPID2 Set SPID (Option)<br />
For ISDN lines in the U.S. you have to set the SPID. You get it from your ISDN<br />
provider.<br />
AT**SPID1=xxxx Set SPID 1<br />
AT**SPID2=xxxx Set SPID 2<br />
**<br />
Execute configuration command<br />
Page 25 of 44
TA manual<br />
Configuring the TA<br />
r09/09.2007<br />
Executes one configuration command.<br />
AT**<br />
4.1.2 AT command S register set<br />
S0 0: No automatic call acceptance, acceptance of an incoming call is<br />
controlled by the data terminal (command ATA after RING)<br />
1: Immediate call acceptance by the terminal adapter (default)<br />
2..n: Call acceptance through the terminal adapter after n "RING"<br />
messages.<br />
Note: The time between two ring messages can be configured using<br />
the TA-configuration command “ringtimer“ (default = 5 sec.)<br />
S2 Escape Character (default = 43h)<br />
S3 Carriage Return Character (default = 0Dh)<br />
S4 Line Feed Character (default = 0Ah)<br />
S5 Backspace Character (default = 1Ah)<br />
S7 Wait time for Carrier (sec) (default = 30 sec)<br />
S9 Enable PNP functionality for Windows95 (default=1, enabled)<br />
S16<br />
S91<br />
4.1.3 AT result codes<br />
Last occurred CAPI/ISDN error cause<br />
0: default<br />
1: all unknown AT commands will be answered with OK.<br />
2: Windows 2000 compatibility: some AT commands will be answered<br />
with OK (see list below), unknown AT commands will be answered with<br />
OK.<br />
Windows2000 AT command set change:<br />
ATBxxx All commands ATBxxx will respond OK without<br />
any functionality behind it. The B-channel protocol<br />
settings can be set with AT**PROT.<br />
Result codes (numerical and verbose):<br />
Code Text Meaning<br />
0 OK Command completed<br />
1 CONNECT Connection established<br />
(rn = call number of remote site)<br />
2 RING Indicates an incoming call (SETUP received)<br />
3 NO CARRIER No synchronization (xx = ISDN error cause)<br />
4 ERROR Illegal command or error that can not be<br />
indicated otherwise<br />
5 CONNECT 1200 Connection, line speed 1.2 kbps (V.110)<br />
6 NO DIALTONE No access to ISDN network (xx = ISDN error)<br />
Page 26 of 44
09/09.2007<br />
TA manual<br />
Configuring the TA<br />
7 BUSY Number engaged (xx = ISDN error cause)<br />
8 NO ANSWER No connection; called number can not be<br />
reached (xx = ISDN error cause)<br />
10 CONNECT 2400 Connection, line speed 2.4 kbps (V.110)<br />
11 CONNECT 4800 Connection, line speed 4.8 kbps (V.110)<br />
12 CONNECT 9600 Connection, line speed 9.6 kbps (V.110)<br />
16 CONNECT 19200 Connection, line speed 19.2 kbps (V.110)<br />
19 CONNECT 64000 Connection, line speed 64 kbps<br />
- RINGING Outgoing call is ringing at called site<br />
Call number display:<br />
= call number of remote site<br />
In AT command mode, call number display (does not belong to the AT command<br />
standard) can be turned on by issuing the command ATV2 or ATV3. If turned on, the<br />
call number of the caller is shown with the Connect- or Ring-message (in pointed<br />
brackets), depending on the signaling in D-channel.<br />
If the TA is used at the public network then the call number of the remote site<br />
(including area code) is displayed.<br />
Example: CONNECT 64000 <br />
Error cause display:<br />
= ISDN release (error) cause, hexadecimal<br />
Example: NO CARRIER <br />
In AT command mode, error cause display (does not belong to the AT command<br />
standard) can be turned on by issuing the command ATV2 or ATV3. The shown<br />
error causes use the coding defined by the CAPI definition. ISDN error causes from<br />
the ISDN network are always coded as 34xxH, where xx represents the hexadecimal<br />
version of the ISDN error cause (see page 32). All other causes are CAPI error<br />
causes (see page 34).<br />
4.2 Subaddressing<br />
With outgoing and incoming calls the transmission of subaddresses can be<br />
performed using the ISDN supplementary service SUB. The subaddress is<br />
transmitted transparently from the calling party to the called party before the B<br />
channel connection is fully established.<br />
Please note, that this ISDN service typically has to be enabled by the ISDN service<br />
provider and may be charged additionally.<br />
Page 27 of 44
TA manual<br />
Configuring the TA<br />
r09/09.2007<br />
The subaddress is separated by an “/“ from the called number.<br />
The functionality Subaddressing can be used with the dialling procedures ATcommand<br />
set and automatic call.<br />
Examples:<br />
ATDisdnnumber[/subaddr]<br />
isdnnumber Dialling called party number<br />
subaddr<br />
Called subaddress<br />
RING [[/subaddr]]<br />
CONNECT [[/subaddr]]<br />
rn<br />
subaddr<br />
Calling party number<br />
Calling party subaddress<br />
The own subaddress (calling subbaddress) can be setup using the configuration<br />
command sub.<br />
Note: The subaddress can be entered additionally into all tables that contain ISDN<br />
numbers for dialling or checking an ISDN address.<br />
Page 28 of 44
09/09.2007<br />
TA manual<br />
Configuring the TA<br />
4.3 Using Multilink PPP<br />
To enable Multilink PPP handling within the TA please enable protocol ML-PPP:<br />
ATB31 rsp. prot = 31.<br />
ML-PPP may be used with two different authentication protocols during the link<br />
establishment phase:<br />
• PAP (password authentication protocol, RFC 1334),<br />
• CHAP (challenge handshake authentication protocol, RFC 1994) with variants<br />
• MD5 according to RFC 1321,<br />
• Microsoft Chap according to RFC 2433.<br />
The simpler PAP transmits the user password as clear text over the line, whereas<br />
CHAP uses encryption. Which protocol is actually used depends on<br />
• the local PC: if the dialup network configuration requests password encryption<br />
only CHAP will be used,<br />
• the remote host configuration: it may (e.g.) allow both PAP and CHAP, CHAP<br />
only etc..<br />
4.3.1 Restrictions on Windows95<br />
The CHAP protocol requires that the local side (PC or TA) responds with the proper,<br />
encrypted password when ever requested by the remote host. Since Windows95<br />
does not respond on repeated requests CHAP can be used on the second link only<br />
if the TA knows the password. It must be stored in the TA’s NVRAM:<br />
• Enter “at**chappwd=” to input your password in the TA.<br />
Warning: The input echo is shown in clear text, it should be hidden from<br />
unauthorized persons. Nevertheless, commands as “AT&V1” display the<br />
password as a sequence of asterisks (“*”).<br />
• Enter “AT&W” to store the setting in the TA.<br />
If the password chappwd is not stored on the TA (or is wrong) and remote and/or<br />
local dialup network configuration require password encryption, the second link will<br />
be physically established for a short time, and will then be disconnected. As a<br />
consequence the Multilink option is disabled for the current connection.<br />
Page 29 of 44
TA manual<br />
Configuring the TA<br />
r09/09.2007<br />
4.3.2 Call Bumping<br />
A ML-PPP connection uses both B-channels of the S bus. To accept an incoming<br />
call (i.e. for telephony) during a ML-PPP session one B-channel has to be released.<br />
This is called Call Bumping.<br />
To enable Call Bumping proceed as follows:<br />
• Activate call waiting on the S bus. It has to be activated in the ISDN switch and is<br />
a feature of the ISDN line you ordered.<br />
• Open the “properties” of the dial-up link you are using for ML-PPP and<br />
“additional settings”.<br />
4.3.3 Bandwidth on demand ("BOD"), AO/DI (special firmware required)<br />
BOD: Enabling this feature will cause the TA to use the Multilink PPP protocol<br />
to enhance the ISDN throughput using the second B channel automatically:<br />
• if the throughput of the internet connection is higher than a definable value a<br />
second B channel connection will be established automatically and for data<br />
transfer used.<br />
• if the throughput of the internet connection is lower than a definable value the<br />
second B channel connection will be disconnected automatically.<br />
AO/DI: With selecting AO/DI the PPP/TCP/IP transmission will use the D channel<br />
with X.31 protocol (ATB32) and enhance the ISDN throughput by switching to<br />
one or two B channel connections automatically:<br />
• if the throughput of the internet connection is higher than a definable value a<br />
first B channel connection will be established automatically and used for data<br />
transfer. The traffic in the D channel will be stopped.<br />
• if the throughput of the internet connection is lower than a definable value the<br />
B channel connection will be disconnected automatically and all traffic will be<br />
sent through the D channel.<br />
Settings BOD:<br />
at**bod=0<br />
disable BOD (default)<br />
at**bod=1<br />
enable BOD<br />
at**bodiv= Throughput level to add 2 nd B channel connection<br />
(in kbit/s) (default=40)<br />
at**bodit= duration that bodiv has been reached to add 2 nd<br />
b<br />
channel (in secs) (default=30)<br />
at**boddv= Throughput level to release 2 nd B channel connection<br />
(in kbit/s) (default=40)<br />
at**boddt= duration that boddv has been reached to release<br />
2 nd b channel (in secs) (default=30)<br />
Page 30 of 44
09/09.2007<br />
TA manual<br />
Configuring the TA<br />
Settings AO/DI:<br />
atb32<br />
enable AO/DI<br />
at**nr=##<br />
at**dbodiv= Throughput level to use 1 st B channel connection<br />
(in kbit/s) (default=6)<br />
at**dbodit= duration that dbodiv has been reached to use 1 st B<br />
channel (in secs) (default=10)<br />
at**dboddv= Throughput level to release 1 st B channel<br />
connection (in kbit/s) (default=20)<br />
at**dboddt= duration that dboddv has been reached to release<br />
1 st b channel (in secs) (default=180)<br />
4.4 Software update<br />
The TA uses a Flash-EPROM to store the software. This software can be updated<br />
from a local connected PC via the COM port.<br />
4.4.1 Software update<br />
Please fulfil the following steps to update the TA (via AT-Cmds):<br />
• Get a new software release for the TA from your supplier and copy it to your PC.<br />
• Start a terminal emulation on your PC with the capability to run an X-MODEM file<br />
transfer (i.e. HyperTerminal).<br />
• Enter the AT command “at**flash“.<br />
• Wait for end of erasing the Flash-EPROM and the prompt to start your X-<br />
MODEM transfer.<br />
• Start the 1kX-MODEM file transfer (send file or upload) by selecting the Transfer<br />
/ Send File menu point in your terminal emulation and select the new software.<br />
• After completion you will get the information whether the software update ended<br />
successfully or erroneous.<br />
• Give the TA about 20 seconds to activate the new software.<br />
• Due to new functionality the last stored configuration setting may be lost, please<br />
check before using. To set factory default values please use the command<br />
"at&f1".<br />
Please fulfil the following steps to update the TA (via <strong>TA+PPX</strong> Manager):<br />
• Start <strong>TA+PPX</strong> Manager and press the “Update firmware” button<br />
(follow the “Update firmware” instruction to upload a new firmware)<br />
Page 31 of 44
TA manual<br />
Diagnostic and error messages<br />
r09/09.2007<br />
5 Diagnostic and error messages<br />
For the diagnostic of erroneous situations the following functionality is supported.<br />
Please check first the behavior of LED displays, if an ISDN connection can not be<br />
established. Refer to list of LED displays on page 37.<br />
5.1 Error messages from AT command set<br />
When the extended result messages are selected using the command ATV2 ISDN<br />
error codes are displayed in addition to the standard AT result messages.<br />
ISDN error causes from the ISDN network are always coded as 34xxH, whereas the<br />
last two digits xx represent the ISDN cause in hexadecimal coding. The meaning<br />
can be taken from the following tables ISDN causes (see page 32).<br />
5.2 Table of ISDN causes and their explanation (DSS1)<br />
Cause<br />
Decimal /<br />
Hexadecimal<br />
Meaning<br />
1 / 0x81 Unallocated (unassigned) number 3<br />
2 / 0x82 No route to transit network 3<br />
3 / 0x83 No route to destination 3<br />
6 / 0x86 Channel inacceptable 6<br />
7 / 0x87 Call awarded and being delivered in an 6<br />
established channel<br />
16 / 0x90 Normal clearing 3<br />
17 / 0x91 User busy 7<br />
18 / 0x92 No user responding 8<br />
19 / 0x93 No answer from user (user alerted) 8<br />
20 / 0x94 No answer from user (device off) 8<br />
21 / 0x95 Call rejected 8<br />
22 / 0x96 Number changed 3<br />
26 / 0x9A Non selected user clearing 3<br />
27 / 0x9B Destination out of order 8<br />
28 / 0x9C invalid number format 3<br />
29 / 0x9D Facility rejected 3<br />
30 / 0x9E Response to STATUS ENQUIRY 3<br />
31 / 0x9F Normal disconnect, unspecified 3<br />
Translation<br />
to AT<br />
result<br />
codes<br />
Page 32 of 44
09/09.2007<br />
TA manual<br />
Diagnostic and error messages<br />
Cause<br />
Decimal /<br />
Hexadecimal<br />
Meaning<br />
34 / 0xA2 No circuit/channel available 7<br />
38 / 0xA6 ISDN network out of order 6<br />
41 / 0xA9 Temporarily failure 6<br />
43 / 0xAB Access information discarded 6<br />
44 / 0xAC Requested circuit/channel not available 6<br />
46 / 0xAE Precedence call blocked 6<br />
47 / 0xAF Resource unavailable, unspecified 6<br />
49 / 0xB1 Quality of service unavailable 3<br />
50 / 0xB2 Requested facility not subscribed 3<br />
53 / 0xB5 Outgoing calls barred within CUG 3<br />
55 / 0xB7 Incoming calls barred within CUG 3<br />
57 / 0xB9 Bearer capability not authorized 3<br />
58 / 0xBA Bearer capability not presently available 3<br />
63 / 0xBF Service or option not available, 3<br />
unspecified<br />
65 / 0xC1 Bearer capability not implemented 3<br />
66 / 0xC2 Channel type not implemented 3<br />
69 / 0xC5 Requested facility not implemented 3<br />
70 / 0xC6 Only restricted digital information bearer 3<br />
capability is available<br />
79 / 0xCF Service or option not implemented, 3<br />
unspecified<br />
81 / 0xD1 Invalid call reference value 3<br />
82 / 0xD2 Identified channel does not exist 3<br />
83 / 0xD3 A suspended call exists, but this call 3<br />
identity does not<br />
84 / 0xD4 Call identity in use 3<br />
85 / 0xD5 No call suspended 3<br />
86 / 0xD6 Call having the requested call identity<br />
has been cleared<br />
87 / 0xD7 User not member of CUG 3<br />
88 / 0xD8 Incompatible destination 3<br />
90 / 0xDA Non-existent CUG 3<br />
91 / 0xDB Invalid transit network selection 3<br />
95 / 0xDF Invalid message, unspecified 3<br />
96 / 0xE0 Mandatory information element missing 3<br />
97 / 0xE1 Message type non-existent or not 3<br />
implemented<br />
Translation<br />
to AT<br />
result<br />
codes<br />
Page 33 of 44
TA manual<br />
Diagnostic and error messages<br />
r09/09.2007<br />
Cause<br />
Decimal /<br />
Hexadecimal<br />
Meaning<br />
98 / 0xE2 Message not compatible with call state 3<br />
or message type non-existent or not<br />
implemented<br />
99 / 0xE3 Information element /parameter nonexistent<br />
3<br />
or not implemented<br />
100 / 0xE4 Invalid information element contents 3<br />
101 / 0xE5 Message not compatible with call state 3<br />
102 / 0xE6 Recovery on timer expiry 3<br />
103 / 0xE7 Parameter non-existent or not 3<br />
implemented, passed on<br />
111 / 0xEF Protocol error, unspecified 6<br />
127 / 0xFF Network interworking error, unspecified 6<br />
Translation<br />
to AT<br />
result<br />
codes<br />
5.3 CAPI causes and their explanation<br />
Coding of the CAPI cause in hexadecimal form.<br />
0000 No error<br />
0001 NCPI ignored<br />
0002 Flags ignored<br />
0003 Alert already sent<br />
1001 Too many applications<br />
1002 Logical block size too small<br />
1003 Buffer exceeds 64k<br />
1004 Message buffer size too small<br />
1005 Too many logical connections<br />
1006 Reserved1<br />
1007 Message could not be accepted<br />
1008 Register OS Resource Error<br />
100a External Equipment not supported<br />
100b External Equipment only<br />
1101 Bad application ID<br />
1102 Illegal cmd or message length<br />
1103 Message queue full<br />
1104 Message queue empty<br />
1105 Message lost<br />
Page 34 of 44
09/09.2007<br />
TA manual<br />
Diagnostic and error messages<br />
1106 Unknown notification<br />
1107 Message not accepted<br />
1108 OS Resource Error<br />
1109 CAPI not installed<br />
2001 Bad State<br />
2002 Illegal Identifier<br />
2003 Out of PLCI<br />
2004 Out of NCCI<br />
2005 Out of LISTEN<br />
2006 Out of Fax Resources<br />
2007 Illegal Message Parameters<br />
3001 B1 protocol not supported<br />
3002 B2 protocol not supported<br />
3003 B3 protocol not supported<br />
3004 B1 protocol param not supported<br />
3005 B2 protocol param not supported<br />
3006 B3 protocol param not supported<br />
3007 B Prot combination not supported<br />
3008 NCPI not supported<br />
3009 Unknown CIP value<br />
300a Flags not supported<br />
300b Facility not supported<br />
300c Data length not supported<br />
300d Reset procedure not supported<br />
3301 Layer1 protocol error<br />
3302 Layer2 protocol error, i.e. DTE address not correct, TEI not correct<br />
3303 Layer3 protocol error<br />
3304 Another application got the call<br />
3311 Fax remote station is not fax<br />
3312 Fax training failed<br />
3313 Fax disconnect before transfer<br />
3314 Fax disconnect remote abort<br />
3315 Fax disconnect remote procedure<br />
3316 Fax disconnect local transmitter underrun<br />
3317 Fax disconnect local receiver overflow<br />
3318 Fax disconnect local abort<br />
3319 Fax illegal transmit data<br />
34xx Error cause from the ISDN line, xx represents the ISDN cause (see page 32)<br />
Page 35 of 44
TA manual<br />
Appendix<br />
r09/09.2007<br />
6 Appendix<br />
A1: Technical data:<br />
One V.24 channel:<br />
functional: V.24<br />
electrical: V.28<br />
mechanical:<br />
9 pin DSUB connector (female)<br />
Transmission speeds:<br />
DTE:<br />
B channel:<br />
Character representation:<br />
Character synchronization:<br />
Operating mode:<br />
ISDN interface:<br />
1200 – 230400 bit/s (asynchronous)<br />
2 x 64000 bit/s (synchronous)<br />
8Bit no Parity, 1 stop bit<br />
7Bit even/odd Parity, 1 stop bit<br />
asynchronous<br />
half duplex or full duplex<br />
Basic rate interface according to ITU I.430 (RJ45)<br />
Physical dimensions: desktop casing: 230 x 50 x 200 mm (W x H x D)<br />
Switching power supply unit:<br />
Model: SAW02-5.0-500<br />
Blank denote cord output<br />
Rated input voltage: 100-240Vac<br />
Rated input current: 100mA<br />
Rated frequency: 50/60 Hz<br />
Rated output Voltage: 5Vdc<br />
Rated output current: 500mA<br />
Protection class:<br />
II<br />
Max. ambient temperature: 40°C<br />
Tested according to: EN60950-1/A11:2004<br />
Page 36 of 44
09/09.2007<br />
TA manual<br />
Appendix<br />
A2: LED displays<br />
Active states:<br />
L1 L2 Status<br />
⊗ Θ (2sec) Power-On-Phase ; Wait<br />
Θ (1x1s) O ISDN not ok ; Check ISDN interface/ -connector<br />
⊗ O Active phase ; ISDN ok, no ISDN connection established<br />
⊗ ∅ Call active ; ISDN Connection will be<br />
established<br />
⊗ ⊕ Synch active ; Waiting for B channel synchronization<br />
⊗ ⊗ Connected ; Data connection is established<br />
B1, B2 Status B channels<br />
O<br />
⊗<br />
Error states:<br />
B channel offline ; ISDN connection not established<br />
B channel online ; ISDN connection established<br />
L1 L2 Status<br />
O O TA not ok ; Hardware error, TA repair necessary<br />
Θ O ISDN not ok ; Check ISDN interface/ -connector<br />
O Θ (nx1s) TA not ok ; Hardware error, TA repair necessary<br />
Θ Θ B1, B2 flashing ; Bootloader aktive, no operational firmware<br />
programmed. Use command at**flash to<br />
download firmware with 115200 Bd,N81<br />
(see page 31).<br />
LED Legend:<br />
⊗ On<br />
∅ occ short on, long off Cycle 1 sec<br />
⊕ fl long on, short off Cycle 1 sec<br />
Θ (nxms) continuous blinking: n times every m seconds<br />
O Off<br />
Page 37 of 44
TA manual<br />
Appendix<br />
r09/09.2007<br />
A3: Pinout of the ISDN connector<br />
Pinout of the 8 pin ISDN S-interface connector (RJ45) (ITU I.430/ISO 8877)<br />
Pin Signal (S 0 )<br />
1 Not connected<br />
2 Not connected<br />
3 Tx+ (Transmit +)<br />
4 Rx+ (Receive +)<br />
5 Rx- (Receive -)<br />
6 Tx- (Transmit -)<br />
7 Not connected<br />
8 Not connected<br />
A4: Pinout of the V.24/V.28 interface TA (DSUB 9)<br />
Pin V.24/V.28 I/O TEXT<br />
ITU DIN EIA<br />
1 109 M5 DCD O Data carrier detect<br />
2 104 D2 R D O Receive data<br />
3 103 D1 T D I Transmit data<br />
4 108/1<br />
108/2<br />
S1.1<br />
S1.2<br />
DTR I Data terminal ready<br />
5 102 E2 GND --- Signal ground<br />
6 107 M1 DSR O Data set ready<br />
7 105 S2 RTS I Request to send<br />
8 106 M2 CTS O Clear to send<br />
9 125 M3 RI O Ring indicator<br />
A5: Pinout of the V.24/V.28 interface TA (DSUB 25):<br />
Pin V.24/V.28 I/O TEXT<br />
ITU DIN EIA<br />
Page 38 of 44
09/09.2007<br />
TA manual<br />
Appendix<br />
Pin V.24/V.28 I/O TEXT<br />
ITU DIN EIA<br />
1 101 E1 --- Protective ground<br />
2 103 D1 T D I Transmit data<br />
3 104 D2 R D O Receive data<br />
4 105 S2 RTS I Request to send<br />
5 106 M2 CTS O Clear to send<br />
6 107 M1 DSR O Data set ready<br />
7 102 E2 --- Signal ground<br />
8 109 M5 DCD O Data carrier detect<br />
20 108/1<br />
108/2<br />
S1.1<br />
S1.2<br />
DTR I Data terminal ready<br />
22 125 M3 RI O Ring indicator<br />
Page 39 of 44
TA manual<br />
Appendix<br />
r09/09.2007<br />
A6: Cable layout for connection of terminals with 25 pin<br />
connectors (male or female) to a TA<br />
Only the cable with a male plug at the terminal side is shown. The pin configuration<br />
for the female plug is the same.<br />
V.24 device TA<br />
1 shield *<br />
5 SGND 102 5<br />
2 TD 103 3<br />
3 RD 104 2<br />
4 RTS 105 7<br />
5 CTS 106 8<br />
6 DSR 107 6<br />
20 DTR 108 4<br />
8 DCD 109 1<br />
22 RI 125 9<br />
25 pin jack 9 pin jack<br />
Attention: allowed cable length < 15m.<br />
for transmission speeds > 19.200 bit/s < 2m.<br />
* necessary if cable length > 2m<br />
Page 40 of 44
09/09.2007<br />
TA manual<br />
Appendix<br />
A7: Cable layout to connect a PC with 9 pin male plug through a serial COMport<br />
to a TA<br />
PC<br />
TA<br />
shield *<br />
5 SGND 102 5<br />
3 TD 103 3<br />
2 RD 104 2<br />
7 RTS 105 7<br />
8 CTS 106 8<br />
6 DSR 107 6<br />
4 DTR 108 4<br />
1 DCD 109 1<br />
9 RI 125 9<br />
9 pin jack 9 pin jack<br />
Attention: allowed cable length < 15m.<br />
for transmission speeds > 19.200 bit/s < 2m.<br />
* necessary if cable length > 2m<br />
Page 41 of 44
TA manual<br />
Declaration of conformity<br />
r09/09.2007<br />
7 Declaration of conformity<br />
Page 42 of 44
09/09.2007<br />
TA manual<br />
History<br />
8 History<br />
Version Release Date By Change description<br />
8.03 13.06.2007 NH Added: Declaration of conformity<br />
Added: Technical data of power supply<br />
Fixed: Some format errors<br />
R09_d01 05.09.2007 FH New version numbering system<br />
Added: Chapter 8 “History”<br />
Added: “Life Support Policy”<br />
Page 43 of 44
TA manual<br />
History<br />
r09/09.2007<br />
Life Support Policy<br />
This <strong>Stollmann</strong> product is not designed for use in life support appliances, devices,<br />
or systems where malfunction can reasonably be expected to result in a significant<br />
personal injury to the user, or as a critical component in any life support device or<br />
system whose failure to perform can be reasonably expected to cause the failure of<br />
the life support device or system, or to affect its safety or effectiveness. <strong>Stollmann</strong><br />
customers using or selling these products for use in such applications do so at their<br />
own risk and agree to fully indemnify <strong>Stollmann</strong> for any damages resulting.<br />
<strong>Stollmann</strong> Entwicklungs- und Vertriebs-<br />
GmbH<br />
Mendelssohnstraße 15 D<br />
22761 Hamburg<br />
Germany<br />
Phone: +49 (0)40 890 88-0<br />
Fax: +49 (0)40 890 88-444<br />
E-mail: info@stollmann.de<br />
www.stollmann.de<br />
Page 44 of 44