
Create successful ePaper yourself
Turn your PDF publications into a flip-book with our unique Google optimized e-Paper software.
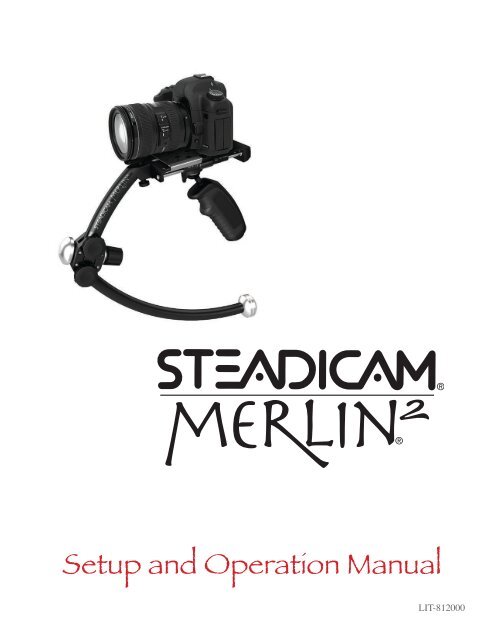
Setup and Operation <strong>Manual</strong><br />
LIT-812000
Designed in the USA, manufactured in Taiwan by:<br />
The <strong>Tiffen</strong> Company<br />
90 Oser Avenue<br />
Hauppauge, NY 11788<br />
631-273-2500 Fax 631-273-2557<br />
Toll Free 800-645-2522 www.tiffen.com<br />
<strong>Tiffen</strong>/Steadicam 818-843-4600 www.steadicam.com<br />
Cookbook & <strong>Merlin</strong> 2 help: www.merlin2cookbook.com<br />
merlintechsupport@Steadicam.com<br />
US Patents 4,946,272, 5,098,182 and 5,229,798<br />
Other US & Foreign Patents applied for.<br />
Steadicam ® and <strong>Merlin</strong> ® are registered trademarks of The <strong>Tiffen</strong> Company.<br />
Copyright 2012 Garrett Brown & The <strong>Tiffen</strong> Company. All rights reserved.
Basic Set-up<br />
Table of Contents<br />
Part One — Setup<br />
1. Overview 3 – 5<br />
2. A Tour of the <strong>Merlin</strong> 2 6 – 8<br />
3. Getting Started 9 – 10<br />
4. Pre-Setting Balance 11 – 15<br />
5. Installing Dovetail Plate 16 – 18<br />
6. Balancing and Mounting the Camera 19 – 21<br />
7. Horizontal and Vertical Trim 22 – 26<br />
Part Two — Operating<br />
8. Hand Positions 28<br />
9. Body Positions 29 – 31<br />
10. Extreme Trimming 32<br />
11. Stairs 33<br />
12. Shooting and Resting Positions 33 – 34<br />
13. Vehicle Shots 35<br />
14. <strong>Merlin</strong> 2 Technique 36 – 40<br />
Moves and Results<br />
15. Accessories 41<br />
16. Troubleshooting 42<br />
17. Maintenance 42<br />
18. Glossary 43<br />
1
Basic Part Set-up One<br />
A letter from Steadicam ® Inventor, Garrett Brown<br />
Dear Friends,<br />
You are about to have a two-part experience. Even<br />
this manual is in two parts. First you will go through<br />
the Setup of your particular camera on the Steadicam<br />
<strong>Merlin</strong> 2 — think of this as a brief game of weights and<br />
balances — after which you will progress to the fun<br />
part: Operating!<br />
Steadicam operating is a compelling and evolving art,<br />
and the <strong>Merlin</strong> 2 is a true instrument – stiffer, more<br />
precise than ever – and fully as capable as its big brothers in the movie world. On this DVD,<br />
you’ll find everything you need to get started; and a bit later, as your skills develop, you may<br />
find it worthwhile to have a second look through the ‘Operating’ section for info and tips you<br />
may have missed.<br />
The Steadicam <strong>Merlin</strong> 2® with its second generation Folding-Caliper hinge, and ultra-rigid<br />
aluminum and stainless-steel construction, permits moving shots at unprecedented focal lengths,<br />
and the Folding-Caliper extends and retracts to balance cameras weighing from one-half pound<br />
to five pounds, yet automatically seeks the compact folded position. I hope that you will really<br />
enjoy owning and using the Steadicam <strong>Merlin</strong> 2, and I look forward to seeing some of the results<br />
– in sample reels, documentaries, commercials, home movies and feature films!<br />
Good luck and have fun.<br />
Garrett Brown,<br />
Philadelphia, 2012<br />
www.garrettcam.com<br />
2
Part One — Setup<br />
Congratulations on your purchase of the Steadicam ® <strong>Merlin</strong> 2® !<br />
The Steadicam <strong>Merlin</strong> 2® is a camera stabilization system for lightweight<br />
camcorders based on the professional Steadicam technology used worldwide in<br />
professional film and television production.<br />
Basic Set-up<br />
Features<br />
• Ultra-light: by itself weighs just 1.4 lbs (0.64 kg)<br />
• Ultra-compact<br />
• Ultra-rigid aluminum construction: supports longer-focal-length shooting<br />
• Precision two-axis vernier stage for accurate, repeatable horizontal balance<br />
• Adjustable vertical trim<br />
• Patented ‘Folding-Caliper’ hinge—magically finds true folding position<br />
• Quick-release aluminum dovetail with three-position lock<br />
• Quick-release tripod adaptor<br />
• Tough, modular construction<br />
• Flies cameras weighing from 0.5 to 5.0lbs (0.23 - 2.27kg)*<br />
• Ergonomic, three-axis inter-gimballed handle<br />
Camcorder video quality is now superb, but unstable shooting still looks<br />
amateurish. When you master the <strong>Merlin</strong> 2® , you will be able to move your<br />
camera smoothly, with a high level of artistic and creative freedom. With the<br />
<strong>Merlin</strong> 2® your moves can be virtually indistinguishable from those made by<br />
dollies, cranes and the big Steadicam ® rigs.<br />
The Steadicam <strong>Merlin</strong> 2® is an instrument that requires know-how and practice.<br />
Please read the rest of this introduction and then carefully follow the recommended<br />
procedure for setup and operation. You’ll save time in the long run and minimize the<br />
risk of damaging the unit.<br />
*Camera Weight Capacity is dependant on camera CG position.<br />
3
1. Overview — Read this first<br />
Overview<br />
How to Use the <strong>Merlin</strong> 2® <strong>Manual</strong> and Instructional Video<br />
The <strong>Merlin</strong> 2 manual and instructional video are designed to be used together. They are divided into<br />
corresponding sections. Watching the video for each section will show you the basic principles and<br />
operations of the <strong>Merlin</strong> 2 and give you a feel for how to perform them. Then the manual will take you<br />
step-by-step through the same operations with your <strong>Merlin</strong> 2 and camcorder. We recommend that you<br />
proceed as follows:<br />
Print out the manual, if desired, read this introduction all the way through and prepare for setup as<br />
described.<br />
From this point on, each step requiring a specific action on your part will contain space for a check mark<br />
and should be checked off as performed.<br />
Now watch Sections 1 (Introduction) and 2 (Tour of the <strong>Merlin</strong> 2) on the DVD. Watch them all the way<br />
through, and don’t attempt to follow along with your <strong>Merlin</strong> 2. We’ve found that it’s almost impossible<br />
to work with the <strong>Merlin</strong> 2 and watch the DVD at the same time!<br />
At the end of Section 2, the DVD will pause and you can turn to Section 2 of the manual. Perform each<br />
step as requested and check them off as you go. If you determine that a step does not apply to you, check<br />
it off anyway.<br />
It is important to perform the steps in the proper sequence, to avoid both frustration and the risk of<br />
damage to the <strong>Merlin</strong> 2. Do not unfold the unit or attempt to mount your camera except as directed.<br />
The <strong>Merlin</strong> 2® Cookbook<br />
Recommended settings for some popular camcorders may be found in the Online Cookbook at:<br />
www.merlin2cookbook.com<br />
Note: Due to the ever-increasing number of camcorders, we may not yet have your<br />
camera setting listed. If your camera is not in the cookbook, we recommend the<br />
following:<br />
If you know that your camera generically resembles one that is listed, try using the specifications<br />
for that camera.<br />
4<br />
If not, we’ll help you balance ‘from scratch’, and you can help us in return, by<br />
e-mailing your successful <strong>Merlin</strong> 2 settings for cameras not yet listed in the cookbook to:<br />
merlincookbook@Steadicam.com to be posted in the “User-Reported Settings” Table.
Requirements for setup<br />
Set aside an hour or so for your first session with the <strong>Merlin</strong> 2. Set up a comfortable work chair and table in front of<br />
your TV and near a bright light. Put the following items within easy reach:<br />
• The <strong>Merlin</strong> 2 packing case. Don’t unpack yet.<br />
• Your camcorder, with a fully charged battery.<br />
• Check for your camcorder listing at: www.merlin2cookbook.com and write down the settings here (we’ll<br />
explain):<br />
• Number and size of forward weights<br />
• Number and size of lower weights<br />
• Arc size<br />
• Mounting hole letter (A-O) on dovetail plate<br />
• Stage position<br />
• ‘Guide’: number of turns.<br />
• Large and small flat-head screwdrivers.<br />
• A pencil.<br />
• A tape measure.<br />
• A white grease pencil or china marker (optional).<br />
• A shallow cereal bowl or glass pie plate (optional).<br />
• The DVD remote. It can help to perform the setup as a team effort. One person reads the manual, checks off<br />
each item and plays the sections of the DVD as appropriate; the other performs the setup of the <strong>Merlin</strong> 2.<br />
You will perform these basic operations<br />
• Unpacking and identifying each part.<br />
• Learning to safely unfold the <strong>Merlin</strong> 2 into “flying mode” and to re-fold it into “travel mode.”<br />
Don’t attempt to unfold the <strong>Merlin</strong> 2 until you reach this section.<br />
• Presetting <strong>Merlin</strong> 2 balance for your camera.<br />
• Preparing and mounting your camera.<br />
• Trimming (fine-tuning) <strong>Merlin</strong> 2 balance.<br />
Once the camera is properly balanced on the <strong>Merlin</strong> 2, we recommend that you leave it attached to the <strong>Merlin</strong> 2’s<br />
quick-release dovetail plate. By itself, your camera can be hand-held or instantly attached to your tripod with the<br />
included Tripod Adaptor Plate, and when mounted on your <strong>Merlin</strong> 2 it can be tucked against your shoulder for<br />
extra stability if shooting conventionally, or quickly folded for traveling or storage.<br />
<strong>Merlin</strong> 2 setup takes a little time, but if you do it right you’ll only have to do it once. Even if you remove the<br />
dovetail plate from your camera the locating pin will insure that it can be remounted in the correct, balanced<br />
position with just a single screw.<br />
Basic Set-up<br />
Now, you’re ready to start.<br />
View the first two sections of the DVD, including Section 1:<br />
Introduction and Section 2: A Tour of the <strong>Merlin</strong> 2® .<br />
Follow up by reading A Tour of the <strong>Merlin</strong> 2® in this manual.<br />
5
2. A Tour of the <strong>Merlin</strong> 2®<br />
The Parts<br />
Before you take your <strong>Merlin</strong> 2® out of the box…<br />
We’ll begin by describing the purpose of the system and identifying<br />
the major components. Then we’ll cover the procedure for safely<br />
unpacking and unfolding the unit. So leave it in the box for now!<br />
Camcorders are unstable because the human beings holding them are<br />
always in motion. Small rising, falling and side-to-side movements<br />
don’t really show unless there’s some object close in the foreground,<br />
but tilting the camera up, down or side-to-side by a similar amount<br />
will noticeably affect the framing.<br />
Activate your camcorder, go fairly wide-angle and frame<br />
a scene across the room. Keeping the camera level, try<br />
raising and lowering it about an inch by slightly bending<br />
and unbending your knees, then moving it side-to-side the<br />
same amount by slightly shifting your weight from one<br />
foot to the other. Note that the effect on the framing is slight.<br />
Now tilt the camera slightly to the left…to the right…up…down. Note the dramatic effect<br />
on framing of these tipping motions.<br />
Hand-holding a camera, particularly a small camera, results in angular motions (little ‘tilt’ and ‘pan’<br />
corrections) which are quite disturbing because the human eye doesn’t see the world with the shakes.<br />
So-called ‘digital stabilizers’ and optically stabilized lenses work well to eliminate vibrations, but are<br />
useless for the large-scale bumps that occur when you attempt to walk, run or climb stairs.<br />
The Steadicam rig works by disconnecting the camera support from the camera and allowing you just<br />
enough angular influence to aim it. In addition to being a great stabilizer, it is also an elegant way of<br />
holding a camcorder to permit complicated and graceful moves that would otherwise be impossible.<br />
Locate the following parts on Diagram 1:<br />
Gimbal and Grip. The shape of the <strong>Merlin</strong> 2 is designed to stabilize the system by placing<br />
its center-of-gravity below the camera — in fact, just below the center of the Gimbal. The<br />
Gimbal won’t permit any angular force to pass through it, so it doesn’t matter if your hand<br />
shakes while holding the Grip, which is below the Gimbal and therefore isolated from the<br />
camera.<br />
Just above the Gimbal is the Guide, the small surface you use to aim the <strong>Merlin</strong> 2. Since<br />
your “gripping hand” does all the work in supporting the <strong>Merlin</strong> 2, your “guiding” hand can<br />
retain the extremely light touch necessary to aim the camera without transmitting the shakes.<br />
Your camera will mount to the quick-release Dovetail Plate, which attaches to the Stage.<br />
The Trim Controls on the Stage make it possible to tune the balance of the system so that<br />
it is poised level on the Gimbal, but is every-so-slightly bottom heavy.<br />
The Upper Spar and Lower Spar distribute the mass of the system. (Note the tapered<br />
Start and Finish weights screwed together at the end of the Lower Spar.)<br />
6<br />
The Folding Caliper Hinge has two functions: It permits the <strong>Merlin</strong> 2 to fold and<br />
unfold between the travel (storage) and shooting positions; and it adjusts the size of the arc<br />
between the upper and lower spar, to tune the vertical balance of the <strong>Merlin</strong> 2.
The Caliper Release Ring prohibits inadvertent folding with heavy cameras.<br />
The Upper Locking Knob and the Lower Locking Knob release the upper and<br />
lower spars to expand or contract at the Caliper Hinge, and then lock them tightly to prevent<br />
vibration when shooting<br />
The Caliper Adjusting Knob raises and lowers the lower spar to adjust the size of the<br />
arc between them.<br />
Basic Set-up<br />
The combination of these elements works astonishingly well, and we hope you will enjoy the <strong>Merlin</strong><br />
2 as much as we do. With practice, you can move easily through almost any shooting opportunity,<br />
walking, running or climbing stairs, and deliver wonderful shots.<br />
stage<br />
upper spar<br />
upper locking knob<br />
finish weight<br />
folding caliper<br />
hinge<br />
caliper<br />
release<br />
ring<br />
fore-and-aft<br />
trim roller<br />
gimbal<br />
guide<br />
handle grip<br />
lower locking knob<br />
caliper<br />
adjusting<br />
knob<br />
dovetail plate<br />
dovetail lock<br />
folded<br />
metal edge<br />
lower spar<br />
tapered start and<br />
middle weights<br />
Diagram 1<br />
7
Unpacking and identifying parts<br />
The Parts<br />
Remove the parts one at a time from the box. Make a check in the space provided as you identify each<br />
part. Any part that is packed in an envelope should be identified and then kept in that envelope until<br />
it’s called for. Do not throw away any packing material until all parts are accounted for. If anything is<br />
missing, please contact <strong>Tiffen</strong> for a replacement.<br />
You should have:<br />
Steadicam <strong>Merlin</strong> 2®<br />
DVD: “The Art of Steadicam <strong>Merlin</strong> 2”<br />
Nine threaded stainless-steel weights:<br />
One Start and two Finish weights<br />
Six Mid weights<br />
Plastic Bag, containing:<br />
Mounting Screw for mounting camcorder to <strong>Merlin</strong> 2<br />
Locating Pin sets: pin and attaching screw<br />
Lens Saddle (provides optional stiffening and support for<br />
some heavy camcorders)<br />
Tripod Adaptor Plate<br />
When all parts have been located and identified, watch<br />
Section 3 of the DVD, Unfolding the <strong>Merlin</strong> 2® .<br />
Then continue with the <strong>Manual</strong>.<br />
8
3. Getting Started<br />
Unfolding the <strong>Merlin</strong> 2® into Flying Mode<br />
The Steadicam <strong>Merlin</strong> 2 is shipped to you in its compact Folded or Travel Mode.<br />
It is important to unfold and fold the unit in the proper sequence, to avoid accidental<br />
damage. There are only two positions.<br />
Getting Started<br />
Begin by unfolding the unit into Flying Mode as follows:<br />
Position the <strong>Merlin</strong> 2 as shown. Hold the Stage and the Grip<br />
together with your hand.<br />
Note the storage position of the Grip in the folded unit,<br />
secured up under the stage alongside the folded lower spar.<br />
Check that the Caliper Hinge<br />
Release is open and out of the way.<br />
With the other hand, swing down the Lower Spar sideways<br />
until it clicks into the fully opened position.<br />
If you plan to use a heavy camera, get into the habit of<br />
locking the Caliper Hinge Release when the <strong>Merlin</strong> 2 is<br />
unfolded into Flying Mode.<br />
The Steadicam <strong>Merlin</strong> 2 is now in Flying Mode. When a camera is<br />
properly mounted on the Stage, you will be able to hold the unit by<br />
the Grip and the camera will “float” in balance above it.<br />
Folding the <strong>Merlin</strong> 2® into Travel Mode<br />
Unlock the Caliper Hinge<br />
Release by pulling back the<br />
lock ring ring and rotating it<br />
counter-clockwise.<br />
‘Dock’ the Gimbal under the stage by pressing the<br />
hook and loop fastener patch on the Grip to the<br />
matching patch under the bubble level.<br />
Grasp the Stage and the Grip with one hand and swing<br />
up the Lower Spar until it clicks into the ‘Travel’<br />
position under the stage alongside the grip.<br />
Practice folding and unfolding the <strong>Merlin</strong> 2® between Flying Mode and Travel Mode.<br />
9
Identify the following parts:<br />
Getting Started<br />
Gimbal. We identified the Gimbal in Section 1, but<br />
now examine its range of motion. The Gimbal contains<br />
delicate bearings and must not be forced beyond its<br />
natural range of movement.<br />
Grip. The Grip supports and positions the <strong>Merlin</strong> 2.<br />
The Grip should always be held with the rubber grip<br />
side facing forward in contact with your fingers. If<br />
it’s held backward, movement of the Gimbal will be<br />
impeded and under some circumstances the Gimbal<br />
could be damaged. Try gently moving the Grip and<br />
Gimbal around to compare its range of motion in the<br />
correct vs. incorrect positions.<br />
Guide. This is the black ring above the Gimbal. The<br />
Guide provides a minimal surface so the thumb and<br />
one or two fingers can aim the camera. The “Tongue”<br />
at the front of the Guide provides extra surface area to<br />
assist in tilting the camera. Do not rotate or adjust the<br />
Guide yet.<br />
Fore-and-Aft Trim Roller, along the side of the<br />
Stage.<br />
Side-to-side Trim Roller, under the Stage at the<br />
back of the Gimbal mount.<br />
Now you are ready to begin balancing the unit for your camera.<br />
Watch Section 4 of the DVD, Presetting Balance.<br />
Then continue with the <strong>Manual</strong>.<br />
10
4. Pre-Setting Balance<br />
When your camera is mounted onto the <strong>Merlin</strong> 2, the entire unit must be set-up and balanced so that the<br />
combined center-of-gravity (camera plus <strong>Merlin</strong> 2), ends up just below the center of the fulcrum (the<br />
Gimbal), and precisely adjusted to be slightly bottom-heavy. Let’s take a moment to understand this.<br />
“Z” Balance<br />
Try balancing a shallow pie plate on the tip of your finger. It’s very difficult to do,<br />
because the center-of-gravity (c.g.) of the bowl is above your finger.<br />
Turn the bowl upside down. Now it’s much easier to find the balance point and<br />
once you find it you can move your finger from side-to-side and it won’t fall off.<br />
That’s because you’ve made the bowl bottom heavy and put its center-of-gravity<br />
below your fingertip.<br />
c.g. is above finger<br />
c.g. is below finger<br />
Slight bottom-heaviness is the key to Steadicam stabilization. That’s what the compact stage and the<br />
weights on the Lower Spar are for: to provide just enough mass well below the Gimbal to compensate<br />
for the much greater weight of your camera just above the Gimbal. Of course you’ll want the unit to be<br />
somewhat bottom-heavy before attempting side-to-side or front-to-back balance, or the camera will tend<br />
to flop over and hang upside-down.<br />
Three ways to balance bottom-heaviness<br />
Because the <strong>Merlin</strong> 2 accepts cameras weighing from 0.5 to 5.0lbs (0.23 - 2.27kg), we provide three<br />
graduated ways of achieving appropriate bottom heaviness.<br />
1. Adding weights<br />
The coarsest adjustment of bottom-heaviness is obtained by adding or subtracting weights, particularly<br />
at the end of the lower spar. The Steadicam <strong>Merlin</strong> 2 comes with nine threaded stainless steel weights:<br />
One ‘Start’ weight:<br />
1/8 lb (57g)<br />
Two ‘Finish’ weights:<br />
1/8 lb (57g)<br />
Six ‘Mid’ weights:<br />
1/4 lb (114g)<br />
11
You won’t need to screw them on tightly. Each weight has a rubber<br />
O-ring at the back of the threads that keeps it from working loose,<br />
even when barely tightened.<br />
“Z” Balance<br />
Screw and unscrew two weights together and apart, notice that<br />
they only need to be lightly tightened (until just snug), so they<br />
remain easy to add and remove.<br />
Unfold the <strong>Merlin</strong> 2 and unscrew the Start weight from the<br />
forward position and the Start and Finish weights from the<br />
lower position and set them aside.<br />
If your camcorder is in the Online Cookbook at www.merlin2cookbook.com note the number and<br />
type of weights specified for both the forward and lower positions, and note them again here:<br />
Forward Position: 0 or 1 Finish (zero for lightest cameras) + Mid (0 or 1)<br />
Lower Position: Start (0 or 1) + Mid (0 to 6) + Finish<br />
Install the weights specified at both the forward and lower positions. Note, as above: a Start weight<br />
may not be called for, but cameras weighing a pound or more will almost always employ Finish<br />
weights, both forward and below.<br />
Balancing from Scratch I: Formula for adding weights<br />
If you don’t see your camcorder in the Online <strong>Merlin</strong> 2 Cookbook, here’s a rough formula to help you preset vertical<br />
balance. Weigh your camera accurately (or look up its weight in the camera’s manual or on the manufacturer’s<br />
website). Make sure you have the tape, disc or memory card aboard, plus a camera battery when you weigh it. Note<br />
that the compact structure of the <strong>Merlin</strong> 2 puts its counterweights about four times as far below the gimbal (think<br />
fulcrum!) as the center of your camera’s mass is above it. Therefore you’ll need at least a quarter of your camera’s<br />
weight down below as counterbalance.<br />
For every pound of camcorder weight, add at least a quarter-pound <strong>Merlin</strong> 2 weight to the lower spar.<br />
< 1 lb (.45kg) Cameras under one pound will generally need one Finish weight forward and one Finish<br />
weight below.<br />
> 1 lb (.45kg) Cameras weighing over one pound will also need a tapered Start weight added below.<br />
> 2 lbs (.91kg) At two pounds, add one Mid weight below.<br />
> 3 lbs (1.36kg) At three pounds, add one more Mid below and also add a Mid in front (but never<br />
more than one Mid and one Finish in the forward position -- they are for increased inertia and don’t<br />
contribute much to vertical balance.)<br />
+1 For every additional pound (.45kg), add at least one more Mid weight below.<br />
Note some of the heavier HDV cameras suggested for use with <strong>Merlin</strong> 2, such as the Sony “Z” have higher than<br />
normal centers-of-mass and may require the Mid weight in front to be moved down onto the lower spar. The idea<br />
is to add as little weight as possible to balance your camera and so preserve the essential lightness of the <strong>Merlin</strong> 2<br />
system. Without its weights <strong>Merlin</strong> 2 weighs 1.4 lbs (0.64 kg).<br />
12
2. Adjusting the Caliper Hinge<br />
The second method of balance – for a finer adjustment of bottom-heaviness – involves expanding and<br />
contracting the angle of the <strong>Merlin</strong> 2’s lower spar. This adjustment raises or lowers the weights relative<br />
to the camera.<br />
Identify the Caliper Hinge Locking Knobs. They tighten<br />
the connection between the upper and lower spar and keep<br />
the <strong>Merlin</strong> 2 rigid to prevent vibration.<br />
Basic Set-up<br />
Loosen both Locking Knobs.<br />
Identify the Caliper Adjusting Knob. It adjusts the angle<br />
of the lower spar.<br />
Notice the graphic on the knob. It tells<br />
you which direction to turn to expand<br />
or contract the Arc Size. Clockwise<br />
expands. Counterclockwise contracts.<br />
If weights have already been added, support the lower<br />
spar rest on the surface of the table to make the Caliper<br />
Adjusting Knob easier to turn. Turn the knob clockwise to<br />
increase bottom-heaviness.<br />
Continue until you reach the maximum expansion<br />
of the Arc Size between the upper and lower spars –<br />
approximately 13.6 inches (34.5 cm) – but don’t force this<br />
adjustment further. Use this maximum Arc Size for cameras<br />
weighing much above two pounds (.9kg), so you can use as<br />
few weights as possible.<br />
Turn the Adjusting Knob counter-clockwise to reduce<br />
the Arc-Size. You will reach the minimum arc size of<br />
approximately 10 inches (25.4 cm).<br />
If your camera is listed in the Online Cookbook, note the<br />
Arc Size distance specified again here:<br />
Arc Size for your camera:<br />
inches or cm.<br />
The distance is measured from the lower weight to the top of the Stage.<br />
13
Lay the <strong>Merlin</strong> 2 on its side on the table. Using a tape<br />
measure, open or close the Caliper as needed to set the<br />
suggested distance from the lower weight to the top of the<br />
Stage.<br />
“Z” Balance<br />
Now hold the <strong>Merlin</strong> 2 vertical and lock both Locking<br />
Knobs tightly to prevent vibration.<br />
Balancing from Scratch II: Pre-adjusting the Caliper Hinge<br />
If your camera weighs approximately a pound (450g) set the Caliper Hinge to about<br />
10 inches (25cm).<br />
If your camera weighs more than two pounds (1kg), preset the Caliper Hinge so that<br />
it’s almost fully open at 12 inches (30cm), so you will need fewer weights. This will<br />
keep the mass of the entire unit as low as possible.<br />
3. Adjusting the Guide Ring<br />
The finest adjustment of bottom heaviness is obtained by rotating the threaded Guide Ring to raise or<br />
lower the Gimbal, closer or farther from the underside of the Stage.<br />
Identify the Guide Ring, for vertical (“Z”) axis balance adjustment. (The X axis is fore-and-aft<br />
and the Y axis is side-to-side). Don’t adjust the Guide Ring until directed to do so.<br />
Consult the Online Cookbook and note<br />
the Guide Ring setting for your camera<br />
here: turns. (Number of Z turns<br />
counterclockwise = number of threads<br />
showing above the Guide Ring.)<br />
With the unit unfolded and open in Flying<br />
Mode, turn it sideways and examine the<br />
Guide Ring above the Gimbal.<br />
Identify the Guide Latch Button at the<br />
front of the ring that keeps the ring from<br />
rotating. If this button is depressed with<br />
a fingernail or the back of a pencil (it’s<br />
purposely stiff) the Guide Ring can be<br />
rotated one full turn<br />
before the Latch snaps<br />
back to lock it in the<br />
correct position. But<br />
read the next several<br />
paragraphs, including<br />
the warning before you<br />
try it!<br />
• Rotating the Guide Ring<br />
clockwise screws in the ring<br />
and raises the Gimbal closer<br />
to the Stage.<br />
• Rotating counterclockwise<br />
unscrews the Guide Ring<br />
and lowers the Gimbal away<br />
from the Stage.<br />
14
This adjustment fine-tunes the location of the center of mass to the optimum point just below the pivot<br />
point of the Gimbal. We call this the ‘Z’ axis, or vertical balance.<br />
WARNING: The Guide can be difficult to rotate if screwed<br />
all the way in. Also, tightening the Guide all the way can make<br />
the latch difficult to release.<br />
The Gimbal contains delicate bearings. Excessive force will<br />
cause the Gimbal Ring to break.<br />
Basic Set-up<br />
DO NOT use the Grip as a lever for turning the Guide. Also,<br />
DO NOT use the tongue as a lever for turning the Guide.<br />
Now depress the latch and gently rotate the Guide two turns clockwise, pressing<br />
in the latch each time it comes to the front of the unit. It should rotate easily. You<br />
may be able to rotate it part of a third turn but DO NOT ATTEMPT to force or<br />
tighten it.<br />
After determining that the Guide is screwed all the way in clockwise, back it off<br />
to the first detent position (latch forward). Then rotate it counterclockwise the<br />
number of turns specified in the “Cookbook” for your camera.<br />
Always leave the Guide Ring with the latch and tongue in the forward position,<br />
locked into place. If the Guide Ring is left with the tongue at the rear, the handle<br />
will strike it and may snap off the tongue when the unit is folded into travel mode.<br />
more bottom heavy<br />
less bottom heavy<br />
You have now preset the rough vertical balance of the Z (vertical) axis. After the<br />
camera is mounted, this balance will be further adjusted.<br />
Now watch Section 5 of the DVD, Installing Dovetail Plate.<br />
Then continue with the <strong>Manual</strong>.<br />
15
5. Installing the Dovetail Plate<br />
Dovetail Plate<br />
Before mounting your camera, let’s preview docking the Dovetail Plate<br />
on the stage.<br />
Hook the folded metal edge of the Dovetail<br />
Plate over the left side of the Stage (toward<br />
your camera’s fold-out monitor), and the long<br />
flat surface will be toward the front.<br />
The three-position Dovetail Locking Lever<br />
goes to the other side.<br />
Hold the Locking Lever straight forward and<br />
lower the Dovetail Plate gently onto the Stage.<br />
Swing the Locking Lever straight out away from the Stage. Notice<br />
that the plate is held on loosely, but can still be slid fore and aft.<br />
LOOK CLOSELY at how the shape of the Lever allows the Plate<br />
to drop past it when the lever is forward, and to be held against the<br />
Stage when the lever is swung toward the rear.<br />
Swing the Locking Lever to the rear to tighten the Dovetail Plate<br />
in position. Note that the Stage Position markings can show you<br />
the correct position, and help you return to it when the camera has<br />
been removed from the <strong>Merlin</strong> 2.<br />
Refer to your list of Cookbook settings for your camera and note<br />
the suggested Stage Position here:<br />
Prepare your camera<br />
Accessories have a big influence on the center of balance, so leave them off for now. Eventually you<br />
may want to balance the <strong>Merlin</strong> 2 with your preferred combination of accessories in place, including a<br />
wide-angle adaptor, but to get started, the Cookbook settings are for a fairly stripped down camera.<br />
Make sure the tape, disc or memory card is installed in your camera. Tuck your lens cap away so it<br />
stays put while you’re shooting, and remove the shoulder strap or anything else that might dangle.<br />
We recommend that you put a narrow strip of thick Gaffer’s Tape (fancy duct tape!) running fore<br />
and aft at either side of the threaded insert (mounting hole) on the underside of the camera.<br />
Since camcorder mounting surfaces can be small, irregular and often somewhat weak, this increases the<br />
friction between camera and Dovetail Plate and improves the tightness of the fit.<br />
16<br />
Note: If your camera weighs more than four pounds (1.8kg), we recommend that you<br />
plan on using the lightest, rather than the heaviest batteries you own, and cameras<br />
approaching 5 lbs (2.2kg) may be overweight for <strong>Merlin</strong> 2 with a wide-angle adapter.<br />
Remember that once the Caliper Hinge is fully open, each object added to the camera<br />
will require additional counterweight below.
Attaching the camera to the Dovetail Plate<br />
Because the center-of-gravity of each type of camera is different, their positioning on the Stage will<br />
vary. Gross positioning of the camera above the Gimbal is accomplished by the proper choice of<br />
mounting hole. (Fine positioning is accomplished with the fore-and-aft and side-to-side trim knobs.)<br />
Consult your settings from the Online Cookbook to find<br />
the correct mounting hole on the Dovetail Plate for your<br />
camera, identified alphabetically, from A to O.<br />
Basic Set-up<br />
Note it here: Hole<br />
Examine the fifteen mounting holes on the Dovetail.<br />
Directly in front of each is a smaller hole for the<br />
Locating Pin. Circle the suggested hole with a grease<br />
pencil or other marker. Be sure the Dovetail Plate is<br />
oriented so that the long flat side will be toward the lens<br />
of your camera.<br />
Identify the Locating Pin and the small screw that<br />
will hold it to the Dovetail Plate. Insert the screw in<br />
the underside of the small hole, forward of the selected<br />
mounting hole and thread on the Locating Pin from the<br />
top. Tighten gently with a small flat-head screwdriver.<br />
Note: the locating pin is not an option with a DSLR<br />
camera. The aforementioned gaffer tape usually<br />
resolves any spinning issues.<br />
Hold the Dovetail Plate against the underside of your<br />
camera, align the Locating Pin correctly in your<br />
camera’s Locating Pin hole, and insert and tighten the<br />
camera Mounting Screw.<br />
Note the Stage Position Scale on the top of the Stage<br />
which will indicate the position on the Stage for the<br />
Dovetail Plate.<br />
17
Dovetail Plate<br />
Balancing from Scratch III: Find your camera’s c.g.<br />
If you did not find your camera in the online cookbook, here’s how to find and mark your<br />
camera’s center of balance, and locate the correct hole on the Dovetail Plate. (This is a good<br />
thing to know in any event.)<br />
Be sure the camera’s monitor screen is folded out in the<br />
viewing position.<br />
Keep one hand in control of your camera so it doesn’t<br />
topple over, and experimentally find the spot on the<br />
underside where the entire mass can roughly balance on<br />
the tip of your finger.<br />
Invert the camera and mark that spot with a pencil or<br />
grease pencil. Your mark will probably not exactly<br />
coincide with the threaded insert (mounting hole) in the<br />
camera. Some of them are wildly different – that’s why<br />
we provided 15 mounting holes!<br />
Hold the Dovetail Plate inverted over the underside<br />
of your camera so the true center of the plate (roughly<br />
hole ‘H’), is located over your mark (and therefore over<br />
the center of your camera’s mass).<br />
Keeping the Dovetail Plate in place, visually locate<br />
the mounting hole on the Dovetail Plate that coincides<br />
most closely with threaded insert (mounting hole) on<br />
your camera. You should be able to view right through<br />
to the bottom of the hole. (It may or may not be hole H)<br />
Mark the hole on the Dovetail Plate and install the locating pin just forward of it as<br />
described above.<br />
Hold the Dovetail Plate so the Locating Pin engages the locating pin hole in your<br />
camera, and align so that you can insert and tighten the camera mounting screw.<br />
Your camera is now ready to mount on the <strong>Merlin</strong> 2® .<br />
Now watch Section 6 of the DVD, Balancing and Mounting the Camera.<br />
Then continue with the <strong>Manual</strong>.<br />
18
6. Balancing and Mounting the Camera<br />
Before your camera is mounted, inspect both trim rollers<br />
Unfold the <strong>Merlin</strong> 2 into the Shooting Mode.<br />
Look at the Fore-and-Aft Trim Roller alongside the Stage.<br />
There should be about one inch (25mm) of threaded rod<br />
showing in front.<br />
Camera<br />
Note the two arrows forward of the Roller. They indicate<br />
that when you need the front of the <strong>Merlin</strong> 2 to tilt up, push<br />
the roller up. It may take several energetic turns to make a<br />
difference, as this is a very fine adjustment. When you need the<br />
front of the <strong>Merlin</strong> 2 to tilt down, pull the roller down.<br />
Look at the smaller Side-to-Side Trim Roller underneath<br />
the Stage. It should be approximately set with about an equal<br />
amount of threaded rod showing on either side.<br />
Note the two arrows to the left of the Roller. They indicate that<br />
when you need the left (or monitor) side of the camera to go<br />
upward, push this roller up, and vice versa.<br />
Observe the Bubble Level at the back of the Stage. The Sideto-Side<br />
Trim Roller will be used to help balance the <strong>Merlin</strong> 2<br />
to stay level.<br />
Try giving both Trim Rollers a couple of quick, energetic turns. Hold the Upper Spar still with<br />
one hand, and use the thumb of your ‘support’ hand on the Grip to push either Trim Roller up or<br />
down. The action of the Trim Rollers is best seen from underneath. Observe how they alter the<br />
balance of the system by moving the Gimbal carrier fore-and-aft or side-to-side relative to the<br />
camera.<br />
Now return the Trim Rollers roughly to their preset positions.<br />
Mounting your camera<br />
By now your camera should be attached in the correct location on the<br />
Dovetail Plate. Your <strong>Merlin</strong> 2 should have the correct weights aboard and<br />
be adjusted to have the correct Arc Size for your camera – either per the<br />
Cookbook settings or according to our Balancing-From-Scratch instructions.<br />
Here goes:<br />
Hold the <strong>Merlin</strong> 2 Stage with one hand and the camera with the other<br />
hand. Hook the bent portion of the Dovetail Plate over the monitor side<br />
of the <strong>Merlin</strong> 2 Stage as you practiced earlier.<br />
Hold the Dovetail Locking Lever in the forward position to carefully<br />
allow the Dovetail Plate to drop down onto the stage.<br />
Swing the Locking Lever straight out to the side.<br />
19
Camera<br />
CAUTION: Be sure to keep a hand on your camera<br />
whenever the locking lever is unlocked to keep your<br />
camera from falling off.<br />
Slide the Dovetail Plate until the forward<br />
edge is at the correct Stage Position<br />
(according to the Cookbook as noted).<br />
Now, swing the Locking Lever toward the<br />
rear to lock the Dovetail to the Stage.<br />
Balancing from Scratch IV:<br />
If your camera is not in the Online Cookbook, set the default stage position to “0” before<br />
locking the lever.<br />
The Custom Lens Saddle for large, heavy camcorders:<br />
Even on heavy camcorders, the mounting structures are often less than rigid,<br />
and we have tried not to make the <strong>Merlin</strong> 2 too massive, so if you’re moving<br />
violently or running and your hand is shaking there may be some relative<br />
motion between the front of the camera and the <strong>Merlin</strong> 2 stage.<br />
Here’s the solution: We provide the custom lens saddle – the little screw-in<br />
platform that goes into the 1/4-20 threaded hole at the front of the <strong>Merlin</strong> 2<br />
stage to dampen these vibrations.<br />
If you have a large, heavy camcorder, insert the saddle and screw the<br />
support screw into the threaded hole at the front of the <strong>Merlin</strong> 2 before<br />
you mount your camera.<br />
Mount your camera at the correct Stage Position, and then look under<br />
it from the side and carefully adjust the lens saddle upward until it just<br />
touches the underside of the camera body. Stiffening the connection<br />
between camera and <strong>Merlin</strong> 2, dampens any relative motion between<br />
them and you will be able to shoot more telephoto without vibration in<br />
your shots.<br />
Be careful not to over-tighten the lens saddle screw against the<br />
underside of your camera; it can make the Dovetail Plate harder to<br />
mount or dismount from the <strong>Merlin</strong> 2, and may even bend it or cause<br />
excessive strain to the camera’s threaded insert.<br />
20
The Caliper Hinge Release Ring<br />
If you have more than three or four weights attached to the Lower Spar, the ‘click-stop’ catch that<br />
keeps the <strong>Merlin</strong> 2 in the Flying Mode, may not be strong enough to restrain the weight when held out<br />
sideways and the hinge may open. With heavier cameras, get in the habit of locking and unlocking the<br />
Caliper Hinge Release when you unfold and fold the <strong>Merlin</strong> 2. (That will also prevent it from opening<br />
inadvertently when set down sideways between shots.)<br />
Basic Set-up<br />
Practice opening and locking the Caliper<br />
Hinge Release Ring.<br />
Note how it prevents the <strong>Merlin</strong> 2 from<br />
folding inadvertently.<br />
Practice folding the <strong>Merlin</strong> 2 with the<br />
camera mounted: Secure the Gimbal<br />
up under the Stage; hold the Stage, and<br />
Gimbal with one hand.<br />
Be sure the Caliper Hinge Release is open. Pull<br />
it out to fold the unit, be sure to push it back in<br />
to lock the hinge when in use<br />
Swing up the Lower Spar in an arc to<br />
find it’s notch. Now open it fully into the<br />
Flying Mode.<br />
DON’T RUSH these maneuvers and<br />
pay attention to what you are doing. If<br />
you forcefully fold the unit, for example<br />
and the Caliper Hinge Release is still<br />
locked, or if it’s in the way when you try<br />
to unfold, it could be damaged.<br />
Now watch Section 7 of the DVD, Horizontal and Vertical Trim.<br />
Then continue with the <strong>Manual</strong>.<br />
21
7. Horizontal and Vertical Trim<br />
Trim<br />
Horizontal trim<br />
You have preset vertical balance and camera position on the Stage, but your <strong>Merlin</strong> 2 is still unlikely to<br />
be in perfect balance. Let’s see how unbalanced it is, and in what direction.<br />
Grasp the Grip with your right hand and slide up your hand so<br />
you can steady the Guide with your right thumb and forefinger.<br />
Steady the upper spar with your left hand and tentatively<br />
release it. It will probably start to tilt over – either to the front,<br />
back or sideways (or both).<br />
Note the direction of tilt.<br />
If the <strong>Merlin</strong> 2 tries to tilt forward, use your thumb to push up<br />
several times on the Fore-and-Aft Trim Roller.<br />
If the <strong>Merlin</strong> 2 tilts backwards, pull down several times, and<br />
try it again.<br />
The adjacent arrows will remind you which direction to adjust<br />
each Trim Roller. Use quick full turns.<br />
Each time you trim, hold the <strong>Merlin</strong> 2 level before you release<br />
it so you can tell if you are getting close. Repeat as needed<br />
until it hangs level front-to-back.<br />
If the <strong>Merlin</strong> 2 also goes off-level side-to-side (which is likely),<br />
use your thumb to push up or pull down on the Side-to-Side<br />
Trim Roller under the Stage.<br />
Follow the arrows. If the monitor side of your camera needs to<br />
come up, push up. If the monitor is too high, pull down.<br />
Remember to hold it level each time before you release. Repeat<br />
as necessary.<br />
Alternate trying to trim fore-and-aft and side-to-side. It is<br />
easier if you don’t try to balance one axis entirely all at once.<br />
Go back and forth from one Trim Roller to the other as you<br />
get closer.<br />
Making a large fore-and-aft adjustment<br />
If your camera is way out of balance fore-and-aft, as might happen if you’re balancing from scratch, it<br />
may fall quickly when released. In that case you may slide the camera forward or backward on the Stage<br />
to get closer to rough balance before trying to use the Fore-and-Aft<br />
Trim Roller.<br />
22<br />
Don’t grab the Lower Spar if the <strong>Merlin</strong> 2 falls off-level. Just<br />
slide your ‘Grip’ hand up and stabilize the Guide Ring with<br />
your thumb and fingers in order to keep the <strong>Merlin</strong> 2 from<br />
tilting too far in any direction.
Keep one hand lightly on the camera to keep it secure and<br />
swing the Locking Lever straight out to the side to loosen<br />
the Dovetail Plate. Now slide the camera backward or<br />
forward until it feels roughly in balance. Then lock it by<br />
swinging the Locking Lever to the rear.<br />
Now touch up fore-and-aft balance with the Trim Roller.<br />
Basic Set-up<br />
Top-heaviness<br />
If you have trimmed repeatedly and the <strong>Merlin</strong> 2 never seems<br />
balanced, it may be top-heavy (with the center of mass above the<br />
gimbal). If so, it will never hang upright – it will always try to flip<br />
upside down.<br />
If you pre-set your <strong>Merlin</strong> 2 according to the Online Cookbook<br />
settings for your camcorder, this condition is likely to be mild, but<br />
even if you balanced from scratch, you can diagnose it as follows:<br />
Hold the Grip with one hand and move the Upper Spar out to one side with the other<br />
hand until the entire unit is horizontal. It will be easy to feel if it wants to keep going<br />
and hang upside down! The stronger this tendency, the more top-heavy it is.<br />
Cure slight top-heaviness by loosening both<br />
Locking Knobs and expanding the Arc Size<br />
with the Caliper Hinge Adjusting Knob (if<br />
you have not already opened it fully).<br />
Cure moderate top-heaviness by adding<br />
weights to the Lower Spar.<br />
Note: Both of the above ‘cures’ will alter trim, and you will need to re-balance with the<br />
Fore-and-Aft Trim Roller.<br />
Severe top-heaviness is unlikely if you followed the formula for “weights added vs. weight of camera.”<br />
But the cure is the same: add more weight below. Remember that the <strong>Merlin</strong> 2 is only designed to<br />
support cameras weighing five pounds (2.25kg)) or less, and you may need to remove wide-angle<br />
adapters, or heavy batteries.<br />
Excess bottom-heaviness<br />
If the center of mass of the entire unit is too far below the<br />
gimbal, trimming will seem to have little effect and moving<br />
the Grip rapidly to one side will create an obvious pendulum<br />
effect.<br />
Hold the Lower Spar out to the side and let it go<br />
briefly to see if it falls rapidly – a sure sign it’s too<br />
bottom-heavy.<br />
Note: Whenever you hold the Spar out sideways and let it fall, be sure to grab it just<br />
as it passes through vertical, and also tilt your Grip hand as it falls, so you do not<br />
forcefully exceed the range of the Gimbal bearings.<br />
23
Cure mild bottom-heaviness by loosening the<br />
Locking Knobs and reducing the Arc Size<br />
with the Caliper Hinge Adjusting Knob.<br />
Trim<br />
Cure moderate bottom-heaviness by removing<br />
weight from the Lower Spar.<br />
Again either ‘cure’ will require re-trimming foreand-aft.<br />
Drop test<br />
A <strong>Merlin</strong> 2 that’s in correct top-to-bottom balance can be moved rapidly back and<br />
forth laterally and it will essentially stay upright! It is technically bottom-heavy,<br />
but only slightly!<br />
Hold out the lower spar sideways and let it go, If it falls slowly, if it takes<br />
a full second (say “Go…one-thousand-and-one”) until it passes through<br />
vertical, in <strong>Merlin</strong> 2 terms that’s the magic!… That’s just where you want it<br />
to be! This is the famous Drop Test and your <strong>Merlin</strong> 2 is ready to shoot!<br />
This Drop Test is the way Steadicam operators worldwide discuss and calibrate<br />
the elusive quality of slight bottom-heaviness. Some prefer as long as three or<br />
four seconds for their full-sized rigs to fall through vertical.<br />
Experience, however, has shown that the <strong>Merlin</strong> 2 works best with a Drop Time<br />
of about one full second.<br />
NOTE: Typically, if the <strong>Merlin</strong> 2<br />
is not operating properly, 9 times<br />
out of 10 the solution is to correct<br />
the drop time.<br />
Once your Drop Time is correct, touch up the Sideto-Side<br />
Trim Roller so the <strong>Merlin</strong> 2 hangs level on its<br />
gimbal.<br />
And finally, adjust the Fore-and-Aft Trim Roller so<br />
the <strong>Merlin</strong> 2’s tilt angle helps maintain the headroom of<br />
your shot.<br />
The <strong>Merlin</strong> 2 Gimbal is like the pivot point on a see-saw<br />
There are three ways to change the balance of a see-saw:<br />
• you can change a weight<br />
• you can move a weight<br />
• you can change the location of the pivot point itself<br />
In <strong>Merlin</strong> 2® terms:<br />
• you can add and subtract weights at the Lower Spar<br />
• you can move a weight by expanding or contracting the Caliper Hinge<br />
• you can move the fulcrum laterally by Trimming fore-and-aft or side-to-side<br />
• remember that Guide Ring – you can move the fulcrum up or down by counter-clocking,<br />
or clocking the Guide Ring, which is a super-fine adjustment of bottom heaviness.<br />
24<br />
Check bottom-heaviness with a careful Drop Test. How long does it take for the spar to fall from<br />
sideways through vertical? Now counter-clock the Guide Ring one full turn, and note that the drop time<br />
is just a little slower.
Trimming Review<br />
If the camera tilts forward, push up the Fore-and-Aft Trim Roller alongside the Stage several<br />
quick turns (like the arrows) to raise the front of the <strong>Merlin</strong> 2, and vice versa.<br />
If the camera tilts toward the monitor (to the left), push up the Side-to-Side Trim Roller several<br />
quick turns to return to level. If it tilts right, pull down on the Roller.<br />
Trim Review<br />
In each case, hold the <strong>Merlin</strong> 2 level and steady. Then, let it go to test your trim.<br />
Perform the Drop Test to check the degree of bottom-heaviness. If it’s top-heavy, the camera will<br />
stay tilted over. If it’s excessively bottom-heavy, the Lower Spar will fall too quickly. Remember<br />
to also tilt your Grip hand as it falls, so you do not forcefully exceed the range of the Gimbal<br />
bearings.<br />
If your <strong>Merlin</strong> 2 is correctly balanced, slightly bottom heavy, the Lower Spar will slowly fall and<br />
the camera will right itself. The Spar should take just over a second to swing through the bottom<br />
of its travel, like a slow pendulum. Remember to stop it from swinging further by grasping the<br />
Upper Spar.<br />
If your <strong>Merlin</strong> 2 is very slightly top-heavy (falls too slowly):<br />
Raise the Gimbal by pushing in the small black Latch and rotating the Guide Ring clockwise.<br />
If your <strong>Merlin</strong> 2 is very slightly bottom-heavy (falls too quickly):<br />
Lower the Gimbal by pushing in the Latch and rotating the Guide Ring counter-clockwise.<br />
Note: The total “Z” travel available is 12 turns counterclockwise<br />
from fully tightened. When unscrewing the<br />
Guide, watch for the unthreaded band above the threaded<br />
section. When it appears, it is dangerous to further<br />
unscrew the Guide as it may fall out of the socket.<br />
When the camera is level, grasp the Grip with your strongest hand. Remove your other hand from<br />
the unit and try moving your Grip hand from side to side. The camera should remain essentially<br />
level. (If the Lower Spar swings like a pendulum when you stop you may still be too bottomheavy.)<br />
Put the thumb and forefinger of your other hand gently on the Guide Ring above the Gimbal. Try<br />
using your fingers to tilt the camera up and down and to swivel (pan) from side to side. A properly<br />
trimmed <strong>Merlin</strong> 2 can be panned and tilted with almost no effort on the Guide.<br />
Under most circumstances, you will want to trim to keep<br />
the Bubble Level at the back of the Stage centered,<br />
indicating that your camera’s framing is not tilted to<br />
either side. As you shoot, you will find that fine-tuning of<br />
both trim controls becomes a familiar, ongoing process.<br />
Congratulations! You have now completed the<br />
Setup part of the manual. Now you are ready for<br />
the fun part, Operating.<br />
25
If you have performed all set up adjustments in a single session, you may want to take<br />
a break and continue when you are fresh and rested!<br />
Trim Review<br />
As soon as you are ready, watch Section 8 of the DVD: Hand Positions.<br />
Then begin reading Part II – Operating in the <strong>Manual</strong>..<br />
26
Part Two — Operating<br />
Please read this manual carefully and keep it as a<br />
reference. It includes a number of useful operating<br />
tips that are not shown in the DVD.<br />
Part Two<br />
Operating! This is the fun part!<br />
The <strong>Merlin</strong> 2 is not just a stabilizer, it’s a uniquely elegant way to hold a camera at the center of balance,<br />
with the full freedom of your extended arms, and none of the awkward jerks and lurches of handheld<br />
shooting.<br />
With this finely tuned instrument in your hands, trimmed for your shot, moving and booming and<br />
changing positions at your will, genuine moving-camera artistry is within your reach.<br />
And here’s the good news: It’s like riding a bicycle—you’ll never forget the “trick” of how to operate<br />
a Steadicam rig. Once you get it, you have it for life. We’ll show you the same hand and body positions<br />
that allow professional Steadicam operators to make those magically smooth moving shots on Movie<br />
and TV sets worldwide. And we’ll teach you the nuts-and-bolts tricks of the trade – techniques of shot<br />
design and preparation – that help make them possible. We’ll teach you how the professionals setup and<br />
trim for every shot until it becomes second nature, and we’ll show you how to pace yourself and operate<br />
in ways that avoid fatigue.<br />
The <strong>Merlin</strong> 2 is versatile, durable and precise, and once you become expert in all its uses, you may never<br />
want to shoot without it.<br />
Cautions<br />
• Handle only works one way. Hold it with your fingers in the grooves.<br />
Holding the handle backwards can cause damage.<br />
• Avoid pinching your finger between the moving gimbal yoke and the<br />
bottom of the Guide. Keep fingertips either on the Grip or on the outer<br />
surface of the guide.<br />
• Avoid violent camera moves. It is possible for a strong operator to move<br />
a <strong>Merlin</strong> 2 and camcorder at many times the acceleration of gravity but<br />
mounting attachments on some camcorders are not strong enough and<br />
might pull loose. We recommend not exceeding roughly 1.5 g’s of vertical<br />
or horizontal accelerations. (That’s somewhat faster than the speed of an<br />
object falling from your hand.)<br />
• Avoid shooting in windy conditions as the <strong>Merlin</strong> 2’s stability requires<br />
isolation from all external influences and its performance will degrade<br />
proportionately. Attempt to shield the camera with bodies or find the “lee”<br />
of a nearby structure.<br />
27
Hand Positions<br />
8. Hand Positions<br />
Two-handed operating position<br />
This is the smoothest, easiest and most precise<br />
way to operate the Steadicam <strong>Merlin</strong> 2. The force<br />
to support it is isolated from the camera and the<br />
force to aim it can be almost non-existent. The<br />
camera is free to rotate on excellent bearings.<br />
What’s more, it is highly inert! The combination<br />
will provide you with an entirely new sensation<br />
as you orient an object that acts as if it were<br />
floating in space. (Ignore the weight and you can<br />
almost believe it!)<br />
One hand (your choice) holds the Grip and<br />
supports all the weight. You can’t pan or tilt with<br />
that hand and it has no influence on the camera’s<br />
angle unless you bump the stage or upper spar.<br />
This is the hand that ‘Flies’ your <strong>Merlin</strong> 2<br />
through space and avoids contact with anything<br />
(legs, elbows, clothing, furniture!) that could<br />
disrupt your shot.<br />
Inertia<br />
Remember that the <strong>Merlin</strong> 2 is both inert and<br />
free to rotate. This means that you must think<br />
ahead if you want it to start panning and begin<br />
early, with the smallest force possible. Also<br />
remember to stop the pan – the <strong>Merlin</strong> 2 obeys<br />
several of Newton’s laws, such as the one about<br />
“remaining in motion.”<br />
Use your thumb and finger like a drum brake<br />
to stop a pan, releasing the pressure the instant<br />
the camera is aimed where you want. Let your<br />
wrist bend a little to stay out of the way of the<br />
spars. The inertia of the <strong>Merlin</strong> 2 makes it hard<br />
to react instantly – try to anticipate your moves.<br />
One-handed operating position<br />
NOTE: If your<br />
<strong>Merlin</strong> doesn’t<br />
feel right, or<br />
you are having<br />
trouble at this<br />
point, please<br />
reference the<br />
Troubleshooting<br />
section on p 42.<br />
28<br />
The thumb and two fingertips of the other hand<br />
lightly touch the Guide Ring and the Tongue<br />
when you want to change where it’s pointing,<br />
and otherwise more or less leave it alone.<br />
In other words: barely touch it as long as the<br />
framing is correct and use minimal force to reaim<br />
as necessary.<br />
Two-handed support<br />
Try not to let your operating hand touch your<br />
support hand unless you need help holding<br />
up a heavy camera. In that case, you can hook<br />
the pinkie of your guiding hand in between the<br />
fingers of your gripping hand, (like a modified<br />
golf grip), and help support it with the operating<br />
hand, while still maintaining that light and<br />
isolated finger contact on the Guide.<br />
Slide up your hand on the Grip, so that your<br />
second finger is just below the notch.<br />
Hold the Grip strongly with you second, third<br />
and little finger. Your thumb and first finger can<br />
just reach the Guide and contact it lightly and<br />
intermittently.<br />
Use your entire arm as a crank when you<br />
pan, while you intermittently accelerate the<br />
Guide with your fingers.<br />
Tilt by keeping your forefinger crossways as<br />
shown so it won’t also induce unwanted pan<br />
rotation, and use your entire arm as a lever,
e-setting its angle relative to the guide, as you<br />
intermittently hold and let go the Guide with<br />
finger and thumb. (This is esoteric stuff – check<br />
the DVD for this one!)<br />
One-handed operating is not as precise as<br />
two-handed, but it can be extremely useful<br />
when you need a free hand to open doors, move<br />
extras out of the way or hold a sandwich. It is<br />
9. Body Positions<br />
Forward mode (aka ‘Missionary’)<br />
Missionary is what Steadicam operators have<br />
called the basic Forward Position since the<br />
earliest operating workshops in Rockport,<br />
Maine in 1980. It is defined as operating with<br />
the camera aimed roughly in the same direction<br />
as the forearm of your guide hand. Try it twohanded.<br />
Hold the Grip with one hand (your choice), the<br />
Guide with the other.<br />
Stand with the camera facing ahead but don’t<br />
hold it way out in front of you.<br />
Shift camera to either left or right, so the spar<br />
settles in beside your body. Either your “grip” or<br />
your “guide” hand will now cross in front of your<br />
body. Practice on both sides. Be sure not to bump<br />
yourself with the lower spar.<br />
Trim the camera to hang level and try a walking<br />
shot. The fastest way to get the “trick” of<br />
isolating your <strong>Merlin</strong> 2 from all unwanted<br />
movements, is to walk rapidly for a city block<br />
invaluable for extending your reach, particularly<br />
for shots high over your head, moving through a<br />
crowd, or for shooting way out to one side, so it<br />
is definitely worth practicing.<br />
REMINDER: Correct Trim is<br />
essential for both one- and<br />
two-handed operating. (See<br />
Section 6.)<br />
or so. Steady it once you are in motion and then<br />
virtually let go with the “guide” hand, even if the<br />
framing wanders a bit, even if it ends up looking<br />
sideways.<br />
As you walk, gradually touch the Guide more<br />
frequently, so it begins to point where you want,<br />
and then continuously, but ultra-lightly.<br />
Learn to avoid that over-controlling death-grip<br />
on the Guide (the symptom is unwanted lurching<br />
of the frame side-to-side).<br />
Forward Position is for easy straight-ahead<br />
shots and shots looking to either side. This is<br />
your standard, everyday, meat & potatoes shot<br />
and it’s how you’ll operate <strong>Merlin</strong> 2 90% of the<br />
time,<br />
You can approach or follow somebody, and even<br />
when you’re backing up, it’s still the ‘Forward<br />
Position’ if the camera and your guiding forearm<br />
are pointed mostly the same way.<br />
Body Positions<br />
Forward Position ranges from the camera pointing forward to the operator’s right side, as he<br />
walks forward or backwards.<br />
29
Reverse mode (aka ‘Don Juan’)<br />
Body Positions<br />
The Don Juan was also whimsically named circa<br />
l980, and it’s still what the professional operators<br />
in 40 countries call the other major operating<br />
position: the Reverse Position, defined as<br />
operating with the camera aimed roughly in the<br />
reverse direction as the forearm of your “guide”<br />
hand. Try it two-handed.<br />
Assume the Forward Mode as shown<br />
above…<br />
Pan the camera to the rear without moving<br />
your body. Flex the wrist inward as necessary to<br />
avoid bumping the spar. But it’s the same finger<br />
position on the Guide. It is exactly like Forward<br />
shooting except the camera is pointed in the<br />
opposite direction and you must turn your gaze<br />
sideways to see your monitor. Keep your head<br />
angled down as shown—it lets the widest arc of<br />
your peripheral vision see the path ahead of you.<br />
Reverse Mode is for when you need to shoot<br />
backwards, but also want to see where you’re<br />
going. Following people is easy but can be<br />
boring. Shots that precede people are friendlier<br />
because you see their faces. Reverse shooting<br />
helps you avoid bumping into things or falling<br />
down. It’s a very common Steadicam shooting<br />
mode, used in thousands of feature films and lets<br />
one precede the action, sometimes at high speed,<br />
and even up and down steps, but it definitely<br />
takes practice.<br />
Note: Reverse Mode shooting can be<br />
dangerous if you lose your footing or<br />
get too involved with your shot to notice<br />
where you’re going.<br />
DO NOT attempt a Reverse<br />
Mode shot without first<br />
scouting the terrain for<br />
obstacles and hazards your<br />
peripheral vision might miss.<br />
Boom Height<br />
Another essential technique for Steadicam<br />
operating is Booming. In many instances it is<br />
easier to control headroom on your subject by<br />
adjusting camera height rather than tilting.<br />
Reverse Position ranges from the<br />
camera pointing backward to the<br />
operator’s left side, as he walks<br />
forward or backwards.<br />
Remember, your camera is not connected<br />
to you, so it no longer has to point the<br />
way you’re headed.<br />
Note: Booming moves do not affect the<br />
angular isolation of the camera.<br />
30
Boom high for shooting adults<br />
Boom low for correct headroom for kids. This<br />
lets you see the world from a kid’s perspective,<br />
rather than looking down on the top of their<br />
heads.<br />
Boom up as you approach your subject (instead<br />
of tilting) to maintain correct headroom.<br />
Boom up and down if the height of the<br />
ground is changing between you and your<br />
subject. Example: You are following someone<br />
who steps off a curb. Boom down as they lower<br />
in your frame. Boom up when you step off the<br />
curb because your subject will appear to be<br />
rising in frame. The <strong>Merlin</strong> 2 is an inert object<br />
and tilting rapidly is difficult. Booming is easy<br />
because moving the Grip hand straight up or<br />
down has no effect on the camera’s angle and<br />
can be done as quickly as you like.<br />
Note: Your framing is the sum of the tilt<br />
angle and the boom height.<br />
Experiment with different combinations. A lowangle<br />
shot (boomed low, tilted up) can be much<br />
more dramatic than the usual eye-level stuff.<br />
A high-angle shot (boomed up over your head,<br />
tilted down) looks great for similar reasons.<br />
Don’t always just shoot at the conventional<br />
hand-held lens height. Adjust your camera’s<br />
monitor screen as needed and experiment with<br />
raising and lowering the height of the camera<br />
and notice the effect that it has on your shot.<br />
When you boom up and down, make sure that<br />
the operating hand (on the Guide) rises and falls<br />
right along with the lifting hand (on the Grip). In<br />
fact, when booming, it’s helpful to let both hands<br />
remain slightly in contact with each other so they<br />
can move in sync.<br />
Combo Tilt/Boom Shots<br />
Working with, rather than against, the unique<br />
nature of any<br />
Steadicam rig, large<br />
or small, will make<br />
your shots as easier<br />
to obtain. Booming<br />
is easy. Tilting is<br />
difficult due to the<br />
increased inertia of<br />
the tilt axis.<br />
Combine booming and tilting: raise the camera<br />
part way when tilting up, lower it when tilting<br />
down – it keeps your hand positions less radical<br />
and your shots more precise.<br />
Body Clearances<br />
Learn how to avoid bumping your body or<br />
clothes with the spars and the weights.<br />
Bend your elbow out sideways to avoid hitting<br />
the <strong>Merlin</strong> 2 as you boom up.<br />
Flex your wrists out of the way of the spars as<br />
you make extreme pans to either side.<br />
Almost any contact with the lower spar can ruin<br />
a shot, but giving the Steadicam a bit of “flying<br />
room” will soon become instinctive. Be extraconscious<br />
of clearance at first, and after a few<br />
days of practice you will find that you almost<br />
never bump into things.<br />
Basic Set-up<br />
31
10. Extreme Trimming<br />
Extreme Trim<br />
Trimming for Shots<br />
Steadicam operating is radically different from<br />
almost every other human activity—including<br />
normal camera operating! It requires a number<br />
of unusual moves and techniques such as<br />
trimming, so the desired headroom can be<br />
effortlessly maintained.<br />
Side-to-side trim should be checked every few<br />
minutes to confirm that the <strong>Merlin</strong> 2 is hanging<br />
approximately level (check the bubble). The<br />
balance required is so fine that it can never be set<br />
permanently. In addition the <strong>Merlin</strong> 2’s multiple<br />
joints and articulated moving parts may cause<br />
folding and unfolding operations to affect trim<br />
and require a slight touch-up.<br />
Professional operators tweak fore-and-aft trim<br />
between almost every take so the camera’s exact<br />
attitude can help get the shot, rather than hinder<br />
the framing.<br />
Remember that trimming is approximate, never<br />
perfect, so don’t fuss with it. Get it roughly<br />
correct and try a take. You may want to trim<br />
differently make some other part of the shot<br />
easier to get.<br />
Note: Don’t try to tilt or pan the <strong>Merlin</strong><br />
2 by grabbing the spars. It ‘re-connects’<br />
you to the camera, and will not be much<br />
more stable than ordinary hand-held<br />
shooting.<br />
Extreme Trimming for Extreme<br />
Angles<br />
If your entire shot requires an extreme angle of<br />
tilt (like up to a cathedral ceiling or down from a<br />
high balcony):<br />
• trim up slightly to maintain headroom<br />
for tall people<br />
• trim down slightly for shorter people<br />
Use quick full turns of the trim rollers—<br />
it’s a fine micrometer adjustment, and<br />
otherwise would take forever.<br />
The <strong>Merlin</strong> 2 stabilizes best when trimmed so<br />
you could let go with the guiding hand and the<br />
camera would stay where you want it. If not, the<br />
camera must be continually forced up or down<br />
to hold your shot and would tilt the moment<br />
you let go. It is axiomatic that human beings<br />
cannot exert a constant force – but they can<br />
exert no force – constantly! Your shots are much<br />
more stable when you don’t have to walk along<br />
holding the camera above or below the tilt angle<br />
it’s trimmed for.<br />
• Don’t be afraid of radical fore-and-aft<br />
trimming, so the camera holds the desired<br />
position for you. It may take a dozen or<br />
more quick turns of the Trim Roller –<br />
it’s a very fine micrometer adjustment<br />
–to achieve this. If many turns is not<br />
sufficient, it suggests that your <strong>Merlin</strong> 2<br />
may be too bottom heavy. Counter-clock<br />
the Guide Ring several turns and try<br />
again.<br />
32<br />
Make Tilting Easier<br />
For shots that may tilt both up and down, we<br />
suggest reducing bottom-heaviness by counter<br />
clocking the Guide Ring and increase the droptime<br />
– which will make it easier to aim up or<br />
down with just finger pressure – and just trim<br />
fore-and-aft for the most difficult part of the shot.<br />
• Don’t forget to re-trim afterward for<br />
normal shooting! It’s like keeping a guitar<br />
in tune. It will get to be second nature!
11. Stairs<br />
Stair shots can look great and be easy to shoot,<br />
if you:<br />
Reduce bottom-heaviness by counter-clocking<br />
the Guide one turn, and then trim for the average<br />
angle required for going up or down, including<br />
any landings.<br />
Boom up and down to make additional<br />
adjustments for headroom.<br />
(Your subject will rise and fall in your frame<br />
because you both cross-landings at different<br />
times.)<br />
Trimming & Booming for Stairs<br />
If you’re following someone up the stairs (in<br />
Forward Mode), trim the <strong>Merlin</strong> 2 so the camera<br />
tilts slightly up and then use the boom range of<br />
your arms to maintain headroom – it’s easier,<br />
faster and more intuitive than constantly trying<br />
to tilt to compensate for the rapidly changing<br />
framing. Booming can also be more accurate,<br />
and has the additional virtue of providing the<br />
least radical camera angle at any moment.<br />
This can help you avoid<br />
the less-than-elegant<br />
look of following<br />
someone’s posterior<br />
wide-angle from below!<br />
If you’re preceding<br />
your subject, shooting<br />
downward, looking to<br />
the rear, for instance, in<br />
the Reverse Mode, trim<br />
the <strong>Merlin</strong> 2 down and<br />
likewise use the boom<br />
range of your arms to<br />
avoid radical angles<br />
down on someone’s<br />
bald-spot!<br />
This is an advanced<br />
technique, so don’t try it<br />
in earnest until you have<br />
enlisted a stand-in and<br />
gotten lots of practice!<br />
Basic Set-up<br />
12. Shooting and Resting Positions<br />
The Steadicam <strong>Merlin</strong> 2 plus camcorder weighs<br />
a few pounds. It acts weightless but of course it<br />
isn’t and it can tire your Grip arm fairly rapidly<br />
(though it gets easier with practice). Here are<br />
some tips to help with fatigue:<br />
Share the load by also supporting the Grip with<br />
the little finger of your “guide’ hand. Slip your<br />
pinkie underneath the fingers of your Grip hand<br />
and share the load. You can still operate up above<br />
with the lightest touch of thumb and finger on the<br />
Guide.<br />
Rest the elbow of your grip hand on a chair<br />
arm, a table or your knee whenever you don’t<br />
have to move the camera — you can easily fly up<br />
and away from those rest positions without any<br />
visible bump in your shot!<br />
Shorten your moving shots — use cuts between<br />
a series of moving and static shots.<br />
Change hands to share the load. Practice<br />
changing hands safely to avoid dropping your<br />
camera. One way is to shift up your “Grip” hand<br />
to the “one-handed” position, and release the<br />
Grip as your other hand takes over.<br />
Hold the <strong>Merlin</strong> 2 as close to<br />
your body as possible. When<br />
shooting in either the Forward<br />
or Reverse Modes, hold it right<br />
beside you instead of out in<br />
front. Stand sideways to your<br />
shot whenever possible so you<br />
can keep it closer, and be extracareful<br />
not to bump the spar<br />
against yourself when working<br />
that close.<br />
33
Positions<br />
Shoulder Modes<br />
The <strong>Merlin</strong> 2 can also rest on your shoulder and<br />
still act as a brace for conventional hand-held<br />
shooting:<br />
Open the caliper hinge release and swing the<br />
Upper Spar up into the travel mode underneath<br />
the stage.<br />
Set the end of the weights on your shoulder<br />
(make sure the Gimbal is out of the way so it<br />
doesn’t get damaged).<br />
Adjust your viewfinder screen and control the<br />
lens as usual. The mass and braced position of<br />
the <strong>Merlin</strong> 2 will provide extra stability for handheld<br />
type telephoto shooting.<br />
Docking and Carrying<br />
<strong>Merlin</strong> 2 can be quickly set-down between shots<br />
as follows:<br />
Stow the Gimbal underneath your Stage and set<br />
the unit down on a table (or other flat surface)<br />
that has room underneath for the Lower Spar to<br />
dangle.<br />
Cushion the Tongue (the hard extension below<br />
the Guide Ring) to avoid damaging the furniture;<br />
and be sure that it is in a safe area and will not be<br />
bumped by passers-by.<br />
34<br />
Another version of Shoulder Mode is<br />
even handier:<br />
Press the fully-open <strong>Merlin</strong> 2 against your torso<br />
by holding the Caliper Hinge with your left hand<br />
Insert your right hand<br />
through the camera strap<br />
to secure the camera<br />
and operate the lens<br />
conventionally.<br />
You may be able to have<br />
your eye on the viewfinder in<br />
this mode, yet, with practice,<br />
you can learn to reposition<br />
your right hand onto the<br />
Grip and ‘fly’ away from this<br />
position to continue shooting<br />
<strong>Merlin</strong> 2-style.<br />
Rest by docking the Gimbal<br />
and placing the <strong>Merlin</strong> 2 on<br />
your shoulder.<br />
The <strong>Merlin</strong> 2 can be conveniently carried for<br />
long distances between shots as follows:<br />
Unlock the Caliper Hinge Release<br />
Fold it into Traveling mode and simply hold the<br />
camera’s hand strap with the lens facing forward,<br />
and off you go.<br />
This is also the smallest configuration for<br />
temporarily stowing your camera and <strong>Merlin</strong> 2<br />
in a case. However, we recommend removing<br />
the camera by unlocking the Dovetail Plate, for<br />
long-term storage or shipment.
13. Vehicle Shots<br />
Steadicam rigs in general and the <strong>Merlin</strong><br />
2 in particular can provide superb camera<br />
stabilization in moving vehicles — riding in a<br />
car or hanging out the back<br />
of an ATV or a pickup<br />
truck. You’ll see the world<br />
smoothly from virtually any<br />
non-violent conveyance<br />
(including our new<br />
‘HandsFree” version of the<br />
Segway Transporter), or<br />
you can include your fellow<br />
passengers and reveal the<br />
true motions of the vehicle<br />
in the foreground.<br />
Vehicle technique is similar to normal<br />
Steadicam shooting except that long periods of<br />
vehicular acceleration will make even a slightly<br />
bottom-heavy <strong>Merlin</strong> 2 try to go off-level.<br />
(Humans on foot rarely get up to 50 mph!) The<br />
solution is to reduce bottom-heaviness even<br />
further by counter-clocking “Z” trim ( the Guide<br />
Ring) one or more turns so that the camera acts<br />
less like a pendulum, and diligently control level<br />
with the your operating hand.<br />
WARNING: We do not<br />
recommend using the<br />
<strong>Merlin</strong> 2 on risky stunt shots.<br />
The concentration required<br />
for operating increases the<br />
likelihood of accidents involving<br />
yourself and your equipment as<br />
well as the people around you.<br />
In stunt-type shooting situations,<br />
operate at your own risk.<br />
Do not subject anyone else<br />
to danger, and be prepared<br />
to lose both camera and<br />
<strong>Merlin</strong> 2, in case of a mishap.<br />
WHEN IN DOUBT, TOSS<br />
AWAY THE GEAR AND SAVE<br />
YOURSELF!<br />
Vehicle Shots<br />
Two-handed shooting with a light touch on<br />
the guide works best. Support the <strong>Merlin</strong> 2 with<br />
one hand, pan and tilt with the other and let the<br />
Gimbal take out the angular shakes. Be sure you<br />
are securely seated and/or belted in, or:<br />
Hold on with one hand and operate one-handed<br />
if there is any chance of falling off or hurting<br />
yourself, such as on boats, on bicycles, on<br />
horseback, etc.<br />
One-handed operation is also recommended<br />
for ‘vehicle’ shots that require personal agility<br />
and balance, such as skiing, skating, riding<br />
horseback, running-with-the-bulls, etc.<br />
Rehearse vehicle shots whenever possible:<br />
Have a trial run without the <strong>Merlin</strong> 2 and<br />
make sure you can remain in contact with your<br />
driver, drover, pilot or mahout. Make sure these<br />
persons will not exceed the speeds you arranged<br />
beforehand, no matter what, and immediately<br />
slow or stop the vehicle if asked. Cornering<br />
and braking can generate a lot of force. Don’t<br />
exceed 1.5 “g’s” of force on the Gimbal in order<br />
to avoid damage to either the <strong>Merlin</strong> 2 or your<br />
camera.<br />
Clear space around you, so there is room for<br />
the <strong>Merlin</strong> 2 to avoid bumping anything as the<br />
vehicle moves up, down and around you! Even<br />
a minor collision with the <strong>Merlin</strong> 2’s spars could<br />
subject the Gimbal to many ‘g’s’ of force.<br />
Relax your arm to make as flexible a ‘spring”<br />
as possible. Don’t be alarmed if the <strong>Merlin</strong> 2<br />
mysteriously moves up and down. It is just<br />
obeying Newton and trying to stay at the same<br />
height above the center of the Earth as the<br />
vehicle rises and falls!<br />
35
14. <strong>Merlin</strong> 2® Technique<br />
Technique<br />
36<br />
Good technique can make your shots much<br />
easier to get.<br />
Lack of technique can make them nearly<br />
impossible.<br />
Moves & Results<br />
Watch section 14 in the DVD. It is a ‘wordless<br />
workshop’ of Steadicam moves, along with the<br />
picture-in-picture results. Play it several times<br />
and compare the physical maneuvers of the<br />
operators with the shots produced. You’ll be<br />
surprised at the amount of ground covered, and<br />
the magnitude of the booming moves involved in<br />
these simple-but-elegant shots!<br />
Here are some general tips:<br />
Design shots based on<br />
ideas – even bad ideas.<br />
There is no substitute for<br />
planning and rehearsing, or<br />
at least trying to think a bit<br />
ahead. Otherwise you are<br />
just looking and reacting at<br />
random.<br />
Start the camera moving<br />
with your arms, and move<br />
your body an instant later.<br />
Stop your body first when ending a move, and<br />
ease the camera to a stop a moment later.<br />
Walk with your feet along an invisible straight<br />
line – your arms will not have to compensate<br />
side-to-side for the weaving of your body.<br />
Think ahead about panning. Think ahead about<br />
stopping your pan! (Watch objects at the edge of<br />
the frame to be sure your shot doesn’t ‘backlash’<br />
and remains still.)<br />
Practice keeping the edges of walls and<br />
doorways just in frame as you turn corners).<br />
Reach laterally with your arms to help make<br />
quick framing adjustments instead of panning<br />
– as you might boom instead of just tilting.<br />
And if moving subjects speed up or slow down<br />
unexpectedly, use your arm reach to instantly<br />
vary the speed of the camera – you’ll react more<br />
quickly than by accelerating or decelerating your<br />
whole body.<br />
Don’t crowd your subjects, except briefly for<br />
effect – stay back as much as possible. Vary the<br />
figure-size from an over-the-shoulder or a closeup<br />
‘bust shot’ to a so-called ‘knee-figure’ (midcalf<br />
to above head), to a full-figure (including<br />
the feet), to a wide shot with your subject small<br />
in the frame, but don’t stop on an in-between<br />
framing – it’s a convention of movie composition<br />
to not cut subjects at the waist or ankles.<br />
Vary subject sizes, speeds, directions. Perfectly<br />
stabilized tracking shots can still be lifeless, even<br />
boring at times, without some variation – keep<br />
them alive, breathing and unpredictable.<br />
Schedule your Attention Cycle. That’s<br />
how professional operators concentrate their<br />
momentary attention to squeak through all the<br />
simultaneous hazards and opportunities that<br />
make for great Steadicam shots.<br />
Since framing is, at times, the least volatile<br />
element, due to the inertia of the <strong>Merlin</strong> 2, one’s<br />
attention can cycle between headroom, level<br />
(look at the bubble!) navigating (watch out for<br />
that curb!), and framing, etc. This can be quite<br />
absorbing.<br />
In addition, you must pick the best moment<br />
to look from one element to the next – check<br />
the bubble when your framing is not changing<br />
radically and vice-versa and make sure your<br />
Attention Cycle gets around to Navigation in<br />
time to avoid the alligators! After watching a<br />
Steadicam master at work, calmly lugging a 70lb<br />
(32kg) rig through a diabolical shot, you may<br />
conclude that he or she has really earned that big<br />
salary!<br />
Use your peripheral vision to see what’s going<br />
on outside the frame; not only for navigating, but<br />
also to help plan where your shot should go next<br />
and anticipate encounters with actors, extras and<br />
vehicles.<br />
Relax your “grip” arm, and let it flex so you<br />
can sense the direct path of the camera, even if<br />
you are bouncing up and down on stairs or rough<br />
ground. Counter your body motions by, in effect,<br />
booming up and down in the opposite direction.<br />
Practice flying the <strong>Merlin</strong> 2 smoothly above<br />
a railing or alongside a banister as you climb<br />
stairs, so you can see in your monitor when<br />
you are successfully isolating the camera from<br />
yourself!
Use your senses to navigate. Seems<br />
obvious, yes?—what else are you going to use?<br />
Well we just want to remind you of a couple of<br />
non-obvious sensory possibilities:<br />
• Use a foot to reach out and locate<br />
obstacles and identify doorways, etc. when<br />
backing up or shooting blind.<br />
• Check your auditory circuits now and then<br />
for voices whispering useful suggestions<br />
like “watch out!” (You’ll be amazed.<br />
Steadicam operating is so absorbing that<br />
you may become oblivious to car horns,<br />
explosions and the word ‘Cut!’)<br />
• Use what boaters call a “range” by<br />
memorizing the visual alignment of a near<br />
background object with a far-background<br />
object (such as the corner of a chair lining<br />
up with a distant wall switch) just as you<br />
are about to back through a doorway. By<br />
definition, spotting such a visual alignment<br />
means you are on the exact same path every<br />
time.<br />
• Scout the terrain without the Steadicam rig<br />
if possible before you shoot, so you aren’t<br />
unpleasantly surprised by the unexpected<br />
cliff, pit, low doorway or mad dog.<br />
Level control. Trim will only provide a basic<br />
tendency for the camera to hang level side-toside.<br />
It is up to you to keep your shots level by<br />
paying close attention and controlling the guide.<br />
Here are some tips to help you manage this:<br />
• Check the bubble whenever you are<br />
moving in a straight line – it will not be<br />
accurate when you are cornering.<br />
• Control the slight tendency of the lower<br />
spar to swing outward when you are<br />
cornering. Imagine that you are holding a<br />
stick upright, and let your hand tell you if<br />
it’s level.<br />
• Watch the monitor screen to see that<br />
vertical objects such as door frames, appear<br />
vertical as they pass by the center of your<br />
screen. Remember, verticals may not appear<br />
vertical at the sides of the screen if you are<br />
tilted it all up or down!<br />
Shooting Opportunities<br />
Experiment with longer focal lengths. Shoot<br />
mid-telephoto. With a little care, you can make<br />
some amazing moves and shoot close and<br />
complimentary shots of people without having<br />
to be right on top of them. Plus, today’s amazing<br />
auto-focus circuitry can keep them sharp.<br />
Walking zooms.<br />
Pick a good focal<br />
length and use your<br />
legs to approach<br />
and depart! Unlike<br />
optical zooming,<br />
actual approaches<br />
and departures have<br />
a pleasing threedimensional<br />
effect and<br />
emphasize foreground<br />
objects as they grow<br />
(or shrink) faster than<br />
distant backgrounds.<br />
Pass the <strong>Merlin</strong> 2 close to people’s faces and<br />
they probably won’t shy away as they might if<br />
you came at them with a camera covering your<br />
own face. They understand that it’s a hand-held<br />
object, that you have binocular vision, and you<br />
won’t bump into them — the result can be some<br />
wonderfully affecting pass-by shots.<br />
Hand focus. <strong>Merlin</strong> 2’s various shouldermodes<br />
let you “pull” focus by hand. Many<br />
of today’s camcorder owners have never<br />
experienced the fun of hand-focusing fastpaced<br />
telephoto shooting! Use all your senses<br />
to determine the next move of your subject.<br />
Humans can still “pull focus” faster and more<br />
accurately than most auto-focus devices.<br />
Digital stabilization. So-called ‘digital<br />
stabilizers’ and optically stabilized lenses work<br />
well to eliminate vibrations, but are useless<br />
for the large-scale bumps that occur when<br />
you attempt to walk, run or climb stairs. We<br />
recommend turning them off unless you intend<br />
to make telephoto moving shots, which can be<br />
very pleasing, and surprisingly easy to obtain if<br />
you make clever use of your camera’s auto-focus<br />
circuitry. Even without internal stabilization, the<br />
stiffness and rigidity of the <strong>Merlin</strong> 2 encourages<br />
shooting at surprisingly long focal lengths.<br />
Basic Set-up<br />
37
Technique<br />
38<br />
One-handed operating can be quite<br />
comfortable, can allow you to reach higher<br />
with the camera and further out to the side. It<br />
is essential for opening doors, or for including<br />
yourself in a shot!<br />
Hand-offs (passing the <strong>Merlin</strong> 2 to another<br />
camera person) can be useful, but please practice<br />
and be careful not to drop the things in the<br />
process.<br />
Shot geography thrives on familiarity. Scout<br />
the terrain, visualize your shot by eye, sneak<br />
furniture and props out of your way, be aware<br />
of lights that might encroach, and rehearse,<br />
rehearse, rehearse until you can get through it<br />
blindfolded.<br />
Control the size and speed of foreground<br />
objects in your frame. Use your eyes. Watch the<br />
monitor closely and make the dynamics of your<br />
frame as satisfying as your composition. The<br />
moving camera makes two-dimensional images<br />
appear to be three-dimensional.<br />
Panning, Whip-Panning & Dynamic<br />
Balance. Panning accurately is an art, and<br />
panning rapidly is pure magic, when you<br />
can start and stop on a dime, even in during<br />
a complicated move. Here are some useful<br />
techniques:<br />
• Establish a pan rate and go with<br />
it! A good trick, not explained in the<br />
DVD, permits ultra-smooth telephoto<br />
shots circling 360 around, for example, a<br />
dancing couple. Try a mid-telephoto focal<br />
length such as 20mm. Begin circling at a<br />
distance that looks promising. You have<br />
now automatically established a “pan rate”<br />
which the <strong>Merlin</strong> 2 will continue on its own<br />
if you were to let go of the guide. Continue<br />
circling, and use your walking speed to keep<br />
your subjects centered in frame! The camera<br />
will continue its slow pan – you just have to<br />
keep up!<br />
• Practice Whip Pans (lightning fast<br />
pans). Start with slow 180˚ pans – always<br />
from a given start frame to a consistent<br />
stop frame, and gradually speed them up.<br />
Do hundreds of them! (I’m serious!), and<br />
master the technique at each speed before<br />
going faster; and faster; and faster!<br />
Whip Pans are extremely difficult, even<br />
on a tripod, but are particularly satisfying<br />
and useful on the <strong>Merlin</strong> 2, since you have<br />
the option to change the cameras height or<br />
position during the whip!<br />
Starting a rapid whip is relatively easy. Be<br />
sure that your thumb and finger pressure<br />
to start the Guide turning is level and<br />
consistent. The trick is stopping the pan<br />
where you want, and without backlash due<br />
to flex in the skin of your fingers – success<br />
requires releasing all finger pressure at the<br />
instant you stop the pan so the inert <strong>Merlin</strong><br />
2 will sit still on your desired frame!<br />
Whip pans are a terrifically dynamic<br />
technique and worth ardent practice to<br />
master. Even a Steadicam Master can<br />
sometimes be seen having a few ‘practice<br />
swings’ to get his hands and eyes adjusted<br />
to the day’s exact conditions, since even the<br />
humidity can affect whip pan performance!<br />
• Dynamic Balance helps keep fast pans<br />
from ‘precessing’ off level. If your camera<br />
also tilts a bit when panned rapidly, dynamic<br />
balance can be experimentally achieved by<br />
opening the Dovetail Locking Lever and<br />
sliding the camera slightly forward or back<br />
on the stage. Then re-lock and then re-trim<br />
the Fore-and-Aft Trim Roller the reverse<br />
distance to restore level trim. Try adjusting<br />
camera position on the Stage in small<br />
increments until it ‘behaves’ when panned<br />
rapidly. Good Luck! Keep at this one – it’s<br />
worth it!<br />
Wind. Professional Steadicam operators<br />
get nervous when they hear a windy weather<br />
forecast. It is an “outside” influence that can<br />
make your camera hard to control. The only<br />
way to help the <strong>Merlin</strong> 2 in wind is to shield the<br />
camera by using your body or someone else’s,<br />
or by staying in the lee of buildings etc. When<br />
shooting directly into the wind, try to stand<br />
in front of large objects (or several people) to<br />
“backstop” the wind so it doesn’t rush directly<br />
past your camera.
WARNING: Stunt shooting<br />
and leaping over cliffs with the<br />
Steadicam rig is tempting but<br />
remember: it’s only a movie.<br />
We don’t advise trashing a<br />
thousand-dollar camera or<br />
breaking your leg—even for<br />
the “Shot of the Century!”<br />
Home Shooting Tips<br />
BIRTHDAY PARTIES<br />
Sit on the floor among very young children as<br />
they play around you. Relax and take the load<br />
off your arm by bracing your elbow on your<br />
knee. Watching both inside and outside your<br />
frame for the next good moments—remember<br />
you are free to move your camera nearly five feet<br />
from side to side with your arms without even<br />
getting up!<br />
Circle the birthday table, mid-telephoto. Once<br />
the kids get used to you, you can cruise up on<br />
wonderful spontaneous moments, the sound will<br />
be excellent because you aren’t shooting from<br />
across the room.<br />
Hold the camera out right into the middle of<br />
the action. Party games look great with <strong>Merlin</strong><br />
2, and intimate wide-angle shots at your kid’s<br />
eye-level can hold the birthday boy or girl and a<br />
number of friends in the frame at the same time,<br />
with the relative emphasis you select.<br />
HOLIDAYS<br />
Christmas, Hanukkah and summer vacations<br />
all provide priceless opportunities for <strong>Merlin</strong><br />
2 shooting. Go caroling, hunt Easter eggs, run<br />
on the beach—document your life in a way that<br />
looks more like the movies and less like amateur<br />
night. Traveling shots made on professional<br />
dollies and cranes can look terrific, but the very<br />
bulk of the equipment makes intimacy difficult<br />
to achieve. You can have closeness as well as<br />
smoothness, and effortlessly be there for the<br />
moments that really count!<br />
SPORTS<br />
Whether you’re covering professional sporting<br />
events from the stands in shoulder-mode, or<br />
shooting family contests or even watching<br />
yourself dribbling the ball, <strong>Merlin</strong> 2 offers unique<br />
advantages. It can be moved with great speed,<br />
yet isn’t massive enough to be dangerous. You<br />
only have to remind yourself now and then to not<br />
pull too many “g’s” as you follow the action right<br />
up to the basket!<br />
FAMILY TRAVEL<br />
Family travel becomes a group activity again<br />
for the whole family when the person with the<br />
camcorder isn’t left behind. You can keep up,<br />
shooting what everybody sees as they see it,<br />
holding back just enough to let them enter your<br />
shots as you capture all the<br />
dialogue close up. A camera<br />
which is mobile from within<br />
a group has a much more<br />
intimate and friendly feeling<br />
than one on the sidelines.<br />
Trains, cars and buses<br />
become magical platforms for<br />
seeing the world smoothly,<br />
instead of the bumpy<br />
vibrating embarrassments that<br />
plague typical screenings.<br />
Professional Uses<br />
The advent of DV and HDV formats have<br />
thrust camcorders into contention for high-end<br />
professional applications. Cameramen who have<br />
spent their lives working with large crews are<br />
becoming fascinated with ultra-light cameras and<br />
their auto-color-balance, auto-iris, and auto-focus<br />
circuits that, if used intelligently, can deliver<br />
excellent results. The resolution is “broadcast<br />
quality” yet the small size encourages an entirely<br />
new style of shooting. Steadicam <strong>Merlin</strong> 2 is the<br />
most compact and versatile way for the pros to<br />
get the smooth traveling shots they’re used to.<br />
WEDDINGS<br />
Nuptials are seldom photographed with moving<br />
cameras, except those involving hereditary<br />
monarchs, heads-of-state, film stars and friends<br />
of Steadicam Operators!<br />
Walk up the side aisle, mid-telephoto, parallel<br />
with the bride and her father as they move up<br />
the center aisle. You will pass rank upon rank<br />
of wedding guests craning to see them – those<br />
near you are looking away from camera, those<br />
on the far side are looking toward you, and the<br />
bride and her Dad reappear between each row<br />
as the central motif of your shot, glowing and<br />
emotional in a way that could not otherwise be<br />
recorded.<br />
Basic Set-up<br />
39
Technique<br />
Rush back down the aisle after the ceremony,<br />
ahead of bride and groom as the well-wishers<br />
lean out to see them sweep by.<br />
Move along the receiving line, shoot 360°<br />
circles around the groom and the bride’s mother<br />
dancing at the reception, use your optional<br />
“Obie” light to bring up couples on the floor.<br />
The possibilities are limitless.<br />
DOCUMENTARIES<br />
<strong>Merlin</strong> 2 is the ultimate documentary tool.<br />
It is uninhibiting and unobtrusive. Add its<br />
unparalleled mobility and tripod-like pauses,<br />
and you have a potent, versatile<br />
way to record or persuade or<br />
to simply witness processes<br />
and events that would leave<br />
traditional methods of<br />
production far behind. The<br />
<strong>Merlin</strong> 2 can represent the<br />
“eyes” of a distant CEO in<br />
the hands of a trusty local<br />
manager, and will perhaps soon<br />
be to “desktop video” what<br />
the Macintosh was to desktop<br />
publishing!<br />
REAL ESTATE VIDEOS<br />
The difficulties of making good real estate videos<br />
cannot be overstated. Don’t just grab your<br />
<strong>Merlin</strong> 2 and race through a house. If you want<br />
to sell your house, or help a friend sell a house,<br />
here are some tips:<br />
Plan and rehearse your shots in advance and<br />
play them back to see what needs changing.<br />
Slow down. Imagine that your traveling shots<br />
are being done on a slowly moving camera dolly.<br />
Stop already! Don’t neglect still shots.<br />
Connect the rooms in the viewers mind, to<br />
show them the layout.<br />
Turn on the lights, let the camera auto-colorbalance,<br />
but pre-set manual focus for at least<br />
ten feet.<br />
Practice extensively; shoot several houses<br />
and examine your playbacks before attempting<br />
this professionally.<br />
Plan moves that can elegantly reveal the floor<br />
plan and layout.<br />
Pan slowly, without touching the guide,<br />
turning yourself along with the <strong>Merlin</strong> 2, for<br />
ultra smooth, 360˚ views of rooms—and also<br />
try moving slowly around the perimeter to<br />
enhance the effect.<br />
Boom during slow pans to allow coverage of<br />
high and low room details without needing to<br />
tilt, thus preserving the maximum isolation of<br />
the camera.<br />
Turn on house lights, even in daylight.<br />
Select manual iris for your camera, if<br />
available, set it to preserve interior exposures<br />
despite “hot” windows, Select manual focus<br />
and set it to a hyperfocal distance of about<br />
10’ if your camcorder’s auto-focus tends to<br />
wander. Rehearse and playback with auto-color<br />
balance, or try a manual color-balance in half<br />
tungsten/half daylight. This will yield a “film”<br />
look with the outdoors appearing bluish and the<br />
interior lighting not excessively warm.<br />
FEATURE FILMS<br />
Famous director/camera auteurs are embracing<br />
DV and HDV formats for their ‘personal’<br />
features because of the total control, the<br />
intimacy, the spectacular low-light possibilities,<br />
the affordability of the ‘raw stock’, and the<br />
almost invisible nature of the gear – and the<br />
<strong>Merlin</strong> 2 is poised to be their one indispensable<br />
tool!<br />
The Moving Camera<br />
Those conceptually interested in the Moving Camera can<br />
read further at:<br />
http://www.garrettcam.com/<br />
40
15. Accessories<br />
The Tripod Adaptor Plate (included)<br />
screws onto your tripod and accepts the <strong>Merlin</strong><br />
2 dovetail plate; so you can switch your camera<br />
instantaneously back and forth between tripod<br />
and <strong>Merlin</strong> 2. Simply unlock the Dovetail Plate<br />
and remount it onto<br />
the Tripod Adaptor.<br />
Then be sure to return<br />
it back onto the same<br />
mark on the <strong>Merlin</strong><br />
2 stage so your foreand-aft<br />
trim will be<br />
retained.<br />
The Obie Light (optional), otherwise known<br />
in the movie biz as a “basher” or “eye light”, was<br />
invented by the cameraman, Lucien Ballard and<br />
named for actress Merle Oberon. It is highly<br />
useful accessory for <strong>Merlin</strong> 2 shooting. Since<br />
Steadicam tends to cruise in close proximity<br />
to people, the “Obie” gives you just enough<br />
beautiful illumination to properly expose eyes<br />
and faces without blowing out the true ambient<br />
lighting in the room.<br />
Try it at parties to “fill” people in the middle<br />
of typically lit rooms It is useless outdoor<br />
or in bright environments, but it perfectly<br />
complements the excellent low-light<br />
performance of today’s camcorders. The <strong>Merlin</strong><br />
2 Obie Light contains a 3 watt halogen bulb and<br />
is powered by two re-chargeable lithium-ion<br />
AAA batteries (included), and an included AC<br />
charger.<br />
• Add a small weight to the lower spar.<br />
(the Z-axis adjustment of the Guide is<br />
the easiest and requires no additional<br />
trimming, so try that first.)<br />
3. Touch up the fore-aft and side-to-side trim<br />
for level and the fore-and-aft trim for your<br />
intended shot.<br />
Accessories<br />
CAUTION: If accessories bring the weight of the camera<br />
over five pounds you will exceed the recommended<br />
capacity of the <strong>Merlin</strong> 2 and risk stress to the Gimbal<br />
and the Caliper Hinge.<br />
DO SO AT YOUR OWN RISK.<br />
Optional Accessories<br />
801-7125 <strong>Merlin</strong> Camera Controller:<br />
fits standard <strong>Merlin</strong> and <strong>Merlin</strong> 2<br />
stabilizers. Enables you to start/stop<br />
recording plus control zoom and<br />
autofocus with no telltale bumps.<br />
Complex sequences can be shot and<br />
edited on the fly in real time which is<br />
then ready to hand off to clients.<br />
801-7908 <strong>Merlin</strong> DSLR Travel Bag<br />
Adding & Subtracting Accessories to<br />
the camera involves some rebalancing and retrimming.<br />
Don’t worry, it’s easy to do.<br />
Here’s a reminder:<br />
801-7900 <strong>Merlin</strong> 2<br />
Docking Bracket<br />
1. Restore rough X-Y balance by adjusting<br />
the side-to-side and fore-and-aft Trim<br />
Rollers. (If you added a wide-angle<br />
adapter to the lens, push the Trim Roller<br />
up. If you added a larger camcorder<br />
battery to the back of the camera, pull the<br />
Trim Roller down. Adding both at the<br />
same time, may compensate for trim, but<br />
you must still correct bottom-heaviness.)<br />
2. Depending on the amount of weight added<br />
(in order of magnitude):<br />
• Screw in the Guide Ring,<br />
• Decrease the Arc Size by adjusting the<br />
Caliper Hinge, or<br />
801-7940 Stage<br />
Weight Bracket<br />
801-7910 <strong>Merlin</strong> 2<br />
Display Stand<br />
41
Troubleshooting<br />
16. Troubleshooting<br />
TROUBLE OPERATING<br />
If things don’t feel right, if your <strong>Merlin</strong> 2 doesn’t<br />
seem to behave like the ones in the DVD, check<br />
out these possibilities.<br />
Yawing (rolling). <strong>Merlin</strong> 2 is probably<br />
excessively bottom-heavy, a too-rapid pendulum.<br />
Try counter clocking the Guide Ring until the<br />
‘drop-time’ approaches one full second. Once<br />
trimmed, side-to-side, don’t let the camera<br />
‘swing’ – use a light touch on guide to keep the<br />
camera level.<br />
Erratic, unsmooth. Excessive finger<br />
pressure on the guide—use a lighter touch, and<br />
almost let go if the shot needs no correction.<br />
Off-level. Trim side-to-side, and pay more<br />
attention to the bubble level until level shooting<br />
becomes second nature (if that doesn’t work, see<br />
WON’T STAY TRIMMED below)<br />
MECHANICAL TROUBLE<br />
Won’t stay trimmed. This may indicate that<br />
your <strong>Merlin</strong> 2 isn’t bottom heavy enough—<br />
screw the Guide Ring in clockwise a turn or<br />
two and check the drop time. Note: trim is not<br />
a cure-all, nor is it necessarily permanent, after<br />
folding and unfolding—your guide hand must<br />
ultimately keep your camera level.<br />
Inadvertent pan/tilt shake or drag.<br />
1. Check that Upper and Lower Caliper<br />
Locking Knobs are tightened.<br />
2. Possible dirt in Gimbal bearings—unscrew<br />
the Guide Ring fully to remove, and blow<br />
dry the Gimbal with “Dust-off” dry gas.<br />
Reinstall. If this doesn’t work, pack the<br />
Gimbal handle assembly carefully and<br />
send back to <strong>Tiffen</strong> for service (see contact<br />
information on page one). (Use of <strong>Merlin</strong><br />
2 in sandstorms, etc. not recommended).<br />
3. Possible bent gimbal components – return<br />
handle assembly to <strong>Tiffen</strong> for replacement<br />
– Avoid violent panning moves<br />
above 1.5 “G”!<br />
Guide won’t lock (rotates freely). Broken<br />
detent on guide – tape with electrical tape to<br />
temporarily prevent inadvertent rotation of<br />
guide during panning. Return to <strong>Tiffen</strong> for<br />
replacement.<br />
Avoid ultra violent panning moves.<br />
17. Maintenance<br />
During normal operation your <strong>Merlin</strong> 2 should<br />
require minimal maintenance. Spar, Stage,<br />
Hinge and Dovetail Lock tightness should be<br />
checked occasionally.<br />
42
18. Glossary of Steadicam ® Terms<br />
Attention Cycle: sequential check of framing,<br />
level, navigating, etc., that helps Steadicam<br />
operators get tough shots.<br />
Basher: self-powered fill light, aka “Obie”,<br />
“Eye-Light” – which is optional with <strong>Merlin</strong> 2.<br />
Boom: to smoothly raise or lower the entire<br />
<strong>Merlin</strong> 2 and camera unit.<br />
Boom Height: height at which you choose to<br />
carry the <strong>Merlin</strong> 2.<br />
Bottom Heaviness: strength of camera’s<br />
tendency to hang upright – calibrated by drop<br />
time.<br />
Center-of-Gravity: balance point of<br />
masses—used interchangeably on the DVD<br />
video to mean “Center of Balance”.<br />
c.g.: center of gravity.<br />
Don Juan: Colloquial term for the Reverse<br />
Shooting Position—lens aimed in roughly<br />
opposite direction of operating forearm.<br />
Drop Time: defines pendular ‘period” of<br />
<strong>Merlin</strong> 2 spar. Held out horizontally and let go,<br />
should ideally pass through vertical in about one<br />
full second.<br />
Flying Mode: fully unfolded balanced mode<br />
which permits isolated, stable moving shots.<br />
Fore-and-Aft: front-to-rear.<br />
Gimbal: mechanism to provide angular<br />
isolation.<br />
Grip: portion of handle below gimbal for<br />
supporting and positioning camera.<br />
Guide: portion of handle above gimbal, for<br />
aiming the camera.<br />
Headroom: space in frame above top of<br />
subject’s head. Allow less or none in close-ups.<br />
High-Angle Shot: camera held high, looking<br />
downward.<br />
Iris: The lens aperture which controls the<br />
amount of light and/or brightness of shot.<br />
Locating Pin: supplied pin to prevent camera<br />
rotation on stage.<br />
Low-Angle Shot: camera held low, looking<br />
upward.<br />
Missionary: colloquial term for the basic<br />
Forward Shooting Position—lens aimed in<br />
similar direction as your forearm.<br />
Obie Light: fill light—aka “basher” or ‘eyelight’—named<br />
for actress Merle Oberon.<br />
Oil-Canning: flexibility of bottom of<br />
camcorder resulting in less adherence to stage,<br />
potentially causing vertical vibration.<br />
Pan: pivoting the camera horizontally, “looking<br />
around”.<br />
Roll: pivoting the camera around the lens<br />
axis—“seasick” horizon, i.e. aileron trim for<br />
pilots.<br />
Shoulder-Mode: semi-folded position for<br />
comfortable static shooting, as from audience.<br />
Stage: platform for mounting the camera,<br />
includes micrometer trim adjustments.<br />
Telephoto: Long focal-length (or magnified),<br />
end of zoom lens.<br />
Tilt: pivoting the camera vertically—looking up<br />
or down.<br />
Tongue: additional surface on front of guide,<br />
helps tilting.<br />
Trim: fine adjustment of <strong>Merlin</strong> 2 balance foreand-aft<br />
and side-to-side.<br />
Vehicle Shot: use of a Steadicam rig while<br />
being transported instead of walking.<br />
“Z” adjustment: Guide Ring adjustment<br />
of gimbal position on “Z” axis alters bottom<br />
heaviness.<br />
“Z” axis: vertical axis through center of<br />
gimbal carrier.<br />
Glossary<br />
43
Notes<br />
44
Designed in the USA, manufactured in Taiwan by:<br />
The <strong>Tiffen</strong> Company<br />
90 Oser Avenue<br />
Hauppauge, NY 11788<br />
631-273-2500 Fax 631-273-2557<br />
Toll Free 800-645-2522<br />
<strong>Tiffen</strong>/Steadicam 818-843-4600<br />
www.steadicam.com<br />
Cookbook & <strong>Merlin</strong> 2 help: www.merlin2cookbook.com<br />
merlintechsupport@Steadicam.com<br />
Inventor: Garrett Brown<br />
US Patents 4,946,272, 5,098,182 and 5,229,798<br />
Other US & Foreign Patents applied for.<br />
Industrial Design by Tony Sacksteder<br />
<strong>Manual</strong> Design by Laurie Hayball<br />
Steadicam ® and <strong>Merlin</strong> ® are registered trademarks of The <strong>Tiffen</strong> Company.<br />
Copyright 2012 Garrett Brown & The <strong>Tiffen</strong> Company. All rights reserved.