
Create successful ePaper yourself
Turn your PDF publications into a flip-book with our unique Google optimized e-Paper software.
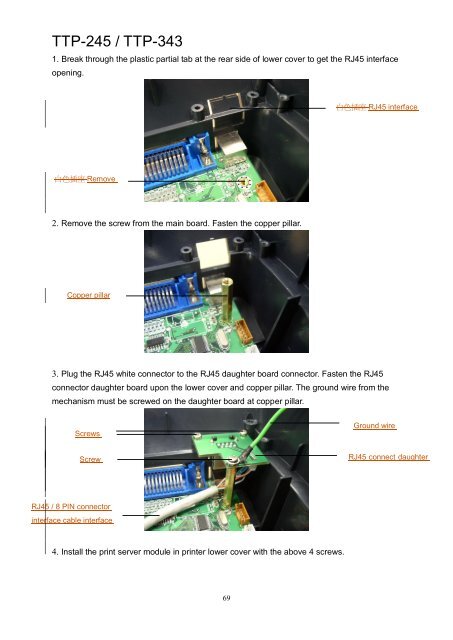
<strong>TTP</strong>-<strong>245</strong> / <strong>TTP</strong>-<strong>343</strong><br />
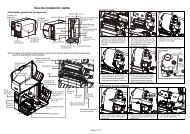
1. Break through the plastic partial tab at the rear side of lower cover to get the RJ45 interface<br />
opening.<br />
白 色 插 座 RJ45 interface<br />
opening 1.25mm 8PIN<br />
白 色 插 座 Remove<br />
the screw1.25mm<br />
8PIN<br />
2. Remove the screw from the main board. Fasten the copper pillar.<br />
Copper pillar<br />
3. Plug the RJ45 white connector to the RJ45 daughter board connector. Fasten the RJ45<br />
connector daughter board upon the lower cover and copper pillar. The ground wire from the<br />
mechanism must be screwed on the daughter board at copper pillar.<br />
Screws<br />
TP3*6 螺<br />
絲 Screw 4pcs<br />
TP3*6<br />
螺 絲<br />
4pcs<br />
RJ45 / 8 PIN connector<br />
interface cable interface<br />
cable 網 路 連 接 模 組<br />
轉 接 板<br />
4. Install the print server module in printer lower cover with the above 4 screws.<br />
Ground wire<br />
TP3*6 螺 絲<br />
4pcs<br />
RJ45 connect daughter<br />
board 網 路 連 接 模 組<br />
轉 接 板<br />
69