minimoog owners manual.pdf - Synth Zone
minimoog owners manual.pdf - Synth Zone
minimoog owners manual.pdf - Synth Zone

Create successful ePaper yourself
Turn your PDF publications into a flip-book with our unique Google optimized e-Paper software.
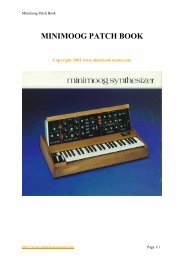
Minimoog Operation Manual<br />
filter and filter contour<br />
The Mini Moog features a wide-range lowpass filter. This filter attenuates, or cuts out,<br />
those frequency components of an audio signal which lie above a variable cutoff<br />
frequency, while passing those components which lie below it.<br />
1. The CUTOFF FREQUENCY control (17) is used to set the filter's cutoff frequency.<br />
Hold down a key and turn this control first clockwise, then counter-clockwise. You will<br />
hear the tone become more shrill and then more muted, as the higher overtones are<br />
first allowed to pass and then attenuated. If control (17) is moved all the way to the<br />
left, the entire signal will be cut out.<br />
2. The AMOUNT OF CONTOUR control (19) determines the amount of filter contour<br />
applied to the filter's cutoff frequency. Each time a key is depressed, a contour<br />
generator attached to the filter is actuated, and sends a control signal to the filter.<br />
The control signal rises at one rate, then falls at a second rate, and finally levels off at<br />
a certain level. This results in a corresponding rise, fall, and leveling off of the filter<br />
cutoff frequency, which we call the filter contour.<br />
Set the CUTOFF FREQUENCY to -2 and repeatedly depress and hold down a key<br />
while setting the AMOUNT OF CONTOUR at various levels. The more this control is<br />
turned up, the greater will be the increase and decrease in the brightness of each<br />
note. Controls (17) and (19) have an additive effect on the cutoff frequency.<br />
3. The ATTACK TIME control (20) determines the duration of the initial segment of<br />
the filter contour. The initial rise of the filter cutoff frequency can be as short as 10<br />
milliseconds or as long as 10 seconds. (The frequency at which the contour begins is<br />
determined by control (17), while the peak which it reaches is determined by controls<br />
(17) and (19) combined.) Repeatedly depress a key while varying the setting of the<br />
ATTACK TIME control from left to right. You will hear the brightness of the note<br />
increase sharply at first, and then more gradually as the attack time increases.<br />
4. The DECAY TIME control (21) determines the duration of the second segment of<br />
the contour, the fall from the initial peak to the sustain level. The range of this control<br />
is about the same as that of the previous control. Set the DECAY TIME control at<br />
various levels moving slowly from left to right, while repeatedly depressing a key. At<br />
first you will hear the brightness drop sharply after the initial attack; the drop will<br />
become more gradual as the decay time increases.<br />
http://www.oldschool-sound.com Page 10