Spacewalker II 40 Manual - Horizon Hobby
Spacewalker II 40 Manual - Horizon Hobby
Spacewalker II 40 Manual - Horizon Hobby
You also want an ePaper? Increase the reach of your titles
YUMPU automatically turns print PDFs into web optimized ePapers that Google loves.
SPACE WALKER <strong>II</strong><br />
Instruction <strong>Manual</strong>.<br />
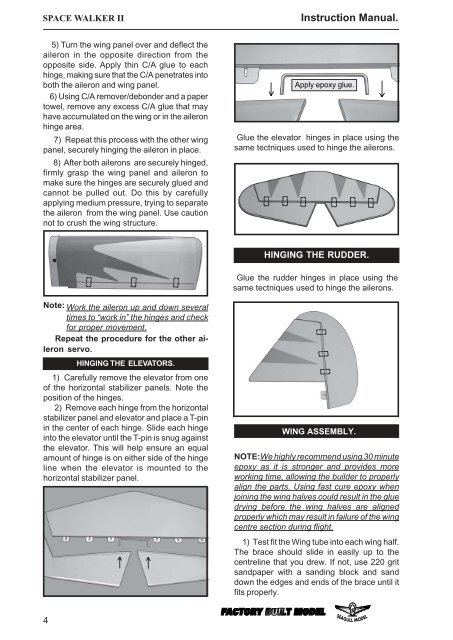
5) Turn the wing panel over and deflect the<br />
aileron in the opposite direction from the<br />
opposite side. Apply thin C/A glue to each<br />
hinge, making sure that the C/A penetrates into<br />
both the aileron and wing panel.<br />
6) Using C/A remover/debonder and a paper<br />
towel, remove any excess C/A glue that may<br />
have accumulated on the wing or in the aileron<br />
hinge area.<br />
7) Repeat this process with the other wing<br />
panel, securely hinging the aileron in place.<br />
8) After both ailerons are securely hinged,<br />
firmly grasp the wing panel and aileron to<br />
make sure the hinges are securely glued and<br />
cannot be pulled out. Do this by carefully<br />
applying medium pressure, trying to separate<br />
the aileron from the wing panel. Use caution<br />
not to crush the wing structure.<br />
Apply epoxy glue.<br />
Glue the elevator hinges in place using the<br />
same tectniques used to hinge the ailerons.<br />
HINGING THE RUDDER.<br />
Glue the rudder hinges in place using the<br />
same tectniques used to hinge the ailerons.<br />
Note: Work the aileron up and down several<br />
times to “work in” the hinges and check<br />
for proper movement.<br />
Repeat the procedure for the other aileron<br />
servo.<br />
HINGING THE ELEVATORS.<br />
1) Carefully remove the elevator from one<br />
of the horizontal stabilizer panels. Note the<br />
position of the hinges.<br />
2) Remove each hinge from the horizontal<br />
stabilizer panel and elevator and place a T-pin<br />
in the center of each hinge. Slide each hinge<br />
into the elevator until the T-pin is snug against<br />
the elevator. This will help ensure an equal<br />
amount of hinge is on either side of the hinge<br />
line when the elevator is mounted to the<br />
horizontal stabilizer panel.<br />
WING ASSEMBLY.<br />
NOTE:We highly recommend using 30 minute<br />
epoxy as it is stronger and provides more<br />
working time, allowing the builder to properly<br />
align the parts. Using fast cure epoxy when<br />
joining the wing halves could result in the glue<br />
drying before the wing halves are aligned<br />
properly which may result in failure of the wing<br />
centre section during flight.<br />
1) Test fit the Wing tube into each wing half.<br />
The brace should slide in easily up to the<br />
centreline that you drew. If not, use 220 grit<br />
sandpaper with a sanding block and sand<br />
down the edges and ends of the brace until it<br />
fits properly.<br />
4


