

Spacewalker II 40 Manual - Horizon Hobby
Spacewalker II 40 Manual - Horizon Hobby
Spacewalker II 40 Manual - Horizon Hobby

You also want an ePaper? Increase the reach of your titles
YUMPU automatically turns print PDFs into web optimized ePapers that Google loves.
SPACE WALKER <strong>II</strong><br />
Instruction <strong>Manual</strong>.<br />
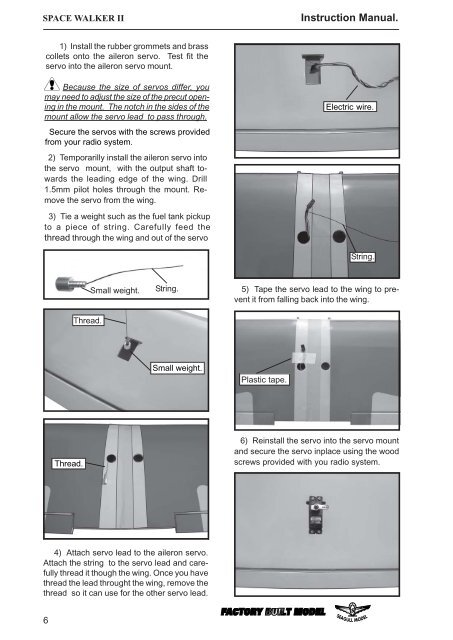
1) Install the rubber grommets and brass<br />
collets onto the aileron servo. Test fit the<br />
servo into the aileron servo mount.<br />
Because the size of servos differ, you<br />
may need to adjust the size of the precut opening<br />
in the mount. The notch in the sides of the<br />
mount allow the servo lead to pass through.<br />
Secure the servos with the screws provided<br />
from your radio system.<br />
2) Temporarilly install the aileron servo into<br />
the servo mount, with the output shaft towards<br />
the leading edge of the wing. Drill<br />
1.5mm pilot holes through the mount. Remove<br />
the servo from the wing.<br />
Electric wire.<br />
3) Tie a weight such as the fuel tank pickup<br />
to a piece of string. Carefully feed the<br />
thread through the wing and out of the servo<br />
String.<br />
Thread.<br />
Small weight.<br />
String.<br />
5) Tape the servo lead to the wing to prevent<br />
it from falling back into the wing.<br />
Small weight.<br />
Plastic tape.<br />
Thread.<br />
6) Reinstall the servo into the servo mount<br />
and secure the servo inplace using the wood<br />
screws provided with you radio system.<br />
4) Attach servo lead to the aileron servo.<br />
Attach the string to the servo lead and carefully<br />
thread it though the wing. Once you have<br />
thread the lead throught the wing, remove the<br />
thread so it can use for the other servo lead.<br />
6


