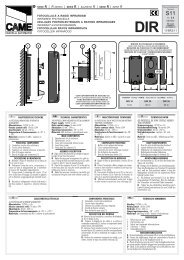
Anleitungen â Garagentorantriebe Modell 5580, 3780 Instructions ...
Anleitungen â Garagentorantriebe Modell 5580, 3780 Instructions ...
Anleitungen â Garagentorantriebe Modell 5580, 3780 Instructions ...

You also want an ePaper? Increase the reach of your titles
YUMPU automatically turns print PDFs into web optimized ePapers that Google loves.
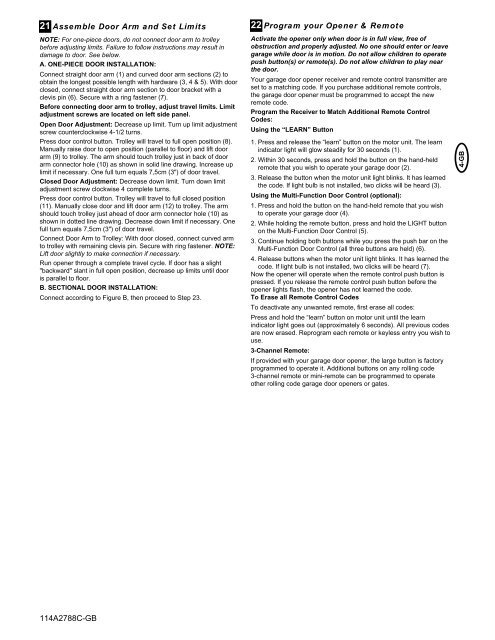
21 Assemble Door Arm and Set Limits<br />
NOTE: For one-piece doors, do not connect door arm to trolley<br />
before adjusting limits. Failure to follow instructions may result in<br />
damage to door. See below.<br />
A. ONE-PIECE DOOR INSTALLATION:<br />
Connect straight door arm (1) and curved door arm sections (2) to<br />
obtain the longest possible length with hardware (3, 4 & 5). With door<br />
closed, connect straight door arm section to door bracket with a<br />
clevis pin (6). Secure with a ring fastener (7).<br />
Before connecting door arm to trolley, adjust travel limits. Limit<br />
adjustment screws are located on left side panel.<br />
Open Door Adjustment: Decrease up limit. Turn up limit adjustment<br />
screw counterclockwise 4-1/2 turns.<br />
Press door control button. Trolley will travel to full open position (8).<br />
Manually raise door to open position (parallel to floor) and lift door<br />
arm (9) to trolley. The arm should touch trolley just in back of door<br />
arm connector hole (10) as shown in solid line drawing. Increase up<br />
limit if necessary. One full turn equals 7,5cm (3") of door travel.<br />
Closed Door Adjustment: Decrease down limit. Turn down limit<br />
adjustment screw clockwise 4 complete turns.<br />
Press door control button. Trolley will travel to full closed position<br />
(11). Manually close door and lift door arm (12) to trolley. The arm<br />
should touch trolley just ahead of door arm connector hole (10) as<br />
shown in dotted line drawing. Decrease down limit if necessary. One<br />
full turn equals 7,5cm (3") of door travel.<br />
Connect Door Arm to Trolley: With door closed, connect curved arm<br />
to trolley with remaining clevis pin. Secure with ring fastener. NOTE:<br />
Lift door slightly to make connection if necessary.<br />
Run opener through a complete travel cycle. If door has a slight<br />
"backward" slant in full open position, decrease up limits until door<br />
is parallel to floor.<br />
B. SECTIONAL DOOR INSTALLATION:<br />
Connect according to Figure B, then proceed to Step 23.<br />
22 Program your Opener & Remote<br />
Activate the opener only when door is in full view, free of<br />
obstruction and properly adjusted. No one should enter or leave<br />
garage while door is in motion. Do not allow children to operate<br />
push button(s) or remote(s). Do not allow children to play near<br />
the door.<br />
Your garage door opener receiver and remote control transmitter are<br />
set to a matching code. If you purchase additional remote controls,<br />
the garage door opener must be programmed to accept the new<br />
remote code.<br />
Program the Receiver to Match Additional Remote Control<br />
Codes:<br />
Using the “LEARN” Button<br />
1. Press and release the “learn” button on the motor unit. The learn<br />
indicator light will glow steadily for 30 seconds (1).<br />
2. Within 30 seconds, press and hold the button on the hand-held<br />
remote that you wish to operate your garage door (2).<br />
3. Release the button when the motor unit light blinks. It has learned<br />
the code. If light bulb is not installed, two clicks will be heard (3).<br />
Using the Multi-Function Door Control (optional):<br />
1. Press and hold the button on the hand-held remote that you wish<br />
to operate your garage door (4).<br />
2. While holding the remote button, press and hold the LIGHT button<br />
on the Multi-Function Door Control (5).<br />
3. Continue holding both buttons while you press the push bar on the<br />
Multi-Function Door Control (all three buttons are held) (6).<br />
4. Release buttons when the motor unit light blinks. It has learned the<br />
code. If light bulb is not installed, two clicks will be heard (7).<br />
Now the opener will operate when the remote control push button is<br />
pressed. If you release the remote control push button before the<br />
opener lights flash, the opener has not learned the code.<br />
To Erase all Remote Control Codes<br />
To deactivate any unwanted remote, first erase all codes:<br />
Press and hold the “learn” button on motor unit until the learn<br />
indicator light goes out (approximately 6 seconds). All previous codes<br />
are now erased. Reprogram each remote or keyless entry you wish to<br />
use.<br />
3-Channel Remote:<br />
If provided with your garage door opener, the large button is factory<br />
programmed to operate it. Additional buttons on any rolling code<br />
3-channel remote or mini-remote can be programmed to operate<br />
other rolling code garage door openers or gates.<br />
4-GB<br />
114A2788C-GB