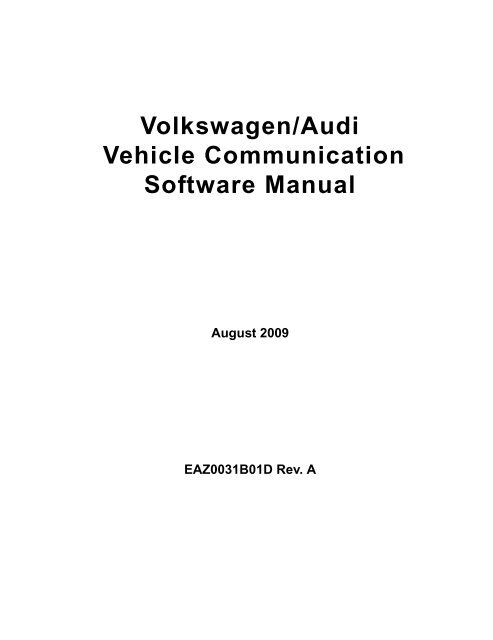
Volkswagen-Audi Vehicle Communication Software Manual [888kb ...
Volkswagen-Audi Vehicle Communication Software Manual [888kb ...
Volkswagen-Audi Vehicle Communication Software Manual [888kb ...

Create successful ePaper yourself
Turn your PDF publications into a flip-book with our unique Google optimized e-Paper software.
<strong>Volkswagen</strong>/<strong>Audi</strong><br />
<strong>Vehicle</strong> <strong>Communication</strong><br />
<strong>Software</strong> <strong>Manual</strong><br />
August 2009<br />
EAZ0031B01D Rev. A
Trademarks Acknowledgements<br />
Snap-on is a trademark of Snap-on Incorporated.<br />
All other marks are trademarks of their respective holders.<br />
Copyright Information<br />
©2009 Snap-on Incorporated<br />
All rights reserved.<br />
Disclaimer<br />
The information, specifications and illustrations in this manual are based on the latest information available at the<br />
time of printing.<br />
Snap-on reserves the right to make changes at any time without notice.<br />
For Technical Assistance Call:<br />
1-800-332-2526 (US only)<br />
1-800-424-7226 (North America)<br />
ii
Safety Information<br />
For your own safety and the safety of others, and to prevent damage to the equipment and<br />
vehicles upon which it is used, it is important that the accompanying Safety Information be read<br />
and understood by all persons operating, or coming into contact with, the equipment. We suggest<br />
you store a copy near the unit in sight of the operator<br />
This product is intended for use by properly trained and skilled professional automotive<br />
technicians. The safety messages presented throughout this manual are reminders to the<br />
operator to exercise extreme care when using this test instrument.<br />
There are many variations in procedures, techniques, tools, and parts for servicing vehicles, as<br />
well as in the skill of the individual doing the work. Because of the vast number of test applications<br />
and variations in the products that can be tested with this instrument, we cannot possibly<br />
anticipate or provide advice or safety messages to cover every situation. It is the automotive<br />
technician’s responsibility to be knowledgeable of the system being tested. It is essential to use<br />
proper service methods and test procedures. It is important to perform tests in an appropriate and<br />
acceptable manner that does not endanger your safety, the safety of others in the work area, the<br />
equipment being used, or the vehicle being tested.<br />
It is assumed that the operator has a thorough understanding of vehicle systems before using this<br />
product. Understanding of these system principles and operating theories is necessary for<br />
competent, safe and accurate use of this instrument.<br />
Before using the equipment, always refer to and follow the safety messages and applicable test<br />
procedures provided by the manufacturer of the vehicle or equipment being tested. Use the<br />
equipment only as described in this manual.<br />
Read, understand and follow all safety messages and instructions in this manual, the<br />
accompanying safety manual, and on the test equipment.<br />
Safety Message Conventions<br />
Safety messages are provided to help prevent personal injury and equipment damage. All safety<br />
messages are introduced by a signal word indicating the hazard level.<br />
! DANGER<br />
Indicates an imminently hazardous situation which, if not avoided, will result in death or serious<br />
injury to the operator or to bystanders.<br />
! WARNING<br />
Indicates a potentially hazardous situation which, if not avoided, could result in death or serious<br />
injury to the operator or to bystanders.<br />
! CAUTION<br />
Indicates a potentially hazardous situation which, if not avoided, may result in moderate or minor<br />
injury to the operator or to bystanders.<br />
iii
Safety Information<br />
Important Safety Instructions<br />
Safety messages contain three different type styles.<br />
• Normal type states the hazard.<br />
• Bold type states how to avoid the hazard.<br />
• Italic type states the possible consequences of not avoiding the hazard.<br />
An icon, when present, gives a graphical description of the potential hazard.<br />
Example:<br />
! WARNING<br />
Risk of unexpected vehicle movement.<br />
• Block drive wheels before performing a test with engine running.<br />
A moving vehicle can cause injury.<br />
Important Safety Instructions<br />
For a complete list of safety messages, refer to the accompanying safety manual.<br />
SAVE THESE INSTRUCTIONS<br />
iv
Table of Contents<br />
Safety Information ..................................................................................................................... iii<br />
Chapter 1: Using This <strong>Manual</strong> ................................................................................................... 1<br />
Conventions.................................................................................................................................. 1<br />
Bold Text ................................................................................................................................ 1<br />
Terminology............................................................................................................................ 1<br />
Notes and Important Messages....................................................................................................2<br />
Notes...................................................................................................................................... 2<br />
Important ................................................................................................................................ 2<br />
Chapter 2: Introduction.............................................................................................................. 3<br />
Chapter 3: Operations................................................................................................................ 4<br />
Identifying the <strong>Vehicle</strong>................................................................................................................... 4<br />
Engine ID Codes.................................................................................................................... 5<br />
<strong>Vehicle</strong> Identification .............................................................................................................11<br />
Connecting to a <strong>Vehicle</strong>...............................................................................................................11<br />
Selecting a System..................................................................................................................... 15<br />
Demonstration Programs............................................................................................................ 17<br />
Chapter 4: Expert Mode ........................................................................................................... 18<br />
Using Expert Mode ..................................................................................................................... 18<br />
Initiating Expert Mode ..........................................................................................................19<br />
Selecting a System ..............................................................................................................19<br />
Expert Mode Function Selection Menu ................................................................................ 20<br />
Testing in Expert Mode ............................................................................................................... 29<br />
Chapter 5: Testing .................................................................................................................... 30<br />
VW/<strong>Audi</strong> <strong>Software</strong> Application List ............................................................................................. 30<br />
Testing Engine Systems ............................................................................................................. 32<br />
VW/<strong>Audi</strong> Application Coverage............................................................................................ 32<br />
Clearing Codes .................................................................................................................... 40<br />
Data...................................................................................................................................... 42<br />
Functional Tests ................................................................................................................... 43<br />
Testing Transmission Systems ................................................................................................... 53<br />
Digimat Control Module Identification—Golf & Jetta, 1993–97 ............................................ 58<br />
4-Speed Automatic Transmission—01N .............................................................................. 60<br />
VW Series—095, 096, 01M ................................................................................................. 60<br />
<strong>Audi</strong> Transmission—01F, 01K.............................................................................................. 61<br />
Important Tips for Transmission Codes ............................................................................... 62<br />
Transmission Basic Settings ................................................................................................ 63<br />
Functional Tests—VW Passat 01V ...................................................................................... 64<br />
VW/<strong>Audi</strong> Transmission Emergency Operation—01V........................................................... 66<br />
Testing Electronic Throttle Systems ........................................................................................... 67<br />
Throttle Valve Control Module Adaptation............................................................................ 67<br />
v
Table of Contents<br />
Table of Contents<br />
Electronic Throttle Types ..................................................................................................... 69<br />
Testing ABS Systems ................................................................................................................. 72<br />
ABS Basic Settings ..............................................................................................................75<br />
Testing Immobilizer Systems ...................................................................................................... 75<br />
Important Tips for Testing Immobilizer III Systems............................................................... 76<br />
<strong>Audi</strong> Immobilizers................................................................................................................. 77<br />
Immobilizer Adaptation Procedures ..................................................................................... 77<br />
Radio Frequency Remote Control Functions....................................................................... 81<br />
Immobilizer Frequently Asked Questions............................................................................. 82<br />
Testing Electronic Instrument Panel Systems ............................................................................ 83<br />
Electronic Instrument Panel Types....................................................................................... 83<br />
Testing Airbag (SRS) Systems ................................................................................................... 88<br />
Testing CAN Data Bus Systems ................................................................................................. 89<br />
Sources of Interference........................................................................................................ 90<br />
Powertrain CAN Bus ............................................................................................................ 90<br />
CAN Data Bus in the Convenience System ......................................................................... 91<br />
Chapter 6: Data Parameters .................................................................................................... 92<br />
Alphabetical Parameter List........................................................................................................ 93<br />
Gas Engine Parameters ........................................................................................................... 105<br />
Diesel Engine Parameters........................................................................................................ 136<br />
Transmission Parameters......................................................................................................... 140<br />
Transmission Expert Mode Parameters ................................................................................... 148<br />
ABS Parameters....................................................................................................................... 150<br />
Appendix A: Terms and Acronyms....................................................................................... 151<br />
Terms........................................................................................................................................ 151<br />
Acronyms.................................................................................................................................. 151<br />
Appendix B: Troubleshooting ............................................................................................... 154<br />
<strong>Communication</strong> Problems ........................................................................................................ 154<br />
The Aftermarket Radio Problem ............................................................................................... 154<br />
The Problem ...................................................................................................................... 154<br />
Testing for this Problem ..................................................................................................... 155<br />
Appendix C: Fuel Control Learning Adaptation Values...................................................... 157<br />
Long-Term Fuel Control............................................................................................................ 157<br />
Additive Adaptation ............................................................................................................ 157<br />
Multiplicative Adaptation .................................................................................................... 158<br />
Examples of Display Groups for Long Term FT Adaptive Value ........................................ 158<br />
Important Tips for Long Term Fuel Control......................................................................... 160<br />
Short-Term Fuel Control ........................................................................................................... 160<br />
Examples Short Term FT O2 Regulation ........................................................................... 160<br />
Important Tips for Short-Term Fuel Control........................................................................ 161<br />
Oxygen Sensor Voltage............................................................................................................ 162<br />
Early <strong>Vehicle</strong> Oxygen Sensor Reading..................................................................................... 162<br />
Example: Motronic 2.9 (1993–1995).................................................................................. 163<br />
Late Model Oxygen Sensor Reading........................................................................................ 163<br />
Oxygen Sensor Aging Test ................................................................................................ 164<br />
Oxygen Sensor Control-Dwell Time Test ........................................................................... 165<br />
CAT Test Parameters ......................................................................................................... 165<br />
vi
Table of Contents<br />
Table of Contents<br />
Index ........................................................................................................................................ 170<br />
vii
Chapter 1<br />
Using This <strong>Manual</strong><br />
This manual contains instructions for testing BMW vehicles. Some of the Illustrations shown in this<br />
manual may contain modules and optional equipment that are not included on your system.<br />
Contact a Snap-on Sales Representative for availability of other modules and optional equipment.<br />
1.1 Conventions<br />
This manual uses the conventions described below.<br />
1.1.1 Bold Text<br />
Bold text is used for emphasis and to highlight selectable items such as buttons and menu<br />
options.<br />
Example:<br />
• Select OK to continue.<br />
1.1.2 Terminology<br />
Certain terms are used to command specific actions throughout this manual. Those terms are<br />
described below.<br />
Select<br />
The term “select” means to highlight a menu item or other option, then pressing the Y/a, OK,<br />
Accept, or similar button to activate it.<br />
Example:<br />
• Select Functional Tests.<br />
Scroll<br />
The term “scroll” means moving the cursor or changing data by using the directional arrow<br />
buttons, scroll bars, or other means.<br />
Example:<br />
• Scroll to see any other codes and the data list.<br />
1
Using This <strong>Manual</strong><br />
Notes and Important Messages<br />
Scan Tool<br />
The term “scan tool” will be used to refer to any tool that communicates directly with the vehicle<br />
data stream. When necessary, the term “Scanner” is used to distinguish Snap-on equipment from<br />
another diagnostic device, such as the BMW factory scan tool.<br />
1.2 Notes and Important Messages<br />
The following messages appear throughout this manual.<br />
1.2.1 Notes<br />
A NOTE provides helpful information such as explanations, tips, and comments.<br />
Example:<br />
NOTE:<br />
i For additional information refer to...<br />
1.2.2 Important<br />
IMPORTANT indicates a situation which, if not avoided, may result in damage to the test<br />
equipment or vehicle.<br />
Example:<br />
IMPORTANT:<br />
To avoid incorrect TPS adjustment or component damage, be sure to follow the on-screen<br />
instructions. Refer to a vehicle service manual for complete test or adjustment procedures.<br />
2
Chapter 2<br />
Introduction<br />
This manual contains instructions for testing <strong>Volkswagen</strong> and <strong>Audi</strong> vehicles.<br />
Some of the illustrations shown in this manual may contain modules and optional equipment that<br />
are not included on your system. Contact a Snap-on Sales Representative for availability of other<br />
modules and optional equipment.<br />
This chapter provides an overview of the conventions used in this manual. The remainder of this<br />
guide is divided in to the following chapters:<br />
• Operations, on page 4—explains how to begin using the basic scan tool test functions, such<br />
as identifying a vehicle, selecting a system for testing, and connecting to a vehicle.<br />
• Expert Mode, on page 18—details enhanced factory tool capabilities and special functions,<br />
such as setting adaptations and control module coding.<br />
• Testing, on page 30—provides information and procedures for using the scan tool with<br />
specific control systems.<br />
• Data Parameters, on page 92—provides definitions and operating ranges for the<br />
<strong>Volkswagen</strong> and <strong>Audi</strong> vehicle data stream parameters.<br />
• Terms and Acronyms, on page 151—defines common terms and acronyms used in this<br />
manual.<br />
• Troubleshooting, on page 154—contains information for troubleshooting specific problems<br />
that may arise when using the scan tool.<br />
• Fuel Control Learning Adaptation Values, on page 157—explains OBD-II short and long<br />
term FT terminology applied to VW/<strong>Audi</strong> fuel control terminology.<br />
3
Chapter 3<br />
Operations<br />
This chapter explains how to begin using the basic scan tool test functions, such as identifying a<br />
vehicle, selecting a system for testing, and connecting to a vehicle. This information is specific to<br />
VW/<strong>Audi</strong> vehicles. For general scan tool functionality, see the manual for your diagnostic tool.<br />
Test the Same <strong>Vehicle</strong><br />
YES<br />
NO<br />
Select <strong>Volkswagen</strong>/<strong>Audi</strong><br />
Select Make<br />
Select Market<br />
Identify the <strong>Vehicle</strong> by Entering VIN Digits<br />
Connect to the <strong>Vehicle</strong><br />
Select the System for Testing<br />
System Main Menu<br />
Codes Only<br />
Data<br />
Functional Tests<br />
Review ECU ID<br />
Stop <strong>Communication</strong><br />
Figure 3-1 Basic <strong>Volkswagen</strong> <strong>Audi</strong> test routine<br />
3.1 Identifying the <strong>Vehicle</strong><br />
The scan tool typically identifies a vehicle using certain characters of the vehicle identification<br />
number (VIN). The scan tool vehicle identification (ID) process prompts to you enter VIN<br />
characters and answer questions about the vehicle to be tested.<br />
4
Operations<br />
Identifying the <strong>Vehicle</strong><br />
3.1.1 Engine ID Codes<br />
The vehicle identification process includes entering the test vehicle’s engine ID code. The exact<br />
engine ID code selection is usually not required for vehicle communications, however, in order for<br />
the scan tool to communicate with all installed systems, we recommend that you identify the<br />
correct engine code. The scan tool has to match all possible control module identities with the<br />
exact control module installed in the vehicle. In addition, the engine ID code is required to select<br />
the correct OBD-II Readiness Monitor setting procedures. See the <strong>Volkswagen</strong>/<strong>Audi</strong> OBD-II<br />
Readiness Charts for more information.<br />
VW/<strong>Audi</strong> specific engine differences are determined by a three-digit engine ID code. In any<br />
particular year, there could be multiple engine ID codes for any one engine. The engine codes<br />
may represent different horsepower, torque rating or emission package.<br />
Engine ID codes are stamped on the engine block in three-digit alpha characters followed by a<br />
series of numbers (usually six), for example, “AEG 029452". If more than 999,999 engines with the<br />
same engine code are produced, the first number is replaced by a letter. Newer models may also<br />
have an adhesive label located on the timing belt cover. The engine ID code can be difficult to<br />
locate on older engines with excessive oil and grease. Here are typical older model 4- and<br />
6-cylinder locations:<br />
• 4-cylinder engine codes and numbers are usually, stamped into the rear of the cylinder block<br />
casting near the oil filter flange near the engine/transmission joint.<br />
• 6-cylinder engine codes are usually located on the left side of the engine block below the<br />
camshaft timing chain tensioner. The code numbers should be visible when looking down<br />
between the throttle valve control module and the valve cover.<br />
Note the following when looking for an engine ID code:<br />
• Alternatively, look in the owners “maintenance” manual for an adhesive sticker.<br />
• For most engines, the engine ID code is also included on the vehicle data plate, typically<br />
located in the trunk near the spare tire. This may be the easiest way to find the engine code.<br />
Table 3-1 contains engine ID code locations for <strong>Audi</strong> models.<br />
Table 3-1 <strong>Volkswagen</strong> engine ID code locations (part 1 of 4)<br />
Model Year Engine Code Location<br />
Beetle<br />
1999 and<br />
later<br />
1998–2002<br />
2003<br />
2004 and<br />
later<br />
1.8L<br />
1.9L 4-cyl<br />
2V TDI<br />
2.0L 4-cyl<br />
2V<br />
1.8L<br />
Turbo<br />
1.9L TDI<br />
APH, AWP, AWV: Near the engine/transmission joint. Also on a<br />
sticker on the toothed belt guard.<br />
ALH: Between the diesel injection pump and the exhaust manifold<br />
on the engine block. Also on a sticker on the timing belt guard.<br />
BBW, BDC: On the front of the engine near the engine/<br />
transmission joint. Also on a sticker on the cylinder head cover and<br />
vehicle data plate.<br />
AWU: Unknown at this time.<br />
BKF: The engine number can be found on the joint between<br />
engine/gearbox.<br />
BNU: The engine number can be found on the joint between<br />
engine/gearbox.<br />
BEW: The engine number can be found on the joint between<br />
engine/gearbox.<br />
5
Operations<br />
Identifying the <strong>Vehicle</strong><br />
Table 3-1 <strong>Volkswagen</strong> engine ID code locations (part 2 of 4)<br />
Model Year Engine Code Location<br />
Beetle<br />
(continued)<br />
Eurovan<br />
Golf, Jetta,<br />
GTI<br />
2004 and<br />
later<br />
(continued)<br />
1999 and<br />
earlier<br />
2000 and<br />
later<br />
2001 to<br />
2004<br />
1999 and<br />
earlier<br />
1999 and<br />
later<br />
2000 and<br />
later<br />
2.0L<br />
2.5L<br />
2.8L<br />
AZG: Near the engine/transmission joint. Also on a sticker on the<br />
cylinder head cover and vehicle data plate.<br />
BDC: Front of the engine near the engine/transmission joint. Also<br />
on a sticker on the cylinder head cover and vehicle data plate.<br />
BER: Unknown at this time.<br />
BEV: The engine number can be found on the flange between<br />
engine/transmission.<br />
AEG: Near the engine/transmission joint. Also on a sticker on the<br />
cylinder head cover and vehicle data plate.<br />
AVH: Near the engine/transmission joint. Also on a sticker on the<br />
cylinder head cover and vehicle data plate.<br />
BHP: Unknown at this time.<br />
BGD: The engine number can be found at the front next to the joint<br />
between engine/transmission<br />
AAF, ACU: Between cylinders 1 and 3 on the cylinder block. Also<br />
on a sticker on the toothed belt guard.<br />
AES: Behind the cylinder head cover on the cylinder block. Also on<br />
a sticker attached to the cylinder head cover.<br />
2.8L AES: On the cylinder block next to the vibration damper.<br />
2.8L<br />
2.8L VR6<br />
2V<br />
1.8L 4-cyl<br />
5V Turbo<br />
1.9L 4-cyl<br />
2V TDI<br />
2.0L 4-cyl<br />
2V<br />
2.8L<br />
2.8L VR6<br />
2V<br />
2003 2.0L<br />
2004 and<br />
later<br />
1.8L<br />
Turbo<br />
1.9L TDI<br />
AXK: The engine code is located next to the vibration damper on<br />
the cylinder head.<br />
AFP: On the engine block next to the vibration damper. The engine<br />
ID number is found here from 06.27.99 production and from engine<br />
AFP-019059.<br />
Also on a sticker on the back of the intake manifold upper section<br />
near the vacuum connection. Remove the engine cover to view.<br />
AWD, AWP, AWW: Near the engine/transmission joint. Also on a<br />
sticker on the toothed belt guard.<br />
ALH: Between the diesel injection pump and the exhaust manifold<br />
on the engine block. Also on a sticker on the toothed belt guard.<br />
AEG, AVH, AZG: Near the engine/transmission joint. Also on a<br />
sticker on the cylinder head cover and vehicle data plate.<br />
BDF: Next to the vibration damper on the cylinder block. Also on a<br />
sticker on the intake manifold.<br />
AFP: On the engine block next to the cylinder head, beneath the<br />
chain tensioner for the camshaft roller chain. It can be seen by<br />
looking down between heating resistor N79 and the throttle valve<br />
control unit. Also on a sticker on the valve cover.<br />
BBW: Near the engine/transmission joint. Also on a sticker on the<br />
cylinder head cover and vehicle data plate.<br />
BEK: Unknown at this time.<br />
BEW: The engine number can be found on the joint between<br />
engine/gearbox.<br />
BKC: Unknown at this time.<br />
BRM: Unknown at this time.<br />
6
Operations<br />
Identifying the <strong>Vehicle</strong><br />
Table 3-1 <strong>Volkswagen</strong> engine ID code locations (part 3 of 4)<br />
Model Year Engine Code Location<br />
Golf, Jetta,<br />
GTI<br />
(continued)<br />
Passat<br />
Touareg<br />
Phaeton<br />
2004 and<br />
later<br />
(continued)<br />
2005 and<br />
later<br />
1995–97<br />
1998 and<br />
later<br />
2004 and<br />
later<br />
2004 and<br />
later<br />
2004 and<br />
later<br />
2.0L<br />
3.2L<br />
2.5L<br />
1.9L 4-cyl<br />
2V TDI<br />
2.8L VR6<br />
2V<br />
1.8L 4-cyl<br />
5V Turbo<br />
2.8L V6<br />
5V<br />
W8, 4.0L<br />
2.0L<br />
2.8L<br />
BEV: The engine number can be found on the flange between<br />
engine/transmission.<br />
BER: Unknown at this time.<br />
BHP: Unknown at this time.<br />
BFM: Unknown at this time.<br />
BML: Unknown at this time.<br />
BJS: The engine number is located next to the vibration damper on<br />
cylinder block under coolant pump.<br />
BGQ: Unknown at this time.<br />
BGP: Unknown at this time.<br />
AAZ, 1Z: On the cylinder block between the diesel injection pump<br />
and the exhaust. Also on a sticker on the toothed belt guard.<br />
AAA: On the vibration damper end of the cylinder block. Also on a<br />
sticker on the cylinder head cover.<br />
AEB, ATW, AUG, AWM: On the left side of the cylinder block. Also<br />
on a sticker on the cylinder head cover. The engine code is also<br />
stamped on the front of the engine lifting eye (visible after removing<br />
the cover above the fuel injectors).<br />
AHA, ATQ: On the flat surface of the cylinder block, on the front of<br />
the right cylinder head.<br />
BDP: On the left of the cylinder block. Also on a sticker on the<br />
cylinder head cover.<br />
BHW: The engine number can be found on the joint between<br />
engine/transmission.<br />
BGW: Unknown at this time.<br />
AMX: Unknown at this time.<br />
BBG: Unknown at this time.<br />
4.0L BDN: Unknown at this time.<br />
AZZ: Unknown at this time<br />
BKJ: Unknown at this time<br />
3.2L<br />
BAA: The engine number is located next to the vibration damper<br />
on cylinder block under coolant pump.<br />
BMX: The engine number is located next to the harmonic balancer<br />
on the cylinder block under the coolant pump<br />
AXQ: The engine number is stamped on the right side of the<br />
cylinder block.<br />
4.2L<br />
BHX: The engine number is stamped on the right hand side of the<br />
engine block.<br />
AYH: Unknown at this time.<br />
5.0L TDI BKW: The engine number is located on the cylinder below the<br />
cylinder head of cylinder bank 2.<br />
BGJ: The engine number is stamped on the right side of the<br />
cylinder block<br />
4.2L<br />
BGH: The engine number is stamped on the right side of the<br />
cylinder block<br />
BAP: The engine number is located at left on cylinder block<br />
6.0L BAN: Unknown at this time.<br />
BRP: The engine number is located at left on cylinder block<br />
7
Operations<br />
Identifying the <strong>Vehicle</strong><br />
Table 3-1 <strong>Volkswagen</strong> engine ID code locations (part 4 of 4)<br />
Model Year Engine Code Location<br />
New Jetta<br />
2005 and<br />
later<br />
1.9L TDI<br />
2.5L<br />
BRM: The engine number can be found on the joint between<br />
engine/transmission.<br />
BGP: The engine code and serial number are located on the<br />
backside of the engine, above the separation point of the engine<br />
block/upper point of oil pan.<br />
BGQ: The engine code and serial number are located on the<br />
backside of the engine, above the separation point of the engine<br />
block/upper point of oil pan.<br />
Table 3-2 <strong>Audi</strong> engine ID code locations (part 1 of 3)<br />
Model Year Engine Code Location<br />
A4<br />
1998 and<br />
later<br />
2001<br />
1.8L 4-cyl<br />
5V Turbo<br />
1.8L<br />
2.8L<br />
AUG, AWM: On the left side, on the cylinder head. Also on a sticker<br />
with the on the cylinder head. The engine ID code is also stamped<br />
on the front of the engine lifting eye (visible after removing the<br />
cover above the fuel injectors).<br />
AEB, ATW: On the left side of the cylinder block between the<br />
transmission and above the oil filter. Also on a sticker on the timing<br />
belt guard. The engine ID is also stamped on the front of the engine<br />
mounting bracket (visible after removing cover above fuel<br />
injectors).<br />
AFC: On the right-hand side of the engine block between the<br />
cylinder head and the power steering pump. Also on a sticker on<br />
the drive belt cover.<br />
AHA, ATQ: On the block in front of the right cylinder head.<br />
AHA Only: In vehicles with VINs up to 8D-V-205 000, the oil pump<br />
is mounted on the front of the engine and driven directly by the<br />
crankshaft. In vehicles with VINs from 8D-V-205 001 on, the oil<br />
pump is driven via a chain by the crankshaft and mounted inside<br />
the oil pan. Also, oil supply lines are mounted on the camshaft<br />
bearing caps.<br />
2003 4.2L BHF: On the right of the intake manifold.<br />
AMB: On the rear left of the cylinder block. Also on a sticker on the<br />
1.8L toothed belt guard and stamped on the front lifting eye (visible<br />
when engine cover panel is removed).<br />
2003 and<br />
later<br />
3.0L<br />
AVK: Remove the front engine cover; there is a sticker with the<br />
engine code and production number on the housing for vacuum<br />
diaphragm for intake manifold adjustment. If the sticker is not<br />
present and the engine identification is required, remove the rear<br />
engine cover; engine codes are stamped on the rear of the cylinder<br />
block, left side.<br />
If there is no sticker and the engine identification and production<br />
number are required, remove the bolts and the vacuum diaphragm<br />
for intake manifold adjustment, then remove the compression<br />
spring which is behind it and set off to the side of the vacuum<br />
diaphragm with connected lines; the engine code and production<br />
number are located at the front of the cylinder head, on top.<br />
8
Operations<br />
Identifying the <strong>Vehicle</strong><br />
Table 3-2 <strong>Audi</strong> engine ID code locations (part 2 of 3)<br />
Model Year Engine Code Location<br />
A4<br />
(continued)<br />
A6<br />
A6/S6<br />
A8<br />
2004 and<br />
later<br />
1998 and<br />
later<br />
2000 and<br />
later<br />
2002 and<br />
later<br />
2004 and<br />
later<br />
Sedan<br />
(1995–97)<br />
Wagon<br />
(1995–98)<br />
2003<br />
2004 and<br />
later<br />
1.8 L<br />
Turbo<br />
1.8 L<br />
Turbo<br />
2.0L<br />
BKB: Unknown at this time.<br />
BFB: Unknown at this time.<br />
BEX: Unknown at this time.<br />
AMB: The engine number can be found on the rear left of the<br />
cylinder block.<br />
BPG: The engine number can be found on the joint between<br />
engine/transmission.<br />
3.0L<br />
ASN: Unknown at this time.<br />
BBJ: Unknown at this time.<br />
3.2L<br />
BKH: The engine number is located on the front of the cylinder<br />
block below the right cylinder head.<br />
4.2L BBK: Unknown at this time.<br />
4.2L<br />
BHF: A sticker arrow with engine code and serial number is located<br />
on the intake manifold on the right side.<br />
APB, AHA, ATQ: On the machined surface on the cylinder block,<br />
2.7L, 2.8L<br />
at the front of the right cylinder bank.<br />
4.2L<br />
ART, AWN, BBD: On the left side of the cylinder block. Also on a<br />
sticker on the belt cover.<br />
AVK: Remove the front engine cover; there is a sticker on the<br />
3.0L<br />
housing for the vacuum diagram for intake manifold adjustment.<br />
Also if the rear engine cover is removed engine codes are stamped<br />
on the rear of the cylinder block, left side.<br />
4.2L<br />
AWN: Unknown at this time.<br />
BBD: The engine number is located at left on the cylinder block.<br />
3.0L<br />
ASN: Unknown at this time.<br />
BBJ: Unknown at this time.<br />
3.2L<br />
BKH: The engine number is located on the front of the cylinder<br />
block below the right cylinder head.<br />
2.7L BES: Unknown at this time.<br />
ANK: Unknown at this time.<br />
4.2L<br />
ASG: Unknown at this time.<br />
BNK: A sticker with the engine and serial number is affixed to the<br />
cylinder head cover on the right hand side.<br />
2.2L AAN: On the right-hand side at the rear of the cylinder head.<br />
2.7L BEL: On the cylinder block at the front of the right cylinder bank.<br />
2.2L AAN: On the right-hand side at the rear of the cylinder head.<br />
2.7L BEL: On the cylinder block at the front of the right cylinder bank.<br />
4.2L BAS: On the right-hand side at the rear of the cylinder head.<br />
BCY: On top of the cylinder block. Also on a sticker on the drive<br />
belt cover.<br />
4.2L BFM: The engine number is located at left on cylinder block.<br />
BHT: Unknown at this time.<br />
6.0L BSB: The engine number is located on the front of the cylinder<br />
block below the left cylinder head<br />
9
Operations<br />
Identifying the <strong>Vehicle</strong><br />
Table 3-2 <strong>Audi</strong> engine ID code locations (part 3 of 3)<br />
Model Year Engine Code Location<br />
A8/S8<br />
4.2L<br />
3.7L, 4.2L<br />
Cabriolet 2.8L<br />
S4<br />
TT<br />
2000<br />
2004 and<br />
later<br />
2003 and<br />
earlier<br />
2004 and<br />
later<br />
1.8L<br />
2.8L<br />
1.8L<br />
Turbo<br />
3.0L<br />
4.2L<br />
1.8L, 3.2L<br />
AKB, AUX, AYS: On the left side of the cylinder block. Also on a<br />
sticker on the belt cover.<br />
ABZ, AEW: On the left side of the cylinder block directly above the<br />
power steering pump. Also on a sticker on the toothed belt guard.<br />
AAH, AFC: On the right-hand side of the engine block between the<br />
cylinder head and the power steering pump. Also on a sticker on<br />
the drive belt cover.<br />
AEB, ATW: On the left side of the cylinder block between the<br />
transmission and above the oil filter. Also on a sticker on the timing<br />
belt guard and stamped on the front of the engine mounting bracket<br />
(visible after removing cover above fuel injectors).<br />
AFC: On the right-hand side of the engine block between the<br />
cylinder head and the power steering pump. Also on a sticker on<br />
the drive belt cover.<br />
AHA, ATQ: On the flat surface of the cylinder block in front of the<br />
right cylinder head.<br />
AHA Only: In vehicles with VINs up to 8D-V-205 000 the oil pump<br />
is mounted on the front of the engine and driven directly by the<br />
crankshaft. In vehicles with VINs from 8D-V-205 001 on, the oil<br />
pump is driven via a chain by the crankshaft and mounted inside<br />
the oil pan. Also, oil supply lines are mounted on the camshaft<br />
bearing caps.<br />
AMB: Unknown at this time.<br />
BKB: Unknown at this time.<br />
BFB: Unknown at this time.<br />
ASN: Unknown at this time.<br />
BGN: Remove the front engine cover; there is a sticker on the<br />
housing for the vacuum diagram for intake manifold adjustment.<br />
Also if the rear engine cover is removed engine codes are stamped<br />
on the rear of the cylinder block, left side.<br />
BBJ: Unknown at this time.<br />
AVK: Remove the front engine cover; there is a sticker on the<br />
housing for the vacuum diagram for intake manifold adjustment.<br />
Also if the rear engine cover is removed engine codes are stamped<br />
on the rear of the cylinder block, left side.<br />
BBK: Unknown at this time.<br />
BHF: On the right of the intake manifold.<br />
AMW, ATC, AWP, BEA, BHE: At the front next to the joint between<br />
engine and transmission. Also on a sticker on the cylinder head<br />
cover.<br />
1.8L BAM: Unknown at this time.<br />
3.2L<br />
BHE: The engine number can be found on the joint between<br />
engine/transmission.<br />
10
Operations<br />
Connecting to a <strong>Vehicle</strong><br />
3.1.2 <strong>Vehicle</strong> Identification<br />
If you are powering up the scan tool after just installing the VAG software, or if you exited from the<br />
Current <strong>Vehicle</strong> Identification screen, the <strong>Software</strong> Selection screen displays.<br />
z To enter vehicle identification:<br />
1. Select to continue.<br />
The Manufacturer Selection menu displays.<br />
2. Select the manufacturer.<br />
Though you are able to select Seat or Skoda, these options apply to European vehicles only.<br />
Select <strong>Audi</strong> or <strong>Volkswagen</strong> for US vehicles.<br />
When you select a manufacturer, a systems selection screen displays.<br />
NOTE:<br />
i This is also the screen where you may select Expert Mode. See “Chapter 4 Expert Mode” on<br />
page 18 for instructions on using Expert Mode, or continue on to the next step for standard scan<br />
tool operations.<br />
3. Select <strong>Vehicle</strong> Systems US.<br />
The <strong>Vehicle</strong> Identification screen displays.<br />
When testing vehicles in the United States, always choose the option with “US” at the end<br />
when available, unless you are in Expert Mode.<br />
4. Select the correct year for the vehicle.<br />
The display now shows the model year you just selected and asks for the selection of the<br />
model type.<br />
5. Enter any further VIN character requests and answer any yes or no questions.<br />
At the end of vehicle identification, the scan tool displays the complete model and engine<br />
identification.<br />
6. If the ID is correct, continue to store the identification in memory. If the ID is not completely<br />
correct, exit to return to the start of the identification steps.<br />
3.2 Connecting to a <strong>Vehicle</strong><br />
Once a vehicle has been identified, a scan tool connection message appears, instructing you to<br />
use the supplied vehicle test adapters to connect the scan tool for testing.<br />
IMPORTANT:<br />
Before connecting the scan tool to 1997 and later vehicles, read “The Aftermarket Radio Problem”<br />
on page 154 in order to avoid seriously damaging your scan tool.<br />
The following adapters are available to connect the scan tool to VW/<strong>Audi</strong> vehicles:<br />
• VW-1—test adapter for 1991–94 VW and <strong>Audi</strong> vehicles. Hooks up to the white/black<br />
connector only (Connector for 1991–94 vehicles requires VW1 adapter).<br />
• DL-16—test adapter with Personality Key S-7 for 1994 and later vehicles (DL). This OBD-II<br />
style connector is used for all vehicles. The S-44 key is used for CAN communications.<br />
11
Operations<br />
Connecting to a <strong>Vehicle</strong><br />
Figure 3-2 VW-1 adapter<br />
Figure 3-3 DL-16 adapter with S-7 Personality Key<br />
The following vehicle connectors are found on VW/<strong>Audi</strong> vehicles.<br />
1<br />
4<br />
2<br />
5<br />
3<br />
6<br />
1— White connector<br />
2— Blue (“K”)<br />
3— Yellow (“L”)<br />
4— Black connector<br />
5— Red (+12)<br />
6— Black or Brown (ground)<br />
Figure 3-4 Connector for 1991–94 vehicles, requires VW-1 adapter<br />
NOTE:<br />
i There may be other connectors with the white/black connector. <strong>Audi</strong> may have a yellow (A/T blink<br />
codes) or blue (not used) connector, and VW may have a red connector for Airbag I systems. It<br />
may be possible to hook the white connector of the VW-1 adapter to these other connectors and<br />
read codes (without definitions).<br />
12
Operations<br />
Connecting to a <strong>Vehicle</strong><br />
1 2 3 4 5 6 7 8<br />
9 10 11 12 13 14 15 16<br />
Figure 3-5 16-pin OBD-II connector, requires DL-16 adapter<br />
Refer to Table 3-3 for <strong>Volkswagen</strong> diagnostic connector locations and to Table 3-4 for <strong>Audi</strong><br />
diagnostic connector locations.<br />
Follow the on-screen connection instructions to connect to the vehicle.<br />
Table 3-3 <strong>Volkswagen</strong> diagnostic connector locations (part 1 of 2)<br />
Model Year Connector Location<br />
Cabrio 1994–97<br />
On the instrument panel center section, on the right side of the<br />
ashtray, behind the cover. To access, remove the ashtray and<br />
slide the cover off.<br />
Cabriolet<br />
Corrado<br />
Eurovan<br />
Eurovan<br />
Winnebago<br />
Camper &<br />
Rialta<br />
Fox<br />
1991–93<br />
(California only)<br />
All<br />
1992–93<br />
1994<br />
<strong>Manual</strong> transmission: On the center console under the shifter<br />
boot. To access, pull firmly to dislodge the boot.<br />
Automatic transmission: On the center console under the<br />
selector indicator cover. To access, remove the handle from the<br />
shifter, and then unsnap the indicator cover. The shifter can also<br />
be lifted up and turned without removing the handle.<br />
Behind the parcel shelf. To access, release the catch button, pull<br />
the shelf out from top, and lift out.<br />
One of three locations: (1) behind the fold-down storage panel in<br />
front of the relay/fuse panel, (2) behind the panel in the<br />
dashboard, or (3) under the steering column.<br />
1995–2003 Under the steering column.<br />
1995<br />
1991–93<br />
(California only)<br />
Behind the parcel shelf. To access, release the catch button, pull<br />
the shelf out from top, and lift out.<br />
On the center console under the shifter boot. To access, pull firmly<br />
to dislodge the boot.<br />
13
Operations<br />
Connecting to a <strong>Vehicle</strong><br />
Table 3-3 <strong>Volkswagen</strong> diagnostic connector locations (part 2 of 2)<br />
Model Year Connector Location<br />
Golf/Jetta/GTI<br />
Passat<br />
1990–92<br />
1993<br />
1994<br />
1995–97<br />
1998–2004<br />
1993–94<br />
1995–97<br />
1998–2005<br />
<strong>Manual</strong> transmission: On the center console under the shifter<br />
boot. To access, pull firmly to dislodge the boot.<br />
Automatic transmission: On the center console under the<br />
selector indicator cover. To access, remove the handle from the<br />
shifter, and then unsnap the indicator cover. The shifter can also<br />
be lifted up and turned without removing the handle.<br />
On the instrument panel center section, below the heater controls<br />
behind the blank switch covers.<br />
One of two locations: (1) on the instrument panel center section,<br />
below the heater controls behind the blank switch covers, or (2) on<br />
the instrument panel center section, on the right side of the<br />
ashtray, behind the cover.<br />
On the instrument panel center section, on the right side of the<br />
ashtray, behind the cover. To access, remove the ashtray and<br />
slide the cover off.<br />
One of two locations: (1) below the dashboard near the hood<br />
release, or (2) on the instrument panel center section, below<br />
heater controls behind blank switch covers.<br />
<strong>Manual</strong> transmission: On the center console under the shifter<br />
boot. To access, pull firmly to dislodge the boot.<br />
Automatic transmission: On the center console under the<br />
selector indicator cover. To access, remove the handle from the<br />
shifter, and then unsnap the indicator cover. The shifter can also<br />
be lifted up and turned without removing the handle.<br />
On the instrument panel, on the right side of the steering wheel,<br />
behind the cover.<br />
One of two locations: (1) below the dashboard near the hood<br />
release, or (2) between the front seats near the parking brake<br />
under a rubber cover.<br />
New Jetta 2004-2005 Connector located near bonnet release handle.<br />
Touareg 2004-2005 Connector located near bonnet release handle, behind cover.<br />
Phaeton 2004-2005 Connector located near bonnet release handle.<br />
New Beetle 1998-2005 Connector located near bonnet release handle.<br />
Table 3-4 <strong>Audi</strong> diagnostic connector locations (part 1 of 2)<br />
Model Year Connector Location<br />
100/A6 1992–97<br />
200/V8 1990–94<br />
One of two locations: (1) in the fuse box under the hood near the<br />
firewall, or (2) between the front seats near the parking brake<br />
under a rubber cover.<br />
One of three locations:<br />
(1) under the carpet in the passenger side footwell<br />
(2) in the fuse box under the hood near the firewall<br />
(3) between the front seats near the parking brake under a rubber<br />
cover.<br />
14
Operations<br />
Selecting a System<br />
Table 3-4 <strong>Audi</strong> diagnostic connector locations (part 2 of 2)<br />
Model Year Connector Location<br />
90 1993–95 In the fuse box under the hood near the firewall.<br />
A3 1997–2003 Under the dashboard.<br />
A4<br />
A6/Allroad/S6/<br />
RS6<br />
1996–2001<br />
One of two locations: (1) under the dashboard, or (2) under the<br />
sliding cover in the rear ashtray.<br />
2002–05 Under the dashboard.<br />
1998–2005<br />
A8 1997–2005 Under the dashboard.<br />
Cabriolet<br />
1994–1999<br />
One of two locations: (1) under the dashboard, or (2) between the<br />
front seats near the parking brake under rubber cover.<br />
One of three locations: (1) in the fuse box under the hood near the<br />
firewall, or (2) under the sliding cover in the rear ashtray, or (3)<br />
under the dashboard.<br />
2004-2005 Connector located near bonnet release handle.<br />
S3 1999–2003 Under the dashboard.<br />
S4/S6 1992–95<br />
S4/RS4<br />
2000–02<br />
One of two locations: (1) in the fuse box under the hood near the<br />
firewall, or (2) between the front seats near the parking brake<br />
under a rubber cover.<br />
One of two locations: (1) under the dashboard, or (2) under the<br />
sliding cover in the rear ashtray.<br />
2003 Under the dashboard.<br />
S8 2001–02 Under the dashboard.<br />
TT 2000–03 Under the dashboard.<br />
Note the following when connecting to VW/<strong>Audi</strong> vehicles:<br />
• “Bonnet” is European for hood.<br />
• Do not assume that the scan tool ID screen is correct if the scan tool communicates. If there<br />
are multiple selections, the scan tool will automatically identify the electronic control module,<br />
which means that scan tool communication does not depend on a correct engine ID code<br />
selection.<br />
3.3 Selecting a System<br />
Once you have confirmed a vehicle identification and connected to a vehicle (see previous<br />
sections), the Select System menu displays.<br />
The items that appear on this menu vary depending on the vehicle you are testing, however, not<br />
all of the systems will be present—some of them are optional and others are mutually exclusive.<br />
For example, when an integrated immobilizer is present, there will be no separate immobilizer<br />
available.<br />
NOTE:<br />
i Some early control modules may require an engine speed below 2000 RPM and a closed throttle<br />
(closed CTP switch) to initialize communication. However, once communication has initialized,<br />
higher engine speeds have no effect.<br />
15
Operations<br />
Selecting a System<br />
The following systems can be selected for VW/<strong>Audi</strong> vehicles:<br />
• Engine Management<br />
• Electronic Instrument Panel<br />
• Abs/eds/esp/tcs<br />
• Airbag/pretensioners<br />
• Airbag Usa Golf-cabrio<br />
• Air-conditioning<br />
• Alarm System Interior<br />
• <strong>Audi</strong>o System<br />
• Automatic Transmission<br />
• Central Door Lock System<br />
• Immobilizer (Separated)<br />
• Immobilizer (If Not Separated)<br />
• Steering Wheel Electronics<br />
• Steering Help (Separated)<br />
• Steering Help (If Not Separated)<br />
• 4wd Electronics<br />
• Comfort Systems<br />
• Seat Adjustment Driver’s Side<br />
• Seat & Mirror Adjusting<br />
• Central Electronic Unit<br />
• Can Bus Interface<br />
• Add. Heater/parking Heater<br />
• Electronic Level Control<br />
• Level Control Xenon Lights<br />
• Tire Pressure Monitoring<br />
• Parking Help<br />
• Radio<br />
• Navigation Systems<br />
• Electronic Roof Control<br />
• Distance Control<br />
• Suspension Electronics<br />
• Back Spoiler<br />
• Emergency Control<br />
• Speech Control<br />
• Light Control Left<br />
• Light Control Right<br />
• Auto Light Switch<br />
Note the following when selecting a VW/<strong>Audi</strong> system for testing:<br />
• If a system is listed on the Select System menu, that does not mean it is installed on the<br />
vehicle. To determine the installed systems, perform an Automatic System Test in Expert<br />
Mode (see “00-Automatic System Test” on page 20).<br />
16
Operations<br />
Demonstration Programs<br />
• “Separated” means a standalone control module. “Not Separated” means that the system is<br />
integrated with another control module.<br />
• The 25-Immobilizer (Separated) and 44-Steering Help (Separated) systems can give the<br />
following ECU identification: “Bitte Adresse 17 eingeben”. This means that the selected<br />
system is integrated in the instrument panel and that you need to select 17-Electronic<br />
Instrument Panel for diagnostics. Although it is possible to continue and select the functions,<br />
the information retrieved is not valid.<br />
• The numbers that precede each system selection (i.e., “01” in front of “Engine Management”)<br />
are for use with the manufacturer scan tool only. These numbers are not used for Snap-on ®<br />
scan tool operations.<br />
z To select a system for testing:<br />
1. Select the system you would like to test.<br />
An instructions screen displays.<br />
2. Follow the on-screen instructions to continue.<br />
The Connection In Progress screen displays while the scan tool attempts to communicate<br />
with the vehicle.<br />
3. When the scan tool communicates with the vehicle, accept the defaults until the Main Menu<br />
displays.<br />
3.4 Demonstration Programs<br />
The <strong>Volkswagen</strong>/<strong>Audi</strong> software contains programs that demonstrate test capabilities without<br />
connecting to a vehicle. The demonstration program can help you become familiar with scan tool<br />
menus and operation by providing mock data and test results for a sample vehicle ID.<br />
The demonstration program is accessed at the vehicle identification phase of scan tool<br />
operations.<br />
z To access a demonstration:<br />
1. Select Demonstration US.<br />
A screen displays, prompting you to identify a vehicle with “Demo” on line 1.<br />
2. Select the defaults until the System Selection menu displays.<br />
You are now in demonstration mode.<br />
17
Chapter 4<br />
Expert Mode<br />
In addition to providing the same capability as standard or vehicle ID mode, Expert Mode has<br />
enhanced factory tool capabilities, giving the user special functions, such as setting adaptations<br />
and control module coding. Scan tool display screens in Expert Mode give no information about<br />
the specific procedures nor how to perform these special functions. Aftermarket information is<br />
limited in performing these functions. Expert Mode should only be used if the user is experienced<br />
in <strong>Volkswagen</strong> or <strong>Audi</strong> diagnostics and has the required information.<br />
IMPORTANT:<br />
It is possible to change and clear system settings with this function. Some functions can be<br />
disabled and/or the control module could be corrupted by incorrect use!<br />
IMPORTANT:<br />
Expert Mode functionality in this manual describes only the basic operation of some of the<br />
capabilities. Factory procedures for specific vehicles and systems must be followed to prevent any<br />
damage or inadvertent change in critical driveability, security and safety settings. For example,<br />
adaptation functions can disable or enable airbags, a major liability to a shop should there be a<br />
future accident with this vehicle.<br />
4.1 Using Expert Mode<br />
This section explains how to start using Expert Mode. The following is an outline of scan tool<br />
Expert Mode operation, starting with identifying the vehicle. Step 2 is described in “Chapter 3<br />
Operations” on page 4.<br />
Select Expert Mode<br />
Connect to the <strong>Vehicle</strong><br />
Select a System to Test<br />
Select a Function<br />
01-Read ECU Identification<br />
02-Check DTC Memory<br />
03-Actuator Tests<br />
04-Basic settings<br />
05-Clear DTC Memory<br />
06-Stop <strong>Communication</strong><br />
07-ECU Coding<br />
08-Read Measuring Value Block<br />
09-Read ADC Channel<br />
10-Adaptation<br />
11-Login Request<br />
15-Check readiness Code Setting<br />
16-Security Access<br />
Figure 4-1 Expert Mode basic operations<br />
18
Expert Mode<br />
Using Expert Mode<br />
The remaining steps are described in greater detail in this chapter.<br />
1. Select Expert Mode—Instead of selecting <strong>Vehicle</strong> Systems US as you would for standard<br />
scan tool operations, select Expert Mode. See “Initiating Expert Mode” on page 19.<br />
2. Connect the scan tool—Follow the connection instructions displayed after selecting Expert<br />
Mode to connect the scan tool with the vehicle. See “Connecting to a <strong>Vehicle</strong>” on page 11.<br />
3. Select the system—Enter the system to be tested (engine, transmission, ABS, etc.). See<br />
“Selecting a System” on page 19.<br />
4. Select the Expert Mode function—The scan tool displays the functions available on the<br />
identified vehicle electronic control module. Select the appropriate functions for the vehicle<br />
you have identified. See “Expert Mode Function Selection Menu” on page 20.<br />
4.1.1 Initiating Expert Mode<br />
After you have selected a manufacturer, you can initiate Expert Mode.<br />
z To initiate Expert Mode:<br />
1. Select Expert Mode.<br />
A warning screen displays.<br />
2. Select to continue.<br />
Instructions to connect the scan tool to the vehicle display.<br />
See “Connecting to a <strong>Vehicle</strong>” on page 11 for information about connecting the scan tool to<br />
VW/<strong>Audi</strong> diagnostic connectors, or ID the vehicle in standard mode (see “Identifying the<br />
<strong>Vehicle</strong>” on page 4) until model-specific connection instructions display.<br />
3. Connect to the correct diagnostic connector on the vehicle, then continue.<br />
The System Selection menu displays.<br />
4.1.2 Selecting a System<br />
There are two special items on the Expert Mode System Selection menu that do not display on the<br />
standard System Selection menu:<br />
• 00-Automatic System Test<br />
• 01-Engine Management Master (11-Engine Management Slave is not used for US vehicles)<br />
The rest of the items on the menu are the same as in standard mode (“Selecting a System” on<br />
page 15).<br />
z To select a system for testing:<br />
1. Select the system you would like to test.<br />
The communication instruction screen displays.<br />
NOTE:<br />
i Selecting 00-Automatic System Test displays a different screen (see 00-Automatic System Test).<br />
2. Select to continue.<br />
A warning message displays.<br />
19
Expert Mode<br />
Using Expert Mode<br />
3. Select to continue.<br />
The scan tool displays the vehicle’s electronic control module identification.<br />
4. Select to go to the Expert Mode Function Selection menu (see “Expert Mode Function<br />
Selection Menu” on page 20).<br />
00-Automatic System Test<br />
The Automatic System Test is always the first menu choice in Expert Mode. This selection<br />
interrogates all installed controllers and automatically prints out all control module IDs and any<br />
DTCs stored there.<br />
NOTE:<br />
i A printer must be connected for an Automatic System Test to run.<br />
This test may take ten minutes or longer depending on the number of control modules. DTCs may<br />
be set in multiple controllers, therefore, all control modules need to be checked for DTCs and have<br />
DTCs cleared after repairs. Automatic System Test is a good way to know which controllers are<br />
installed on the vehicle and to obtain DTC information.<br />
z To perform an Automatic System Test:<br />
1. Select 00-Automatic System Test from the System Selection menu. A screen displays,<br />
prompting you to select Y to begin the test or N to return to the previous menu.<br />
2. Select to begin the Automatic System Test. The Printing in progress screen displays.<br />
The scan tool prints the result when the test is finished.<br />
4.1.3 Expert Mode Function Selection Menu<br />
When the scan tool has established a connection with the vehicle, the scan tool displays a<br />
Function Selection menu, such as the Expert Mode Function Selection menu.<br />
The Expert Mode Function Selection menu allows you to select from the following general<br />
functions:<br />
• 01-Read ECU Identification—displays the control module identification string, the control<br />
module coding, and Work Shop Code (see page 21).<br />
• 02-Check DTC Memory—displays all current diagnostic trouble codes present (see<br />
page 22).<br />
• 03-Actuator Tests—activates different actuator tests for about 30 seconds in sequence (see<br />
page 22).<br />
• 04-Basic Setting—performs a Basic Setting, depending on the entered block number (000–<br />
255) (see page 22).<br />
• 05-Clear DTC Memory—clears any existing trouble codes and checks if the trouble codes<br />
are really cleared (see page 22).<br />
• 06-Stop <strong>Communication</strong>—stops the communication and exits Expert Mode (see page 22).<br />
• 07-ECU Coding—changes the existing control module coding by entering a new coding (see<br />
page 23).<br />
20
Expert Mode<br />
Using Expert Mode<br />
• 08-Read Measuring Value Block—displays measuring value blocks after entering a valid<br />
block number (see page 23).<br />
• 09-Read ADC Channel—displays data from a single ADC channel (see page 27).<br />
• 10-Adaptation—changes adaptation values from the control module (see page 27).<br />
• 11-Login Request—performs a login request to the control module after entering a valid login<br />
code (see page 28).<br />
• 15-Check Readiness Code Setting—displays a readiness code and whether it is set or not<br />
(see page 28).<br />
• 16-Security Access— performs a security access request to the control module (see<br />
page 29).<br />
Note the following when using Expert Mode:<br />
• There is no Custom Setup available in Expert Mode (for example, you cannot change the<br />
temperature readings from Celsius to Fahrenheit).<br />
• There are no Movie or Print Frame options, only Print Screen and Print Codes. Printer<br />
communication settings must be configured in standard mode using vehicle ID or in<br />
Demonstration mode to have the possibility to print. Expert Mode also will not work with<br />
Snap-link or ScanGrafix PC graphing programs.<br />
• When using Expert Mode, supplemental information found in VAG service manuals is<br />
necessary to interpret displayed data values and to know the proper procedure to perform a<br />
specific test, coding, or adaptation.<br />
01-Read ECU Information<br />
This function displays the control module identification string, the control module coding, and<br />
Work Shop Code. Also, some systems will display some extra control module identification if<br />
selected.<br />
VW/<strong>Audi</strong> part numbers for this controller contain a version number for the controller's internal<br />
firmware. Shop number identifies the Work Shop Code stored in the scan tool that last recoded<br />
this control module.<br />
NOTE:<br />
i Some older control modules are not “codeable” and you may see a Bosch part number or other<br />
information in theses fields.<br />
The Extra ECU identification fields can store VIN and immobilizer information on some vehicles.<br />
Work Shop Code<br />
World Wide, every VW/<strong>Audi</strong> dealer is assigned a unique Work Shop Code (WSC). Factory scan<br />
tools require a valid WSC to function, and once it has been entered, it cannot be changed.<br />
Whenever a control module is coded, or adaptations are performed, the scan tool sends its WSC<br />
to the control module and the control module records it. If a factory scan tool was used to perform<br />
specific functions, such as disabling an airbag through the WSC, it may be possible to identify<br />
which dealer performed this procedure.<br />
21
Expert Mode<br />
Using Expert Mode<br />
NOTE:<br />
i The Snap-on ® VAG software does not change or alter the WSC. It reads the existing WSC and<br />
sends it back unchanged after a procedure has been performed.<br />
02-Check DTC Memory<br />
This function displays all diagnostic trouble codes (DTCs) currently present or stored in memory.<br />
03-Actuator Tests<br />
This function activates different actuator tests for about 30 seconds in sequence, or depending on<br />
the ECU you may select which available test to run. The user can abort or continue to the next test.<br />
Some tests display a command to the user. For example, if “Press Brake Pedal” displays, the user<br />
has to press and hold the brake pedal and then continue. The sequence, number, and type of tests<br />
are dictated by the control module.<br />
To perform the actuator tests, the entry conditions must be correct. For the correct entry conditions<br />
refer to the VAG system specific workshop manual. On some systems, the actuator tests cannot<br />
be restarted until the ignition key is switched off for some time. Alternatively, briefly start and run<br />
the engine, shut down, turn the ignition to the run position, then re-initiate the actuator tests.<br />
04-Basic Settings<br />
This function can put a system in basic mode or performs a Basic Setting. This depends on the<br />
entered block number (000–255). After entering a valid block number, data values or text can be<br />
displayed. There is no description of the data value, only the value and unit is displayed. For<br />
interpretation of the values, refer to the VAG system-specific workshop manual. See “Basic<br />
Settings” on page 45 for more information.<br />
05-Clear DTC Memory<br />
This function attempts to clear all current and stored DTCs. After clearing, the scan tool rechecks<br />
for DTCs, and any that reset from current problems will re-display.<br />
06-Stop <strong>Communication</strong><br />
This function stops the communication and leaves the Expert Mode. If the scan tool gets<br />
accidently disconnected, go back to the same controller and then exit properly using 06. This is<br />
the equivalent of selecting Other Systems in standard mode.<br />
IMPORTANT:<br />
Always exit out of any one module using 06-Stop <strong>Communication</strong> before selecting another<br />
module. Failure to do so may cause communication problems, corrupt data, or cause a parasitic<br />
draw on the battery.<br />
22
Expert Mode<br />
Using Expert Mode<br />
07-ECU Coding<br />
This function can change the existing control module coding by entering a new coding. The range<br />
of coding can be 0–127, 0–32767 or 0–1048575. The coding number can tell a control module<br />
about the configuration, for example, if cruise control is available or not.<br />
After entering a new coding, it is sent to the control module and the scan tool reports if the new<br />
coding is accepted or not. A coding will not be accepted if it is an unknown number or if a control<br />
module cannot be coded. However, be aware that a control module usually does accept an<br />
incorrect coding number.<br />
Some special codings require an unlocked control module. The control module can be unlocked<br />
with a Log-in or Security Access request.<br />
Note the following regarding control module coding:<br />
• The following login information is subject to change and is not guaranteed to work on every<br />
application. A common VW login is 01283; a common <strong>Audi</strong> login is 13861. Specific vehicle<br />
logins are found in that vehicle’s service manual.<br />
• 2002 vehicles using the new CAN Bus communication network may not require control<br />
modules to be version coded, as the version coding information is obtained from the other<br />
controllers sharing the CAN Bus. However, if the engine control module is replaced it will need<br />
to be adapted to the immobilizer (see “Testing Immobilizer Systems” on page 75).<br />
08-Read Measuring Value Block<br />
This function displays measuring value blocks. After entering a valid block number, data values or<br />
text are displayed. There is no description of the data value, only the value and unit is displayed.<br />
For interpretation of the values, refer to the VAG system specific workshop manual. Press N to<br />
enter the print exit menu. Scroll to change the block number. The displayed data is the actual data<br />
received from the control module.<br />
VW/<strong>Audi</strong> Display Group Data<br />
Instead of one long data list, VW and <strong>Audi</strong> data is organized into display groups (Table 4-1).<br />
However, these groups are not determined by a scan tool. Instead, these are manufacturer<br />
predetermined groups which change depending on the vehicle and engine. Table 4-1 provides<br />
some examples of group categories available on a late model VW and <strong>Audi</strong>.<br />
Table 4-1 VW/<strong>Audi</strong> display group categories (part 1 of 2)<br />
Display Group Number Display Group Category<br />
1–9 General engine activity data<br />
10–19 Ignition<br />
20–29 Knock control<br />
30–39 O2 sensor control system<br />
40–49 Three-way CAT<br />
50–59 Engine speed control<br />
60–69 Throttle drive<br />
70–79 Emissions reduction<br />
80–89 Special function<br />
90–97 Power increase<br />
23
Expert Mode<br />
Using Expert Mode<br />
Table 4-1 VW/<strong>Audi</strong> display group categories (part 2 of 2)<br />
Display Group Number Display Group Category<br />
98–100 Compatibility<br />
101–109 Fuel Ignition<br />
110–119 Boost pressure control<br />
120–129 Control unit communication<br />
130–150 Special info<br />
The following sections provide information that give examples of engine data interpretation. Note<br />
that data available varies by year, engine, engine code, and management system.<br />
NOTE:<br />
i The display groups available using vehicle ID may vary from the total number of display groups<br />
available in Expert Mode. Display groups in standard vehicle ID mode are preselected based on<br />
priority of use. All possible display groups can be viewed using Expert Mode. To view a particular<br />
display group in Expert Mode, the specific group number must be manually entered.<br />
The following examples may have additional display groups available in Expert Mode.<br />
Example 1: 2002 VW Jetta Drive-by-Wire, Bosch ME 7.5 Control System<br />
• Group=1, Basic Functions (1)<br />
• Group=2, Basic Functions (2)<br />
• Group=3, Basic Functions (3)<br />
• Group=4, Basic Functions (4)<br />
• Group=5, Operating Mode Engine<br />
• Group=6, Altitude Correction<br />
• Group=10 Ignition<br />
• Group=20, Ignition, Knock Control Cyl 1-4<br />
• Group=22, Ignition, Knock Control Cyl 1+2<br />
• Group=23, Ignition, Knock Control Cyl 3+4<br />
• Group=28, Knock Control<br />
• Group=30, O2 Status<br />
• Group=32, Learn Values O2<br />
• Group=33, O2 Regulation Before Cat<br />
• Group=37, Diagnose O2 Control System<br />
• Group=41, O2 Sensor Heater<br />
• Group=50, Idle Speed Control<br />
• Group=54, Idle Speed Control<br />
• Group=55, Idling Stabilization (1)<br />
• Group=56, Idling Stabilization (2)<br />
• Group=60, Adaptation Epc-system<br />
• Group=61, Epc-system (1)<br />
• Group=62, Epc-system (2)<br />
• Group=99, O2 Loop<br />
24
Expert Mode<br />
Using Expert Mode<br />
Example 2: 2002 <strong>Audi</strong> TT Drive-by-Wire, Bosch ME 7.1 Control System<br />
• Group=1, Basic Functions (1)<br />
• Group=2, Basic Functions (2)<br />
• Group=4, Basic Functions (3)<br />
• Group=5, Basic Functions (4)<br />
• Group=6, Basic Functions (4)<br />
• Group=10, Ignition<br />
• Group=22, Ignition, Knock Control Cyl 1+2<br />
• Group=23, Ignition, Knock Control Cyl 3+4<br />
• Group=28, Diagnose Knock Sensors<br />
• Group=30, O2 Status<br />
• Group=32, Learn Values O2<br />
• Group=33, O2 Regulation<br />
• Group=41, O2 Sensor Heater<br />
• Group=50, Idle Speed Control<br />
• Group=54, Idle Speed Control<br />
• Group=55, Idling Stabilization<br />
• Group=56, Idling Stabilization<br />
• Group=60, Adaptation Epc-system<br />
• Group=60, Throttle Valve Adjuster<br />
• Group=61, Throttle Valve Adjuster<br />
• Group=62, Epc-system<br />
• Group=63, Kickdown Function<br />
• Group=66, Cruise Control Status<br />
• Group=99, O2 Loop<br />
• Group=113, Control Turbo Pressure<br />
• Group=114, Control Turbo Pressure<br />
• Group=115, Control Turbo Pressure<br />
• Group=117, Control Turbo Pressure<br />
• Group=118, Control Turbo Pressure<br />
• Group=120, Tcs System<br />
• Group=125, Can Bus <strong>Communication</strong><br />
Example 3: Motronic 2.9 (1993–1995)<br />
Display group 000 has 10 channels or display fields, listed below.<br />
1. Coolant temperature<br />
2. Engine load<br />
3. RPM<br />
4. O2 factor<br />
5. Idle Adapt<br />
6. Part throttle adapt<br />
7. Low load adapt<br />
25
Expert Mode<br />
Using Expert Mode<br />
8. IAC adapt<br />
9. Not used<br />
10. IGN timing<br />
The display fields are output in binary numbers. To understand the binary number, visualize a<br />
clock with 0 at the top center. The number 128 is at the center bottom. The binary clock counts<br />
from 0 to 255, a rich/lean correction from base midpoint (0).<br />
In binary output 0–255, based on O2S output, numbers fluctuate between rich (high numbers) and<br />
lean (low numbers).<br />
The number can theoretically range from 0 to 255 with 0 as the midpoint. A number of 13 to 128<br />
indicates that the control module has commanded an overall lean mixture correction. A number of<br />
128 to 243 indicates that the control module has commanded an overall rich mixture correction.<br />
Example 4: Late Model Motronic 7.5<br />
The following example concerns display group 000 for 1-bank systems:<br />
1. Engine coolant temperature<br />
2. Load<br />
3. RPM<br />
4. Voltage<br />
5. Throttle valve potentiometer<br />
6. Idle air control valve<br />
7. Idle air control valve learning value<br />
8. Lambda control<br />
9. Lambda control learning value idle<br />
10. Lambda control learning value partial load<br />
Display group 000 for 2-bank systems:<br />
1. Engine coolant temperature<br />
2. Load<br />
3. RPM<br />
4. Throttle valve angle<br />
5. Idle air control<br />
6. Idle air control valve learning value<br />
7. Lambda control Bank 1<br />
8. Lambda control Bank 2<br />
9. Lambda adaptation (add) Bank 1<br />
10. Lambda adaptation (add) Bank 2<br />
Example 5: Central Electronic Unit (09)<br />
The four display fields for display group 012 indicate the following:<br />
• Display field 1: Check bus—This field indicates whether the data bus is OK or faulty (e.g.<br />
fault in single wire).<br />
26
Expert Mode<br />
Using Expert Mode<br />
• Display field 2: Equipment front—This field indicates which front control units are fitted and<br />
participate in data transfer.<br />
• Display field 3: Equipment rear—This field indicates which rear control units are fitted and<br />
participate in data transfer.<br />
• Display field 4: Accessories—This field indicates whether the seat and mirror adjustment<br />
memory system is fitted. Both systems (convenience system and memory system)<br />
interchange data.<br />
NOTE:<br />
i Inter-module CAN data transfer currently cannot be checked.<br />
09-Read ADC Channel (Except KW2000 1 )<br />
This function displays data from a single ADC channel. This function allows you to look at real-time<br />
data from control modules that support it. Currently, this data has no interpretation or scaling<br />
information.<br />
z To set the Read ADC Channel function:<br />
1. Enter a valid channel number<br />
A number from 0 to 65535 displays.<br />
2. Scroll to change the channel number.<br />
10-Adaptation<br />
This function can change adaptation values from the control module and allows you to alter certain<br />
values and/or settings in control modules which support it.<br />
IMPORTANT:<br />
Function 10 changes baseline settings. Do not proceed with this function unless you know the<br />
exact procedure. Be aware that some Channels may not be documented.<br />
Examples of things you can do with the adaptation selection:<br />
• Alter the Idle Speed (e.g., 01-Engine Management > 10-Adaptation > 000/0001).<br />
• Change the Service Intervals and resetting the Service Reminder Indicators (newer<br />
instrument clusters).<br />
• Disable/enable various components of the airbag (SRS) system.<br />
• Change the sensitivity of the Interior Monitor (Sonar Scan) component of the alarm system in<br />
many newer <strong>Audi</strong> models.<br />
• Swap control modules and rematch keys (newer immobilizer-equipped cars).<br />
• Select certain Central Locking options in newer vehicles.<br />
1 “KW2000” stands for Key Word 2000, and refers to a communication protocol which was used beginning<br />
in 2002 on limited vehicles, such as the VW Passat 1.8L turbo, the <strong>Audi</strong> A4 1.8L and 3.0L, and the <strong>Audi</strong><br />
A6 3.0L.<br />
27
Expert Mode<br />
Using Expert Mode<br />
To change adaptation values:<br />
1. Read the adaptation.<br />
2. Test the adaptation.<br />
3. Save the adaptation.<br />
To set an adaptation:<br />
1. Select a valid channel.<br />
The actual adaptation value is displayed. On some adaptation channels, there will be data<br />
displayed on the last line.<br />
2. Scroll for manual input.<br />
The new adaptation value can be tested or changed. For example, the engine speed is raised<br />
to numbers greater than 128 or lowered to numbers less than 128.<br />
3. To exit and store a new value, select to confirm or abort.<br />
Selecting channel 000 clears all adaptation values after confirming the request.<br />
11-Login Request (Except KW2000)<br />
This function performs a login request to the control module. After entering a valid login code, the<br />
control module is ready to perform a special coding or adaptation function.<br />
Used on some (mostly 1996 and later) control modules, Login Request is necessary before you<br />
can recode or change adaptation values. On others, it “enables” certain features like cruise<br />
control. Valid login codes can be found in the workshop manual for the car.<br />
The following login information is subject to change and is not guaranteed to work on every<br />
application:<br />
• A common VW login is 01283<br />
• A common <strong>Audi</strong> login is 13861<br />
NOTE:<br />
i You get only one chance to enter the correct login number. If you enter the wrong number, turn off<br />
the ignition and wait 10 seconds before another attempt.<br />
11-ECU Coding 2 (KW2000 Only)<br />
This function can change the special control module coding by entering a new valid coding.<br />
15-Check Readiness Code Setting (Except KW2000)<br />
If the system has a readiness code, this function displays that readiness code and whether it is set<br />
or not. If the system has no special readiness block, sometimes the same information can be<br />
found in function 08 by selecting group 86 and checking Channel 1.<br />
28
Expert Mode<br />
Testing in Expert Mode<br />
16-Security Access (KW2000 Only)<br />
This function performs a security access request to the control module. After entering a valid code,<br />
the control module is ready to perform a special coding or adaptation function.<br />
Note the following when using 16-Security Access:<br />
• The Snap-on scan tool currently performs only 5-digit security codes.<br />
• Some early systems cannot communicate if the engine is running.<br />
• Some early systems cannot communicate or communication is lost if engine or vehicle speed<br />
exceeds a certain specification. Refer to the VAG system-specific manual for details.<br />
4.2 Testing in Expert Mode<br />
The functions available depend on the communication protocol. Functions that can be executed<br />
depend on the system and entry conditions. Some functions need a login or security access<br />
before executing the particular function. Not all systems support all functions.<br />
NOTE:<br />
i The 25-Immobilizer (Separated) and 44-Steering Help (Separated) systems give the following<br />
control module identification: Bitte Adresse 17 eingeben. Although it is possible to continue and<br />
select the functions, the information retrieved is not valid and should be discarded. The selected<br />
system is integrated in the instrument panel. Please select 17-Electronic Instrument Panel for<br />
diagnostics.<br />
For more testing information, see “Chapter 5 Testing” on page 30.<br />
29
Chapter 5<br />
Testing<br />
This chapter provides information and procedures for using the scan tool with specific control<br />
systems. Control systems discussed in this chapter are:<br />
• Testing Engine Systems, on page 32<br />
• Testing Transmission Systems, on page 53<br />
• Testing Electronic Throttle Systems, on page 67<br />
• Testing ABS Systems, on page 72<br />
• Testing Immobilizer Systems, on page 75<br />
• Testing Electronic Instrument Panel Systems, on page 83<br />
• Testing Airbag (SRS) Systems, on page 88<br />
• Testing CAN Data Bus Systems, on page 89<br />
5.1 VW/<strong>Audi</strong> <strong>Software</strong> Application List<br />
Table 5-1 provides VW/<strong>Audi</strong> systems covered by the scan tool.<br />
Table 5-1 VW/<strong>Audi</strong> software application list (part 1 of 2)<br />
Control Systems Codes Data Advanced Functions<br />
ABS/EDL/ESP/TCS Standard & Expert Mode Expert Mode Only<br />
Add. Heater/Parking<br />
heater<br />
Airbag/Pretensioners<br />
Air-conditioning<br />
Alarm System Interior<br />
Anti-slip Control<br />
<strong>Audi</strong>o System<br />
Auto Light Switch<br />
Automatic Transmission<br />
Back Spoiler<br />
CAN Bus Interface<br />
Central Door Lock<br />
Central Electronic Unit<br />
Standard & Expert<br />
Mode<br />
Standard & Expert<br />
Mode<br />
Standard & Expert<br />
Mode<br />
Standard & Expert<br />
Mode<br />
Standard & Expert<br />
Mode<br />
Standard & Expert<br />
Mode<br />
Standard & Expert<br />
Mode<br />
Standard & Expert<br />
Mode<br />
Standard & Expert<br />
Mode<br />
Standard & Expert<br />
Mode<br />
Standard & Expert<br />
Mode<br />
Expert Mode Only<br />
Expert Mode Only<br />
Expert Mode Only<br />
Expert Mode Only<br />
Expert Mode Only<br />
Expert Mode Only<br />
Expert Mode Only<br />
Standard & Expert Mode<br />
Expert Mode Only<br />
Expert Mode Only<br />
Expert Mode Only<br />
Expert Mode Only<br />
Expert Mode Only<br />
Expert Mode Only<br />
Expert Mode Only<br />
Expert Mode Only<br />
Expert Mode Only<br />
Expert Mode Only<br />
Expert Mode Only<br />
Expert Mode Only<br />
Expert Mode Only<br />
Expert Mode Only<br />
Expert Mode Only<br />
30
Testing<br />
VW/<strong>Audi</strong> <strong>Software</strong> Application List<br />
Table 5-1 VW/<strong>Audi</strong> software application list (part 2 of 2)<br />
Control Systems Codes Data Advanced Functions<br />
Clutch Electronics<br />
Comfort Systems<br />
Distance Control<br />
Electronic Instrument<br />
Panel<br />
Electronic Level Control<br />
Electronic Roof Control<br />
Emergency Unit<br />
Engine Management<br />
Immobilizer<br />
Level Control Xenon<br />
Lights<br />
Light Control Left<br />
Light Control Right<br />
Navigation<br />
Parking Help<br />
Radio<br />
Seat Adjustment<br />
Driver Side<br />
Seat and Mirror<br />
Adjustment<br />
Speech Control<br />
Steering Help<br />
Steering Wheel<br />
Electronics<br />
Suspension Electronics<br />
Tire Pressure<br />
Monitoring<br />
4WD Electronics<br />
Standard & Expert<br />
Mode<br />
Standard & Expert<br />
Mode<br />
Standard & Expert<br />
Mode<br />
Standard & Expert<br />
Mode<br />
Standard & Expert<br />
Mode<br />
Standard & Expert<br />
Mode<br />
Standard & Expert<br />
Mode<br />
Standard & Expert<br />
Mode<br />
Standard & Expert<br />
Mode<br />
Standard & Expert<br />
Mode<br />
Standard & Expert<br />
Mode<br />
Standard & Expert<br />
Mode<br />
Standard & Expert<br />
Mode<br />
Standard & Expert<br />
Mode<br />
Standard & Expert<br />
Mode<br />
Standard & Expert<br />
Mode<br />
Standard & Expert<br />
Mode<br />
Standard & Expert<br />
Mode<br />
Standard & Expert<br />
Mode<br />
Standard & Expert<br />
Mode<br />
Standard & Expert<br />
Mode<br />
Standard & Expert<br />
Mode<br />
Expert Mode Only<br />
Expert Mode Only<br />
Expert Mode Only<br />
Expert Mode Only<br />
Expert Mode Only<br />
Expert Mode Only<br />
Expert Mode Only<br />
Standard & Expert Mode<br />
Expert Mode Only<br />
Expert Mode Only<br />
Expert Mode Only<br />
Expert Mode Only<br />
Expert Mode Only<br />
Expert Mode Only<br />
Expert Mode Only<br />
Expert Mode Only<br />
Expert Mode Only<br />
Expert Mode Only<br />
Expert Mode Only<br />
Expert Mode Only<br />
Expert Mode Only<br />
Expert Mode Only<br />
Expert Mode Only<br />
Expert Mode Only<br />
Expert Mode Only<br />
Expert Mode Only<br />
Standard & Expert<br />
Mode<br />
Expert Mode Only<br />
Expert Mode Only<br />
Expert Mode Only<br />
Expert Mode Only<br />
Expert Mode Only<br />
Expert Mode Only<br />
Expert Mode Only<br />
Expert Mode Only<br />
Expert Mode Only<br />
Expert Mode Only<br />
Expert Mode Only<br />
Expert Mode Only<br />
Expert Mode Only<br />
Expert Mode Only<br />
Expert Mode Only<br />
Expert Mode Only<br />
Expert Mode Only<br />
Expert Mode Only<br />
31
Testing<br />
Testing Engine Systems<br />
5.2 Testing Engine Systems<br />
The following sections contain scan tool testing information for engine systems. Testing Engine<br />
Systems first lists the VW/<strong>Audi</strong> engines that communicate with the scan tool, and continues to<br />
provide procedures and tips for certain testing functions.<br />
5.2.1 VW/<strong>Audi</strong> Application Coverage<br />
The following sections contain US vehicle coverage for 1991–2005 VW and <strong>Audi</strong>.<br />
Table 5-2 VW/<strong>Audi</strong> application coverage<br />
<strong>Volkswagen</strong><br />
CIS-E or K-Jetronic/CIS (1990–92)<br />
Digifant 1 (CA only) (1991–93)<br />
Motronic M2.9 (1993–95)<br />
Motronic M5.9 (1995–2000)<br />
Motronic M5.9.2 (1997–2005)<br />
Motronic M7.0 (1999–2001)<br />
Motronic M7.1 (2000–01)<br />
Motronic M7.1.1 (2002–05)<br />
Motronic M7.5 (2001–05)<br />
Motronic M7.5.1 (2002)<br />
Diesel TDI (1996–2003)<br />
<strong>Audi</strong><br />
CIS-E or K-Jetronic/CIS (1990–92)<br />
MPI (1990–95)<br />
Motronic M2.3 (1991–94)<br />
Motronic M2.3.2 (1993–95)<br />
Motronic M2.4 (1990–94)<br />
Motronic M2.9 (1993–95)<br />
Motronic M5.4.2 (1995–96)<br />
Motronic M5.9 (1996–98)<br />
Motronic M5.9.2 (1998–2000)<br />
Motronic ME7.1 (2000–01)<br />
Motronic ME7.5.1 (2002–03)<br />
US <strong>Volkswagen</strong> Application Coverage<br />
Table 5-3 provides application coverage for US <strong>Volkswagen</strong> engines.<br />
Table 5-3 US VW application coverage (part 1 of 4)<br />
Model Year Volume<br />
Engine<br />
Code<br />
Engine Info Supported Notes<br />
Cabriolet (15) 1990–92 1.8 2H YES CA Only<br />
Cabriolet (1E) 1995–2001 2.0 ABA YES<br />
Cabriolet (1V) 2000–02 2.0 ABA YES<br />
Corrado (50)<br />
1992–1995 2.8 AAA YES<br />
1991–92 1.8 PG G60 YES CA Only<br />
1992–95 2.5 AAF 5L YES<br />
1992 Canada<br />
Only<br />
Eurovan (70) 1995 2.5 ACU 5L YES<br />
1995 Only<br />
Winnebago/<br />
Rialta<br />
1997–2000 2.8 AES VR6 YES<br />
2001–04 2.8 AXK VR6 YES<br />
Fox (30) 1991–93 1.8 ABG YES CA Only<br />
32
Testing<br />
Testing Engine Systems<br />
Table 5-3 US VW application coverage (part 2 of 4)<br />
Engine<br />
Model Year Volume<br />
Code<br />
Golf/Jetta/GTI<br />
(1G) MK II<br />
Golf/Jetta/GTI<br />
(1H) MK III<br />
Golf/Jetta/GTI<br />
(1J) MKIV<br />
New Beetle<br />
(1C)<br />
Engine Info Supported Notes<br />
2.0 9A 16V YES<br />
1991–92 1.8 PF NO<br />
1.8 RV YES CA Only<br />
1993–99<br />
2.8 AAA VR6 YES<br />
2.0 ABA YES<br />
1993–97 1.8 ACC YES Canada Only<br />
1998–99 1.9<br />
IZ TDI YES<br />
AHU TDI YES<br />
1999–2002 2.8 AFP VR6 YES<br />
1999–2001 2.0 AEG YES<br />
1999–2003 1.9 ALH TDI YES<br />
2000–01 1.8 AWD Turbo YES<br />
2001–03<br />
2.0 AVH YES<br />
1.8 AWW Turbo YES<br />
2002 2.8 AFP VR6 YES<br />
1.8 AWP Turbo YES<br />
2003–05<br />
2.0 AZG YES<br />
2.0 BBW SULEV YES<br />
2.8 BDF VR6 YES<br />
1.8 BEK Turbo YES<br />
1.9 BEW TDI YES<br />
AZG<br />
YES<br />
2004–05<br />
2.0 BEV<br />
YES<br />
BER<br />
YES<br />
BJS<br />
YES<br />
3.2 BML<br />
YES<br />
BFM<br />
YES<br />
1999–2000 1.8 APH Turbo YES<br />
2001–05 1.8 AWV Turbo YES<br />
1998–2005 1.9 ALH TDI YES<br />
1998–2002 2.0 AEG YES<br />
2000–03 2.0 AVH YES<br />
2001–05 2.0 AZG YES<br />
2003 2.0 BDC Convertible YES<br />
1.8<br />
AWU Turbo YES<br />
AWP Turbo YES<br />
2004–05<br />
1.9 BEW TDI YES<br />
AZJ<br />
YES<br />
2.0 BDC<br />
YES<br />
BEV<br />
YES<br />
33
Testing<br />
Testing Engine Systems<br />
Table 5-3 US VW application coverage (part 3 of 4)<br />
Engine<br />
Model Year Volume<br />
Code<br />
New Beetle<br />
(1C)<br />
(continued)<br />
New Jetta<br />
(9M) MK IV<br />
Passat (31)<br />
Passat (3A)<br />
New Passat<br />
(3B)<br />
2004–05 2.0<br />
BER<br />
BGD<br />
BHP<br />
Engine Info Supported Notes<br />
YES<br />
YES<br />
YES<br />
1999–2001 1.8 AWD Turbo YES<br />
1999–2005 1.9 ALH TDI YES<br />
1999–2001 2.0 AEG YES<br />
2000–03 2.0<br />
AVH<br />
YES<br />
AZG<br />
YES<br />
1999–2002 2.8 AFP VR6 YES<br />
2003 2.8 BDF YES<br />
2004–05 1.9 BEW TDI YES<br />
2005 1.9<br />
BKC TDI YES<br />
BRM TDI YES<br />
2000–05 2.0<br />
AVH<br />
YES<br />
AZG<br />
YES<br />
BBW<br />
YES<br />
2004–05 2.0<br />
BER<br />
YES<br />
BEV<br />
YES<br />
BHP<br />
YES<br />
2003-2005 2.8 BDF YES<br />
2005 2.5<br />
BGP<br />
YES<br />
BGQ<br />
YES<br />
1991–93 2.0 9A 16V YES<br />
1993–94 2.8 AAA VR6 YES<br />
1996–97 1.9 1Z TDI YES<br />
1995–97<br />
2.8 AAA YES<br />
2.0 ABA YES<br />
1998–99 1.8 AEB Turbo YES<br />
1998–2000 2.8 AHA V6 YES<br />
2000–03 2.8 ATQ V6 YES<br />
Turbo with<br />
1999–2001 1.8 ATW variable YES<br />
valve timing<br />
2003 4.0 BDP W8 YES<br />
BGW<br />
YES<br />
2.0 BHW YES<br />
2004–05<br />
AMX<br />
YES<br />
2.8<br />
BBG<br />
YES<br />
4.0 BDN YES<br />
34
Testing<br />
Testing Engine Systems<br />
Table 5-3 US VW application coverage (part 4 of 4)<br />
Model Year Volume<br />
Engine<br />
Code<br />
Engine Info Supported Notes<br />
Phaeton 2004–05<br />
4.2<br />
BGH<br />
YES<br />
BGJ<br />
YES<br />
6.0<br />
BAN<br />
YES<br />
BAP<br />
YES<br />
AZZ<br />
YES<br />
3.2 BAA<br />
YES<br />
Touarag 2004–05<br />
BKJ<br />
YES<br />
4.2 AXQ YES<br />
5.0<br />
AYH TDI YES<br />
BKW TDI YES<br />
VW/<strong>Audi</strong> On-board Diagnostic Availability:<br />
1990–1995 Gas, 1992–2002 Diesel<br />
The VW/<strong>Audi</strong> software starts VW/<strong>Audi</strong> US VIN ID in 1991 (US vehicle systems) and only identifies<br />
those vehicles with Codes and Data (does not retrieve blink codes). Table 5-4 on page 36 depicts<br />
many early year models with some vehicles having scan tool diagnostics depending on Emission<br />
certification or country, engine system description, including emission certification and early<br />
systems without diagnostic capability.<br />
Starting in 1990, VW and <strong>Audi</strong> started using digital engine management systems on some models<br />
that were sold only in California.<br />
Note the following when determining diagnostic availability:<br />
• Only some of these early systems may have codes and rapid or serial data.<br />
• There are some early blink code only systems not listed in Table 5-4 on page 36.<br />
• For 1991–93, certain engine codes have data on California (CA) models only. Federal<br />
vehicles with the same engine code will display a “no communication” message and an<br />
additional message stating “Federal <strong>Vehicle</strong>s are not capable of communicating.” Federal<br />
<strong>Vehicle</strong>s may have blink codes.<br />
• If the underhood emission label is missing, distinguishing between CA or Federal vehicles<br />
may be difficult. Also, Federal vehicles may still have the white/black diagnostic connector<br />
(under shifter boot). This connector may not be functional or may be for transmission (4-speed<br />
only) or ABS data. Only the 9A Federal emission equipped engine has engine data. To help<br />
identify a CA emission engine, check for a functional Malfunction Indicator Lamp (ignition on,<br />
engine off) or check for an exhaust gas recirculation (EGR) valve installed on the engine.<br />
• European IDs can be used where the VIN cannot. The following systems can not be identified<br />
using US VIN ID. Use the alternate IDs below.<br />
– For the 1990 Golf/Jetta/GTI/Corrado/Passat using the 2.0L (9A) with CIS-E Motronic, ID<br />
as a 1991 Passat or use European ID for 1990 Golf or Jetta.<br />
– For the 1993–1994 Golf 1.8L (ACC), ID as a 1995 model year or use European ID and<br />
select 1993 or 1994 Golf 1.8L ACC.<br />
35
Testing<br />
Testing Engine Systems<br />
NOTE:<br />
i The scan tool vehicle ID provides connector messages and system information but because the<br />
control modules are identified automatically, an incorrect VIN or vehicle ID does not stop scan tool<br />
communication.<br />
In addition, be aware that Expert Mode can also be used on any vehicle with diagnostic capability<br />
and does not require any vehicle ID.<br />
Table 5-4 Early VW engine system coverage (part 1 of 2)<br />
Model Year<br />
Engine<br />
Engine Emission Scan Tool<br />
Displacement<br />
Code<br />
Management Cert. Only Diagnostics<br />
Cabriolet<br />
1995 ABA 2.0L 4-cyl Motronic M2.9 YES<br />
1990–92 2H 1.8L 4-cyl Digifant California YES<br />
Corrado<br />
1992–95 AAA 2.8L (VR6) Motronic M2.9 YES<br />
1990–92 PG 1.8L 4-cyl (G60) Digifant California YES<br />
Canada Only<br />
AAF 2.5L 5-cyl Digifant<br />
1992–93<br />
for 1992<br />
YES<br />
AAB 2.4L 5-cyl Diesel Canada NO<br />
Eurovan<br />
2.5L 5-cyl<br />
1995 ACU (Winnebago, Digifant Tier 1 YES<br />
Rialta)<br />
1995–97 AAB 2.4L 5-cyl Diesel Canada NO<br />
1990 JN 1.8L 4-cyl CIS-E (KA Jetronic) NO<br />
Fox<br />
California YES<br />
1991–93 ABG 1.8L 4-cyl Digifant<br />
Federal NO<br />
1993–97 ACC 1.8L 4-cyl Mono-Motronic Canada YES<br />
1994–95 AAA 2.8L (VR6) Motronic M2.9 YES<br />
1993–95 AAZ 1.9L 4-cyl Turbo Diesel Canada NO<br />
Golf/GTI 1990–92<br />
9A 2.0L 4-cyl (16V) CIS-E Motronic YES<br />
PF/RV 1.8L 4-cyl Digifant NO<br />
1991 PF/RV 1.8L 4-cyl Digifant NO<br />
1993–99<br />
RV 1.8L 4-cyl Digifant California YES<br />
ABA 2.0L 4-cyl Motronic M2.9 YES<br />
1994–95 AAA 2.8L 4-cyl Motronic M2.9 YES<br />
1993–95<br />
ABA 2.0L 4-cyl Motronic M2.9 YES<br />
AAZ 1.9L 4-cyl Turbo Diesel Canada NO<br />
PF/RV 1.8L 4-cyl Digifant NO<br />
1990–92<br />
Jetta<br />
9A 2.0L 4-cyl (16V) CIS-E Motronic YES<br />
1991–92 RV 1.8L 4-cyl Digifant California YES<br />
1990–91<br />
ME 1.6L 4-cyl Diesel NO<br />
MF 1.6L 4-cyl Turbo Diesel Canada NO<br />
1F 1.6L 4-cyl ECO Diesel Turbo NO<br />
36
Testing<br />
Testing Engine Systems<br />
Table 5-4 Early VW engine system coverage (part 2 of 2)<br />
Engine<br />
Model Year<br />
Displacement<br />
Code<br />
Passat<br />
1995 ABA 2.0L 4-cyl Motronic M2.9 YES<br />
1993–95<br />
Engine<br />
Management<br />
Emission<br />
Cert. Only<br />
Scan Tool<br />
Diagnostics<br />
AAA 2.8L (VR6) Motronic M2.9 YES<br />
AAZ 1.9L 4-cyl Turbo Diesel Canada NO<br />
1991–94 PG 1.8L 4-cyl (G-60) Digifant Canada NO<br />
1990–93 9A 2.0L 4-cyl (16V) CIS-E Motronic YES<br />
Vanagon 1990–91 MV 2.1L 4-cyl Digifant NO<br />
US <strong>Audi</strong> Application Coverage<br />
Table 5-5 provides early US <strong>Audi</strong> engines applications.<br />
Table 5-5 US <strong>Audi</strong> engine system application coverage (part 1 of 3)<br />
Model Year Volume Engine Info<br />
Engine<br />
Code<br />
Supported Notes<br />
1986–91 2.2 K-Jetronic MC Turbo NO <strong>Manual</strong> blink<br />
1986 2.2 KE-Jetronic KZ NO<br />
codes<br />
1991–95 2.2 Turbo 20V AAN YES<br />
100 S4<br />
<strong>Manual</strong> blink<br />
1986–1990 2.3 KE3-Jetronic NF/NG NO<br />
codes<br />
1990–94 2.8 V6 12V AAH YES<br />
1994 2.8 V6 12V AFC YES<br />
<strong>Manual</strong> blink<br />
1986–91 2.2 K-Jetronic MC Turbo NO<br />
200<br />
codes<br />
1989–90 2.2 20V 3B Turbo YES<br />
1988–90<br />
(Type 89)<br />
2.0 Motronic 3A<br />
80<br />
90<br />
1992–94<br />
(Type B4)<br />
2.3 KE3-Jetronic NG NO<br />
1988–89<br />
(Type 89)<br />
2.3 20V 7A<br />
1992–94<br />
(Type B4)<br />
2.8 V6 12V AAH YES<br />
1993–94<br />
(Type B4)<br />
2.8 V6 12V AFC YES<br />
1987–91 2.3 KE3-Jetronic NG<br />
1988 2.3 20V 7A<br />
NO<br />
1989–93 2.3 20V 7A YES<br />
1992–94<br />
(Type B4)<br />
2.8 V6 12V AAH YES<br />
1993–95 2.8 V6 12V AFC YES<br />
<strong>Manual</strong> blink<br />
codes<br />
<strong>Manual</strong> blink<br />
codes<br />
37
Testing<br />
Testing Engine Systems<br />
Table 5-5 US <strong>Audi</strong> engine system application coverage (part 2 of 3)<br />
Engine<br />
Model Year Volume Engine Info<br />
Code<br />
A4/S4<br />
A6/S6<br />
Supported<br />
1995–99 1.8 Turbo AEB YES<br />
2000 1.8 Turbo ATW YES<br />
1994–97 2.8 V6 12V AAH YES<br />
1995–97 2.8 V6 12V AFC YES<br />
1996–97 2.8 V6 30V AHA YES<br />
2000–01 2.8 V6 30V ATQ YES<br />
2002–05 3.0 V6 30V AVK YES<br />
2002–05 1.8 Turbo AMB YES<br />
2001–03 2.7<br />
Turbo V6<br />
30V<br />
APB YES<br />
Turbo BEX YES<br />
1.8 Turbo BFB YES<br />
Turbo BKB YES<br />
2004–05<br />
ASN YES<br />
3.0<br />
BBJ YES<br />
4.2<br />
BBK YES<br />
BHF YES<br />
1993–95 2.8 V6 12V AAH YES<br />
1994–96 2.8 V6 12V AFC YES<br />
1997–99 2.8 V6 30V AHA YES<br />
2000–01 2.8 V6 30V ATQ YES<br />
2000 4.2 V8 ART YES<br />
2000–03 2.7<br />
Turbo V6<br />
30V<br />
APB YES<br />
3.0 V6 30V AVK YES<br />
2000–05 4.2 V8 AWN YES<br />
4.2 V8 BBD YES<br />
2003–05 4.2 V8<br />
BAS YES<br />
BCY YES<br />
2002–05 3.0<br />
ASN YES<br />
BBJ YES<br />
2004–05 2.7<br />
BEL YES<br />
BES YES<br />
2002–03 4.2 ART YES<br />
2004–05<br />
4.2 ANK YES<br />
ASG YES<br />
Notes<br />
2003 A4<br />
Cabriolet<br />
2003 A4<br />
Cabriolet<br />
38
Testing<br />
Testing Engine Systems<br />
Table 5-5 US <strong>Audi</strong> engine system application coverage (part 3 of 3)<br />
Engine<br />
Model Year Volume Engine Info<br />
Code<br />
Supported<br />
1997–99 4.2 V8 ABZ YES<br />
1999-2003 4.2 V8 AKB YES<br />
1997–99 3.7 V8 AEW YES<br />
2001–03 4.2 V8 AUX YES<br />
A8/S8<br />
ABZ YES<br />
2002–03 4.2 V8<br />
AYS YES<br />
2004–05<br />
4.2 BFM YES<br />
6.0 BHT YES<br />
All-road<br />
Turbo V6<br />
2000–03 2.7<br />
Quattro<br />
30V<br />
APB YES<br />
Cabrio<br />
1994–95 2.8 V6 12V AAH YES<br />
1994–97 2.8 V6 12V AFC YES<br />
AMB YES<br />
1.8 Turbo BFB YES<br />
BKB YES<br />
ASN YES<br />
Cabriolet 2004–05<br />
AVK YES<br />
3.0<br />
BBJ YES<br />
BEN YES<br />
4.2 BBK YES<br />
BHF YES<br />
2000–03 1.8 Turbo AMU YES<br />
2000–01 1.8 Turbo ATC YES<br />
TT 2000–03 1.8 Turbo AWP YES<br />
2003 1.8 Turbo BEA YES<br />
2004–05 1.8 Turbo BAM YES<br />
Notes<br />
<strong>Audi</strong> Early Model Application 1990–1995<br />
The VW/<strong>Audi</strong> primary cartridge starts VW/<strong>Audi</strong> US VIN ID in 1991 (US vehicle systems) and only<br />
identifies those vehicles with Codes and Data (does not retrieve blink codes). The models in<br />
Table 5-6 on page 40 have diagnostic capability with the scan tool.<br />
39
Testing<br />
Testing Engine Systems<br />
Table 5-6 <strong>Audi</strong> early model application 1990–95<br />
Model Year Displacement<br />
200/2000 Quattro<br />
Turbo 20V<br />
V8 Quattro<br />
Engine<br />
Code<br />
Engine Management<br />
1991 Turbo 2.2L 20V 3B M2.3<br />
1992–94 V8 4.2L 32V ABH<br />
1990–91 V8 3.6L 32V PT<br />
M2.4<br />
100/1000 Quattro 1992–94 V6 2.8L 12V AAH MPI<br />
S4 1993–94<br />
A6 1995<br />
90/90 Quattro 1993–95<br />
Cabrio 1994–95<br />
2.2L AAN M2.3<br />
V6 2.8L 12V AAH MPI<br />
5.2.2 Clearing Codes<br />
This function attempts to clear all current and stored DTCs. After clearing, the scan tool re-checks<br />
for DTCs, and any that reset from current problems will re-display.<br />
z To clear DTCs:<br />
1. From any codes display, press N to display the Exit menu.<br />
2. Select Clear Codes.<br />
The Initiate Code Clearing screen displays.<br />
3. Select to initiate code clearing.<br />
A code-clearing message displays. This message varies depending on the control module.<br />
4. Select to clear the codes automatically, if applicable for the vehicle under test.<br />
The display indicates that codes are cleared by displaying the No Codes screen.<br />
If the code-clearing operation fails for any reason, the previous codes reappear at the top of<br />
the data list when returning to Codes.<br />
5. Exit to return to the Exit menu and repeat the Clear Codes operation if necessary.<br />
z To clear multiple DTCs:<br />
1. Record all codes.<br />
2. Clear all codes using the previous procedure.<br />
Codes that re-display are current problems. Fix these first.<br />
3. After repairs, clear codes again.<br />
4. Perform a road test.<br />
5. Re-check for codes.<br />
6. Repair any codes that set.<br />
z To test drive a VW or <strong>Audi</strong> to verify repairs after DTCs are erased:<br />
1. Warm the engine up to normal operating temperature.<br />
2. Allow the engine to idle (1 or 2 minutes).<br />
3. Road test at part throttle.<br />
40
Testing<br />
Testing Engine Systems<br />
4. Road test at Wide Open Throttle (attain at least 3500 RPM).<br />
5. Decelerate.<br />
6. Perform all steps several times.<br />
Remember that all modules should be re-checked for codes after the test drive. Use automatic<br />
test mode to automatically print out all interrogated modules and codes (“00-Automatic<br />
System Test” on page 20).<br />
Important Tips for Codes<br />
• The message on the scan tool states that to clear codes, the engine must be off. Input from<br />
field technicians indicates that this is not always necessary.<br />
• Intermittent codes have the message “Error Occurs Intermittent” after the code description<br />
(VW calls these codes “sporadic”). Codes are considered intermittent if they occur for a<br />
maximum of five seconds. Intermittent codes do not turn the Check Engine Light on. They are<br />
automatically erased from memory after 40 drive cycles if they do not occur again. When a<br />
malfunction is first detected, it is stored as a static or pending malfunction. If the malfunction<br />
no longer exists after a pre-determined time or distance travelled, then it is labelled<br />
intermittent.<br />
• Most 1995 and earlier Bosch control modules may show you a false DTC “00513 - Engine<br />
Speed Sensor (G28)” if the engine is not running. This fault code should disappear once the<br />
engine is started. With a defective sensor, the engine would not start. In addition, many<br />
automatic transmission control modules may show a DTC that indicates a faulty brake light<br />
switch. This usually can be ignored and usually will not appear if you press the brakes once<br />
before checking for fault codes.<br />
• Disconnecting the battery may erase fault codes and basic settings on pre-OBD-II vehicles,<br />
which may result in driveability problems. Disconnecting the battery on OBD-II vehicles does<br />
not erase stored codes or turn the MIL off. However, intermittent codes and control unit<br />
adaptation learned values may be erased in both the engine and transmission.<br />
• Disconnecting the battery may require resetting of convenience electronics such as alarm,<br />
interior lights, radio, etc. It is recommended to use a jumper battery or battery charger to<br />
maintain power when replacing a battery.<br />
• Readiness Codes need to be reset after codes are cleared or the battery has been<br />
disconnected. Throttle body adaptation relearn is essential and may prevent the engine from<br />
starting. See “Testing Electronic Throttle Systems” on page 67 for more information.<br />
• Be aware that clearing codes may not change throttle body adaptation status to “not ready”<br />
(060 or 098), but throttle body reset is highly recommended to ensure no problems. See the<br />
<strong>Volkswagen</strong>/<strong>Audi</strong> OBD-II Readiness Code Charts for additional information.<br />
• Sometimes a fault code is displayed for a component which is not installed in the vehicle<br />
under test (i.e., a cruise control). This code cannot be cleared. Always make sure the<br />
component the code refers to is present when a code cannot be cleared.<br />
• Performing activation tests may set false codes. Always check and clear codes after<br />
performing activation tests.<br />
• <strong>Vehicle</strong>s with Drive-by-Wire (no throttle cable) cannot be power-braked. The Brake On signal<br />
notifies the control module to command the throttle closed and may also set false codes.<br />
• <strong>Vehicle</strong>s with full Drive-by-Wire (no throttle cable), usually have a EPC (Electronic Power<br />
Control) indicator light. The EPC light should come on if there is any problem in the<br />
Drive-by-Wire system. Faults detected by the EPC set duplicate fault codes in the ECM.<br />
• Electronic Instrument Clusters may store only up to four fault codes. Intermittent fault codes<br />
are automatically erased if they do not reoccur in the next 50 engine starts.<br />
41
Testing<br />
Testing Engine Systems<br />
• Diesel Only: Late model Diesel TDI engines (1996 and newer) may have three different<br />
code-setting MILs. All three of the following lamps set codes in the ECM memory.<br />
– Engine Management Check Engine Lamp<br />
– Glow Plug Warning Lamp<br />
This lamp has dual functions: the lamp is on when starting a cold engine, which normally<br />
indicates that glow plugs are on; blinking lamps indicate malfunctions that affect<br />
driveability.<br />
– Exhaust Warning Lamp<br />
This lamp is switched on with faults that adversely affect emissions (not all exhaust gas<br />
faults turn the lamp on; always check for codes regardless of lamp).<br />
5.2.3 Data<br />
A Data selection is available from the Main Menu of most vehicles, but only when “Engine<br />
Management” is selected from the System Selection menu (see “Selecting a System” on<br />
page 15). Viewing data in standard mode with the scan tool does not affect vehicle operation.<br />
The Data selection displays the following choices:<br />
• Data Groups displays data in diagnostic groups to make problem solving easier.<br />
• Codes & Data displays all data parameters and codes together but the screen data has a<br />
slower refresh rate.<br />
• Return To Main Menu takes you back to the Main Menu.<br />
NOTE:<br />
i Some late model vehicles may communicate with the scan tool with the ignition switched off,<br />
though communication is limited to the ECM, and data values received may be erroneous. Always<br />
communicate with the ignition on.<br />
Data Groups<br />
The Data Groups mode first displays a Group Selection screen.<br />
The data group items available will vary from one vehicle to another. For some vehicles, the data<br />
groups list may be as short as two groups, or it may be as long as 25 groups.<br />
NOTE:<br />
i It is possible to read any display group like the factory tool by selecting Readiness Code from the<br />
Functional Tests menu or by selecting Expert Mode > 08-Read Measuring Value Block and<br />
entering the display group. Data is displayed in a four-channel format, like the factory tool.<br />
z To display data groups:<br />
1. Select any specific group.<br />
A Data Group screen displays.<br />
When the scan tool first enters the group, it displays the group title and three lines of data.<br />
Scroll down and the scan tool displays the rest of the group data, until End Of Group displays.<br />
42
Testing<br />
Testing Engine Systems<br />
2. Scroll past the last line and the scan tool attempts to communicate with the next group in the<br />
list and displays the Requesting Data Group screen.<br />
3. After communication has been reestablished, the next group for that vehicle displays.<br />
In this way it is possible to scroll though all the data groups, scrolling in the opposite direction<br />
moves through the groups in reverse order.<br />
Codes & Data<br />
Selecting Codes & Data displays codes and data together.<br />
NOTE:<br />
i The data in the Codes & Data display are preselected from the individual display groups. It is<br />
important to note that except for a few early models (with only one display group 000) the<br />
preselected “codes and data” represents a limited list that may not include all possible display<br />
groups. There may be more display groups available in Expert Mode than in standard mode.<br />
Check Expert Mode for any missing display groups.<br />
Reading Codes & Data or individual display group data (Measuring Value Blocks 08) can be used<br />
for testing as the engine operates normally. The scan tool does not affect the control module when<br />
reading data (08). This is not true for 04-Basic Settings (see page 22).<br />
5.2.4 Functional Tests<br />
The Functional Tests menu gives you the ability to activate components of the engine<br />
management system.<br />
Initiate Actuator Tests<br />
Which actuators can be activated depends on the control module under test and the vehicle itself.<br />
Actuators can include the following:<br />
• Fuel pump relay<br />
• EVAP canister purge valve<br />
• Injector valves (odd and even cylinders)<br />
• Oxygen sensor (O2S) heater relay<br />
IMPORTANT:<br />
The Fuel Pump will run continuously while the Actuator tests are in progress.<br />
The scan tool commands the control module to activate a component, but it does not check<br />
whether the component is actually operating correctly.<br />
In most cases, the effect can be clearly heard: a relay clicks or a pump runs. Be aware, actuators<br />
can be mounted anywhere within the vehicle, (i.e., under the dashboard, under the hood, and<br />
even in the trunk). If no reaction can be heard at all, measure the actuator with an oscilloscope or<br />
a multimeter. This indicates whether the control module is controlling the component properly.<br />
43
Testing<br />
Testing Engine Systems<br />
When Initiate Actuator Tests is selected, the scan tool sequentially activates each of the actuators<br />
for 30 seconds. For example, running actuator tests on a 2002 W8 Passat would activate the<br />
following actuators in the following sequence:<br />
1. TAnk Vent Valve<br />
2. Secondary Air Control<br />
3. Secondary Air Pump<br />
4. Bank 1 Camshaft Adjustment<br />
5. Evaporative Emission Control System L.D.P.<br />
6. Valve Engine Mounting<br />
7. Bank 2 Camshaft Adjustment<br />
8. Exhaust Cam Timing Valve B1<br />
9. Exhaust Cam Timing Valve B2<br />
10. Control Vacuum Pump Brake<br />
11. Cooling Fan High Speed<br />
12. Cooling Fan Low Speed<br />
13. Cooling Fan Low Speed Deactivated<br />
14. Relay Additional Coolant Pump<br />
15. Injector 1 Activated<br />
16. Injector 1 Deactivated<br />
17. Injector 2 Activated<br />
18. Injector 2 Deactivated<br />
19. Injector 3 Activated<br />
20. Injector 3 Deactivated<br />
21. Injector 4 Activated<br />
22. Injector 4 Deactivated<br />
23. Injector 5 Activated<br />
24. Injector 5 Deactivated<br />
25. Injector 6 Activated<br />
26. Injector 6 Deactivated<br />
27. Injector 7 Activated<br />
28. Injector 7 Deactivated<br />
29. Injector 8 Activated<br />
30. Injector 8 Deactivated<br />
Before the actuator tests can be re-initiated, the vehicle ignition must be turned off. Then, start the<br />
engine, turn the engine off, then turn the ignition switch on again. If the actuator tests are<br />
re-initialized without the ignition being cycled, the Actuator Test Not Possible screen displays.<br />
z To run actuator tests:<br />
1. Select Initiate Actuator Tests from the Functional Tests menu.<br />
A warning message displays.<br />
2. Select to continue.<br />
44
Testing<br />
Testing Engine Systems<br />
The scan tool proceeds directly to the first actuator test available for the current vehicle ID.<br />
This test automatically activates all the actuators applicable to the vehicle for approximately<br />
30 seconds each. The current test displays on-screen.<br />
Important Tips for VW/<strong>Audi</strong> Engine Actuator Tests<br />
• The Output Test Function is only available when the engine is not running.<br />
• Exiting and reselecting actuator tests will not re-initiate actuator tests on some engines. It is<br />
not recommended to interrupt the test sequence once it has been started. Exiting while an<br />
output is activated causes a “Close Controller” command to be issued. If exiting and<br />
reselecting the actuator test does not work, turn the key off for 10 seconds, then start the<br />
engine, then shut the engine off. Turn the ignition on, then reselect Initiate Actuator Tests from<br />
the Functional Test menu. Most control modules will permit the Output Test Sequence to be<br />
run only one time per session. Therefore, each new session will usually require an ignition<br />
reset and engine start. Verify that the component is present on the vehicle you are testing.<br />
• Have the engine running only when instructed to do so by the scan tool and always follow the<br />
instructions displayed on the scan tool.<br />
• With some engines, it is very difficult to hear the injectors click. Use a multimeter, scope, or<br />
stethoscope to make sure the injectors are activated properly (if injectors can be reached, it is<br />
sometimes possible to feel the injectors working).<br />
• The sequence in which the tests are performed and the availability of the tests are controlled<br />
by the control module under test. Output tests available are not determined by the scan tool.<br />
• On some engines, before the actuator test can be re-initiated, the engine has to run at least<br />
30 seconds prior to the test.<br />
• Some automatic transmission systems do not have actuator tests. If Initiate Actuator Tests is<br />
selected one of these systems, an Actuator Test Not Possible message displays.<br />
• Some outputs require additional action before they become active. Fuel injectors are a<br />
common example. To activate a fuel injector, you must press (and in some cases release) the<br />
accelerator pedal.<br />
! WARNING<br />
Risk of erratic vehicle response.<br />
• Do not use the Output Tests function on any system while the car is in motion.<br />
Erratic vehicle response can cause serious injury.<br />
Review ECU ID<br />
This menu item displays the identification data of the control module under test. The data<br />
displayed may be required when ordering replacement components for the vehicle.<br />
Supplemental control module information may be available, if so, it can consist of the VIN number,<br />
module numbers for additional control units, or other information sent by the control module.<br />
The Review ECU ID screen should display when selected, follow screen instructions.<br />
Basic Settings<br />
Basic Settings has different functions depending on the year, make, and model. Generally, it<br />
involves invoking a specific control module to run in a special mode of operation that either sets<br />
45
Testing<br />
Testing Engine Systems<br />
the conditions to perform an adjustment or internally run a test. When in Basic Settings, the user<br />
may be required to:<br />
• Command the scan tool by entering the correct numbers and making the correct on-screen<br />
selections.<br />
• Create the correct vehicle conditions for a diagnostic test to run.<br />
• Operate the vehicle for Accelerated Adaptive Learning.<br />
• Perform an adjustment procedure.<br />
NOTE:<br />
i Basic Setting mode is also used to run system or subsystem Readiness Codes, which verify repair<br />
work (see Readiness Code supplement for more information).<br />
You can select BASIC SETTING from three different menu choices on the scan tool:<br />
• Functional Test menu > Basic Settings—This Basic Setting selection will only have one or<br />
two preselected tests with help screens.<br />
This selection for Basic Settings is different from the “Expert Mode” Basic Settings. This<br />
selection will list only one or two important procedures with help screens to guide you through<br />
the process. Note that in “Expert mode” neither Basic Settings nor any other selection have<br />
any help screens available.<br />
• Functional Test menu > Readiness Code > 04-Basic Setting—This Readiness Code mini<br />
Expert Mode has some but not all of the functions available under the main Expert Mode.<br />
• Expert Mode > 01-Engine Management Master > 04-Basic Setting—Viewing data in Basic<br />
Settings (04) is very similar to viewing data in display group mode (08, Measuring Value<br />
Blocks). The display group numbers and the specific data displayed are the same, however,<br />
the difference is that in Basic Settings the Control Module performs various calibrations or<br />
activates certain tests which should be reflected in the readings.<br />
Engine Management Functional Test Menu<br />
The following Basic Settings can be selected if available:<br />
• Throttle Valve Adjuster/Idling Control/Adaptation EPC-System (Electronic Throttle<br />
Body Adaptation). In this Basic Setting, the control module relearns the throttle position<br />
using an automatic procedure. See “Testing Electronic Throttle Systems” on page 67.<br />
NOTE:<br />
i If possible, the factory procedure recommends performing this test with the engine cold.<br />
• Kickdown Function. In this Basic Setting, the control module relearns the kickdown position<br />
for the automatic transmission. The procedure must be followed exactly. Hold the throttle for<br />
3 seconds, by pressing down the throttle fully to the floor, then release (make sure you feel the<br />
kickdown switch engage).<br />
– Always check for kickdown selection in the Engine Functional Test menu, as kickdown<br />
adaptation is not always included in the Readiness Code Charts.<br />
– Kickdown may also be selected in Expert Mode. In engine or transmission, select basic<br />
settings 04/000. Remember that in Expert mode there are no help screens. Once in Basic<br />
Settings, depress the throttle to the floor for three seconds, then release. Press N to exit.<br />
New kickdown learn settings should be set (no feedback on-screen).<br />
46
Testing<br />
Testing Engine Systems<br />
On some models, kickdown relearn may not set properly using Basic Settings in the<br />
transmission controller. There is no way to verify that the kickdown reset test has been<br />
completed by looking at the transmission data. A test drive before and after may verify that the<br />
test was completed. Alternately, select engine management data and select display group<br />
063. If kickdown adaptation status reports an error, go back and select Basic Settings in the<br />
Engine Management Functional Tests menu, then select kickdown as stated above.<br />
• Ignition Timing. While in Basic Settings mode the ignition timing is fixed; the control module<br />
will not attempt to compensate for any variation in ignition timing or idle speed. After any<br />
adjustments, cancel to return engine control to the control module.<br />
• Start of Delivery (Diesel Engines). In this Basic Setting, the engine is set in a mode so the<br />
start of delivery can be checked or manually adjusted. The actual value as well as the<br />
minimum and maximum values are displayed (values displayed depend on temperature).<br />
Basic Setting Screen<br />
With most Basic Settings, data displays with the required instructions.<br />
Always end the Basic Setting session by selecting Other Systems to be sure that the settings are<br />
stored. Turn the ignition key off and wait 60 seconds, to ensure that adaptation has occurred.<br />
IMPORTANT:<br />
You should refer to the Service <strong>Manual</strong> for a specific vehicle and engine before attempting to use<br />
the Basic Settings function. Using an incorrect procedure can have negative consequences.<br />
In Basic Settings, certain functions are disabled or stabilized to avoid learning interference and to<br />
allow specific tests to run or adaptive learning to happen. Learning usually starts 20 seconds after<br />
the initiation of Basic Settings if the engine is at normal operating temperature. Exactly what Basic<br />
Setting controls varies by year, vehicle and engine.<br />
Example 1: 1993–1995 engine code AAA or ABA<br />
1. Stabilizes ignition<br />
2. Stabilizes Idle Speed<br />
3. Disables the A/C<br />
4. Disables the Evaporative Control System<br />
Example 2: All Late Model OBD-II<br />
1. A/C is shut off<br />
2. No idle stabilization<br />
3. Disables the Evaporative Control System<br />
4. Runs Readiness Code Monitors<br />
5. Enables accelerated learning<br />
NOTE:<br />
i In Basic Settings, Evaporative and Leak Detection functions are usually only temporarily disabled<br />
depending on the function.<br />
47
Testing<br />
Testing Engine Systems<br />
Basic Settings and Adaptive Learned Values<br />
Operating parameter values are preprogrammed into the control module as default values.<br />
Control module adaptive learning adjusts to these default values as changes in engine conditions<br />
occur. If the battery or control module is disconnected or fault codes are erased, learned values<br />
are erased and the control module reverts back to the default values. The engine runs, but the<br />
default values may not match the current needs of the engine, which can result in poor<br />
performance. Also, when repairs are made, the default values may not match the current needs<br />
of the engine. The control module has to relearn new adaptive values over time as the vehicle is<br />
driven. To expedite the learning process, the scan tool in Basic Settings can force the control<br />
module to learn current conditions in several minutes compared to normally taking several days of<br />
extended driving to meet all the different conditions.<br />
Basic Settings and Fuel Trim Accelerated Learning<br />
After repairs, Long Term Fuel Trim adaptation settings need to be relearned or the vehicle may not<br />
operate properly. Basic Settings can be used to accelerate learning, greatly reducing the normal<br />
time under standard operating conditions that it would take for adaptation to readjust itself. Note<br />
that <strong>Audi</strong> repair strategy usually includes basic settings accelerated learning, but VW is limited to<br />
specific models and systems. However, because VW and <strong>Audi</strong> share the same technology, Basic<br />
Settings may work similarly on VW. For Fuel Trim accelerated Learning on both VW and <strong>Audi</strong>,<br />
initiate basic settings for accelerated learning in the appropriate fuel trim display group (see<br />
“Appendix C Fuel Control Learning Adaptation Values” on page 157). After selecting a display<br />
group in Basic Settings, check that the scan tool does not report an error, which usually indicates<br />
that Basic Settings is not available for that display group. If no error is reported and the engine is<br />
fully warmed up, perform a short road test and monitor if the readings change. If an error is<br />
reported, then Basic Settings cannot be used for accelerated learning and a longer road test will<br />
be necessary for proper fuel control learning to occur.<br />
Example: Using basic settings for accelerated learning to assist in diagnosis.<br />
After replacement of a faulty Mass Air Flow (MAF) sensor on a late model <strong>Audi</strong>, a technician wants<br />
to validate the repair and reset the Long-term fuel trim values. Being careful not to clear codes<br />
before road testing because this resets the learned values to 0, the technician records the fuel trim<br />
adaptation values (idle and part throttle adaptation) for after repair comparison. With the engine is<br />
at operating temperature, Basic Setting in display group 032 is selected, and idle for 3–5 minutes.<br />
Then a short road test (1–2 miles) is performed, which includes a few stop-and-go part throttle<br />
accelerations. The new MAF should substantially change the fuel trim adaptation values. If values<br />
are normal, clear codes and then set all the readiness codes to the OK status. If they all set OK,<br />
the technician is very confident that there are no other problems. A final road test is always a good<br />
idea, checking for any possible intermittent problems.<br />
NOTE:<br />
i Out-of-range adaptation readings resulting from a faulty component like a MAF sensor usually will<br />
not set a code or turn the MIL on until values are excessive (±14). Normal adaptation readings with<br />
a good MAF sensor should not exceed ±5% Clearing codes or initializing Basic Settings resets the<br />
adaptation values back to base or zero. Recording the previous reset readings for comparison is<br />
helpful to verify that the repair has corrected the problem.<br />
48
Testing<br />
Testing Engine Systems<br />
Basic Settings and Readiness Codes on OBD-II <strong>Vehicle</strong>s<br />
Basic Settings is also used on OBD-II vehicles to set Readiness Codes. These are OBD-II<br />
Readiness monitor tests that are commanded by the scan tool using Basic Settings.<br />
All Readiness Code tests are run using Basic Settings. OBD-II Readiness Code tests automate<br />
many of the previous OBD-I and some early <strong>Audi</strong> OBD-II adaptation learn procedures that<br />
previously required driving the vehicle. Now many of these relearn procedures can be<br />
accomplished in the shop without a complex test drive.<br />
On OBD-II vehicles with electronic throttle bodies, the most common use for the Basic Settings<br />
function is to recalibrate the throttle position sensors. This is accomplished using Group 098<br />
(electronic throttle with a cable) or 060 (electronic throttle without a cable—full, Drive-by-Wire).<br />
Basic Settings learning is prohibited when:<br />
• Malfunction codes are stored.<br />
• Engine idle is uneven (surging).<br />
• Engine coolant temperature is below 176°F (80°C) or above 230°F (110°C).<br />
• Fuel Mixture is too rich or lean (an excessive difference between the richest and leanest<br />
oxygen sensor learning values).<br />
• During acceleration and at Wide Open Throttle. Learning takes place only at idle (650–900<br />
RPM) and at 1500–3000 RPM. Road test the vehicle at steady cruise to set the part throttle<br />
fuel trim adaptation.<br />
NOTE:<br />
i During the diagnosis, if a vehicle has a possible fuel control related problem, it is recommended<br />
to record both the idle and part throttle adaptation values (usually display group 032) before<br />
clearing codes or performing basic settings. Out of specification adaptation readings may not<br />
always set a code. Clearing codes resets the adaptation values and basic settings initiates<br />
accelerated learning. Using the previous readings for comparison is helpful to verify that the repair<br />
has corrected the problem.<br />
NOTE:<br />
i Always end the Basic Settings session by selecting Other Systems in standard mode or 06-Stop<br />
<strong>Communication</strong> in Expert Mode to be sure that the settings are stored. Turn the ignition key off and<br />
wait 60 seconds.<br />
Other Basic Setting System Functions<br />
Crankshaft Sensor Wheel Learning. Correction for flywheel gear teeth inconsistency for misfire<br />
detection. When the scan tool is connected to the vehicle during a road test in Basic Settings with<br />
the appropriate display group for a specific vehicle, the CKP Sensor wheel is tested during a<br />
deceleration fuel shutoff at 2200–4000 RPM. After the learning has occurred, Channel 4 changes<br />
to “OK” or learned status “YES”.<br />
Basic Ignition Timing Check. Available on most late 1980s to mid-1990s vehicles with<br />
adjustable ignition timing. In 04-Basic Setting, the DIS (digital Idle stabilization) is shut down. Base<br />
ignition timing can now be checked. On some early vehicles, Basic Setting may also force an open<br />
loop operation to allow for mixture adjustment.<br />
49
Testing<br />
Testing Engine Systems<br />
Xenon Lights base setting level control adjustment. Basic setting is required for Automatic<br />
vertical headlight aim control which keeps the tilt angle of the low beam constant regardless of<br />
acceleration or load shift.<br />
Problems with Basic Settings<br />
If the adaptation status displays Error, or other problems occur, read the trouble codes for more<br />
information. Check the required conditions and try the basic setting again.<br />
Service Interval Reset<br />
This section includes different service reset procedures for various types of electronic instrument<br />
clusters. However, most of these will apply to <strong>Audi</strong> only and also depend on whether a high or low<br />
end cluster is installed (optional equipment on some models).<br />
NOTE:<br />
i Use Expert Mode for communication problems with the Electronic Instrument service interval<br />
reset or if Service Interval Reset is not on the menu. Select 17-Electronic Instrument Panel ><br />
10-Adaptation, then select channel 5 (005), scroll in the 8 for 8,000 kilometers (5,000 miles).<br />
Channel 6 is the distance value (24 = 24,000 kilometers or 15,000 miles). Channel 7 is the time<br />
value until the next Inspection 1 (36 = 360 days). Channel 8 is the time to Inspection 2 (72 = 720<br />
days). See “Chapter 4 Expert Mode” on page 18 for more information.<br />
<strong>Vehicle</strong>s with <strong>Manual</strong> Mechanical SRI Reset (1995–2000)<br />
Most VWs have mechanical SRI reset; <strong>Audi</strong> may have electronic SRI reset depending on model<br />
and instrument cluster.<br />
z To mechanically reset the oil light:<br />
1. Switch the ignition on.<br />
2. Press and hold the odometer reset button located below the speedometer.<br />
3. Switch the ignition off and release the odometer reset button.<br />
OEL (Oil Engine Lamp) appears in the SRI display.<br />
4. Press and hold the lower digital clock reset button or the analog clock reset button until<br />
5 dashes (-----) appear in the display.<br />
OEL SRI is now reset to 7500 miles or 6 months.<br />
NOTE:<br />
i Once the OEL is reset, the other displays can be reset without switching the ignition on.<br />
z To reset the service light:<br />
1. Press the odometer reset button to perform the inspection 01.<br />
IN 01 should be displayed in the SRI display.<br />
2. Reset by pressing the clock button.<br />
3. If necessary, repeat the procedure for Inspection 02.<br />
4. Turn ignition on.<br />
50
Testing<br />
Testing Engine Systems<br />
When IN 01 appears in the SRI display, switch the ignition off, procedure is completed.<br />
<strong>Vehicle</strong>s with Electronic Service Interval Reset<br />
On VW/<strong>Audi</strong> vehicles with electronic dashboards, the following functions may be available from<br />
the Functional Tests menu:<br />
• Reset Service Interval<br />
• Reset Service Interval Oil(Km)<br />
• Reset Service Interval Insp1(Km)<br />
• Reset Service Interval Insp1(Days)<br />
• Reset Service Interval Insp2(Days)<br />
• Reset Days And Km After Service<br />
• Pre-set Value Oil(Km)<br />
• Pre-set Value Oil(Days)<br />
• Pre-set Value Insp1(Km)<br />
• Pre-set Value Insp1(Days)<br />
• Pre-set Value Insp2(Km)<br />
• Pre-set Value Min Oil(Km)<br />
• Pre-set Value Max Oil(Km)<br />
• Pre-set Value Oil Quality(Km)<br />
• Read, Set Km Remaining To Oil Service<br />
• Read, Set Days Remaining To Oil Service<br />
• Read, Set Km Remaining To Insp1<br />
• Read, Set Days Remaining To Insp1<br />
• Read, Reset Km After Oil Service<br />
• Read, Reset Days After Oil Serv.<br />
• Read, Reset Days After Insp1<br />
• Read, Reset Km After Insp2<br />
Note the following when performing an electronic service interval reset.<br />
• Depending on the type of Electronic Instrument Panel, there are 4 to 9 functions available for<br />
Service Resetting.<br />
• The service intervals are measured/set/reset in kilometers even when the speedometer<br />
shows miles. The scan tool will calculate the equivalence in miles when showing kilometers.<br />
• Remember that the service intervals can be changed in steps of 100 or 1000 kilometers only.<br />
It is not always possible to set them to a round number of miles. The only exceptions are some<br />
new instrument panels, Type H and J, which use miles as base value.<br />
• Depending on the type of Instrument Panel, up to three different types of service intervals are<br />
available:<br />
– Oil Service— Oil Change<br />
– Inspection 1— Yearly Inspection<br />
– Inspection 2— Bi-yearly Inspection<br />
• Depending on the type of Instrument Panel, the limit values for the above type of inspections<br />
are in kilometers and/or days.<br />
51
Testing<br />
Testing Engine Systems<br />
z To perform an electronic service interval reset:<br />
1. Select 17-Electronic Instrument Panel from the System Selection menu.<br />
2. From the Main Menu, select Functional Tests.<br />
The Functional Tests menu displays.<br />
3. Select Reset Service Interval.<br />
The scan tool displays a warning message.<br />
4. Select to continue.<br />
The Reset Service Interval screen displays.<br />
The number displayed is the recommended value by the factory. This value can be changed<br />
by scrolling.<br />
5. Select the correct amount.<br />
The new value is entered into the control module and the scan tool returns to the Functional<br />
Tests menu.<br />
Pre-set Functions<br />
The Pre-Set functions are used to specify the total length in kilometers and or days between the<br />
service intervals. These functions only specify the time or distance between intervals, they do not<br />
reset the interval.<br />
z To use pre-set functions:<br />
1. Select the desired function from the Functional Tests menu.<br />
The scan tool displays a warning message.<br />
2. Select to continue.<br />
The number displayed is the current value.<br />
3. If the value is not to be changed, return to the Functional Tests menu. If the value requires<br />
changing, select continue to open the Change Confirmation screen.<br />
4. Select continue.<br />
The Change Preset Value screen displays.<br />
The number displayed is the current value. When it has never been changed, it is the factory<br />
setting. This value can be changed by scrolling.<br />
5. Select the correct amount.<br />
The new value is entered into the control module and the scan tool returns to the Functional<br />
Tests menu.<br />
Read, Set/Reset Functions<br />
The Read, Set and Read, Reset functions can be used to read the kilometers or days since the<br />
last service set them to the required value. These functions are only needed when an inspection<br />
has been carried out prematurely (before the service interval is required). These functions work<br />
the same as the Pre-Set functions. See “Pre-set Functions” on page 52.<br />
52
Testing<br />
Testing Transmission Systems<br />
5.3 Testing Transmission Systems<br />
The VAG software cartridge covers the following transmissions:<br />
• AG4 Getriebe 001<br />
• AG4 Getriebe 018<br />
• AG4 Getriebe 01F<br />
• AG4 Getriebe 01K<br />
• AG4 Getriebe 01M<br />
• AG4 Getriebe 01N<br />
• AG4 Getriebe 01P<br />
• AG4 Getriebe 096<br />
• AG4 Getriebe 097<br />
• AG4 Getriebe 098<br />
• AG5 Getriebe 01L<br />
• AG5 Getriebe 01V<br />
• AG5 Getriebe 09A<br />
• AG5 Getriebe 09B<br />
• Digimat 0842<br />
• Direkt-Schaltgetriebe DS085<br />
• Multitronic V30 01J<br />
VW automatic transmission controllers started using digital diagnostics in 1989 on the Passat with<br />
the 095 transmission (4-speed) and continued with 096/01M and 098/01P. 5-speeds include the<br />
01V and 09A. All VW transmissions use digital controllers with codes.<br />
<strong>Audi</strong> started with the 097 transmission (4-speed) in 1990 on 80/90/100 models and continued with<br />
01F, 01K, 01N 5-speeds, which includes the 01L and 01V transmissions. The newest<br />
transmission called the Constant Velocity Transmission (CVT) is designated the 01J.<br />
The VW/<strong>Audi</strong> vehicle communication software starts VIN ID in 1991 (US vehicle systems). On<br />
early 1990–1992 vehicles, using VIN ID regular mode the scan tool may display codes only.<br />
Using regular mode, transmission data may not be available until 1993, but you can use Expert<br />
Mode to read transmission data on pre-1993 vehicles. See Table 5-8 for coverage.<br />
Table 5-7 lists <strong>Volkswagen</strong>/<strong>Audi</strong> transmissions from 1988 to 2003 and their features, and<br />
Table 5-8 on page 57 lists <strong>Volkswagen</strong>/<strong>Audi</strong> transmissions with the models where they are found.<br />
Table 5-7 Transmission types and system descriptions (part 1 of 4)<br />
Transmission Transmission Features Notes<br />
018 (ZF4HP24)<br />
• 4-speed longitudinal AWD<br />
• TCC On/Off Solenoid<br />
01F (ZF4HP18)<br />
01J<br />
• 4-speed longitudinal AWD<br />
• TCC variable lockup<br />
• TCM: 54-pin, 55-pin, or 88-pin connector<br />
• 5 shift programs<br />
• 2 emergency running modes<br />
• CVT longitudinal FWD<br />
• TCM inside transmission rear cover<br />
53
Testing<br />
Testing Transmission Systems<br />
Table 5-7 Transmission types and system descriptions (part 2 of 4)<br />
Transmission Transmission Features Notes<br />
01K (ZF4HP18)<br />
01L (ZF5HP24)<br />
01M<br />
01N<br />
01P<br />
• 4-speed longitudinal FWD<br />
• TCC variable lockup<br />
• TCM: 54-pin, 55-pin, or 88-pin connector<br />
• 5-speed longitudinal AWD<br />
• TCC variable lockup<br />
• Lifetime oil<br />
• TCM: 88-pin connector<br />
• 4-speed transverse FWD<br />
• Fuzzy logic, 253 constantly adapting shift<br />
strategies<br />
• Cold start & limp home programs<br />
• TCM: 68-pin connector<br />
• Converter clutch in torque converter and uses<br />
PWM solenoid for variable lockup<br />
• Sun shell speed sensor (trans VSS) added for shift<br />
timing<br />
• Trans ID stamped in case at top of starter boss<br />
• Dipstick replaced with fluid level plug<br />
• 4-speed longitudinal FWD<br />
• Used mid-1995 to present<br />
• Lifetime oil<br />
• TCM: 68-pin connector<br />
• Dynamic shift program<br />
• Convertor clutch in torque converter and Uses<br />
PWM solenoid for variable lockup<br />
• Sun shell speed sensor added for shift timing<br />
• Dipstick replaced with fluid level plug<br />
• 4-speed transverse FWD<br />
• Fuzzy logic, 253 constantly adapting shift<br />
strategies<br />
• Cold start & limp home programs<br />
• TCM: 68-pin connector<br />
•TCC-PWM<br />
• Sun shell speed sensor<br />
• Used mid-year 1995 to present<br />
• 098 renamed 01P.<br />
• Converter clutch in torque converter and uses<br />
PWM solenoid<br />
• Sun shell speed sensor added for shift timing<br />
• Dipstick replaced with fluid level plug<br />
Tiptronic appeared on some<br />
models in 1998. E17 was the<br />
earliest control system. E18/2<br />
started late 1998 on some<br />
models. CAN bus appear in<br />
some models in 1998.<br />
096 was renamed 01M and<br />
used from mid-1995 to<br />
present; year model 1995<br />
may have 096 Phase 1 or<br />
01M Phase 2 trans.<br />
097 was renamed 01N in<br />
mid-1995; year model 1995<br />
may have 097 Phase 1 or 01N<br />
Phase 2 trans.<br />
Model year 1995 may have<br />
either 098 Phase 1 or 01P<br />
Phase 2 trans.<br />
54
Testing<br />
Testing Transmission Systems<br />
Table 5-7 Transmission types and system descriptions (part 3 of 4)<br />
Transmission Transmission Features Notes<br />
01V (ZF5HP19)<br />
095<br />
096<br />
• 5-speed longitudinal<br />
•FWD or AWD<br />
• TCC variable lockup<br />
• Lifetime oil<br />
• TCM: 88-pin connector<br />
• 4-speed transverse FWD<br />
• Economy/Sport switch on console near shift lever.<br />
• K3 clutch locks gear train one to one with torque<br />
converter for lockup with On/Off solenoid.<br />
• Trans ID stamped at top of bell housing on some.<br />
• External transmission oil filter (If not updated<br />
“removed” with bulletin #37-91-03).<br />
• 4-speed transverse FWD<br />
Phase 0<br />
• Used to mid-1993<br />
• TCM: 38-pin connector<br />
• Economy/Sport switch on console near shift lever<br />
• K3 clutch locks gear train one to one with torque<br />
converter for lockup with On/Off solenoid<br />
• Trans ID stamped at top of bell housing<br />
Phase 1<br />
• Used mid-year 1993 to mid year 1995<br />
• Fuzzy logic, 253 constantly adapting shift<br />
strategies<br />
• Cold start & limp home programs<br />
• TCM: 38-pin or 68-pin connector<br />
• K3 clutch locks gear train one to one with torque<br />
converter for lockup with On/Off solenoid<br />
• Economy/Sport switch deleted<br />
• Sport shift map in TCM<br />
(Used for VW and <strong>Audi</strong>)<br />
FL = FWD, FLA = AWD<br />
VW/<strong>Audi</strong>: Tiptronic appeared<br />
on some models in 1998. E17<br />
was the earliest control<br />
system. E18/2 control system<br />
started late 1998 on some<br />
models. CAN bus appear in<br />
some models in 1998.<br />
VW Only: Replaces 01M<br />
transmission starting 1998<br />
Passat model year.<br />
VW introduced the transverse<br />
4-speed,<br />
electronically-controlled 095<br />
automatic transmission in<br />
model year 1989. It was soon<br />
replaced by the 096<br />
transmission in mid-1990.<br />
096 replaced the 095<br />
transmission in mid-1990;<br />
year model 1993 may have<br />
096 Phase 0 or Phase 1 trans;<br />
1995 may have 096 phase 1<br />
or 01M phase 2.<br />
55
Testing<br />
Testing Transmission Systems<br />
Table 5-7 Transmission types and system descriptions (part 4 of 4)<br />
Transmission Transmission Features Notes<br />
097<br />
098<br />
09A<br />
09G<br />
• 4-speed longitudinal FWD<br />
Phase 0:<br />
• TCM: 38-pin connector<br />
• Used to mid-1993<br />
• Economy/Sport switch on console near shift lever<br />
• K3 clutch locks gear train one to one with torque<br />
converter hub for lockup with On/Off solenoid<br />
Phase 1:<br />
• TCM: 38-pin connector<br />
• Used mid-1993 to mid-1995<br />
• K3 clutch locks gear train one to one with torque<br />
converter for lockup. Uses On/Off solenoid<br />
• Economy/Sport switch deleted<br />
• Sport shift map in TCM<br />
• 4-speed transverse FWD<br />
• Fuzzy logic, 253 constantly adapting shift<br />
strategies<br />
• Cold start & limp home programs<br />
• TCC On/Off<br />
Phase 0:<br />
• TCM has 38-pin connector<br />
• Used to mid-1993<br />
• Economy/Sport switch on console near shift lever<br />
• K3 clutch locks gear train one to one with torque<br />
converter hub for lockup with On/Off solenoid<br />
Phase 1:<br />
• TCM: 38-pin or 68-pin connector<br />
• Used mid-1993 to mid-1995<br />
• K3 clutch locks gear train one to one with torque<br />
converter for lockup and Uses On/Off solenoid<br />
• Economy/Sport switch deleted<br />
• Sport shift map in TCM<br />
• 5-speed transverse FWD<br />
• Lifetime oil<br />
• TCM: 68-pin connector<br />
• 6-speed automatic transmission<br />
• 6 hydraulically activated forward gears<br />
• 2nd, 3rd, 4th, and 6th gears mechanically driven<br />
with TCC locked.<br />
• ATF oil is filled for life and is not changed.<br />
• Uses fuzzy logic adaptation to driving with infinitely<br />
variable gear switch points.<br />
Model year 1993 may have<br />
either 097 Phase 0 or Phase 1<br />
trans.; 1995 may have either<br />
097 or 01N.<br />
Introduced when Eurovan<br />
replaced Vanagon in 1992;<br />
year model 1993 may have<br />
098 Phase 0 or Phase 1<br />
trans.; 1995 also has 01P.<br />
2002 Golf/Jetta has either<br />
01M or 09A<br />
56
Testing<br />
Testing Transmission Systems<br />
Table 5-8 Transmission applications (part 1 of 2)<br />
Transmission Model Engine Year<br />
Control System<br />
Version<br />
018 (ZF4HP24) V8<br />
3.6L 1990–92<br />
4.2L 1993–94<br />
01F (ZF4HP18)<br />
A6 2.8L 1995–98<br />
100 2.8L 1992–94<br />
01J<br />
1.8L, 1.9L,<br />
A4 2.0L, 2.4L,<br />
2.5L, 3.0L 2003–05 Multitronic<br />
01K (ZF4HP18)<br />
01L (ZF5HP24)<br />
01M<br />
A6 3.0L<br />
A6 2.8L 1994–98<br />
100 2.8L 1992–94<br />
A6 4.2L 1999–2005<br />
A8 4.2L 1997–2005<br />
Phaeton<br />
4.2L 2004–05<br />
6.0L 2004–05<br />
VW Cabrio 2.0L 1995–2002<br />
L4 1.8L 1995–2005<br />
Golf/Jetta/GTI 1.9L TD 1995–2005<br />
2.0L, V6 2.8L 1995–2005<br />
New Beetle<br />
1.8L, 1.9L,<br />
2.0L<br />
1998–2005<br />
Passat<br />
1.8L, 1.9L,<br />
2.0L, V6 2.8L<br />
1995–97<br />
E17–E18/2<br />
All 01M trans. are<br />
Phase 2<br />
01N<br />
01P<br />
01V (ZF5HP19)<br />
095<br />
<strong>Audi</strong> Cabriolet 2.8L 1995–98 All 01N trans. are<br />
90 2.8L 1995<br />
Phase 2<br />
Eurovan<br />
2.4L, L5 2.5L,<br />
2.8L<br />
1995–2005<br />
1.8L 1997–2003<br />
A4<br />
2.7L 1998–2003<br />
2.8L 1996–2001<br />
3.0L 2002<br />
A6<br />
2.7L 2000–03<br />
2.8L 1998–2003<br />
A8 3.7L 1997–99<br />
Golf/GTI/Jetta 1.8L, 2.8L 2001–03<br />
Passat FWD<br />
1.8L, 2.8L,<br />
4.0L<br />
Passat AWD<br />
2.8L<br />
4.0L<br />
Corrado/<br />
Passat<br />
All 01P trans. are<br />
Phase 2<br />
E17–E18/2<br />
E18/2<br />
E17–E18/2<br />
1998–2005 E17, E18/2<br />
1989–90 Phase 0<br />
57
Testing<br />
Testing Transmission Systems<br />
Table 5-8 Transmission applications (part 2 of 2)<br />
Corrado<br />
1.8L 1989–92<br />
Phase 0<br />
1992–93<br />
2.8L<br />
1993–95 Phase 1<br />
1.8L<br />
1993 Phase 0<br />
1993–95 Phase 1<br />
096<br />
Golf/Jetta 2.0L<br />
1993 Phase 0<br />
1993–95 Phase 1<br />
2.8L<br />
1993 Phase 0<br />
1993–95 Phase 1<br />
1990–93 Phase 0<br />
2.0L<br />
1993–95 Phase 1<br />
Passat<br />
1993 Phase 0<br />
V6 2.8L<br />
1993–95<br />
Phase 1<br />
VW Cabrio 2.0L early 1995<br />
<strong>Audi</strong> Cabriolet 2.8L 1994–95 Phase 1<br />
097<br />
80 2.3L<br />
1990–92<br />
2.3L<br />
Phase 0<br />
90<br />
1992–mid-93<br />
2.8L<br />
mid-1993–95 Phase 1<br />
100 1990–92 Phase 0<br />
098 Eurovan<br />
1992–93 Phase 0<br />
L5 2.5L<br />
1993–95<br />
Phase 1<br />
2.4L 1993–95<br />
1.8L 132 KW,<br />
Golf/Jetta 2.8L 147 KW, 2002<br />
2.8L 150 KW<br />
09A<br />
Golf GTI<br />
Jetta<br />
1.8L, 2.0L,<br />
1.9TDI, 2.8L,<br />
Jetta Wagon<br />
3.2 VR6<br />
R32<br />
1999–05<br />
09G<br />
Transmission Model Engine Year<br />
VW New<br />
Beetle/<strong>Audi</strong> TT<br />
Passat, Jetta<br />
1.8/2.0L,<br />
1.9 TDI, 2.5L,<br />
3.6L<br />
1998 (Beetle)<br />
2005 (TT)<br />
Control System<br />
Version<br />
6-speed<br />
5.3.1 Digimat Control Module Identification—Golf & Jetta, 1993–97<br />
Use Table 5-9 and Table 5-10 to identify which TCMs are available for various 50 state ECM/TCM<br />
combinations. Do not update a vehicle unless a specific condition has been identified.<br />
58
Testing<br />
Testing Transmission Systems<br />
When replacing a TCM for any reason, the TCM must be paired with the ECM according to the<br />
chart. VIN numbers are for general reference only. Most VINs shown are approximate.<br />
When multiple TCM part numbers are listed for a particular ECM/TCM combination, they are<br />
shown in order of development, the earliest TCM at the top. Part numbers are for reference only.<br />
Always check a <strong>Volkswagen</strong> parts department for the latest information.<br />
Table 5-9 Engine code AAA<br />
Model<br />
Year<br />
ECU<br />
Part Number<br />
Vin<br />
TCM Part<br />
Number<br />
Digimat<br />
Trans Code<br />
& Phase<br />
Valve<br />
Body<br />
Code<br />
1995<br />
021906258BM<br />
021906258EA<br />
021906258CR<br />
California<br />
From: 1H_S_012883<br />
To: 1H_S_012952*<br />
From: 1H_S_012883<br />
To: 1H_S_072798<br />
From: 1H_S_072799<br />
To: 1H_S_999000<br />
096927731CE 1.0<br />
096927733AC<br />
096927733BA<br />
2.0<br />
01M927733F 2.0<br />
01M927733FJ 2.1<br />
CFF Phase<br />
1<br />
QBA<br />
1996 021906259A From: 1H_T_000001<br />
01M927733AC 2.0<br />
01M927733CB 2.1<br />
CLB Phase<br />
2<br />
7DK<br />
QCA<br />
1997<br />
021906259K<br />
021906259AA<br />
From: 1H_V_000001<br />
To: 1H_V_073027<br />
From: 1H_V_073028<br />
To: 1H_V_999000<br />
01M927733CB<br />
01M927733DM<br />
2.1<br />
DMA Phase<br />
2<br />
QEA<br />
* German-built vehicles<br />
Table 5-10 Engine code ABA (part 1 of 2)<br />
Model<br />
Year<br />
1993<br />
1994<br />
1995<br />
ECU<br />
Part Number<br />
037906258T<br />
037906258AA<br />
037906258AH<br />
037906258AE<br />
037906258T<br />
037906258AA<br />
037906258AH<br />
037906258AE<br />
037906258T<br />
037906258AA<br />
037906258AH<br />
037906258AE<br />
Vin<br />
From: 1H_P_012601<br />
To: 1H_P_999000<br />
From: 1H_R_000001<br />
To: 1H_R_999000<br />
From: 1H_S_000001<br />
To: 1H_S_012952<br />
From: 1H_S_012953<br />
To: 1H_S_066798<br />
From: 1H_S_066799<br />
To: 1H_S_999000<br />
TCM Part<br />
Number<br />
Digimat<br />
Trans Code &<br />
Phase<br />
096927731BH 1.0 CFH Phase 1<br />
096927731BH 1.0<br />
096927733AB<br />
096927733AT<br />
2.0<br />
CFH Phase 1<br />
CNK Phase 1<br />
01M927733BA<br />
2.0<br />
01M927733CD<br />
CLK Phase 2<br />
CLA Phase 2<br />
01M927733EB 2.1<br />
Valve<br />
Body<br />
Code<br />
QBA<br />
7DK<br />
QCA<br />
59
Testing<br />
Testing Transmission Systems<br />
Table 5-10 Engine code ABA (part 2 of 2)<br />
Model<br />
Year<br />
ECU<br />
Part Number<br />
Vin<br />
TCM Part<br />
Number<br />
Digimat<br />
Trans Code &<br />
Phase<br />
Valve<br />
Body<br />
Code<br />
037906259<br />
037906259X<br />
037906259JX<br />
From: 1H_T_000001<br />
To: See footnote<br />
01M927733M 2.0<br />
01M927733DN<br />
01M927733EA<br />
1996<br />
037906259D<br />
Tier 1 (w/LDP)*<br />
037906259E<br />
TLEV (w/air<br />
pumps & LDP)*<br />
From: 1H_T_118928<br />
To: 1H_T_999000<br />
From: 1H_T_117284<br />
To: 1H_T_999000<br />
01M927733CA<br />
2.1<br />
CLK Phase 2<br />
7DK<br />
1997<br />
037906259D<br />
Tier 1 (w/LDP)*<br />
037906259E<br />
TLEV (w/air<br />
pumps & LDP)*<br />
037906259M<br />
Tier 1 (w/LDP)*<br />
037906259N<br />
TLEV (w/air<br />
pumps & LDP)*<br />
From: 1H_V_000001<br />
To: See footnote<br />
From: 1H_V_070133<br />
To: 1H_V_999000<br />
From: 1H_V_074116<br />
To: 1H_V_999000<br />
01M927733CA<br />
01M927733DL<br />
2.1<br />
CLK Phase 2<br />
DLZ Phase 2<br />
“ETA”<br />
7DK<br />
QEA<br />
5.3.2 4-Speed Automatic Transmission—01N<br />
The 01N transmission is an electronically-controlled transmission with adaptive control. Shift<br />
points are automatically regulated to provide three distinct operating characteristics:<br />
• Comfort driving, maximum fuel economy (shift points are kept low)<br />
• Average driving (shift points are slightly raised)<br />
• High-performance driving (shift points increase to allow higher engine speed between gears)<br />
The transmission control module can tune the shift program incrementally between these modes<br />
with up to 244 variations. This is referred to as the DSP (Dynamic Shift Program). Each of these<br />
244 variations can be seen using the scan tool. Tapping the accelerator twice will raise the<br />
program one level, which means that the transmission shift points will occur at a higher engine<br />
RPM. These increments are indicated on the scan tool by numbers 0–244, with 0 representing the<br />
lowest RPM shift points and 244 indicating the highest.<br />
5.3.3 VW Series—095, 096, 01M<br />
These TCMs have gear changes based on driving situation (Fuzzy Logic). Depending on the<br />
driving situation and driving force resistance, gear change points are determined automatically.<br />
These transmissions have the following advantages:<br />
• Gear changes are fuel consumption orientated.<br />
• Maximum engine output is always available.<br />
60
Testing<br />
Testing Transmission Systems<br />
• Individual adaptation of gear change points in all driving situations.<br />
• Gear change points are infinitely variable.<br />
A gear change map automatically selects gear changes for gradients depending on accelerator<br />
pedal position and driving speed, which has the following advantages:<br />
• Gear change map for extreme uphill stretches is matched to engine output.<br />
• Gear change map for extreme downhill stretches is matched to the engine braking effect.<br />
5.3.4 <strong>Audi</strong> Transmission—01F, 01K<br />
NOTE:<br />
i <strong>Audi</strong> transmission Fuzzy Logic Shift Adaptation features are usually more complicated than<br />
<strong>Volkswagen</strong> transmissions.<br />
The Dynamic Selection Program (DSP) represents a new form of intelligent switching logic. DSP<br />
eliminates the program switch. It can choose automatically between five different selection<br />
programs and makes for optimum adaptation of the gear selection characteristic to vehicle<br />
handling and usage conditions. The signals for Throttle-valve Opening, Engine Speed, Road<br />
Speed and <strong>Vehicle</strong> Longitudinal Acceleration/deceleration are used by the TCM to determine a<br />
characteristic response number which forms the basis for selection of one of the five programs.<br />
Control of the shift points can be a long-term or a short-term function.<br />
DSP offers the following advantages:<br />
• Better adaptation of shift points to driving habits and traffic situations (five instead of two<br />
selection programs).<br />
• No driver-selected program switch.<br />
• Better handling in extreme situations, for example when towing a trailer or on a steep hill.<br />
• Greater fuel economy than previous “Economy” driving program in urban traffic.<br />
• Further improved power potential in selection program 5 as opposed to the previous “sport”<br />
driving program.<br />
Long-term functions include the following:<br />
• A normal driving style results in a low characteristic response number which results in a more<br />
fuel-economic selection program where the gears are shifted in average time.<br />
• A sporty driving style results in a high characteristic response number and a selection<br />
program where switching up a gear is delayed and switching down a gear is done sooner.<br />
Short-term functions include the following:<br />
• Instant selection program at a road speed in excess of 34 MPH (55 KPH).<br />
• With rapid acceleration, a shift-down to the lowest possible gear without fully depressing the<br />
kickdown switch.<br />
• Returns to the original selection program following initiation of an upward gearshift or after<br />
dropping below a fixed throttle-valve value.<br />
61
Testing<br />
Testing Transmission Systems<br />
5.3.5 Important Tips for Transmission Codes<br />
• For both VW and <strong>Audi</strong>, on 1996 and newer models, when emission or limp-home related<br />
transmission faults are stored, all the dash transmission gear selector indicator lights may turn<br />
on and stay on until fault is cleared. For some pre-OBD-II models, the PRND321 light may turn<br />
on or flash. Some may reverse video foreground/background (black background/white letters)<br />
when transmission codes are stored.<br />
• For both VW and <strong>Audi</strong>, transmission limp-home mode defaults to a fixed gear (2nd or 3rd<br />
gear). Certain stored codes initiate limp-home mode. The transmission stays in limp-home<br />
until the fault or faults are repaired.<br />
• Multifunction switch-related faults usually turn the transmission MIL on. Other faults are less<br />
predictable.<br />
• Transmission codes affecting emissions may not turn on the transmission MIL.<br />
• For some sensor-related faults, the transmission control unit may substitute a fixed value.<br />
• Not all faults initiate limp-home mode. There are different degrees of limp-home mode<br />
depending on the problem.<br />
• After repairs, solenoid-related faults usually clear failsafe mode. Other faults usually require a<br />
clear codes function before the failsafe clears. In addition, the transmission may not shift<br />
correctly until codes are cleared. Always clear codes after repairs which reset any modified<br />
shift operation or failsafe mode.<br />
• On 1996 or newer models, disconnecting the vehicle battery will not turn out the engine or the<br />
transmission MIL.<br />
• Intermittent faults have “Error Occurs Intermittent” after the code description. Intermittent<br />
codes are faults usually not reoccurring within a minimum of 3 miles or 6 minutes and a<br />
maximum of 12 miles or 24 minutes. When a malfunction is first detected, it is stored as a<br />
static or pending malfunction. If the malfunction no longer exists after the above listed<br />
pre-determined time or distance traveled, then it is labeled intermittent. Intermittent faults<br />
usually auto erase after 625 miles or 20 hours of operation.<br />
• Codes may set if the vehicle battery is disconnected or if the transmission is removed from<br />
vehicle for service.<br />
• Most 1995 and earlier Bosch control modules may display a false DTC, such as<br />
“00513-Engine Speed Sensor (G28)” or “00526-Brake Light Implausible Signal” if the engine<br />
is not running. These fault codes should disappear once the engine is started. With a defective<br />
sensor, the engine would not start.<br />
• If DTC memory cannot be cleared, check that the ignition switch position was not altered<br />
during DTC retrieval. The ignition switch must remain on during DTC retrieval and the clearing<br />
procedure.<br />
• DTCs need to have the test followed exactly. First, check DTC memory and repair<br />
malfunctions. Next, erase DTC memory.<br />
• On early transmissions (1989–1992), use Expert Mode for data parameters. With some 1989<br />
models with the scan tool hooked up, the vehicle may only accelerate to 1900 RPM. This is<br />
normal vehicle software operation. Use Expert mode to obtain the data group binary readings<br />
and get help with interpretation in “Transmission Expert Mode Parameters” on page 148.<br />
62
Testing<br />
Testing Transmission Systems<br />
5.3.6 Transmission Basic Settings<br />
This selection for Basic Settings is different from the “Expert Mode” Basic Settings. This selection<br />
will only list up to two adaptation tests with help. See “Basic Settings” on page 45 for a complete<br />
description of Basic Settings.<br />
The following selections are available from the Basic Setting menu. The first selection, Throttle<br />
Body Adaptation, must be done in Engine testing (see “Engine Management Functional Test<br />
Menu” on page 46). Kickdown Function may be done in Transmission testing.<br />
Restore a system to Basic Setting (adaptation) after performing the following repairs:<br />
• Engine exchange<br />
• Throttle position adjustment<br />
• Throttle valve conversion<br />
• Replacement of throttle position sensor<br />
• Replacement of transmission control module<br />
• Transaxle shifting concern<br />
NOTE:<br />
i Check for any codes present and clear before starting this procedure.<br />
• Throttle Body Adaptation. In this Basic Setting, the control module learns the throttle<br />
position with an automatic procedure. The electronic throttle body needs to be readapted<br />
every time codes are cleared or control module power is disconnected.<br />
• Throttle Body and Transmission kickdown adaptations (also included as part of Readiness<br />
Codes) must be set to avoid driveability problems. The other OBD-II Readiness Codes will set<br />
on their own eventually and not produce driveability problems. Clearing codes may not<br />
necessarily change throttle body adaptation status to NOT OK, however, driveability problems<br />
may occur after an extended road test.<br />
• Kickdown Function. In this Basic Setting, the control module relearns the kickdown position<br />
for the automatic transmission. In addition, shift learned values are reset to base settings.<br />
Resetting can be very useful for various driving styles causing learned erratic shifting. The<br />
procedure must be followed exactly. Hold the throttle for 3 seconds, by pressing down the<br />
throttle fully to the floor, then release (make sure you feel the kickdown switch engage).<br />
– Always check for kickdown selection in the Engine Functional Test menu, as kickdown<br />
adaptation is not always included in the Readiness Code Charts.<br />
– Kickdown may also be selected in Expert Mode. In engine or transmission, select Basic<br />
Setting 04/000. Remember that in Expert mode there are no screen prompts. Once in<br />
Basic Settings, depress the throttle to floor for three seconds, then release. Press N to<br />
exit. New kickdown learn settings should be set (no feedback on-screen).<br />
– On some models, kickdown relearn may not set properly using Basic Settings in the<br />
transmission controller. There is no way to verify that the kickdown reset test has been<br />
completed by looking at the transmission data. A test drive before and after may verify that<br />
the test was completed or select engine management data and select display group 063.<br />
If kickdown adaptation status reports an error, go back and select Basic Settings in the<br />
Engine Management Functional Tests menu, then select kickdown as stated above.<br />
63
Testing<br />
Testing Transmission Systems<br />
NOTE:<br />
i VW added a resistor to the brake pedal circuit that activates the kickdown relearn procedure when<br />
the brake pedal has been depressed. This resets transmission adaptation on some models during<br />
brake apply.<br />
Important Tips for Transmission Basic Settings<br />
• Basic Settings 04/000 also resets transmission learned shifting adaptation to 0 or base point.<br />
Some early transmissions have no Basic Setting selection. To reset adaptation on these,<br />
switch the ignition on without starting the engine and press the accelerator all the way to the<br />
floor, turn ignition off, let up on accelerator, restart engine. Drive the car and monitor shifting.<br />
It should shift at default with no learning. Early transmissions may require an extended road<br />
test to learn new shift adaptation.<br />
5.3.7 Functional Tests—VW Passat 01V<br />
A differentiation is made between two types 01V transmissions:<br />
• Type I has the transmission input speed sensor (inductive sensor) secured to the underside<br />
of the valve body (E17).<br />
• Type II has the input speed sensor secured behind the valve body at the transmission housing<br />
(E 18-2).<br />
Both types have the following output diagnostic tests available in Functional Tests:<br />
• The output diagnostic test mode is a part of a system electric test. The output diagnostic test<br />
mode checks the solenoid valves, the shift lock solenoid, the kickdown switch, and the relay<br />
for the solenoid valves.<br />
• The output diagnostic test mode can only be performed when the selector lever is position “P”,<br />
the engine is not running and the vehicle is stationary.<br />
• The output diagnostic will be terminated if the engine is started.<br />
• The function of the solenoid valves 1-N88-, 2-N89-, 3-N90- and the solenoids for the selector<br />
lever lock are checked acoustically during the output diagnostic test mode. Avoid noise in the<br />
surrounding area during the acoustic check because the switching noise (clicking) of the final<br />
controls is very quiet.<br />
• The solenoid valves 4 –N91-, 5-N92-, 6-N93- and 7 –N94- are activated during the output<br />
diagnostic test mode. A direct functional check of these valves is not possible. But a possible<br />
electrical fault, which occurs during the activation, will be recognized by the on-board<br />
diagnostic (OBD) and stored in the DTC memory.<br />
• Only one complete output diagnostic test mode is possible after switching the ignition on. To<br />
repeat the output diagnostic test mode, the ignition must be switched off and on again<br />
(sometimes this may require engine to be started).<br />
64
Testing<br />
Testing Transmission Systems<br />
Type I Transmission (E17) Solenoid Activation<br />
Activation sequence:<br />
1. Solenoid valve 1 –N88-<br />
2. Solenoid valve 2 –N89-<br />
3. Solenoid valve 3 –N90<br />
4. Shift lock solenoid –N110-<br />
5. Solenoid valve 4 –N91-<br />
6. Solenoid valve 5 –N92-<br />
7. Solenoid valve 6 –N93-<br />
8. Solenoid valve 7 –N94-<br />
9. Kickdown switch –F8- (Kickdown for air conditioner)<br />
10. Solenoid valves relay<br />
NOTE:<br />
i If the kickdown switch is operated, the transmission control module briefly switches off the air<br />
conditioner compressor.<br />
Type II Transmission (E18/2) Solenoid Activation<br />
Activation sequence:<br />
1. Solenoid valve 1 –N88-<br />
2. Solenoid valve 2 –N89-<br />
3. Solenoid valve 3 –N90<br />
4. Shift lock solenoid –N110-<br />
5. Pressure control valve 1 –N215-<br />
6. Pressure control valve 2 –N216-<br />
7. Pressure control valve 3 –N217-<br />
8. Pressure control valve 4 –N218-<br />
9. Voltage supply for Solenoid valves<br />
NOTE:<br />
i Pressure-regulating valve –5- for automatic transmission –N233- could be displayed<br />
erroneously—valve –5- does not exist on the –N233-.<br />
Fail-safe Functions of the TCM<br />
If individual or several components or sensors fail, the transmission control module (TCM)<br />
activates corresponding substitute functions or backup programs to ensure the automatic<br />
transmission operates, allowing a vehicle to be driven to a safe location. The respective effect is<br />
noticeable on the operation and quality of the gearshifts.<br />
65
Testing<br />
Testing Transmission Systems<br />
If critical malfunctions occur and the TCM is active, the gear engaged at that moment is<br />
maintained initially. The TCM activates the “Fail-safe mode with active control module” as soon as<br />
the driving situation permits it while ensuring transmission security and road safety.<br />
Fail-safe Mode with Active Control Module<br />
• Transmission shifts out of all forward gears into hydraulic 4th gear. Torque converter clutch is<br />
open. All solenoid valves are de-energized.<br />
• Maximum shift pressure applied to the power-transmitting elements.<br />
• Reverse gear can be engaged. Selector lever lock is inactive (In “P” and “N”)<br />
• All the segments of the gear display light up completely.<br />
If the TCM fails, the transmission immediately continues to operate in “Fail-safe mode with<br />
non-active control module”.<br />
Fail-safe Mode with Non-active Control Module<br />
• Transmission shifts out of all forward gears into hydraulic 4th gear. Torque converter clutch is<br />
open. All solenoid valves are de-energized.<br />
• Maximum shift pressure applied to the power-transmitting elements.<br />
• Reverse gear can be engaged. Selector lever lock is inactive (“P” and “N”).<br />
• All the segments of the gear display are dark.<br />
• The TCM is completely inoperative and it is not possible to initiate the on-board diagnostic.<br />
5.3.8 VW/<strong>Audi</strong> Transmission Emergency Operation—01V<br />
If an electrical fault occurs, and depending on the TCM, emergency operation may use two<br />
different limp-home programs to prevent transmission damage while retaining the ability of the<br />
vehicle to move. In either mode, all segments of gear indicator usually light up.<br />
Emergency Operation 1<br />
In the absence of certain signals, the TCM switches to maximum modulation pressure (pressure<br />
for actuating shift elements). Clutches and brakes in the transmission are rapidly operated and<br />
protected against damage. The transmission will shift harshly in this mode.<br />
Emergency Operation 2<br />
In the absence of certain signals or actuator circuits, the TCM de-energizes the relay for the<br />
solenoid valves. The solenoid valves in the valve assembly are deactivated, thus preventing gear<br />
selection. If this occurs while the engine is running, 4th gear is engaged. If the vehicle is braked to<br />
a standstill, the engine cuts out since 4th gear is a direct mechanical drive with no converter<br />
action. On restarting the engine, it is possible to drive in 2nd gear and reverse.<br />
66
Testing<br />
Testing Electronic Throttle Systems<br />
NOTE:<br />
i Two important relays are housed in the control module. The solenoid-valve relay serves as a<br />
safety relay and is de-energized in limp-home mode as is the relay for the cruise control system.<br />
5.4 Testing Electronic Throttle Systems<br />
The following sections contain scan tool testing information for VW/<strong>Audi</strong> electronic throttle<br />
systems.<br />
5.4.1 Throttle Valve Control Module Adaptation<br />
All 1996 VW/<strong>Audi</strong> electronic throttle systems require adaptation. There are different electronic<br />
throttle types as described further in this section, but all types require the adaptation procedure<br />
whenever one of the following has occurred:<br />
• Throttle Valve Control Module, ECM, or TCM is removed or replaced.<br />
• Power supply to control module is interrupted.<br />
• Low or disconnected battery.<br />
• Codes are cleared.<br />
What the Adaptation Process Does<br />
The adaptation process involves the control module learning the different throttle valve positions<br />
so that it knows the exact throttle position. It compares previous voltage readings with new voltage<br />
reading inputs from two angle position sensors located inside the throttle actuator housing. If the<br />
adaptation procedure is successful, these new positions are stored in the control module. Simply<br />
put, throttle adaptation is the control module learning exact throttle positions against previous<br />
preprogrammed values. If the two sets of readings exceed the range of tolerance, an error is<br />
reported.<br />
Typical conditions before throttle adaptation include the following:<br />
• Key on engine off.<br />
• No stored DTCs.<br />
• Battery Voltage of at least 11.5 volts.<br />
• All electrical consumers switched off (lights, heater fan, etc.).<br />
• Throttle must be in closed position (foot off accelerator pedal).<br />
• Engine coolant temperature between 41–212°F (5–100°C). Certain vehicles may require<br />
above 176°F (80°C).<br />
• Intake temperature less than 212°F (100°C).<br />
Performing throttle body adaptation<br />
Throttle body adaptation is performed using Basic Settings listed under the Functional Test menu<br />
(“Basic Settings” on page 45) or in Expert Mode (“04-Basic Settings” on page 22). If selected in<br />
67
Testing<br />
Testing Electronic Throttle Systems<br />
Functional Tests, the automated menu will prompt you through the process. If using Expert Mode,<br />
see the Readiness Code Chart <strong>Manual</strong> for the exact application procedure. If applicable, throttle<br />
adaptation is always one of the first steps in the chart.<br />
Readiness Codes always need to be reset after codes are cleared or the battery has been<br />
disconnected. Throttle body adaptation relearn (part of Readiness Code procedure) is essential<br />
and may prevent the engine from starting (it can also cause MIL to go on or cause driveability<br />
problems). Clearing codes using a Generic OBD-II scan tool has the same effect.<br />
NOTE:<br />
i Clearing codes may not change throttle body adaptation status to NOT READY (060 or 098), but<br />
performing a throttle body adaptation after clearing codes is recommended to ensure no<br />
problems. See the <strong>Volkswagen</strong>/<strong>Audi</strong> OBD-II Readiness Code Charts for more information.<br />
An unsuccessful adaptation may be caused by any of the following:<br />
• Throttle valve is unable to close because of dirt or carbon buildup.<br />
• Battery voltage is too low.<br />
• Throttle body actuator connector is loose or contacts are corroded or damaged.<br />
• Throttle valve housing is distorted (check bolts for proper torque).<br />
• Engine was started or throttle was depressed during the adaptation.<br />
The scan tool performs the adaptation process by sending the correct command to the control<br />
module using a special operation mode called Basic Settings (see “Basic Settings” on page 45).<br />
After the scan tool sends the command to start the test, the control module sends the test<br />
measurements and the final adaptation result back to the scan tool.<br />
NOTE:<br />
i Throttle body faults may also cause misfire faults.<br />
If a throttle body faults occur, try to set adaptation again. If errors still occur, check and clean the<br />
throttle body. Attempt to set the adaptation again. If errors are still present, check for wiring and<br />
connection problems between the throttle body and the control module.<br />
What should I do if I get pedal position faults<br />
If pedal position faults occur, first check the wiring by using scan tool in measuring block 62, which<br />
will allow you to see both pedal sensors. Look for one pedal position sensor not responding.<br />
Next, check the connectors at throttle body and the control module. Check the wiring for continuity.<br />
Throttle body or pedal position faults may be caused by any of the following:<br />
• If the MIL stays on after the engine starts, the throttle body may be failing self-test at startup.<br />
• Cell phone antennas and cables can cause electromagnetic interference problems.<br />
Electronic throttle systems are sensitive to a low or disconnected battery, especially if the ignition<br />
was left on. With a low battery, adaptation settings may erase, which may cause poor idle or poor<br />
throttle response (emergency run mode). On the 2000/2001 Type III throttle actuator, this may<br />
cause a start and die condition. With this condition, the MIL may be on with a fault code set. The<br />
fault code will not clear until throttle body adaptation is performed. Throttle body adaptation reset<br />
procedure is done in Basic Settings Mode (04). See “Basic Settings” on page 45.<br />
68
Testing<br />
Testing Electronic Throttle Systems<br />
In an emergency, there is an alternative, less reliable method. Turn the ignition on for at least six<br />
seconds without operating the starter or depressing the accelerator pedal. The control module<br />
must register a Learning Requirement in order for this procedure to work because previously<br />
stored voltage readings from the angle sensors do not correspond to the new voltage readings.<br />
Electronic throttle valves are sealed units and are not serviceable. Internal component failure<br />
means replacing a complete unit.<br />
5.4.2 Electronic Throttle Types<br />
Due to availability at the time of this writing, the information below references VW, but the<br />
information regarding the three electronic throttle control systems is applicable to <strong>Audi</strong> (throttle<br />
system type by years is the same for <strong>Audi</strong>). The types listed below were developed for VW only.<br />
Type I<br />
VW Electronic Throttle Valve Control started in 1996 with the M5.9 management system. This first<br />
design replaced the separate Throttle Position Sensor and Idle Air Control Valve. This first<br />
electronic throttle body module still has a throttle cable (not full Drive-by-Wire system). This early<br />
style controls idle speed only by means of a movable throttle stop controlled by an electric servo<br />
motor which is connected to the throttle plate. Within the sealed housing (no adjustment<br />
capability) are the following 4 components:<br />
• Throttle Position Sensor (G69)<br />
• Closed Throttle Position (CTP) switch (F60)<br />
• Throttle Position (TP) sensor (G88)<br />
• Throttle Position (TP) actuator (V60)<br />
The G69 sensor has a full range (reads actual throttle plate position) 0.5–5.0V reference signal<br />
(called Throttle Position Sensor (V) on the scan tool). Voltage is high at idle, about 4.0–4.5V and<br />
low, about 0.3–0.8V, at wide open throttle (WOT).<br />
The G88 sensor reads the position of the idle or bottom throttle stop position of the actuator. On<br />
this sensor (called Throttle Valve Adjuster (V) on the scan tool), voltage normally reads in the 3–4<br />
V range. This type of sensor provides feedback on the throttle position actuator and the throttle<br />
stop position. Input voltage is crosschecked against the input voltage from the G69 sensor for<br />
plausibility. This G88 sensor, which has a reduced voltage range, changes minimally when the<br />
throttle is moved and the engine is running. The actuator only controls idle speed and opens<br />
during deceleration. Scan tool display group 060 or 098 (Throttle Valve Adjuster) at idle,<br />
part-throttle, and WOT:<br />
Idle:<br />
THROTTLE POSITION SENSOR (V) ______________________________________ 4.380<br />
THROTTLE VALVE ADJUSTER (IDLE)____________________________________ 3.680<br />
THROTTLE ADJUSTER MODE ___________________________________________IDLE<br />
ADAPTATION STATUS___________________________________________________ OK<br />
69
Testing<br />
Testing Electronic Throttle Systems<br />
Part-throttle:<br />
THROTTLE POSITION SENSOR (V) _______________________________________ 3.90<br />
THROTTLE VALVE ADJUSTER (IDLE) (V) __________________________________ 2.28<br />
THROTTLE ADJUSTER MODE __________________________________________ PART<br />
ADAPTATION STATUS___________________________________________________ OK<br />
WOT:<br />
THROTTLE POSITION SENSOR (V) ________________________________________ 0.8<br />
THROTTLE VALVE ADJUSTER (IDLE) (V) __________________________________ 1.66<br />
THROTTLE ADJUSTER MODE ________________________________________ ENRICH<br />
ADAPTATION STATUS___________________________________________________ OK<br />
With the key on and the engine off, Throttle Valve Adjuster (Idle) (V) voltage does not change with<br />
throttle movement. With the engine running and throttle movement, voltage change is minimal and<br />
lags behind the actual Throttle Position Sensor. Also note that actual Throttle Position Sensor has<br />
opposite voltage graph pattern to engine speed (high at idle and low at WOT).<br />
Type II<br />
The next type of electronic throttle system came out in 1998 with the VW M5.9.2 engine<br />
management system. It is similar to Type 1 (still has a throttle cable) except that cruise control is<br />
now integrated into the throttle valve control module. The important difference from Type I is that<br />
the scan tool does not display throttle position voltages. Instead, the scan tool display reads<br />
throttle angle (degrees) and percent. Also different from Type I, Throttle Valve Angle now<br />
increases with engine speed (moves up and down in the same direction), while Thr Valve Adjuster<br />
moves in the opposite direction to throttle or engine speed.<br />
Some vehicles may also read Display group 054 (Idle control) which includes Thr Valve Adjuster<br />
in degrees (THR ADJ (°) in a Codes & Data screen). Scan tool display group 060 (Throttle Valve<br />
Adjuster):<br />
THROTTLE VALVE ANGLE (degrees) ________________________________________2<br />
THR VALVE ADJUSTER (%) _____________________________________________ 75.2<br />
OPERATING MODE ENGINE_____________________________________________IDLE<br />
ADAPTATION STATUS___________________________________________________ OK<br />
THROTTLE VALVE ANGLE (degrees) _______________________________________36<br />
THR VALVE ADJUSTER (%) _____________________________________________ 57.6<br />
OPERATING MODE ENGINE____________________________________________ PART<br />
ADAPTATION STATUS___________________________________________________ OK<br />
THROTTLE VALVE ANGLE (degrees) _______________________________________85<br />
THR VALVE ADJUSTER (%) _____________________________________________ 39.2<br />
OPERATING MODE ENGINE____________________________________________ FULL<br />
ADAPTATION STATUS___________________________________________________ OK<br />
Type III<br />
The third type is the full Drive-by-Wire electronic throttle module that came out in 2000 (VW) on the<br />
M7.0, M7.1, M7.5.1 engine management systems. This system is easily recognized by the<br />
absence of a throttle cable. The accelerator pedal has two position sensors (variable resistors)<br />
both installed in a single housing and connected to the accelerator pedal. The throttle valve is<br />
actuated by a servo motor (throttle valve positioner) which is control module-controlled. There are<br />
two throttle valve angle sensors which measure throttle valve position. Each one sends its own<br />
70
Testing<br />
Testing Electronic Throttle Systems<br />
signal to the control module. Dual sensors are used for backup plausibility on both the accelerator<br />
position and throttle actuator position sensors in case one fails.<br />
Emergency Running or Limp-Home Mode<br />
There are two emergency running modes for accelerator pedal sensor failure; one for when one<br />
accelerator pedal sensor fails, and one for when both accelerator pedal sensors fail.<br />
When one accelerator pedal sensor fails:<br />
• Accelerator position is limited to a predefined value.<br />
• Brake pedal switch on indicates idling speed.<br />
• If there are implausible signals between sensors, then the lower value is used.<br />
• Comfort functions are disabled.<br />
• Electronic Engine Power (EPC) light is illuminated.<br />
When both accelerator pedal sensors fail:<br />
• EPC light is illuminated.<br />
• Engine runs only at idle speed.<br />
There are three emergency running modes for throttle actuator module failure. One for when one<br />
throttle valve angle sensor fails, one for when the throttle valve actuator fails or malfunctions, and<br />
one for when throttle valve position is not recognized.<br />
When one throttle valve angle sensor fails, engine power output is greatly reduced.<br />
When the throttle valve actuator fails or malfunctions (both angle sensors are good) and when<br />
throttle valve position is not recognized (implausible signals):<br />
• Voltage to the actuator is shutoff.<br />
• Throttle valve defaults to mechanical stop position.<br />
• Engine speed is limited to 1200 RPM.<br />
It is important to note that the control module can open and close the throttle valve independently<br />
of the driver. For example, under certain conditions, such as during traction control or electronic<br />
transmission shift optimization controlling engine torque, the driver’s foot may have little or no<br />
affect on acceleration. This system is an integrated subsystem, complete with its own on-board<br />
monitoring system and EPC indicator light.<br />
EPC Indicator Light Operation<br />
The EPC dash warning lamp is used for the Electronic Throttle Control System (Drive-by-Wire).<br />
The control module checks the throttle control system and turns the EPC light off if all checks out<br />
OK. It also turns the EPC light on if it detects a malfunction. Codes are stored and read at the<br />
control module.<br />
NOTE:<br />
i Field technicians note that in addition to Drive-by-Wire faults, the EPC light may also be turned on<br />
for other engine non-emission related faults. If a fault is emission-related and EPC-related, then<br />
both MIL and EPC lights may be on.<br />
71
Testing<br />
Testing ABS Systems<br />
NOTE:<br />
i At idle, neither the Throttle Valve Angle Sensor nor the Accelerator Pedal Position Sensor are<br />
monitored for faults. If the accelerator pedal module becomes disconnected, it may not set a code<br />
nor turn the EPC light on (field reports indicate that in some cases a throttle body code may set).<br />
In this condition, the engine only idles and does not respond to accelerator input.<br />
Here is an example of a late model Drive-by-Wire data as read on the scan tool in display group<br />
062 (EPCSYSTEM):<br />
IDLE:<br />
THROTTLE VALVE ANGLE SNS 1 (%) _______________________________________ 11<br />
THROTTLE VALVE ANGLE SNS 2 (%) _______________________________________87<br />
ACCEL.PEDAL POSITION SNS 1 (%)________________________________________14<br />
ACCEL.PEDAL POSITION SNS 2 (%)_________________________________________7<br />
WOT:<br />
THROTTLE VALVE ANGLE SNS 1 (%) _______________________________________87<br />
THROTTLE VALVE ANGLE SNS 2 (%) _______________________________________ 11<br />
ACCEL.PEDAL POSITION SNS 1 (%)________________________________________76<br />
ACCEL.PEDAL POSITION SNS 2 (%)________________________________________38<br />
Readings for Throttle Valve Angle Sns 1 & 2 are inverse to each other at idle and WOT. Also note<br />
that Accel Pedal Position Sns 1 is double Accel Pedal Position Sns 2 (this is true for any pedal<br />
position).<br />
5.5 Testing ABS Systems<br />
The following sections contain scan tool testing information for VW/<strong>Audi</strong> antilock brake systems<br />
(ABS).<br />
NOTE:<br />
i The VW/<strong>Audi</strong> vehicle communication software starts VW/<strong>Audi</strong> US VIN ID in 1991 and only<br />
identifies those ABS systems with Codes and Data (does not retrieve blink codes).<br />
The scan tool communicates with the VW ABS systems in Table 5-11.<br />
Table 5-11 VW ABS system applications (part 1 of 2)<br />
ABS Systems Codes Data<br />
ABS 20 IE CAN YES YES<br />
ABS 30 IE CAN YES YES<br />
ABS 5.3 Front YES YES<br />
ABS 5.7 Front YES YES<br />
ABS Bosch 5 YES YES<br />
ABS Front MK60 YES YES<br />
ABS ITTAE 20 DI YES YES<br />
ABS Teves 04 YES NO<br />
ABS/ASR 5.3 Front YES YES<br />
72
Testing<br />
Testing ABS Systems<br />
Table 5-11 VW ABS system applications (part 2 of 2)<br />
ABS Systems Codes Data<br />
ABS/EDS 20 IE CAN YES YES<br />
ABS/EDS 5.3 YES YES<br />
ABS/EDS 5.3 Front YES YES<br />
ABS/EDS 5.3 Quattro YES YES<br />
ABS/EDS Bosch 5 YES YES<br />
ABS/EDS ITTAE 20 GI YES YES<br />
ABS/EDS Teves 02 YES NO<br />
ABS/EDS Teves 04 YES NO<br />
ABS/ESP Allrad YES YES<br />
ABS/ESP Front YES YES<br />
ASR 20 IE CAN YES YES<br />
ASR Front MK60 YES YES<br />
Bremson-Elektronik YES YES<br />
ESP 20 CAN YES YES<br />
ESP 5.3 T4 Front YES YES<br />
ESP 5.7 Allrad YES YES<br />
ESP 5.7 Front YES YES<br />
ESP 5.7 RS YES YES<br />
ESP Allrad MK60 YES YES<br />
ESP Front MK60 YES YES<br />
Table 5-12 lists VW ABS systems and Table 5-13 lists <strong>Audi</strong> ABS systems.<br />
Table 5-12 VW ABS types and system descriptions (part 1 of 2)<br />
ABS Type Year/Model Codes/Data Connector<br />
TEVES MK II<br />
ABS/EDL<br />
TEVES MK IV<br />
ABS/EDL<br />
• 1990 Jetta GLI (9A)<br />
• 1991–92 Jetta GLI (9A)<br />
• 1989–91 Corrado (PG)<br />
• 1992 Corrado (AAA)<br />
• 1994–95 Jetta VR6 (AAA)<br />
• 1995 Cabriolet (ABA)<br />
• 1993–95 Golf (ABA)<br />
• 1995 Golf/GTI VR6 (AAA)<br />
• 1993–94 Corrado (AAA)<br />
• 1992–95 Passat (AAA)<br />
Blink codes<br />
Codes and Data<br />
Blink codes<br />
Codes and Data<br />
Codes and Data<br />
Gear lever box under<br />
shift lever cover. White/<br />
Black connector<br />
The connector may be<br />
in one of three<br />
locations. See<br />
Table 3-3 on page 13<br />
for connector location<br />
information.<br />
EDL = Electronic Differential Lock; ASR = Anti-Slip Regulation; ESP = Electronic Stability Program<br />
73
Testing<br />
Testing ABS Systems<br />
Table 5-12 VW ABS types and system descriptions (part 2 of 2)<br />
ABS Type Year/Model Codes/Data Connector<br />
TEVES ITT MARK 20<br />
IE<br />
ABS/EDL<br />
Smaller pump than<br />
TEVES MK IV<br />
TEVES 60 IE/EDL/<br />
ASR/ESP/Front<br />
wheel drive or<br />
4Motion<br />
ABS/EDL/ASR/ESP<br />
No mechanical brake<br />
pressure regulator<br />
• 1996 Passat (AAA)<br />
• 1997/8–2000 all models<br />
• 1998–2005 New Beettle<br />
• All 2003 models<br />
• 2005 New Golf GTI<br />
• 1997–2003 Eurovan (Bosch<br />
5.0/5.3)<br />
• Up to 2001 Passat (Bosch 5.3)<br />
• 2002–03 Passat (Bosch 5.7)<br />
• 2004–05 Phaeton (Bosch 5.7)<br />
Codes and Data<br />
Codes and Data<br />
Codes and Data<br />
OBD-II DLC under left<br />
side of dash<br />
OBD-II DLC under left<br />
side of dash<br />
OBD-II DLC under left<br />
side of dash<br />
EDL = Electronic Differential Lock; ASR = Anti-Slip Regulation; ESP = Electronic Stability Program<br />
Table 5-13 <strong>Audi</strong> ABS types and system descriptions<br />
ABS Type Year/Model Codes/Data Connector<br />
BOSCH II ABS<br />
BOSCH 5.0<br />
ABS/EDL<br />
BOSCH 5.3<br />
• 1996–88 5000 Quattro<br />
• 1988–92 90/90 Quattro<br />
• 1992–94 80<br />
• 1992–94 S4<br />
• 1994 100<br />
• 1995 A6/A6 Quattro<br />
• 1996–97 A6<br />
None<br />
None<br />
Codes Auxiliary relay station 1<br />
at rear of engine<br />
compartment<br />
Codes and Data<br />
ABS/EDL/ASR/ESP • 1998–2002 A4/A6/A8 Codes and Data<br />
BOSCH 5.7<br />
ABS/EDL/ASR/ESP<br />
ABS/EDL/ASR ITT<br />
Mark 20 IE<br />
MARK 60 IE<br />
ABS/EDP/ESP ITT<br />
• 2002-2004 A4<br />
• 2003-2004 A4 Cabrio<br />
• 2004 S4<br />
• 2004 A8L<br />
• 2001–02 A4<br />
• 2001–04 A6<br />
• 2005 TT<br />
• 2003–05 TT<br />
• 2005 A3<br />
EDP = Electronic Brake Distribution<br />
OBD-II DLC under left<br />
side of dash<br />
74
Testing<br />
Testing Immobilizer Systems<br />
Important Tips for <strong>Audi</strong> ABS Testing<br />
• In many of the newer models, there will be a series of beeps from the dash when you access<br />
the ABS controller (and the ABS light will be on during diagnostics). This is normal and is done<br />
to notify the driver that the ABS is nonfunctional while in diagnostic mode.<br />
! WARNING<br />
Risk of erratic vehicle response.<br />
• Do not use the Output Tests function on any system while the car is in motion. Running<br />
Output Tests on the ABS can temporarily disable brakes entirely and cause individual<br />
wheels to lock and unlock.<br />
Erratic vehicle response can cause serious injury.<br />
5.5.1 ABS Basic Settings<br />
Basic Setting must be selected from Expert Mode to perform the following for late model traction<br />
and stability control:<br />
• Zero position adjustment of steering angle sensor.<br />
• Test the plausibility of sensor signals (yaw and press) for transverse acceleration.<br />
• Any brake bleeding on systems equipped with Electronic Stability Control (ESP) (ESP<br />
hydraulic pump requires basic settings to bleed).<br />
NOTE:<br />
i ABS/ESP Basic Setting brake bleeding usually requires login.<br />
z To login for ABS/ESP Basic Setting brake bleeding:<br />
1. Select 03-ABS/EDL/ESP/TCS.<br />
2. Select 11 Login.<br />
3. Enter Login Code from Service <strong>Manual</strong> (varies with model and year).<br />
4. Select channel 002.<br />
5. Follow procedure from the Service <strong>Manual</strong>.<br />
5.6 Testing Immobilizer Systems<br />
NOTE:<br />
i All Immobilizer functions must be done in Expert Mode.<br />
In the US, <strong>Volkswagen</strong> has three generations of antitheft systems.<br />
The first system was used in the early 1990s. The 1996–99 Golf/Jetta may have a key fob with a<br />
transmitter used for remote activation of the Pneumatic Central Locking System. This system has<br />
no self-diagnostic capability and is nothing more than series of micro switches in the doors, hood<br />
and trunk and a starter lockout. When armed, the alarm would sound if a door, hood or trunk was<br />
opened and the starter circuit would be deactivated. The important aspect to remember here is<br />
that this system does not have an ignition key immobilizer, it is an alarm system only.<br />
75
Testing<br />
Testing Immobilizer Systems<br />
The second system, Immobilizer II. It came out on some 1999 models, but was used only on the<br />
2000/2001 Golf, Jetta and New Beetle. Immobilizer II uses an electronic key that prevents the<br />
engine from starting without a matching key microchip. There is a symbol in the instrument cluster<br />
showing a key inside a car. If a new (or different control module) is installed in the vehicle, the<br />
Immobilizer prevents the engine from running and causes the symbol to flash. The scan tool<br />
performs all of the adaptation functions on the Immobilizer II system including new key adaptation,<br />
but only if the 4-digit security code is available for that specific vehicle. This security code may be<br />
found under a scratch-off tag on the key fob or a scratch-off tab on the instrument cluster (which<br />
has to be removed to inspect).<br />
The third system, called Immobilizer III, came out on some VW models in approximately 1999.<br />
Electric door locks replaced the pneumatic locks and Radio Remote Key fobs are replaced with<br />
either a straight or switchblade-type key that has an embedded transmitter. Immobilizer III also<br />
uses an electronic key. The Immobilizer prevents the engine from running without a matching key<br />
microchip. There is a symbol in the instrument cluster showing a key inside a car. If a new (or<br />
different control module) is installed in the vehicle, the Immobilizer prevents the car from running<br />
and causes the symbol to flash. The Immobilizer III system has self-diagnostic capability for both<br />
the remote and Locking Security System. The Immobilizer III system incorporates 4 systems:<br />
• Central Door Lock System (35)<br />
• Comfort System (46)<br />
• Electronic Instrument Panel (17)<br />
• Engine Control Module (01)<br />
5.6.1 Important Tips for Testing Immobilizer III Systems<br />
• Key matching is performed using an adaptation function in the Comfort System (46). With this<br />
system, a 7-digit secret key code (SKC) is required in order to perform any adaptation routine<br />
on most models. However, some early (1999) models use the 4-digit security code from the<br />
Immobilizer II system.<br />
• The 7 digit security code routine changes depending on whether you are using a brand new<br />
control module that has never been in any other car, or if you are using a used control module<br />
that has been previously matched to another car. See “Immobilizer II Engine Control Module<br />
Replacement Adaptation” on page 77.<br />
• The scan tool does not perform the Immobilizer III key adaptation function. The system<br />
requires a special 7-digit secret key code (SKC) currently only obtained from the VW or <strong>Audi</strong><br />
dealer. In the future, the factory tool may be hooked directly to a VW site and eliminate the<br />
need for the dealer to obtain the code. However, the scan tool does read the 14-digit<br />
Immobilizer control module identification number which must be provided along with the VIN<br />
to obtain the 7-digit security code. The scan tool also can perform ignition key matching to the<br />
key remote control system (see “Radio Frequency Remote Control Functions” on page 81).<br />
The information on Immobilizer III key adaptation is only to help you understand the process<br />
given the extreme importance and need. Please understand that this information is subject to<br />
change and is only current for the date at the time this manual was written.<br />
76
Testing<br />
Testing Immobilizer Systems<br />
5.6.2 <strong>Audi</strong> Immobilizers<br />
In the US, some early <strong>Audi</strong> models (1995–1996 A6) use the Infrared Remote key system and<br />
Pneumatic Central Locking that has no diagnostic capability. The 1997 A6, may have remote keys<br />
or a key fob with a transmitter to activate the central locking system. The remote key fob does not<br />
have diagnostic capability but the Central Locking does. <strong>Audi</strong> started using the Immobilizer III<br />
system in 1998.<br />
5.6.3 Immobilizer Adaptation Procedures<br />
The following sections provide Immobilizer adaptation procedures.<br />
Immobilizer II Engine Control Module Replacement Adaptation<br />
The following procedure introduces a new control module to the instrument cluster. This must be<br />
performed each time the engine control module is replaced on a system with Immobilizer II.<br />
z To perform control module replacement adaptation with Immobilizer II:<br />
1. Install the new control module in the car.<br />
2. Connect the scan tool to the vehicle and select Expert Mode (see “Initiating Expert Mode” on<br />
page 19 for more information).<br />
The Expert Mode System Selection menu displays.<br />
3. Select 17-Electronic Instrument Panel.<br />
The Expert Mode Function Selection menu displays.<br />
4. Select 10-Adaptation.<br />
The Select Adaptation Channel screen displays.<br />
5. Scroll in Channel 000 and press Y.<br />
The Clear Adaptation Values confirmation screen displays.<br />
6. Select to clear adaptation values.<br />
The Adaptation Value Stored screen displays.<br />
7. Select exit.<br />
8. Select 06-Stop <strong>Communication</strong>.<br />
9. Turn the ignition off for 10 seconds, then back on again. Leave the ignition on for two minutes<br />
without starting the engine. After two minutes, start the vehicle.<br />
Key Coding (Adaptation)<br />
The following procedure outlines the key coding (adaptation) procedure for the Immobilizer II<br />
(early Immobilizer III) systems that use a 4-digit security code. Currently, the scan tool cannot<br />
perform key matching or adapting using the 7-digit security code obtained from the dealer. The<br />
4-digit security code was available through 1999 (Immobilizer II) and may be found under a<br />
scratch-off tag on the key fob, or on a scratch-off tab on the instrument cluster (which has to be<br />
removed to inspect). All keys must be available at the start of the adaptation procedure.<br />
77
Testing<br />
Testing Immobilizer Systems<br />
z To perform a key adaptation:<br />
1. Connect the scan tool to the vehicle and select Expert Mode (see “Initiating Expert Mode” on<br />
page 19 for more information).<br />
2. Select 17-Electronic Instrument Panel (integrated immobilizer) or 25-Immobilizer if<br />
separated.<br />
The Function Selection menu displays.<br />
3. Select 11-Login Request.<br />
4. Scroll in the 4-digit security code preceded with a zero (for example, 0XXXX).<br />
5. Select to return to the Function Selection menu.<br />
6. Select 10-Adaptation.<br />
7. Scroll in 021 (or 001 for separate Immobilizer 25).<br />
8. Scroll in the number of keys to be programmed and select to store.<br />
After 2 seconds, the Immobilizer warning light in the dashboard should go off. The key in the<br />
ignition is now matched (adapted).<br />
9. Select to return to the Function Selection menu.<br />
10. Turn the ignition off and remove the key from the ignition switch<br />
11. Insert the next key into the ignition switch and turn the ignition switch on.<br />
The dashboard Immobilizer warning light should go on for about 2 seconds, then go out.<br />
12. As soon as the warning light goes out, turn the ignition off and remove the key.<br />
This key is now matched (adapted).<br />
13. Insert the next key into the ignition switch and turn the ignition switch on (within 30 seconds)<br />
and repeat procedure.<br />
NOTE:<br />
i All keys must be inserted and the ignition switch turned on within 30 seconds after removing the<br />
last key.<br />
14. After all keys are adapted, exit to return to the Function Selection menu.<br />
15. Select 06-Stop <strong>Communication</strong> before disconnecting the scan tool.<br />
NOTE:<br />
i Any keys that are not present for the adaptation will not be recognized by the vehicle after the<br />
matching has completed. Any keys that are not adapted cause the Immobilizer light to flash. If a<br />
mismatched or unadapted key is used to start the car, the engine starts, runs for 2 seconds, and<br />
then dies.<br />
Immobilizer III Engine Control Module Replacement Adaptation<br />
The following procedure introduces a new control module to the instrument cluster. This must be<br />
performed when the engine control module is replaced on an Immobilizer III system.<br />
z To perform control module replacement adaptation with Immobilizer III:<br />
1. Measure battery voltage.<br />
Voltage should be maintained at 12.5V or higher.<br />
2. Install the new control module in the vehicle.<br />
78
Testing<br />
Testing Immobilizer Systems<br />
3. Connect the scan tool to the vehicle and select Expert Mode (see “Initiating Expert Mode” on<br />
page 19 for more information).<br />
The System Selection menu displays.<br />
4. Select 01-Engine Management Master.<br />
The ECU ID screen displays.<br />
5. Verify that the VIN and the 14-digit Immobilizer serial number have been written to the new<br />
control module by checking the ECU ID.<br />
If they have not been written automatically to the new control module from the instrument<br />
cluster, a row of Xs displays, indicating that this action cannot be performed with the scan tool<br />
(requires 7-digit security code). If the VIN and the 14-digit serial number display, continue with<br />
the following steps to validate that the control module was coded correctly.<br />
6. Select to proceed to the Function Selection menu.<br />
7. Select 07-ECU Coding to make sure the control module coding is correct.<br />
8. Select to return to the Function Selection menu.<br />
9. Perform a Readiness Code Setting. See the “<strong>Volkswagen</strong>/<strong>Audi</strong> OBD-II Readiness Code<br />
Charts” supplement manual for details.<br />
Immobilizer II and III Adaptation: Remote Key Programming<br />
(Integrated Remote)<br />
New or additional ignition keys must be matched to the Immobilizer and comfort system control<br />
electronics. The matching procedure must always be carried out for all the ignition keys, including<br />
the existing ones. The number of keys already matched will be displayed when the adaptation<br />
(matching) function is selected. You must have all ignition keys available to perform this<br />
procedure. If there is no existing ignition key, contact your VW/<strong>Audi</strong> dealer.<br />
z To match ignition keys to radio frequency remote control:<br />
1. Insert correct profile (mechanically-programmed key marked “W”) key into the ignition lock<br />
(usually there is one mechanical key and 2 switchblade-type remote keys marked “W3”).<br />
2. Connect the scan tool to the vehicle and select Expert Mode (see “Initiating Expert Mode” on<br />
page 19 for more information).<br />
3. Select 46-Comfort System.<br />
4. Select 10-Adaptation.<br />
5. Enter Channel 000 (erase all keys with channel number 000).<br />
It is not possible to match new or additional keys without erasing existing keys.<br />
6. Select to confirm the deletion of learned values.<br />
7. Scroll in Channel 001.<br />
All keys are “learned” with channel number 001.<br />
8. Scroll to select the number of keys, including the existing mechanical key in the ignition<br />
switch, (e.g. 00003) and select to confirm.<br />
There is a maximum of four possible keys that can be matched.<br />
9. Select to exit back to the Function Selection menu.<br />
10. Press the lock or unlock button for one second, once on each of the radio frequency keys to<br />
be “learned” (in the example above, two keys). This must be completed within 15 seconds<br />
after exiting.<br />
11. After all the remote keys are adapted, select 06-Stop <strong>Communication</strong>.<br />
79
Testing<br />
Testing Immobilizer Systems<br />
12. Switch off the ignition and remove the ignition key.<br />
13. Test the remote keys for proper operation.<br />
VW 1996–99 Remote Key Programming (Separate Remote)<br />
Two keys and all remote controls that will be programmed are needed. A maximum of four keys<br />
can be programmed (old and new keys included).<br />
z To program 1996–99 mechanical keys:<br />
1. Insert the first key into the ignition switch and turn it to “ignition on.”<br />
2. Insert the second key into the outer door handle and turn it to the unlocked position for<br />
10 seconds.<br />
The system alarm will beep three times.<br />
3. Press button 1 on the first remote control to be programmed.<br />
The system alarm will beep two times.<br />
4. Press button 1 on the second remote control to be programmed.<br />
The system alarm will beep two times.<br />
5. Do the same for any further keys you wish to program.<br />
NOTE:<br />
i All remote controls must be programmed within one minute, otherwise the new programming will<br />
be cancelled.<br />
6. Turn the key in the outer door handle to the unlocked position for 10 seconds.<br />
The system alarm will beep once.<br />
7. Switch the ignition off.<br />
Important Tips for Setting Immobilizer Adaptations<br />
• All keys are “learned” in one matching sequence.<br />
• 15 seconds must not be exceeded when matching all ignition keys (pressing either the lock or<br />
unlock button).<br />
• A successful adaptation can be determined via Read Measured Value Block, function 08,<br />
display group number 013. The operation of the radio frequency unit measurement values<br />
must have the status OK. Simultaneously, the last measurement value will show the positional<br />
number of the key (i.e. first, second, third, fourth).<br />
• If the remote control key is operated several times, the third display “no measured value”<br />
changes to “OK.”<br />
• The matching of ignition keys is automatically terminated when:<br />
– Number of keys to be matched is reached.<br />
– A button of one of the keys to be “learned” is pressed frequently.<br />
– Permissible matching period of 15 seconds is exceeded (DTC is stored).<br />
• Select function 02-Check DTC Memory. If there is no DTC stored, the matching of the keys<br />
has been successfully completed.<br />
80
Testing<br />
Testing Immobilizer Systems<br />
5.6.4 Radio Frequency Remote Control Functions<br />
The functions in Table 5-14 on page 81 are examples of remote control variations that can be<br />
adapted by selecting 46-Comfort Systems > 10-Adaptation > channels 003–010.<br />
z To change the battery in the remote key:<br />
1. Insert a screwdriver in the slot between the transmitter unit -1- and the main key.<br />
2. Move the screwdriver to unclip the transmitter unit from the main key.<br />
3. Pry the transmitter unit apart on the two locating lugs.<br />
4. Unclip the upper battery from the retainers with a screwdriver.<br />
The contact plate has two straight edges. When these edges are turned toward the retainers,<br />
the contact plate can be removed. The contact plate can also be unclipped with a screwdriver.<br />
5. Unclip the lower battery from the retainers with a screwdriver.<br />
Table 5-14 Sample remote key option settings<br />
Passat, New Beetle, New Jetta, New Golf<br />
Channel 1998 1999–2000 Condition<br />
03<br />
04<br />
Auto-lock: <strong>Vehicle</strong> is locked at<br />
10 MPH (15 KPH)<br />
Interior monitoring switch off<br />
(if equipped)<br />
05 Unlock: Horn sounds<br />
Auto-lock: <strong>Vehicle</strong> is locked at<br />
10 MPH (15 KPH)<br />
Auto-unlock: <strong>Vehicle</strong> is<br />
unlocked when key is removed<br />
Interior monitoring switch off (if<br />
equipped)<br />
06 Lock: Horn sounds Unlock: Horn sounds<br />
07<br />
Unlock: Turn signals flash<br />
twice<br />
Lock: Horn sounds<br />
08 Lock: Turn signals flash once<br />
Unlock: Turn signals flash<br />
twice<br />
09 — Lock: Turn signals flash once<br />
10 —<br />
Not for North American<br />
vehicles<br />
1 = On<br />
0 = Off<br />
6. Place the battery with the positive terminal downward into the transmitter (positive terminal is<br />
marked on the housing).<br />
Note the polarity and correct position when installing the batteries.<br />
7. Place the contact plate on the battery.<br />
8. Place the battery, with the positive terminal downward, onto the contact plate and secure.<br />
9. Place the transmitter halves together and clip to fasten.<br />
10. Engage the transmitter unit with the main key.<br />
NOTE:<br />
i When operating a radio wave remote control, the LED must flash briefly. If the LED does not flash,<br />
the battery is discharged and must be replaced.<br />
—<br />
81
Testing<br />
Testing Immobilizer Systems<br />
5.6.5 Immobilizer Frequently Asked Questions<br />
Refer to the following frequently asked questions for additional information.<br />
How do you tell if you have an Immobilizer<br />
With the key on and engine off, look for a yellow key dash light which should come on momentarily<br />
and then off.<br />
What does a flashing key dash light mean<br />
If it does not go out and starts flashing, then the Immobilizer has detected a problem and most<br />
likely the engine will not start.<br />
What are the possible causes for the Immobilizer light to flash<br />
• Wrong ignition key was inserted into the ignition switch<br />
• Faulty key transponder<br />
• Faulty control module<br />
• Faulty Instrument Cluster<br />
What should always be done after working on the Immobilizer system<br />
• Check and clear any engine faults.<br />
• Check and clear any Immobilizer (25) faults.<br />
• Check and clear any CAN bus (19) faults.<br />
• Check and clear any Instrument Cluster (17) faults.<br />
How do you tell if you have Immobilizer II or III<br />
Immobilizer III knows the VIN, which is imbedded in the CAN bus control unit.<br />
z To distinguish between Immobilizer II or III:<br />
1. Connect the scan tool to the vehicle and select Expert Mode (see “Initiating Expert Mode” on<br />
page 19 for more information).<br />
2. Select 17-Electronic Instrument Panel or 25-Immobilizer (Separated).<br />
3. Select until the ECU ID screen displays.<br />
If you see something like “Immo-ID VWZ7Z0W0648696”, you have Immobilizer II.<br />
If you see something like “WVZKB58001H231169 VWZ7Z0W0648696”, you have<br />
Immobilizer III. The first 17-digit string is the VIN. The second 14-digit string is the Immobilizer<br />
identification number.<br />
What does the scan tool do on Immobilizer II<br />
It can perform all Immobilizer functions if the 4-digit, vehicle-specific security code is known.<br />
82
Testing<br />
Testing Electronic Instrument Panel Systems<br />
Does the scan tool work on Immobilizer III<br />
Yes. The scan tool can do key matching to the remote system and remote key adaptation.<br />
However, the scan tool cannot adapt new keys or adapt either an control module or Instrument<br />
Cluster to the Immobilizer III system.<br />
Is the key matching to the remote system the same procedure for<br />
Immobilizer II or III<br />
Yes, although there may be different remote key option configurations depending on the vehicle.<br />
5.7 Testing Electronic Instrument Panel Systems<br />
The following sections provide information for testing electronic instrument panel systems.<br />
5.7.1 Electronic Instrument Panel Types<br />
There are several types of Electronic Instrument Panels and the possibilities of each type are<br />
described in the following sections.<br />
Electronic Instrument Panel, Type A<br />
The available functions are:<br />
• Reset Service Interval Oil(Km)<br />
• Reset Service Interval Insp1(Km)<br />
• Reset Service Interval Insp1(Days)<br />
• Reset Service Interval Insp2(Days)<br />
After an Oil Service, the following must be used:<br />
• Reset Service Interval Oil(Km)<br />
After an Inspection 1, the following must be used:<br />
• Reset Service Interval Oil(Km)<br />
• Reset Service Interval Insp1(Km)<br />
• Reset Service Interval Insp1(Days)<br />
After an Inspection 2, the following must be used:<br />
• Reset Service Interval Oil(Km)<br />
• Reset Service Interval Insp1(Km)<br />
• Reset Service Interval Insp1(Days)<br />
• Reset Service Interval Insp2(Days)<br />
83
Testing<br />
Testing Electronic Instrument Panel Systems<br />
Electronic Instrument Panel, Type B<br />
The available functions are:<br />
• Reset Service Interval<br />
• Pre-set Value Oil(Km)<br />
• Pre-set Value Insp1(Km)<br />
• Pre-set Value Insp1(Days)<br />
• Read, Set Km Remaining To Oil Service<br />
• Read, Set Km Remaining To Insp1<br />
• Read, Set Days Remaining To Insp1<br />
After any service, with the dashboard service indication on, the following must be used:<br />
• Reset Service Interval<br />
After an Oil Service, with the dashboard service indication off, such as a premature service, use<br />
the following function:<br />
• Read, Set Km Remaining To Oil Service<br />
After an Inspection 1, with the dashboard service indication off, such as a premature service, use<br />
the following functions:<br />
• Read, Set Km Remaining To Insp1<br />
• Read, Set Days Remaining To Insp1<br />
Electronic Instrument Panel, Type C<br />
The available functions are:<br />
• Pre-set Value Oil(KM)<br />
• Pre-set Value Oil(Days)<br />
• Pre-set Value Insp1(Days)<br />
• Pre-set Value Insp2(KM)<br />
• Read, Reset Km After Oil Service<br />
• Read, Reset Days After Oil Serv.<br />
• Read, Reset Days After Insp1<br />
• Read, Reset Km After Insp2<br />
After performing the Oil Service, the following functions must be used:<br />
• Read, Reset Km After Oil Service<br />
• Read, Reset Days After Oil Serv.<br />
After performing the Inspection 1, the following function must be used:<br />
• Read, Reset Days After Insp1<br />
After performing the Inspection 2, the following function must be used:<br />
• Read, Reset Km After Insp2<br />
84
Testing<br />
Testing Electronic Instrument Panel Systems<br />
Electronic Instrument Panel, Type D<br />
The available functions are:<br />
• Pre-set Value Oil(Km)<br />
• Pre-set Value Insp1(Days)<br />
• Read, Reset Km After Oil Service<br />
• Read, Reset Days After Insp1<br />
After an Oil Service, the following function must be used:<br />
• Read, Reset Km After Oil Service<br />
After an Inspection 1, the following function must be used:<br />
• Read, Reset Days After Insp1<br />
Electronic Instrument Panel, Type E<br />
The available functions are:<br />
• Reset Service Interval<br />
• Pre-set Value Oil(Km)<br />
• Pre-set Value Insp1(Days)<br />
• Read, Reset Km After Oil Service<br />
• Read, Reset Days After Insp1<br />
After any service, with the dashboard service indication on, the following must be used:<br />
• Reset Service Interval<br />
After an Oil Service, with the dashboard service indication off, i.e. a premature service, the<br />
following function must be used:<br />
• Read, Reset Km After To Oil Service<br />
After an Inspection 1, with the dashboard service indication off, i.e. a premature service, the<br />
following function must be used:<br />
• Read, Reset Days After Insp1<br />
Electronic Instrument Panel, Type F<br />
The Type F Instrument Panel can be programmed to use fixed or flexible Service Intervals<br />
(Table 5-15). For a fixed interval, the variables are set15,000 KM. For flexible Service Intervals,<br />
minimum distance is set to 15,000 KM and Maximum is set to 30,000, 35,000 or 50,000 KM.<br />
Table 5-15 Service intervals<br />
<strong>Vehicle</strong> Type<br />
Interval Type Required<br />
<strong>Vehicle</strong>s with fixed intervals (Oil Quality 1)<br />
Gasoline engines (Oil Quality 2)<br />
6-cylinder diesel engines (Oil Quality 3)<br />
Diesel engines (Oil Quality 4)<br />
Fixed intervals (15000 kilometers, 9300 miles)<br />
Flexible intervals (30000 kilometers, 18600 miles)<br />
Flexible intervals (35000 kilometers, 21700 miles)<br />
Flexible intervals (50000 kilometers, 31000 miles)<br />
Insp1 has a factory setting of 365 days (1 year) for fixed intervals and 730 days (2 years) for flexible<br />
intervals.<br />
85
Testing<br />
Testing Electronic Instrument Panel Systems<br />
The available functions are:<br />
• Reset Service Interval<br />
• Pre-set Value Oil Quality(Km)<br />
• Pre-set Value Min Oil(Km)<br />
• Pre-set Value Max Oil(Km)<br />
• Pre-set Value Insp1(Days)<br />
After the Inspection the following functions must be used:<br />
• Pre-set Value Oil Quality(Km)<br />
Even when this number stays the same, this value must be changed. It is necessary for the<br />
internal housekeeping of the Instrument Panel. When the Oil Quality has been changed, check<br />
Minimum, Maximum and Insp1 for correct values, then reset the rest of the Instrument Panel.<br />
• Reset Service Interval<br />
Electronic Instrument Panel, Type G<br />
The Type G Instrument Panel can be programmed to use fixed or flexible Service Intervals.<br />
Interval variables are the same as for a Type F Instrument Panel. See Table 5-15 on page 85 for<br />
service intervals.<br />
The available functions are:<br />
• Reset Service Interval<br />
• Pre-set Value Oil Quality(Km)<br />
• Pre-set Value Min Oil(Km)<br />
• Pre-set Value Max Oil(Km)<br />
• Pre-set Value Min Insp(Days)<br />
• Pre-set Value Max Insp(Days)<br />
After the Inspection the following functions must be used:<br />
• Pre-set Value Oil Quality(Km)<br />
Even when this number stays the same, this value must be changed. It is necessary for the<br />
internal housekeeping of the Instrument Panel. When the Oil Quality has been changed, check<br />
Minimum, Maximum Oil and Minimum, Maximum Insp for correct values, then reset the rest of the<br />
Instrument Panel.<br />
• Reset Service Interval<br />
Electronic Instrument Panel, Type H<br />
The available functions are:<br />
• Reset Service Interval<br />
• Pre-set Value Oil(Miles)<br />
• Pre-set Value Insp1(Days)<br />
• Read, Reset Miles After Oil Service<br />
• Read, Reset Days After Insp1<br />
86
Testing<br />
Testing Electronic Instrument Panel Systems<br />
After any service, with the dashboard service indication ON, the following must be used:<br />
• Reset Service Interval<br />
After an Oil Service, with the dashboard service indication OFF (a premature service), the<br />
following function must be used:<br />
• Read, Reset Miles After Oil Service<br />
After an Inspection 1, with the dashboard service indication OFF, (a premature service), the<br />
following function must be used:<br />
• Read, Reset Days After Insp1<br />
Electronic Instrument Panel, Type I<br />
The available functions are:<br />
• Reset Service Interval<br />
• Pre-set Value Min Oil(Km)<br />
• Pre-set Value Max Oil(Km)<br />
• Pre-set Value Min Insp(Days)<br />
After the service the following must be used:<br />
• Reset Service Interval<br />
Electronic Instrument Panel, Type J<br />
The Type J Instrument Panel can be programmed to use fixed or flexible Service Intervals. Interval<br />
variables are the same as for a Type F Instrument Panel (see Table 5-15 on page 85).<br />
The available functions are:<br />
• Reset Service Interval<br />
• Pre-set Value Oil Quality(Miles)<br />
• Pre-set Value Min Oil(Miles)<br />
• Pre-set Value Max Oil(Miles)<br />
• Pre-set Value Insp1(Days)<br />
After the Inspection the following functions must be used:<br />
• Pre-set Value Oil Quality(Miles)<br />
Even when this number stays the same, this value must be changed. It is necessary for the<br />
internal housekeeping of the Instrument Panel. When the Oil Quality has been changed, check<br />
Minimum, Maximum Oil and Minimum, Maximum Insp for correct values, then reset the rest of the<br />
Instrument Panel.<br />
• Reset Service Interval<br />
Electronic Instrument Panel, Type K<br />
The available functions are:<br />
• Reset Service Interval<br />
87
Testing<br />
Testing Airbag (SRS) Systems<br />
After the service the following function must be used:<br />
• Reset Service Interval<br />
Refer to the vehicle owner’s manual for the actual values of the Service Interval settings.<br />
5.8 Testing Airbag (SRS) Systems<br />
There are currently three types of airbag (SRS) systems on VW/<strong>Audi</strong> vehicles.<br />
Airbag I came out in 1989 and was used until about 1993 for both VW and <strong>Audi</strong>. This system had<br />
only one driver’s side airbag and limited diagnostics—codes only (no data). California emission<br />
equipped vehicles may have red, white and black connectors. The red connector is for the Airbag I<br />
system. If the vehicle is Federal emission equipped, then it may only have a red and black<br />
connector. The airbag module on this system is pre-coded at the factory (no version coding).<br />
NOTE:<br />
i To read Airbag I codes without code definitions by hooking the white connector of the VW-1<br />
adapter to the red vehicle connector and the black VW-1 connector to the black vehicle connector.<br />
Airbag II was used from 1994 to 1995 for <strong>Audi</strong> models and from 1996 to 1998 for VW models. This<br />
SRS system displays codes and data and the module is version coded. This system uses<br />
pyrotechnics for seatbelt retraction and has dual airbags, one for the driver (steering wheel) and<br />
one for the passenger (front dash).<br />
Airbag III is used from 1996 to 2003 for <strong>Audi</strong> models and from 1998 to 2003 for VW models. This<br />
system displays codes and data and the module is version coded. This system also uses<br />
pyrotechnics for seatbelt retraction and has dual airbags for the driver (steering wheel) and<br />
passenger (front dash).<br />
Note the following when working on SRS systems:<br />
• 1993–94 VW vehicles may have no airbag systems.<br />
• For Airbag I, <strong>Audi</strong> has recalled KF for a static electricity deployment problem. The recall<br />
converts the system to an Airbag II module with codes and data but still has only the one<br />
driver’s side airbag. To see if recall has been done, lift up the rear seat and look for two<br />
separate modules bolted to the body sheet metal. If both modules have been removed and the<br />
harnesses are taped, then the recall has been performed. If these two modules are present,<br />
then recall has not been performed and should be done.<br />
• Airbag II and III systems are version coded. Be sure to use the latest version coding tables<br />
and that the battery is fully charged before coding the airbag modules. Coding is performed<br />
with the key on, engine off. Battery voltage should not drop below 11.6V. High quality battery<br />
chargers with noise and voltage spiking suppression are recommended.<br />
IMPORTANT:<br />
Coding and module corruption may occur if the battery goes dead during the coding process.<br />
• SRS components made for European vehicles are not the same as for the US. Certain<br />
aftermarket sport steering wheels with SRS may be available for sale that do not meet U.S.<br />
SRS deployment specifications. Always identify the correct airbag system and verify the<br />
correct component configuration prior to version coding.<br />
88
Testing<br />
Testing CAN Data Bus Systems<br />
5.9 Testing CAN Data Bus Systems<br />
Late 2001 and early 2002 models started using a CAN (Controller Area Network) data bus, which<br />
affects diagnostics and how and when the scan tool is used. The CAN data bus ensures that the<br />
electronics in the vehicle still remain manageable and do not take up too much space. CAN means<br />
that control units are networked and interchange data.<br />
1 2<br />
3<br />
4<br />
5<br />
1— ABS control module<br />
2— Door control modules<br />
3— Central control module<br />
4— Transmission control module<br />
5— electronic control module<br />
Figure 5-1 CAN control unit network<br />
The CAN data bus is made up of a controller, a transceiver, two data bus terminals, and two data<br />
bus lines. Apart from the data bus lines, the components are located in the control units.<br />
Accept<br />
Data<br />
Check<br />
Data<br />
Receive<br />
Data<br />
Provide<br />
Data<br />
Send<br />
Data<br />
Check<br />
Data<br />
Receive<br />
Data<br />
Accept<br />
Data<br />
Check<br />
Data<br />
Receive<br />
Data<br />
Data Bus Line<br />
Data Bus Line<br />
Figure 5-2 CAN bus data transfer process<br />
89
Testing<br />
Testing CAN Data Bus Systems<br />
The CAN controller receives the transfer data from the microcomputer integrated in the control<br />
unit. The CAN controller processes this data and relays it to the CAN transceiver. Likewise, the<br />
CAN controller receives data from the CAN transceiver, processes it and relays it to the<br />
microcomputer integrated in the control unit.<br />
The data bus does not have a designated receiver. Data is sent over the data bus and is generally<br />
received and evaluated by all subscribers (modules on the data bus).<br />
5.9.1 Sources of Interference<br />
Components which produce sparks or in which electric circuits are open or closed during<br />
operation can be sources of interference. Other sources of interference include mobile telephones<br />
and transmitter stations, or any other object which produces electromagnetic waves.<br />
Electromagnetic waves can affect or corrupt data transfer.<br />
To prevent interference with the data transfer, the two data bus lines are twisted together so that<br />
the voltage on both lines is opposed. That means that if a voltage of approximately 0 Volts is<br />
applied to the one data bus line, then a voltage of approximately 5 Volts is applied to the other line<br />
and vice versa. As a result, the total voltage remains constant at all times and the electromagnetic<br />
field effects of the two data bus lines cancel each other out. The data bus line is protected against<br />
received interference and is virtually neutral in sending interference.<br />
5.9.2 Powertrain CAN Bus<br />
The CAN data bus links the following:<br />
• The Motronic Engine management control unit<br />
• The ABS/EDL control unit<br />
• The automatic gearbox control unit<br />
The data bus operates at a speed of 500 kbit/s (500,000 bits per second). This means that it lies<br />
in a speed range (high speed) from 125 to 1000 kbit/s. A data protocol transfer takes about 0.25<br />
milliseconds. Each control unit tries to send its data at intervals of 7–20 milliseconds.<br />
If more than one control unit wants to send its data protocol simultaneously, the system must<br />
decide which control unit comes first. For safety reasons, the data protocol supplied by the ABS/<br />
EDL control unit is more important than the data protocol supplied by the engine control unit or<br />
automatic gearbox unit, so ABS/EDL data takes priority and is sent first. Table 5-16 demonstrates<br />
the order of priority of data on the CAN bus line.<br />
Table 5-16 Order of CAN bus information priorities in the drive train<br />
Priority Control Unit Example<br />
1 ABS/EDL Request for Traction Control System (TCS)<br />
2 ECU, data protocol 1 Engine speed; throttle valve position; kickdown<br />
3 ECU, data protocol 2 Coolant temperature; road speed<br />
4 TCM Gearshift; gearbox in emergency mode; selector lever position<br />
90
Testing<br />
Testing CAN Data Bus Systems<br />
NOTE:<br />
i All control units which interchange information must be regarded as an integrated system during<br />
self-diagnosis and troubleshooting. This means data displayed at one control unit may actually be<br />
shared from another control unit on the CAN Bus. Codes set in one control unit will often set codes<br />
in other control units which share the data bus. Always clear codes in each control unit and<br />
monitor in which control unit the codes return.<br />
5.9.3 CAN Data Bus in the Convenience System<br />
The following functions of the convenience system transfer data:<br />
• Central locking<br />
• Electric windows<br />
• Switch illumination<br />
• Electrically adjustable and heated door mirrors<br />
• Self-diagnosis<br />
In the convenience system, the CAN data bus currently connects the control units of the<br />
convenience system. These are a central electronic unit (09) and two or four door Central door<br />
Lock (35) control units.<br />
The lines of the control units converge at one point in a star pattern. The advantage: if one of the<br />
control units fails, the other control units are still able to send their data protocols. Each control unit<br />
tries to send its data at intervals of 20 milliseconds.<br />
The following list describes how the information in the convenience system is prioritized:<br />
1. Central control unit<br />
2. Control unit on driver’s side<br />
3. Control unit on front passenger’s side<br />
4. Control unit on rear left<br />
5. Control unit on rear right<br />
Since the data in the comfort system can be transferred at a relatively low speed, it is possible to<br />
use a transceiver with a lower power output. The advantage is that it is possible to change over to<br />
single-wire mode if a data bus line fails. The data can still be transferred.<br />
91
Chapter 6<br />
Data Parameters<br />
The following chapters provide definitions and operating ranges for the <strong>Volkswagen</strong> and <strong>Audi</strong><br />
vehicle data stream parameters.<br />
The ECM provides two basic kinds of parameters: digital (or discrete) and analog:<br />
• Digital (discrete) parameters are those that can be in only one of two states, such as on or<br />
off, open or closed, high or low, rich or lean, and yes or no. Switches, relays, and solenoids are<br />
examples of devices that provide discrete parameters on the control module data list.<br />
• Analog parameters are displayed as a measured value in the appropriate units. Voltage,<br />
pressure, temperature, time, and speed parameters are examples of analog values. The scan<br />
tool displays them as numbers that vary through a range of values in units, such as pounds<br />
per square inch (psi), kilopascal (kPa), degrees Celsius (°C), degrees Fahrenheit (°F),<br />
kilometers per hour (KPH), or miles per hour (MPH).<br />
The scan tool displays some data parameters in numbers that range from 0 to 100, 0 to 255, or 0<br />
to 1800. These ranges are used because it is the range that the control module transmits for a<br />
given parameter. However, many parameter readings never reach the highest possible number.<br />
The maximum range of a parameter often varies by year, model, and engine. On these<br />
applications, the word “variable” appears in the range heading. However, typical sampled values<br />
observed under actual test conditions are in the parameter description when available.<br />
Parameters may also be identified as input signals or output commands.<br />
• Input or feedback parameters are signals from various sensors and switches to the control<br />
module. They may display as analog or discrete values, depending upon the input device.<br />
• Output parameters are commands that the control module transmits to various actuators,<br />
such as solenoids and fuel injectors. They are displayed as discrete (ON/OFF) parameters,<br />
analog values or as a pulse-width modulated (PWM) signal.<br />
In the following section, parameters are presented as they appear on the scan tool screen. Most<br />
parameter descriptions are in alphabetical order, but there are exceptions. Often, the same<br />
parameter goes by a similar, but different, name when used on more than one model, engine, or<br />
control system. In these instances, all of the applicable parameter names, as displayed on the<br />
scan tool, are listed in alphabetical order before the description.<br />
To find the description of a parameter, locate it in the alphabetical index, then go to the indicated<br />
page. Parameters are listed in the index as they appear on the scan tool screen.<br />
The data parameter descriptions in this manual were created from a combination of sources. For<br />
most parameters, some basic information was provided by the vehicle manufacturers, then<br />
expanded through research and field testing. Parameter definitions and ranges may expand as<br />
more test results become available. For some parameters, no information is currently available.<br />
The scan tool may display names for some data parameters that differ from names displayed by<br />
a factory tool and other scan tools.<br />
Always use a meter or lab scope, to further validate the displayed values. If data is corrupted on<br />
multiple parameters, do not assume that the control module may be faulty. This corrupt data may<br />
be caused by improper communication between the scan tool and the control module controller.<br />
92
Data Parameters<br />
Alphabetical Parameter List<br />
6.1 Alphabetical Parameter List<br />
A<br />
A/C COMP SW OFF BY ENG-ECU ...............................................................................................................................105<br />
A/C COMPRESSOR .......................................................................................................................................................105<br />
A/C COMPRESSOR OFF ..............................................................................................................................................105<br />
A/C COMPRESSOR ON ................................................................................................................................................105<br />
A/C KICKDOWN .............................................................................................................................................................140<br />
A/C MODE ......................................................................................................................................................................105<br />
A/C READINESS ............................................................................................................................................................105<br />
A/C SWITCH ..................................................................................................................................................................105<br />
A/T ..................................................................................................................................................................................140<br />
A/T INPUT(RPM) ............................................................................................................................................................140<br />
A/T INPUT(RPM) ............................................................................................................................................................141<br />
A/T INPUT(RPM) ............................................................................................................................................................141<br />
A/T OUTPUT(RPM) ........................................................................................................................................................141<br />
A/T SWITCH ...................................................................................................................................................................141<br />
A/T(RPM) ........................................................................................................................................................................140<br />
ACCEL.PEDAL POSITION SNS 1(%) ............................................................................................................................105<br />
ACCEL.PEDAL POSITION SNS 2(%) ............................................................................................................................105<br />
ACCELERATION ENRICHMENT ...................................................................................................................................105<br />
ACCELERATOR PEDAL POSITION(%) ........................................................................................................................136<br />
Accelerator Pedal Value .................................................................................................................................................148<br />
ACTUAL ADAPTATION POSITION(V) ...........................................................................................................................105<br />
Actual Engine Torque .....................................................................................................................................................148<br />
ACTUAL SELECTED GEAR ..........................................................................................................................................140<br />
ACTUAL SOLENOID(A) .................................................................................................................................................140<br />
ADAPTATION ABORTED(BATTERY
Data Parameters<br />
Alphabetical Parameter List<br />
ALTITUDE CORRECTION FACTOR(%) ........................................................................................................................107<br />
AMBIENT TEMPERATURE(°C/°F) .................................................................................................................................107<br />
ATF TEMPERATURE(°C) ...............................................................................................................................................141<br />
AUX HEATING REQUESTED ........................................................................................................................................107<br />
B<br />
BAROMETRIC PRESSURE(mbar) ................................................................................................................................107<br />
BASE THR POS(IDLE SW CLSD)(°) .............................................................................................................................108<br />
BASE VALUE THROTTLE ADJUSTER .........................................................................................................................108<br />
BASE VALUE TPS .........................................................................................................................................................108<br />
BASE VALUE TPS(V) .....................................................................................................................................................108<br />
BATTERY VOLTAGE ......................................................................................................................................................141<br />
BATTERY VOLTAGE BELOW 9V ..................................................................................................................................136<br />
BATTERY VOLTAGE TOO LOW ....................................................................................................................................108<br />
BATTERY(V) ...................................................................................................................................................................108<br />
BOOST PRESSURE(ACTUAL)(mbar) ...........................................................................................................................108<br />
BOOST PRESSURE(ACTUAL)(mbar) ...........................................................................................................................136<br />
BOOST PRESSURE(DESIRED)(mbar) .........................................................................................................................108<br />
BOOST PRESSURE(DESIRED)(mbar) .........................................................................................................................136<br />
BOOST PRESSURE(mbar) ............................................................................................................................................108<br />
BRAKE LIGHT SWITCH .................................................................................................................................................141<br />
BRAKE PEDAL PRESSED ............................................................................................................................................108<br />
BRAKE PEDAL SWITCH ...............................................................................................................................................108<br />
C<br />
CAM ADJUSTER MODE ................................................................................................................................................108<br />
CAMSHAFT ADJUSTER ................................................................................................................................................109<br />
CAMSHAFT ADJUSTER(ACTIVE)(°) .............................................................................................................................109<br />
CAMSHAFT ADVANCE(°) ..............................................................................................................................................109<br />
CAMSHAFT PHASING ...................................................................................................................................................109<br />
CAMSHAFT POSITION(BANK 1)(°) ...............................................................................................................................109<br />
CAMSHAFT POSITION(BANK 2)(°) ...............................................................................................................................109<br />
CANISTER PURGE MODE ............................................................................................................................................109<br />
CANP CHARGE(%) ........................................................................................................................................................109<br />
CANP FLUSH .................................................................................................................................................................109<br />
CANP SYSTEM ACTIVE ................................................................................................................................................109<br />
CANP VALVE CLOSED ..................................................................................................................................................109<br />
CANP VALVE ON CHARGE ...........................................................................................................................................109<br />
CANP VALVE ON MIN MODE ........................................................................................................................................109<br />
CANP VALVE ON NORMAL MODE ...............................................................................................................................109<br />
CAT TEMPERATURE>300°C .........................................................................................................................................109<br />
CATALYST EFFICIENCY(%) ..........................................................................................................................................110<br />
CATALYST TEMPERATURE(°C/F) ................................................................................................................................109<br />
CHANGE OVER TO CHARGE MODE CANP ................................................................................................................110<br />
CHANGE OVER TO CLOSE MODE CANP ...................................................................................................................110<br />
CHANGE OVER TO MIN MODE CANP .........................................................................................................................110<br />
CLUTCH PEDAL PRESSED ..........................................................................................................................................110<br />
CLUTCH PEDAL SWITCH .............................................................................................................................................110<br />
CODING FOR SYNCRO(4WD) ......................................................................................................................................110<br />
COMBINED HALL & ENG SPEED SIGN .......................................................................................................................110<br />
CONTROL VALUE MIXTURE(%) ...................................................................................................................................110<br />
COOLANT TEMPERATURE >80°C ...............................................................................................................................110<br />
94
Data Parameters<br />
Alphabetical Parameter List<br />
COOLANT TEMPERATURE(°) ......................................................................................................................................136<br />
COOLANT TMP >70°C/OR AIR TEMP >5°C .................................................................................................................136<br />
COOLANT/AIRTMP SNS DEFECT ................................................................................................................................136<br />
CRUISE CTRL ENABLED ..............................................................................................................................................110<br />
CRUISE CTRL STATUS .................................................................................................................................................110<br />
CTRL VALUE IDLE AIR MASS(g/s) ...............................................................................................................................110<br />
CTRL VALUE MIXTURE(BANK 1)(%) ............................................................................................................................110<br />
CTRL VALUE MIXTURE(BANK 2)(%) ............................................................................................................................110<br />
CTRL VALUE MIXTURE/O2 ........................................................................................................................................... 111<br />
CTRL VALUE MIXTURE/O2(%) ..................................................................................................................................... 111<br />
CURRENT CONSUMPTION IAC(A) .............................................................................................................................. 111<br />
CURRENT CTRL FACTOR IAC ..................................................................................................................................... 111<br />
CURRENT CTRL IAC(%) ............................................................................................................................................... 111<br />
CYLINDER 1 RECOGNIZED ......................................................................................................................................... 111<br />
D<br />
DC(DUTY CYCLE)START OF DELIVERY .....................................................................................................................139<br />
DECEL ENLEAN ............................................................................................................................................................ 111<br />
DECELERATE POSITION .............................................................................................................................................. 111<br />
DECELERATION ENLEANMENT .................................................................................................................................. 111<br />
DIAGNOSE LEARN VALUE O2(BK1)IDLE .................................................................................................................... 111<br />
DIAGNOSE LEARN VALUE O2(BK1)P/T2 .................................................................................................................... 111<br />
DIAGNOSE LEARN VALUE O2(BK1)P/T3 .................................................................................................................... 111<br />
DIAGNOSE LEARN VALUE O2(BK1)P/T4 .................................................................................................................... 111<br />
DIAGNOSE LEARN VALUE O2(BK2)IDLE .................................................................................................................... 111<br />
DIAGNOSE LEARN VALUE O2(BK2)P/T2 .................................................................................................................... 111<br />
DIAGNOSE LEARN VALUE O2(BK2)P/T3 .................................................................................................................... 111<br />
DIAGNOSE LEARN VALUE O2(BK2)P/T4 .................................................................................................................... 111<br />
DRIVING SLIP CTRL .....................................................................................................................................................148<br />
DUTY CYCLE CANP VALVE ..........................................................................................................................................112<br />
DUTY CYCLE CANP VALVE(%) ....................................................................................................................................112<br />
DUTY CYCLE EGR-VALVE(%) ......................................................................................................................................112<br />
DUTY CYCLE FAN CTRL VALVE(%) .............................................................................................................................112<br />
DUTY CYCLE IAC(%) ....................................................................................................................................................112<br />
DUTY CYCLE ISC(%) ....................................................................................................................................................112<br />
DUTY CYCLE THR ADJUSTER(%) ...............................................................................................................................112<br />
DUTY CYCLE WASTE GATE VALVE(%) .......................................................................................................................112<br />
E<br />
EDS CUT OFF ................................................................................................................................................................150<br />
EGR-SYSTEM ................................................................................................................................................................112<br />
EGR-TEMPERATURE(°C/°F) .........................................................................................................................................112<br />
ENGINE CRANKED IN LAST 10S .................................................................................................................................136<br />
ENGINE LOAD AFTER REDUC(ms) .............................................................................................................................113<br />
ENGINE LOAD(%) .........................................................................................................................................................112<br />
ENGINE LOAD(ACTUAL)(%) .........................................................................................................................................112<br />
ENGINE LOAD(ACTUAL)(ms) .......................................................................................................................................113<br />
ENGINE LOAD(ACTUAL)(Nm) ......................................................................................................................................113<br />
ENGINE LOAD(AFTER CORR)(ms) ..............................................................................................................................113<br />
ENGINE LOAD(BEFORE CORR)(ms) ...........................................................................................................................113<br />
ENGINE LOAD(ms) ........................................................................................................................................................112<br />
ENGINE LOAD(V) ..........................................................................................................................................................112<br />
95
Data Parameters<br />
Alphabetical Parameter List<br />
ENGINE SPEED
Data Parameters<br />
Alphabetical Parameter List<br />
IDLE SPEED SWITCH OPEN ........................................................................................................................................115<br />
IDLE SPEED(ACTUAL)(RPM) .......................................................................................................................................114<br />
IDLE SPEED(DESIRED)(RPM) ......................................................................................................................................114<br />
IGN ADV W KNOCK & ISC(AV)(°) .................................................................................................................................115<br />
IGN RTD BY A/T-ECU(°) ................................................................................................................................................115<br />
IGN RTD BY DIGITAL ISC(°) .........................................................................................................................................115<br />
IGN RTD BY KNOCK CTRL(°) .......................................................................................................................................115<br />
IGN RTD BY KNOCK CTRL(CYL 1)(°) ...........................................................................................................................115<br />
IGN RTD BY KNOCK CTRL(CYL 2)(°) ...........................................................................................................................115<br />
IGN RTD BY KNOCK CTRL(CYL 3)(°) ...........................................................................................................................115<br />
IGN RTD BY KNOCK CTRL(CYL 4)(°) ...........................................................................................................................115<br />
IGN RTD BY KNOCK CTRL(CYL 5)(°) ...........................................................................................................................115<br />
IGN RTD BY KNOCK CTRL(CYL 6)(°) ...........................................................................................................................115<br />
IGN RTD BY KNOCK CTRL(CYL 7)(°) ...........................................................................................................................115<br />
IGN RTD BY KNOCK CTRL(CYL 8)(°) ...........................................................................................................................115<br />
IGN RTD BY KNOCK(°) .................................................................................................................................................115<br />
IGN RTD BY KNOCK(ALL CYL)(°) .................................................................................................................................115<br />
IGN RTD BY TCS-ECU(COLD)(°) ..................................................................................................................................115<br />
IGN RTD W/O KNOCK & W/O ISC(°) ............................................................................................................................115<br />
IGN RTD WITH KNOCK & ISC(°) ...................................................................................................................................115<br />
IGNITION ADV REDUCTION .........................................................................................................................................116<br />
IGNITION ADV(CALCULATED)(°) .................................................................................................................................116<br />
IGNITION ADVANCE(°) ..................................................................................................................................................116<br />
IGNITION MAP ...............................................................................................................................................................116<br />
INCREASED IDLE SPEED WITH A/C ON .....................................................................................................................116<br />
INCREASING RPM ........................................................................................................................................................116<br />
INJ DIFF CYL 1 TO 3(mg/S) ..........................................................................................................................................137<br />
INJ DIFF CYL 1 TO 4(mg/S) ..........................................................................................................................................137<br />
INJ DIFF CYL 1 TO 5(mg/S) ..........................................................................................................................................137<br />
INJ DIFF CYL 1 TO AVERAGE(mg/S) ...........................................................................................................................137<br />
INJ DIFF CYL 2 TO 3(mg/S) ..........................................................................................................................................137<br />
INJ DIFF CYL 2 TO 4(mg/S) ..........................................................................................................................................137<br />
INJ DIFF CYL 2 TO 5(mg/S) ..........................................................................................................................................137<br />
INJ DIFF CYL 2 TO AVERAGE(mg/S) ...........................................................................................................................137<br />
INJ DIFF CYL 3 TO 4(mg/S) ..........................................................................................................................................137<br />
INJ DIFF CYL 3 TO 5(mg/S) ..........................................................................................................................................137<br />
INJ DIFF CYL 3 TO AVERAGE(mg/S) ...........................................................................................................................137<br />
INJ DIFF CYL 4 TO 3(mg/S) ..........................................................................................................................................137<br />
INJ DIFF CYL 4 TO 5(mg/S) ..........................................................................................................................................137<br />
INJ DIFF CYL 4 TO AVERAGE(mg/S) ...........................................................................................................................137<br />
INJ DIFF CYL 5 TO 3(mg/S) ..........................................................................................................................................137<br />
INJ DIFF CYL 5 TO 4(mg/S) ..........................................................................................................................................137<br />
INJ DIFF CYL 6 TO 3(mg/S) ..........................................................................................................................................137<br />
INJ QUANTITY(CRUISE)(mg/S) ....................................................................................................................................137<br />
INJ QUANTITY(DESIRED)(mg/S) ..................................................................................................................................137<br />
INJ QUANTITY(DRIVER)(mg/S) ....................................................................................................................................137<br />
INJ QUANTITY(mg/S) ....................................................................................................................................................137<br />
INJ QUANTITY(mm3) .....................................................................................................................................................116<br />
INJ QUANTITY(SMOKE)(mg/S) .....................................................................................................................................137<br />
INJ QUANTITY(TCS)(mg/S) ...........................................................................................................................................138<br />
INJ QUANTITY(TORQUE A/T)(mg/S) ............................................................................................................................138<br />
INJ QUANTITY(TORQUE)(mg/S) ..................................................................................................................................137<br />
INJECTION TIME(AVERAGE)(ms) ................................................................................................................................116<br />
97
Data Parameters<br />
Alphabetical Parameter List<br />
INJECTION TIME(ms) ....................................................................................................................................................116<br />
INTAKE AIR TEMPERATURE(°) ....................................................................................................................................136<br />
INTAKE MANIFOLD PRESSURE(%) .............................................................................................................................116<br />
INTAKE MANIFOLD PRESSURE(mbar) ........................................................................................................................116<br />
ISC INTGRATOR ............................................................................................................................................................116<br />
ISC UNDER LOAD .........................................................................................................................................................117<br />
ISC(CTRL FACTOR) ......................................................................................................................................................116<br />
ISC(POSITION) ..............................................................................................................................................................116<br />
ISC(REACTION TO MALFUNCTION) ............................................................................................................................116<br />
K<br />
KICKDOWN SWITCH .....................................................................................................................................................142<br />
KICKDOWN SWITCH .....................................................................................................................................................142<br />
KNOCK CTRL(°) .............................................................................................................................................................117<br />
KNOCK SENSOR(CYL 1)(V) .........................................................................................................................................117<br />
KNOCK SENSOR(CYL 2)(V) .........................................................................................................................................117<br />
KNOCK SENSOR(CYL 3)(V) .........................................................................................................................................117<br />
KNOCK SENSOR(CYL 4)(V) .........................................................................................................................................117<br />
KNOCK SENSOR(CYL 5)(V) .........................................................................................................................................117<br />
KNOCK SENSOR(CYL 6)(V) .........................................................................................................................................117<br />
KNOCK SENSOR(CYL 7)(V) .........................................................................................................................................117<br />
KNOCK SENSOR(CYL 8)(V) .........................................................................................................................................117<br />
L<br />
LACK OF FUEL ..............................................................................................................................................................117<br />
LEARN AIR MASS IDLE(D)(g/s) ....................................................................................................................................117<br />
LEARN AIR MASS IDLE(g/s) .........................................................................................................................................117<br />
LEARN AIR MASS IDLE(P/N)(g/s) .................................................................................................................................117<br />
LEARN INJECTION TIME(ms) .......................................................................................................................................117<br />
LEARN MIXT(BANK 1)(IDLE)(%) ...................................................................................................................................118<br />
LEARN MIXT(BANK 1)(IDLE)(%) ...................................................................................................................................118<br />
LEARN MIXT(BANK 1)(P/T)(%) .....................................................................................................................................118<br />
LEARN MIXT(BANK 1)(P/T)(%) .....................................................................................................................................118<br />
LEARN MIXT(BANK 1)(P/T1)(%) ...................................................................................................................................118<br />
LEARN MIXT(BANK 1)(P/T2)(%) ...................................................................................................................................118<br />
LEARN MIXT(BANK 1)(P/T3)(%) ...................................................................................................................................118<br />
LEARN MIXT(BANK 2)(IDLE)(%) ...................................................................................................................................118<br />
LEARN MIXT(BANK 2)(IDLE)(%) ...................................................................................................................................118<br />
LEARN MIXT(BANK 2)(P/T)(%) .....................................................................................................................................118<br />
LEARN MIXT(BANK 2)(P/T)(%) .....................................................................................................................................118<br />
LEARN MIXT(BANK 2)(P/T1)(%) ...................................................................................................................................118<br />
LEARN MIXT(BANK 2)(P/T2)(%) ...................................................................................................................................118<br />
LEARN MIXT(BANK 2)(P/T3)(%) ...................................................................................................................................118<br />
LEARN RANGE O2 IDLE ...............................................................................................................................................118<br />
LEARN RANGE O2 P/T 2 ..............................................................................................................................................118<br />
LEARN RANGE O2 P/T 3 ..............................................................................................................................................118<br />
LEARN RANGE O2(BK1)IDLE .......................................................................................................................................118<br />
LEARN RANGE O2(BK1)P/T2 .......................................................................................................................................118<br />
LEARN RANGE O2(BK1)P/T3 .......................................................................................................................................118<br />
LEARN RANGE O2(BK1)P/T4 .......................................................................................................................................118<br />
LEARN RANGE O2(BK2)IDLE .......................................................................................................................................118<br />
LEARN RANGE O2(BK2)P/T2 .......................................................................................................................................118<br />
98
Data Parameters<br />
Alphabetical Parameter List<br />
LEARN RANGE O2(BK2)P/T3 .......................................................................................................................................118<br />
LEARN RANGE O2(BK2)P/T4 .......................................................................................................................................118<br />
LEARN VALUE AIR MASS IDLE(%) ..............................................................................................................................118<br />
LEARN VALUE AIR MASS IDLE(g/s) .............................................................................................................................118<br />
LEARN VALUE CANP SYSTEM ....................................................................................................................................119<br />
LEARN VALUE DC ISC ..................................................................................................................................................119<br />
LEARN VALUE DC ISC(%) ............................................................................................................................................119<br />
LEARN VALUE DC ISC(A/T) ..........................................................................................................................................119<br />
LEARN VALUE DC ISC(MUL)(%) ..................................................................................................................................119<br />
LEARN VALUE IAC ........................................................................................................................................................119<br />
LEARN VALUE IDLE SPEED(NOT P/N) ........................................................................................................................119<br />
LEARN VALUE IDLE SPEED(P/N) ................................................................................................................................119<br />
LEARN VALUE ISC ........................................................................................................................................................119<br />
LEARN VALUE ISC(AT IN D) .........................................................................................................................................119<br />
LEARN VALUE ISC(MT/AT IN P/N) ................................................................................................................................119<br />
LEARN VALUE KICKDOWN(%) .....................................................................................................................................119<br />
LEARN VALUE MAF-SENSOR ......................................................................................................................................119<br />
LEARN VALUE MIXTURE ..............................................................................................................................................119<br />
LEARN VALUE MIXTURE CORR ..................................................................................................................................121<br />
LEARN VALUE MIXTURE CORR(%) .............................................................................................................................121<br />
LEARN VALUE MIXTURE CORR(ms) ...........................................................................................................................121<br />
LEARN VALUE MIXTURE(%) ........................................................................................................................................120<br />
LEARN VALUE MIXTURE(ADAPTIVE) ..........................................................................................................................120<br />
LEARN VALUE MIXTURE(ADP)(ms) .............................................................................................................................120<br />
LEARN VALUE MIXTURE(BANK 1) ...............................................................................................................................120<br />
LEARN VALUE MIXTURE(BANK 1)(%) .........................................................................................................................120<br />
LEARN VALUE MIXTURE(BANK 2) ...............................................................................................................................120<br />
LEARN VALUE MIXTURE(BANK 2)(%) .........................................................................................................................120<br />
LEARN VALUE MIXTURE(CANP ACT)(%) ....................................................................................................................120<br />
LEARN VALUE MIXTURE(IDLE)(%) ..............................................................................................................................121<br />
LEARN VALUE MIXTURE(P/T1)(%) ..............................................................................................................................121<br />
LEARN VALUE MIXTURE(P/T2)(%) ..............................................................................................................................121<br />
LEARN VALUE MIXTURE(P/T3)(%) ..............................................................................................................................121<br />
LEARN VALUE O2 .........................................................................................................................................................121<br />
LEARN VALUE O2 IDLE OK ..........................................................................................................................................124<br />
LEARN VALUE O2 P/T 1 OK .........................................................................................................................................124<br />
LEARN VALUE O2 P/T 2 OK .........................................................................................................................................124<br />
LEARN VALUE O2 P/T 3 OK .........................................................................................................................................124<br />
LEARN VALUE O2 SNS 1(IDLE)(%) ..............................................................................................................................124<br />
LEARN VALUE O2 SNS 1(P/T)(%) ................................................................................................................................124<br />
LEARN VALUE O2(%) ....................................................................................................................................................122<br />
LEARN VALUE O2(ACTUAL)(BK1)(%) ..........................................................................................................................122<br />
LEARN VALUE O2(ACTUAL)(BK2)(%) ..........................................................................................................................122<br />
LEARN VALUE O2(BK1) ................................................................................................................................................122<br />
LEARN VALUE O2(BK1)(%) ..........................................................................................................................................122<br />
LEARN VALUE O2(BK1)(ADD)(%) ................................................................................................................................122<br />
LEARN VALUE O2(BK1)(IDLE)(%) ................................................................................................................................122<br />
LEARN VALUE O2(BK1)(MUL)(%) ................................................................................................................................122<br />
LEARN VALUE O2(BK1)(P/T)(%) ..................................................................................................................................122<br />
LEARN VALUE O2(BK1)IDLE OK ..................................................................................................................................123<br />
LEARN VALUE O2(BK1)P/T1 OK ..................................................................................................................................123<br />
LEARN VALUE O2(BK1)P/T2 OK ..................................................................................................................................123<br />
LEARN VALUE O2(BK1)P/T3 OK ..................................................................................................................................123<br />
99
Data Parameters<br />
Alphabetical Parameter List<br />
LEARN VALUE O2(BK2) ................................................................................................................................................122<br />
LEARN VALUE O2(BK2)(%) ..........................................................................................................................................122<br />
LEARN VALUE O2(BK2)(ADD)(%) ................................................................................................................................122<br />
LEARN VALUE O2(BK2)(IDLE)(%) ................................................................................................................................122<br />
LEARN VALUE O2(BK2)(MUL)(%) ................................................................................................................................122<br />
LEARN VALUE O2(BK2)(P/T)(%) ..................................................................................................................................122<br />
LEARN VALUE O2(BK2)IDLE OK ..................................................................................................................................123<br />
LEARN VALUE O2(BK2)P/T1 OK ..................................................................................................................................123<br />
LEARN VALUE O2(BK2)P/T2 OK ..................................................................................................................................123<br />
LEARN VALUE O2(BK2)P/T3 OK ..................................................................................................................................123<br />
LEARN VALUE O2(FULL) ..............................................................................................................................................123<br />
LEARN VALUE O2(IDLE) ...............................................................................................................................................123<br />
LEARN VALUE O2(IDLE)(%) .........................................................................................................................................123<br />
LEARN VALUE O2(IDLE)(ms) ........................................................................................................................................123<br />
LEARN VALUE O2(P/T) .................................................................................................................................................123<br />
LEARN VALUE O2(P/T)(%) ............................................................................................................................................123<br />
LEARN VALUE O2(P/T)(MUL)(%) ..................................................................................................................................123<br />
LEARN VALUE O2(P/T-WOT) ........................................................................................................................................123<br />
LEARN VALUE THR VALVE ADJUSTER .......................................................................................................................124<br />
LEARN VALUE TPS .......................................................................................................................................................124<br />
LEARN VALUE TPS(V) ..................................................................................................................................................124<br />
LIMITED DYNAMIC ACTIVE ..........................................................................................................................................124<br />
LIMITED OPERATION(LIMP) .........................................................................................................................................124<br />
LOCK-UP SLIP ...............................................................................................................................................................142<br />
LOCK-UP SLIP ...............................................................................................................................................................142<br />
LOCK-UP SLIP ...............................................................................................................................................................142<br />
LOS MODE .....................................................................................................................................................................124<br />
LRN IDLING STABILIZATION(kg/h) ...............................................................................................................................124<br />
LRN VALUE ISC(g/s) ......................................................................................................................................................119<br />
M<br />
MAF 1(mg/S) ..................................................................................................................................................................138<br />
MAF 2(mg/S) ..................................................................................................................................................................138<br />
MAF DES(mg/S) .............................................................................................................................................................138<br />
MAF IDLE(g/s) ................................................................................................................................................................124<br />
MAF ISC TRIM(%) ..........................................................................................................................................................124<br />
MAF TRIM(g/s) ...............................................................................................................................................................125<br />
MAF-SENSOR(V) ...........................................................................................................................................................125<br />
MAP(%) ..........................................................................................................................................................................125<br />
MAP(mbar) .....................................................................................................................................................................125<br />
MAP(V) ...........................................................................................................................................................................125<br />
MAP-CONTROLLED IDLE SPEED ................................................................................................................................125<br />
MASS AIR FLOW(ACTUAL)(g/s) ...................................................................................................................................125<br />
MASS AIR FLOW(ACTUAL)(mg/S) ................................................................................................................................138<br />
MASS AIR FLOW(DESIRED)(g/s) .................................................................................................................................125<br />
MASS AIR FLOW(DESIRED)(ms/S) ..............................................................................................................................138<br />
MASS AIR FLOW(g/s) ....................................................................................................................................................125<br />
MASS AIR FLOW(mg/S) ................................................................................................................................................138<br />
MASS AIR FLOW(V) ......................................................................................................................................................125<br />
MAX VALUE THR ADJUSTER(%) .................................................................................................................................125<br />
MAX VALUE THR ADJUSTER(V) ..................................................................................................................................125<br />
MIN VALUE THR ADJUSTER(%) ..................................................................................................................................125<br />
MIN VALUE THR ADJUSTER(V) ...................................................................................................................................126<br />
100
Data Parameters<br />
Alphabetical Parameter List<br />
MISFIRES PER 200 REVS(ALL CYL) ............................................................................................................................126<br />
MISFIRES PER 200 REVS(CYL.1) ................................................................................................................................126<br />
MISFIRES PER 200 REVS(CYL.2) ................................................................................................................................126<br />
MISFIRES PER 200 REVS(CYL.3) ................................................................................................................................126<br />
MISFIRES PER 200 REVS(CYL.4) ................................................................................................................................126<br />
MISFIRES PER 200 REVS(CYL.5) ................................................................................................................................126<br />
MISFIRES PER 200 REVS(CYL.6) ................................................................................................................................126<br />
MISFIRES PER 200 REVS(CYL.7) ................................................................................................................................126<br />
MISFIRES PER 200 REVS(CYL.8) ................................................................................................................................126<br />
MIXTURE .......................................................................................................................................................................126<br />
MIXTURE CORR(CANP ACTIVE) .................................................................................................................................126<br />
MIXTURE CORRECTION ..............................................................................................................................................126<br />
MIXTURE CORRECTION(%) .........................................................................................................................................126<br />
MODE HALL-REFERENCE SIGNAL .............................................................................................................................126<br />
O<br />
O2 ACTIVE .....................................................................................................................................................................126<br />
O2 ADP & ACTUAL VALUE(%) ......................................................................................................................................127<br />
O2 CONTROL MODE ....................................................................................................................................................127<br />
O2 CORR(CANP ACTIVATED) ......................................................................................................................................127<br />
O2 CORR(CANP ACTIVATED)(%) .................................................................................................................................127<br />
O2 CTRL & ACT(BANK 1)(%) ........................................................................................................................................127<br />
O2 CTRL & ACT(BANK 2)(%) ........................................................................................................................................127<br />
O2 CTRL FACTOR(BANK 1) ..........................................................................................................................................127<br />
O2 CTRL FACTOR(BANK 2) ..........................................................................................................................................127<br />
O2 CTRL FACTOR(CYL 1-3)(%) ....................................................................................................................................128<br />
O2 CTRL FACTOR(CYL 4-6)(%) ....................................................................................................................................128<br />
O2 CTRL READY ...........................................................................................................................................................128<br />
O2 CTRL(BANK 1)(%) ....................................................................................................................................................127<br />
O2 CTRL(BANK 2)(%) ....................................................................................................................................................127<br />
O2 INTEGRATOR ...........................................................................................................................................................128<br />
O2 LOOP CLOSED ........................................................................................................................................................128<br />
O2 REGULATION ...........................................................................................................................................................128<br />
O2 REGULATION ACTIVE .............................................................................................................................................129<br />
O2 REGULATION ON STOP ..........................................................................................................................................129<br />
O2 REGULATION(%) .....................................................................................................................................................129<br />
O2 REGULATION(BANK 1)(%) ......................................................................................................................................129<br />
O2 REGULATION(BANK 2)(%) ......................................................................................................................................129<br />
O2 SENSOR 1(V) ...........................................................................................................................................................129<br />
O2 SENSOR 2(V) ...........................................................................................................................................................129<br />
O2 SENSOR HEATER ...................................................................................................................................................130<br />
O2 SENSOR HEATER AFTER CAT ...............................................................................................................................130<br />
O2 SENSOR HEATER BEFORE CAT ............................................................................................................................130<br />
O2 SENSOR HEATER(BK1-SNS1) ...............................................................................................................................130<br />
O2 SENSOR HEATER(BK1-SNS2) ...............................................................................................................................130<br />
O2 SENSOR HEATER(BK2-SNS1) ...............................................................................................................................130<br />
O2 SENSOR HEATER(BK2-SNS2) ...............................................................................................................................130<br />
O2 SENSOR READY .....................................................................................................................................................130<br />
O2 SENSOR(BANK 1)(V) ...............................................................................................................................................129<br />
O2 SENSOR(BANK 1)(V) ...............................................................................................................................................129<br />
O2 SENSOR(BANK 2)(V) ...............................................................................................................................................129<br />
O2 SENSOR(BANK 2)(V) ...............................................................................................................................................129<br />
O2 SENSOR(V) ..............................................................................................................................................................129<br />
101
Data Parameters<br />
Alphabetical Parameter List<br />
O2 VALUE ......................................................................................................................................................................130<br />
O2 VALUE(ACTUAL)(%) ................................................................................................................................................130<br />
O2 VALUE(BANK 1)(%) .................................................................................................................................................130<br />
O2 VALUE(BANK 2)(%) .................................................................................................................................................130<br />
OIL TEMPERATURE(°C/°F) ...........................................................................................................................................131<br />
On-Board Diagnostic ......................................................................................................................................................149<br />
OPERATING MODE .......................................................................................................................................................131<br />
OVERRUN ......................................................................................................................................................................131<br />
Overrun/engine pulling signal .........................................................................................................................................149<br />
P<br />
PARK/NEUTRAL POSITION ..........................................................................................................................................131<br />
PARK/NEUTRAL POSITION ..........................................................................................................................................131<br />
PART LOAD DETECTED ...............................................................................................................................................131<br />
PHASE POSITION BK1(°CA) .........................................................................................................................................131<br />
PHASE POSITION BK2(°CA) .........................................................................................................................................131<br />
PHASE POSITION HALL SNS(°) ...................................................................................................................................131<br />
POWER SUPPLY ECU(V) ..............................................................................................................................................150<br />
PRESS CNTRL(%) .........................................................................................................................................................131<br />
PRESSURE CTRL(A) .....................................................................................................................................................143<br />
R<br />
REAR HEATER MODE ..................................................................................................................................................131<br />
REAR HEATER SWITCH ...............................................................................................................................................131<br />
REDUCTION TORQUE(ACTUAL)(Nm) .........................................................................................................................131<br />
REL.HEAT HIGH ............................................................................................................................................................138<br />
REL.HEAT LOW .............................................................................................................................................................138<br />
RELATIVE AIR MASS(%) ...............................................................................................................................................131<br />
RELAY HEATER HIGH ...................................................................................................................................................138<br />
RELAY HEATER LOW ....................................................................................................................................................138<br />
REQUIRED SOLENOID #4 ............................................................................................................................................143<br />
REQUIRED SOLENOID #5 ............................................................................................................................................143<br />
REQUIRED SOLENOID #6 ............................................................................................................................................143<br />
REQUIRED SOLENOID #7 ............................................................................................................................................143<br />
REQUIRED SOLENOID(A) ............................................................................................................................................143<br />
RETARDED IGNITION POINT .......................................................................................................................................131<br />
RETARDED IGNITION POINT(°) ...................................................................................................................................131<br />
RETARDING STEPS ......................................................................................................................................................131<br />
ROTATIONAL SPEED(°/s) .............................................................................................................................................150<br />
RTD SIGNAL A/T ACTIVE .............................................................................................................................................132<br />
S<br />
SECONDARY AIR MASS(g/s) .......................................................................................................................................132<br />
SELECTOR OUTPUTS ..................................................................................................................................................149<br />
SHIFT LEVER LOCK ......................................................................................................................................................143<br />
SIGNAL FROM A/T ........................................................................................................................................................132<br />
SLIDE VALVE SENSOR(MAX)(V) ..................................................................................................................................132<br />
SLIDE VALVE SENSOR(MIN)(V) ...................................................................................................................................132<br />
SLIDE VALVE SENSOR(V) ............................................................................................................................................138<br />
SOLENOID #1 ................................................................................................................................................................143<br />
SOLENOID #2 ................................................................................................................................................................143<br />
SOLENOID #3 ................................................................................................................................................................143<br />
102
Data Parameters<br />
Alphabetical Parameter List<br />
SOLENOID #4 ................................................................................................................................................................143<br />
SOLENOID #5 ................................................................................................................................................................143<br />
SOLENOID #7 ................................................................................................................................................................143<br />
SPORT FACTOR(%) ......................................................................................................................................................145<br />
START OF DELIVERY(°) ................................................................................................................................................132<br />
START OF DELIVERY(ACTUAL) ...................................................................................................................................139<br />
START OF DELIVERY(ACTUAL)(°) ...............................................................................................................................132<br />
START OF DELIVERY(DESIRED) .................................................................................................................................139<br />
START OF DELIVERY(DESIRED)(°) .............................................................................................................................132<br />
START QUANTITY(mg/S) ..............................................................................................................................................139<br />
START SYNCHRONIZATION(°) .....................................................................................................................................132<br />
STATUS FUEL COOLING(%) .........................................................................................................................................132<br />
STEERING ANGLE(°) ....................................................................................................................................................150<br />
SUM MISFIRES ..............................................................................................................................................................132<br />
T<br />
TCS STATUS ..................................................................................................................................................................145<br />
TCS SWITCH .................................................................................................................................................................150<br />
TEETH COUNT TILL HALL-SIG SHIFT +TO – ..............................................................................................................132<br />
THR ADJ SENSOR, MAX LRN OK/EXEC .....................................................................................................................132<br />
THR ADJ SENSOR, MIN LRN OK/EXEC ......................................................................................................................132<br />
THR ADJ/TPS BALANCE OK/EXEC ..............................................................................................................................133<br />
THR ADJUSTER(LIMP)(%) ............................................................................................................................................133<br />
THR POS SENSOR(AV)(LIMP)(V) .................................................................................................................................133<br />
THR POS SENSOR(THR STOP)(V) ..............................................................................................................................133<br />
THR VALVE ADJUSTER ANGLE(V) ..............................................................................................................................133<br />
THR VALVE ANGLE(ABSOLUTE)(°) ..............................................................................................................................133<br />
THR VALVE ANGLE(LEARN)(°) .....................................................................................................................................133<br />
THROTTLE ADJUSTER MODE .....................................................................................................................................133<br />
THROTTLE POSITION SENSOR(V) .............................................................................................................................133<br />
THROTTLE POSITION(IDLE)(V) ...................................................................................................................................133<br />
THROTTLE VALVE ADJUSTER ANGLE(°) ....................................................................................................................133<br />
THROTTLE VALVE ADJUSTER MAX(%) ......................................................................................................................133<br />
THROTTLE VALVE ADJUSTER MAX(V) .......................................................................................................................133<br />
THROTTLE VALVE ADJUSTER MIN(%) .......................................................................................................................133<br />
THROTTLE VALVE ADJUSTER MIN(V) ........................................................................................................................133<br />
THROTTLE VALVE ADJUSTER(V) ................................................................................................................................133<br />
THROTTLE VALVE ANGLE(°) .......................................................................................................................................133<br />
THROTTLE VALVE CLOSED .........................................................................................................................................133<br />
THROTTLE VALVE POSITION 1(%) ..............................................................................................................................134<br />
THROTTLE VALVE POSITION 1(°) ...............................................................................................................................134<br />
THROTTLE VALVE POSITION 2(%) ..............................................................................................................................134<br />
THROTTLE VALVE POSITION 2(°) ...............................................................................................................................134<br />
THROTTLE VALVE POSITION(%) .................................................................................................................................133<br />
THROTTLE VALVE POSITION(V) ..................................................................................................................................145<br />
TIME COUNTER 1 .........................................................................................................................................................134<br />
TIME COUNTER 2 .........................................................................................................................................................134<br />
TIME COUNTER(O2) .....................................................................................................................................................134<br />
TIPTRONIC ....................................................................................................................................................................146<br />
TORQUE (ACTUAL)(Nm) ...............................................................................................................................................134<br />
Torque converter slip speed ...........................................................................................................................................149<br />
TORQUE FROM A/T(Nm) ..............................................................................................................................................134<br />
TORQUE FROM ENGINE(Nm) ......................................................................................................................................134<br />
103
Data Parameters<br />
Alphabetical Parameter List<br />
TORQUE LOSS(Nm) ......................................................................................................................................................150<br />
TORQUE MAX(Nm) .......................................................................................................................................................146<br />
TORQUE RAISE ............................................................................................................................................................146<br />
TORQUE REDUC ..........................................................................................................................................................146<br />
TORQUE REDUCTION ..................................................................................................................................................134<br />
TORQUE REDUCTION(Nm) ..........................................................................................................................................134<br />
TORQUE(%) ...................................................................................................................................................................150<br />
TORQUE(DESIRED)(Nm) ..............................................................................................................................................134<br />
TORQUE(DESIRED, BY A/T-ECU)(Nm) ........................................................................................................................134<br />
TORQUE(Nm) ................................................................................................................................................................146<br />
TPS FULL RANGE(V) ....................................................................................................................................................134<br />
TPS LOW RANGE(V) .....................................................................................................................................................134<br />
TPS, MAX LRN OK/EXEC ..............................................................................................................................................134<br />
TPS, MIN LRN OK/EXEC ...............................................................................................................................................134<br />
TRANSVERSE ACCELERATION(m/s2) ........................................................................................................................150<br />
TROUBLE CODE STORED IN MEMORY ......................................................................................................................135<br />
U<br />
UNPLAUSIBLE SIGNAL THR ADJ ................................................................................................................................135<br />
V<br />
VEHICLE SPEED ...........................................................................................................................................................135<br />
VEHICLE SPEED ...........................................................................................................................................................146<br />
VEHICLE SPEED CTRL .................................................................................................................................................135<br />
VEHICLE SPEED SENSOR(V) ......................................................................................................................................146<br />
VOLTAGE THR ADJ OUT OF RANGE ...........................................................................................................................135<br />
W<br />
WARM UP CAT ..............................................................................................................................................................135<br />
WARM UP CAT(%) .........................................................................................................................................................135<br />
WARN. SIGNAL INSTR. PANEL: REFUEL ....................................................................................................................135<br />
WHEEL LEFT FRONT ....................................................................................................................................................150<br />
WHEEL LEFT FRONT(RPM) .........................................................................................................................................147<br />
WHEEL LEFT REAR ......................................................................................................................................................150<br />
WHEEL LEFT REAR(RPM) ............................................................................................................................................147<br />
WHEEL RIGHT FRONT .................................................................................................................................................150<br />
WHEEL RIGHT FRONT(RPM) .......................................................................................................................................147<br />
WHEEL RIGHT REAR ....................................................................................................................................................150<br />
WHEEL RIGHT REAR(RPM) .........................................................................................................................................147<br />
104
Data Parameters<br />
Gas Engine Parameters<br />
6.2 Gas Engine Parameters<br />
A/C COMP SW OFF BY ENG-ECU _________________________________ (range: YES/NO)<br />
Indicates an ECM-controlled switch which disables the operation of the A/C if a fault is detected<br />
by the ECM. If the ECM has switched the A/C off, the reading will be YES.<br />
A/C COMPRESSOR _____________________________________________ (range: ON/OFF)<br />
Indicates a feedback signal from the A/C compressor clutch or relay. When the display reads ON,<br />
the clutch is engaged, when it reads OFF, the clutch is disengaged.<br />
A/C COMPRESSOR OFF)<br />
A/C COMPRESSOR ON __________________________________________ (range: YES/NO)<br />
Indicates whether the A/C compressor is running.<br />
A/C MODE___________________________________________________(range: HIGH/LOW)<br />
Indicates whether the A/C system is set in the HIGH or LOW mode.<br />
A/C READINESS _______________________________________________ (range: YES/NO)<br />
Indicates if the A/C is ready to be used. If A/C is fitted and no defects are found in the system, the<br />
reading will be YES. If the vehicle does not have A/C fitted or a fault in the system or wiring is<br />
found, the reading will be NO.<br />
A/C SWITCH ___________________________________________________ (range: ON/OFF)<br />
Informs the ECM whether the A/C switch is set at ON/OFF or HIGH/LOW.<br />
ACCELERATION ENRICHMENT ___________________________________ (range: YES/NO)<br />
Indicates whether the ECM provides a richer mixture during acceleration by momentarily<br />
increasing injector pulse width. It should read YES when the ECM is enriching the mixture during<br />
acceleration. Injector pulse width should also increase at the same time. It should read NO under<br />
all other conditions.<br />
ACCEL.PEDAL POSITION SNS 1(%)<br />
ACCEL.PEDAL POSITION SNS 2(%) ___________________________ (range: not available)<br />
Indicates the position of the acceleration pedal in percentage. A V-type Engine uses 2 sensors,<br />
which are designated by the 1 and 2 in the parameter name.<br />
ACTUAL ADAPTATION POSITION(V)___________________________ (range: not available)<br />
Indicates the adaptive position of the EGR valve calculated by the ECM in voltage.<br />
ADAPTATION ABORTED(BATTERY
Data Parameters<br />
Gas Engine Parameters<br />
ADAPTATION STATUS_______________________________ (range: RUNNING/OK/ERROR)<br />
Indicates whether the ECM is learning a position for the throttle valve, for example: under normal<br />
conditions the reading should be OK.<br />
RUNNING will be displayed for a short time as the ECM learns the new values while in Basic<br />
Setting mode. If ERROR is displayed, then a fault in the learning processes has occurred.<br />
ADP ENG SPEED SENSOR(CROWN GEAR) __________________ (range: I/O or RUNNING)<br />
Indicates the operation of the crankshaft sensor and the segmented gear fitted to the crankshaft<br />
and adapts the ECM for ignition misfires. The crown gear is the segmented disk fitted on the<br />
crankshaft and the engine speed sensor (Hall-effect sensor) takes its signal from the teeth on this<br />
gear. If the display reads RUNNING, then the sender/gear check has not yet been completed and<br />
the misfire detection is restricted until the adaptation is completed. The sender/gear check can<br />
only be performed during overrun conditions.<br />
ADP IDLING STABILIZATION(kg/h) ____________________________ (range: not available)<br />
Indicates the learning value of the idle control system. The reading is the volume of air the ECM is<br />
commanding in kilograms per hour.<br />
ADP STOPPED(TIME EXCEEDED) _________________________________ (range: YES/NO)<br />
Indicates whether the adaptation process was stopped because the maximum time allowed was<br />
exceeded. The normal reading is NO, Yes indicates an adaptation problem.<br />
ADP THROTTLE VALVE ADJUSTER ___________________________ (range: not available)<br />
Indicates the current throttle adjuster adaptation mode and can display ADP, (running) ADP OK,<br />
or ADP ERROR.<br />
ADP VALUE AIR MASS IDLE(%)_______________________________ (range: not available)<br />
Indicates the amount of extra air mass required to keep the engine idle speed correct when a<br />
change in load occurs, such as when the A/C or the rear heater is switched on.<br />
ADP VALUE CANP SYSTEM __________________________________ (range: not available)<br />
Indicates the learning value of the canister purge system. It displays the duty cycle the ECM is<br />
commanding.<br />
ADP VALUE CANP VALVE<br />
ADP VALUE CANP VALVE 1(%) _______________________________ (range: not available)<br />
Indicates the learning value of the canister purge system. It displays the duty cycle the ECM has<br />
learned.<br />
ADP VALUE ISC ____________________________________________ (range: not available)<br />
Indicates the learning value of the idle control system. It displays the duty cycle the ECM is<br />
commanding.<br />
ADP VALUE MIXTURE(BANK1)(%)<br />
ADP VALUE MIXTURE(BANK2)(%) ____________________________ (range: not available)<br />
Indicates the operation and Short-term correction of the fuel delivery for cylinders 1 to 3 (Bank 1)<br />
and cylinders 4 to 6 (Bank 2). It shows whether the ECM is commanding a rich or lean mixture.<br />
A number above 0% indicates that the ECM has commanded a temporary rich mixture correction.<br />
A number below 0% indicates that the ECM has commanded a temporary lean mixture correction.<br />
These Short-term correction numbers are also used by the ECM to learn a fuel correction pattern<br />
or trend and are stored in the learned mixture or lambda values. Fuel correction parameters<br />
operate only in closed loop. In open loop, the number changes to a fixed value.<br />
106
Data Parameters<br />
Gas Engine Parameters<br />
ADP VALUE MIXTURE(BANK1)<br />
ADP VALUE MIXTURE(BANK2) __________________________________ (range: 0.0 to 1.9)<br />
Indicates the operation and Short-term correction of the fuel delivery for cylinders 1 to 4 (Bank 1)<br />
and for cylinders 5 to 8 (Bank 2). It shows whether the ECM is commanding a rich or lean mixture.<br />
The number theoretically can range from 0.0 to 1.9 with 1.0 as the midpoint. A number above 1.0<br />
indicates that the ECM has commanded a temporary rich mixture correction. A number below 1.0<br />
indicates that the ECM has commanded a temporary lean mixture correction. Fuel correction<br />
parameters operate only in closed loop. In open loop, the number changes to a fixed value.<br />
AIR DIVERT VALVE _____________________________________________ (range: ON/OFF)<br />
Indicates the state of the dual path intake manifold used on the 2.8 5V V6. There are two sets of<br />
intake runners of different lengths. At lower engine speeds the length of the intake manifold is<br />
lengthened with smaller diameter runners to produce a ram effect (increased air velocity). At<br />
higher RPM, the intake manifold is shortened with larger diameter runners to reduce restriction to<br />
faster moving air. Should read ON (ECM command) at 4500 RPM.<br />
An actuator or rotary servo changes intake manifold position from low to high or high to low. At<br />
4500 RPM after the Intake Manifold change over valve receives a signal from the ECM, it supplies<br />
vacuum to the servo which in turn moves the rotary valve to engage the high speed intake runners.<br />
When engine RPM drops, the change over valve shuts off vacuum to the servo (low speed intake<br />
runners) and vents trapped vacuum.<br />
AIR MASS IDLE(g/s) ________________________________________ (range: not available)<br />
Indicates the amount of alteration required to maintain idle speed when there is a change in load<br />
conditions at idle, such as when the heated rear window is switched on. Once the ECM has<br />
learned the new value, the figure should return to the mean setting (0).<br />
ALTERNATOR DEFECT __________________________________________ (range: YES/NO)<br />
Indicates whether the ECM has recognized a charging voltage. The reading is YES when the ECM<br />
is allowing adaptation (adaptive learn). If the reading is NO, the ECM will not relearn any<br />
adaptation values.<br />
ALTERNATOR LOAD(%) _____________________________________ (range: not available)<br />
Indicates the current alternator load.<br />
ALTITUDE CORRECTION FACTOR<br />
ALTITUDE CORRECTION FACTOR(%)__________________________ (range: not available)<br />
Indicates the correction factor for altitude, which is applied to air intake and lambda values when<br />
driving in mountainous terrain. This is an ECM-calculated value that compares air mass and<br />
throttle angle, and is greatly influenced by intake air temperature.<br />
AMBIENT TEMPERATURE(°C/°F) ______________________________ (range: not available)<br />
Indicates the temperature of the ambient air outside the vehicle.<br />
AUX HEATING REQUESTED__________________________________ (range: not available)<br />
Indicates if Auxiliary Heat is requested or not.<br />
BAROMETRIC PRESSURE(mbar) _____________________________ (range: not available)<br />
Indicates barometric pressure, which is provided by the barometric pressure (BARO) sensor, in<br />
millibars. The reading should be high when barometric pressure is near atmospheric pressure at<br />
sea level, and drop as barometric pressure drops.<br />
107
Data Parameters<br />
Gas Engine Parameters<br />
The ECM uses the BARO sensor to calculate manifold vacuum and true absolute pressure. Some<br />
systems do not have a BARO sensor, but the ECM provides a BARO reading by sampling the<br />
MAP sensor reading with the key on and engine off just before cranking.<br />
BASE THR POS(IDLE SW CLSD)(°) ____________________________ (range: not available)<br />
Indicates throttle opening in degrees based on the Throttle Position Sensor low range<br />
potentiometer. This is one of two potentiometers incorporated into one (throttle position) TP<br />
sensor. The signal is for the whole range (from idle to full throttle).<br />
BASE VALUE THROTTLE ADJUSTER __________________________ (range: not available)<br />
Indicates the stored base value for the throttle value potentiometer position when throttle valve is<br />
fully closed. The value is determined when base settings are activated with the throttle closed.<br />
BASE VALUE TPS<br />
BASE VALUE TPS(V)________________________________________ (range: not available)<br />
Indicates the voltage from throttle position (TP) sensor low range potentiometer. This is one from<br />
a set of two potentiometers incorporated into one TP sensor. The signal is for the whole range<br />
(from idle to full throttle).<br />
BATTERY(V) _______________________________________________ (range: not available)<br />
Indicates vehicle battery voltage. The engine control system has no specific sensor to measure<br />
battery voltage, but some ECMs calculate this parameter from a sensing circuit across the supply<br />
voltage circuit. The reading should be close to normal charging system regulated voltage with the<br />
engine running. This is typically 13.5 to 14.5V at idle. Check the reading against actual voltage<br />
measured at the battery or alternator. Check vehicle specifications for exact values.<br />
The battery voltage value is used principally for ECM self-diagnostics. Some ECM functions will<br />
be modified if voltage falls too low or rises too high. For example, if voltage drops below minimum<br />
value, the ECM will try to recharge the battery by running the engine at a higher idle speed. This<br />
may affect the idle speed control, fuel metering and ignition timing parameters.<br />
BATTERY VOLTAGE TOO LOW ___________________________________ (range: YES/NO)<br />
Indicates whether the ECM has recognized a battery voltage that is too low for reliable operation.<br />
If the reading is NO, then Adaptation (adaptive learn) can take place. If the reading is YES, then<br />
the ECM will not relearn any values.<br />
BOOST PRESSURE(ACTUAL)(mbar)___________________________ (range: not available)<br />
Indicates the current pressure in the intake manifold. The value is in millibar and will be an<br />
absolute pressure.<br />
BOOST PRESSURE(DESIRED)(mbar) __________________________ (range: not available)<br />
Indicates the desired intake manifold pressure under present operating conditions. The value is in<br />
millibar and will be an absolute pressure.<br />
BOOST PRESSURE(mbar) ___________________________________ (range: not available)<br />
Indicates the pressure in the intake manifold under current operating conditions. The value is in<br />
millibar and will be an absolute pressure.<br />
BRAKE PEDAL PRESSED _______________________________________ (range: YES/NO)<br />
Indicates whether the ECM has detected that the brake pedal has been pressed.<br />
BRAKE PEDAL SWITCH ___________________________________(range: OPEN/CLOSED)<br />
Indicates whether the ECM has detected that the brake pedal switch is closed or open.<br />
CAM ADJUSTER MODE ______________________________ (range: ACTIVE/NOT ACTIVE)<br />
Indicates whether the ECM has activated camshaft timing adjustments.<br />
108
Data Parameters<br />
Gas Engine Parameters<br />
CAMSHAFT ADJUSTER ______________________________ (range: ACTIVE/NOT ACTIVE)<br />
Indicates whether the ECM has activated camshaft timing adjustments.<br />
CAMSHAFT ADJUSTER(ACTIVE)(°)<br />
CAMSHAFT ADVANCE(°) ____________________________________ (range: not available)<br />
Indicates the amount of camshaft adjustment commanded by the ECM in degrees.<br />
CAMSHAFT PHASING ___________________________________________ (range: YES/NO)<br />
Indicates whether the ECM has activated the camshaft timing adjustments.<br />
CAMSHAFT POSITION(BANK 1)(°)<br />
CAMSHAFT POSITION(BANK 2)(°)_____________________________ (range: not available)<br />
Indicates the amount of camshaft adjustment commanded by the ECM for the intake camshaft on<br />
cylinders 1 to 3 (Bank 1) or cylinders 4 to 6 (Bank 2) from its base position.<br />
CANISTER PURGE MODE_____________________________(range: ACTIVE/NOT ACTIVE)<br />
Indicates the operating mode of the canister purge valve.<br />
CANP CHARGE(%) ___________________________________________ (range: 0 to 100%)<br />
Indicates the percentage of canister purge flow. The duty cycle solenoids in these systems are<br />
turned on to activate purging and turned off to block purging. A reading of 0 indicates that the<br />
solenoid is fully de-energized to cut off purging. A reading of 100 indicates that the solenoid is fully<br />
energized to allow maximum purging.<br />
CANP FLUSH ________________________________________________ (range: 0 to 100%)<br />
Indicates the percentage of canister purge flushed from the charcoal canister back into the engine<br />
for re-burn. A reading of 0 indicates the solenoid is fully de-energized to cut off purging. A reading<br />
of 100 indicates the solenoid is fully energized to allow maximum purging.<br />
CANP SYSTEM ACTIVE _________________________________________ (range: YES/NO)<br />
Indicates the status of the canister purge valve, it reads YES when the canister purge valve<br />
(CANP) is active (purging).<br />
CANP VALVE CLOSED __________________________________________ (range: YES/NO)<br />
Indicates the status of the canister purge valve, it reads YES when the canister purge valve<br />
(CANP) is closed (not purging).<br />
CANP VALVE ON CHARGE_______________________________________ (range: YES/NO)<br />
Indicates the status of the canister purge valve, it reads YES when the canister purge valve<br />
(CANP) is in check mode. In check mode, the ECM calculates the fuel content of the fumes<br />
coming from the canister by measuring the effect the fumes have on the lambda signal.<br />
CANP VALVE ON MIN MODE _____________________________________ (range: YES/NO)<br />
Indicates the status of the canister purge valve, it reads YES when the canister purge valve<br />
(CANP) is at a minimum pulse width in order to stop sudden mixture changes and improve<br />
driveability.<br />
CANP VALVE ON NORMAL MODE _________________________________ (range: YES/NO)<br />
Indicates the status of the canister purge valve, it reads YES when the canister purge valve<br />
(CANP) is operating normally.<br />
CAT TEMPERATURE>300°C __________________________________ (range: not available)<br />
Indicates whether catalytic converter (CAT) temperature is above 300°C (572°F).<br />
CATALYST TEMPERATURE(°C/F) _____________________________ (range: not available)<br />
Indicates catalytic converter (CAT) temperature.<br />
109
Data Parameters<br />
Gas Engine Parameters<br />
CATALYST EFFICIENCY(%) __________________________________ (range: not available)<br />
Indicates the efficiency of the catalytic converter (CAT) based on O2S signals.<br />
CHANGE OVER TO CHARGE MODE CANP _________________________ (range: YES/NO)<br />
Indicates the status of the canister purge valve, it reads YES when the canister purge valve<br />
(CANP) is in charge mode.<br />
CHANGE OVER TO CLOSE MODE CANP ___________________________ (range: YES/NO)<br />
Indicates the status of the canister purge valve, it reads YES when the canister purge valve<br />
(CANP) is closed.<br />
CHANGE OVER TO MIN MODE CANP ______________________________ (range: YES/NO)<br />
Indicates the status of the canister purge valve, it reads YES when the canister purge valve<br />
(CANP) is at a minimum pulse width in order to stop sudden mixture changes and improve<br />
driveability.<br />
CLUTCH PEDAL PRESSED ______________________________________ (range: YES/NO)<br />
Indicates clutch pedal status, it reads YES when the ECM detects the clutch pedal is pressed.<br />
CLUTCH PEDAL SWITCH __________________________________(range: OPEN/CLOSED)<br />
Indicates the current state of the clutch pedal switch.<br />
CODING FOR SYNCRO(4WD)_____________________________________ (range: YES/NO)<br />
Indicates whether the ECM is coded for 4WD.<br />
COMBINED HALL & ENG SPEED SIGN _________________________ (range: not available)<br />
Indicates the number of teeth on the crankshaft sender wheel until the hall sensor on the camshaft<br />
switches. The ECM uses this to determine the relative positions of crank and cam.<br />
CONTROL VALUE MIXTURE(%)<br />
CTRL VALUE MIXTURE(BANK 1)(%)<br />
CTRL VALUE MIXTURE(BANK 2)(%) ___________________________ (range: not available)<br />
Indicates the operation and Short-term correction of the fuel delivery for the stated cylinders. The<br />
reading shows whether the ECM is commanding a rich or lean mixture.<br />
A number above 0% indicates that the ECM has commanded a temporary rich mixture correction.<br />
A number below 0% indicates that the ECM has commanded a temporary lean mixture correction.<br />
These Short-term correction numbers are also used by the ECM to learn a fuel correction pattern<br />
or trend and are stored in the learned mixture or lambda values. Fuel correction parameters<br />
operate only in closed loop. In open loop, the number changes to a fixed value.<br />
COOLANT TEMPERATURE >80°C _________________________________ (range: YES/NO)<br />
Indicates whether the engine coolant temperature is above 80°C (176°F). It is used during some<br />
adaptive learning processes.<br />
CRUISE CTRL ENABLED ________________________________________ (range: ON/OFF)<br />
Indicates the current state of the main cruise control switch.<br />
CRUISE CTRL STATUS _______________________________(range: ACTIVE/NOT ACTIVE)<br />
Indicates the current state of the main cruise control switch.<br />
CTRL VALUE IDLE AIR MASS(g/s)_____________________________ (range: not available)<br />
Indicates the amount of air that bypasses the throttle at idle and thus controls the idle speed. The<br />
motor that drives the IAC valve returns a value of 0 to 255 to the ECM. The ECM then converts this<br />
value into an airflow value in grams per second.<br />
110
Data Parameters<br />
Gas Engine Parameters<br />
CTRL VALUE MIXTURE/O2 ___________________________________ (range: not available)<br />
Indicates the operation and Short-term correction of the fuel delivery. The reading shows whether<br />
the ECM is commanding a rich or lean mixture.<br />
The number theoretically can range from 0.00 to 1.99 with 1.00 as the midpoint, but in practice the<br />
number only ranges from 0.9 to 1.1. A number above 1.0 indicates that the ECM has commanded<br />
a temporary rich mixture correction. A number below 1.0 indicates that the ECM has commanded<br />
a temporary lean mixture correction.<br />
These Short-term correction numbers are also used by the ECM to learn a fuel correction pattern<br />
or trend and are stored in the learned mixture or lambda values. Fuel correction parameters<br />
operate only in closed loop. In open loop, the number changes to a fixed value.<br />
CTRL VALUE MIXTURE/O2(%) ________________________________ (range: not available)<br />
Indicates the operation and Short-term correction of the fuel delivery. The reading shows whether<br />
the ECM is commanding a rich or lean mixture.<br />
A number above 0% indicates that the ECM has commanded a temporary rich mixture correction.<br />
A number below 0% indicates that the ECM has commanded a temporary lean mixture correction.<br />
These Short-term correction numbers are also used by the ECM to learn a fuel correction pattern<br />
or trend and are stored in the learned mixture or lambda values. Fuel correction parameters<br />
operate only in closed loop. In open loop, the number changes to a fixed value.<br />
CURRENT CONSUMPTION IAC(A)_____________________________ (range: not available)<br />
Indicates the amount of current used by the IAC (Idle Air Control) valve as amperes.<br />
CURRENT CTRL FACTOR IAC ________________________________ (range: not available)<br />
Indicates the amount of current used by the IAC (Idle Air Control) valve as a percentage.<br />
CURRENT CTRL IAC(%) _____________________________________ (range: not available)<br />
Indicates the control factor regulating the current to the IAC valve as a percentage.<br />
CYLINDER 1 RECOGNIZED ______________________________________ (range: YES/NO)<br />
Indicates whether the ECM has detected cylinder number 1 TDC.<br />
DECEL ENLEAN____________________________________________ (range: not available)<br />
Indicates whether the ECM is providing a lean air/fuel mixture during deceleration.<br />
DECELERATE POSITION ________________________________________ (range: YES/NO)<br />
Indicates whether the ECM determines the current engine operating condition as deceleration.<br />
DECELERATION ENLEANMENT ______________________________ (range: not available)<br />
Indicates whether the ECM is providing a lean air/fuel mixture due to deceleration.<br />
DIAGNOSE LEARN VALUE O2(BK1)IDLE<br />
DIAGNOSE LEARN VALUE O2(BK1)P/T2<br />
DIAGNOSE LEARN VALUE O2(BK1)P/T3<br />
DIAGNOSE LEARN VALUE O2(BK1)P/T4<br />
DIAGNOSE LEARN VALUE O2(BK2)IDLE<br />
DIAGNOSE LEARN VALUE O2(BK2)P/T2<br />
DIAGNOSE LEARN VALUE O2(BK2)P/T3<br />
DIAGNOSE LEARN VALUE O2(BK2)P/T4 ___________________________ (range: YES/NO)<br />
Indicates whether the relearn operation for the stated cylinders and engine/throttle load conditions<br />
was successful.<br />
111
Data Parameters<br />
Gas Engine Parameters<br />
DUTY CYCLE CANP VALVE<br />
DUTY CYCLE CANP VALVE(%) _______________________________ (range: not available)<br />
Indicates the percentage of canister purge flow. The duty cycle solenoids in these systems are<br />
turned on to activate purging and turned off to block purging. A reading of 0% indicates that the<br />
solenoid is fully de-energized to cut off purging. A reading of 100% indicates that the solenoid is<br />
fully energized to allow maximum purging.<br />
DUTY CYCLE EGR-VALVE(%)_________________________________ (range: not available)<br />
Indicates the duty cycle of the Exhaust Gas Recirculating (EGR) valve. Exhaust gasses can be<br />
added to the intake air (to cool combustion temperatures thus reducing the formation of NOx).<br />
EGR valve open/close rate depends on operating conditions of the engine.<br />
DUTY CYCLE FAN CTRL VALVE(%)____________________________ (range: not available)<br />
Indicates the duty-cycle of the electric ventilator. A lower percentage means the ventilator is<br />
blowing lightly.<br />
DUTY CYCLE IAC(%)________________________________________ (range: not available)<br />
Indicates the duty cycle of the IAC valve.<br />
DUTY CYCLE ISC(%) ________________________________________ (range: not available)<br />
Indicates the duty cycle of the throttle valve positioner, which regulates the throttle stop position,<br />
thus controlling idle speed.<br />
DUTY CYCLE THR ADJUSTER(%) _____________________________ (range: not available)<br />
Indicates the duty cycle of the throttle adjuster valve.<br />
DUTY CYCLE WASTE GATE VALVE(%) _________________________ (range: not available)<br />
Indicates the duty cycle of the turbo waste gate actuator valve. This action governs the turbo<br />
output (manifold) pressure.<br />
EGR-SYSTEM_______________________________________(range: ACTIVE/NOT ACTIVE)<br />
Indicates whether the EGR system is active or not.<br />
EGR-TEMPERATURE(°C/°F) __________________________________ (range: not available)<br />
Indicates EGR system temperature based on a feedback signal from a thermistor installed in the<br />
EGR passage.<br />
ENGINE LOAD(%) __________________________________________ (range: not available)<br />
Indicates the ECM calculated relative engine load based on engine speed (RPM), number of<br />
cylinders, and manifold airflow. High readings indicate a heavy load; low readings, a light load.<br />
ENGINE LOAD(ms) _________________________________________ (range: not available)<br />
Indicates the relative engine load based on a processed signal that comes from the Throttle<br />
Position Sensor and/or the Manifold Air Flow sensor and/or the Manifold Air Pressure sensor and/<br />
or the Intake Air Temperature sensor. The Engine Load has still to be corrected with all lambda<br />
factors. View this in conjunction with the injection period where Engine Load is the theoretical<br />
Injection time and the injection period is the corrected actual value.<br />
ENGINE LOAD(V)___________________________________________ (range: not available)<br />
Indicates the ECM calculated relative engine load as voltage based on engine speed (RPM),<br />
number of cylinders, and manifold airflow.<br />
ENGINE LOAD(ACTUAL)(%)__________________________________ (range: not available)<br />
Indicates the ECM calculated actual engine load based on engine speed (RPM), number of<br />
cylinders, and manifold airflow. High readings indicate a heavy load; low readings, a light load.<br />
112
Data Parameters<br />
Gas Engine Parameters<br />
ENGINE LOAD(ACTUAL)(ms)_________________________________ (range: not available)<br />
Indicates the actual engine load based on a processed signal that comes from the Throttle<br />
Position Sensor and/or the Manifold Air Flow sensor and/or the Manifold Air Pressure sensor and/<br />
or the Intake Air Temperature sensor. The load has been corrected with all factors.<br />
ENGINE LOAD(ACTUAL)(Nm) ________________________________ (range: not available)<br />
Indicates the ECM calculated actual engine load based on engine speed (RPM), number of<br />
cylinders, and manifold airflow as newton meters (Nm).<br />
ENGINE LOAD(AFTER CORR)(ms) ____________________________ (range: not available)<br />
Indicates the corrected engine load based on a processed signal that comes from the Throttle<br />
Position Sensor and/or the Manifold Air Flow sensor and/or the Manifold Air Pressure sensor and/<br />
or the Intake Air Temperature sensor. The load has been corrected with all factors.<br />
ENGINE LOAD(BEFORE CORR)(ms) ___________________________ (range: not available)<br />
Indicates the uncorrected engine load based on a processed signal that comes from the Throttle<br />
Position Sensor and/or the Manifold Air Flow sensor and/or the Manifold Air Pressure sensor and/<br />
or the Intake Air Temperature sensor. The load has still to be corrected with all lambda factors.<br />
ENGINE LOAD AFTER REDUC(ms) ____________________________ (range: not available)<br />
Indicates the engine load based on a processed signal that comes from the Throttle Position<br />
Sensor and/or the Manifold Air Flow sensor and/or the Manifold Air Pressure sensor and/or the<br />
Intake Air Temperature sensor. The load has been corrected with knock control factors.<br />
ENGINE SPEED(RPM) _______________________________________ (range: not available)<br />
Indicates whether the ECM is receiving engine speed information from the engine speed sensor,<br />
then passing this information on to the TCM.<br />
Signal utilization: The engine speed signal is one of the most important input signals and is<br />
required for calculation of the shift points.<br />
ENGINE SPEED
Data Parameters<br />
Gas Engine Parameters<br />
EXHAUST GAS TEMPERATURE(°C/°F) _________________________ (range: not available)<br />
Indicates the exhaust-gas temperature.<br />
FUEL COOLING(%) _________________________________________ (range: not available)<br />
Indicates the percentage that the fuel is cooled.<br />
FUEL CUT OFF<br />
FUEL CUT-OFF VALVE ACTIVE ___________________________________ (range: YES/NO)<br />
Indicates the status of the ECM command to cut off to the injectors during engine overrun.<br />
FUEL HEAT(l/h) ____________________________________________ (range: not available)<br />
Indicates the amount of fuel that is used by the external heater.<br />
FUEL LOW ________________________________________________ (range: not available)<br />
Indicates whether the fuel level is low.<br />
FULL LOAD DETECTED<br />
FULL LOAD ___________________________________________________ (range: YES/NO)<br />
Indicates whether the engine is currently operating at full load. The reading is YES at full load, this<br />
value is used during some adaptive learning processes.<br />
FULL LOAD SWITCH ______________________________________(range: OPEN/CLOSED)<br />
Indicates the ECM output to the TP sensor full load switch.<br />
HALL-SENSOR(°)<br />
Indicates the position of the Hall Sensor offset against the zero adjustment in crankshaft angle<br />
degrees.<br />
IAC INTEGRATOR __________________________________________ (range: not available)<br />
Indicates the working zero range of the idle air control (IAC). It represents the point that the ECM<br />
regards as IAC set to 0 (no adjustment required). The number can range from 0 to 255 with 128<br />
as the midpoint. A number above 128 indicates that the ECM has learned to reduce the idle. A<br />
number below 128 indicates that the ECM has learned to increase the idle.<br />
IDLE AIR CORRECTION(g/s) _________________________________ (range: not available)<br />
Indicates the correction factor of the idle control system. The value is the amount of airflow<br />
correction the ECM is commanding.<br />
IDLE AIR CTRL(%) __________________________________________ (range: not available)<br />
Indicates the duty cycle of the idle air control valve, which regulates the throttle stop position, thus<br />
controlling idle speed.<br />
IDLE AIR MASS(g/s) ________________________________________ (range: not available)<br />
Indicates the amount of air being drawn into the engine at idle. Most port fuel injection engines<br />
have an airflow sensor to measure the mass or weight of air entering the engine. The airflow<br />
sensor delivers a signal that indicates the mass airflow in grams per second at any given instant.<br />
The ECM uses the signal from the airflow sensor and other sensors to determine the air/fuel ratio<br />
needed by the engine and the amount of fuel to be injected.<br />
IDLE SPEED(ACTUAL)(RPM) _________________________________ (range: not available)<br />
Indicates the actual engine idle speed recorded by the ECM, as opposed to desired RPM.<br />
IDLE SPEED(DESIRED)(RPM) ________________________________ (range: not available)<br />
Indicates the engine idle speed the ECM is trying to maintain, as opposed to the actual RPM.<br />
114
Data Parameters<br />
Gas Engine Parameters<br />
IDLE SPEED CTRL VALVE<br />
IDLE SPEED CTRL VALVE(%)_________________________________ (range: not available)<br />
Indicates the amount of air that bypasses the throttle at idle. The motor that drives the IAC valve<br />
returns a value of 0 to 255 to the ECM. The ECM then converts this value into an airflow value as<br />
a percentage of the total airflow.<br />
IDLE SPEED SWITCH _____________________________________(range: OPEN/CLOSED)<br />
Indicates the ECM has detected idle switch state. It is used in conjunction with other parameters<br />
when the ECM is applying learned idle values.<br />
IDLE SPEED SWITCH CLOSED ___________________________________ (range: YES/NO)<br />
Indicates whether the ECM has detected that the idle switch is closed. It is used in conjunction<br />
with other parameters when the ECM is applying learned idle values.<br />
IDLE SPEED SWITCH OPEN______________________________________ (range: YES/NO)<br />
Indicates whether the ECM has detected that the idle switch is open. It is used in conjunction with<br />
other parameters when the ECM is applying learned idle values.<br />
IGN ADV W KNOCK & ISC(AV)(°) ______________________________ (range: not available)<br />
Indicates the average amount of ignition advance actually applied to the engine after any<br />
retardation by the knock sensor or idle speed control has been removed.<br />
IGN RTD BY A/T-ECU(°) _____________________________________ (range: not available)<br />
Indicates the amount of ignition advance removed by the ECM when the automatic transmission<br />
commands it. Timing is retarded from the optimum advance for the existing speed and load.<br />
IGN RTD BY DIGITAL ISC(°) __________________________________ (range: not available)<br />
Indicates the amount of ignition advance removed by the ECM when the digital idle speed control<br />
(ISC) commands it. Timing is retarded from the optimum advance for the existing speed and load.<br />
IGN RTD BY KNOCK(°)<br />
IGN RTD BY KNOCK CTRL(°)<br />
IGN RTD BY KNOCK(ALL CYL)(°)<br />
IGN RTD BY KNOCK CTRL(CYL 1)(°)<br />
IGN RTD BY KNOCK CTRL(CYL 2)(°)<br />
IGN RTD BY KNOCK CTRL(CYL 3)(°)<br />
IGN RTD BY KNOCK CTRL(CYL 4)(°)<br />
IGN RTD BY KNOCK CTRL(CYL 5)(°)<br />
IGN RTD BY KNOCK CTRL(CYL 6)(°)<br />
IGN RTD BY KNOCK CTRL(CYL 7)(°)<br />
IGN RTD BY KNOCK CTRL(CYL 8)(°)___________________________ (range: not available)<br />
Indicates the amount of ignition advance removed by the ECM when detonation is sensed by the<br />
knock sensor. Timing is retarded from the optimum advance for existing speed and load.<br />
IGN RTD BY TCS-ECU(COLD)(°) ______________________________ (range: not available)<br />
Indicates the amount of ignition advance to be removed by the ECM using the traction control<br />
system (only with engine cold conditions) restrictions. Timing is retarded from the optimum<br />
advance for the existing speed and load.<br />
IGN RTD WITH KNOCK & ISC(°) _______________________________ (range: not available)<br />
Indicates the amount of ignition advance actually applied to the engine after any retardation by the<br />
knock sensor or idle speed control has been removed.<br />
IGN RTD W/O KNOCK & W/O ISC(°)____________________________ (range: not available)<br />
Indicates the amount of ignition advance commanded by the ECM before any retardation by the<br />
knock sensor or idle speed control has been removed.<br />
115
Data Parameters<br />
Gas Engine Parameters<br />
IGNITION ADV(CALCULATED)(°) ______________________________ (range: not available)<br />
Indicates the amount of ignition advance before other factors are removed by the ECM.<br />
IGNITION ADV REDUCTION ___________________________(range: ACTIVE/NOT ACTIVE)<br />
Indicates whether the ignition timing reduction system is active or not.<br />
IGNITION ADVANCE(°) ______________________________________ (range: not available)<br />
Indicates the total spark advance or retard commanded by the ECM, including base timing.<br />
IGNITION MAP _____________________________________________ (range: not available)<br />
Indicates which ignition timing map is currently being used by the ECM. The map changeover is<br />
initiated by the knock sensor. The 1ST TIMING MAP is the default choice (98 octane) and the 2ND<br />
TIMING MAP retards the overall ignition timing (95 octane).<br />
INCREASED IDLE SPEED WITH A/C ON ____________________________ (range: YES/NO)<br />
Indicates whether the ECM has detected the A/C is active. If so, the ECM increases the idle speed<br />
to compensate.<br />
INCREASING RPM ______________________________________________ (range: YES/NO)<br />
Indicates whether the ECM is increasing the idle speed because the A/C is active.<br />
INJ QUANTITY(mm3)________________________________________ (range: not available)<br />
Indicates the maximum quantity of fuel that has been injected under the present operating<br />
conditions. The value is in cubic milliliters per cylinder stroke.<br />
INJECTION TIME(ms) _______________________________________ (range: not available)<br />
Indicates the length of time that the ECM commands the fuel injectors to turn on in milliseconds<br />
(ms). A high reading indicates more “on time” and a richer mixture. A low reading indicates less<br />
“on time” and a leaner mixture. There are no definite specifications for injector pulse, but the<br />
reading should change as engine speed and load change.<br />
INJECTION TIME(AVERAGE)(ms) _____________________________ (range: not available)<br />
Indicates the average length of time that the ECM commands the fuel injectors to turn on in<br />
milliseconds (ms). A high reading indicates more “on time” and a richer mixture. A low reading<br />
indicates less “on time” and a leaner mixture. There are no definite specifications for injector<br />
pulse, but the reading should change as engine speed and load change.<br />
INTAKE MANIFOLD PRESSURE(%) ____________________________ (range: not available)<br />
Indicates intake manifold vacuum as a percentage. The ECM uses the figure in calculations to<br />
determine engine load.<br />
INTAKE MANIFOLD PRESSURE(mbar) _________________________ (range: not available)<br />
Indicates intake manifold vacuum as millibar. The ECM uses the figure in calculations to<br />
determine engine load.<br />
ISC(CTRL FACTOR)_________________________________________ (range: not available)<br />
Indicates the idle stabilizing control factor.<br />
ISC(POSITION) _____________________________________________ (range: not available)<br />
Indicates the idle speed control valve position.<br />
ISC(REACTION TO MALFUNCTION) ___________________________ (range: not available)<br />
Indicates the influence value of a system fault on the idle speed control system.<br />
ISC INTGRATOR____________________________________________ (range: not available)<br />
Indicates the integrator value for the idle speed control.<br />
116
Data Parameters<br />
Gas Engine Parameters<br />
ISC UNDER LOAD __________________________________________ (range: not available)<br />
Indicates the working range of the idle speed control (ISC) when a load is applied (example, with<br />
A/C operating). It indicates whether the ECM is commanding a faster or slower idle. The number<br />
can range from 0 to 255 with 128 as the midpoint. A number above 128 indicates that the ECM has<br />
commanded less air to slow the idle. A number below 128 indicates that the ECM has commanded<br />
more air to speed up the idle.<br />
KNOCK CTRL(°)____________________________________________ (range: not available)<br />
Indicates the amount of spark advance removed by the ECM when detonation is sensed by the<br />
knock sensor. Timing is retarded from the optimum advance for existing speed and load. The<br />
value is the amount of advance that has been taken away.<br />
KNOCK SENSOR(CYL 1)(V)<br />
KNOCK SENSOR(CYL 2)(V)<br />
KNOCK SENSOR(CYL 3)(V)<br />
KNOCK SENSOR(CYL 4)(V)<br />
KNOCK SENSOR(CYL 5)(V)<br />
KNOCK SENSOR(CYL 6)(V)<br />
KNOCK SENSOR(CYL 7)(V)<br />
KNOCK SENSOR(CYL 8)(V) __________________________________ (range: not available)<br />
Indicates the voltage read by the ECM when detonation is sensed by the knock sensor on the<br />
indicated cylinder.<br />
LACK OF FUEL ____________________________________________ (range: not available)<br />
Indicates whether or not there is a lack of fuel.<br />
LEARN AIR MASS IDLE(g/s)__________________________________ (range: not available)<br />
Indicates the learned value of air that bypasses the throttle at idle and thus controls the idle speed.<br />
The motor that drives the IAC valve returns a value of 0 to 255 to the ECM. The ECM then<br />
converts this value into an airflow value in grams per second.<br />
LEARN AIR MASS IDLE(D)(g/s) _______________________________ (range: not available)<br />
Indicates the learned value of air that bypasses the throttle at idle only if the transmission is in<br />
drive. The motor that drives the IAC valve returns a value of 0 to 255 to the ECM. The ECM then<br />
converts this value into an airflow value in grams per second.<br />
LEARN AIR MASS IDLE(P/N)(g/s) _____________________________ (range: not available)<br />
Indicates the learned value of air that bypasses the throttle at idle only if the transmission is in park<br />
or neutral. The motor that drives the IAC valve returns a value of 0 to 255 to the ECM. The ECM<br />
then converts this value into an airflow value in grams per second.<br />
LEARN INJECTION TIME(ms)_________________________________ (range: not available)<br />
Indicates the value in milliseconds that the ECM is using as an adaptive value for injection time<br />
correction.<br />
117
Data Parameters<br />
Gas Engine Parameters<br />
LEARN MIXT(BANK 1)(IDLE)(%)<br />
LEARN MIXT(BANK 1)(P/T)(%)<br />
LEARN MIXT(BANK 1)(P/T1)(%)<br />
LEARN MIXT(BANK 1)(P/T2)(%)<br />
LEARN MIXT(BANK 1)(P/T3)(%)<br />
LEARN MIXT(BANK 1)(IDLE)(%)<br />
LEARN MIXT(BANK 1)(P/T)(%)<br />
LEARN MIXT(BANK 2)(IDLE)(%)<br />
LEARN MIXT(BANK 2)(P/T)(%)<br />
LEARN MIXT(BANK 2)(P/T1)(%)<br />
LEARN MIXT(BANK 2)(P/T2)(%)<br />
LEARN MIXT(BANK 2)(P/T3)(%)<br />
LEARN MIXT(BANK 2)(IDLE)(%)<br />
LEARN MIXT(BANK 2)(P/T)(%) ________________________________ (range: not available)<br />
Indicates the operation and Long-term correction of the fuel delivery for the stated loads and<br />
cylinders. The readings show whether the ECM is commanding a rich or lean mixture.<br />
A number above 0% indicates that the ECM has commanded an overall rich mixture correction. A<br />
number below 0% indicates that the ECM has commanded an overall lean mixture correction.<br />
Fuel correction parameters operate only in closed loop. In open loop, the number changes to a<br />
fixed value.<br />
LEARN RANGE O2 IDLE<br />
LEARN RANGE O2 P/T 2<br />
LEARN RANGE O2 P/T 3<br />
LEARN RANGE O2(BK1)IDLE<br />
LEARN RANGE O2(BK1)P/T2<br />
LEARN RANGE O2(BK1)P/T3<br />
LEARN RANGE O2(BK1)P/T4<br />
LEARN RANGE O2(BK2)IDLE<br />
LEARN RANGE O2(BK2)P/T2<br />
LEARN RANGE O2(BK2)P/T3<br />
LEARN RANGE O2(BK2)P/T4 _____________________ (range: REACHED/NOT REACHED)<br />
Indicates the state of the lambda learned range when at idle or part load section 2, 3, for cylinders<br />
1 to 3 (Bank 1) when at idle or part load section 2, 3 or 4, and for cylinders 4 to 6 (Bank 2) when at<br />
idle or part load section 2, 3 or 4.<br />
NOTE:<br />
i On some OBD-I (1991–1995) vehicles, the displayed values for Short-term fuel trim, LEARN O2<br />
(IDLE), LEARN O2 (P/T), or LEARN O2 (FULL), may be mislabeled as reading in percentage. In<br />
actuality, they are reading a numeric factor of 1.0 midpoint ±0.5 (0.5 to 1.5). For 2.8L AAA engine,<br />
the range is 0.80–1.20.<br />
LEARN VALUE AIR MASS IDLE(%) __________________________(range: see description)<br />
Indicates the learned value correction for idle speed based on mass airflow. The number can<br />
range from -100% to 100% with 0% as the midpoint. A number above 0% indicates that the ECM<br />
has commanded a overall high idle correction. A number below 0% indicates that the ECM has<br />
commanded a overall low idle correction.<br />
LEARN VALUE AIR MASS IDLE(g/s) _________________________(range: see description)<br />
Indicates learned value of air that bypasses the throttle at idle and thus controls the idle speed.<br />
The motor that drives the IAC valve returns a value of 0 to 255 to the ECM. The ECM then<br />
converts this value into an airflow value in grams per second.<br />
118
Data Parameters<br />
Gas Engine Parameters<br />
LEARN VALUE CANP SYSTEM _____________________________(range: see description)<br />
Indicates the learned canister purge value, an internal calculating factor and can be ignored.<br />
LEARN VALUE DC ISC<br />
LEARN VALUE DC ISC(%) _________________________________(range: see description)<br />
Indicates the learned duty cycle of the idle air control motor and thus controls the idle speed.<br />
LEARN VALUE DC ISC(A/T) ________________________________(range: see description)<br />
Indicates the learned value of the idle air control motor on models with an automatic transmission.<br />
The value is the duty cycle of the ISC valve.<br />
LEARN VALUE DC ISC(MUL)(%) ______________________________ (range: not available)<br />
Indicates the learned duty cycle of the idle air control motor and thus controls the idle speed.<br />
LEARN VALUE IAC _________________________________________ (range: not available)<br />
Indicates the current learned idle air control value.<br />
LEARN VALUE IDLE SPEED(NOT P/N) _________________________ (range: not available)<br />
Indicates the learning value for the idle stabilizing control system when an automatic transmission<br />
is in drive or reverse range.<br />
LEARN VALUE IDLE SPEED(P/N) _____________________________ (range: not available)<br />
Indicates the learning value for the idle stabilizing control system when an automatic transmission<br />
is in neutral or park range, or when a manual transmission is in neutral.<br />
LEARN VALUE ISC _________________________________________ (range: not available)<br />
Indicates the current learned idle speed control value.<br />
LRN VALUE ISC(g/s) ________________________________________ (range: not available)<br />
Indicates the learned value of the idle speed control airflow when the transmission is in park or<br />
neutral range. The motor that drives the ISC valve returns the duty cycle to the ECM which<br />
calculates the airflow value in grams per second.<br />
LEARN VALUE ISC(AT IN D) __________________________________ (range: not available)<br />
Indicates the learned value of the idle air control motor when an automatic transmission is in a<br />
forward or reverse range. The value is the ISC valve duty cycle.<br />
LEARN VALUE ISC(MT/AT IN P/N) _____________________________ (range: not available)<br />
Indicates the learned value of the idle air control motor when the transmission is in park or neutral<br />
range. The value is the ISC valve duty cycle.<br />
LEARN VALUE KICKDOWN(%) _______________________________ (range: not available)<br />
Indicates the learning value for the kickdown of the automatic transmission.<br />
LEARN VALUE MAF-SENSOR ________________________________ (range: not available)<br />
Indicates the learning voltage being read by the Mass Air Flow (MAF) sensor. This voltage is used<br />
by the ECM to calculate the maximum amount of air being drawn into the engine.<br />
LEARN VALUE MIXTURE ____________________________________ (range: not available)<br />
Indicates the operation and Long-term correction of the fuel delivery. It shows whether the ECM is<br />
commanding a rich or lean mixture.<br />
The number theoretically can range from 0.00 to 1.99 with 1.00 as the midpoint. A number above<br />
1.0 indicates that the ECM has commanded an overall rich mixture correction. A number below<br />
1.0 indicates that the ECM has commanded an overall lean mixture correction.<br />
Fuel correction operates only in closed loop. In open loop, a fixed value displays.<br />
119
Data Parameters<br />
Gas Engine Parameters<br />
LEARN VALUE MIXTURE(%)<br />
LEARN VALUE MIXTURE(BANK 1)(%)<br />
LEARN VALUE MIXTURE(BANK 2)(%)__________________________ (range: not available)<br />
Indicates the operation and Long-term correction of the fuel delivery. It shows whether the ECM is<br />
commanding a rich or lean mixture. The number theoretically can range from -100% to 100% with<br />
0% as the midpoint. A number above 0% indicates that the ECM has commanded an overall rich<br />
mixture correction. A number below 0% indicates that the ECM has commanded an overall lean<br />
mixture correction.<br />
These Long-term correction numbers are calculated by the ECM from the Short-term fuel<br />
correction patterns or trends. Fuel correction operates only in closed loop. In open loop, a fixed<br />
value displays.<br />
LEARN VALUE MIXTURE(ADAPTIVE) __________________________ (range: not available)<br />
Indicates the operation and Long-term correction of the fuel delivery. It shows whether the ECM is<br />
commanding a rich or lean mixture.<br />
The number theoretically can range from 0 to 255 with 0 as the midpoint. A number of 13 to 128<br />
indicates that the ECM has commanded an overall lean mixture correction. A number of 128 to<br />
243 indicates that the ECM has commanded an overall rich mixture correction.<br />
These Long-term correction numbers are calculated by the ECM from the Short-term fuel<br />
correction patterns or trends. Fuel correction operates only in closed loop. In open loop, a fixed<br />
value displays.<br />
On some OBD-I (1991–1995) vehicles, values for short-term fuel trim may be mislabeled. See the<br />
note on page page 118 for details.<br />
LEARN VALUE MIXTURE(ADP)(ms) ___________________________ (range: not available)<br />
Indicates what the ECM uses as a learned value for injection time correction in milliseconds.<br />
On some OBD-I (1991–1995) vehicles, values for short-term fuel trim may be mislabeled. See the<br />
note on page page 118 for details.<br />
LEARN VALUE MIXTURE(BANK 1)<br />
LEARN VALUE MIXTURE(BANK 2) ____________________________ (range: not available)<br />
Indicates the operation and Long-term correction of the fuel delivery for cylinders 1 to 4 (Bank 1)<br />
or 5 to 8 (Bank 2). The readings show if the ECM is commanding a rich or lean mixture.<br />
The number theoretically can range from 0.00 to 1.99 with 1.00 as the midpoint. A number above<br />
1.0 indicates that the ECM has commanded an overall rich mixture correction. A number below<br />
1.0 indicates that the ECM has commanded an overall lean mixture correction. Fuel correction<br />
operates only in closed loop. In open loop, a fixed value displays.<br />
On some OBD-I (1991–1995) vehicles, values for short-term fuel trim may be mislabeled. See the<br />
note on page page 118 for details.<br />
LEARN VALUE MIXTURE(CANP ACT)(%) _______________________ (range: not available)<br />
Indicates the operation and Short-term correction of the fuel delivery when the canister purge<br />
system is active. It shows whether the ECM is commanding a rich or lean mixture.<br />
The number theoretically can range from -100% to 100% with 0% as the midpoint. Fuel correction<br />
operates only in closed loop. In open loop, a fixed value displays.<br />
120
Data Parameters<br />
Gas Engine Parameters<br />
LEARN VALUE MIXTURE(IDLE)(%)<br />
LEARN VALUE MIXTURE(P/T1)(%)<br />
LEARN VALUE MIXTURE(P/T2)(%)<br />
LEARN VALUE MIXTURE(P/T3)(%) ____________________________ (range: not available)<br />
Indicates the operation and Long-term correction of the fuel delivery when at idle or part throttle 1,<br />
2 or 3 only. (Sections of a petitioned part load range). It shows whether the ECM is commanding<br />
a rich or lean mixture.<br />
The number theoretically can range from -100% to 100% with 0% as the midpoint. A number<br />
above 0% indicates that the ECM has commanded an overall rich mixture correction. A number<br />
below 0% indicates that the ECM has commanded an overall lean mixture correction.<br />
These Long-term correction numbers are calculated by the ECM from the Short-term fuel<br />
correction patterns or trends. Fuel correction operates only in closed loop. In open loop, a fixed<br />
value displays.<br />
LEARN VALUE MIXTURE CORR ______________________________ (range: not available)<br />
Indicates the operation and Long-term correction of the fuel delivery. It shows whether the ECM is<br />
commanding a rich or lean mixture.<br />
The number theoretically can range from 0 to 255 with 128 as the midpoint. A number above 128<br />
indicates that the ECM has commanded an overall rich mixture correction. A number below 128<br />
indicates that the ECM has commanded an overall lean mixture correction.<br />
These Long-term correction numbers are calculated by the ECM from the Short-term fuel<br />
correction patterns or trends. Fuel correction operates only in closed loop. In open loop, a fixed<br />
value displays.<br />
On some OBD-I (1991–1995) vehicles, values for short-term fuel trim may be mislabeled. See the<br />
note on page page 118 for details.<br />
LEARN VALUE MIXTURE CORR(%)____________________________ (range: not available)<br />
Indicates the operation and Short-term correction of the fuel delivery. It shows whether the ECM<br />
is commanding a rich or lean mixture.<br />
The number theoretically can range from -100% to 100% with 0% as the midpoint. A number<br />
above 0% indicates that the ECM has commanded a temporary rich mixture correction. A number<br />
below 0% indicates that the ECM has commanded a temporary lean mixture correction. Fuel<br />
correction operates only in closed loop. In open loop, a fixed value displays.<br />
LEARN VALUE MIXTURE CORR(ms)___________________________ (range: not available)<br />
Indicates the learning value the ECM is using for injection time correction at idle in milliseconds.<br />
On some OBD-I (1991–1995) vehicles, values for short-term fuel trim may be mislabeled. See the<br />
note on page page 118 for details.<br />
LEARN VALUE O2 __________________________________________ (range: not available)<br />
Indicates the Long-term correction of the fuel delivery. It shows whether the ECM is commanding<br />
a rich or lean mixture.<br />
The number can range from 0 to 255 with 128 as the midpoint. A number above 128 indicates that<br />
the ECM has commanded a overall rich mixture correction. A number below 128 indicates that the<br />
ECM has commanded a overall lean mixture correction.<br />
On some OBD-I (1991–1995) vehicles, values for short-term fuel trim may be mislabeled. See the<br />
note on page page 118 for details.<br />
121
Data Parameters<br />
Gas Engine Parameters<br />
LEARN VALUE O2(%) _______________________________________ (range: not available)<br />
Indicates the operation and Long-term correction of the fuel delivery. It shows whether the ECM is<br />
commanding a rich or lean mixture.<br />
The number theoretically can range from -100% to 100% with 0% as the midpoint. A number<br />
above 0% indicates that the ECM has commanded an overall rich mixture correction. A number<br />
below 0% indicates that the ECM has commanded an overall lean mixture correction. Fuel<br />
correction operates only in closed loop. In open loop, a fixed value displays.<br />
LEARN VALUE O2(ACTUAL)(BK1)(%)<br />
LEARN VALUE O2(ACTUAL)(BK2)(%) __________________________ (range: not available)<br />
Indicates the actual value (before correction) of the fuel delivery for cylinders 1 to 3 (Bank 1) or 4<br />
to 6 (Bank 2). A number above 0% indicates a rich mixture. A number below 0% indicates a lean<br />
mixture. Fuel correction operates only in closed loop. In open loop, a fixed value displays.<br />
LEARN VALUE O2(BK1)<br />
LEARN VALUE O2(BK2) _____________________________________ (range: not available)<br />
Indicates the operation and Short-term correction of the fuel delivery for cylinders 1 to 3 (Bank 1)<br />
or 4 to 6 (Bank 2). They show whether the ECM is commanding a rich or lean mixture.<br />
The number theoretically ranges from 0.00 to 2.00 with 1.00 as the midpoint. A number above 1.0<br />
indicates that the ECM has commanded a temporary rich mixture correction. A number below 1.0<br />
indicates that the ECM has commanded a temporary lean mixture correction.<br />
These Short-term correction numbers are also used by the ECM to learn a fuel correction pattern<br />
or trend and are stored in the learned mixture or lambda values. Fuel correction operates only in<br />
closed loop. In open loop, a fixed value displays.<br />
On some OBD-I (1991–1995) vehicles, values for short-term fuel trim may be mislabeled. See the<br />
note on page page 118 for details.<br />
LEARN VALUE O2(BK1)(%)<br />
LEARN VALUE O2(BK2)(%)<br />
LEARN VALUE O2(BK1)(ADD)(%)<br />
LEARN VALUE O2(BK2)(ADD)(%)<br />
LEARN VALUE O2(BK1)(MUL)(%)<br />
LEARN VALUE O2(BK2)(MUL)(%)<br />
LEARN VALUE O2(BK1)(IDLE)(%)<br />
LEARN VALUE O2(BK2)(IDLE)(%)<br />
LEARN VALUE O2(BK1)(P/T)(%)<br />
LEARN VALUE O2(BK2)(P/T)(%) ______________________________ (range: not available)<br />
Indicates the operation and Short-term correction of the fuel delivery for Bank 1 or Bank 2 under<br />
the stated engine load conditions. They show if the ECM is commanding a rich or lean mixture.<br />
A number above 0% indicates that the ECM has commanded a temporary rich mixture correction.<br />
A number below 0% indicates that the ECM has commanded a temporary lean mixture correction.<br />
These Short-term correction numbers are also used by the ECM to learn a fuel correction pattern<br />
or trend and are stored in the learned mixture or lambda values. Fuel correction operates only in<br />
closed loop. In open loop, a fixed value displays.<br />
122
Data Parameters<br />
Gas Engine Parameters<br />
LEARN VALUE O2(BK1)IDLE OK<br />
LEARN VALUE O2(BK1)P/T1 OK<br />
LEARN VALUE O2(BK1)P/T2 OK<br />
LEARN VALUE O2(BK1)P/T3 OK __________________________________ (range: YES/NO)<br />
Indicates whether the ECM has determined that the learned lambda value for cylinders 1 to 3<br />
(Bank 1) at idle or part load sections is within tolerances. They read YES if adaptation is learned,<br />
and NO if the ECM has to relearn the lambda settings in this engine load range.<br />
LEARN VALUE O2(BK2)IDLE OK<br />
LEARN VALUE O2(BK2)P/T1 OK<br />
LEARN VALUE O2(BK2)P/T2 OK<br />
LEARN VALUE O2(BK2)P/T3 OK __________________________________ (range: YES/NO)<br />
Indicates whether the ECM has determined that the learned lambda value for cylinders 4 to 6<br />
(Bank 2) at idle or part load sections is within tolerances. They read YES if adaptation is learned,<br />
and NO if the ECM has to relearn the lambda settings in this engine load range.<br />
LEARN VALUE O2(FULL)<br />
LEARN VALUE O2(IDLE)_____________________________________ (range: not available)<br />
Indicates the operation and Long-term correction of the fuel delivery, when at full throttle or at idle<br />
only. They show whether the ECM is commanding a rich or lean mixture.<br />
The number theoretically can range from 0.00 to 1.99 with 1.00 as the midpoint. A number above<br />
1.0 indicates that the ECM has commanded an overall rich mixture correction. A number below<br />
1.0 indicates that the ECM has commanded an overall lean mixture correction. Fuel correction<br />
operates only in closed loop. In open loop, a fixed value displays.<br />
On some OBD-I (1991–1995) vehicles, values for short-term fuel trim may be mislabeled. See the<br />
note on page page 118 for details.<br />
LEARN VALUE O2(IDLE)(%)<br />
LEARN VALUE O2(P/T)(%)<br />
LEARN VALUE O2(P/T)(MUL)(%) ______________________________ (range: not available)<br />
Indicates the operation and Short-term correction of the fuel delivery under the stated engine load<br />
conditions. They show whether the ECM is commanding a rich or lean mixture.<br />
A number above 0% indicates that the ECM has commanded a temporary rich mixture correction.<br />
A number below 0% indicates that the ECM has commanded a temporary lean mixture correction.<br />
Fuel correction operates only in closed loop. In open loop, a fixed value displays.<br />
LEARN VALUE O2(IDLE)(ms) _________________________________ (range: not available)<br />
Indicates the learning value that the ECM is using for injection time correction at idle in<br />
milliseconds.<br />
On some OBD-I (1991–1995) vehicles, values for short-term fuel trim may be mislabeled. See the<br />
note on page page 118 for details.<br />
LEARN VALUE O2(P/T)<br />
LEARN VALUE O2(P/T-WOT) _________________________________ (range: not available)<br />
Indicates the operation and Long-term correction of the fuel delivery when at part load or full<br />
throttle (WOT). They show whether the ECM is commanding a rich or lean mixture.<br />
The number theoretically can range from 0.00 to 1.99 with 1.00 as the midpoint. A number above<br />
1.0 indicates that the ECM has commanded an overall rich mixture correction.<br />
A number below 1.0 indicates that the ECM has commanded an overall lean mixture correction.<br />
Fuel correction operates only in closed loop. In open loop, a fixed value displays.<br />
123
Data Parameters<br />
Gas Engine Parameters<br />
On some OBD-I (1991–1995) vehicles, values for short-term fuel trim may be mislabeled. See the<br />
note on page page 118 for details.<br />
LEARN VALUE O2 IDLE OK<br />
LEARN VALUE O2 P/T 1 OK<br />
LEARN VALUE O2 P/T 2 OK<br />
LEARN VALUE O2 P/T 3 OK ______________________________________ (range: YES/NO)<br />
Indicates whether the ECM has determined that the learned lambda value for idle or part load<br />
sections is within tolerances. They read YES when within tolerance, and NO if the ECM has to<br />
relearn the lambda adaptation settings in the idle engine load range.<br />
LEARN VALUE O2 SNS 1(IDLE)(%) ____________________________ (range: not available)<br />
Indicates the learning value for the O2S when the engine is idling.<br />
LEARN VALUE O2 SNS 1(P/T)(%) _____________________________ (range: not available)<br />
Indicates the learning value for the O2S when the engine is in part load according to the throttle<br />
position.<br />
LEARN VALUE THR VALVE ADJUSTER ________________________ (range: not available)<br />
Indicates the internal ECM figure for the learning value for the idling stabilization by throttle valve<br />
positioner.<br />
LEARN VALUE TPS _________________________________________ (range: not available)<br />
Indicates the learning value for the throttle position sensor.<br />
LEARN VALUE TPS(V) ______________________________________ (range: not available)<br />
Indicates the learning voltage for throttle closed. This value is learned by the ECM and is used as<br />
the throttle closed learned position.<br />
LIMITED DYNAMIC ACTIVE ______________________________________ (range: YES/NO)<br />
Indicates whether the self diagnostic system has detected a fault in the lambda or lambda heater<br />
systems, even if no trouble codes are stored in the fault code memory.<br />
LIMITED OPERATION(LIMP) ______________________________________ (range: YES/NO)<br />
Indicates whether the ECM is operating in limited operation strategy (LOS or limp home mode),<br />
which can automatically supply substitute values when sensor failure occurs, so a sensor can fail<br />
and not necessarily affect driveability. Reading should normally be NO.<br />
LOS MODE ____________________________________________________ (range: YES/NO)<br />
Indicates whether the ECM is operating in limited operation strategy (LOS or limp home mode),<br />
which can automatically supply substitute values when sensor failure occurs, so a sensor can fail<br />
and not necessarily affect driveability. Reading should normally be NO.<br />
LRN IDLING STABILIZATION(kg/h) ____________________________ (range: not available)<br />
Indicates the learned value of the idle control system. It shows the volume of air the ECM is<br />
commanding in kilograms per hour.<br />
MAF IDLE(g/s) _____________________________________________ (range: not available)<br />
Indicates the amount of extra air mass required to keep the engine idle speed correct when a<br />
change in load occurs, such as when the air conditioning or the rear heater is switched on.<br />
MAF ISC TRIM(%) __________________________________________ (range: not available)<br />
Indicates the amount of air that bypasses the throttle at idle. The motor that drives the IAC valve<br />
returns a value of 0 to 255 to the ECM. The ECM then converts this value into an airflow value as<br />
a percentage of the total airflow.<br />
124
Data Parameters<br />
Gas Engine Parameters<br />
MAF-SENSOR(V) ___________________________________________ (range: not available)<br />
Indicates the actual voltage signal from the Mass Air Flow (MAF) sensor. This voltage is used by<br />
the ECM to calculate the maximum amount of air being drawn into the engine.<br />
MAF TRIM(g/s) _____________________________________________ (range: not available)<br />
Indicates the amount of extra air mass required to keep the engine idle speed correct when a<br />
change in load occurs, such as when the air conditioning or the rear heater is switched on.<br />
MAP(%) ___________________________________________________ (range: not available)<br />
Indicates intake manifold vacuum as a percentage. The ECM uses the figure in calculations to<br />
determine engine load.<br />
MAP(V)<br />
MAP(mbar) ________________________________________________ (range: not available)<br />
Indicates either actual voltage from the Manifold Absolute Pressure (MAP) sensor, or a pressure<br />
in mbar as calculated by the ECM based on the MAP sensor signal. The voltage is low when the<br />
absolute pressure is low and high when the absolute pressure is high.<br />
On turbocharged engines, this value is used to control the amount of boost that the turbocharger<br />
delivers.<br />
MAP-CONTROLLED IDLE SPEED _____________________________ (range: not available)<br />
Indicates the pre-mapped working range of the idle speed control (ISC). It shows the idle<br />
stabilization characteristics the ECM should use for a given set of operating conditions.<br />
MASS AIR FLOW(g/s) _______________________________________ (range: not available)<br />
Indicates mass air flow (MAF) in grams per second. Most port fuel injection engines have an<br />
airflow sensor to measure the mass or weight of air entering the engine. The airflow sensor<br />
delivers a signal that indicates the mass airflow in grams per second at any given instant. The<br />
ECM uses the signal from the airflow sensor and other sensors to determine the air/fuel ratio<br />
needed by the engine and the amount of fuel to be injected.<br />
MASS AIR FLOW(V)_________________________________________ (range: not available)<br />
Indicates the actual voltage being read by the Mass Air Flow (MAF) sensor. This voltage is used<br />
by the ECM to calculate the maximum amount of air being drawn into the engine.<br />
MASS AIR FLOW(ACTUAL)(g/s)_______________________________ (range: not available)<br />
Indicates the actual amount of air flowing into the engine as grams per second.<br />
Used on 2.0L 5.9.2 systems for measurement of reverse airflow at MAF sensor using two<br />
temperature sensors. Normal valve overlap and intake manifold design may cause reversion of<br />
airflow which results in incorrect rich mixture. Two similarly heated temperature sensors are ECM<br />
monitored in the MAF to detect differential temperatures.<br />
MASS AIR FLOW(DESIRED)(g/s) ______________________________ (range: not available)<br />
Indicates the maximum quantity of air that should be drawn into the engine under the present<br />
operating conditions in grams per second.<br />
MAX VALUE THR ADJUSTER(%) ______________________________ (range: not available)<br />
Indicates the throttle valve adjuster maximum stop position for start up and base idle.<br />
MAX VALUE THR ADJUSTER(V) ______________________________ (range: not available)<br />
Indicates the throttle valve adjuster maximum position as voltage.<br />
MIN VALUE THR ADJUSTER(%)_______________________________ (range: not available)<br />
Indicates the throttle valve adjuster minimum stop position for start up and basic idle.<br />
125
Data Parameters<br />
Gas Engine Parameters<br />
MIN VALUE THR ADJUSTER(V) _______________________________ (range: not available)<br />
Indicates the throttle valve adjuster minimum stop position for start up and basic idle.<br />
MISFIRES PER 200 REVS(CYL.1)<br />
MISFIRES PER 200 REVS(CYL.2)<br />
MISFIRES PER 200 REVS(CYL.3)<br />
MISFIRES PER 200 REVS(CYL.4)<br />
MISFIRES PER 200 REVS(CYL.5)<br />
MISFIRES PER 200 REVS(CYL.6)<br />
MISFIRES PER 200 REVS(CYL.7)<br />
MISFIRES PER 200 REVS(CYL.8)<br />
MISFIRES PER 200 REVS(ALL CYL) ___________________________ (range: not available)<br />
Indicates the number of misfires detected for the selected cylinder per 200 crankshaft revolutions<br />
(vehicle must be driven).<br />
MIXTURE __________________________________________________ (range: RICH/LEAN)<br />
Indicates the general rich or lean condition of the exhaust as measured by the lambda O2S.<br />
Exhaust oxygen content is related to oxygen content in the intake air/fuel mixture and thus<br />
indicates intake air/fuel ratio. The O2S is the primary sensor that indicates whether the engine is<br />
running rich or lean. The O2S must be hot and the ECM must be in closed loop before the ECM<br />
will respond to the sensor signal.<br />
MIXTURE CORR(CANP ACTIVE) __________________________________ (range: YES/NO)<br />
Indicates the current mixture correction with canister purge valve active.<br />
MIXTURE CORRECTION _____________________________________ (range: not available)<br />
Indicates the operation and Short-term correction of the fuel delivery. It shows whether the ECM<br />
is commanding a rich or lean mixture.<br />
The number can range from 0 to 255 with 128 as the midpoint. A number above 128 indicates that<br />
the ECM has commanded a temporary rich mixture correction. A number below 128 indicates that<br />
the ECM has commanded a temporary lean mixture correction.<br />
These Short-term correction numbers are also used by the ECM to learn a fuel correction pattern<br />
or trend and are stored in the learned mixture or lambda values. Fuel correction operates only in<br />
closed loop. In open loop, a fixed value displays.<br />
MIXTURE CORRECTION(%) __________________________________ (range: not available)<br />
Indicates the operation and Short-term correction of the fuel delivery. It shows whether the ECM<br />
is commanding a rich or lean mixture.<br />
A number above 0% indicates that the ECM has commanded a temporary rich mixture correction.<br />
A number below 0% indicates that the ECM has commanded a temporary lean mixture correction.<br />
These Short-term correction numbers are also used by the ECM to learn a fuel correction pattern<br />
or trend and are stored in the learned mixture or lambda values. Fuel correction operates only in<br />
closed loop. In open loop, a fixed value displays.<br />
MODE HALL-REFERENCE SIGNAL ____________________________ (range: not available)<br />
Indicates the position of the reference signal (missing teeth) in the Hall-effect sensor window.<br />
O2 ACTIVE ____________________________________________________ (range: YES/NO)<br />
Indicates whether the lambda regulation part of the ECM is active or not (open/closed loop), this<br />
depends on the lambda sensor temperature and operating conditions of the engine. Under full<br />
load conditions, the ECM goes into open loop.<br />
126
Data Parameters<br />
Gas Engine Parameters<br />
O2 ADP & ACTUAL VALUE(%) ________________________________ (range: not available)<br />
Indicates the operation and Short-term correction of the actual fuel delivery. It shows whether the<br />
ECM is commanding a rich or lean mixture.<br />
A number above 0% indicates that the ECM has commanded a temporary rich mixture correction.<br />
A number below 0% indicates that the ECM has commanded a temporary lean mixture correction.<br />
These Short-term correction numbers are also used by the ECM to learn a fuel correction pattern<br />
or trend and are stored in the learned mixture or lambda values. Fuel correction operates only in<br />
closed loop. In open loop, a fixed value displays.<br />
O2 CONTROL MODE _________________________________ (range: ACTIVE/NOT ACTIVE)<br />
Indicates the current operating mode of the lambda system.<br />
O2 CORR(CANP ACTIVATED)_________________________________ (range: not available)<br />
Indicates the required correction of the lambda figure when the canister purge system (CANP) is<br />
in operation. It shows whether the charge coming from the CANP is very rich or lean and therefore<br />
the ECM needs to reduce or increase the amount of fuel delivery.<br />
The number theoretically can range from 0.0 to 1.9 with 1.0 as the midpoint. A number above 1.0<br />
indicates an ECM command for a temporary rich mixture correction. A number below 1.0 indicates<br />
an ECM command for a temporary lean mixture correction.<br />
O2 CORR(CANP ACTIVATED)(%)______________________________ (range: not available)<br />
Indicates the required correction of the lambda figure when the canister purge system (CANP) is<br />
in operation. It shows the percentage the ECM needs to reduce or increase the amount of fuel<br />
delivery.<br />
A number above 0% indicates an ECM command for a temporary rich mixture correction. A<br />
number below 0% indicates an ECM command for a temporary lean mixture correction.<br />
O2 CTRL(BANK 1)(%)<br />
O2 CTRL(BANK 2)(%) _______________________________________ (range: not available)<br />
Indicates the operation and Short-term correction of the fuel delivery for cylinders 1 to 3 (Bank 1)<br />
or 4 to 6 (Bank 2). It shows whether the ECM is commanding a rich or lean mixture.<br />
O2 CTRL & ACT(BANK 1)(%)<br />
O2 CTRL & ACT(BANK 2)(%) _________________________________ (range: not available)<br />
Indicates the overall operation and Long-term correction of fuel delivery for cylinders 1 to 3 (Bank<br />
1) or 4 to 6 (Bank 2). They show whether the ECM is commanding an overall rich or lean mixture.<br />
Fuel correction operates only in closed loop. In open loop, a fixed value displays.<br />
A number above 0% indicates that the ECM has commanded a temporary rich mixture correction.<br />
A number below 0% indicates that the ECM has commanded a temporary lean mixture correction.<br />
These Short-term correction numbers are also used by the ECM to learn a fuel correction pattern<br />
or trend and are stored in the learned mixture or lambda values.<br />
O2 CTRL FACTOR(BANK 1)<br />
O2 CTRL FACTOR(BANK 2) __________________________________ (range: not available)<br />
Indicates the operation and Short-term correction of fuel delivery for cylinders 1 to 3 (Bank 1) or 4<br />
to 6 (Bank 2). It shows whether the ECM is commanding a rich or lean mixture. The number<br />
theoretically can range from 0.0 to 1.9 with 1.0 as the midpoint. A number above 1.0 indicates that<br />
the ECM has commanded a temporary rich mixture correction. A number below 1.0 indicates that<br />
the ECM has commanded a temporary lean mixture correction.<br />
127
Data Parameters<br />
Gas Engine Parameters<br />
These Short-term correction numbers are also used by the ECM to learn a fuel correction pattern<br />
or trend and are stored in the learned mixture or lambda values. Fuel correction operates only in<br />
closed loop. In open loop, a fixed value displays.<br />
Table 6-1 Normal ranges and factory names for O2 control factor parameters<br />
Factory Data Name<br />
O2 SENSOR LAMBDA FACTOR<br />
O2 SENSOR LAMBDA FACTOR<br />
LAMBDA FACT IDLE ADAPT; LAMBDA<br />
FACT PART ADAPT; LAMBDA FACT<br />
ADAPTMED/FULL LOAD<br />
Normal Value Working Range<br />
Range: 0.5–1.5; Normal Value: 1.0 ±0.3 is base<br />
mid-point; For 2.8 (AAA) spec: 0.80–1.20<br />
Range: 0.5–1.5; Normal Value: 1.0 ±0.3 is base<br />
mid-point<br />
Range: 0.5–1.5; Normal Value: 1.0 ±0.3 (0.7–1.3) is<br />
base mid-point; For 2.0L (ABA) IDLE ADAPT: 0.87–1.2;<br />
For 2.8L (AAA) IDLE ADAPT: 0.53–1.47; Part Load:<br />
0.80–1.20; Low Load: 0.53–1.47<br />
O2 CTRL FACTOR(CYL 1-3)(%)<br />
O2 CTRL FACTOR(CYL 4-6)(%) _______________________________ (range: not available)<br />
Indicates the operation and Short-term correction of fuel delivery for cylinders 1 to 3 (Bank 1) or 4<br />
to 6 (Bank 2). They show whether the ECM is commanding a rich or lean mixture.<br />
A number above 0% indicates that the ECM has commanded a temporary rich mixture correction.<br />
A number below 0% indicates that the ECM has commanded a temporary lean mixture correction.<br />
These Short-term correction numbers are also used by the ECM to learn a fuel correction pattern<br />
or trend and are stored in the learned mixture or lambda values.<br />
O2 CTRL READY _______________________________________________ (range: YES/NO)<br />
Indicates whether the lambda circuit is ready to reliably measure the exhaust oxygen content.<br />
O2 INTEGRATOR ___________________________________________ (range: not available)<br />
Indicates the operation and Short-term correction of the fuel delivery. It shows whether the ECM<br />
is commanding a rich or lean mixture.<br />
The number can range from 0 to 255 with 128 as the midpoint. A number above 128 indicates that<br />
the ECM has commanded a temporary rich mixture correction. A number below 128 indicates that<br />
the ECM has commanded a temporary lean mixture correction.<br />
These Short-term correction numbers are also used by the ECM to learn a fuel correction pattern<br />
or trend and are stored in the learned mixture or lambda values. Fuel correction operates only in<br />
closed loop. In open loop, a fixed value displays.<br />
O2 LOOP CLOSED______________________________________________ (range: YES/NO)<br />
Indicates whether the lambda regulation part of the ECM is in closed loop. This depends on the<br />
lambda sensor temperature and operating conditions of the engine. Under full load conditions, the<br />
ECM goes into open loop.<br />
O2 REGULATION ___________________________________________ (range: not available)<br />
Indicates the operation and Short-term correction of the fuel delivery. It shows whether the ECM<br />
is commanding a rich or lean mixture.<br />
The number theoretically can range from 0.00 to 1.99 with 1.00 as the midpoint, but in practice the<br />
number only ranges from 0.9 to 1.1. A number above 1.0 indicates that the ECM has commanded<br />
a temporary rich mixture correction. A number below 1.0 indicates that the ECM has commanded<br />
a temporary lean mixture correction.<br />
128
Data Parameters<br />
Gas Engine Parameters<br />
These Short-term correction numbers are also used by the ECM to learn a fuel correction pattern<br />
or trend and are stored in the learned mixture or lambda values. Fuel correction operates only in<br />
closed loop. In open loop, a fixed value displays.<br />
O2 REGULATION(%)<br />
O2 REGULATION(BANK 1)(%)<br />
O2 REGULATION(BANK 2)(%) ________________________________ (range: not available)<br />
Indicates the operation and Short-term correction of the fuel delivery. It shows whether the ECM<br />
is commanding a rich or lean mixture.<br />
A number above 0% indicates that the ECM has commanded a temporary rich mixture correction.<br />
A number below 0% indicates that the ECM has commanded a temporary lean mixture correction.<br />
These Short-term correction numbers are also used by the ECM to learn a fuel correction pattern<br />
or trend and are stored in the learned mixture or lambda values. Fuel correction operates only in<br />
closed loop. In open loop, a fixed value displays.<br />
O2 REGULATION ACTIVE ________________________________________ (range: YES/NO)<br />
Indicates whether the lambda regulation part of the ECM is active or not (open/closed loop). This<br />
depends on the lambda sensor temperature and operating conditions of the engine. Under full<br />
load conditions, the ECM goes into open loop.<br />
O2 REGULATION ON STOP ______________________________________ (range: YES/NO)<br />
Indicates whether the lambda regulation part of the ECM is active or not (open/closed loop). This<br />
depends on the lambda sensor temperature and operating conditions of the engine. Under full<br />
load conditions, the ECM goes into open loop.<br />
O2 SENSOR(V)<br />
O2 SENSOR 1(V)<br />
O2 SENSOR 2(V)<br />
O2 SENSOR(BANK 1)(V)<br />
O2 SENSOR(BANK 1)(V)<br />
O2 SENSOR(BANK 2)(V)<br />
O2 SENSOR(BANK 2)(V) _____________________________________ (range: not available)<br />
Indicates oxygen sensor (O2S) voltage. The O2S is the primary sensor that indicates whether the<br />
engine is running rich or lean. An O2S can have a range of 0.0 to 1.0V or 0.0 to 5.0V.<br />
O2 SENSOR 1 and O2 SENSOR 2 refer to cylinder Bank 1 or cylinder Bank 2 respectively.<br />
The most common O2Ss generate a voltage signal that ranges from 0.0 to 1.0V. A high signal<br />
(0.48 to 1.00V) indicates a rich mixture; a low signal (0.0 to 0.48) indicates a lean mixture. In<br />
normal operation, the O2S voltage ranges from 0.1 to 1.0V. The O2S must be hot, and the ECM<br />
must be in closed loop before the ECM will respond to the sensor signal.<br />
Some models, such as the VW 2001 2.0L with the AEG engine and the new 2002 Passat W8<br />
(BDP), use a 0–5V O2S. Rich is high voltage; lean is low voltage. Other models may use a Linear<br />
Air/Fuel Ratio Sensor (A/F sensor) which measures the exact air/fuel mixture, the signal does not<br />
constantly switch between low and high. The voltage displayed (display group 33 in Table 6-2<br />
below) for these is an ECM computed value where 1.5V = 1 lambda or the ideal fuel mixture ratio<br />
of 14.7:1. Higher voltage indicates correction for rich mixture and lower voltage indicates a<br />
correction for a lean mixture. Under normal load, the voltage should vary around 1.5V, which<br />
means the mixture is right at stoichiometric or Lambda = 1. During deceleration from 3000 RPM,<br />
129
Data Parameters<br />
Gas Engine Parameters<br />
the mixture is lean and the voltage should go higher than 1.5V. Under full load acceleration, the<br />
mixture is rich and the signal should go low, 1V or lower.<br />
Table 6-2 Display group 33<br />
Display<br />
Group<br />
Sensor<br />
Bank 1,<br />
Sensor 1<br />
Bank 1, Sensor<br />
2<br />
Sensor voltage<br />
before CAT of a<br />
broadband<br />
sensor (V)<br />
Bank 2,<br />
Sensor 1<br />
Bank 2, Sensor<br />
2<br />
Sensor voltage<br />
before CAT of a<br />
broadband<br />
sensor (V)<br />
33<br />
Linear oxygen<br />
sensor control value<br />
Control value<br />
(%)<br />
Control value<br />
(%)<br />
O2 SENSOR HEATER ___________________________________________ (range: ON/OFF)<br />
Indicates whether the preheating of the O2 sensor is ON or OFF.<br />
O2 SENSOR HEATER(BK1-SNS1) _________________________________ (range: ON/OFF)<br />
Indicates if the before CAT O2S on Bank 1 heater is turned on.<br />
O2 SENSOR HEATER(BK1-SNS2) _________________________________ (range: ON/OFF)<br />
Indicates if the before CAT O2S on Bank 2 heater is turned on.<br />
O2 SENSOR HEATER(BK2-SNS1) _________________________________ (range: ON/OFF)<br />
Indicates if the preheating of the after CAT O2S is ON or OFF (Bank 1).<br />
O2 SENSOR HEATER(BK2-SNS2) _________________________________ (range: ON/OFF)<br />
Indicates if the preheating of the after CAT O2S is ON or OFF (Bank 2).<br />
O2 SENSOR HEATER AFTER CAT_________________________________ (range: ON/OFF)<br />
Indicates if the preheating of the after CAT O2S is ON or OFF.<br />
O2 SENSOR HEATER BEFORE CAT _______________________________ (range: ON/OFF)<br />
Indicates if the preheating of the before CAT O2S is ON or OFF.<br />
O2 SENSOR READY ____________________________________________ (range: YES/NO)<br />
Indicates whether the lambda regulation part of the ECM is ready or not (open/closed loop). This<br />
depends on the lambda sensor temperature and operating conditions of the engine. Under full<br />
load conditions, the ECM goes into open loop.<br />
O2 VALUE_________________________________________________ (range: not available)<br />
Indicates the operation and short term correction of the fuel delivery. It shows whether the ECM is<br />
commanding a rich or lean mixture.<br />
The number theoretically can range from 0.00 to 1.99 with 1.00 as the midpoint. A number above<br />
1.0 indicates that the ECM has commanded a temporary rich mixture correction. A number below<br />
1.0 indicates that the ECM has commanded a temporary lean mixture correction.<br />
These short term correction numbers are also used by the ECM to learn a fuel correction pattern<br />
or trend and are stored in the learned mixture or lambda values. Fuel correction operates only in<br />
closed loop. In open loop, a fixed value displays.<br />
O2 VALUE(ACTUAL)(%)<br />
O2 VALUE(BANK 1)(%)<br />
O2 VALUE(BANK 2)(%) ______________________________________ (range: not available)<br />
Indicates the operation and Short-term correction of the fuel delivery for the stated cylinders. They<br />
show whether the ECM is commanding a rich or lean mixture.<br />
A number above 0% indicates that the ECM has commanded a temporary rich mixture correction.<br />
A number below 0% indicates that the ECM has commanded a temporary lean mixture correction.<br />
130
Data Parameters<br />
Gas Engine Parameters<br />
These Short-term correction numbers are also used by the ECM to learn a fuel correction pattern<br />
or trend and are stored in the learned mixture or lambda values. Fuel correction operates only in<br />
closed loop. In open loop, a fixed value displays.<br />
OIL TEMPERATURE(°C/°F) ___________________________________ (range: not available)<br />
Indicates engine oil temperature in degrees.<br />
OPERATING MODE _________________________________________ (range: not available)<br />
Indicates the current operating mode of the engine system.<br />
OVERRUN_____________________________________________________ (range: YES/NO)<br />
Indicates whether the current engine operating condition is overrun.<br />
PARK/NEUTRAL POSITION ____________________________________(range: P-N-/-R-DL)<br />
Indicates whether an automatic transmission is in park or neutral, or in one of the drive ranges. It<br />
should read: P-N if the transmission is in either park or neutral R-DL if the transmission is in any<br />
forward gear or in reverse.<br />
PARK/NEUTRAL POSITION _________________________________ (range: P/N /NOT P/N)<br />
Indicates whether an automatic transmission is in park or neutral (reads P/N), or in one of the drive<br />
ranges (reads NOT P/N).<br />
PART LOAD DETECTED _________________________________________ (range: YES/NO)<br />
Indicates whether the ECM has determined that the engine is currently at part load. It is used<br />
during some adaptive learning processes.<br />
PHASE POSITION BK1(°CA)<br />
PHASE POSITION BK2(°CA)__________________________________ (range: not available)<br />
Indicates the position of the camshaft of Bank 1 or 2 in degrees.<br />
PHASE POSITION HALL SNS(°) _______________________________ (range: not available)<br />
Indicates the position of the Hall-effect sensor in degrees.<br />
PRESS CNTRL(%) __________________________________________ (range: not available)<br />
Indicates the duty cycle of the pressure control valve of the fuel pump.<br />
REAR HEATER MODE<br />
REAR HEATER SWITCH _________________________________________ (range: ON/OFF)<br />
Indicates the feedback signal from the Heated Rear Screen switch.<br />
REDUCTION TORQUE(ACTUAL)(Nm)<br />
Indicates the actual torque output after reductions (flywheel torque). Torque reductions are made<br />
by retarding the ignition point or by briefly switching off the fuel injectors.<br />
RELATIVE AIR MASS(%)_____________________________________ (range: not available)<br />
Indicates the relative air mass in percentage.<br />
RETARDED IGNITION POINT _____________________________________ (range: YES/NO)<br />
Indicates whether the ignition retard is active by, for example, the knock control system.<br />
RETARDED IGNITION POINT(°) _______________________________ (range: not available)<br />
Indicates the amount of ignition timing retard in degrees that is required to enable smooth gear<br />
changes on an automatic transmission system.<br />
RETARDING STEPS_________________________________________ (range: not available)<br />
Indicates the torque reduction steps being currently applied by the traction control system.<br />
131
Data Parameters<br />
Gas Engine Parameters<br />
RTD SIGNAL A/T ACTIVE ________________________________________ (range: YES/NO)<br />
Indicates whether the automatic transmission (A/T) retard is active. With the vehicle stationary<br />
and signal inactive (NO), A/T has R selected and with the signal active (YES), A/T has 2, 3, D, P<br />
or N selected.<br />
With the vehicle moving (above 10 MPH or 14 KM/H) and the signal inactive (NO), ignition timing<br />
retardation for A/T downshift is selected and with the signal active (YES), ignition timing<br />
retardation for A/T upshift is selected.<br />
SECONDARY AIR MASS(g/s) _________________________________ (range: not available)<br />
Indicates the amount of output air from the secondary air pump in grams per second.<br />
SIGNAL FROM A/T______________________________________________ (range: YES/NO)<br />
Indicates whether the ECM is receiving a signal from the automatic transmission.<br />
SLIDE VALVE SENSOR(MAX)(V) ______________________________ (range: not available)<br />
Indicates the voltage feedback signal used by the ECM to determine the injection pump governor<br />
maximum voltage (start position) and is used during start up.<br />
SLIDE VALVE SENSOR(MIN)(V) _______________________________ (range: not available)<br />
Indicates the voltage feedback signal used by the ECM to determine the injection pump governor<br />
minimum voltage (stop position) and is used before start up.<br />
START OF DELIVERY(°) _____________________________________ (range: not available)<br />
Indicates the commencement of injection point that the ECM commands. The figure is degrees of<br />
crankshaft angle and can be + for BTDC or - for ATDC.<br />
START OF DELIVERY(ACTUAL)(°) _____________________________ (range: not available)<br />
Indicates the actual commencement of injection. The figure is degrees of crankshaft angle and<br />
can be + for BTDC or – for ATDC. The signal is from the injector pump cam ring position sensor.<br />
START OF DELIVERY(DESIRED)(°) ____________________________ (range: not available)<br />
Indicates the desired commencement of injection point. The figure is degrees of crankshaft angle<br />
and can be + for BTDC or – for ATDC.<br />
START SYNCHRONIZATION(°) ________________________________ (range: not available)<br />
Indicates the start synchronization in degrees.<br />
STATUS FUEL COOLING(%)__________________________________ (range: not available)<br />
Indicates the percentage that the fuel is cooled.<br />
SUM MISFIRES_____________________________________________ (range: not available)<br />
Indicates the total amount of misfires detected.<br />
TEETH COUNT TILL HALL-SIG SHIFT +TO – ____________________ (range: not available)<br />
Indicates the number of teeth on the crankshaft sender wheel until the Hall-effect sensor on the<br />
camshaft switches the polarity of the sensor from positive (+) to negative (–). This is so the ECM<br />
knows the difference between compression stroke and exhaust stroke.<br />
THR ADJ SENSOR, MAX LRN OK/EXEC ____________________________ (range: YES/NO)<br />
Indicates the current state of the learning process for the TP sensor maximum position stop.<br />
THR ADJ SENSOR, MIN LRN OK/EXEC_____________________________ (range: YES/NO)<br />
Indicates the current state of the learning process for the TP sensor minimum position stop.<br />
132
Data Parameters<br />
Gas Engine Parameters<br />
THR ADJ/TPS BALANCE OK/EXEC ________________________________ (range: YES/NO)<br />
Indicates if the signal from the throttle position (TP) sensor is equalized to the signal from the<br />
throttle stop position sensor. (The ECM recognizes both signals as being the same.)<br />
THR ADJUSTER(LIMP)(%)<br />
THR POS SENSOR(AV)(LIMP)(V) ______________________________ (range: not available)<br />
Indicates the signal used by the ECM to set the throttle valve adjuster average voltage when in<br />
limp home mode. Reading may be as a percentage of opening or voltage.<br />
THR POS SENSOR(THR STOP)(V) _____________________________ (range: not available)<br />
Indicates the signal voltage of the throttle position sensor at idle.<br />
THR VALVE ADJUSTER ANGLE(V) ____________________________ (range: not available)<br />
Indicates the voltage signal from the throttle adjuster potentiometer (throttle position).<br />
THR VALVE ANGLE(ABSOLUTE)(°) ____________________________ (range: not available)<br />
Indicates the actual throttle valve angle.<br />
THR VALVE ANGLE(LEARN)(°) _______________________________ (range: not available)<br />
Indicates the learned throttle valve angle when the idle switch is closed or when the throttle is<br />
slightly open.<br />
THROTTLE ADJUSTER MODE ____________________ (range: IDLING/PART TRHROTTLE)<br />
Indicates the current throttle adjuster mode.<br />
THROTTLE POSITION(IDLE)(V) _______________________________ (range: not available)<br />
Indicates the voltage from the throttle position sensor at idle.<br />
THROTTLE POSITION SENSOR(V) ____________________________ (range: not available)<br />
Indicates the voltage from the throttle position sensor. The throttle position (TP) sensor produces<br />
a voltage signal proportional to the throttle position. The signal tells the ECM how wide the throttle<br />
is open: low voltage at closed throttle, high voltage at WOT.<br />
The full range of the TP sensor voltage readings available to the ECM is 0 to approximately 5.1 V.<br />
A typical TP sensor voltage range might be approximately 0.5 V at idle to 4.5 V at WOT.<br />
THROTTLE VALVE ADJUSTER(V) _____________________________ (range: not available)<br />
Indicates the voltage from the throttle position sensor. The throttle position (TP) sensor produces<br />
a voltage signal proportional to the throttle position.<br />
THROTTLE VALVE ADJUSTER ANGLE(°) _______________________ (range: not available)<br />
Indicates the position in degrees that the throttle returns to when the accelerator is released.<br />
THROTTLE VALVE ADJUSTER MAX(V)<br />
THROTTLE VALVE ADJUSTER MAX(%)<br />
THROTTLE VALVE ADJUSTER MIN(V)<br />
THROTTLE VALVE ADJUSTER MIN(%) _________________________ (range: not available)<br />
Indicates the throttle valve adjuster maximum position.<br />
THROTTLE VALVE ANGLE(°) _________________________________ (range: not available)<br />
Indicates the ECM calculated amount of throttle opening in degrees.<br />
THROTTLE VALVE CLOSED______________________________________ (range: YES/NO)<br />
Indicates whether the ECM has detected the throttle valve is closed or open. This value is used in<br />
conjunction with other parameters when the ECM is applying learned idle values.<br />
THROTTLE VALVE POSITION(%) ______________________________ (range: not available)<br />
Indicates the amount of throttle opening as a percentage.<br />
133
Data Parameters<br />
Gas Engine Parameters<br />
THROTTLE VALVE POSITION 1(%)<br />
THROTTLE VALVE POSITION 1(°)<br />
THROTTLE VALVE POSITION 2(%)<br />
THROTTLE VALVE POSITION 2(°) _____________________________ (range: not available)<br />
Indicates the position of the throttle valve on Banks 1 and 2.<br />
TIME COUNTER(O2) ________________________________________ (range: not available)<br />
Indicates a time counter that starts counting upwards when the diagnosis conditions for EGR are<br />
met and counts backwards when the diagnosis conditions for EGR are not met.<br />
TIME COUNTER 1 __________________________________________ (range: not available)<br />
Indicates a time counter that starts counting upwards when the diagnosis conditions for the EGR<br />
are met and counts backwards when the diagnosis conditions for the EGR are not met. Time<br />
counter 1 is increased by 1 when counter 2 reaches the value of 255. This value is only valid if the<br />
vehicle has an EGR system. If no EGR, then 0 will be displayed.<br />
TIME COUNTER 2 __________________________________________ (range: not available)<br />
Indicates a time counter that starts counting upwards when the diagnosis conditions for the EGR<br />
are met and counts backwards when the diagnosis conditions for the EGR are not met. Time<br />
counter 2 is increased by 1 when counter 1 reaches the value of 255. This value is only valid if the<br />
vehicle has an EGR system. If no EGR, then 0 will be displayed.<br />
TORQUE (ACTUAL)(Nm)_____________________________________ (range: not available)<br />
Indicates the actual torque output after reductions (flywheel torque).<br />
TORQUE(DESIRED)(Nm)_____________________________________ (range: not available)<br />
Indicates the actual torque output before reductions (flywheel torque).<br />
TORQUE(DESIRED, BY A/T-ECU)(Nm)<br />
TORQUE FROM A/T(Nm)_____________________________________ (range: not available)<br />
Indicates the maximum torque output before reductions (flywheel torque) that the automatic<br />
transmission can use for smooth gear change.<br />
TORQUE FROM ENGINE(Nm)_________________________________ (range: not available)<br />
Indicates the amount of torque the engine produces, it is used when gear changes are made.<br />
TORQUE REDUCTION(Nm)<br />
TORQUE REDUCTION________________________________(range: ACTIVE/NOT ACTIVE)<br />
Indicates the amount of torque the engine produces, it is used when gear changes are made.<br />
TPS FULL RANGE(V)________________________________________ (range: not available)<br />
Indicates the voltage from throttle position (TP) sensor full range potentiometer. This is one of two<br />
potentiometers incorporated into one TP sensor unit. The signal is for the whole range (from idle<br />
to full throttle).<br />
TPS LOW RANGE(V) ________________________________________ (range: not available)<br />
Indicates the voltage from throttle position (TP) sensor low range potentiometer. This is one of two<br />
potentiometers incorporated into one TP sensor unit. The signal is for the whole range (from idle<br />
to full throttle).<br />
TPS, MAX LRN OK/EXEC ________________________________________ (range: YES/NO)<br />
Indicates the current state of the learning process for the TP sensor maximum position stop.<br />
TPS, MIN LRN OK/EXEC _________________________________________ (range: YES/NO)<br />
Indicates the current state of the learning process for the TP sensor minimum position stop.<br />
134
Data Parameters<br />
Gas Engine Parameters<br />
TROUBLE CODE STORED IN MEMORY ____________________________ (range: YES/NO)<br />
Indicates whether the self diagnostic system has detected a fault. It reads YES if a fault is detected<br />
and reads NO at all other times.<br />
UNPLAUSIBLE SIGNAL THR ADJ _________________________________ (range: YES/NO)<br />
Indicates whether the ECM can reconcile the relationship between the throttle position sensor and<br />
the throttle stop position sensor.<br />
VEHICLE SPEED ___________________________________________ (range: not available)<br />
Indicates vehicle speed, which is calculated by the ECM based on the vehicle speed sensor (VSS)<br />
pulses. The ECM uses vehicle speed primarily for torque converter clutch engagement, although<br />
it also is an important value for electronic cruise control systems.<br />
This induction sensor detects the information regarding vehicle speed by means of the pulse rotor<br />
at the input gear. This information is used for the decision as to which gear should be engaged,<br />
cruise control system and torque converter slip control.<br />
NOTE:<br />
i If signal fails, the control unit uses the engine speed as a substitute signal and the lockup clutch is<br />
no longer closed.<br />
VEHICLE SPEED CTRL __________________________________ (range: TACHO/SPEEDO)<br />
Indicates whether a speedometer or a speed recorder (tachograph) is fitted to the vehicle.<br />
VOLTAGE THR ADJ OUT OF RANGE_______________________________ (range: YES/NO)<br />
Indicates that ECM can not reconcile the relationship between the throttle position sensor and the<br />
throttle stop position sensor.<br />
WARM UP CAT _________________________________________________ (range: YES/NO)<br />
Indicates whether the ECM is operating in warm up CAT mode. Warm-up is achieved by retarding<br />
the ignition point to after TDC and enriching the mixture.<br />
WARM UP CAT(%) __________________________________________ (range: not available)<br />
Indicates whether the ECM is allowing extra fuel into the CAT to speed warm-up. Warm-up is<br />
achieved by retarding the ignition point to AFTER TDC and enriching the mixture.<br />
WARN. SIGNAL INSTR. PANEL: REFUEL _______________________ (range: not available)<br />
Indicates whether the fuel level is low or not.<br />
135
Data Parameters<br />
Diesel Engine Parameters<br />
6.3 Diesel Engine Parameters<br />
<strong>Volkswagen</strong> Turbo Direct Injection (TDI) diesel came out in 1996. Previous ECO and Umwelt<br />
diesel engines were not electronically-controlled. The control system has more than 25<br />
performance maps and characteristic curves for all possible performance variations based on<br />
torque, fuel consumption, and emissions.<br />
ACCELERATOR PEDAL POSITION(%) _________________________ (range: not available)<br />
Indicates accelerator pedal position (APP). The APP sensor is one of the main inputs for<br />
determining fuel quantity. The APP sensor is a potentiometer that contains an idle switch and a<br />
kickdown switch. With failure, the engine runs at fast idle.<br />
BATTERY VOLTAGE BELOW 9V __________________________________ (range: YES/NO)<br />
Indicates whether the ECM has recognized a battery voltage below 9V and is used by the glow<br />
plug start system.<br />
BOOST PRESSURE(DESIRED)(mbar)<br />
BOOST PRESSURE(ACTUAL)(mbar)<br />
INTAKE AIR TEMPERATURE(°) _______________________________ (range: not available)<br />
Indicates intake air pressure and temperature based on the MAP sensor and IAT sensor signals.<br />
Both sensors are combined in the intake air duct between the charge cooler and intake manifold<br />
and are used to calculate intake air density and turbocharger boost pressure. Atmospheric<br />
pressure at sea level = 1000 millibar; boost pressure increases to a positive pressure above<br />
atmospheric. Desired and actual should read fairly close to each other.<br />
COOLANT TEMPERATURE(°)_________________________________ (range: not available)<br />
Indicates temperature based on the signal of the engine coolant temperature (ECT) sensor, which<br />
is the main input for determining fuel quantity and injector timing based on engine temperature. If<br />
ECT fails, the ECM substitutes the value from the Fuel Temperature Sensor.<br />
COOLANT/AIRTMP SNS DEFECT _________________________________ (range: YES/NO)<br />
Indicates whether a fault has been recognized in the coolant or air temperature systems and is<br />
used by the glow plug start system.<br />
COOLANT TMP >70°C/OR AIR TEMP >5°C __________________________ (range: YES/NO)<br />
Indicates whether the coolant or air temperature are above the set temperatures and is used by<br />
the glow plug start system.(range: not available)<br />
ENGINE CRANKED IN LAST 10S __________________________________ (range: YES/NO)<br />
Indicates whether the engine has been cranked in the last 10 seconds and is used by the glow<br />
plug start system.<br />
ENGINE SPEED(RPM) _______________________________________ (range: not available)<br />
Indicates engine speed based on the signal from the RPM sensor, which supplies a Top Dead<br />
Center signal for each cylinder. If this sensor fails, the engine will not run.<br />
FUEL CONS. AUX HEATER(l/h) _______________________________ (range: not available)<br />
Indicates the amount of fuel that is used by the external heater.<br />
FUEL CONSUMPTION(l/h)____________________________________ (range: not available)<br />
Indicates fuel consumption (as calculated by the ECM) in liters per hour.<br />
FUEL CONSUMPTION ISC(g/s)________________________________ (range: not available)<br />
Indicates the calculated fuel usage adaptation by the idle stabilization control unit. Value is in<br />
grams per second.<br />
136
Data Parameters<br />
Diesel Engine Parameters<br />
FUEL TEMPERATURE(°) _____________________________________ (range: not available)<br />
Indicates the reading from the fuel temperature sensor. Fuel quantity calculation requires coolant<br />
temperature and fuel density. Uses substituted values in the event of sensor failure.<br />
GLOW(s) __________________________________________________ (range: not available)<br />
Indicates the time in seconds the glow plug start system is active.<br />
GLOW TIME(s) _____________________________________________ (range: not available)<br />
Indicates the time in seconds the glow plug start system is active.<br />
INJ DIFF CYL 1 TO AVERAGE(mg/S)<br />
INJ DIFF CYL 2 TO AVERAGE(mg/S)<br />
INJ DIFF CYL 3 TO AVERAGE(mg/S)<br />
INJ DIFF CYL 4 TO AVERAGE(mg/S) ___________________________ (range: not available)<br />
TDI Diesels are equipped with an Idle speed smooth running control system. To smooth out power<br />
differences between individual cylinders, the identified cylinder is given more (+x.xx mg/S) or less<br />
fuel (-x.xx mg/S), until the engine runs evenly again. Individual cylinder power output is compared<br />
to being more or less powerful than the number 3 cylinder.<br />
INJ DIFF CYL 1 TO 3(mg/S)<br />
INJ DIFF CYL 1 TO 4(mg/S)<br />
INJ DIFF CYL 1 TO 5(mg/S)<br />
INJ DIFF CYL 2 TO 3(mg/S)<br />
INJ DIFF CYL 2 TO 4(mg/S)<br />
INJ DIFF CYL 2 TO 5(mg/S)<br />
INJ DIFF CYL 3 TO 4(mg/S)<br />
INJ DIFF CYL 3 TO 5(mg/S)<br />
INJ DIFF CYL 4 TO 3(mg/S)<br />
INJ DIFF CYL 4 TO 5(mg/S)<br />
INJ DIFF CYL 5 TO 3(mg/S)<br />
INJ DIFF CYL 5 TO 4(mg/S)<br />
INJ DIFF CYL 6 TO 3(mg/S)___________________________________ (range: not available)<br />
Indicates the difference of fuel injected in milligrams per stroke between the two identified<br />
cylinders.<br />
INJ QUANTITY(mg/S) _______________________________________ (range: not available)<br />
Indicates the quantity of fuel that has been injected under the present operating conditions. The<br />
value is in milligrams per cylinder stroke.<br />
INJ QUANTITY(DESIRED)(mg/S)<br />
Indicates the maximum quantity of fuel that can be injected under the present operating conditions<br />
after all corrections are applied. The value is in milligrams per cylinder stroke.<br />
INJ QUANTITY(DRIVER)(mg/S)<br />
INJ QUANTITY(TORQUE)(mg/S)<br />
INJ QUANTITY(SMOKE)(mg/S)<br />
INJ QUANTITY(CRUISE)(mg/S) _______________________________ (range: not available)<br />
Indicates injection quantity based on the driver’s requirement, injection quantity limited according<br />
to specific RPM/torque limitation, injection quantity limited for smoke prevention, and injection<br />
quantity with cruise control system activated, respectively. DRIVER is the APP sensor input from<br />
the driver commanding more or less fuel. TORQUE is the RPM/load restrictions (torque) placed<br />
on the engine influencing fuel demand. SMOKE is a calculation from the Smoke Map to ensure<br />
fuel quantity does not exceed a preset amount to prevent black smoke. CRUISE calculation is<br />
from various inputs indicating engine fuel delivery for cruise conditions.<br />
137
Data Parameters<br />
Diesel Engine Parameters<br />
INJ QUANTITY(TCS)(mg/S)___________________________________ (range: not available)<br />
Indicates the maximum quantity of fuel that can be injected under the present operating conditions<br />
with regards to the Traction Control System (TCS) map. The value is in milligrams per cylinder<br />
stroke.<br />
INJ QUANTITY(TORQUE A/T)(mg/S) ___________________________ (range: not available)<br />
Indicates the maximum quantity of fuel that can be injected under the present operating<br />
conditions, limited by the automatic transmission during gear change. The value is in milligrams<br />
per cylinder stroke.<br />
MAF 1(mg/S)<br />
MAF 2(mg/S)_______________________________________________ (range: not available)<br />
Indicates the amount of air measured by the manifold airflow sensor in cylinder banks 1 and 2.<br />
MAF DES(mg/S) ____________________________________________ (range: not available)<br />
Indicates the desired amount of airflow calculated by the ECM.<br />
MASS AIR FLOW(mg/S) _____________________________________ (range: not available)<br />
Indicates the amount of air drawn into the engine under the present operating conditions. The<br />
value is in milligrams per cylinder stroke. The figure is only valid while the EGR is active.<br />
MASS AIR FLOW(DESIRED)(ms/S)<br />
MASS AIR FLOW(ACTUAL)(mg/S) _____________________________ (range: not available)<br />
Indicates the desired and actual reading of the MAF sensor. The MAF sensor uses Reverse Flow<br />
detection using two temperature sensors to measure intake air flow upstream and downstream of<br />
a heating element. The downstream sensor will measure higher temperature because the air is<br />
warmed as it passes the heating element. Change in temperature signals the ECM to factor out<br />
the reverse flow. Uses substitute values if sensor fails. The fixed value may result in part throttle<br />
performance problems. Normal value range for Mass Air Flow at idle is 230 to 370 (mg/S). Mass<br />
Air Flow desired and actual should read fairly close to each other.<br />
REL.HEAT HIGH<br />
REL.HEAT LOW ________________________________________________ (range: YES/NO)<br />
Indicates whether the coolant or air temperature is above or below the set temperatures and is<br />
used by the glow plug start system.<br />
RELAY HEATER HIGH<br />
RELAY HEATER LOW ___________________________________________ (range: ON/OFF)<br />
Indicates the current output state of the glow plug start system relay circuits.<br />
SLIDE VALVE SENSOR(V)<br />
Indicates the voltage of the modulating piston replacement sensor. Part of the Injection Pump, the<br />
Quantity adjuster regulates the quantity of fuel injected; an electromagnetic swivelling positioner,<br />
ECM duty cycle controlled. The rotational angle of an eccentric shaft attached to the quantity<br />
adjuster is measured by the modulating piston displacement sensor (slide valve sensor) The<br />
sensor variable voltage directly correlates to how much fuel is delivered. Normal range is 1.45 to<br />
2.0 V. Below 1.450 V, mixture is too rich; Above 2.0 V, mixture is too lean.<br />
Slide Valve Sensor Min. V range is 0.500 to 0.970 V. Slide Valve Sensor Max V range is 4.150 to<br />
4.740 V.<br />
138
Data Parameters<br />
Diesel Engine Parameters<br />
START OF DELIVERY(DESIRED)<br />
START OF DELIVERY(ACTUAL)<br />
DC(DUTY CYCLE)START OF DELIVERY ________________________ (range: not available)<br />
Injector #3 is equipped with a Needle Lift Sensor to detect the start of injection. The sensor signals<br />
the actual opening time of the injector which acts as ECM feedback to confirm that the proper map<br />
for start of injection. The ECM calculates the start of injection from the time difference between the<br />
needle lift sensor and the TDC signal input from the RPM sensor. This is compared to a<br />
programmed map (DESIRED vs. ACTUAL) and corrected to the specified value if they differ.<br />
Normal values for START OF DELIVERY (DESIRED) are 2° ATDC to 3 ° BTDC at idle. Normal<br />
values for START OF DELIVERY (ACTUAL) are 2° ATDC to 3° BTDC at idle and 8–14° at WOT<br />
(2900–3100 RPM).<br />
DC (DUTY CYCLE) START OF DELIVERY (Cold Start Injector) controls the start of injection<br />
timing by regulating the pressure for the injection timing piston. The injection pump contains a<br />
mechanical injection timing device which requires engine speed dependent fuel pressure to<br />
advance or retard injection timing. The cold start injector is duty cycle controlled, precisely<br />
regulating the pressure to the timing piston. Normal range is 3 to 80% at idle and 70 to 95% at<br />
full throttle.<br />
START QUANTITY(mg/S) ____________________________________ (range: not available)<br />
Indicates the quantity of fuel that has to be injected under the present starting conditions because<br />
ECM input reading may not be correct under start conditions. The value is in milligrams per<br />
cylinder stroke.<br />
139
Data Parameters<br />
Transmission Parameters<br />
6.4 Transmission Parameters<br />
These parameters are ECM signals to and from various actuators and sensors in the<br />
transmission.<br />
A/C KICKDOWN ______________________________ (range: ACTIVATED/NOT ACTIVATED)<br />
Indicates the state of A/C (A/C). Only activated after the kickdown downshift. The TCM is linked to<br />
the switch unit for solenoid coupling in the event of a manual A/C, whereas it is connected to the<br />
A/C control module and indicating unit on vehicles with digital A/C.<br />
NOTE:<br />
i Shifting down a gear with the kickdown switch actuated results in a brief disconnection of the A/C<br />
compressor for up to 8 seconds to provide more power on acceleration.<br />
ACTUAL SELECTED GEAR ______________________________________ (range: variable)<br />
Indicates the TCM commanded gear. <strong>Vehicle</strong>s with an electronic program switch in the TCM, the<br />
“ECO”, or “Sport” program will be automatically selected by the TCM according to the speed at<br />
which the accelerator pedal is depressed. The displayed parameters are 1H, 2H, 3H, 4M. <strong>Vehicle</strong>s<br />
with an electronic program in the transmission range program switch display parameters 1H, 2H,<br />
3H, 3LT1, 3M, 3LT2, 4M. There are some transaxles that have the capability to display 1H, 1M,<br />
2H, 2M, 3H, 3M, 4H, 4M, 5H, 5M. Different phases of this transaxle have a different shift solenoid<br />
firing order and may display parameters UNKNOWN.<br />
• H = hydraulic (torque converter not locked up)<br />
• M = mechanical (torque converter locked up)<br />
• LT1 = load splitting (used momentarily for shift smoothness between 3H and 3M shift)<br />
• LT2 = load splitting (used momentarily for shift smoothness between 3M and 4M shift)<br />
LT1 and LT2 are used only with 095, 096, 097, and 098 phase 0 transmissions and may not be<br />
detected by the scan tool.<br />
ACTUAL SOLENOID(A) ________________________________________(range: 0.0 to 1.1A)<br />
Indicates the actual amperage of solenoid # 6 (EPC) timing valve and pressure regulation on 095,<br />
096, 097, 098, 01M, 01N and 01P transmissions. Readings should be 0.0 (A) at WOT and 1.1 (A)<br />
at closed throttle. Actual solenoid (A) should read close to required solenoid (A).<br />
A/T___________________________________________________________ (range: YES/NO)<br />
Indicates whether an automatic transmission is fitted.<br />
A/T(RPM)<br />
A/T INPUT(RPM)______________________________________ (range: 0 to maximum RPM)<br />
Indicates the transmission input shaft RPM.<br />
140
Data Parameters<br />
Transmission Parameters<br />
A/T INPUT(RPM)______________________________________ (range: 0 to maximum RPM)<br />
01V<br />
Indicates transmission input speed.<br />
Table 6-3 Transmission input speed<br />
Gear<br />
A/T INPUT(RPM)___________________________________________(range: 0 to 8200 RPM)<br />
01N<br />
Indicates transmission input speed based on an input speed sensor that is positioned in the<br />
transmission housing. It detects the speed of the large sun wheel in the planetary gear so the<br />
control unit can accurately calculate reduction in engine torque during the gearshift by retarding<br />
the ignition angle to control the clutch and brake application during a shift.<br />
A/T OUTPUT(RPM)____________________________________ (range: 0 to maximum RPM)<br />
Indicates transmission output shaft speed (OSS) based on the OSS sensor. The OSS sensor is on<br />
inductive pickup.<br />
A/T SWITCH ______________________________________________ (range: P/N /NOT P/N)<br />
Indicates the Park/Neutral Position (PNP) switch status, which indicates whether an automatic<br />
transmission is in park or neutral, or in one of the drive ranges.<br />
ATF TEMPERATURE(°C) _________________________________________ (range: variable)<br />
Indicates the temperature of the transmission fluid based on the transmission fluid temperature<br />
(TFT) sensor. It is monitored to prevent the transmission from overheating. It is located on the<br />
valve body within the solenoid wiring harness.<br />
BATTERY VOLTAGE _____________________________________ (range: 9.0 to 16.0 volts)<br />
Indicates battery voltage on terminal 15 of the TCM on a 01V transmission. The TCM monitors<br />
battery voltage to make sure it can operate safely. The safe parameter is 10.8 to 16.0 volts.<br />
BRAKE LIGHT SWITCH________________________ (range: OPERATED/NOT OPERATED)<br />
Indicates the state of brake switch. It reads OPERATED when the switch is on; and NOT<br />
OPERATED when the switch is off.<br />
ENGINE TORQUE(Nm) __________________________________________ (range: variable)<br />
Indicates the ECM calculated engine torque, which is based on the injection time and passed on<br />
to the TCM.<br />
In the event of a faulty signal gear, selection is always implemented at maximum modulation<br />
pressure, emergency operation 1. Gear shifting is affected with a throttle-valve opening angle of<br />
30%. There is no kickdown.<br />
Rpm<br />
R* Approx. 0–10<br />
R Approx. 0–2000<br />
1M* Approx. 0–10<br />
1M, 1H Approx. 0–1200<br />
2H Approx. 0–4000<br />
3H Approx. 0–5800<br />
4H Approx. 0–8200<br />
5H Approx. 0–8200<br />
* <strong>Vehicle</strong> stationary<br />
141
Data Parameters<br />
Transmission Parameters<br />
ENGINE TORQUE MAX __________________________________________ (range: variable)<br />
Indicates the maximum engine torque that the TCM will allow on a 01V transmission. The TCM<br />
reduces engine torque required during shifts.<br />
GEAR POSITION _______________________________________________ (range: variable)<br />
Indicates which gear the transmission is in.<br />
HILL FACTOR(%) _____________________________________________ (range: 0 to 100%)<br />
Indicates the TCM calculation of driving conditions on 01M and 01N transmissions. When driving<br />
on level road (less than ±3½ degrees), the TCM will function in economy mode. When there is<br />
road resistance, such as wind load, towing, increased vehicle load or uphill driving (more than 3½<br />
degrees), shift points change to provide more engine RPM and power. When road resistance<br />
decreases, such as going downhill, the TCM automatically selects a suitable lower gear. Engine<br />
braking is provided with the selector lever in “D” and reduces the need for braking when driving<br />
downhill. When road resistance returns to normal, shifting characteristic also return to normal.<br />
KICKDOWN SWITCH ____________________________________________ (range: ON/OFF)<br />
Indicates the state of the kickdown switch. The kickdown switch is integrated into the Bowden<br />
accelerator cable. It is used to detect situations where the accelerator pedal is depressed beyond<br />
the full-throttle point. With the kickdown switch actuated, the A/C compressor is disengaged to<br />
provide more power on acceleration.<br />
NOTE:<br />
i On vehicles with a TDI engine, the TCM receives the kickdown signal from the acceleration pedal<br />
position (APP) sensor.<br />
KICKDOWN SWITCH ____________________________________________ (range: ON/OFF)<br />
Indicates the state of the kickdown switch on 01M, 01F, and 01K transmissions. The kickdown<br />
switch is integrated into the Bowden accelerator cable. It is used to detect situations where the<br />
accelerator pedal is depressed beyond the full-throttle point.<br />
NOTE:<br />
i On vehicles with a TDI engine, the TCM receives the kickdown signal from the APP sensor that is<br />
located in the bracket for the bell crank. It is an EDC sensor that supplies the kickdown signal on<br />
vehicles with TDI engines.<br />
LOCK-UP SLIP ________________________________________________ (range: 0 to 99%)<br />
Indicates the amount of torque converter clutch regulated slip. It normally reads 0–30% slip when<br />
lockup occurs.<br />
LOCK-UP SLIP ________________________________________________ (range: 0 to stall)<br />
Indicates condition of the torque converter lockup clutch on a 01V transmission. With the TCC<br />
solenoid in the open state, lockup slip, or torque converter slip speed should be between 0 RPM<br />
and stall speed. With the TCC solenoid in the control state, lockup slip speed should be 20 to 120<br />
RPM (last gear shift at least 20 seconds ago). With the TCC solenoid in the closed state, lockup<br />
speed should be 0 to 10 RPM. Engine torque is mechanically transmitted to the transmission<br />
during torque converter lockup.<br />
LOCK-UP SLIP ________________________________________________ (range: 0 to stall)<br />
Indicates torque converter lockup slip on a 01P transmission. When in the hydraulic gears, the<br />
torque converter lockup must be open with 0 to stall RPM slip. With engine speed 2000–3000<br />
142
Data Parameters<br />
Transmission Parameters<br />
RPM in the mechanical gears, gear completed, the torque converter lockup clutch must be closed<br />
and the accelerator pedal value held constant with 0 to 130 RPM slip.<br />
PRESSURE CTRL(A) ____________________________________________ (range: variable)<br />
Indicates the pressure control amperage of the #4 solenoid. It controls the pressure for actuation<br />
of shift elements (modulation pressure) as a function of engine speed, engine torque, and<br />
transmission oil temperature.<br />
REQUIRED SOLENOID(A)______________________________________(range: 0.0 to 1.0A)<br />
Indicates the specified current the TCM would like to see through solenoid A, which is the<br />
electronic pressure control (EPC) solenoid, on 095, 096, 097, 098, 01M, 01N, and 01P<br />
transmissions. It should read 0.0 at WOT and 1.0 at closed throttle. This value should closely<br />
match Actual solenoid (A). Code set if actual and required vary by 0.050 A or more.<br />
REQUIRED SOLENOID #4<br />
REQUIRED SOLENOID #5<br />
REQUIRED SOLENOID #6<br />
REQUIRED SOLENOID #7______________________________________(range: 0.0 to 1.0A)<br />
Indicates the specified current the TCM would like to see through solenoids #4, 5, 6, and 7 on a<br />
01V transmission. It should read 0.0 at WOT and 1.0 at closed throttle. This value should closely<br />
match Actual solenoid (A). Code set if actual and required vary by 0.050 A or more.<br />
Table 6-4 Shift element positions—01V transmission<br />
Gear 1-N88 2-N89 3-N90 4-N91 5-N92 6-N93 7-N94<br />
Reverse * * *<br />
Neutral * * * *<br />
D, 1st * * * *<br />
D, 2nd * * * * *<br />
D, 3rd * *-* * *<br />
D, 4th *-* *<br />
D, 5th * *-* * *<br />
2, 1st * * *<br />
D, 5th to 4th * * * * *<br />
* = Component is actuated, - = Component is not actuated<br />
SHIFT LEVER LOCK ________________________________________ (range: not available)<br />
Indicates the status of the shift lever lock. It prevents involuntary movement of the selector lever<br />
positions P and N if the brake pedal is not depressed.<br />
SOLENOID #1<br />
SOLENOID #2<br />
SOLENOID #3<br />
SOLENOID #4<br />
SOLENOID #5<br />
SOLENOID #7_______________________________________________ (range: ACT/N.ACT)<br />
Indicates the state of the shift solenoids, and should read ACT (active) when the solenoid is on,<br />
and N.ACT (not active) when the solenoid is off.<br />
143
Data Parameters<br />
Transmission Parameters<br />
For 01F and 01K transmissions, the solenoid valves #1 and #2 govern the selection of various<br />
gears in line with actuation by TCM. Solenoid valve #3 creates the necessary prerequisites<br />
(pressure) for proper switching of the solenoid valves #1, #2 while driving.<br />
Table 6-5 Solenoid valve activation—01F and 01K transmissions<br />
Gear Sv 1 (n88) Sv 2 (n89) Sv 3 (N90)<br />
Park N.ACT ACT ACT<br />
Reverse N.ACT N.ACT N.ACT<br />
Neutral N.ACT ACT ACT<br />
First N.ACT ACT N.ACT<br />
Second ACT ACT N.ACT<br />
Third ACT N.ACT N.ACT<br />
Fourth N.ACT N.ACT N.ACT<br />
3–4* ACT<br />
* Brief actuation on shifting from 3rd/4th gear.<br />
NOTE:<br />
i Solenoid #4 is timing valve and is responsible for pressure regulation (See “PRESSURE<br />
CTRL(A)” on page 143).<br />
For 095, 096, 097, and 098 transmissions, the solenoid valves #1, #2, #3, and #4 govern the<br />
selection of various gears in line with actuation by the TCM. Solenoid valves #5 and #7 create the<br />
necessary prerequisites (pressure) for proper clutch apply and release.<br />
Table 6-6 Solenoid valve activation—095, 096, 097, and 098 transmissions<br />
Gear Solenoid #1 Solenoid #2 Solenoid #3 Solenoid #4<br />
Drive 1st<br />
ACT<br />
Drive 2nd ACT ACT<br />
D 3rd H<br />
D 3rd LT1* ACT ACT<br />
D 3rd M*<br />
ACT<br />
D 3rd LT2* ACT ACT<br />
D 4th M ACT ACT ACT ACT<br />
Reverse<br />
H = hydraulic, M = mechanical, LT1 & LT2 = load splitting<br />
* LT1, D3M, and LT2 are only used with phase 0 transmissions. Also, LT1 and LT2 are<br />
momentary TCM commands and may not be detected by the scan tool.<br />
NOTE:<br />
i Solenoid #6 is timing valve and is responsible for pressure regulation (See “ACTUAL<br />
SOLENOID(A)” on page 140).<br />
Solenoid #4 becomes TCC activation with phase 2.<br />
144
Data Parameters<br />
Transmission Parameters<br />
For 01M, 01N, and 01P transmissions, the solenoid valves #1, #2, and #3 govern the selection of<br />
various gears in line with actuation by the TCM. Solenoid valves #5 and #7 create the necessary<br />
prerequisites (pressure) for proper clutch apply and release.<br />
Table 6-7 Solenoid valve activation—01M, 01N, and 01P transmissions<br />
Gear Solenoid #1 Solenoid #2 Solenoid #3 Solenoid #4 Solenoid #5 Solenoid #7<br />
P ACT ACT<br />
R ACT ACT<br />
R 1<br />
ACT<br />
N ACT ACT<br />
D 1 ACT X<br />
D 2 H ACT ACT<br />
D 2 M ACT ACT ACT<br />
D 3 H<br />
D 3 M<br />
D 4 H ACT ACT ACT<br />
D 4 M ACT ACT ACT<br />
X = variable switching condition, H = hydraulic, M = mechanical, 1 = <strong>Vehicle</strong> stationary,<br />
ACT<br />
ACT<br />
NOTE:<br />
i Solenoid #4 is a modulation type for torque converter lockup that does not read amps. This<br />
solenoid shows ACT or N.ACT. To look at how much modulation is taken place, see “LOCK-UP<br />
SLIP” on page 142.<br />
Solenoid #6 is timing valve and is responsible for pressure regulation. See “ACTUAL<br />
SOLENOID(A)” on page 140.<br />
SPORT FACTOR(%)___________________________________________ (range: 0 to 100%)<br />
Indicates the percentage of sport driving on a 01N transmission. High values move the shift points<br />
to higher speeds.<br />
TCS STATUS_______________________________________________ (range: TCS ACTIVE)<br />
Indicates the traction control system (TCS) status on a 01V transmission. When TCS ACTIVE<br />
displays, traction control is activated from TCS control module. When the display is blank, the<br />
traction control system is not activated.<br />
THROTTLE VALVE POSITION___________________________________ (range: 0 to 100%)<br />
Indicates the accelerator pedal position (APP). The readout constantly increases from closed<br />
throttle position to WOT.<br />
THROTTLE VALVE POSITION(V) ___________________________(range: 0.156V to 4.680V)<br />
Indicates the throttle valve position sensor voltage on a 01P transmission. When accelerating from<br />
idling to WOT, the voltage figure increases constantly. With the vehicle stationary, idling should be<br />
min. 0.165, max 0.8V, and WOT should read minimum 3.5 to maximum 4.680V.<br />
NOTE:<br />
i Diesel engine voltage may differ slightly.<br />
145
Data Parameters<br />
Transmission Parameters<br />
TIPTRONIC<br />
Indicates the selected gear range of a Tiptronic transmission. Tiptronic transmissions have an<br />
additional selector gate on the right of the transmission shifter selector gate or steering wheel<br />
paddles. Tiptronic makes it possible to manually shift up a gear by moving the selector lever or<br />
steering wheel paddles to plus (+) or manually shift down a gear by moving the selector lever or<br />
steering wheel paddles to negative (-). This mode is for drivers who prefer manual gear shifting.<br />
The transmission will upshift automatically to prevent inadvertent over-revving of the engine. Also,<br />
the driver cannot downshift to a lower gear if the engine RPM would exceed red-line by<br />
downshifting. In addition, the transmission will downshift to first automatically when the vehicle<br />
comes to a stop, even if the driver does not remember to downshift. This transmission is designed<br />
to handle high torque output.<br />
The left-hand gate is for electronically controlled automatic shifting with adaptive control. This is a<br />
function of various sensors and is transparent to the driver. Shift points are automatically regulated<br />
to provide three distinct operating characteristics:<br />
• Comfort driving for maximum fuel economy (shift points are kept low).<br />
• Average driving (shift points are raised slightly).<br />
• High-performance driving (shift points are increased to allow the engine to rev higher between<br />
gearshifts).<br />
TIPTRONIC SWITCH ___________________________ (range: N/A (+) upshift (–) downshift)<br />
Indicates the upshift (+) or downshift (–) position of the tiptronic shifter.<br />
TORQUE(Nm) __________________________________________________ (range: variable)<br />
Indicates the torque of the TCM calculated by the ECM.<br />
TORQUE MAX(Nm) __________________________________(range: 0 to maximum torque)<br />
Indicates the maximum torque of the TCM calculated by the ECM.<br />
TORQUE RAISE __________________________________________________(range: 1-2,17)<br />
Indicates torque increase in the converter while driving on a 01V transmission. It is calculated by<br />
the TCM from torque converter slip speed.<br />
TORQUE REDUC ___________________________________________ (range: not available)<br />
Indicates if there is a torque reduction or not.<br />
VEHICLE SPEED ____________________________________ (range: 0 to maximum speed)<br />
Indicates vehicle speed on 01F and 01K transmissions based on the vehicle speed sensor<br />
mounted in the transmission housing. This information is used for the decision as to which gear<br />
should be engaged, cruise control system and torque converter slip control.<br />
NOTE:<br />
i If the signal fails, the control unit uses the engine speed as a substitute signal and lockup clutch is<br />
no longer closed.<br />
VEHICLE SPEED SENSOR(V)_________________________________ (range: 2.20 to 2.52V)<br />
Indicates vehicle speed senor voltage on 097, 01N and 098 transmissions. With the vehicle<br />
stationary, voltage should read 2.20 min. and 2.52 max.<br />
146
Data Parameters<br />
Transmission Parameters<br />
WHEEL LEFT FRONT(RPM) _____________________________ (range: 0 to vehicle speed)<br />
WHEEL RIGHT FRONT(RPM)<br />
WHEEL RIGHT REAR(RPM)<br />
WHEEL LEFT REAR(RPM)<br />
Indicates vehicle speed from wheel speed sensor through the ABS controller on 018 and 01K<br />
transmissions. The ABS unit recognizes the wheel speeds from the signals provided by the speed<br />
sensors. These signals are passed from ABS control unit to the control unit for the automatic<br />
transmission. The TCM averages the 4 signals and detects output speed.<br />
NOTE:<br />
i Should one wheel-speed signal fail, the transmission output speed is determined from the three<br />
remaining signals. The TCM switches to emergency operation 2 if more than one speed sensor<br />
signal fails.<br />
147
Data Parameters<br />
Transmission Expert Mode Parameters<br />
6.5 Transmission Expert Mode Parameters<br />
Expert Mode displays all data groups and on some models data may not be available, but still may<br />
show data in some form. Data is filtered in regulator data groups and should be verified before<br />
suspecting a scan tool or vehicle problem.<br />
Accelerator Pedal Value _______________________________________ (range: 0 to 100%)<br />
Indicates the accelerator pedal position (APP). When accelerating from idle to WOT, the<br />
accelerator pedal percentage should increase.<br />
Actual Engine Torque ___________________________________________ (range: variable)<br />
Indicates actual engine torque. This 01V transmission parameter is viewed from Expert Mode in<br />
display group 009, display field 1. With the vehicle driven, the actual engine torque signal is<br />
passed from the engine control module (ECM) to the transmission control module (TCM) via CAN<br />
bus wiring.<br />
Adaptation of start-from-stop behavior forward_____________ (range: ADP OK/RUNNING)<br />
This 01J transmission data parameter is viewed from Expert Mode in display group 010, display<br />
field 2. The parameter should read either ADP OK or RUNNING. ADP (“adaptation”) means<br />
adapting to an internal specified value. If the ADP value does not read OK with transmission fluid<br />
temperature higher than 140°F (60° C) and no codes in memory, drive forward briefly and then<br />
brake to a stop again. Repeat until the display reads ADP OK.<br />
• Display field 3 is transaxle temperature.<br />
• Display field 1 is adaptation of clutch curve forward and can be ignored.<br />
• Display field 4 is specified clutch torque and can be ignored.<br />
Adaptation of start-from-stop characteristics Reverse _______ (range: ADP OK/RUNNING)<br />
This 01J transmission parameter is viewed from Expert Mode in display group 011, display field 2.<br />
The parameter should read either ADP OK or RUNNING. ADP (“adaptation”) means adapting to<br />
an internal specified value. If ADP value does not read OK, with transmission fluid temperature<br />
higher than 140°F (60°C) and no codes in memory, drive in reverse briefly and then brake to a stop<br />
again. Repeat until the display reads ADP OK.<br />
• Display field 3 is transaxle temperature.<br />
• Display field 1 is adaptation of clutch curve forward and can be ignored.<br />
• Display field 4 is specified clutch torque and can be ignored.<br />
DRIVING SLIP CTRL _________________________________________ (range: ACT/N.ACT)<br />
Indicates whether the traction control system is activated (ACT) or not activated (N.ACT) on a 01M<br />
transmission.<br />
Dynamic Code Number __________________________________________ (range: variable)<br />
Indicates a code for the 01V transmission that can only be viewed from Expert Mode in display<br />
group 002, display field 1. This data group has five number sets to indicate vehicle characteristics<br />
and customer driving conditions. The first set of three numbers is determined by driving style and<br />
operating conditions (acceleration, accelerator pedal movement, speed, and load).<br />
With normal driving conditions, a reading of 0 equals minimum value (very economic), 240 equals<br />
maximum value (very sporty). High values move shift points to higher engine speeds. The second<br />
set of three numbers indicated whether the warm-up program is active (min./max numbers are not<br />
available) and may read 241. The third set of three numbers determines whether the anti-slip<br />
regulation (ASR) is active and may read 242 (min./max numbers are not available). Shifting<br />
should be avoided whenever possible. The fourth set of three numbers determines whether the<br />
148
Data Parameters<br />
Transmission Expert Mode Parameters<br />
tiptronic recognition is activated and may read 243 (min./max numbers are not available). The fifth<br />
set of three numbers indicates the cruise control system characteristic map and may read 244<br />
(min./max numbers are not available). This parameter is only available for vehicles in the USA and<br />
may not be applicable on some models.<br />
FUEL CONSUMPTION SIGNAL________________________________ (range: not available)<br />
Indicates fuel consumption on a 01V transmission when viewed in Expert Mode display group<br />
009, display field 4. Fuel consumption signal displays the injection period on vehicles equipped<br />
with a data bus. Injection period is read in milliseconds and varies by engine, speed, and load.<br />
GEAR SELECTED ________________________________________(range: 1H+/– to 4M +/–)<br />
Indicates the current gear on 01M, 01N, and 01P transmissions when viewed in Expert Mode data<br />
group 007, display field 1. The + or – sign relates to the lockup slip of the torque converter clutch.<br />
A plus sign (“+”) indicates that the engine speed (pump speed) is greater than the turbine speed,<br />
and so the vehicle is under traction. A minus sign (“–“) indicates that the engine speed is less than<br />
the turbine speed, and so the vehicle in overrun.<br />
On-Board Diagnostic______________________________________________ (range: 0 to 1)<br />
Indicates the on-board diagnostic display information from left to right. This display group can be<br />
viewed in Expert Mode display group 004, display field 4. The display indicates malfunction<br />
(1 = switched on 0 = switched off), trip (1 = complete 0 = not complete), transmission warm-up<br />
(1 = complete 0 = not complete), engine start (1 = recognized 0 = not recognized).<br />
Overrun/engine pulling signal _______________________ (range: overrun/engine pulling)<br />
Indicates whether an 01V transmission is in overrun or normal mode when viewed from Expert<br />
Mode in display group 008, display field 4. If in overrun, the transaxle has engine braking. With no<br />
display normal driving, the engine is delivering power.<br />
SELECTOR OUTPUTS____________________________________________(range: 0 and 1)<br />
Indicates engine management status (0 = turned off, 1 = turned on) on a 098 transmission when<br />
viewed from Expert Mode in display group 005, display field 2 (first set of binary numbers). The<br />
second set of numbers are unknown at this time. The third set of numbers are the shift lock<br />
solenoid (0 = turned off, 1 = turned on). The fourth set of numbers are unknown at this time. The<br />
fifth set of numbers are the cruise control (0 = turned off, 1 = turn on). The sixth set of numbers are<br />
the air conditioner (0 = turned off, 1 = on). The seventh set of numbers are the Park/Neutral signal<br />
selector lever (0 = 1, 2, 3, D; 1 = P, N).<br />
Torque converter lockup clutch _______________ (range: tcc open/tcc control/tcc closed)<br />
Indicates the percentage of TCC solenoid activation on a 01V transmission when viewed from<br />
Expert Mode in display group 007, display field 3. When the parameter reads TCC OPEN, there<br />
is no torque converter clutch operation, with TCC CONTROL, the torque converter clutch is<br />
partially applied, with TCC CLOSED, the torque converter clutch is fully applied.<br />
Torque converter slip speed________________________________ (range: 0 to stall speed)<br />
Indicates the torque converter slip speed on a 01V transmission when viewed in Expert Mode in<br />
display group 007, display field 3, display fields 4.<br />
149
Data Parameters<br />
ABS Parameters<br />
6.6 ABS Parameters<br />
EDS CUT OFF______________________________________________ (range: not available)<br />
Indicates if the EDS fuel cut off is switched on or off.<br />
HANDBRAKE ______________________________________________ (range: not available)<br />
Indicates if the handbrake is activated or not.<br />
POWER SUPPLY ECU(V)_____________________________________ (range: not available)<br />
Indicates the power supply of the ECM.<br />
ROTATIONAL SPEED(°/s) ____________________________________ (range: not available)<br />
Indicates the rotation speed of the steering wheel in degrees per second.<br />
STEERING ANGLE(°)________________________________________ (range: not available)<br />
Indicates the position of the steering wheel in degrees.<br />
TCS SWITCH __________________________________________________ (range: ON/OFF)<br />
Indicates a feedback signal from the Traction Control System (TCS) switch.<br />
TORQUE(%) _______________________________________________ (range: not available)<br />
Indicates the total torque in percentage.<br />
TORQUE LOSS(Nm) ________________________________________ (range: not available)<br />
Indicates the total torque loss in the ABS system in Newton meters.<br />
TRANSVERSE ACCELERATION(m/s2)<br />
Indicates the transverse acceleration.<br />
WHEEL LEFT FRONT<br />
WHEEL RIGHT FRONT<br />
WHEEL LEFT REAR<br />
WHEEL RIGHT REAR _______________________________________ (range: not available)<br />
Indicates wheel speed.<br />
150
Appendix A<br />
Terms and Acronyms<br />
A.1 Terms<br />
The following terms are used throughout this manual to explain certain operations and displays:<br />
blink code<br />
bonnet<br />
code<br />
cursor<br />
fix<br />
frame<br />
hold<br />
movie<br />
menu<br />
parameter<br />
release<br />
screen<br />
A type of vehicle control system that has no serial data. Any trouble<br />
codes the control system set are extracted either by flashing the<br />
malfunction indicator lamp (MIL) or using a special breakout box.<br />
European for “hood.”<br />
A numerical code, generated by the vehicle control system to indicate<br />
a fault has occurred in a particular subsystem, circuit, or part.<br />
The arrow that appears on menus and some other displays. In most<br />
displays, the cursor moves as you scroll.<br />
To lock a single line of the display in a fixed position on the screen to<br />
prevent it from scrolling. Data readings remain live while the<br />
parameter categories are fixed.<br />
One complete data package, or transmission cycle, from an electronic<br />
control module (ECM) that provides serial data of control system<br />
operating parameters.<br />
To capture and hold a single data frame for review or printing.<br />
A vehicle data record whose length depends on the number of<br />
selected data parameters.<br />
A list of vehicle tests or programs from which a selection can be made.<br />
A measured value of control system input or output operation.<br />
Parameters include voltage signals, as well as temperature, pressure,<br />
speed, and other data.<br />
To unlock a fixed line and allow it to scroll.<br />
Any given 4-line display.<br />
A.2 Acronyms<br />
The following acronyms are used in diagnostic trouble code definitions displayed by the scan tool<br />
or used in this manual.<br />
4WD<br />
ABS<br />
A/C<br />
AIR<br />
APP<br />
4 wheel drive<br />
antilock brake system<br />
air conditioning<br />
secondary Air Injection (OBD-II)<br />
accelerator pedal position<br />
151
Acronyms<br />
ASC<br />
ASR<br />
A/T<br />
B1S1<br />
B1S2<br />
B2S1<br />
B2S2<br />
BDC<br />
CA<br />
CAN<br />
CAT<br />
CCS<br />
CMP<br />
CPI<br />
CPP<br />
CTP<br />
CVT<br />
DA<br />
DIS<br />
DLC<br />
DP<br />
DLC<br />
DSA<br />
DSL<br />
DTC<br />
DTM<br />
ECM<br />
ECT<br />
ECU<br />
EDL<br />
EDS<br />
EFI<br />
EGR<br />
EMS<br />
EPC<br />
ESP<br />
EVAP<br />
anti-spin control<br />
anti-slip regulation<br />
automatic transmission<br />
bank 1, sensor 1 (passenger side pre-catalytic, upstream oxygen sensor)<br />
bank 1, sensor 2 (passenger side post-catalytic, downstream oxygen<br />
sensor)<br />
bank 2, sensor 1 (driver side pre-catalytic, upstream oxygen sensor)<br />
bank 2, sensor 2 (driver side post-catalytic, downstream oxygen sensor)<br />
bottom dead center<br />
California<br />
controller area network<br />
catalytic converter<br />
cruise control system<br />
camshaft position<br />
central point injection<br />
clutch pedal position<br />
closed throttle position<br />
continuously variable transmission<br />
drivers airbag<br />
digital idle speed control<br />
data link connector<br />
driver pretensioner<br />
data link connector<br />
driver side airbag<br />
diesel engine<br />
diagnostic trouble code<br />
output diagnostic test mode<br />
engine control module<br />
electronic coolant temperature<br />
electronic control unit<br />
electronic differential lock<br />
pressure regulator<br />
electronic fuel injection<br />
exhaust gas recirculation<br />
engine management system<br />
electronic power control<br />
electronic stability control<br />
evaporative emissions system<br />
152
Acronyms<br />
FL<br />
FR<br />
FT<br />
IAT<br />
ISC<br />
L4<br />
LDP<br />
LEV<br />
MAF<br />
MAP<br />
MBAR<br />
MIL<br />
MPI<br />
MSR<br />
M/T<br />
MV<br />
O2S<br />
PA<br />
PNP<br />
PP<br />
PSA<br />
RL<br />
RR<br />
SAI<br />
SFI<br />
SULEV<br />
TCC<br />
TCM<br />
TCS<br />
TDC<br />
TDI<br />
TLEV<br />
TP<br />
TWC<br />
ULEV<br />
V6<br />
WOT<br />
ZEV<br />
front left (wheel)<br />
front right (wheel)<br />
fuel trim<br />
intake air temperature<br />
idle speed control<br />
4 cylinder longitudinal mounted engine<br />
leak detection pump<br />
low emission vehicle<br />
mass airflow sensor<br />
manifold absolute pressure<br />
millibar; 1000 millibar = 14.5 psi<br />
malfunction indicator lamp<br />
multipoint injection<br />
engine drag torque control<br />
manual transmission<br />
magnetic valve(s)<br />
oxygen sensor<br />
passenger airbag<br />
park/neutral position<br />
passenger pretensioner<br />
passenger side airbag<br />
rear left (wheel)<br />
rear right (wheel)<br />
secondary air injection<br />
sequential fuel injection<br />
super ultra low emission vehicle<br />
torque converter clutch<br />
transmission control module<br />
traction control system<br />
top dead center<br />
turbo direct injection<br />
transitional low emission vehicle<br />
throttle position<br />
three way catalytic converter<br />
ultra low emission vehicle<br />
6-cylinder V-type engine<br />
wide open throttle<br />
zero emission vehicle<br />
153
Appendix B<br />
Troubleshooting<br />
This chapter contains information for troubleshooting specific problems that may arise when using<br />
the scan tool.<br />
B.1 <strong>Communication</strong> Problems<br />
When the scan tool is unable to establish communication with the control module in the vehicle<br />
under test, or when the communication is interrupted, a message will display. If this happens, wait<br />
to see whether the communication is established again or interrupted. If communication is<br />
interrupted again, press N to abort.<br />
NOTE:<br />
i Switching the ignition off-and-on and reentering the ID may reset communication.<br />
Note the following regarding communication problems with VW/<strong>Audi</strong> vehicles:<br />
• When testing a VW/<strong>Audi</strong> with certain ECMs, communication problems may occur when the<br />
engine speed is above 2000 RPM. In this case, communication cannot be established. Once<br />
communication has been established, the engine may be revved above 2000 RPM.<br />
• If testing ABS/EDS/ESP/TCS systems, problems may occur if the vehicle speed exceeds<br />
12 MPH (19 KPH). <strong>Communication</strong> will be stopped or cannot be established.<br />
B.2 The Aftermarket Radio Problem<br />
Between 1997 and 1998, VW and <strong>Audi</strong> started using radios with self-diagnostic capabilities in<br />
most models. The scan tool can communicate with the radio, which allows you to set various<br />
options, like whether a CD player is connected, an amplified or conventional antenna, or other<br />
installed options.<br />
B.2.1 The Problem<br />
VW brought the “K-Line”, the wire on which all of the vehicle control modules communicate with<br />
the scan tool, to a pin in the connector on which older radios used to return B+ back into the<br />
harness. So if you were to take the non-diagnostics capable radio out of a 1997 GTI and put it in<br />
a 1998 where there should be a diagnostics-capable one, it fits perfectly, but the K-Line ends up<br />
shorted to power.<br />
Many aftermarket radios have adapter harnesses that plug into the vehicle radio connector.<br />
Unfortunately, some of the aftermarket harnesses faithfully reproduce the older, non-diagnostics<br />
radios with a loop of wire between B+ and the pin where the K-Line is on newer models. The radio<br />
will work fine until you connect a scan tool.<br />
154
The Aftermarket Radio Problem<br />
The vehicle is not affected if the K-Line is shorted to B+. The K-Line is not used for intra-vehicle<br />
communications, however, the scan tool initializes a communications session by pulling the<br />
K-Line to ground. The K-Line normally has some voltage on it, but through a high-impedance<br />
source. If the K-Line has “full” B+ on it, it can damage the scan tool output driver for the K-Line.<br />
B.2.2 Testing for this Problem<br />
You can test for this problem yourself without removing the radio.<br />
1 2 3<br />
1 2 3 4 5 6 7 8<br />
9 10 11 12 13 14 15 16<br />
1— Chassis ground<br />
2— Signal ground<br />
3— K-Line<br />
4— L-Line<br />
5— B+<br />
Figure B-1 16-pin OBD-II data link connector (DLC)<br />
5<br />
4<br />
z To test this problem with a voltmeter, such as the Snap-on ® Vantage ® graphing meter:<br />
1. Measure the voltage between pins 4 and 7 of the DLC with the ignition and radio on.<br />
If the reading is below 9V, your K-Line is fine. If the reading is above 9V, the results are<br />
inconclusive and you need to proceed to the next step.<br />
2. Put a 1K-ohm resistor between pins 4 and 7 of the DLC.<br />
3. Use the voltmeter to measure the voltage between 4 and 7 (in parallel with the resistor).<br />
If it is under 1V, you don't have the problem. If it remains near 12V (the resistor will get hot!)<br />
you do have this problem and you will need to fix it (see the procedure for fixing this problem<br />
on page 156).<br />
z To test this problem without a voltmeter:<br />
1. Temporarily place a 1K-ohm resistor between pins 4 and 7 of the DLC and ensure it is making<br />
contact with both pins (Figure B-1).<br />
If the resistor gets hot, your K-Line is shorted to B+. If it does not get hot, you do not have a<br />
problem. Do NOT install this resistor in the port. You are simply using it to check and see if the<br />
K-Line has 12V.<br />
2. If the resistor gets hot, then pull it out and fix the problem by disconnecting the K-Line from the<br />
stereo wiring harness.<br />
155
The Aftermarket Radio Problem<br />
z To repair the problem:<br />
1. Remove the radio.<br />
2. Make sure that the K-Line in the radio wiring harness (black 8-pin multi-connector III-T8) has<br />
been removed from the connector and taped back to the harness (Figure B-2).<br />
I<br />
K-Line<br />
II<br />
III<br />
Figure B-2 K-Line on the radio wiring harness black 8-pin multi-connector III-T8<br />
NOTE:<br />
i Some 2002 and newer <strong>Volkswagen</strong>s come with the double-DIN “Premium VI” radio. This radio<br />
does not have a K-Line connection, but rather has a CAN-high and CAN-low. Although the<br />
connector is completely different and it should not be possible to have the “Aftermarket Radio<br />
Problem” with these newer cars, if you use an aftermarket radio, it would be best to make sure that<br />
nothing is connected to these pins in the radio harness. The back of the Premium VI radio is<br />
shown in Figure B-3.<br />
1 2<br />
1— CAN–<br />
2— CAN+<br />
Figure B-3 Back of Premium VI radio<br />
156
Appendix C<br />
Fuel Control Learning<br />
Adaptation Values<br />
VW/<strong>Audi</strong> uses a type of fuel control called “adaptive learning.” This is defined as the ability of the<br />
engine management system to continuously modify the fuel mixture to account for changing<br />
operating conditions.<br />
OBD-II terms for fuel control are “short-term” and “long-term” fuel trim (FT).<br />
• Short term means the correction responds directly to the oxygen sensor (O2S) input.<br />
• Long term FT is designed to maintain short term FT in a balanced state, equal range of<br />
control on either side of rich or lean.<br />
The following sections explain OBD-II short and long term FT terminology applied to VW/<strong>Audi</strong> fuel<br />
control terminology. VW/<strong>Audi</strong> use Bosch Motronic engine management systems. For VW,<br />
Adaptive Learning started with the Motronic 2.9 engine management system in 1993. Each new<br />
system increased the adaptation sophistication (M2.9, M5.0, M5.9.2, M7.0, M7.1, M7.5.1). For<br />
these systems, two central fuel control terms require explanation:<br />
• Additive for idle adaptation.<br />
• Multiplicative for part throttle or cruise adaptation.<br />
C.1 Long-Term Fuel Control<br />
Both Additive and Multiplicative adaptation are a form of long term fuel control. Each is a coarse<br />
type of FT control, allowing short term FT to maintain a midpoint balance between rich and lean.<br />
C.1.1 Additive Adaptation<br />
Additive means adding or subtracting equal amounts of fuel to every fuel block cell regardless of<br />
the programmed base injection pulse value. It works very effectively for idle mixture related<br />
problems, but its effect is minimal at the higher engine speeds. For example, vacuum leaks greatly<br />
affect fuel mixture at idle but become less severe at higher RPM. The important distinction is that<br />
the amount of fuel correction is not dependent upon the original base in each fuel memory cell.<br />
Additive adaptation indicates a fine-tuning, long-term correction or adaptation that the ECM is<br />
applying to the fuel injection pulse width. Although these minute adjustments affect the entire<br />
engine speed range, they are most noticeable at idle or during lower pulse-width operating<br />
conditions. A positive value indicates increased fuel injection duration, and a negative value<br />
indicates a decreased fuel injection duration.<br />
When the short term correction value, reaches its upper or lower limit, the ECM resets short term<br />
correction and moves the long term FT value up or down by one count. The short term FT moves<br />
quickly, while the long term FT moves slowly. The short and long term FT continue to work<br />
together until the fuel mixture problem is corrected, or until the long term FT reaches its upper or<br />
lower limit. When the long term FT reaches its limit, the ECM sets a DTC, and usually defaults into<br />
open loop operation. The factory term “Additive Mixture Adaptation” refers to the fact that the ECM<br />
157
Fuel Control Learning Adaptation Values<br />
Long-Term Fuel Control<br />
is adding directly to the injector opening time for all memory cells. However, data is only updated<br />
under certain idle conditions. Be aware that Idle and Part Load Multiplicative work together to<br />
establish the long term FT.<br />
C.1.2 Multiplicative Adaptation<br />
Multiplicative means multiplying or taking the preprogrammed cell base value and multiplying that<br />
number by either a correction factor or percent. Here, the correction amount increased or<br />
decreased in each memory block cell is dependent on each cell’s base injection pulse. This form<br />
of adaptation is required to compensate for fuel control-type problems that get worse with<br />
increased engine speed (i.e., a faulty injector). Short term FT in VW/<strong>Audi</strong> language is usually<br />
called O2 regulation or O2 control. The readings are constantly changing, directly responding to<br />
oxygen sensor (O2S) input. Normal readings are usually in the ±10% range with 0 as the midpoint.<br />
If it gets too far off, Long-term additive or multiplicative adjusts the window back to the midpoint<br />
(balanced state).<br />
Multiplicative adaptation correction indicates the long-term FT correction that the ECM is applying<br />
to the air/fuel mixture during closed loop operation over the middle to upper range of engine<br />
operation. VW/<strong>Audi</strong> use the term “Multiplicative Mixture Adaptation” because it is a percent<br />
correction factor based on the individual base injection value for each memory cell. Cells are<br />
constantly updated based on feedback operation. If any cell stores an update that is beyond the<br />
neutral feedback value, a correction is then factored into the injector pulse-width calculation. To<br />
maintain the optimal air/fuel ratio of 14.7:1 for catalytic converter (CAT) efficiency, the ECM<br />
monitors the O2Ss and calculated load. From this information, the ECM calculates a percent value<br />
that indicates how much to enrich or dilute the fuel mixture. Sometimes, the ECM makes fine<br />
tuning adjustments across the complete fuel map by adjusting the IDLE (Additive) FUEL TRIM (for<br />
example, when a fine adjustment is needed across the range to compensate for fuel injector drift).<br />
C.1.3 Examples of Display Groups for Long Term FT Adaptive Value<br />
Depending on the year, vehicle, engine, and engine code, you may see some combination of the<br />
following long term FT parameters:<br />
• ADPVALUEO2(ADD)(%)<br />
• ADPVALUEO2(IDLE)(ADD)(%)<br />
• ADPVALUEO2(MUL)(%)<br />
• ADPVALUEO2(P/T)(ADD)(%)<br />
• LEARNO2(ACTUAL)(BANK1)(%)<br />
• LEARNO2(ACTUAL)(BANK2)(%)<br />
• LEARNO2(BANK1)<br />
• LEARNO2(BANK1)(ADD)(%)<br />
• LEARNO2(BANK1)(IDLE)(%)<br />
• LEARNO2(BANK1)(MUL)(%)<br />
• LEARNO2(BANK1)(P/T)(%)<br />
• LEARNO2(BANK2)<br />
• LEARNO2(BANK2)(%)<br />
158
Fuel Control Learning Adaptation Values<br />
Long-Term Fuel Control<br />
• LEARNO2(BANK2)(ADD)(%)<br />
• LEARNO2(BANK2)(IDLE)(%)<br />
• LEARNO2(BANK2)(MUL)(%)<br />
• LEARNO2(BANK2)(P/T)(%)<br />
• LEARNO2(BK1-SNS1)(IDLE)(%)<br />
• LEARNO2(BK1-Sensible/T)(%)<br />
• LEARNO2(BK2-SNS1)(IDLE)(%)<br />
• LEARNO2(BK2-SNS1)(P/T)(%)<br />
• LEARNO2(FULL)<br />
• LEARNO2(IDLE)<br />
• LEARNO2(IDLE)(%)<br />
• LEARNO2(IDLE)(ADD)(%)<br />
• LEARNO2(IDLE)(ADD)(%)<br />
• LEARNO2(IDLE)(ms)<br />
• LEARNO2(IDLE)(MUL)(%)<br />
• LEARNO2(P/T)<br />
• LEARNO2(P/T)(%)<br />
• LEARNO2(P/T)(ADD)(%)<br />
• LEARNO2(P/Tumult)(%)<br />
• LEARNO2(P/T-WOT)<br />
• LEARNO2(PART)(MUL)(%)<br />
• LEARNVALUEMIXTUREADAPTATION<br />
• LEARNVALUEMIXTURECORR(%)<br />
• LEARNVALUEMIXTURECORR(ms)<br />
• LEARNVALUEO2(P/T)(ADD)(%)<br />
• LRNO2BEFORECAT(P/T)(ADD)(%)<br />
• LRNO2BEFORECAT(IDLE)(ADD)(%)<br />
• LRNO2BEFORECAT(P/T)(ADD)(%)<br />
• LEARNVALUEO2(IDLE)(ADD)(%)<br />
• LEARNVALUEO2(P/T)(MUL)(%)<br />
• ADPVALUEMIXTURE(BANK1)(%)<br />
• LRNO2BEFORECAT(IDLE)(ADD)(%)<br />
• LEARNMIXT(BANK1)(IDLE)(%)<br />
• LEARNMIXT(BANK1)(P/T)(%)<br />
• LEARNMIXT(BANK1)(P/T1)(%)<br />
• LEARNMIXT(BANK1)(P/T2)(%)<br />
• LEARNMIXT(BANK1)(P/T3)(%)<br />
• LEARNMIXT(BANK2)(IDLE)(%)<br />
• LEARNMIXT(BANK2)(P/T)(%)<br />
• LEARNMIXT(BANK2)(P/T1)(%)<br />
• LEARNMIXT(BANK2)(P/T2)(%)<br />
• LEARNMIXT(BANK2)(P/T3)(%)<br />
159
Fuel Control Learning Adaptation Values<br />
Short-Term Fuel Control<br />
• LEARNMIXTURE(BANK1)(%)<br />
• LEARNMIXTURE(BANK2)(%)<br />
Below is a typical display group, Group (32), “LEARN VALUES O2”.<br />
• LEARN VALUE O2(BK 1)(IDLE)(%)<br />
• LEARN VALUE O2(BK 2)(IDLE)(%)<br />
• LEARN VALUE O2(BK 1)(P/T)(%)<br />
• LEARN VALUE O2(BK 2)(P/T)(%)<br />
C.1.4 Important Tips for Long Term Fuel Control<br />
• The value typically ranges from -10 to +10. A normal operating engine should fluctuate only<br />
slightly. If more than ±7%, perform a mixture diagnosis. Technicians report MAF sensor<br />
problems with readings of ±5%.<br />
• Use Basic Settings for faster adaptation relearn. Take short road test (usually 2–3 miles) with<br />
the scan tool hooked up in Basic Settings. For relearn, make sure the engine is at normal<br />
operating temperature (coolant minimum temperature of 167°F [75°C] and a maximum intake<br />
air temperature of 194°F [90°C]). For idle relearn, let the engine idle in Basic Settings for a few<br />
minutes. For road test in Basic Settings, perform multiple accelerations and decelerations, as<br />
well as a part throttle cruise. Check to see that learn values are back within normal range. If<br />
OK, clear the codes. Field technicians report faster relearn and verification of repair by not<br />
clearing codes until correct fuel control has been confirmed). Finish by setting all Readiness<br />
Codes, and then one more final road test (see “Basic Settings and Fuel Trim Accelerated<br />
Learning” on page 48).<br />
• Some vehicles may have part throttle learning divided into 3 different parts: (P/T1, P/T2, P/<br />
T3). Check to see that each part is in proper specification.<br />
• For most systems that have FT control using ±25% maximum range, readings above or below<br />
14 sets a DTC and turns on the MIL.<br />
C.2 Short-Term Fuel Control<br />
Short term FT is usually called O2 regulation or O2 control. The readings are constantly changing,<br />
directly responding to O2S input. Normal readings usually are in the ±10% range with 0 as the<br />
midpoint. If it gets too far off, Long-term additive or multiplicative adjusts the window back to the<br />
midpoint (balanced state).<br />
C.2.1 Examples Short Term FT O2 Regulation<br />
Depending on the year, vehicle, engine and then engine code you may see some combination of<br />
the following short term FT parameters:<br />
• ADPVALUEMIXTURE(BANK1)<br />
• ADPVALUEMIXTURE(BANK2)<br />
• ADPVALUEMIXTURE(BANK2)(%)<br />
• ADPVALUEO2<br />
160
Fuel Control Learning Adaptation Values<br />
Short-Term Fuel Control<br />
• LEARNVALUEO2<br />
• O2CONTROL(BANK1)(%)<br />
• O2CONTROL(BANK2)(%)<br />
• O2CONTROLFACTOR(BK1)<br />
• O2CONTROLFACTOR(BK1)(%)<br />
• O2CONTROLFACTOR(BK2)<br />
• O2CONTROLFACTOR(BK2)(%)<br />
• O2REGULATION(BK1-SNS1)(%)<br />
• O2REGULATIONBEFORECAT(%)<br />
• O2SENSOR(BK1-SNS1)(V)<br />
• DYNAMIC FACTOR O2-SNSBEFORECAT<br />
• O2CONTROL(BANK1)(%)<br />
• O2CONTROL(BANK2)(%)<br />
• O2CONTROLDEVIATION(%)<br />
• O2INTEGRATOR<br />
Below is a typical short term FT display group, Group O2 REGULATION BEFORE CAT<br />
• O2 SENSOR(BANK 1,BEFORE CAT)(V)<br />
• O2 SENSOR(BANK 2,BEFORE CAT)(V)<br />
• O2 REGULATION (BANK 1)(%)<br />
• O2 REGULATION (BANK 2)(%)<br />
These parameters are equivalent to the short term FT correction during closed loop operation.<br />
This correction is based on the O2S input for a given engine load and speed. The ECM monitors<br />
engine operating conditions and calculates short-term and long-term adaptations to correct for<br />
engine wear.<br />
The value typically range is ±10. A normal operating engine should see this value fluctuate by at<br />
least 2%. If it fluctuates by more than 7%, perform a fuel mixture diagnosis.<br />
NOTE:<br />
i Some vehicles use a calculated value called factor. The parameter names are ADP VALUE O2<br />
and DYNAMIC FACTORO2, SNS BEFORE CAT. Normal range is 0.5–1.5;<br />
1.0 ±0.3 is base midpoint; for 2.8L (AAA), the range is 0.80–1.20.<br />
Positive values indicate the ECM is enriching the air/fuel mixture, and negative values indicate the<br />
ECM is leaning the mixture.<br />
During open loop operation, the ECM runs at a base program without correction and the<br />
parameter displays a fixed 0% value. The ECM adjusts the air/fuel mixture by changing the fuel<br />
injector pulse width.<br />
C.2.2 Important Tips for Short-Term Fuel Control<br />
• On some OBD-I (1991–1995) vehicles, values for short term FT, LEARN O2 (IDLE), LEARN<br />
O2 (P/T), or LEARN O2 (FULL), may be mislabeled as reading in percentage. In actuality,<br />
they are reading a numeric factor of 1.0 midpoint ±0.5 (0.5 to 1.5). For 2.8L AAA engine, the<br />
range is 0.80–1.20.<br />
161
Fuel Control Learning Adaptation Values<br />
Oxygen Sensor Voltage<br />
• Range: 0.5 - 1.5 Normal Value: 1.0 ±0.3 (0.7–1.3) is base midpoint<br />
• For 2.0L (ABA) IDLE ADAPT: 0.87–1.2<br />
• For 2.8L (AAA) IDLE ADAPT: 0.53–1.47<br />
• Part Load: 0.80–1.20<br />
• Low Load: 0.53–1.47<br />
• Adaptation values may be erased if the car battery goes low or is disconnected.<br />
• Additive adaptation is used mostly to correct idle mixture, however, it may also be used at<br />
higher RPM for fine adjustment (may see different additive values at different RPM). With<br />
relearn, it is normal for Additive adaptation to respond quickly. Multiplicative learning typically<br />
requires more learning time and vehicle must be driven on an extended road test under<br />
various driving conditions.<br />
• For most systems that have FT control using ±25% maximum range, readings above or below<br />
14 sets a DTC and turn on MIL.<br />
C.3 Oxygen Sensor Voltage<br />
Typical displays to view O2S voltage are either 001–004 (basic) or 026/033. You may see some<br />
combination of the following parameters:<br />
• O2SENSOR(V)<br />
• O2SENSOR1(V)<br />
• O2SENSOR2(V)<br />
• O2SENSOR(BANK1)(V)<br />
• O2SENSOR(BANK1,AFTERCAT)(V)<br />
• O2SENSOR(BANK1,BEFORECAT)(V)<br />
• O2SENSOR(BANK2)(V)<br />
• O2SENSOR(BANK2,AFTERCAT)(V)<br />
• O2SENSOR(BANK2,BEFORECAT)(V)<br />
• O2SENSOR(BK1-SNS1)(V)<br />
• O2SENSORAFTERCAT(V)<br />
• O2SENSORAFTERCATBK1(V)<br />
• O2SENSORAFTERCATBK2(V)<br />
• O2SENSORBEFORECAT(V)<br />
These parameters indicate the amount of oxygen in the exhaust gas. High oxygen levels indicate<br />
a lean air/fuel mixture, while low oxygen levels indicate a rich air/fuel mixture. When the O2Ss are<br />
at operating temperature and the system is operating in closed loop, the ECM constantly adjusts<br />
the air/fuel mixture to achieve a 14.7:1 ratio. The ECM uses O2S signals to determine how rich or<br />
lean the engine is running and to correct the mixture.<br />
C.4 Early <strong>Vehicle</strong> Oxygen Sensor Reading<br />
Many early vehicles, model years 1990–93, with limited display groups may not read O2S or O2<br />
control. However, you can use Expert Mode and select display group 000. O2V reads in binary<br />
162
Fuel Control Learning Adaptation Values<br />
Late Model Oxygen Sensor Reading<br />
format (0–255). There is no consistency, but Channel 5 often reads the O2 signal. Look for this<br />
number to be constantly varying up and down by at least 14 digits. If Channel 5 is not active, it may<br />
be an application that only displays an O2 short term FT factor. In this case, check channel 4. The<br />
O2 control factor will also output a binary 0–255 number with 128 as the midpoint. Numbers less<br />
than 128 indicate a rich mixture correction. Numbers higher than 128 indicate a lean mixture<br />
correction. Look for fast fluctuations at different RPM and load conditions which indicate an active<br />
O2S (use DVOM to test O2S directly). Above is for those vehicles with display group 000 only. On<br />
vehicles with additional display groups but still not displaying O2V directly, look at the O2 Factor<br />
which reads 1.0 as the base point. Higher numbers indicate correction for a mixture too lean and<br />
lower numbers indicate a correction for a mixture too rich. A typical normal range is 1.0 ±0.3.<br />
The following sections are display examples for late model OBD-II O2S and CAT tests.<br />
C.4.1 Example: Motronic 2.9 (1993–1995)<br />
The following example concerns reading engine data display Group 000.<br />
Display group 000 has 10 channels or display fields, listed below.<br />
1. Coolant temperature<br />
2. Engine load<br />
3. RPM<br />
4. O2 factor<br />
5. Idle Adapt<br />
6. Part throttle adapt<br />
7. Low load adapt<br />
8. IAC adapt<br />
9. Not used<br />
10. IGN timing<br />
The display fields are output in binary numbers. To understand the binary number, visualize a<br />
clock with 0 at the top center. The number 128 is at the center bottom. The binary clock counts<br />
from 0 to 255.<br />
The number can theoretically range from 0 to 255 with 0 as the midpoint. A number of 13 to 128<br />
indicates that the ECM has commanded an overall lean mixture correction. A number of 128 to<br />
243 indicates that the ECM has commanded an overall rich mixture correction.<br />
C.5 Late Model Oxygen Sensor Reading<br />
Some late models are using 0–5V O2Ss. Rich is high voltage; lean is low voltage. For example, a<br />
VW 2001 2.0L with the AEG engine and the 2002 Passat W8 (BDP). Other late model vehicles<br />
may be using a Linear Air/Fuel Ratio sensor (A/F sensor) which measures the exact air/fuel<br />
mixture (not like a standard Zirconium O2S switching constantly between rich and lean). The<br />
voltage displayed (display group 33 in Table C-1 below) for these is an ECM computed value<br />
where 1.5V = 1 lambda or the ideal fuel mixture ratio of 14.7:1. Higher voltage indicates correction<br />
for a rich mixture and lower voltage indicates a correction for a lean mixture. Under normal load,<br />
the A/F sensor voltage should vary around 1.5V, which means the mixture is right at stoichiometric<br />
163
Fuel Control Learning Adaptation Values<br />
Late Model Oxygen Sensor Reading<br />
or Lambda = 1. During deceleration from 3000 RPM, the mixture is lean and the A/F sensor<br />
voltage should go higher than 1.5V. Under full load acceleration, the mixture is rich and the A/F<br />
sensor voltage should go low, 1V or lower.<br />
Table C-1 Display groups 31 and 33<br />
Display<br />
Group<br />
Sensor<br />
Bank 1,<br />
Sensor 1<br />
Bank 1,<br />
Sensor 2<br />
Bank 2,<br />
Sensor 1<br />
Bank 2,<br />
Sensor 2<br />
31<br />
Linear oxygen<br />
sensors<br />
Lambda<br />
actual value<br />
Lambda<br />
specified value<br />
Sensor voltage<br />
before CAT of a<br />
broadband<br />
sensor (V)<br />
33<br />
Linear oxygen<br />
sensor control<br />
value<br />
Control<br />
value (%)<br />
Control<br />
value (%)<br />
Sensor voltage<br />
before CAT of a<br />
broadband<br />
sensor (V)<br />
NOTE:<br />
i The broadband lambda probe linear Air Fuel Ratio Sensor acquires and evaluates lambda values<br />
differently to the step type zirconium O2S. The lambda value (display group 31 in Table C-1) is<br />
determined from a change of current, not from a change of voltage.<br />
C.5.1 Oxygen Sensor Aging Test<br />
The O2S Aging Test is a Readiness Code test, typically display groups 34 or 35 for O2S before<br />
CAT, and display groups 36 or 43 for O2S after CAT.<br />
Typical display Group, DIAGN AGING O2 BEFORE CAT<br />
• ENGINE SPEED(rpm)<br />
• EXHAUST GAS TEMPERATURE<br />
• DYNAMIC FACTOR<br />
• DIAGNOSE STATUS<br />
Depending on the year, vehicle, engine, and engine code, you may see some combination of the<br />
following O2S Aging Test Parameter list:<br />
• AGINGTESTO2(BK1-SNS2)<br />
• AGINGTESTO2(BK2-SNS2)<br />
• AGINGTESTO2AFTERCATBK1<br />
• AGINGTESTO2AFTERCATBK2<br />
• AGINGTESTO2-SNSAFTERCAT<br />
• AGINGTESTO2-SNSBEFORECAT<br />
• DIAGNOSESTATUS<br />
• DYNAMICFACTOR<br />
• DYNAMICFACTORO2-SNSBEFORECAT<br />
These parameters indicate the Readiness Code for the O2S Aging test. The test measures the<br />
O2S cycling time between a rich to lean transition back to rich transition. This measurement then<br />
translates into the aging condition of the O2S. If the specified allowable time is exceeded,<br />
DIAGNOSESTATUS will read NOT OK. A typical normal range for the cycling time period duration<br />
(DYNAMICFACTOR) is 0.1–1.8 seconds (typical functional range is 0–3.3 seconds).<br />
164
Fuel Control Learning Adaptation Values<br />
Late Model Oxygen Sensor Reading<br />
C.5.2 Oxygen Sensor Control-Dwell Time Test<br />
Below is a typical display group example, DIAGN O2 CONTROL SYSTEM.<br />
• ENGINE LOAD(%)<br />
• O2 SENSOR(BANK 1, AFTER CAT)(V)<br />
• CORR.BETW O2-SNS 1+2 BK1(ms)<br />
• DIAGNOSE STATUS<br />
These parameters indicate the relationship of the before CAT O2S and the after CAT O2S. The<br />
after CAT O2S has the authority to override the before the CAT O2S. The reason for this is in case<br />
the before CAT O2S performance deteriorates to the point of jeopardizing the CAT, the after CAT<br />
O2 control can take over control preventing possible CAT damage. The after CAT O2S also can<br />
correct for slight changes in the mixture if it detects displacement of the before CAT voltage curve.<br />
It takes control by holding the before CAT O2 control at its higher or lower point for a specific time<br />
(dwell time). If this time is in the positive range (i.e., 50 ms), then the mixture is shifted to the rich<br />
direction. If the time is negative (i.e., -50 ms), then the mixture is shifted to the lean direction.<br />
NOTE:<br />
i If the value is above +200 ms, then there is a possible leak in the exhaust system.<br />
C.5.3 CAT Test Parameters<br />
Below is a typical display group 46/47, DIAGNOSE CATALYST BANK 1.<br />
• ENGINE SPEED(rpm)<br />
• CATALYST TEMPERATURE<br />
• CATALYST EFFICIENCY<br />
• DIAGNOSE STATUS<br />
The engine management ECM compares the voltage(s) of the upstream or before CAT O2S to the<br />
voltage(s) of the downstream or after the CAT O2S. The result is called the amplitude ratio<br />
between the two sensors and indicates the CAT test result in either percent or amplitude ratio. A<br />
good CAT amplitude ratio range is 0.00 –0.32.<br />
Table C-2 provides O2S and fuel control display fields available in Expert Mode.<br />
Table C-2 Display fields for O2S and Fuel control available in Expert Mode (part 1 of 5)<br />
Display<br />
Group<br />
Sensor<br />
Bank 1,<br />
Sensor 1<br />
Bank 1,<br />
Sensor 2<br />
Bank 2,<br />
Sensor 1<br />
Bank 2,<br />
Sensor 2<br />
Oxygen sensor,<br />
status (2-bank XXX 1 XXX 1 XXX 1 XXX 1<br />
system)<br />
30 Oxygen sensor,<br />
status (1-bank XXX 1 XXX 1<br />
system)<br />
X values: (1) Control Active, (2) Sensor Ready, (3) Sensor Heater ON<br />
1 Condition attained = 1; Condition not attained = 0<br />
165
Fuel Control Learning Adaptation Values<br />
Late Model Oxygen Sensor Reading<br />
Table C-2 Display fields for O2S and Fuel control available in Expert Mode (part 2 of 5)<br />
Display<br />
Group<br />
31<br />
32<br />
33<br />
34<br />
Sensor<br />
Knock sensor<br />
voltage<br />
Oxygen sensor<br />
voltage<br />
Linear oxygen<br />
sensors (2-bank<br />
system)<br />
Linear oxygen<br />
sensors (1-bank<br />
system)<br />
Oxygen sensors<br />
learning values<br />
(maximum value)<br />
(2-bank systems)<br />
Oxygen sensors<br />
learning values<br />
(maximum value)<br />
(1-bank systems)<br />
Lambda control<br />
value (2-bank<br />
system)<br />
Lambda control<br />
value (1-bank<br />
system<br />
Linear oxygen<br />
sensor control value<br />
Oxygen sensor<br />
aging test Bank 1 or<br />
Bank 3 before CAT,<br />
short trip<br />
Oxygen sensor<br />
aging test Bank 1 or<br />
Bank 3 before CAT<br />
for linear oxygen<br />
sensors, short trip<br />
Bank 1,<br />
Sensor 1<br />
(V) (V) (V) (V)<br />
(V)<br />
Lambda<br />
actual value<br />
Lambda<br />
actual value<br />
(V)<br />
Lambda<br />
specified value<br />
Lambda<br />
specified value<br />
Lambda<br />
actual value<br />
Lambda<br />
specified value<br />
Idle (%) Partial load (%) Idle (%) Partial load (%)<br />
Idle (%) Partial load (%)<br />
Control value<br />
(%)<br />
Control value<br />
(%)<br />
Control value<br />
(%)<br />
RPM (1/min.)<br />
RPM (1/min.)<br />
1 Condition attained = 1; Condition not attained = 0<br />
Bank 1,<br />
Sensor 2<br />
Oxygen sensor<br />
voltage (V)<br />
Oxygen sensor<br />
voltage (V)<br />
Sensor voltage<br />
before CAT of a<br />
broadband<br />
sensor (V)<br />
Exhaust gas/<br />
CAT<br />
temperature<br />
(°C)<br />
Exhaust gas/<br />
CAT<br />
temperature<br />
(°C)<br />
Bank 2,<br />
Sensor 1<br />
Control value<br />
(%)<br />
Control value<br />
(%)<br />
Length of<br />
period (s)<br />
Dynamic<br />
factor<br />
Bank 2,<br />
Sensor 2<br />
Oxygen sensor<br />
voltage (V)<br />
Sensor voltage<br />
before CAT of a<br />
broadband<br />
sensor (V)<br />
Result (Test<br />
ON/Test OFF/<br />
B1-S1 OK/<br />
B1-S1 not OK/<br />
B3-S1 OK/<br />
B3-S1 not OK)<br />
Result (Test<br />
ON/Test OFF/<br />
B1-S1 OK/<br />
B1-S1 not OK/<br />
B3-S1 OK/<br />
B3-S1 not OK)<br />
166
Fuel Control Learning Adaptation Values<br />
Late Model Oxygen Sensor Reading<br />
Table C-2 Display fields for O2S and Fuel control available in Expert Mode (part 3 of 5)<br />
Display<br />
Group<br />
35<br />
36<br />
37<br />
38<br />
39<br />
Sensor<br />
Oxygen sensor<br />
aging test Bank 2 or<br />
Bank 4 before CAT,<br />
short trip<br />
Oxygen sensor<br />
aging test Bank 2 or<br />
Bank 4 before CAT<br />
for linear oxygen<br />
sensors, short trip<br />
Oxygen sensor<br />
aging test Bank 2<br />
before CAT<br />
Oxygen sensor<br />
readiness after CAT,<br />
short trip (2-bank<br />
system)<br />
Oxygen sensor<br />
readiness after CAT,<br />
short trip (1-bank<br />
system)<br />
Oxygen sensors,<br />
short trip<br />
Linear oxygen<br />
sensors, short trip<br />
Oxygen sensors,<br />
short trip<br />
Linear oxygen<br />
sensors, short trip<br />
Oxygen sensors<br />
(1-bank systems)<br />
Sensor exchange<br />
after CAT, short trip<br />
Bank 1,<br />
Sensor 1<br />
RPM (1/min.)<br />
RPM (1/min.)<br />
Sensor<br />
voltage (V)<br />
Sensor<br />
voltage (V)<br />
Load (%)<br />
Load (%)<br />
Load (%)<br />
Load (%)<br />
Air mass (g/s)<br />
1 Condition attained = 1; Condition not attained = 0<br />
Bank 1,<br />
Sensor 2<br />
Exhaust gas/<br />
CAT<br />
temperature<br />
(°C)<br />
Exhaust gas/<br />
CAT<br />
temperature<br />
(°C)<br />
Result (Test<br />
ON/Test OFF/<br />
B1-S2 OK/<br />
B1-S2 not OK/<br />
B3-S2 OK/<br />
B3-S2 not OK<br />
Result (Test<br />
ON/Test OFF/<br />
B1-S2 OK/<br />
B1-S2 not OK<br />
Oxygen sensor<br />
voltage after<br />
CAT (V)<br />
Oxygen sensor<br />
voltage after<br />
CAT (V)<br />
Oxygen sensor<br />
voltage after<br />
CAT (V)<br />
Oxygen sensor<br />
voltage after<br />
CAT (V)<br />
Sensor voltage<br />
(V)<br />
NOT USED<br />
Bank 2,<br />
Sensor 1<br />
Length of<br />
period (s)<br />
Dynamic<br />
factor<br />
Sensor<br />
voltage (V)<br />
TV shift (ms)<br />
Lambda<br />
TV shift (ms)<br />
Lambda<br />
Sensor<br />
voltage (V)<br />
Bank 2,<br />
Sensor 2<br />
Result (Test<br />
ON/Test OFF/<br />
B2-S1 OK/<br />
B2-S1 not OK/<br />
B4-S1 OK/<br />
B4-S1 not OK)<br />
Result (Test<br />
ON/Test OFF/<br />
B2-S1 OK/<br />
B2-S1 not OK/<br />
B4-S1 OK/<br />
B4-S1 not OK)<br />
Result (Test<br />
ON/Test OFF/<br />
B2-S2 OK/<br />
B2-S2 not OK/<br />
B4-S2 OK/<br />
B4-S2 not OK)<br />
Result (Test<br />
ON/Test OFF/<br />
Sys. OK/Sys.<br />
not OK)<br />
Result (Test<br />
ON/Test OFF/<br />
Sys. OK/Sys.<br />
not OK)<br />
Result (Test<br />
ON/Test OFF/<br />
Sys. OK/Sys.<br />
not OK)<br />
Result (Test<br />
ON/Test OFF/<br />
Sys. OK/Sys.<br />
not OK)<br />
Result (Test<br />
ON/Test OFF/<br />
Sys. OK/Sys.<br />
not OK)<br />
167
Fuel Control Learning Adaptation Values<br />
Late Model Oxygen Sensor Reading<br />
Table C-2 Display fields for O2S and Fuel control available in Expert Mode (part 4 of 5)<br />
Display<br />
Group<br />
40<br />
41<br />
42<br />
43<br />
44<br />
Sensor<br />
Oxygen sensor<br />
heaters resistor<br />
(combined wires of<br />
heaters)<br />
(1-bank systems)<br />
Oxygen sensor<br />
heater<br />
Oxygen sensor<br />
heaters (separate<br />
wires of heaters)<br />
Oxygen sensor<br />
aging after CAT,<br />
linear oxygen<br />
sensors, short trip<br />
Oxygen sensor<br />
aging after CAT,<br />
short trip<br />
Bank 1,<br />
Sensor 1<br />
Heater<br />
resistor (<br />
Heater<br />
resistor (<br />
Heater<br />
resistor (<br />
RPM (U/min.)<br />
RPM (U/min.)<br />
Bank 1,<br />
Sensor 2<br />
Condition<br />
(Heater before<br />
CAT ON/Heater<br />
before CAT<br />
OFF)<br />
Condition<br />
(Heater before<br />
CAT ON/Heater<br />
before CAT<br />
OFF/Sensor 1<br />
(%))<br />
Condition<br />
(Heater before<br />
CAT ON/Heater<br />
before CAT<br />
OFF/Sensor 1<br />
(%))<br />
Exhaust gas/<br />
CAT<br />
temperature<br />
(°C)<br />
Exhaust gas/<br />
CAT<br />
temperature<br />
(°C)<br />
NOT USED<br />
Bank 2,<br />
Sensor 1<br />
Heater<br />
resistor (<br />
Heater<br />
resistor (<br />
Heater<br />
resistor (<br />
Oxygen<br />
sensor<br />
voltage (V)<br />
Oxygen<br />
sensor<br />
voltage (V)<br />
Bank 2,<br />
Sensor 2<br />
Condition<br />
(Heater before<br />
CAT ON/Heater<br />
before CAT<br />
OFF)<br />
Condition<br />
(Heater before<br />
CAT ON/Heater<br />
before CAT<br />
OFF)<br />
Condition<br />
(Heater before<br />
CAT ON/Heater<br />
before CAT<br />
OFF)<br />
Result (Test<br />
ON/Test OFF/<br />
B1-S2 OK/<br />
B1-S2 not OK/<br />
B3-S2 OK/<br />
B3-S2 not OK)<br />
Result (Test<br />
ON/Test OFF/<br />
B2-S2 OK/<br />
B2-S2 not OK/<br />
B4-S2 OK/<br />
B4-S2 not OK)<br />
45<br />
46<br />
47<br />
CAT conversion test<br />
Bank 1 or Bank 3,<br />
short trip<br />
CAT conversion test<br />
Bank 2 or Bank 4,<br />
short trip<br />
CAT conversion test<br />
Bank 2 (1-bank<br />
systems)<br />
RPM (1/min.)<br />
RPM (1/min.)<br />
1 Condition attained = 1; Condition not attained = 0<br />
CAT<br />
temperature<br />
(°C)<br />
CAT<br />
temperature<br />
(°C)<br />
NOT USED<br />
Measuring<br />
value CAT<br />
conversion<br />
Measuring<br />
value CAT<br />
conversion<br />
Result (Test<br />
ON/Test OFF/<br />
CAT B1 OK/<br />
CAT B1 not OK/<br />
CAT B3 OK/<br />
CAT B2 no OK)<br />
Result (Test<br />
ON/Test OFF/<br />
CAT B2 OK/<br />
CAT B2 not OK/<br />
CAT B4 OK/<br />
CAT B4 no OK)<br />
168
Fuel Control Learning Adaptation Values<br />
Late Model Oxygen Sensor Reading<br />
Table C-2 Display fields for O2S and Fuel control available in Expert Mode (part 5 of 5)<br />
Display<br />
Group<br />
48<br />
49<br />
Sensor<br />
Thermal CAT<br />
diagnosis Bank 1,<br />
short trip<br />
Operating<br />
system BDE<br />
XXXXXXXX 1<br />
Number of test<br />
steps (-)<br />
Exothermal<br />
temp.<br />
increase (K)<br />
Result (Test<br />
ON/Test OFF/<br />
Sys. OK/Sys.<br />
not OK)<br />
X values: (1) With bit homogenous knock protection, (2) Not used, (3) Not used, (4) Layer<br />
CAT heating double inject., (5) Layer, (6) Homogenous layer double inject., (7)<br />
Homogenous lean, (8) Homogenous<br />
Thermal CAT<br />
diagnosis Bank 2,<br />
short trip<br />
Bank 1,<br />
Sensor 1<br />
Operating<br />
system BDE<br />
XXXXXXXX 1<br />
Bank 1,<br />
Sensor 2<br />
Number of test<br />
steps (-)<br />
Bank 2,<br />
Sensor 1<br />
Exothermal<br />
temp.<br />
increase (K)<br />
Bank 2,<br />
Sensor 2<br />
Result (Test<br />
ON/Test OFF/<br />
Sys. OK/Sys.<br />
not OK)<br />
X values: (1) With bit homogenous knock protection, (2) Not used, (3) Not used, (4) Layer<br />
CAT heating double inject., (5) Layer, (6) Homogenous layer double inject., (7)<br />
Homogenous lean, (8) Homogenous<br />
1 Condition attained = 1; Condition not attained = 0<br />
169
Index<br />
ABS systems 72<br />
basic settings brake bleeding 75<br />
actuator tests 43<br />
important notes for testing 45<br />
aftermarket radio problem 11, 154<br />
application charts<br />
ABS (<strong>Audi</strong> types and system descriptions) 74<br />
ABS (VW types and system descriptions) 73<br />
ABS (VW) 72<br />
engine (<strong>Audi</strong>) 37<br />
engine (early <strong>Audi</strong>) 40<br />
engine (early VW) 36<br />
engine (VW) 32<br />
transmission (types and descriptions) 53<br />
transmissions 57<br />
VW/<strong>Audi</strong> software 30<br />
A<br />
B<br />
basic settings 41<br />
ABS 75<br />
adaptive learned values 48<br />
crankshaft sensor learn 49<br />
Expert Mode 20, 22<br />
fuel trim accelerated learning 48<br />
ignition timing 47<br />
kickdown function 46<br />
menu choices 46<br />
problems with 50<br />
standard mode 45<br />
throttle body adaptation 46<br />
transmission testing 63<br />
C<br />
checking for codes (test drive) 40<br />
coding and programming<br />
VW 1996–99 mechanical keys 80<br />
D<br />
data display (ignition off) 42<br />
data groups (pre-selected) 43<br />
data parameters<br />
ABS 150<br />
diesel engine 136<br />
gas engine 105<br />
listed alphabetically 93<br />
transmission 140<br />
transmission Expert Mode 148<br />
display data groups 23<br />
DL-16 11<br />
E<br />
early <strong>Audi</strong> engine systems 37<br />
early VW engine systems 36<br />
ECU coding 23<br />
ECU ID information 21<br />
electronic throttle 67<br />
emergency running or limp-home mode 71<br />
electronic throttle systems 67<br />
adaptation 67<br />
types of 69<br />
engine ID codes 5<br />
engine systems<br />
important notes for fault codes 41<br />
system coverage 36<br />
systems covered 32<br />
engine trouble codes 41<br />
Expert Mode 18–29<br />
automatic system test 16<br />
important warnings 18<br />
selecting 11<br />
VW/<strong>Audi</strong> software applications 30<br />
false codes 41<br />
fuel control 157<br />
additive adaptation 157<br />
early vehicle O2S 162<br />
Expert Mode display groups 164<br />
late model O2S 163<br />
multiplicative adaptation 158<br />
O2 factor 161<br />
oxygen sensor voltage 162<br />
fuel control learning 157<br />
functional tests<br />
Initiate Actuator Tests 43<br />
Review ECU ID 45<br />
Service Interval Reset 50<br />
Immobilizer 75<br />
ECU replacement 77, 78<br />
FAQ 82<br />
key coding 77<br />
remote key matching 81<br />
sample remote key option settings 81<br />
types of 75<br />
F<br />
I<br />
170
Index<br />
K<br />
keys<br />
actuator tests 22, 45<br />
adaptations 27<br />
basic settings 47, 49<br />
electronic throttle adaptation 67<br />
Personality Keys. See Personality Keys<br />
types used with immobilizer systems 75<br />
KW2000 protocol 27<br />
K<br />
vehicle connectors<br />
VW locations 13<br />
VW-1 11<br />
V<br />
W<br />
Work Shop Code (WSC) 21<br />
login access numbers 28<br />
long-term fuel control 157<br />
L<br />
multiple code clearing 40<br />
M<br />
Personality Keys 11<br />
programming. See coding and programming<br />
P<br />
R<br />
remote key option settings 81<br />
S<br />
Safety iii–iv<br />
safety<br />
information iii<br />
scan tool VW/<strong>Audi</strong> coverage 30<br />
service reset<br />
electronic 51<br />
manual 50<br />
service reset/preset functions 52<br />
short-term fuel control 160<br />
test adapters 11<br />
DL-16 11<br />
VW-1 11<br />
testing<br />
ABS systems 72<br />
engine systems 32<br />
transmission systems 53<br />
transmission systems 53<br />
application chart 57<br />
basic settings 63<br />
emergency operation 66<br />
fail-safe functions 65<br />
important tips for fault codes 62<br />
series 01F, 01K 61<br />
series 01N 60<br />
series 095, 096, 01M 60<br />
solenoid firing 64<br />
T<br />
171


![BMW Vehicle Communication Software Manual [1198kb PDF File]](https://img.yumpu.com/41822192/1/190x247/bmw-vehicle-communication-software-manual-1198kb-pdf-file.jpg?quality=85)