Model No. SA-AKX95LMK - Panasonic
Model No. SA-AKX95LMK - Panasonic
Model No. SA-AKX95LMK - Panasonic
You also want an ePaper? Increase the reach of your titles
YUMPU automatically turns print PDFs into web optimized ePapers that Google loves.
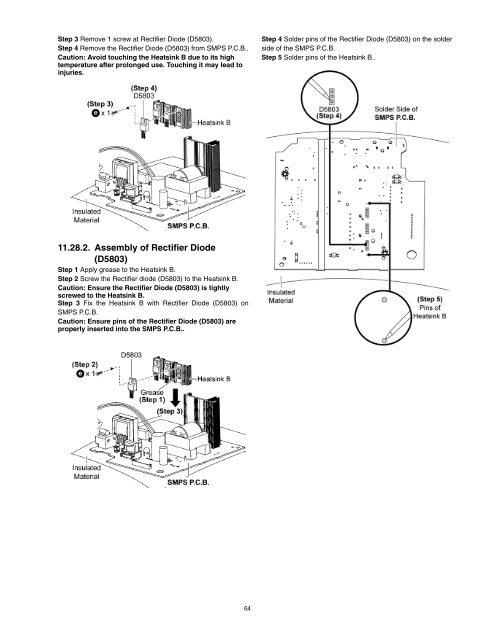
Step 3 Remove 1 screw at Rectifier Diode (D5803).<br />
Step 4 Remove the Rectifier Diode (D5803) from SMPS P.C.B..<br />
Caution: Avoid touching the Heatsink B due to its high<br />
temperature after prolonged use. Touching it may lead to<br />
injuries.<br />
Step 4 Solder pins of the Rectifier Diode (D5803) on the solder<br />
side of the SMPS P.C.B.<br />
Step 5 Solder pins of the Heatsink B..<br />
11.28.2. Assembly of Rectifier Diode<br />
(D5803)<br />
Step 1 Apply grease to the Heatsink B.<br />
Step 2 Screw the Rectifier diode (D5803) to the Heatsink B.<br />
Caution: Ensure the Rectifier Diode (D5803) is tightly<br />
screwed to the Heatsink B.<br />
Step 3 Fix the Heatsink B with Rectifier Diode (D5803) on<br />
SMPS P.C.B.<br />
Caution: Ensure pins of the Rectifier Diode (D5803) are<br />
properly inserted into the SMPS P.C.B..<br />
64


