

Model No. SA-AKX95LMK - Panasonic
Model No. SA-AKX95LMK - Panasonic
Model No. SA-AKX95LMK - Panasonic

You also want an ePaper? Increase the reach of your titles
YUMPU automatically turns print PDFs into web optimized ePapers that Google loves.
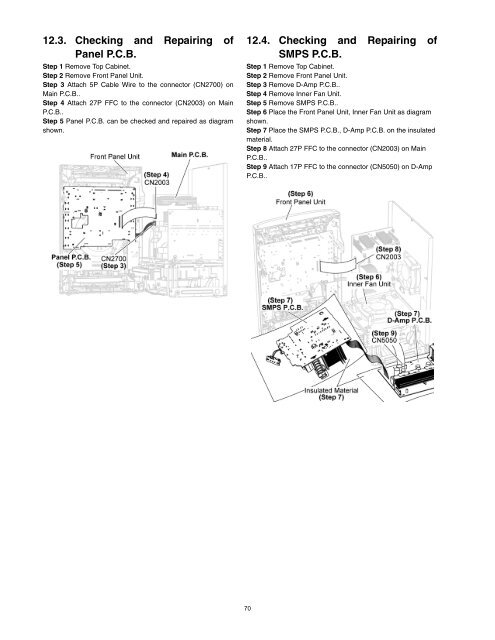
12.3. Checking and Repairing of<br />
Panel P.C.B.<br />
Step 1 Remove Top Cabinet.<br />
Step 2 Remove Front Panel Unit.<br />
Step 3 Attach 5P Cable Wire to the connector (CN2700) on<br />
Main P.C.B..<br />
Step 4 Attach 27P FFC to the connector (CN2003) on Main<br />
P.C.B..<br />
Step 5 Panel P.C.B. can be checked and repaired as diagram<br />
shown.<br />
12.4. Checking and Repairing of<br />
SMPS P.C.B.<br />
Step 1 Remove Top Cabinet.<br />
Step 2 Remove Front Panel Unit.<br />
Step 3 Remove D-Amp P.C.B..<br />
Step 4 Remove Inner Fan Unit.<br />
Step 5 Remove SMPS P.C.B..<br />
Step 6 Place the Front Panel Unit, Inner Fan Unit as diagram<br />
shown.<br />
Step 7 Place the SMPS P.C.B., D-Amp P.C.B. on the insulated<br />
material.<br />
Step 8 Attach 27P FFC to the connector (CN2003) on Main<br />
P.C.B..<br />
Step 9 Attach 17P FFC to the connector (CN5050) on D-Amp<br />
P.C.B..<br />
70


