

HARMON ROCKET III - Green Hobby & Model
HARMON ROCKET III - Green Hobby & Model
HARMON ROCKET III - Green Hobby & Model

Create successful ePaper yourself
Turn your PDF publications into a flip-book with our unique Google optimized e-Paper software.
<strong>HARMON</strong> <strong>ROCKET</strong> <strong>III</strong>. Instruction Manual.<br />
! 2) Locate the two nylon control horns,<br />
two nylon control horn backplates and two<br />
machine screws.<br />
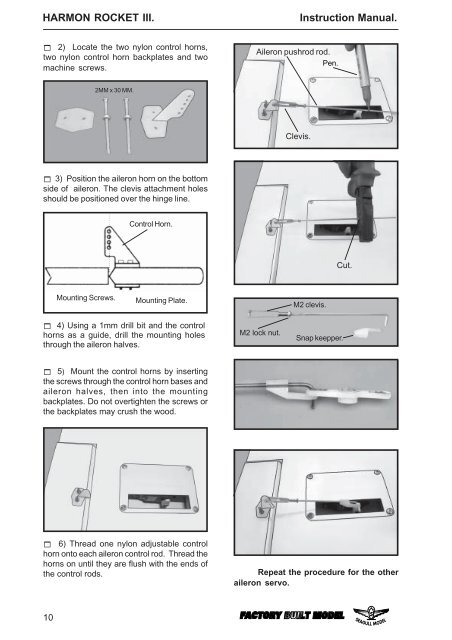
Aileron pushrod rod.<br />
Pen.<br />
2MM x 30 MM.<br />
Clevis.<br />
! 3) Position the aileron horn on the bottom<br />
side of aileron. The clevis attachment holes<br />
should be positioned over the hinge line.<br />
Control Horn.<br />
Cut.<br />
Mounting Screws.<br />
Mounting Plate.<br />
M2 clevis.<br />
! 4) Using a 1mm drill bit and the control<br />
horns as a guide, drill the mounting holes<br />
through the aileron halves.<br />
M2 lock nut.<br />
Snap keepper.<br />
! 5) Mount the control horns by inserting<br />
the screws through the control horn bases and<br />
aileron halves, then into the mounting<br />
backplates. Do not overtighten the screws or<br />
the backplates may crush the wood.<br />
! 6) Thread one nylon adjustable control<br />
horn onto each aileron control rod. Thread the<br />
horns on until they are flush with the ends of<br />
the control rods. Repeat the procedure for the other<br />
aileron servo.<br />
10


