QuickBooks 2010 - Get Ready for the VAT Change 04 Jan 2011
QuickBooks 2010 - Get Ready for the VAT Change 04 Jan 2011
QuickBooks 2010 - Get Ready for the VAT Change 04 Jan 2011

You also want an ePaper? Increase the reach of your titles
YUMPU automatically turns print PDFs into web optimized ePapers that Google loves.
26<br />
3.4 Assign <strong>the</strong> new <strong>VAT</strong> codes<br />
After you have created your new <strong>VAT</strong> codes, you will need to assign each new code to your sales items,<br />
purchase items, customers, suppliers and accounts. You can ei<strong>the</strong>r do this following <strong>the</strong> creation of your<br />
new <strong>VAT</strong> code/s, or you can come back to this step later.<br />
We recommend that you only assign <strong>the</strong> <strong>VAT</strong> codes when you need to process transactions at <strong>the</strong> new<br />
20% rate.<br />
Using <strong>the</strong> check list in section 3.1, simply check each <strong>VAT</strong> code once you have assigned it. That way you’ll<br />
know that you’ve updated <strong>the</strong>m all<br />
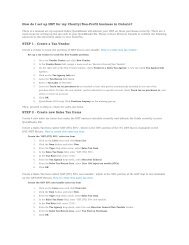
To access this screen go to <strong>the</strong> <strong>VAT</strong> menu and click Manage <strong>VAT</strong>.<br />
1. Click Assign <strong>VAT</strong> Codes.<br />
2. Click on Bulk <strong>Change</strong>.<br />
<strong>Get</strong> <strong>Ready</strong> <strong>for</strong> <strong>the</strong> <strong>VAT</strong> <strong>Change</strong> - 4 <strong>Jan</strong>uary <strong>2011</strong>