
You also want an ePaper? Increase the reach of your titles
YUMPU automatically turns print PDFs into web optimized ePapers that Google loves.
• P_aceasupport/,the sameheight as saw tablel beh<strong>in</strong>d<br />
the .saw for the cut work.<br />
• Make sure the wood is clear of the blade before turn<strong>in</strong>g<br />
on ti'_e ,_Lw.<br />
• Use a push block or push stick to move the wood<br />
throughthe out past the bla_de.Never push a emafl<br />
piece of wood <strong>in</strong>to the blade with your hand, always<br />
use a push stick. The use of push blocks,push sticks,<br />
and feathathoards are necessarywhen ma_rngnonthroughcuts.<br />
• Stand to the side of the wood as it contacts the blade<br />
to reduce the chance of <strong>in</strong>juryshould kickback occur.<br />
Never stand directly <strong>in</strong> the l<strong>in</strong>e of cut.<br />
• Make sure thewood iss[ear of the blade beforeturn<strong>in</strong>g<br />
onthe saw.<br />
• Let the blade b_Jildupto full speed before feed<strong>in</strong>g the<br />
workplece <strong>in</strong>to the blade.<br />
• When the cut is made, turn the saw off.Wait for the<br />
bladeto come to a completestop before reme_ng the<br />
wo_pieoe.<br />
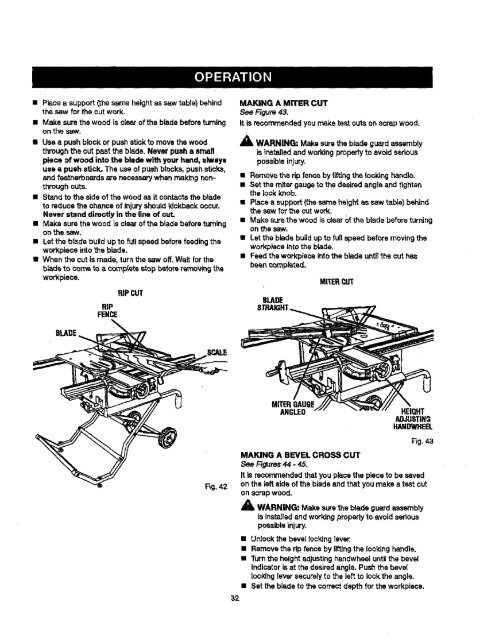
RiP<br />
FENCE<br />
RiPCUT<br />
32<br />
MAKING A MITER CUT<br />
See F-agure43.<br />
It is recommendedyou rnsketest outs on scrap wood.<br />
_k WARNING: Make sure the blade guard assembly<br />
is <strong>in</strong>stalledand work<strong>in</strong>g pmper]y to avoid serious<br />
poes_is <strong>in</strong>jury.<br />
• Remove the rip fence by lift<strong>in</strong>gthe lock<strong>in</strong>g handle.<br />
• Set the miter gauge to the desiredangle and tightsn<br />
the lock knob.<br />
• Place a support(the same height as saw table) bah'rod<br />
the saw forthe cut work.<br />
• Make surethe wood is clear 0f the blade before turn<strong>in</strong>g<br />
on the saw.<br />
• Let the blade bugd up to full speed before mov<strong>in</strong>g the<br />
work,piece <strong>in</strong>totheb_ade.<br />
• Feed the work:piece<strong>in</strong>tothe blade untilthe outhas<br />
been completed.<br />
BLADE<br />
MITERCUT<br />
MITERGAUGE<br />
ANGLED HEIGHT<br />
AOJUSTING<br />
HANDWHEB.<br />
MAKING A BEVEL CROSS CUT<br />
See Ffeures44 - 45.<br />
Fig.43<br />
It is recommendedthat you place the pieceto be saved<br />
on the leftside of the bladeand that you make s test cut<br />
on scrapwood.<br />
X<br />
WARNING: Make surethe blade guardassambly<br />
is <strong>in</strong>stsJlsdand work<strong>in</strong>gpmpedy to avoid serious<br />
pose'lois_n)ury.<br />
• Untookthe bevel Iock<strong>in</strong>g 1ever.<br />
• Removethe rip fence by lift<strong>in</strong>gthe [o,_k<strong>in</strong>ghandle.<br />
• Turnthe heightadjust<strong>in</strong>ghandwhesl untilthe bevel<br />
<strong>in</strong>dicatoris at the desiredangle. Pushthe beve(<br />
lock<strong>in</strong>gleversecurelyto the left to lockthe angle.<br />
• Set the blade to the correctdepth for the workpiece.