A New Way of Flight Training⦠- American Bonanza Society
A New Way of Flight Training⦠- American Bonanza Society
A New Way of Flight Training⦠- American Bonanza Society

You also want an ePaper? Increase the reach of your titles
YUMPU automatically turns print PDFs into web optimized ePapers that Google loves.
www.bonanza.org<br />
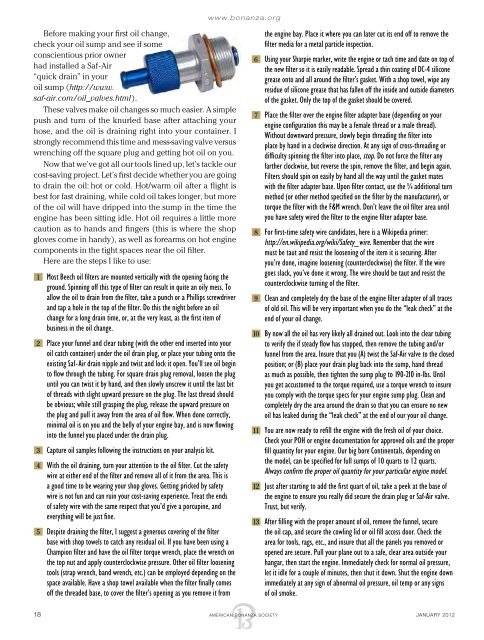
Before making your first oil change,<br />
check your oil sump and see if some<br />
conscientious prior owner<br />
had installed a Saf-Air<br />
“quick drain” in your<br />
oil sump (http://www.<br />
saf-air.com/oil_valves.html).<br />
These valves make oil changes so much easier. A simple<br />
push and turn <strong>of</strong> the knurled base after attaching your<br />
hose, and the oil is draining right into your container. I<br />
strongly recommend this time and mess-saving valve versus<br />
wrenching <strong>of</strong>f the square plug and getting hot oil on you.<br />
Now that we’ve got all our tools lined up, let’s tackle our<br />
cost-saving project. Let’s first decide whether you are going<br />
to drain the oil: hot or cold. Hot/warm oil after a flight is<br />
best for fast draining, while cold oil takes longer, but more<br />
<strong>of</strong> the oil will have dripped into the sump in the time the<br />
engine has been sitting idle. Hot oil requires a little more<br />
caution as to hands and fingers (this is where the shop<br />
gloves come in handy), as well as forearms on hot engine<br />
components in the tight spaces near the oil filter.<br />
Here are the steps I like to use:<br />
n 1 Most Beech oil filters are mounted vertically with the opening facing the<br />
ground. Spinning <strong>of</strong>f this type <strong>of</strong> filter can result in quite an oily mess. To<br />
allow the oil to drain from the filter, take a punch or a Phillips screwdriver<br />
and tap a hole in the top <strong>of</strong> the filter. Do this the night before an oil<br />
change for a long drain time, or, at the very least, as the first item <strong>of</strong><br />
business in the oil change.<br />
n 2<br />
n 3<br />
n 4<br />
n 5<br />
Place your funnel and clear tubing (with the other end inserted into your<br />
oil catch container) under the oil drain plug, or place your tubing onto the<br />
existing Saf-Air drain nipple and twist and lock it open. You’ll see oil begin<br />
to flow through the tubing. For square drain plug removal, loosen the plug<br />
until you can twist it by hand, and then slowly unscrew it until the last bit<br />
<strong>of</strong> threads with slight upward pressure on the plug. The last thread should<br />
be obvious; while still grasping the plug, release the upward pressure on<br />
the plug and pull it away from the area <strong>of</strong> oil flow. When done correctly,<br />
minimal oil is on you and the belly <strong>of</strong> your engine bay, and is now flowing<br />
into the funnel you placed under the drain plug.<br />
Capture oil samples following the instructions on your analysis kit.<br />
With the oil draining, turn your attention to the oil filter. Cut the safety<br />
wire at either end <strong>of</strong> the filter and remove all <strong>of</strong> it from the area. This is<br />
a good time to be wearing your shop gloves. Getting pricked by safety<br />
wire is not fun and can ruin your cost-saving experience. Treat the ends<br />
<strong>of</strong> safety wire with the same respect that you’d give a porcupine, and<br />
everything will be just fine.<br />
Despite draining the filter, I suggest a generous covering <strong>of</strong> the filter<br />
base with shop towels to catch any residual oil. If you have been using a<br />
Champion filter and have the oil filter torque wrench, place the wrench on<br />
the top nut and apply counterclockwise pressure. Other oil filter loosening<br />
tools (strap wrench, band wrench, etc.) can be employed depending on the<br />
space available. Have a shop towel available when the filter finally comes<br />
<strong>of</strong>f the threaded base, to cover the filter’s opening as you remove it from<br />
n 6<br />
n 7<br />
n 8<br />
n 9<br />
the engine bay. Place it where you can later cut its end <strong>of</strong>f to remove the<br />
filter media for a metal particle inspection.<br />
Using your Sharpie marker, write the engine or tach time and date on top <strong>of</strong><br />
the new filter so it is easily readable. Spread a thin coating <strong>of</strong> DC-4 silicone<br />
grease onto and all around the filter’s gasket. With a shop towel, wipe any<br />
residue <strong>of</strong> silicone grease that has fallen <strong>of</strong>f the inside and outside diameters<br />
<strong>of</strong> the gasket. Only the top <strong>of</strong> the gasket should be covered.<br />
Place the filter over the engine filter adapter base (depending on your<br />
engine configuration this may be a female thread or a male thread).<br />
Without downward pressure, slowly begin threading the filter into<br />
place by hand in a clockwise direction. At any sign <strong>of</strong> cross-threading or<br />
difficulty spinning the filter into place, stop. Do not force the filter any<br />
farther clockwise, but reverse the spin, remove the filter, and begin again.<br />
Filters should spin on easily by hand all the way until the gasket mates<br />
with the filter adapter base. Upon filter contact, use the ¾ additional turn<br />
method (or other method specified on the filter by the manufacturer), or<br />
torque the filter with the F&M wrench. Don’t leave the oil filter area until<br />
you have safety wired the filter to the engine filter adapter base.<br />
For first-time safety wire candidates, here is a Wikipedia primer:<br />
http://en.wikipedia.org/wiki/Safety_wire. Remember that the wire<br />
must be taut and resist the loosening <strong>of</strong> the item it is securing. After<br />
you’re done, imagine loosening (counterclockwise) the filter. If the wire<br />
goes slack, you’ve done it wrong. The wire should be taut and resist the<br />
counterclockwise turning <strong>of</strong> the filter.<br />
Clean and completely dry the base <strong>of</strong> the engine filter adapter <strong>of</strong> all traces<br />
<strong>of</strong> old oil. This will be very important when you do the “leak check” at the<br />
end <strong>of</strong> your oil change.<br />
n10 By now all the oil has very likely all drained out. Look into the clear tubing<br />
to verify the if steady flow has stopped, then remove the tubing and/or<br />
funnel from the area. Insure that you (A) twist the Saf-Air valve to the closed<br />
position; or (B) place your drain plug back into the sump, hand thread<br />
as much as possible, then tighten the sump plug to 190-210 in-lbs. Until<br />
you get accustomed to the torque required, use a torque wrench to insure<br />
you comply with the torque specs for your engine sump plug. Clean and<br />
completely dry the area around the drain so that you can ensure no new<br />
oil has leaked during the “leak check” at the end <strong>of</strong> our your oil change.<br />
n11 You are now ready to refill the engine with the fresh oil <strong>of</strong> your choice.<br />
Check your POH or engine documentation for approved oils and the proper<br />
fill quantity for your engine. Our big bore Continentals, depending on<br />
the model, can be specified for full sumps <strong>of</strong> 10 quarts to 12 quarts.<br />
Always confirm the proper oil quantity for your particular engine model.<br />
n12 Just after starting to add the first quart <strong>of</strong> oil, take a peek at the base <strong>of</strong><br />
the engine to ensure you really did secure the drain plug or Saf-Air valve.<br />
Trust, but verify.<br />
n 13 After filling with the proper amount <strong>of</strong> oil, remove the funnel, secure<br />
the oil cap, and secure the cowling lid or oil fill access door. Check the<br />
area for tools, rags, etc., and insure that all the panels you removed or<br />
opened are secure. Pull your plane out to a safe, clear area outside your<br />
hangar, then start the engine. Immediately check for normal oil pressure,<br />
let it idle for a couple <strong>of</strong> minutes, then shut it down. Shut the engine down<br />
immediately at any sign <strong>of</strong> abnormal oil pressure, oil temp or any signs<br />
<strong>of</strong> oil smoke.<br />
18 AMERICAN BONANZA SOCIETY JANUARY 2012