Owner's Manual - Hunter Fan
Owner's Manual - Hunter Fan
Owner's Manual - Hunter Fan

Create successful ePaper yourself
Turn your PDF publications into a flip-book with our unique Google optimized e-Paper software.
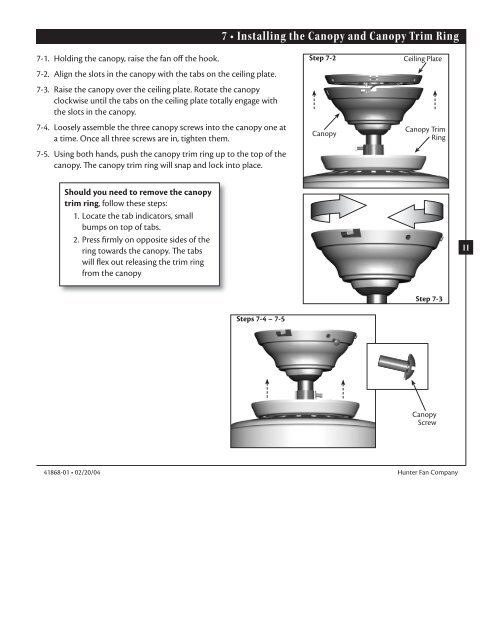
7 • Installing the Canopy and Canopy Trim Ring<br />
7-1. Holding the canopy, raise the fan off the hook.<br />
7-2. Align the slots in the canopy with the tabs on the ceiling plate.<br />
7-3. Raise the canopy over the ceiling plate. Rotate the canopy<br />
clockwise until the tabs on the ceiling plate totally engage with<br />
the slots in the canopy.<br />
7-4. Loosely assemble the three canopy screws into the canopy one at<br />
a time. Once all three screws are in, tighten them.<br />
7-5. Using both hands, push the canopy trim ring up to the top of the<br />
canopy. e canopy trim ring will snap and lock into place.<br />
Step 7-2<br />
Canopy<br />
Ceiling Plate<br />
Canopy Trim<br />
Ring<br />
Should you need to remove the canopy<br />
trim ring, follow these steps:<br />
1. Locate the tab indicators, small<br />
bumps on top of tabs.<br />
2. Press firmly on opposite sides of the<br />
ring towards the canopy. e tabs<br />
will flex out releasing the trim ring<br />
from the canopy<br />
11<br />
Step 7-3<br />
Steps 7-4 – 7-5<br />
Canopy<br />
Screw<br />
41868-01 • 02/20/04 <strong>Hunter</strong> <strong>Fan</strong> Company