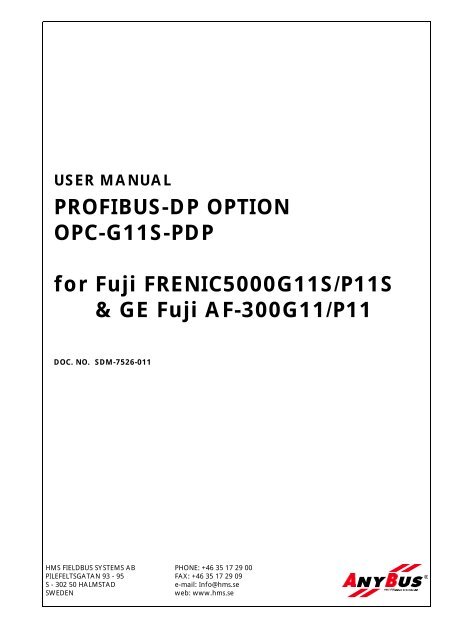
PROFIBUS-DP OPTION OPC-G11S-PDP for ... - Fuji Electric America
PROFIBUS-DP OPTION OPC-G11S-PDP for ... - Fuji Electric America
PROFIBUS-DP OPTION OPC-G11S-PDP for ... - Fuji Electric America

You also want an ePaper? Increase the reach of your titles
YUMPU automatically turns print PDFs into web optimized ePapers that Google loves.
USER MANUAL<br />
<strong>PROFIBUS</strong>-<strong>DP</strong> <strong>OPTION</strong><br />
<strong>OPC</strong>-<strong>G11S</strong>-P<strong>DP</strong><br />
<strong>for</strong> <strong>Fuji</strong> FRENIC5000<strong>G11S</strong>/P11S<br />
& GE <strong>Fuji</strong> AF-300G11/P11<br />
DOC. NO. SDM-7526-011<br />
HMS FIELDBUS SYSTEMS AB<br />
PILEFELTSGATAN 93 - 95<br />
S - 302 50 HALMSTAD<br />
SWEDEN<br />
PHONE: +46 35 17 29 00<br />
FAX: +46 35 17 29 09<br />
e-mail: Info@hms.se<br />
web: www.hms.se<br />
®
Revision Notes<br />
Date: Document: Document Notes:<br />
99.10.22<br />
99.10.28<br />
99.11.15<br />
99.12.20<br />
00.01.10<br />
Preface<br />
Revision 0.10<br />
Revision 0.11<br />
Revision 0.12<br />
Revision 0.13<br />
Revision 0.14<br />
Created by Anders Arvidsson<br />
Minor changes due to remarks from Karin Johansson<br />
Compilation and changes according to <strong>Fuji</strong> remarks<br />
Changes according to <strong>Fuji</strong> GE remarks<br />
Minor spelling changes<br />
USER MANUAL<br />
Revision 0.14<br />
2000-01-14<br />
The data and illustrations found in this document are not binding. We reserve the right to modify our products in line<br />
with our policy of continuous product development. The in<strong>for</strong>mation in this appendix is subject to change without<br />
notice and should not be considered as a commitment by HMS FIELDBUS SYSTEMS AB.<br />
HMS FIELDBUS SYSTEMS AB assumes no responsibility <strong>for</strong> any errors that may appear in this document.<br />
The product and technology described in this document is patent pending in the following countries:<br />
USA, Canada, Japan, Belgium, Denmark, Finland, France, Greece, Ireland, Italy, Luxemburg, Monaco, Netherlands,<br />
Portugal, Switzerland, Lichtenstein, Spain, United Kingdom, Sweden, Germany and Austria.<br />
ANYBUS ® is a registered trademark of HMS FIELDBUS SYSTEMS AB.<br />
All other trademarks are the property of their respective holders.<br />
Related documents<br />
Document Author<br />
<strong>PROFIBUS</strong> Profile <strong>for</strong> variable speed drives,<br />
PROFIDRIVE. PNO Order-No 3.072<br />
FRENIC5000<strong>G11S</strong>/P11S INSTRUCTION MANUAL,<br />
INR-Si47-0554-E<br />
PROFIDRIVE working group of Profibus<br />
Nutzerorganisation<br />
<strong>Fuji</strong> <strong>Electric</strong><br />
HMS FIELDBUS SYSTEMS AB 2
Table of Contents<br />
USER MANUAL<br />
Revision 0.14<br />
2000-01-14<br />
1. Applicable inverters......................................................5<br />
2. Receiving Inspection.....................................................6<br />
3. Installation ....................................................................7<br />
3.1 Installation Method ..................................................................................................................................... 7<br />
3.2 Installation Checklist ................................................................................................................................... 8<br />
4. Profibus option card <strong>OPC</strong>-<strong>G11S</strong>-P<strong>DP</strong>.............................9<br />
5. Introduction to Profibus-<strong>DP</strong> .........................................9<br />
5.1 Technical features of Profibus-<strong>DP</strong>................................................................................................................ 9<br />
6. <strong>OPC</strong>-<strong>G11S</strong>-P<strong>DP</strong> Overview.............................................11<br />
6.1 Physical interface........................................................................................................................................ 11<br />
6.2 Configuration............................................................................................................................................. 12<br />
6.2.1 Baudrate............................................................................................................................................. 12<br />
6.2.2 Termination ....................................................................................................................................... 12<br />
6.2.3 Node Address..................................................................................................................................... 12<br />
6.2.4 PPO-type selection............................................................................................................................. 14<br />
6.2.5 Changeover of communications .......................................................................................................... 15<br />
6.2.6 Fast stop............................................................................................................................................. 16<br />
6.2.7 Configuration of PCD word 1-4......................................................................................................... 17<br />
6.3 Action at communication error................................................................................................................... 18<br />
6.4 Indication LED’s ....................................................................................................................................... 21<br />
7. Operating the drive via Profidrive profile.................22<br />
7.1 PPO- description ....................................................................................................................................... 22<br />
7.2 PCD-part................................................................................................................................................... 23<br />
7.2.1 Control- / status word ........................................................................................................................ 23<br />
7.2.2 Frequency setpoint/ Actual frequency.................................................................................................. 28<br />
7.2.3 PCD word 1-4 ................................................................................................................................... 28<br />
7.3 PCV-part................................................................................................................................................... 28<br />
7.4 Example..................................................................................................................................................... 33<br />
7.5 Profidrive specific parameters ..................................................................................................................... 34<br />
7.6 Malfunction codes...................................................................................................................................... 36<br />
8. Parameters specific <strong>for</strong> communication....................38<br />
8.1 Command data .......................................................................................................................................... 38<br />
8.2 Operation command data........................................................................................................................... 38<br />
HMS FIELDBUS SYSTEMS AB 3
USER MANUAL<br />
Revision 0.14<br />
2000-01-14<br />
8.3 Function data ............................................................................................................................................. 40<br />
8.4 Monitoring data ......................................................................................................................................... 41<br />
8.5 Parameter data <strong>for</strong>mat................................................................................................................................ 43<br />
8.6 Data <strong>for</strong>mat specification............................................................................................................................ 49<br />
9. System configuration .................................................54<br />
10. GSD-file......................................................................57<br />
HMS FIELDBUS SYSTEMS AB 4
1. Applicable inverters<br />
Item Description<br />
Inverter type FRENIC5000<strong>G11S</strong>/P11S (AF-300G11/P11)<br />
Compatible Inverter<br />
Model number<br />
(GE <strong>Fuji</strong> version)<br />
Minimum inverter<br />
ROM version<br />
number<br />
NOTE:<br />
The last two digits of the model number should be B1 or later<br />
Example: 6KG1123X1B1<br />
up to 22 kW(30HP) EN version S08000 and after<br />
30 kW(40HP) and<br />
above<br />
Japanese standard, JE<br />
and CN version<br />
USER MANUAL<br />
Revision 0.14<br />
2000-01-14<br />
(It is impossible to use version prior<br />
to S08000 inverter.)<br />
Cannot be used<br />
UX and GE <strong>Fuji</strong> version S08000 and after<br />
EN, Japanese standard,<br />
JN, JE, AN, CN, UX<br />
and GE <strong>Fuji</strong> version<br />
(It is impossible to use version prior<br />
to S08200 inverter.)<br />
H07602 and after<br />
(It is impossible to use versions of<br />
H00000 to H07601.)<br />
This product can only be used <strong>for</strong> Inverters with ROM version numbers greater than or equal to the<br />
versions shown above.<br />
And in the case of installing this option in the G11/P11 inverter that is a Japanese standard, JN, JE or<br />
CN version, please contact <strong>Fuji</strong> <strong>Electric</strong> or its distributors.<br />
Check the ROM number of your Inverter as follows using the inverter keypad.<br />
a. Check that the Inverter Operation monitor (Operation mode) screen is displayed.<br />
b. Press the [PRG] key of the Inverter once.<br />
c. Select the "5. MAINTENANC" with the cursor and press the [FUNC/DATA] key.<br />
d. Press the down cursor key to increment the display at the MAINTENANC screen.<br />
Finally, the ROM number is shown in the maintenance in<strong>for</strong>mation, as indicated by the<br />
display "INV=Hxxxxx or Sxxxxx".<br />
The maintenance and inspection items are similar to the Inverter unit, <strong>for</strong> detail refer to the Inverter<br />
Instruction Manual.<br />
HMS FIELDBUS SYSTEMS AB 5
2. Receiving Inspection<br />
Confirm the following items upon a receipt.<br />
1) The model number matches your purchase order?<br />
Check the model number printed on the circuit board.<br />
Model : <strong>OPC</strong> - <strong>G11S</strong> - P<strong>DP</strong><br />
<strong>OPTION</strong> TYPE<br />
P<strong>DP</strong> -> Profibus-<strong>DP</strong> INTERFACE <strong>OPTION</strong><br />
INVERTER TYPE<br />
<strong>G11S</strong> -> FRENIC5000<strong>G11S</strong>/P11S SERIES<br />
& AF-300 G11/P11 SERIES<br />
Inspection <strong>for</strong> damage during transportation. Report damage to transportation carrier.<br />
USER MANUAL<br />
Revision 0.14<br />
2000-01-14<br />
HMS FIELDBUS SYSTEMS AB 6
3. Installation<br />
3.1 Installation Method<br />
USER MANUAL<br />
Revision 0.14<br />
2000-01-14<br />
Please follow the installation procedure described as follows. Please install or detach the option after turning off the<br />
input power supply of the inverter and confirming the charge lamp (CHARGE or CRG) is gone out.<br />
The shape, the dimensions and the position of the charge lamp of the inverter are different by each capacity.<br />
Inverter unit<br />
Step1<br />
Step4<br />
Top cover<br />
keypad<br />
Charge lamp<br />
Inverter unit<br />
PE Line<br />
Option unit<br />
Step1 Step2 to 4<br />
Secure the keypad panel to the option unit with two screws at b.<br />
keypad<br />
Loosen two screws(M4) at a and remove the top cover. Loosen two screws(M3) at b and detach the<br />
keypad panel. (For the 30kW[40HP] and above inverters, the keypad panel can be detached if the front<br />
cover is removed and the screws loosened at b.)<br />
Step2<br />
Reassemble the top cover, push-in the option unit and secure it with two screws(M3) at c.<br />
Step3<br />
Connect the ground cable to the PE terminal of the option unit.<br />
HMS FIELDBUS SYSTEMS AB 7
3.2 Installation Checklist<br />
After installation and wiring, check the following items.<br />
[1] The wiring is correct.<br />
[2] No loose wires or screws remain inside the Inverter.<br />
[3] The screws and terminals are all tight.<br />
[4] There are no loose threads of wires at terminals that may contact other terminals.<br />
[5] The switch positions on the Anybus-S module, JP6 on the conversion-board are suitable <strong>for</strong> the use<br />
purpose. (Do not change the JP4 on the conversion-board !)<br />
[6] Inverter parameters such as H30, E15, E30 to E32, o27, o28, o30 to o38, are set correctly.<br />
(H30: Link Active/Inactive, E15: effect to OFF3, E30: effect to Bit 8 of Status word, E31 and<br />
E32: effect to Bit 10 of Status word, o27 and o28: <strong>for</strong> RAS, o30: PPO type, o31 to o38: PCD<br />
setting)<br />
USER MANUAL<br />
Revision 0.14<br />
2000-01-14<br />
HMS FIELDBUS SYSTEMS AB 8
4. Profibus option card <strong>OPC</strong>-<strong>G11S</strong>-P<strong>DP</strong><br />
USER MANUAL<br />
Revision 0.14<br />
2000-01-14<br />
The <strong>OPC</strong>-<strong>G11S</strong>-P<strong>DP</strong> option card gives an instant connection between <strong>Fuji</strong> <strong>G11S</strong> drives (GE <strong>Fuji</strong> AF-300G11) and<br />
Profibus-<strong>DP</strong>. The option board will per<strong>for</strong>m as an integrated part of the <strong>G11S</strong> drive and gives the user access to all<br />
relevant parameters, as well as control-/status signals needed to control the drive<br />
The <strong>OPC</strong>-<strong>G11S</strong>-P<strong>DP</strong> option card communicates according to the Profibus Protocol Standard DIN 19245 part 1 & 3.<br />
This means that it can communicate with all masters that comply with this standard, but it does not necessarily mean<br />
that all services available in the profibus standard are supported. The VDI/VDE 3689 Profibus Profile <strong>for</strong> Variable<br />
Speed Drives, also known as Profidrive, is a subset of Profibus which only supports the services relevant to speed<br />
control applications.<br />
In a control system the <strong>OPC</strong>-<strong>G11S</strong>-P<strong>DP</strong> will act as a slave that can be read and written to, from a Profibus-<strong>DP</strong><br />
master. It will not initiate communication to other nodes, it will only respond to incoming telegrams.<br />
5. Introduction to Profibus-<strong>DP</strong><br />
Profibus has an international user organisation called Profibus International, PI, and local national organisations,<br />
PNO. HMS is represented as board member of Profibus Sweden since the start of the organisation in 1992 and also<br />
as member of the Technical Committee at the <strong>America</strong>n Profibus Trade Organization, PTO.<br />
Technical questions regarding the fieldbus should be addressed to your local Profibus User Group in the first instance.<br />
Address list is available on the Profibus Internet site; www.Profibus.com. For general help on Profibus, contact<br />
Profibus International on e-mail; Profibus_international@compuserve.com.<br />
Profibus-<strong>DP</strong> is normally used in industrial automation, to transfer fast data <strong>for</strong> motor controllers, MMI, I/O units and<br />
other industrial equipment.<br />
5.1 Technical features of Profibus-<strong>DP</strong><br />
• Physical media: EIA RS 485 twisted pair cable or fiber optic.<br />
• Baud rate: 9.6 kbaud up to 12Mbaud.<br />
• Maximum number of nodes: 126<br />
• Maximum number of I/O: 244 bytes/slave.<br />
• Bus topology: Master-Slave communication. The figure below gives an overview of a Profibus-<strong>DP</strong> network.<br />
• Cyclic user data transfer between <strong>DP</strong>-Master and <strong>DP</strong>-Slaves.<br />
• Watch-Dog Timer at the <strong>DP</strong>-Slaves<br />
• Connecting or disconnecting stations without affecting other stations.<br />
• Powerful diagnosis mechanisms, 3 hierarchical levels of the diagnosis messages.<br />
• Synchronization of inputs and/or outputs.<br />
• All messages are transmitted with Hamming Distance HD=4.<br />
HMS FIELDBUS SYSTEMS AB 9
<strong>PROFIBUS</strong> <strong>DP</strong><br />
Master<br />
RS-232<br />
Profibus <strong>DP</strong><br />
Slave node #1<br />
<strong>DP</strong><br />
Personal Computer<br />
with Configuration<br />
Software<br />
Profibus <strong>DP</strong><br />
Slave node #2<br />
Figure 1 Bus topology of Profibus-<strong>DP</strong><br />
Profibus <strong>DP</strong><br />
Profibus <strong>DP</strong><br />
Slave node #n<br />
Figure 2 Bus cycle time of a Profibus-<strong>DP</strong> Profibus <strong>DP</strong> Mono Master system(2 bytes I/O data/slave)<br />
USER MANUAL<br />
Revision 0.14<br />
2000-01-14<br />
HMS FIELDBUS SYSTEMS AB 10
.<br />
6. <strong>OPC</strong>-<strong>G11S</strong>-P<strong>DP</strong> Overview<br />
This section contains all necessary in<strong>for</strong>mation to start-up and configure the <strong>OPC</strong>-<strong>G11S</strong>-P<strong>DP</strong>.<br />
6.1 Physical interface<br />
USER MANUAL<br />
Revision 0.14<br />
2000-01-14<br />
Isolation: The bus is galvanically separated from the other electronics with an on board DC/DC converter. Bus signals<br />
(A-line and B-line) are isolated via opto couplers.<br />
Profibus-<strong>DP</strong> communication ASIC: SPC3 chip from Siemens.<br />
Bus connection: The <strong>OPC</strong>-<strong>G11S</strong>-P<strong>DP</strong> connects to the profibus network with a 9-pin female DSUB connector. For<br />
the pin layout, refer to Table 1.<br />
Pin Name Function<br />
Housing Shield Connected to PE<br />
1 Not Connected -<br />
2 Not Connected -<br />
3 B-Line Positive RxD/TxD according to RS 485 specification<br />
4 RTS Request To Send *<br />
5 GND BUS Isolated GND from RS 485 side *<br />
6 +5V BUS Isolated +5V from RS 485 side *<br />
7 Not Connected -<br />
8 A-Line Negative RxD/TxD according to RS 485 specification<br />
9 Not Connected -<br />
Table 1 Pin Layout<br />
• +5V BUS and GND BUS are used <strong>for</strong> bus termination. Some devices, like optical transceivers (RS485 to fibre<br />
optics) might require external power supply from these pins. RTS is used in some equipment to determine the<br />
direction of transmission. In standard applications only A-Line, B-Line and Shield are used.<br />
HMS FIELDBUS SYSTEMS AB 11
6.2 Configuration<br />
6.2.1 Baudrate<br />
USER MANUAL<br />
Revision 0.14<br />
2000-01-14<br />
The baudrate on a Profibus-<strong>DP</strong> network is set during configuration of the master and only one baudrate is possible in a<br />
Profibus-<strong>DP</strong> installation. The <strong>OPC</strong>-<strong>G11S</strong>-P<strong>DP</strong> has an auto baudrate detection function and the user does not have to<br />
configure the baudrate on the module. Refer to Table 2 <strong>for</strong> the baudrates supported.<br />
6.2.2 Termination<br />
Baudrates supported by <strong>OPC</strong>-<br />
<strong>G11S</strong>-P<strong>DP</strong><br />
9.6 kbit/s<br />
19.2 kbit/s<br />
93.75 kbit/s<br />
187.5 kbit/s<br />
500 kbit/s<br />
1.5 Mbit/s<br />
3 Mbit/s<br />
6 Mbit/s<br />
12 Mbit/s<br />
Table 2 Supported baudrates<br />
The end nodes in a Profibus-<strong>DP</strong> network has to be terminated to avoid reflections on the bus line. The <strong>OPC</strong>-<strong>G11S</strong>-<br />
P<strong>DP</strong> is equipped with a termination switch to accomplish this in an easy way. If the module is used as the first or last<br />
module in a network the termination switch has to be in ON position. Otherwise the switch has to be in OFF<br />
position.<br />
Please Note: Note If an external termination connector is used the switch must be in OFF position.<br />
6.2.3 Node Address<br />
Termination switch ON Bus termination enabled<br />
If the module is the last or first module,<br />
the bus termination has to be set on, or an<br />
external termination connector has to be<br />
used<br />
Termination switch OFF Bus termination disabled<br />
Be<strong>for</strong>e power-on the <strong>OPC</strong>-<strong>G11S</strong>-P<strong>DP</strong> the node address has to be set. This is done with two rotary switches on the<br />
module, this enables address settings from 1-99 in decimal <strong>for</strong>mat. Looking at the front of the module, the leftmost<br />
switch is used <strong>for</strong> the ten setting and the rightmost switch is used <strong>for</strong> the setting of the integers.<br />
Example:<br />
Address = (Left Switch Setting x 10) + (Right Switch Setting x 1)<br />
HMS FIELDBUS SYSTEMS AB 12
Please Note:<br />
The node address can not be changed during operation.<br />
USER MANUAL<br />
Revision 0.14<br />
2000-01-14<br />
HMS FIELDBUS SYSTEMS AB 13
6.2.4 PPO-type selection<br />
<strong>OPC</strong>-<strong>G11S</strong>-P<strong>DP</strong> supports PPO-type 1-4. (Refer to chapter 7.1 <strong>for</strong> PPO description)<br />
USER MANUAL<br />
Revision 0.14<br />
2000-01-14<br />
The same PPO type must be set from both the keypad and the master configuration. If the settings do not comply, the<br />
<strong>OPC</strong>-<strong>G11S</strong>-P<strong>DP</strong> will not start exchanging data with the master.<br />
Setting the PPO type from keypad:<br />
The inverter o-type parameters are used to configure the Profibus-<strong>DP</strong> interface. The o-type parameters are only<br />
accessible from the inverter keypad after the Profibus interface has been installed.<br />
PPO type selection is made in parameter o30. After changing this parameter, the drive has to be re-powered <strong>for</strong> the<br />
change to take affect.<br />
o30 data PPO type selection<br />
0, 1, 6-255 PPO 1<br />
2 PPO 2<br />
3 PPO 3<br />
4 PPO 4<br />
5 PPO 2<br />
Table 3 PPO type selection<br />
Setting the PPO type from master:<br />
Identification bytes are transmitted in the configuration frame of the Profibus -<strong>DP</strong> master. These bytes define the<br />
PPO type of the user data frame. The identification bytes are included in the GSD-file (refer to chapter 8) that is used<br />
during configuration of the master. For how to configure the Profibus-<strong>DP</strong> master, please refer to the manual <strong>for</strong> the<br />
actual master.<br />
HMS FIELDBUS SYSTEMS AB 14
6.2.5 Changeover of communications<br />
USER MANUAL<br />
Revision 0.14<br />
2000-01-14<br />
In order to enable the inverter control through the communication (by command data and operation data), the<br />
inverter function code "H30: Serial link (Function selection)” should be configured <strong>for</strong> a value of 1-3. The reading<br />
and writing of function data and functions are possible at any time regardless of the setting of Function code H30.<br />
Host<br />
Frequency<br />
setting<br />
Forward<br />
command<br />
Changeover of<br />
communication<br />
valid/invalid<br />
Communication<br />
Frequency<br />
command<br />
Forward<br />
command<br />
Frequency<br />
command<br />
Forward<br />
command<br />
Invalid<br />
E01 - E09: Multi-function terminals setting<br />
Changeover signal of<br />
communication valid/invalid<br />
Frequency<br />
command<br />
Forward<br />
command<br />
HMS FIELDBUS SYSTEMS AB 15<br />
Valid<br />
Invalid<br />
Valid<br />
SW1<br />
SW2<br />
6.2.5.1 Changeover method <strong>for</strong> communication control<br />
H30: Serial linlk<br />
Switching circuit of<br />
communication<br />
valid/invalid<br />
The changeover of the communication control can be per<strong>for</strong>med by the multi-function command terminals (terminals<br />
X1-X9) on the inverter. However, it is necessary to configure the inverter’s multi-function command input terminals<br />
(E01 – E09: X1–X9 terminals function) to the link operation selection (Data 24). If the multi-function command<br />
terminals have not been set to the link operation selection, the communication becomes valid automatically.<br />
Input terminals State<br />
OFF Communication invalid mode<br />
ON Communication valid mode (H30 setting)<br />
Note:<br />
1) Since all memories are initialized at switching power supply on, the command data and operation data<br />
must be write again from the upstream units.<br />
2) Even when the communication is invalid, the writing of command data and operation data is valid, but it<br />
is not reflected by SW1 • SW2. The changeover without shock is possible by the way the data is set<br />
prior to the transition.
6.2.5.2 Link function configuration (operation selection)<br />
USER MANUAL<br />
Revision 0.14<br />
2000-01-14<br />
The setting (valid/invalid) <strong>for</strong> command data and operation data during the communication valid period is possible<br />
individually by the setting of " H30: Serial link (Function selection)". (By making the communication always valid<br />
without setting at the multi-function terminals, changeover <strong>for</strong> the H30 data valid/invalid can change over the<br />
communication valid/invalid, similar to the changeover with multi-function command terminals.)<br />
Link function<br />
H30<br />
During communication is valid During communication is invalid<br />
SW1 (Command data) SW2 (Operation data) SW1, SW2<br />
0 Invalid Invalid<br />
1 Valid Invalid<br />
2 Invalid Valid<br />
3 Valid Valid<br />
6.2.5.3 Coexistence of link (option) and RS485 (or Modbus RTU)<br />
communication<br />
Invalid<br />
When the link options (such as T link, field bus, etc.) are mounted on the inverter, the communication is<br />
positioned as described below and the functions are restricted.<br />
Link: The operation through the fieldbus (either one of command data and operation<br />
data or both), the operation monitoring, and the reading and changing of<br />
functions are possible.<br />
RS485: The operation monitoring and the reading and changing of inverter<br />
configuration functions codes is possible (Operation through the RS485<br />
communication is impossible).<br />
Note:<br />
1) The communication valid bit of M14: Operating state becomes the state signal of link option and<br />
not of RS485.<br />
2) When the command data and operation data are accessed from RS485, NAK is returned.<br />
3) If the writing of functions is per<strong>for</strong>med through this communication during the writing of functions<br />
by the link, NAK (no writing right error) is returned.<br />
6.2.6 Fast stop<br />
When the drive is fast stopped, bit 2 (OFF3 command) in the Control Word, the ramp time specified in Dec time 4<br />
(parameter E15) is used. Refer to chapter 7.2.1 <strong>for</strong> detailed in<strong>for</strong>mation about the Control Word.<br />
HMS FIELDBUS SYSTEMS AB 16
6.2.7 Configuration of PCD word 1-4<br />
Assigning parameters to PCD word 1-4 (refer to chapter 7.2.3) can be per<strong>for</strong>med in two ways:<br />
1. From keypad (o31-o38)<br />
2. From network (PNU 915,916)<br />
After changing these parameters the drive has to be re-powered <strong>for</strong> the change to take affect.<br />
Assignment from keypad<br />
Assignment of PCD write word 1-4 (PLC -> Drive):<br />
o31 = Communication number <strong>for</strong> parameter transferred in PCD1<br />
o32 = Communication number <strong>for</strong> parameter transferred in PCD2<br />
o33 = Communication number <strong>for</strong> parameter transferred in PCD3<br />
o34 = Communication number <strong>for</strong> parameter transferred in PCD4<br />
Assignment of PCD read word 1-4 (Drive ->PLC):<br />
o35 = Communication number <strong>for</strong> parameter transferred in PCD1<br />
o36 = Communication number <strong>for</strong> parameter transferred in PCD2<br />
o37 = Communication number <strong>for</strong> parameter transferred in PCD3<br />
o38 = Communication number <strong>for</strong> parameter transferred in PCD4<br />
Assignment from profibus network<br />
Assignment of PCD write word 1-4 (PLC -> Drive) with parameter 915:<br />
915, index 1 = Communication number <strong>for</strong> parameter transferred in PCD1<br />
915, index 2 = Communication number <strong>for</strong> parameter transferred in PCD2<br />
915, index 3 = Communication number <strong>for</strong> parameter transferred in PCD3<br />
915, index 4 = Communication number <strong>for</strong> parameter transferred in PCD4<br />
Assignment of PCD read word 1-4 (Drive ->PLC) with parameter 916.<br />
916, index 1 = Communication number <strong>for</strong> parameter transferred in PCD1<br />
916, index 2 = Communication number <strong>for</strong> parameter transferred in PCD2<br />
916, index 3 = Communication number <strong>for</strong> parameter transferred in PCD3<br />
916, index 4 = Communication number <strong>for</strong> parameter transferred in PCD4<br />
Please Note:<br />
1. PCD words 1-4 are only enabled if PPO 2 or 4 is selected.<br />
USER MANUAL<br />
Revision 0.14<br />
2000-01-14<br />
2. Communication numbers are within the range 1-255. See Section 8.5 <strong>for</strong> an index of inverter communication<br />
numbers. If a communication number is set to 0, the actual PCD word will be ignored.<br />
HMS FIELDBUS SYSTEMS AB 17
6.3 Action at communication error<br />
USER MANUAL<br />
Revision 0.14<br />
2000-01-14<br />
In case of occurring transmission errors (communication cutoff with the master), the following actions can be selected.<br />
1) Select action when error is detected. (o27)<br />
o27 Action at error detection Remarks<br />
0 Immediate <strong>for</strong>ced stop Er5<br />
1 Continue operation within o28 time and stop Er5<br />
2 Continue operation according to the last command<br />
received until restoration of the communication. If the<br />
communication is not restored be<strong>for</strong>e the o28 time<br />
expires, then immediate <strong>for</strong>ced stop.<br />
3 Continue operation till restoration of the<br />
communication, and after the restoration, follow to<br />
designation of communication.<br />
2) Setting time of timer at error (o28)<br />
0.0 – 60.0s<br />
HMS FIELDBUS SYSTEMS AB 18<br />
Er5<br />
Automatic restoration<br />
after restoring<br />
communication<br />
In a case of o27=0 (Mode of immediate <strong>for</strong>ced stop at communication error detection)<br />
Command<br />
from Master<br />
Internal<br />
operation<br />
of inverter<br />
Communication<br />
state<br />
Display<br />
FWD<br />
Setting<br />
frequency<br />
Operation<br />
command<br />
Setting<br />
frequency<br />
Output<br />
frequency<br />
Normal<br />
Error<br />
Normal<br />
Normal Er 5<br />
ON<br />
Operation<br />
Communication failure<br />
ON<br />
Stop<br />
Coast-to-stop<br />
Continue operation<br />
using the command<br />
just be<strong>for</strong>e the error<br />
within o28 time, but<br />
when restoring,<br />
operate following to<br />
the designation of<br />
communication.<br />
Alarm reset<br />
Operation
In a case of o27=1, o28=5.0 s (Mode of immediate <strong>for</strong>ced stop after 5 s at occurring communication error)<br />
Command<br />
from Master<br />
Internal<br />
operation<br />
of inverter<br />
Communication<br />
state<br />
Display<br />
FWD<br />
Setting<br />
frequency<br />
Operation<br />
command<br />
Setting<br />
frequency<br />
Output<br />
frequency<br />
Normal<br />
Error<br />
Normal<br />
Normal Er 5<br />
5.0s<br />
*1<br />
ON<br />
Operation<br />
Coast-to-stop<br />
Alarm reset<br />
In acceleration, even if occurring transmission<br />
error,accelerated to the setting frequency.<br />
USER MANUAL<br />
Revision 0.14<br />
2000-01-14<br />
HMS FIELDBUS SYSTEMS AB 19<br />
OFF<br />
Stop<br />
ON<br />
Operation<br />
*1) In a period until restoring the communication, the last commands (command data and operation data) received<br />
be<strong>for</strong>e the error are kept.<br />
In a case of o27=2, o28=5.0 s (The communication is not restored <strong>for</strong> 5.0 sec after error detection, and inverter<br />
trips Er5.)<br />
Command<br />
from Master<br />
Internal<br />
operation<br />
of inverter<br />
Communication<br />
state<br />
Display<br />
FWD<br />
Setting<br />
frequency<br />
Operation<br />
command<br />
Setting<br />
frequency<br />
Output<br />
frequency<br />
Normal<br />
Error<br />
Normal<br />
Normal Er 5<br />
5.0s<br />
*1<br />
ON<br />
Operation<br />
ON<br />
Stop<br />
Coast-to-stop<br />
Alarm reset<br />
Operation<br />
In acceleration, even if occurring transmission<br />
error, accelerated to the setting frequency.
In a case of o27=2, o28=5.0 s (A communication error occurs, but restored within 5 s.)<br />
Command<br />
from Master<br />
Internal<br />
operation<br />
of inverter<br />
Communication<br />
state<br />
Display<br />
FWD<br />
Setting<br />
frequency<br />
Operation<br />
command<br />
Setting<br />
frequency<br />
Output<br />
frequency<br />
Normal<br />
ON<br />
*1<br />
Operation<br />
Error<br />
Normal<br />
Normal<br />
USER MANUAL<br />
Revision 0.14<br />
2000-01-14<br />
HMS FIELDBUS SYSTEMS AB 20<br />
5.0s<br />
OFF<br />
Stop<br />
In acceleration, even if occurring<br />
transmission<br />
error, accelerated to the setting<br />
frequency.<br />
*1) In a period until restoring the communication, the commands (command data and operation data) just be<strong>for</strong>e the<br />
error are kept.<br />
In a case of o27=3 (When a communication error occurs, the operation continues)<br />
Command<br />
from Master<br />
Internal<br />
operation<br />
of inverter<br />
Communication<br />
state<br />
Display<br />
FWD<br />
Setting<br />
frequency<br />
Operation<br />
command<br />
Setting<br />
frequency<br />
Output<br />
frequency<br />
Normal<br />
ON<br />
Operation<br />
Error<br />
*1<br />
Normal<br />
ON<br />
Normal<br />
Continue operation keeping the setting<br />
at occurring transmission error
6.4 Indication LED’s<br />
USER MANUAL<br />
Revision 0.14<br />
2000-01-14<br />
The <strong>OPC</strong>-<strong>G11S</strong>-P<strong>DP</strong> is equipped with four LED’s. The function of the LED’s are described in Figure 3 and Table<br />
4.<br />
1. Not used<br />
2. On-Line<br />
3. Off-Line<br />
4. Fieldbus diagnostics<br />
Name Color Function<br />
Figure 3 LED's<br />
Fieldbus diagnostics Red Flashing Red 1 Hz - Error in configuration: PPO-type set in<br />
parameter o30 does not match PPO-type set during<br />
configuration of the network.<br />
Flashing Red 4 Hz - Error in initialisation of the Profibus<br />
communication ASIC.<br />
Turned Off - No diagnostics present<br />
On-Line Green Indicates that the module is On-Line on the fieldbus.<br />
Green - Module is On-Line and data exchange is possible.<br />
Turned Off - Module is not On-Line<br />
Off-Line Red Indicates that the module is Off-Line on the fieldbus.<br />
Table 4 LED functionality<br />
Red - Module is Off-Line and no data exchange is possible.<br />
Turned Off - Module is not Off-Line<br />
HMS FIELDBUS SYSTEMS AB 21
7. Operating the drive via Profidrive profile<br />
This section describes how to control drive via control word/status word and how to access drive parameters.<br />
7.1 PPO- description<br />
USER MANUAL<br />
Revision 0.14<br />
2000-01-14<br />
The structure of the user data is designated as parameter process data objects (PPO) in the Profidrive profile. The<br />
profile defines five PPO types, where <strong>OPC</strong>-<strong>G11S</strong>-P<strong>DP</strong> supports PPO1-PPO4.<br />
There are PPO’s with a parameter area (PCV) and a process data area (PCD). There is also PPO’s that consist<br />
exclusively of process data (PCD).<br />
1. PPO1 consists of the PCV area and 2 words PCD.<br />
2. PPO2 consists of the PCV area and 6 words PCD.<br />
3. PPO3 consists only of 2 words PCD.<br />
4. PPO4 consists only of 6 words PCD.<br />
The PPO type is defined in the Profibus-<strong>DP</strong> master parameter settings and must comply with the setting in parameter<br />
o30 (refer to chapter 6.2.4)<br />
PCV PCD<br />
PCA IND PVA<br />
CTW<br />
STW<br />
Word 1 2 3 4 5 6<br />
PPO1<br />
Word 1 2 3 4 5 6 7 8 9 10<br />
PPO2<br />
Word 5 6<br />
PPO3<br />
Word 5 6 7 8 9 10<br />
PPO4<br />
MRV<br />
MAV<br />
Please Note: Note PPO type is selected at power-up and can not be changed in run-time.<br />
PCD<br />
1<br />
PCD<br />
2<br />
PCD<br />
3<br />
HMS FIELDBUS SYSTEMS AB 22<br />
PCD<br />
4<br />
PCD<br />
5<br />
PCD<br />
6<br />
PCD<br />
7<br />
PCD<br />
8
7.2 PCD-part<br />
In this chapter the process data part (PCD) of a PPO is discussed.<br />
The PCD part consists of a fixed part (all PPO’s) and a parameterable part (only PPO 2 & 4).<br />
USER MANUAL<br />
Revision 0.14<br />
2000-01-14<br />
In the fixed part, control word and speed reference are transferred to the drive while status word and actual output<br />
frequency are transferred from the drive.<br />
In the parameterable part, PCD word 1-4, the user can configure what parameters that should be transferred to/from<br />
the drive every bus-cycle.<br />
7.2.1 Control- / status word<br />
This section describes how to operate the drive with the control-/status word. Text written in italic refers to the actual<br />
state in the profidrive state diagram (refer to Figure 4).<br />
Profidrive Control Word:<br />
The control word is used to send control commands to the inverter (PLC->Drive).<br />
Bit # of control word Bit = 0 Bit = 1<br />
0 OFF1 (normal stop) ON1<br />
1 OFF2 (coast stop) ON2<br />
2 OFF3 (fast stop) ON3<br />
3 Operation disabled Operation enabled<br />
4 Ramp generator disabled Condition <strong>for</strong> operation<br />
5 Stop ramp generator Ramp generator enabled<br />
6 Setpoint disabled Setpoint enabled<br />
7 No function Fault acknowledge<br />
8 Not used Not used<br />
9 Not used Not used<br />
10 Data not valid Data valid<br />
11 No function Reversing<br />
12-15 Not used Not used<br />
Bit 0, OFF1/ON1:<br />
Bit=0: Normal stop that uses deceleration time specified in DEC TIME1 (Enter OFF1 active state). When output<br />
frequency = 0 the drive output is disabled.<br />
Bit=1: Drive can be started if all other start conditions are fulfilled.<br />
Bit 1, OFF2/ON2:<br />
Bit=0: Drive coast to stop (Enter OFF2 active state). Returns to Switch-on inhibit state.<br />
Bit=1: Drive can be started if all other start conditions are fulfilled.<br />
HMS FIELDBUS SYSTEMS AB 23
Bit 2, OFF3/ON3:<br />
Bit=0: Fast stop that uses deceleration time specified in DEC TIME4 (Enter OFF3 active state). When output<br />
frequency = 0 the drive output is disabled.<br />
Bit=1: Drive can be started if all other start conditions are fulfilled.<br />
Bit 3, Operation disabled/enabled<br />
Bit=0: Drive coast to stop (Enter Inhibit operation state).<br />
Bit=1: Drive can be started if all other start conditions are fulfilled.<br />
Bit 4, Ramp generator disabled/ Condition <strong>for</strong> operation<br />
Bit=0: Output frequency is set to 0. Inverter remains in Running state.<br />
Bit=1: Drive can be started if all other start conditions are fulfilled.<br />
Bit 5, Stop ramp generator/ Ramp generator enabled<br />
Bit=0: Actual output frequency is frozen. Changes to frequency setpoint has no affect.<br />
Bit=1: Drive can be started if all other start conditions are fulfilled.<br />
Bit 6, Setpoint disabled/enabled<br />
Bit=0: Normal stop that uses deceleration time specified in DEC TIME1.<br />
Bit=1: Drive can be started if all other start conditions are fulfilled.<br />
Bit 7, No function/ Fault acknowledge<br />
Bit=0: No fault acknowledge.<br />
Bit=1: Fault is acknowledged on positive edge, i.e. bit = 0 then 1 (Enter Switch-on inhibit state).<br />
Bit 10, Data invalid/ Data valid<br />
Bit=0: The control word and frequency setpoint (from <strong>PROFIBUS</strong>) are not activated.<br />
Bit=1: The control word and frequency setpoint (from <strong>PROFIBUS</strong>) are activated.<br />
Bit 11, No function/Reversing<br />
Bit=0: Drive is not reversing.<br />
Bit=1: Drive is reversing.<br />
USER MANUAL<br />
Revision 0.14<br />
2000-01-14<br />
HMS FIELDBUS SYSTEMS AB 24
Profidrive Status Word:<br />
The status word indicates the status of the inverter (Drive -> PLC).<br />
Bit # of status word Bit = 0 Bit = 1<br />
0 Not ready <strong>for</strong> switch-on Ready to switch-on<br />
1 Not ready <strong>for</strong> operation Ready <strong>for</strong> operation<br />
2 Operation inhibited Operation enabled<br />
3 No fault Trip<br />
4 OFF2 ON2<br />
5 OFF3 ON3<br />
6 Start disable Start enable<br />
7 No alarm Alarm<br />
8 Frequency not equal to setpoint Frequency equal to setpoint<br />
9 Local control Bus control<br />
10 Frequency out of range Frequency within range<br />
11-15 Not used Not used<br />
Bit 0, Not ready <strong>for</strong> switch-on / Ready to switch-on<br />
Bit=0: Control word bit 0,1 or 2 (OFF1, OFF2, OFF3) is set to 0, or the drive has tripped.<br />
Bit=1: Control word bit 0 = 0 and bits 1, 2,10 are set to 1 (Ready to switch-on state).<br />
Bit 1, Not ready <strong>for</strong> operation / Ready <strong>for</strong> operation<br />
Bit=0: Control word bit 0,1 or 2 (OFF1, OFF2, OFF3) is set to 0, or the drive has tripped.<br />
Bit=1: Control word bit 0,1 and 2 are set to 1, and the drive has not tripped (Ready state).<br />
Bit 2, Operation inhibited / Operation enabled<br />
USER MANUAL<br />
Revision 0.14<br />
2000-01-14<br />
Bit=0: Control word bit 0,1,2 or 3 (OFF1, OFF2, OFF3 or Operation disabled) is set to 0, or the drive has tripped.<br />
Bit=1: Control word bit 0,1,2 and 3 are set to 1, and the drive has not tripped (Enable operation state).<br />
Bit 3, No Fault/ Fault (Trip)<br />
Bit=0: Drive has not tripped.<br />
Bit=1: Drive is tripped. Fault reset from keypad or bit 7 in Control Word is needed to reset the drive after the fault is<br />
cleared.<br />
Bit 4, OFF2/ ON2<br />
Bit=0: OFF2 command active. Control word bit 1 = 0 (OFF2 active state).<br />
Bit=1: Control word bit 1 = 1.<br />
HMS FIELDBUS SYSTEMS AB 25
Bit 5, OFF3/ ON3<br />
Bit=0: OFF3 command active. Control word bit 2 = 0 (OFF3 active state).<br />
Bit=1: Control word bit 2 = 1.<br />
Bit 6, Start disable/ Start enable<br />
Bit=0: Control word bit 0 = 0 and bit 10 = 1 (Not Ready to switch-on state).<br />
USER MANUAL<br />
Revision 0.14<br />
2000-01-14<br />
Bit=1: Control word bit 1 or 2 (OFF2, OFF3 ) is set to 0 or fault trip has been acknowledged (Switch-on inhibit).<br />
Bit 8, Frequency not equal to setpoint/ Frequency equal to setpoint<br />
Bit=0: Actual output frequency does not equal frequency setpoint (i.e. motor is accelerating / decelerating).<br />
Bit=1: Actual output frequency does equal frequency setpoint.<br />
Please Note: The frequency tolerance width is configured in parameter E30.<br />
Bit 9, Local control/ Bus control<br />
Bit=0: Run command and Frequency setting are invalid via Profibus.<br />
Bit=1: Run command or Frequency setting are valid via Profibus.<br />
Bit 10, Frequency out of range/ Frequency within range<br />
Bit=0: Actual output frequency is lower than the limit specified in parameter E31 and E32.<br />
Bit=1: Actual output frequency is above or equal to the limit specified in parameter E31 and E32 .<br />
HMS FIELDBUS SYSTEMS AB 26
Voltage<br />
switched-off<br />
OFF1(bit 0 = 0)<br />
Normal<br />
stop<br />
Drive stopped<br />
Bit 1 = 0<br />
Open load<br />
contactor<br />
Voltage ON<br />
Inhibit operation<br />
(bit3 = 0)<br />
Drive stopped<br />
From every state<br />
OFF 1 active<br />
stage 1<br />
OFF 1 active<br />
stage 2<br />
A B C D<br />
Inhibit operation<br />
active<br />
RFG output disabled<br />
(bit 4 = 0)<br />
Stop RFG<br />
(bit 5 = 0)<br />
OFF1(bit 0 = 0)<br />
Bit 2 = 0<br />
Coast stop<br />
B C D<br />
C D<br />
D<br />
Inhibit setpoint<br />
(bit 6 = 0)<br />
Load contactor open<br />
D<br />
A<br />
B<br />
C<br />
Switch-on<br />
inhibit<br />
Not ready <strong>for</strong><br />
switch-on<br />
Ready to<br />
switch-on<br />
Ready<br />
Enable operation<br />
Control word, bit pattern:<br />
XXXX X1XX XXXX X110<br />
ON1 (bit 0 = 1)<br />
Ramp function generator:<br />
Enabled output<br />
Ramp function generator:<br />
Acceleration enabled<br />
Operating state<br />
Bit 6 = 1<br />
Bit 0 = 1<br />
Bit 1 = 1<br />
Enable operation<br />
(bit 3 = 1)<br />
Bit 2 = 1<br />
RFG output enabled<br />
(bit 4 = 1)<br />
RFG Acceleration enabled<br />
(bit 5 = 1)<br />
Enable setpoint<br />
(bit 6 = 1)<br />
Figure 4 Profidrive state diagram<br />
OFF3(bit 2 = 0)<br />
Quick stop<br />
Bit 5 = 0<br />
Drive stopped<br />
Open load<br />
contactor<br />
Load contactor open<br />
Fault acknowledge:<br />
Bit7: 0 to 1<br />
From every state<br />
USER MANUAL<br />
Revision 0.14<br />
2000-01-14<br />
HMS FIELDBUS SYSTEMS AB 27<br />
Fault<br />
From every state<br />
OFF 3 active<br />
stage 1<br />
OFF 3 active<br />
stage 2<br />
OFF 2<br />
active<br />
Stop drive<br />
Bit 3 = 1<br />
OFF2(bit 1 = 0)<br />
Coast stop<br />
Bit 4 = 0<br />
Load contactor<br />
open
7.2.2 Frequency setpoint/ Actual frequency<br />
USER MANUAL<br />
Revision 0.14<br />
2000-01-14<br />
The data <strong>for</strong>mat is “Standardized value”, where 0 hex = 0 % and 4000 hex is 100% of Max. frequency specified in<br />
parameter F03 or A01.<br />
Standardized value<br />
A linear value.<br />
0%=0 (0h), 100% is 2 14 (4000h)<br />
Data type N2<br />
Range -200%…200%-2 -14<br />
Resolution 2 -14 = 0.0061%<br />
Length 2 bytes<br />
Notation: 2’s complement notation.<br />
MSB is 1 st<br />
bit after sign bit in 1 st<br />
byte.<br />
Sign bit = 0 = positive number<br />
Sign bit = 1 = negative number<br />
Bit 8 7 6 5 4 3 2 1<br />
Byte 1 SIGN 2 0<br />
Byte 2 2 -7<br />
2 -8<br />
2 -1<br />
2 -9<br />
7.2.3 PCD word 1-4<br />
2 -2<br />
2 -10<br />
2 -3<br />
2 -11<br />
2 -4<br />
2 -12<br />
2 -5<br />
2 -13<br />
In PCD word 1-4 the user can determine which drive parameters that should be transferred to/from the drive every<br />
bus-cycle. Refer to chapter 6.2.7 <strong>for</strong> configuration of PCD word 1-4.<br />
7.3 PCV-part<br />
The parameter part (PCV) is fixed to 4 words and can be used <strong>for</strong> reading and/or updating the parameters in the drive<br />
one by one. Requests and responses is a handshake procedure and cannot be batched, meaning that if the master sends<br />
out a read/write request, it has to wait <strong>for</strong> the response, be<strong>for</strong>e it sends a new request.<br />
The PCV is further divided into three parts; PCA- Parameter Characteristics (1 word), IND – Subindex (1 word) and<br />
PVA- Parameter value (2 words).<br />
PCA handling:<br />
b15 b14 b13 b12 b11 b10 b9 b8 b7 b6 b5 b4 b3 b2 b1 b0<br />
Figure 5 PCA word<br />
RC SPM PNU<br />
RC: Request/response characteristics (Range 0-15)<br />
SPM: Toggle bit <strong>for</strong> Spontaneous Messages, not used by <strong>OPC</strong>-<strong>G11S</strong>-P<strong>DP</strong>.<br />
HMS FIELDBUS SYSTEMS AB 28<br />
2 -6<br />
2 -14
USER MANUAL<br />
Revision 0.14<br />
2000-01-14<br />
PNU: Parameter number. Range 1-255 <strong>for</strong> <strong>G11S</strong> specific parameters and 900-999 <strong>for</strong> profidrive specific parameters. Please refer<br />
to chapter 7.5 <strong>for</strong> which profidrive specific parameters that are supported<br />
HMS FIELDBUS SYSTEMS AB 29
Request/Response handling<br />
The RC portion of the PCA word defines the request/response that may be issued.<br />
USER MANUAL<br />
Revision 0.14<br />
2000-01-14<br />
Since all parameters in <strong>G11S</strong> are “word type” (16 bits), the PVA part will transmit parameter values in bytes 7 and 8.<br />
(Byte 5 and 6 are reserved <strong>for</strong> parameters that are “long word type” (32 bits) ).<br />
If the Request/Response contains array elements, the high byte (byte 3) of the IND word will carry the array<br />
subindex.<br />
RC content<br />
Request: Function:<br />
0 No request<br />
1 Request parameter value<br />
2 Change parameter value (word)<br />
3 Change parameter value (long word)*<br />
4 Request description element*<br />
5 Change description element*<br />
6 Request parameter value (array)<br />
7 Change parameter value (array word)<br />
8 Change parameter value (array long word)*<br />
9 Request number of array elements<br />
10-15 Not used<br />
Response: Function:<br />
0 No response<br />
1 Transfer parameter value (word)<br />
2 Transfer parameter value (long word)*<br />
3 Transfer description element*<br />
4 Transfer parameter value (array word)<br />
5 Transfer parameter value (array long word)*<br />
6 Request number of array elements<br />
7 Request rejected (including fault number, see below)<br />
8 Not parameter change rights by PCV interface<br />
9-15 Not used<br />
If the drive rejects a request from the master, the RC word in the PPO-read will indicate this by assuming value 7.<br />
The describing fault number (refer to Table 5) will be found in the PVA part.<br />
HMS FIELDBUS SYSTEMS AB 30
* Not supported by <strong>OPC</strong>-<strong>G11S</strong>-P<strong>DP</strong><br />
USER MANUAL<br />
Revision 0.14<br />
2000-01-14<br />
HMS FIELDBUS SYSTEMS AB 31
Fault number Interpretation<br />
0 Non-admissible parameter number<br />
1 Parameter value can not be changed<br />
2 Upper or lower limit exceeded<br />
3 Erroneous sub-index<br />
4 No array<br />
5 Incorrect data type<br />
7 Descriptive element cannot be changed<br />
9 Descriptive data not available<br />
11 No parameter change rights<br />
17 Task can not be executed due to operating status<br />
101 Priority of link error<br />
102 Drive communication error<br />
103 Busy communicating with another unit<br />
104 Error during writing<br />
105 Flash segment overflow<br />
106 Illegal task requested<br />
Table 5 Fault number<br />
USER MANUAL<br />
Revision 0.14<br />
2000-01-14<br />
HMS FIELDBUS SYSTEMS AB 32
7.4 Example<br />
USER MANUAL<br />
Revision 0.14<br />
2000-01-14<br />
In this example, PPO1 is used to set parameter S08 (Acceleration time 1) to 4.0 seconds. Also, a Start command and a<br />
frequency setpoint (50%) is given.<br />
Request 20 08 00 00 00 00 00 28 04 06/7F* 20 00<br />
Response 10 08 00 00 00 00 00 28 03 37 20 00<br />
In the request message the first two bytes are used <strong>for</strong> parameter identification. The first digit (2) denotes the function<br />
“Change parameter value” (refer to chapter 7.3). The second digit along with the second byte (0 and 08) indicates<br />
parameter nr. 8. Bytes 7 and 8 (00 28 = DEC 40) is the parameter value (40 meaning 4.0 seconds). The last four bytes<br />
are the Control Word and Frequency setpoint. Control Word value 04 06 -> 04 7F* starts the motor, while 20 00<br />
(refer to 7.2.2) signifies 50 % of the maximum frequency specified in parameter F03 or A01.<br />
In the response message, the first digit (1) indicates the function “Transfer parameter value” . The last four bytes are<br />
Status Word and Actual frequency (%).<br />
*To start the drive the profibus state machine must be shifted in a correct way. This may be done in two steps. First<br />
the control word should be set to 04 06 (Enter Ready to switch-on state) and then to 04 7F (Enter Operating state).<br />
Refer to the state diagram in Figure 4.<br />
HMS FIELDBUS SYSTEMS AB 33
7.5 Profidrive specific parameters<br />
The table below shows which profidrive specific parameters that are supported by <strong>OPC</strong>-<strong>G11S</strong>-P<strong>DP</strong>.<br />
PNU(Parameter Number) Description Range<br />
915<br />
Indexed assignment of PCD<br />
write word 1-4<br />
916<br />
Indexed assignment of PCD<br />
read word 1-4<br />
918<br />
Profibus-<strong>DP</strong> slave address<br />
927<br />
Parameter edit rights<br />
947<br />
Indexed Fault memory<br />
963<br />
<strong>PROFIBUS</strong>-<strong>DP</strong> baud rate<br />
Refer to chapter 6.2.7 <strong>for</strong> how to assign<br />
PCD words.<br />
Refer to chapter 6.2.7 <strong>for</strong> how to assign<br />
PCD words.<br />
USER MANUAL<br />
Revision 0.14<br />
2000-01-14<br />
1-255 R/W<br />
1-255 R/W<br />
Returns address switch setting. 1-99 R<br />
0 - Parameter edit rights from network<br />
not possible.<br />
1- Parameter edit rights from network<br />
possible<br />
Index = 1 Fault memory 0<br />
Index = 2 to 8 Fixed to 0<br />
Index = 9 Fault memory (1 st<br />
prior)<br />
Index = 10 to 16 Fixed to 0<br />
Index = 17 Fault memory (2 nd<br />
prior)<br />
Index = 18 to 24 Fixed to 0<br />
Index = 25 Fault memory (3 rd<br />
prior)<br />
Refer to drive parameter M16-M19.<br />
Shows the baudrate of the Profibus-<strong>DP</strong><br />
network.<br />
0 = Baud rate not found<br />
1 = 9.6 Kbaud<br />
2 = 19.2 Kbaud<br />
3 = 45.45 Kbaud<br />
4 = 93.75 Kbaud<br />
5 = 187.5 Kbaud<br />
6 = 500 Kbaud<br />
7 = 1.5 Mbaud<br />
8 = 3.0 Mbaud<br />
9 = 6.0 Mbaud<br />
0, 1 R/W<br />
Refer to chapter 7.6 <strong>for</strong> the<br />
malfunction codes.<br />
0-12 R<br />
HMS FIELDBUS SYSTEMS AB 34<br />
R
965<br />
Profile version<br />
967<br />
Control Word<br />
968<br />
Status Word<br />
970<br />
Reset to factory setting<br />
Table 6 Profidrive parameters<br />
10 = 12.0 Mbaud<br />
Returns the Profidrive profile version<br />
used in the <strong>OPC</strong>-<strong>G11S</strong>-P<strong>DP</strong><br />
implementation<br />
Shows the latest received control word in<br />
hex <strong>for</strong>mat<br />
Refer to chapter 7.2.1 <strong>for</strong> detailed<br />
in<strong>for</strong>mation about the control word.<br />
Shows the latest status word in hex<br />
<strong>for</strong>mat<br />
Refer to chapter 7.2.1 <strong>for</strong> detailed<br />
in<strong>for</strong>mation about the status word.<br />
Parameter <strong>for</strong> starting the parameter<br />
reset to factory setting. After completion<br />
of the factory setting, this parameter is<br />
also reset to it’s original value, 1.<br />
0 - Start parameter reset<br />
1- No parameter reset<br />
Caution: A reset causes the loss of all<br />
parameter changes.<br />
USER MANUAL<br />
Revision 0.14<br />
2000-01-14<br />
Bit 0-15 R<br />
Bit 0-15 R<br />
0,1 R/W<br />
HMS FIELDBUS SYSTEMS AB 35<br />
R
7.6 Malfunction codes<br />
Inverter code (M16- (M1<br />
M19)<br />
Description Malfunction code<br />
(HEX)<br />
0 No alarm - 0000<br />
1 Overcurrent (During acceleration) OC1 2301<br />
2 Overcurrent (During deceleration) OC2 2302<br />
3 Overcurrent (While running at constant<br />
speed)<br />
OC3 2303<br />
4 Overcurrent (Input) OC 2100<br />
5 Ground fault EF 2330<br />
6 Overvoltage (During acceleration) OU1 3211<br />
7 Overvoltage (During deceleration) OU2 3212<br />
8 Overvoltage (While running at constant<br />
speed)<br />
OU3 3213<br />
10 Undervoltage LU 3220<br />
11 Input phase lose Lin 3130<br />
12 Power supply frequency abnormal FrE 3140<br />
13 AC Fuse blown ACF 5453<br />
14 DC Fuse blown FUS 5450<br />
16 DC link charge circuit abnormal PbF 5120<br />
17 Overheat of heat sink in inverter OH1 4310<br />
18 External alarm input OH2 9000<br />
19 Overheat of unit internal temp. OH3 4110<br />
20 Overheat of motor OH4 4300<br />
22 Overheat of DB resistance dbH 4210<br />
23 Electronic thermal overload relay (Motor<br />
1)<br />
24 Electronic thermal overload relay (Motor<br />
2)<br />
OL1 2211<br />
OL2 2212<br />
25 Electronic thermal overload relay (Inverter) OLU 2200<br />
27 Overspeed OS 7310<br />
28 PG error Pg 7301<br />
29 Thermistor circuit disconnection nrb 5000<br />
31 Memory error Er1 5500<br />
32 KEYPAD panel communication error Er2 7520<br />
USER MANUAL<br />
Revision 0.14<br />
2000-01-14<br />
HMS FIELDBUS SYSTEMS AB 36
33 CPU error Er3 5220<br />
34 Option communication error Er4 7510<br />
35 Option error Er5 7511<br />
36 Operating proc. error Er6 F004<br />
37 Output phase loss error Er7 7200<br />
38 RS485 communication error Er8 B100<br />
39 A/D converter defective Er9 7000<br />
USER MANUAL<br />
Revision 0.14<br />
2000-01-14<br />
HMS FIELDBUS SYSTEMS AB 37
8. Parameters specific <strong>for</strong> communication<br />
USER MANUAL<br />
Revision 0.14<br />
2000-01-14<br />
To operate the inverters or to monitor the state via communication, the following parameters are available <strong>for</strong><br />
communication in addition to the configuration functions of the inverters. These parameters are a common data <strong>for</strong>mat<br />
applicable to inverter types on and after G11/P11 series, so that it is possible to access different inverter types by the<br />
same program on the host side.<br />
8.1 Command data<br />
Code Name Unit Variable range Min. unit Read/write<br />
S01 Setting frequency (p.u.) - -20000–20000<br />
(Maximum frequency at ±20000)<br />
1 R<br />
S05 Setting frequency Hz 0.00–400.00 (P11S: 0.00–120.00) 0.01 R<br />
R: Reading<br />
W: Writing<br />
Note:<br />
1) The data writing exceeding the setting range is possible, but the actual action will be restricted within the<br />
inverter.<br />
2) When the command data is read, it is not the command data of actual action but the command data<br />
communicated be<strong>for</strong>e (the final command data can be obtained by reading of the monitoring data<br />
described later).<br />
8.2 Operation command data<br />
Code Name Unit Variable range Min. unit Read/write<br />
S06 Operation command - Refer to the data <strong>for</strong>mat [11] - R/W<br />
S07 Universal Do - Refer to the data <strong>for</strong>mat [12] - R/W<br />
S12 Universal Ao - -20000–20000<br />
(100% output at ±20000)<br />
1 R/W<br />
Note:<br />
1) Since X1–X9 are multi-function inputs, it is necessary to set the functions with E01–E09.<br />
2) The alarm reset is executed, when RST signal changes from ON to OFF even there are no alarming factors.<br />
3) Universal Do is a function utilizing inverter’s Do via transmission.<br />
(In detail, refer to the detail descriptions E20–E24 in "Function Explanation" in the instruction<br />
manual of inverter).<br />
4) The data writing exceeding the setting range is possible, but the actual action will be restricted within the<br />
inverter.<br />
HMS FIELDBUS SYSTEMS AB 38
5) When the operation commands are instructed through the communication, the relation to the<br />
inverter terminal commands becomes as follows.<br />
USER MANUAL<br />
Revision 0.14<br />
2000-01-14<br />
Function Command<br />
Classification Symbol Name Nam<br />
Transmission Terminal block<br />
Operation<br />
command<br />
Multi-function command<br />
FWD/REV FWD/REV command<br />
0–3 SS1, 2, 4, 8 Multistep freq. selection<br />
4, 5 RT1, RT2 ACC/DEC time selection<br />
Valid Invalid<br />
6 HLD 3-wire operation stop command Invalid<br />
7 BX Coast-to-stop command<br />
8 RST Alarm reset<br />
HMS FIELDBUS SYSTEMS AB 39<br />
Valid<br />
9 THR Trip command (External fault) Invalid Valid<br />
10 JOG Jogging operation Invalid<br />
11 Hz2/Hz1 Freq. set. 2 / Freq. set. 1<br />
12 M2/M1 Motor 2 / Motor 1<br />
13 DCBRK DC brake command<br />
14 TL2/TL1 Torque limiter 2 / Torque limiter 1<br />
15, 16 SW50, SW60 Switching operation between line and<br />
inverter (50, 60Hz)<br />
Valid Invalid<br />
17, 18 UP, DOWN UP, DOWN command Invalid Valid<br />
19 WE-KP Write enable <strong>for</strong> KEYPAD<br />
20 Hz/PID PID control cancel<br />
21 IVS Inverse mode changeover<br />
(terminals 12 and C1)<br />
Valid Invalid<br />
22 IL Interlock signal <strong>for</strong> 52-2 Invalid Valid<br />
23 Hz/TRQ TRQ control cancel Valid Invalid<br />
24 LE Link enable (Bus, RS485)<br />
25 U-DI Universal DI<br />
Invalid Valid<br />
26 STM Pick up start mode Valid<br />
27 PG/Hz SY-PG enable<br />
28 SYC Synchronization command<br />
29 ZERO Zero speed command<br />
30 STOP1 Forced stop command<br />
31 STOP2 Forced stop command with<br />
Deceleration time 4<br />
Valid Invalid<br />
Invalid Valid<br />
32 EXITE Pre-exciting command Valid
8.3 Function data<br />
Code Name Uni<br />
t<br />
USER MANUAL<br />
Revision 0.14<br />
2000-01-14<br />
Variable range Min. unit Read/Write<br />
S08 Acceleration time F07 s 0.1–3600.0 0.1 R/W<br />
S09 Deceleration time F08 s 0.1–3600.0 0.1 R/W<br />
S10 Torque limit level 1 (Driving ) F40 % 20.00–200.00<br />
(P11S : 20.00–150.00), 999<br />
S11 Torque limit level 2 (Braking ) F41 % 0.00, 20.00–200.00<br />
(P11S : 20.00–150.00), 999<br />
1.00 R/W<br />
1.00 R/W<br />
Note:<br />
1) The writing to out of the range is treated as out of range error.<br />
2) The acceleration and deceleration time S08 and S09 are assigned to "F07: Acceleration time‚P" and<br />
"F08: Deceleration time 1" respectively.<br />
3) The torque limit level 1 and 2 of S10 and S11 are assigned to "F40: Torque limit 1 (Driving )" and<br />
"F41: Torque limit 1 (Braking )" respectively<br />
HMS FIELDBUS SYSTEMS AB 40
8.4 Monitoring data<br />
Code Description Uni<br />
t<br />
M01 Setting frequency<br />
(Final data)<br />
M05 Setting frequency<br />
(Final data)<br />
Range Min.<br />
unit<br />
- -20000–20000<br />
(Maximum frequency at ±20000)<br />
USER MANUAL<br />
Revision 0.14<br />
2000-01-14<br />
Read/Write Read/ Write<br />
1 R<br />
Hz 0–400.00 (P11S: 0.00–120.00) 0.01 R<br />
M06 Output frequency 1 - -20000–20000<br />
(Maximum frequency at ±20000)<br />
1 R<br />
M07 Torque calculation value % -200.00–200.00 0.01 R<br />
M08 Torque current % -200.00–200.00 0.01 R<br />
M09 Output frequency 1 Hz 0.00–400.00 (P11S:0.00–120.00 ) 0.01 R<br />
M10 Input power % 0.00–200.00 0.01 R<br />
M11 Output current % 0.00–200.00 (Inverter rating at 100.00) 0.01 R<br />
M12 Output voltage V 0.0–600.0 1.0 R<br />
M13 Operation command<br />
(Final data)<br />
- Refer to the data <strong>for</strong>mat [14] - R<br />
M14 Operating state - Refer to the data <strong>for</strong>mat [16] - R<br />
M15 Y1-Y5 output terminal data - Refer to the data <strong>for</strong>mat [15] - R<br />
M16 Fault memory 0 -<br />
M17 Fault memory (1st prior) -<br />
M18 Fault memory (2nd prior) -<br />
M19 Fault memory (3rd prior) -<br />
Refer to the 4.6 Malfunction codes - R<br />
M20 Operating time h 0–65535 1 R<br />
M21 DC link circuit voltage V 0–1000 1 R<br />
M23 Type code - Refer to the data <strong>for</strong>mat [17] - R<br />
M24 Capacity code - Refer to the data <strong>for</strong>mat [11] - R<br />
M25 ROM version - 0–64999 1 R<br />
M26 Transmission error code - Refer to the data <strong>for</strong>mat [10] - R<br />
M27 Setting frequency at alarming<br />
(Final data)<br />
M31 Setting Frequency at alarming<br />
(Final data)<br />
- -20000–20000<br />
(Maximum frequency at 20000)<br />
1 R<br />
Hz 0–400.00 (P11S: 0.00–120.00) 0.01 R<br />
M32 Output frequency at alarming - -20000–20000<br />
(Maximum frequency at ±20000)<br />
1 R<br />
M33 Torque calculation value at alarming % -200.00–200.00 0.01 R<br />
M34 Torque current at alarming % -200.00–200.00 0.01 R<br />
M35 Output frequency 1 at alarming Hz -400.00–400.00<br />
(P11S: -120.00–120.00)<br />
0.01 R<br />
M36 Input power at alarming % 0.00–200.00 0.01 R<br />
M37 Output current at alarming % 0.00–200.00 (Inverter rating at 100.00) 0.01 R<br />
HMS FIELDBUS SYSTEMS AB 41
M38 Output voltage at alarming V 0.0–600.0 1.0 R<br />
M39 Operation command at alarming - Refer to the data <strong>for</strong>mat [14] - R<br />
M40 Operating state at alarming - Refer to the data <strong>for</strong>mat [16] - R<br />
M41 Y1-Y5 output terminal data at<br />
alarming<br />
- Refer to the data <strong>for</strong>mat [15] - R<br />
M42 Operation time at alarming h 0–65535 1 R<br />
M43 DC link circuit voltage at alarming V 0–1000 1 R<br />
M44 Inverter internal air temp. at<br />
alarming<br />
°C 0–120 1 R<br />
M45 Cooling fin temp. at alarming °C 0–120 1 R<br />
M46 Life of main circuit capacitor % 0.0–100.0 0.1 R<br />
M47 Life of printed circuit board<br />
capacitor<br />
h 0–65535 1 R<br />
M48 Life of cooling fan h 0–65535 1 R<br />
Note :<br />
1) The output frequency 1 is be<strong>for</strong>e slip compensation.<br />
USER MANUAL<br />
Revision 0.14<br />
2000-01-14<br />
2) The output frequency 1 with speed regulator (using option <strong>OPC</strong>-<strong>G11S</strong>-PG) is treated as the synchronous<br />
frequency.<br />
HMS FIELDBUS SYSTEMS AB 42
8.5 Parameter data <strong>for</strong>mat<br />
USER MANUAL<br />
Revision 0.14<br />
2000-01-14<br />
The data <strong>for</strong>mats <strong>for</strong> various parameter data of the inverters are defined here. The data shall be prepared according to<br />
the following data <strong>for</strong>mat specifications. The instruction manual of inverter shall be referred to <strong>for</strong> the range and unit<br />
of data. The communication number is used to access inverter parameters through the fieldbus option and to configure<br />
process data exchange.<br />
List of parameter data <strong>for</strong>mat<br />
Code Commu-<br />
nication<br />
No.<br />
decimal<br />
(Hex.)<br />
Name Data<br />
Format<br />
Code Commu-<br />
nication<br />
No.<br />
decimal<br />
(Hex.)<br />
Name Data<br />
- 0 - - M31 45(2D) Setting frequency at alarming [5]<br />
S01 1(1) Setting frequency (p.u.) [2] (Final data)<br />
- 2(2) - - M32 46(2E) Output frequency at alarming [2]<br />
- 3(3) - - M33 47(2F) Torque calculation value at alarming [6]<br />
- 4(4) - - M34 48(30) Torque current at alarming [6]<br />
S05 5(5) Setting frequency [5] M35 49(31) Output frequency 1 at alarming [5]<br />
S06 6(6) Operation command [11] M36 50(32) Input power at alarming [5]<br />
S07 7(7) Universal Do [12] M37 51(33) Output current at alarming [5]<br />
S08 8(8) Acceleration time [3] M38 52(34) Output voltage at alarming [3]<br />
Format<br />
S09 9(9) Deceleration time [3] M39 53(35) Operation command at alarming [11]<br />
S10 10(A) Torque limit level 1 [5] *1 M40 54(36) Operating state at alarming [13]<br />
S11 11(B) Torque limit level 1 [5] *1 M41 55(37) Y1-Y5 output terminal data at [12]<br />
S12 12(C) Universal Ao [2] alarming<br />
- 13(D) - - M42 56(38) Operating time at alarming [1]<br />
- 14(E) - - M43 57(39) DC link circuit voltage at alarming [1]<br />
M01 15(F) Setting frequency (Final data) [2] M44 58(3A) Inverter internal air temp. at [1]<br />
- 16(10) - - alarming<br />
- 17(11) - - M45 59(3B) Cooling fin temp. at alarming [1]<br />
- 18(12) - - M46 60(3C) Life of main circuit capacitor [3]<br />
M05 19(13) Setting frequency (Final data) [5] M47 61(3D) Life of printed circuit board capacitor [1]<br />
M06 20(14) Output frequency 1 [2] M48 62(3E) Life of cooling fan [1]<br />
M07 21(15) Torque calculation value [6] - 63(3F) - -<br />
M08 22(16) Torque current [6] - 64(40) - -<br />
M09 23(17) Output frequency 1 [5] - 65(41) - -<br />
M10 24(18) Input power [5] - 66(42) - -<br />
M11 25(19) Output current [5] - 67(43) - -<br />
M12 26(1A) Output voltage [3] - 68(44) - -<br />
HMS FIELDBUS SYSTEMS AB 43
M13 27(1B) Operation command (Final<br />
data)<br />
USER MANUAL<br />
Revision 0.14<br />
2000-01-14<br />
[11] - 69(45) - -<br />
M14 28(1C) Operating state [13] F00 70(46) Data protection [1]<br />
M15 29(1D) Y1-Y5 output terminal data [12] F01 71(47) Frequency command 1 [1]<br />
M16 30(1E) Fault memory 0 [1] F02 72(48) Operation method [1]<br />
M17 31(1F) Fault memory (1st prior) [1] F03 73(49) Maximum output frequency 1 [1]<br />
M18 32(20) Fault memory (2nd prior) [1] F04 74(4A) Base frequency 1 [1]<br />
M19 33(21) Fault memory (3rd prior) [1] F05 75(4B) Rated voltage 1 [1]<br />
M20 34(22) Operating time [1] F06 76(4C) Maximum output voltage 1 [1]<br />
M21 35(23) DC link circuit voltage [1] F07 77(4D) Acceleration time 1 [10]<br />
- 36(24) - - F08 78(4E) Deceleration time 1 [10]<br />
M23 37(25) Type code [14] F09 79(4F) Torque boost 1 [3]<br />
M24 38(26) Capacity code [9] F10 80(50) Electronics thermal overload relay 1 [1]<br />
M25 39(27) ROM version [1] (Selection)<br />
M26 40(28) Transmission error processing [1] F11 81(51) Electronics thermal overload relay 1 [10]<br />
code (Level)<br />
M27 41(29) Setting frequency at alarming [2] F12 82(52) Electronics thermal overload relay 1 [3]<br />
(Final data) F13 83(53) Electronics thermal overload relay [1]<br />
- 42(2A) - - (Braking resistor)<br />
- 43(2B) - - F14 84(54) Restart after momentary power<br />
failure<br />
- 44(2C) - - (Selection)<br />
*1) 999 is treated as 7FFF H.<br />
HMS FIELDBUS SYSTEMS AB 44<br />
[1]
Code Commu-<br />
nication<br />
No.<br />
decimal<br />
(Hex.)<br />
Name Data<br />
Format<br />
Code Commu-<br />
nication<br />
No.<br />
decimal<br />
(Hex.)<br />
USER MANUAL<br />
Revision 0.14<br />
2000-01-14<br />
Name Data<br />
Format<br />
F15 85(55) Frequency limiter (High) [1] E37 135(87) Overload early warning 2 (level) [10]<br />
F16 86(56) Frequency limiter (Low) [1] E40 136(88) Display coefficient A [10]<br />
F17 87(57) Gain (<strong>for</strong> frequency setting signal) [3] E41 137(89) Display coefficient B [10]<br />
F18 88(58) Bias frequency [4] E43 138(8A) LED monitor (Display selection) [1]<br />
F20 89(59) DC brake (Starting frequency) [3] E44 139(8B) LED monitor (Display at STP<br />
mode)<br />
F21 90(5A) DC brake (Braking level) [1] E45 140(8C) LCD monitor (Display selection) [1]<br />
F22 91(5B) DC brake (Braking time) [3] C01 141(8D) Jump frequency 1 [1]<br />
F23 92(5C) Starting frequency [3] C02 142(8E) Jump frequency 2 [1]<br />
F24 93(5D) Starting frequency (Holding time) [3] C03 143(8F) Jump frequency 3 [1]<br />
F25 94(5E) Stop frequency [3] C04 144(90) Jump frequency (Width) [1]<br />
F26 95(5F) Motor sound (Carrier frequency) [1] *1 C05 145(91) Multi-step frequency 1 [5]<br />
F27 96(60) Motor sound (Sound tone) [1] C06 146(92) Multi-step frequency 2 [5]<br />
F30 97(61) FMA terminal (Voltage adjust) [1] C07 147(93) Multi-step frequency 3 [5]<br />
F31 98(62) FMA terminal (Function selection) [1] C08 148(94) Multi-step frequency 4 [5]<br />
F33 99(63) FMP terminal (Pulse rate multiplier) [1] C09 149(95) Multi-step frequency 5 [5]<br />
F34 100(64) FMP terminal (Voltage adjust) [1] C10 150(96) Multi-step frequency 6 [5]<br />
F35 101(65) FMP terminal (Function selection) [1] C11 151(97) Multi-step frequency 7 [5]<br />
F36 102(66) 30Ry operation mode [1] C20 152(98) Jogging frequency [5]<br />
F40 103(67) Torque limit 1 (Driving) [1] C31 154(9A) Analog input offset (terminal 12) / [4]<br />
F41 104(68) Torque limit 1 (Braking) [1] Analog input bias (terminal 12)<br />
F42 105(69) Torque vector control 1 [1] C32 155(9B) Analog input offset (terminal C1) / [4]<br />
E01 106(6A) X1 terminal function [1] Analog input gain (terminal 12)<br />
E02 107(6B) X2 terminal function [1] C33 156(9C) Analog filter [5]<br />
E03 108(6C) X3 terminal function [1] P01 157(9D) Motor 1 (Number of poles) [1]<br />
E04 109(6D) X4 terminal function [1] P02 158(9E) Motor 1 (Capacity) [5]<br />
E05 110(6E) X5 terminal function [1] P03 159(9F) Motor 1 (Rated current) [10]<br />
E06 111(6F) X6 terminal function [1] P04 160(A0) Motor 1 (Auto-tuning) [1]<br />
E07 112(70) X7 terminal function [1] P05 161(A1) Motor 1 (On-line tuning) [1]<br />
E08 113(71) X8 terminal function [1] P06 162(A2) Motor 1 (No-load current) [10]<br />
E09 114(72) X9 terminal function [1] P07 163(A3) Motor 1 (%R1) [5]<br />
E10 115(73) Acceleration time 2 [10] P08 164(A4) Motor 1 (%X) [5]<br />
E11 116(74) Deceleration time 2 [10] P09 165(A5) Motor 1 (Slip compensation control ) [5]<br />
E12 117(75) Acceleration time 3 [10] H03 166(A6) Data initializing [1] *2<br />
HMS FIELDBUS SYSTEMS AB 45<br />
[1]
USER MANUAL<br />
Revision 0.14<br />
2000-01-14<br />
E13 118(76) Deceleration time 3 [10] H04 167(A7) Auto-reset (Times) [1]<br />
E14 119(77) Acceleration time 4 [10] H05 168(A8) Auto-reset(Reset interval) [1]<br />
E15 120(78) Deceleration time 4 [10] H06 169(A9) Fan stop operation [1]<br />
E16 121(79) Torque limiter 1 (Driving) [1] H07 170(AA) ACC/DCC pattern (Mode selection) [1]<br />
E17 122(7A) Torque limiter 1 (Braking) [1] H08 171(AB) Reverse phase sequence lock [1]<br />
E20 123(7B) Y1 terminal function [1] H09 172(AC) Start mode (Pick-up mode) [1]<br />
E21 124(7C) Y2 terminal function [1] H10 173(AD) Energy-saving operation [1]<br />
E22 125(7D) Y3 terminal function [1] H11 174(AE) Deceleration mode [1]<br />
E23 126(7E) Y4 terminal function [1] H12 175(AF) Instantaneous overcurrent limiting [1]<br />
E24 127(7F) Y5A, Y5C terminal functions [1] H13 176(B0) Auto-restart (Restart time) [3]<br />
E25 128(80) Y5 logical reverse function [1] H14 177(B1) Auto-restart (Frequency fall rate) [5]<br />
E30 129(81) Frequency arrival (FAR) [3] H15 178(B2) Auto-restart (Holding DC voltage) [1]<br />
(Detecting width) H16 179(B3) Auto-restart [3] *3<br />
E31 130(82) Frequency detection 1 (FDT) [1] (OPR command selfhold time)<br />
(level) H18 180(B4) Torque control (Mode selection) [1]<br />
E32 131(83) Frequency detection (FDT) [3] H19 181(B5) Active drive [1]<br />
(Hysteresis width) H20 182(B6) PID control (Mode selection) [1]<br />
E33 132(84) Overload early warning [1] H21 183(B7) PID control (Feed back signal) [1]<br />
(Mode selection) H22 184(B8) PID control (P-Gain) [5]<br />
E34 133(85) Overload early warning 1 (level) [10] H23 185(B9) PID control (I-time) [3]<br />
E35 134(86) Overload early warning (Timer time) [3] H24 186(BA) PID control (D-time) [5]<br />
E36 135(87) Frequency detection 2 (FDT) (level) [1] H25 187(BB) PID control (Feedback filter) [3]<br />
*1) 0.75 kHz is treated as 0000H<br />
*2) The communication might not be able to be continued by writing (data 1).<br />
*3) 999 is treated as 03E7H (99.9).<br />
*4) It is impossible to execute the Auto-tuning via Profibus-<strong>DP</strong>.<br />
HMS FIELDBUS SYSTEMS AB 46
Code<br />
Commu-<br />
nication<br />
No.<br />
decimal<br />
(Hex.)<br />
Name Data<br />
Format<br />
Code<br />
Commu-<br />
nication<br />
No.<br />
decimal<br />
(Hex.)<br />
USER MANUAL<br />
Revision 0.14<br />
2000-01-14<br />
Name Data<br />
H26 188(BC) PTC thermistor (Mode selection) [1] o36 235(EB) Bus Configuration Parameter 07 [1]<br />
H27 189(BD) PTC thermistor (Level) [5] o37 236(EC) Bus Configuration Parameter 08 [1]<br />
H28 190(BE) Droop operation [4] o38 237(ED) Bus Configuration Parameter 09 [1]<br />
H30 191(BF) Serial link (Function selection) [1] o39 238(EE) Bus Configuration Parameter 10 [1]<br />
H31 192(C0) RS485 (Address) [1] *1 o40 239(EF) Bus Configuration Parameter 11 [1]<br />
Format<br />
H32 193(C1) RS485 (Mode selection on error) [1] *1 o41/ 240(F0) Bus Configuration Parameter 12/ [1] /<br />
H33 194(C2) RS485 (Timer time) [3] *1 (o09) Base side number of encoder pulses [1]<br />
H34 195(C3) RS485 (Baud rate) [1] *1 o42/ 241(F1) Bus Configuration Parameter 13/ [1] /<br />
H35 196(C4) RS485 (Data length) [1] *1 (o10) Time constant of pulse train input<br />
filter<br />
H36 197(C5) RS485 (Parity check) [1] *1 o43/ 242(F2) Bus Configuration Parameter 14/ [1] /<br />
H37 198(C6) RS485 (Stop bits) [1] *1 (o11) Command pulse compensation<br />
coefficient 1<br />
H38 199(C7) RS485 (No response detection time) [1] *1 o44/ 243(F3) Bus Configuration Parameter 15/ [1] /<br />
H39 200(C8) RS485 (Response interval) [5] *1 (o12) Command pulse compensation<br />
coefficient 2<br />
A01 201(C9) Maximum frequency 2 [1] o45/ 244(F4) Bus Configuration Parameter 16/ [1] /<br />
A02 202(CA) Base frequency 2 [1] (o13) Main speed regulator gain [3]<br />
A03 203(CB) Rated voltage 2 (at base speed) [1] o46/ 245(F5) Bus Configuration Parameter 17/ [1] /<br />
A04 204(CC) Maximum output voltage 2 [1] (o14) APR P gain [5]<br />
A05 205(CD) Torque boost 2 [3] o47/ 246(F6) Bus Configuration Parameter 18/ [1] /<br />
A06 206(CE) Electronics thermal 2 (Selection) [1] (o15) Z phase matching gain [3]<br />
A07 207(CF) Electronics thermal 2 (Level) [10] o48/ 247(F7) Bus Configuration Parameter 19/ [1] /<br />
A08 208(D0) Electronics thermal 2 [3] (o16) Offset angle [1]<br />
(Thermal time constant) o49/ 248(F8) Bus Configuration Parameter 20/ [1] /<br />
A09 209(D1) Torque vector control 2 [1] (o17) Detecting angle width <strong>for</strong> completion [1]<br />
A10 210(D2) Motor 2 (Number of motor-2 poles) [1] of synchronizing<br />
A11 211(D3) Motor 2 (Capacity) [5] o50/ 249(F9) Bus Configuration Parameter 21/ [1] /<br />
A12 212(D4) Motor 2 (Rated current) [10] (o18) Too mach deviation [1]<br />
A13 213(D5) Motor 2 (Auto-tuning) [1] o51 250(FA) Bus Configuration Parameter 22/ [1]<br />
A14 214(D6) Motor 2 (On-line tuning) [1] o52 251(FB) Bus Configuration Parameter 23/ [1]<br />
A15 215(D7) Motor 2 (No load current [10] o53 252(FC) Bus Configuration Parameter 24/ [1]<br />
A16 216(D8) Motor 2 (%R1 setting) [5] o54 253(FD) Bus Configuration Parameter 25/ [1]<br />
A17 217(D9) Motor 2 (%X setting) [5] o55 254(FE) Bus Configuration Parameter 26/ [1]<br />
A18 218(DA) Motor 2 (Slip compensation control 2) [5] - 255(FF) - -<br />
HMS FIELDBUS SYSTEMS AB 47<br />
[7]<br />
[1]<br />
[1]
o01 219(DB) Speed command system / [15]<br />
automatic speed control system<br />
o02 220(DC) Time constant of PG vector and [7]<br />
speed command filter<br />
o03 221(DD) Number of feedback PG pulses [1]<br />
o04 222(DE) Constant P of feedback speed [5]<br />
controller<br />
o05 223(DF) Constant I of feedback speed [7]<br />
controller<br />
o06 224(E0) Time constant of feedback [7]<br />
speed detection filter<br />
o07 225(E1) Feedback pulse correction [1]<br />
coefficient 1<br />
o08 226(E2) Feedback pulse correction [1]<br />
coefficient 2<br />
o27 227(E3) Mode selection on error [1]<br />
o28 228(E4) Timer time setting [3]<br />
o30 229(E5) Bus Configuration Parameter 01 [1]<br />
o31 230(E6) Bus Configuration Parameter 02 [1]<br />
o32 231(E7) Bus Configuration Parameter 03 [1]<br />
o33 232(E8) Bus Configuration Parameter 04 [1]<br />
o34 233(E9) Bus Configuration Parameter 05 [1]<br />
o35 234(EA) Bus Configuration Parameter 06 [1]<br />
*1) Read-only from communication.<br />
*2) It is impossible to execute the Auto-tuning via Profibus-<strong>DP</strong>.<br />
USER MANUAL<br />
Revision 0.14<br />
2000-01-14<br />
HMS FIELDBUS SYSTEMS AB 48
8.6 Data <strong>for</strong>mat specification<br />
All data within the data field of the communication frame consist of 16 bits binary data.<br />
USER MANUAL<br />
Revision 0.14<br />
2000-01-14<br />
(MSB) (LSB)<br />
15 14 13 12 11 10 9 8 7 6 5 4 3 2 1 0<br />
Data <strong>for</strong>mat [1] Integer data (Positive): Min. unit 1<br />
16-bits binary data<br />
(Negative data is treated with two’s complement.)<br />
Example) If F15 (Frequency limiter, high limit) = 60 Hz,<br />
60 * 1 = 60 = 003C H -><br />
Data <strong>for</strong>mat [2] Integer data (Positive, negative): Min. unit 1<br />
Example) If F18 (Bias frequency) = -20 Hz,<br />
-20 * 1 = -20 = FFEC H(two’s complement) -><br />
Data <strong>for</strong>mat [3] Decimal data (Positive): Min. unit 0.1<br />
Example) If F17 Gain (<strong>for</strong> frequency setting signal) = 100.0%,<br />
100.0 * 10 = 1000 = 03E8 H -><br />
Data <strong>for</strong>mat [4] Decimal data (Positive, negative): Min. unit 0.1<br />
Example) If H28 (Droop operation) = -5.0Hz,<br />
-5.0 * 10 = -50 = FFCE H(two’s complement) -><br />
Data <strong>for</strong>mat [5] Decimal data (Positive): Min. unit 0.01<br />
Example) If C05 (Multi-step frequency 1) = 50.25 Hz,<br />
50.25 * 100 = 5025 = 13A1H Data <strong>for</strong>mat [6] Decimal data (Positive, negative): Min. unit 0.01<br />
Example) If M07 (Actual torque value) = -85.38%,<br />
-85.38 * 100 = -8538 = DEA6H(two’s complement) -><br />
Data <strong>for</strong>mat [7] Decimal data (Positive): Min. unit 0.001<br />
Example) If o05 (Constant I of feedback speed controller) = 0.105s,<br />
0.105 * 1000 = 105 = 0069 H -><br />
HMS FIELDBUS SYSTEMS AB 49<br />
-><br />
0 0 3 C<br />
F F E C<br />
0 3 E 8<br />
F F C E<br />
1 3 A 1<br />
D E A 6<br />
0 0 6 9
Data <strong>for</strong>mat [8] Decimal data (Positive, negative): Min. unit 0.001<br />
Example) If being -1.234,<br />
-1.234 * 1000 = -1234 = FB2E H(two’s complement) -><br />
Data <strong>for</strong>mat [9] Capacity code<br />
Example) If 30kW<br />
Code Capacity (kW) Code Capacity (kW) Code Capacity (kW)<br />
5 0.05 1100 11 11000 110<br />
10 0.1 1500 15 13200 132<br />
20 0.2 1850 18.5 16000 160<br />
40 0.4 2200 22 20000 200<br />
75 0.75 3000 30 22000 220<br />
150 1.5 3700 37 25000 250<br />
220 2.2 4500 45 28000 280<br />
370 3.7 5500 55 31500 315<br />
550 5.5 7500 75 35500 355<br />
750 7.5 9000 90 40000 400<br />
Since 30 * 100 = 3000 = 0BB8H Data <strong>for</strong>mat [10] Exponential data (ACC/DEC time, current value, display coefficient)<br />
USER MANUAL<br />
Revision 0.14<br />
2000-01-14<br />
(MSB) (LSB)<br />
15 14 13 12 11 10 9 8 7 6 5 4 3 2 1 0<br />
Polarity 0 0 0<br />
Not used<br />
Example) F07 (Acceleration time 1) = 20.0 s,<br />
Index<br />
potion<br />
HMS FIELDBUS SYSTEMS AB 50<br />
-><br />
Data portion<br />
0: 0.01 * 001–999 (0.00 – 9.99)<br />
1: 0.1 * 100–999 (10.0 – 99.9)<br />
2: 1 * 100–999 (100 – 999)<br />
3: 10 * 100–999 (1000 – 3600)<br />
0: Positive (+), 1:Negative (-)<br />
20.0 = 0.1 * 200 -><br />
F B 2 E<br />
0 B B 8<br />
0 4 C 8
Data <strong>for</strong>mat [11] Operation command<br />
USER MANUAL<br />
Revision 0.14<br />
2000-01-14<br />
15 14 13 12 11 10 9 8 7 6 5 4 3 2 1 0<br />
(RST)<br />
0 0 0 0 X9 X8 X7 X6 X5 X4 X3 X2 X1<br />
Alarm reset Not used Multi-function command FWD: Forward rotation<br />
command command<br />
Example) If M13 (Operation command, Final command) = FWD, X1, X5 = ON,<br />
0000 0000 0100 0101 b = 0045 H -><br />
Data <strong>for</strong>mat [12] Universal output terminal<br />
HMS FIELDBUS SYSTEMS AB 51<br />
REV<br />
FWD<br />
REV: Reverse rotation<br />
command<br />
(All bits are ON by 1)<br />
15 14 13 12 11 10 9 8 7 6 5 4 3 2 1 0<br />
0 0 0 0 0 0 0 0 0 0 0 Y5 Y4 Y3 Y2 Y1<br />
Example) If M15 (Universal output terminal) = Y1, Y5 = ON,<br />
Not used Universal command<br />
0000 0000 0001 0001 b.= 0011 H -><br />
0 0 4 5<br />
(All bits are ON by 1)<br />
0 0 1 1
Data <strong>for</strong>mat [13] Operating status<br />
USER MANUAL<br />
Revision 0.14<br />
2000-01-14<br />
15 14 13 12 11 10 9 8 7 6 5 4 3 2 1 0<br />
- WR RL ALM DEC ACC IL VL TL NUV BRK INT EXT REV FWD<br />
(All bit are ON or active by 1)<br />
FWD: In <strong>for</strong>ward operation IL: In current limiting<br />
REV: In reverse operation ACC: In acceleration<br />
EXT: In DC braking (or in pre-excitation) DEC: In deceleration<br />
ALM: Alarm<br />
INT: Inverter trip RL: Transmission valid<br />
BRK: In braking WR: Function writing right<br />
NUV: DC link voltage is establishment<br />
(Undervoltage condition at 0)<br />
0: Keypad panel<br />
1: RS485<br />
TL: In torque limiting 2: Link (option)<br />
VL: In voltage limiting<br />
Example) Omitted (Monitoring method is similar as in the <strong>for</strong>mats [11] and [12].)<br />
Data <strong>for</strong>mat [14] Type code<br />
15 14 13 12 11 10 9 8 7 6 5 4 3 2 1 0<br />
Unit type Generation Series Voltage series<br />
Code Type Generation Series Voltage series<br />
1 VG 11th series For Japan 100V single phase<br />
2 G - For Asia 200V single phase<br />
3 P - For China 200V three phase<br />
4 E - For Europe 400V three phase<br />
5 C - For USA 575V three phase<br />
6 S - - -<br />
HMS FIELDBUS SYSTEMS AB 52
Data <strong>for</strong>mat [15] Code setting (1 – 4 figures)<br />
USER MANUAL<br />
Revision 0.14<br />
2000-01-14<br />
15 14 13 12 11 10 9 8 7 6 5 4 3 2 1 0<br />
Data 4 Data 3 Data 2 Data 1<br />
Example) If "o22:Ai function selection" = 123,<br />
Since 123 = 0123 H ⇒<br />
0 1 2 3<br />
HMS FIELDBUS SYSTEMS AB 53
9. System configuration<br />
USER MANUAL<br />
Revision 0.14<br />
2000-01-14<br />
This is an example how to configure the <strong>OPC</strong>-<strong>G11S</strong>-P<strong>DP</strong> in the Siemens step 7 program. Start up the HW configure<br />
part and install the GSD file <strong>for</strong> the <strong>OPC</strong>-<strong>G11S</strong>-P<strong>DP</strong>. This is done under Options/ Install New DDB files.<br />
Choose the GSD file HMS_1011 and press open.<br />
HMS FIELDBUS SYSTEMS AB 54
USER MANUAL<br />
Revision 0.14<br />
2000-01-14<br />
Then start up a new project and configure the PLC and Profibus master. Set-up the Profibus master with baud rate<br />
and parameters.<br />
Create a network <strong>for</strong> the Profibus system by choosing insert/ <strong>DP</strong> Master System.<br />
Click on <strong>OPC</strong>-<strong>G11S</strong>-P<strong>DP</strong> in the Hardware catalogue (Profibus <strong>DP</strong>/Additional Field Devices/ Antriebe )and drag the<br />
folder to the Profibus network line. Then choose the PPO type and press OK.<br />
HMS FIELDBUS SYSTEMS AB 55
The configuration program will now automatically set-up the module with IN and OUT addresses.<br />
To see how the module is configured or to change addresses double click on Universal Module.<br />
When the module is configured the configuration can be downloaded to the master, this is done under<br />
PLC/Download.<br />
USER MANUAL<br />
Revision 0.14<br />
2000-01-14<br />
HMS FIELDBUS SYSTEMS AB 56
10. GSD-file<br />
USER MANUAL<br />
Revision 0.14<br />
2000-01-14<br />
Each device on a Profibus-<strong>DP</strong> network is associated with a GSD file, containing all necessary in<strong>for</strong>mation about the<br />
device. This text file is used by the network configuration program during configuration of the network.<br />
The GSD-file <strong>for</strong> <strong>OPC</strong>-<strong>G11S</strong>-P<strong>DP</strong>(HMS_1011.GSD) is shown below.<br />
;============================================================<br />
; Profibus Device Database of : HMS Fieldbus Systems <strong>DP</strong>-slave<br />
; Model : <strong>OPC</strong>-<strong>G11S</strong>-P<strong>DP</strong><br />
; Description : Profidrive Profibus-<strong>DP</strong> option board <strong>for</strong> FUJI G11-inverter<br />
; Language : English<br />
; Date : 20 October 1999<br />
; Author : HMS Fieldbus Systems AB<br />
;============================================================<br />
#Profibus_<strong>DP</strong><br />
GSD_Revision = 1<br />
; Device identification<br />
Vendor_Name = "HMS Fieldbus Systems AB"<br />
Model_Name = "<strong>OPC</strong>-<strong>G11S</strong>-P<strong>DP</strong>"<br />
Revision = "Version 1.00"<br />
Ident_Number = 0x1011<br />
Protocol_Ident = 0 ; <strong>DP</strong> protocol<br />
Station_Type = 0 ; Slave device<br />
FMS_supp = 0 ; FMS not supported<br />
Hardware_Release = "Version 1.30"<br />
Software_Release = "Version 1.00"<br />
; Supported baudrates<br />
9.6_supp = 1<br />
19.2_supp = 1<br />
93.75_supp = 1<br />
187.5_supp = 1<br />
500_supp = 1<br />
1.5M_supp = 1<br />
3M_supp = 1<br />
6M_supp = 1<br />
HMS FIELDBUS SYSTEMS AB 57
12M_supp = 1<br />
; Maximum responder time <strong>for</strong> supported baudrates<br />
MaxTsdr_9.6 = 60<br />
MaxTsdr_19.2 = 60<br />
MaxTsdr_93.75 = 60<br />
MaxTsdr_187.5 = 60<br />
MaxTsdr_500 = 100<br />
MaxTsdr_1.5M = 150<br />
MaxTsdr_3M = 250<br />
MaxTsdr_6M = 450<br />
MaxTsdr_12M = 800<br />
; Supported hardware features<br />
Redundancy = 0 ; not supported<br />
Repeater_Ctrl_Sig = 2 ; TTL<br />
24V_Pins = 0 ; not connected<br />
Implementation_Type = "SPC3"<br />
; Supported <strong>DP</strong> features<br />
Freeze_Mode_supp = 1 ; supported<br />
Sync_Mode_supp = 1 ; supported<br />
Auto_Baud_supp = 1 ; supported<br />
Set_Slave_Add_supp = 0 ; not supported<br />
; Maximum polling frequency<br />
Min_Slave_Intervall = 1 ; 100 us<br />
; Maximum supported sizes<br />
Modular_Station = 1 ; modular<br />
Max_Module = 1<br />
Max_Input_Len = 20<br />
Max_Output_Len = 20<br />
Max_Data_Len = 40<br />
Modul_Offset = 1<br />
Fail_Safe = 0 ; state CLEAR not accepted<br />
USER MANUAL<br />
Revision 0.14<br />
2000-01-14<br />
HMS FIELDBUS SYSTEMS AB 58
Slave_Family = 1 ; drive<br />
Max_Diag_Data_Len = 6<br />
; Definition of modules<br />
Module = "PPO Typ 1" 0xF3, 0xF1;<br />
EndModule;<br />
Module = "PPO Typ 2" 0xF3, 0xF5;<br />
EndModule;<br />
Module = "PPO Typ 3" 0xF1;<br />
EndModule;<br />
Module = "PPO Typ 4" 0xF5;<br />
EndModule;<br />
USER MANUAL<br />
Revision 0.14<br />
2000-01-14<br />
HMS FIELDBUS SYSTEMS AB 59