Lab & Pre-lab #11
Lab & Pre-lab #11
Lab & Pre-lab #11

You also want an ePaper? Increase the reach of your titles
YUMPU automatically turns print PDFs into web optimized ePapers that Google loves.
Lenses and Images v 0.1<br />
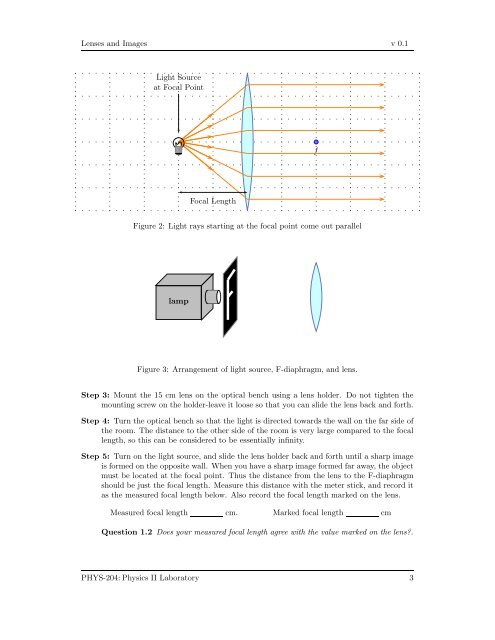
Light Source<br />
at Focal Point<br />
f<br />
Focal Length<br />
Figure 2: Light rays starting at the focal point come out parallel<br />
lamp<br />
Figure 3: Arrangement of light source, F-diaphragm, and lens.<br />
Step 3: Mount the 15 cm lens on the optical bench using a lens holder. Do not tighten the<br />
mounting screw on the holder-leave it loose so that you can slide the lens back and forth.<br />
Step 4: Turn the optical bench so that the light is directed towards the wall on the far side of<br />
the room. The distance to the other side of the room is very large compared to the focal<br />
length, so this can be considered to be essentially infinity.<br />
Step 5: Turn on the light source, and slide the lens holder back and forth until a sharp image<br />
is formed on the opposite wall. When you have a sharp image formed far away, the object<br />
must be located at the focal point. Thus the distance from the lens to the F-diaphragm<br />
should be just the focal length. Measure this distance with the meter stick, and record it<br />
as the measured focal length below. Also record the focal length marked on the lens.<br />
Measured focal length cm. Marked focal length cm<br />
Question 1.2 Does your measured focal length agree with the value marked on the lens.<br />
PHYS-204: Physics II <strong>Lab</strong>oratory 3