EH8008PB - Electrohome
EH8008PB - Electrohome
EH8008PB - Electrohome

Create successful ePaper yourself
Turn your PDF publications into a flip-book with our unique Google optimized e-Paper software.
ENGLISH<br />
®<br />
<strong>EH8008PB</strong><br />
PROGRESSIVE SCAN<br />
DVD/VCR COMBINATION<br />
LECTEUR DVD AVEC À BALAYAGE<br />
PROGRESSIF MAGNÉTOSCOPE<br />
Operating Manual<br />
Manuel d'instructions<br />
Please save these instructions<br />
Conservez ce manuel d'instructions à titre de référence<br />
Read these instructions carefully before using your DVD/VCR Combination.<br />
If you follow the instructions, your DVD/VCR Combination will provide you<br />
with many years of good service.<br />
Veuillez lire attentivement les directives contenues dans le présent manuel<br />
avant d'utiliser votre lecteur DVD/magnétoscope. Si vous suivez ces<br />
directives, l'appareil vous procurera des années de bons et loyaux services.<br />
FRANÇAIS<br />
THE TOLL FREE CITIZEN HELPLINE IS 1-800-663-5954 CALL US IF YOU HAVE ANY<br />
PROBLEMS OR QUESTIONS WITH YOUR NEW CITIZEN PRODUCT 9am - 5pm<br />
(TORONTO TIME) MONDAY TO FRIDAY<br />
Numéro d'aide CITIZEN sans frais 1-800-663-5954 Appelez-nous si vous éprouvez des<br />
problèmes ou avez des questions au sujet de votre nouvel appareil CITIZEN<br />
de 9 h à 17 h (heure de Toronto) du lundi au vendredi<br />
CITIZEN ELECTRONICS<br />
TORONTO CANADA<br />
2D80321A[E] Cover 1<br />
9/6/04, 10:59
ENGLISH<br />
CAUTION<br />
RISK OF ELECTRIC SHOCK<br />
DO NOT OPEN<br />
CAUTION:<br />
TO REDUCE THE RISK OF ELECTRIC SHOCK, DO<br />
NOT REMOVE COVER (OR BACK). NO USER-SER-<br />
VICEABLE PARTS INSIDE. REFER SERVICING TO<br />
QUALIFIED SERVICE PERSONNEL.<br />
The lightning flash with arrowhead symbol,<br />
within an equilateral triangle is intended<br />
to alert the user to the presence<br />
of uninsulated dangerous voltage within<br />
the product's enclosure that may be of<br />
sufficient magnitude to constitute a risk<br />
of electric shock to persons.<br />
The exclamation point within an equilateral<br />
triangle is intended to alert the user to<br />
the presence of important operating and<br />
maintenance (servicing) instructions in<br />
the literature accompanying the appliance.<br />
WARNING: TO REDUCE THE RISK OF FIRE OR ELECTRIC SHOCK, DO NOT EXPOSE THIS<br />
APPLIANCE TO RAIN OR MOISTURE.<br />
CAUTION: TO PREVENT ELECTRIC SHOCK DO NOT USE THIS POLARIZED PLUG WITH AN EXTENSION<br />
CORD, RECEPTACLE OR OTHER OUTLET UNLESS THE BLADES CAN BE FULLY INSERTED<br />
TO PREVENT BLADE EXPOSURE.<br />
WARNING: This equipment has been tested and found to comply with the limits for a Class B digital device,<br />
pursuant to Part 15 of the FCC Rules. These limits are designed to provide reasonable protection<br />
against harmful interference in a residential installation. This equipment generates, uses and<br />
can radiate radio frequency energy and, if not installed and used in accordance with the instructions,<br />
may cause harmful interference to radio communications.<br />
However, there is no guarantee that interference will not occur in a particular installation. If this<br />
equipment does cause harmful interference to radio or television reception, which can be<br />
determined by turning the equipment off and on, the user is encouraged to try to correct the<br />
interference by one or more of the following measures:<br />
- Reorient or relocate the receiving antenna.<br />
- Increase the separation between the equipment and receiver.<br />
- Connect the equipment into an outlet on a circuit different from that to which the receiver is<br />
connected.<br />
- Consult the dealer or an experienced radio/TV technician for help.<br />
CAUTION: Changes or modifications not expressly approved by the partly responsible for compliance with<br />
the FCC Rules could void the user's authority to operate this equipment.<br />
CAUTION:<br />
THIS DIGITAL VIDEO PLAYER EMPLOYS A LASER SYSTEM.<br />
TO ENSURE PROPER USE OF THIS PRODUCT, PLEASE READ THIS USER'S GUIDE CAREFULLY AND<br />
RETAIN FOR FUTURE REFERENCE. SHOULD THE UNIT REQUIRE MAINTENANCE, CONTACT AN AU-<br />
THORIZED SERVICE LOCATION-SEE SERVICE PROCEDURE.<br />
USE OF CONTROLS, ADJUSTMENTS OR THE PERFORMANCE OF PROCEDURES OTHER THAN THOSE<br />
SPECIFIED HEREIN MAY RESULT IN HAZARDOUS RADIATION EXPOSURE.<br />
TO PREVENT DIRECT EXPOSURE TO LASER BEAM, DO NOT TRY TO OPEN THE ENCLOSURE. VISIBLE<br />
LASER RADIATION MAY BE PRESENT WHEN THE ENCLOSURE IS OPENED. DO NOT STARE INTO<br />
BEAM.<br />
Location of the required Marking<br />
The rating sheet and the safety caution are on the rear of the unit.<br />
CERTIFICATION: COMPLIES WITH FDA RADIATION PERFORMANCE<br />
STANDARDS, 21 CFR SUBCHAPTER J.<br />
2<br />
2D80321A[E](02-05) 2<br />
9/6/04, 10:34
ENGLISH<br />
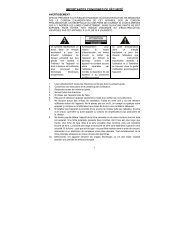
IMPORTANT SAFEGUARDS<br />
1. READ INSTRUCTIONS<br />
All the safety and operating instructions should be read before the unit is operated.<br />
2. RETAIN INSTRUCTIONS<br />
The safety and operating instructions should be retained for future reference.<br />
3. HEED WARNINGS<br />
All warnings on the unit and in the operating instructions should be adhered to.<br />
4. FOLLOW INSTRUCTIONS<br />
All operating and use instructions should be followed.<br />
5. CLEANING<br />
Unplug this unit from the wall outlet before cleaning. Do not use liquid cleaners or aerosol cleaners.<br />
Use a damp cloth for cleaning the exterior cabinet only.<br />
6. ATTACHMENTS<br />
The manufacturer of this unit does not make any recommendations for attachments, as they may cause hazards.<br />
7. WATER AND MOISTURE<br />
Do not use this unit near water. For example, near a bathtub, washbowl, kitchen sink, laundry tub, in a wet basement, or<br />
near a swimming pool.<br />
8. ACCESSORIES<br />
Do not place this unit on an unstable cart, stand, tripod, bracket, or table.<br />
The unit may fall, causing serious injury, and serious damage to the unit.<br />
An appliance and cart combination should be moved with care. Quick stops,<br />
excessive force, and uneven surfaces may cause the appliance and cart<br />
combination to overturn.<br />
9. VENTILATION<br />
Slots and openings in the cabinet back or bottom are provided for ventilation,<br />
to ensure reliable operation of the unit, and to protect it from overheating.<br />
PORTABLE CART WARNING<br />
(symbol provided by RETAC)<br />
S3125A<br />
These openings must not be blocked or covered. The openings should never be blocked by placing the unit on a bed,<br />
sofa, rug, or other similar surface. This unit should never be placed near or over a radiator or heat source. This unit<br />
should not be placed in a built-in installation such as a bookcase or rack unless proper ventilation is provided and/or the<br />
manufacturer’s instructions have been adhered to.<br />
10. POWER SOURCES<br />
This unit should be operated only from the type of power source indicated on the rating plate. If you are not sure of the<br />
type of power supply to your home, consult your appliance dealer or local power company. For units intended to operate<br />
from battery power, or other sources, refer to the operating instructions.<br />
11. GROUNDING OR POLARIZATION<br />
This unit is equipped with a polarized alternating-current line plug (a plug having one blade wider than the other). This<br />
plug will fit into the power outlet only one way. This is a safety feature. If you are unable to insert the plug fully into the<br />
outlet, try reversing the plug. If the plug should still fail to fit, contact your electrician to replace your obsolete outlet. Do<br />
not defeat the safety purpose of the polarized plug, if your unit is equipped with a 3-wire grounding-type plug, a plug<br />
having a third (grounding) pin. This plug will only fit into a grounding-type power outlet. This too, is a safety feature. If you<br />
are unable to insert the plug into the outlet, contact your electrician to replace your obsolete outlet.Do not defeat the<br />
safety purpose of the grounding-type plug.<br />
12. POWER-CORD PROTECTION<br />
Power-supply cords should be routed so that they are not likely to be walked on or pinched by items placed upon or<br />
against them, paying particular attention to cords at plugs, convenience receptacles, and the point where they exit from<br />
the appliance.<br />
13. LIGHTNING<br />
To protect your unit from a lightning storm, or when it is left unattended and unused for long periods of time, unplug it<br />
from the wall outlet and disconnect the antenna or cable system. This will prevent damage to the unit due to lightning<br />
and power line surges.<br />
14. POWER LINES<br />
An outside antenna system should not be located in the vicinity of overhead power lines or other electric light or power<br />
circuits, or where it can fall into such power lines or circuits. When installing an outside antenna system, extreme care<br />
should be taken to keep from touching such power lines or circuits, as contact with them might be fatal.<br />
15. OVERLOADING<br />
Do not overload wall outlets and extension cords, as this can result in a risk of fire or electric shock.<br />
16. OBJECT AND LIQUID ENTRY<br />
Do not push objects through any openings in this unit, as they may touch dangerous voltage points or short out parts that<br />
could result in fire or electric shock. Never spill or spray any type of liquid into the unit.<br />
17. OUTDOOR ANTENNA GROUNDING<br />
If an outside antenna or cable system is connected to the unit, be sure the antenna or cable system is grounded to<br />
provide some protection against voltage surges and built-up static charges, Section 810 of the National Electrical Code,<br />
ANSI/NFPA 70, provides information with respect to proper grounding of the mast and supporting structure, grounding of<br />
the lead-in wire to an antenna discharge unit, size of grounding conductors, location of antenna discharge unit, connection<br />
to grounding electrodes, and requirements for the grounding electrode.<br />
18. SERVICING<br />
Do not attempt to service this unit yourself as opening or removing covers may expose you to dangerous voltage or other<br />
hazards. Refer all servicing to qualified service personnel.<br />
3<br />
2D80321A[E](02-05) 3<br />
9/6/04, 10:34
IMPORTANT SAFEGUARDS<br />
19. DAMAGE REQUIRING SERVICE<br />
Unplug this unit from the wall outlet and refer servicing to qualified service personnel under the following<br />
conditions:<br />
a. When the power-supply cord or plug is damaged.<br />
b. If liquid has been spilled, or objects have fallen into the unit.<br />
c. If the unit has been exposed to rain or water.<br />
d. If the unit does not operate normally by following the operating instructions. Adjust only those controls that are<br />
covered by the operating instructions, as an improper adjustment of other controls may result in damage and will<br />
often require extensive work by a qualified technician to restore the unit to its normal operation.<br />
e. If the unit has been dropped or the cabinet has been damaged.<br />
f. When the unit exhibits a distinct change in performance, this indicates a need for service.<br />
20. REPLACEMENT PARTS<br />
When replacement parts are required, be sure the service technician uses replacement parts specified by the manufacturer<br />
or those that have the same characteristics as the original part.<br />
Unauthorized substitutions may result in fire, electric shock or other hazards.<br />
21. SAFETY CHECK<br />
Upon completion of any service or repairs to this unit, ask the service technician to perform safety checks to determine<br />
that the unit is in proper operating condition.<br />
22. HEAT<br />
The product should be situated away from heat sources such as radiators, heat registers, stoves, or other products<br />
(including amplifiers) that produce heat.<br />
23. DISC TRAY<br />
Keep your fingers well clear of the disc tray as it is closing. It may cause serious personal injury.<br />
24. CONNECTING<br />
When you connect the product to other equipment, turn off the power and unplug all of the equipment from the wall<br />
outlet. Failure to do so may cause an electric shock and serious personal injury. Read the owner's manual of the other<br />
equipment carefully and follow the instructions when making any connections.<br />
25. LASER BEAM<br />
Do not look into the opening of the disc tray or ventilation opening of the product to see the source of the laser beam. It<br />
may cause sight damage.<br />
26. DISC<br />
Do not use a cracked, deformed, or repaired disc. These discs are easily broken and may cause serious personal injury<br />
and product malfunction.<br />
27. NOTE TO CABLE TV SYSTEM INSTALLER<br />
This reminder is provided to call the CABLE TV system installer’s attention to Article 820-40 of the NEC that provides<br />
guidelines for proper grounding and, in particular, specifies that the cable ground shall be connected to the grounding<br />
system of the building, as close to the point of cable entry as practical.<br />
EXAMPLE OF ANTENNA GROUNDING AS PER THE<br />
NATIONAL ELECTRICAL CODE<br />
ANTENNA LEAD IN WIRE<br />
GROUND CLAMP<br />
ANTENNA<br />
DISCHARGE UNIT<br />
(NEC SECTION 810-20)<br />
CONDENSATION<br />
Moisture will form in the operating section of the DVD/VCR if the player is brought from cool surroundings into a warm room<br />
or if the temperature of the room rises suddenly. When this happens, the DVD/VCR's performance will be impaired.<br />
To prevent this, let the DVD/VCR stand in its new surroundings for about an hour before switching it on, or make sure that the<br />
room temperature rises gradually.<br />
Condensation may also form during the summer if the DVD/VCR is exposed to the breeze from an air conditioner. In such<br />
cases, change the location of the DVD/VCR.<br />
4<br />
ELECTRIC SERVICE<br />
EQUIPMENT<br />
NEC-NATIONAL ELECTRICAL CODE<br />
S2898A<br />
GROUNDING CONDUCTORS<br />
(NEC SECTION 810-21)<br />
GROUND CLAMPS<br />
POWER SERVICE GROUNDING<br />
ELECTRODE SYSTEM<br />
(NEC ART 250, PART H)<br />
2D80321A[E](02-05) 4<br />
9/6/04, 10:34
ENGLISH<br />
Features<br />
COMBINATION FEATURES:<br />
• VARIABLE FUNCTION DISPLAY WITH TRILINGUAL OSD MENU<br />
This combination will indicate all system programming and adjustments on screen. All system setup operations can be carried out<br />
using the on-screen display menu system. This combination can display the menu in three languages: English, French and Spanish.<br />
(more on pgs. 18, 27)<br />
• MULTILINGUAL FUNCTION<br />
This combination is capable of 124 different subtitle languages. (more on pgs. 29,33,35)<br />
• SLOW MOTION<br />
This unit is capable of playing DVDs and VHS CASSETTES in slow motion. (more on pgs. 22,28)<br />
• FRAME ADVANCE<br />
This feature allows the user to advance a DVD or VHS CASSETTE one frame at a time. (more on pgs. 22,28)<br />
• 46 KEY, FULL FUNCTION REMOTE CONTROL<br />
This combination can be fully operated and programmed using the supplied remote control. (more on pg. 8)<br />
• REAR RF AND A/V OUTPUT<br />
This unit can be connected to a VCR or other video component for dubbing. It can also be connected to a television that does not<br />
have a Video input. (more on pg. 12)<br />
• ANALOG AUDIO OUTPUT JACK<br />
This unit can be connected to a Stereo System for 2 channel Stereo Sound. (more on pg. 12)<br />
By connecting the audio portion (fixed) of the A/V output jacks to your home stereo system, you will get outstanding stereo sound<br />
adjustable using the stereos volume control.<br />
VCR FEATURES:<br />
• 4 HEAD HIGH QUALITY PICTURE TECHNOLOGY<br />
This VCR incorporates “HQ” or High Quality Picture Technology. This built-in detail enhancer is used to boost the recorded signal<br />
and provide maximum picture quality during playback. An additional set of recording heads has been incorporated to provide the<br />
optimum picture quality for SLP recording and special effects playback.<br />
• 19 MICRON HEAD<br />
This extra set of smaller heads eliminates the overlap of video tracks recorded in SLP mode. This improves the video quality<br />
simulating that of those recorded in 2-hour SP mode.<br />
• STEREO MTS/SAP RECEPTION<br />
This VCR is designed to receive stereo and Second Audio Program (SAP) broadcasts where available. (more on pg. 26)<br />
• DIGITAL AUTO TRACKING<br />
This VCRs Auto Tracking feature automatically finds the best tracking position for optimum picture and sound. (more on pg. 22)<br />
• ONE-TOUCH RECORDING TIMER<br />
One button can program up to 6 hours with an immediate start. (more on pg. 24)<br />
• 8 PROGRAM / 1 MONTH PROGRAMMABLE TIMER<br />
This unit can be programmed to record up to 8 programs within 1 month. (more on pg. 24)<br />
• AUTO HEAD CLEANING<br />
This system automatically cleans the tape heads when a tape is inserted or ejected. (more on pg. 37)<br />
• FRONT A/V INPUT<br />
This A/V input is conveniently located on the front of the unit to allow easy access for the connection of a camcorder, video game<br />
system or other video component. (more on pg. 26)<br />
DVD FEATURES:<br />
• Progressive scan - Progressive scan displays all the horizontal lines of a picture at one time, as a single frame. This unit converts<br />
the interlaced (480i) video from DVD into progressive (480p) format for connection to a progressive display. It increases the vertical<br />
resolution. (more on pg. 34)<br />
• PLAYS DVD, CD, CD-R, CD-RW AND MP3 DISCS (more on pgs. 27,31)<br />
• SELECTABLE SCREEN ASPECT RATIO (4:3 AND 16:9)<br />
Allows you to select the format that best matches the video program you are watching with your television. (more on pg. 33)<br />
• ZOOM<br />
Allows you to magnify the picture and shift the zoom point. (more on pg. 28)<br />
• MULTI ANGLE CONTROL<br />
Some DVDs contain scenes which have been shot simultaneously from a number of different angles. For these discs, the same<br />
scenes can be viewed from each of the different angles with this feature. (more on pg. 30)<br />
• PARENTAL CONTROL<br />
Allows parents to restrict the viewing of certain discs or chapters containing content they deem inappropriate. (more on pg. 32)<br />
• OPTICAL AND DIGITAL COAX AUDIO OUTPUTS FOR DOLBY DIGITAL AND DTS<br />
Optical and Digital Coax Audio Outputs allow for 5.1 Dolby Digital and DTS transmission to an alternate audio component or<br />
decoder. (more on pg. 12)<br />
• S-VIDEO<br />
S-Video connections transmit the black & white and colour portions of a video signal on 2 individual sets of wires within a single<br />
cable. This offers superior colour and detail reproduction over conventional video connections. (more on pg. 12)<br />
• COMPONENT VIDEO<br />
Component Video offers superior colour and detail reproduction over S-Video connections. Component Video transmits a video-only<br />
signal along three individual sets of wires. This process allows for greater separation of video imagery, creating the highest possible<br />
picture quality. Component Video connectors and cables are coloured; Red, Green and Blue. (more on pg. 12)<br />
* This product incorporates copyright protection technology that is protected by method claims of certain U.S. patents and<br />
other intellectual property rights owned by Macrovision Corporation and other rights owners. Use of this copyright protection<br />
technology must be authorized by Macrovision Corporation and is intended for home and other limited viewing uses only<br />
unless otherwise authorized by Macrovision Corporation. Reverse engineering or disassembly is prohibited.<br />
Consumers should note that not all high definition television sets are fully compatible with this product and may cause<br />
artifacts to be displayed in the picture. In case of 525 progressive scan picture problems, it is recommended that the user<br />
switch the connection to the “STANDARD DEFINITION” output. If there are questions regarding our TV set compatibility<br />
with this model 525p DVD player, please contact our customer service center.<br />
* Manufactured under license from Dolby Laboratories. “Dolby” and the double-D symbol are trademarks of Dolby Laboratories.<br />
* “DTS” and “DTS Digital Out” are trademarks of Digital Theater Systems, Inc.<br />
* Unauthorized recording of copyrighted television programs, films, video cassettes and other materials may infringe the<br />
rights of copyright owners and be contrary to copyright laws.<br />
5<br />
2D80321A[E](02-05) 5<br />
9/6/04, 10:34
Contents<br />
Before using your unit<br />
IMPORTANT SAFEGUARDS .................................. 3<br />
Features ................................................................... 5<br />
Contents ................................................................... 6<br />
Parts and functions .................................................. 7<br />
Remote control ......................................................... 8<br />
Power source ........................................................... 9<br />
Basic connections .................................................. 10<br />
CABLE TV connections ......................................... 11<br />
Playback connections ............................................ 12<br />
Setting up the VCR<br />
Setting the video channel ....................................... 18<br />
Setting the language .............................................. 18<br />
Auto clock setting ................................................... 19<br />
Manual clock setting .............................................. 20<br />
Tuner setting .......................................................... 20<br />
To add/delete channels .......................................... 20<br />
Noise elimination .................................................... 20<br />
Tape playback operation<br />
Loading and Unloading a cassette tape ................. 21<br />
Cassette tape playback .......................................... 21<br />
Special playback .................................................... 21<br />
ZERO RETURN function........................................ 22<br />
Video index search system .................................... 22<br />
Recording<br />
Recording a TV program ........................................ 23<br />
One-touch Timer Recording (OTR) ........................ 24<br />
Timer recording ...................................................... 24<br />
Advanced function of VCR<br />
Stereo recording and playback .............................. 26<br />
Second audio program (SAP) ................................ 26<br />
Duplicating a video tape ......................................... 26<br />
Disc playback operation<br />
Disc........................................................................ 27<br />
Setting setup language .......................................... 27<br />
Playback procedure ............................................... 28<br />
Special playback.................................................... 28<br />
Zooming................................................................. 28<br />
Locating desired scene.......................................... 29<br />
Marking desired scenes......................................... 29<br />
Changing soundtrack language ............................. 29<br />
Subtitles ................................................................. 29<br />
Karaoke playback .................................................. 29<br />
Changing angles.................................................... 30<br />
Title selection......................................................... 30<br />
DVD menu ............................................................. 30<br />
Repeat playback .................................................... 30<br />
Program playback (CD) ......................................... 30<br />
Random playback (CD) ......................................... 31<br />
MP3 playback ........................................................ 31<br />
Advanced function of DVD<br />
Parental control ..................................................... 32<br />
Temporary disabling of rating level by<br />
DVD disc ................................................................ 32<br />
Setting language.................................................... 33<br />
Setting the aspect ratio of TV screen .................... 33<br />
Setting on screen display ...................................... 34<br />
Status display of disc ............................................. 34<br />
Dynamic Range Control ........................................ 34<br />
Progressive scan ................................................... 34<br />
Additional information<br />
Language code list ................................................ 35<br />
Problems and troubleshooting ............................... 36<br />
Video head cleaning .............................................. 37<br />
Specifications ........................................................ 38<br />
WARRANTY .......................................................... 39<br />
6<br />
2D80321A[E](06-09) 6<br />
9/6/04, 10:34
ENGLISH<br />
Front<br />
VCR/DVD mode selector button<br />
Parts and functions<br />
PLAY button<br />
Cassette Loading Slot<br />
EJECT button<br />
OPEN/CLOSE button<br />
STOP button<br />
Disc tray<br />
POWER<br />
VCR<br />
CHANNEL<br />
VCR/DVD<br />
DVD<br />
DVD<br />
VIDEO IN<br />
L - AUDIO IN - R<br />
VCR<br />
POWER button<br />
AUDIO/VIDEO IN jacks<br />
Display window<br />
CHANNEL / buttons<br />
VCR indicator<br />
Play indicator<br />
VCR indicator Pause indicator<br />
Remote sensor<br />
Display window<br />
REW (Rewind) button<br />
DVD indicator<br />
DVD indicator<br />
REC button<br />
FF (Fast Forward) button<br />
REC indicator<br />
TRK indicator<br />
Video tape indicator<br />
CD indicator<br />
PM indicator<br />
Number indicator (Title, Chapter, Track playing time or other information)<br />
Progressive scanning indicator<br />
Timer recording indicator<br />
NOTE:<br />
Some discs may be displayed wrong or e.g. chapter number, playback time, etc. may not be displayed.<br />
Rear<br />
DVD COAXIAL DIGITAL AUDIO OUT jack<br />
DVD S-VIDEO OUT jack<br />
AC power cord<br />
DVD/VCR common AUDIO (L/R)/VIDEO OUT jacks<br />
RF IN jack<br />
RF OUT jack<br />
DVD AUDIO (L/R) OUT jacks<br />
DVD OPTICAL DIGITAL AUDIO OUT jack (dust protection cap)<br />
DVD COMPONENT OUT jacks<br />
S-VIDEO/COMPONENT Video selector switch<br />
7<br />
2D80321A[E](06-09) 7<br />
9/6/04, 10:34
Remote control<br />
POWER [9]<br />
EJECT [21]<br />
0 – 9 [20]<br />
VCR/DVD [9]<br />
OPEN/CLOSE [28]<br />
TIMER REC [24]<br />
INPUT SELECT [26]<br />
PROGRESSIVE [34]<br />
DISPLAY [19] [34]<br />
RETURN [27]<br />
SETUP [27]<br />
VCR MENU [18]<br />
CH / [9]<br />
TRK/SET + / – [9][22]<br />
Cursor Buttons [27]<br />
TOP MENU [30]<br />
ENTER [18]<br />
DVD MENU [30]<br />
STOP [21] [28]<br />
SKIP [28]<br />
INDEX + / – [22]<br />
MARKER [29]<br />
AUDIO [29]<br />
AUDIO SELECT [26]<br />
REC/OTR [24]<br />
ZOOM [28]<br />
JUMP [29]<br />
ZERO RETURN [22]<br />
SUBTITLE [29]<br />
ATR [22]<br />
CANCEL [24]<br />
PLAY [21] [28]<br />
PAUSE/STILL [22] [28]<br />
SEARCH + / – [21] [28]<br />
SLOW [22] [28]<br />
CLOCK/COUNTER [22]<br />
TV/VCR [18]<br />
REPEAT A-B [30]<br />
ANGLE [30]<br />
COUNTER RESET [22]<br />
PLAY MODE [30]<br />
SPEED [23]<br />
8<br />
ATTENTION<br />
If you purchase a universal remote<br />
control from your local retailer, please<br />
contact the remote manufacturer for<br />
the required programming code.<br />
2D80321A[E](06-09) 8<br />
9/6/04, 10:34
ENGLISH<br />
Remote control / Power source<br />
Inserting Batteries<br />
1<br />
Open the battery 2 Install two “AAA” batteries (not 3<br />
compartment cover in the<br />
direction of the arrow.<br />
supplied), paying attention to the<br />
polarity diagram in the battery<br />
compartment.<br />
Replace the compartment<br />
cover.<br />
Battery precautions<br />
The precautions below should be followed when using batteries in this device:<br />
1. Use only the size and type of batteries specified.<br />
2. Be sure to follow the correct polarity when installing the batteries as indicated in the battery compartment. Reversed<br />
batteries may cause damage to the device. To avoid a potential short circuit, insert the “–” end first.<br />
3. Do not mix different types of batteries together (e.g. Alkaline and Carbon-zinc) or old batteries with fresh ones.<br />
4. If the device is not to be used for a long period of time, remove the batteries to prevent damage or injury from possible<br />
battery leakage.<br />
5. Do not try to recharge batteries not intended to be recharged; they can overheat and rupture. (Follow battery manufacturer’s<br />
directions.)<br />
Remote control basics<br />
• Press POWER to turn the DVD/VCR on or off.<br />
• Press CH or CH to move through the channels one channel at a time.<br />
• The CH / and SET +/– are also used to navigate on-screen menu system.<br />
• You can directly access specific channels using Number keys pad.<br />
• Each press of VCR/DVD on the remote control, switches the screen between the VCR screen (VCR mode) and the DVD<br />
screen (DVD mode).<br />
Operation<br />
• Aim the remote control at the remote sensor and press control buttons to operate.<br />
• Operate the remote control within 30° angle on either side of the remote sensor,<br />
up to a distance of Approx. 5 meters.<br />
Approx. 5 meters<br />
Power source<br />
Wider Hole<br />
and Blade<br />
AC Outlet<br />
Polarized AC Cord Plug<br />
(One blade is wider than the other.)<br />
TO USE AC POWER SOURCE<br />
Use the AC polarized line cord provided for operation on AC. Insert the AC<br />
cord plug into a standard 120V 60Hz polarized AC outlet.<br />
NOTES:<br />
• Never connect the AC line cord plug to other than the specified<br />
voltage (120V 60Hz). Use the attached power cord only.<br />
• If the polarized AC cord does not fit into a non-polarized AC<br />
outlet, do not attempt to file or cut the blade. It is the user’s<br />
responsibility to have an electrician replace the obsolete outlet.<br />
• If you cause a static discharge when touching the unit and the<br />
unit fails to function, simply unplug the unit from the AC outlet<br />
and plug it back in. The unit should return to normal operation.<br />
9<br />
2D80321A[E](06-09) 9<br />
9/6/04, 10:34
Basic connections<br />
Antenna to DVD/VCR connection<br />
The DVD/VCR must be connected “between” the antenna and<br />
the TV. First, disconnect the antenna from the TV and connect<br />
it to the DVD/VCR. Then connect the DVD/VCR to the TV.<br />
Below are 3 common methods of connecting an antenna system<br />
to a DVD/VCR. Find the type of antenna system you are<br />
using and follow the connection diagram.<br />
Example 1:<br />
Combination VHF/UHF antenna with 75 ohm<br />
coaxial cable<br />
DVD/VCR to TV connection<br />
After you have connected the antenna to the DVD/VCR, you<br />
must connect the DVD/VCR to the TV.<br />
Below are 3 common methods of connecting your DVD/VCR<br />
to a TV. Find the type of TV you are using and follow the connection<br />
diagram.<br />
This DVD/VCR has a single 75 ohm output for connection to a<br />
TV. If your TV has separate VHF and UHF antenna inputs (numbers<br />
2 and 3 below), use a splitter to connect the DVD/VCR to<br />
the TV for VHF and UHF reception.<br />
75 ohm coaxial<br />
cable<br />
IN<br />
(ANT)<br />
Example 1:<br />
TV with single 75 ohm VHF/UHF antenna<br />
input<br />
Example 2:<br />
Example 3:<br />
VHF<br />
Combination VHF/UHF antenna with 300 ohm<br />
twin lead (flat) wire<br />
300 ohm twin lead<br />
(flat) wire<br />
Separate VHF and UHF antennas<br />
UHF<br />
300 ohm twin<br />
lead (flat) wire<br />
75 ohm coaxial<br />
cable<br />
OUT<br />
(TV)<br />
DVD/VCR<br />
Matching transformer<br />
300 ohm input 75 ohm<br />
output (not supplied)<br />
IN<br />
(ANT)<br />
OUT<br />
(TV)<br />
DVD/VCR<br />
Combiner<br />
75/300 ohm inputs<br />
75 ohm output (not supplied)<br />
IN<br />
(ANT)<br />
OUT<br />
(TV)<br />
DVD/VCR<br />
Example 2:<br />
IN<br />
(ANT)<br />
OUT<br />
(TV)<br />
DVD/VCR<br />
Example 3:<br />
IN<br />
(ANT)<br />
OUT<br />
(TV)<br />
IN<br />
(ANT)<br />
OUT<br />
(TV)<br />
DVD/VCR<br />
75 ohm coaxial cable<br />
(supplied)<br />
75 ohm coaxial cable<br />
(supplied)<br />
75 ohm coaxial<br />
cable (supplied)<br />
TV with 300 ohm UHF and 75 ohm VHF<br />
antenna inputs<br />
Splitter 75 ohm input<br />
75/300 ohm outputs<br />
(not supplied)<br />
TV<br />
VHF/UHF<br />
IN (ANT)<br />
TV<br />
UHF<br />
VHF<br />
TV with 300 ohm UHF and 300 ohm VHF<br />
antenna inputs<br />
TV<br />
UHF<br />
VHF<br />
NOTE:<br />
If both VHF and UHF antennas have 300 ohm twin lead (flat)<br />
wires, use a combiner having two 300 ohm inputs and one 75<br />
ohm output.<br />
DVD/VCR<br />
Splitter 75 ohm input<br />
300 ohm output<br />
(not supplied)<br />
NOTES:<br />
• A clear picture will not be obtained by the main unit unless<br />
the antenna signal is good. Connect the antenna to the<br />
main unit properly.<br />
• For better quality recording, an indoor antenna or a<br />
telescopic antenna is not recommended. The use of an<br />
outdoor type antenna is required.<br />
• If you are not sure about the connection, please refer to<br />
qualified service personnel.<br />
NOTE:<br />
If a VHF or UHF antenna is used, set the TV/CABLE menu<br />
option to the “TV” mode.<br />
10<br />
2D80321A[E](10-17) 10<br />
9/6/04, 10:35
ENGLISH<br />
CABLE TV connections<br />
Many cable companies offer services permitting reception of extra channels including pay or subscription channels. This DVD/<br />
VCR has an extended tuning range and can be tuned to most cable channels without using a cable company supplied converter<br />
box, except for those channels which are intentionally scrambled. If you subscribe to a special channel which is scrambled, you<br />
must have a descrambler box for proper reception.<br />
Example 1:<br />
DVD/VCR<br />
TV<br />
Incoming Cable<br />
IN<br />
(ANT)<br />
OUT<br />
(TV)<br />
VHF/UHF<br />
IN (ANT)<br />
ALLOWS: * Recording of nonscrambled channels.<br />
* Use of the programmable timer.<br />
* Recording of one channel while watching another.<br />
Example 2:<br />
DVD/VCR<br />
Converter/<br />
Descrambler<br />
TV<br />
Incoming<br />
Cable<br />
IN<br />
(ANT)<br />
OUT<br />
(TV)<br />
VHF/UHF<br />
IN (ANT)<br />
ALLOWS: * Recording of channels through the converter box<br />
(scrambled and unscrambled).<br />
* Using the programmable timer to record only the<br />
channel selected at the converter box.<br />
PREVENTS: * Recording one channel while watching another.<br />
* Using the DVD/VCR tuner to select channels.<br />
NOTE:<br />
To record from converter/descrambler, DVD/<br />
VCR tuner must be tuned to the converter<br />
output channel, usually channel 3 or 4.<br />
Example 3:<br />
DVD/VCR<br />
TV<br />
Incoming Cable<br />
IN<br />
(ANT)<br />
OUT<br />
(TV)<br />
Converter/Descrambler<br />
VHF/UHF<br />
IN (ANT)<br />
ALLOWS: * Recording of nonscrambled channels.<br />
* Use of the programmable timer.<br />
* Recording an unscrambled channel while watching any<br />
channel selected at the converter box.<br />
PREVENTS: Recording scrambled channels.<br />
NOTE:<br />
If you are playing a tape or using the tuner<br />
built into the DVD/VCR, the converter must<br />
be set to the video channel output of the DVD/<br />
VCR (either 3 or 4).<br />
NOTE:<br />
Whenever a Converter/Descrambler box is placed before the DVD/VCR, you must tune the DVD/VCR to the output<br />
of the Converter/Descrambler box, usually channel 3 or 4.<br />
11<br />
2D80321A[E](10-17) 11<br />
9/6/04, 10:35
Playback connection<br />
If you look at the back of your <strong>Electrohome</strong> DVD/VCR, you will notice a variety of connectors. The way in which you<br />
connect your DVD/VCR and the kinds of cabling you choose, can make a noticeable difference in the quality of the<br />
picture and sound that you will experience.<br />
We recommend that you connect your <strong>Electrohome</strong> DVD/VCR to take advantage of the highest quality supported by your<br />
equipment. To do this, you will need to examine your electronic equipment to determine what type of connectors and<br />
cables you will require and which wiring setup to use. To accomplish this, please do the following:<br />
1.Look on the back of each piece of equipment that you are planning to connect your <strong>Electrohome</strong> DVD/VCR to and note<br />
the types of connectors on each component.<br />
NOTES:<br />
-The Audio connectors of your <strong>Electrohome</strong> DVD/VCR can be connected directly to your television or home stereo. The<br />
Video connectors of your <strong>Electrohome</strong> DVD/VCR can be connected directly to your television or home stereo provided it<br />
offers a Video connection. You may encounter playback difficulties if the connection is made via a secondary VCR due to<br />
copyright limitations. This is normal.<br />
-If you have additional Audio or Video components, or do not have all of the components that are mentioned, you may<br />
have to adjust the wiring accordingly.<br />
2. Compare the types of connectors on your equipment to the chart below to determine the highest quality connection for<br />
both Audio and Video. If you are connecting this DVD/VCR only to a television that only has basic UHF/VHF connectors,<br />
refer back to page 10.<br />
VIDEO<br />
CONNECTIONS<br />
AUDIO<br />
CONNECTIONS<br />
GOOD<br />
COMPOSITE<br />
VIDEO<br />
Yellow<br />
BETTER<br />
RCA AUDIO<br />
White<br />
Red<br />
BETTER<br />
S-VIDEO<br />
BEST*<br />
DIGITAL COAX<br />
Orange<br />
BEST<br />
COMPONENT<br />
VIDEO<br />
Red<br />
Green<br />
Blue<br />
BEST*<br />
OPTICAL<br />
*If your A/V equipment supports either Optical or Digital Coax connections, you will be able to achieve Dolby Digital and<br />
DTS sound for DVD.<br />
Both connection types are of equal quality and offer no real advantage over one another. You need only connect one or<br />
the other to achieve the best possible sound quality.<br />
NOTES:<br />
-Dolby Digital and DTS are only available when this DVD/VCR is connected using an Optical or Digital Coax cable to a<br />
Dolby Digital/DTS receiver.<br />
-Do not substitute a Video cable with an Audio cable. Do not substitute a Component Video cable with an Audio/Video<br />
cable. Although these types of cables do look alike, the actual wires inside the cable in which the signal passes along are<br />
very different. Substituting cables will result in poor picture and sound quality and could damage your equipment. Consult<br />
the chart above for typical cable colouring.<br />
After reviewing the charts above, you should be aware of the best way to connect your <strong>Electrohome</strong> DVD/VCR to your<br />
electronic equipment. You are now able to proceed to the according wiring configuration to complete the installation of<br />
your <strong>Electrohome</strong> DVD/VCR. See the chart below to determine which page and diagram to skip to, to continue setup.<br />
VIDEO<br />
CONNECTIONS<br />
COMPOSITE<br />
GOOD<br />
VIDEO<br />
BETTER S-VIDEO<br />
COMPONENT<br />
BEST<br />
VIDEO<br />
AUDIO<br />
CONNECTIONS<br />
Pg13<br />
figures1 & 2<br />
Pg15<br />
figure 5<br />
Pg16<br />
figure 8<br />
RCA AUDIO BETTER<br />
Pg14<br />
figure 3<br />
Pg15<br />
figure 6<br />
Pg17<br />
figure 9<br />
DIGITAL COAX BEST<br />
Pg14<br />
figure 4<br />
Pg16<br />
figure 7<br />
Pg17<br />
figure 10<br />
OPTICAL BEST<br />
COMPONENT VIDEO and S-VIDEO connectors are for the DVD only. For VCR playback, you must have either a UHF/<br />
VHF or COMPOSITE VIDEO (yellow) connection.<br />
OPTICAL, DIGITAL COAX and DVD RCA (Red & White) audio connectors are for the DVD only. For VCR playback, you<br />
must have either a UHF/VHF or DVD/VCR RCA AUDIO (Red & White) connection.<br />
12<br />
2D80321A[E](10-17) 12<br />
9/6/04, 10:35
ENGLISH<br />
Connecting the <strong>Electrohome</strong> <strong>EH8008PB</strong> using A/V<br />
(red, white and yellow) cables (supplied)<br />
For the VCR portion of this combination unit to be properly connected, you must use either a UHF/VHF or A/V<br />
connection. If the highest quality connectors of your other electronic components are RCA AUDIO and COMPOSITE<br />
VIDEO, use the following connection for both the VCR and DVD portions of the <strong>EH8008PB</strong>. If you are only connecting<br />
your DVD/VCR to a television, see figure 1. If you are connecting your DVD/VCR to a television and a home stereo,<br />
see figure 2.<br />
DVD/VCR<br />
Figure 1<br />
Red<br />
White<br />
Yellow<br />
Yellow<br />
White<br />
Red<br />
VIDEO<br />
AUDIO<br />
IN<br />
IN<br />
TELEVISION<br />
If your TV only has one input connection for this type of audio, connect it to the Red portion of the audio jacks on the<br />
DVD/VCR.<br />
DVD/VCR<br />
Figure 2<br />
Yellow<br />
White<br />
Red<br />
White<br />
Red<br />
Yellow<br />
AUDIO<br />
VIDEO<br />
AUDIO<br />
IN<br />
IN<br />
IN<br />
HOME STEREO<br />
TELEVISION<br />
INPUT SELECTION<br />
For your Audio/Video components to recognize this connection, you must enter the menu of each device and set the proper<br />
input. For instructions on how to set the proper input selection for your other A/V components, refer to the owner’s manual of<br />
the connected equipment.<br />
13<br />
2D80321A[E](10-17) 13<br />
9/6/04, 10:35
Connecting the DVD portion of the <strong>Electrohome</strong> <strong>EH8008PB</strong> using<br />
composite video (yellow) and digital coax (orange) cables<br />
If your Audio/Video equipment does not support S-Video or Component Video connections, Composite Video (Yellow) cables<br />
should be used to connect the DVDs Video signal.<br />
If your stereo system supports Optical or Digital Coax connectors, either one should be used to connect the DVD players<br />
Audio signal. Below illustrates the correct hook-up using a Digital Coax cable connection.<br />
DVD/VCR<br />
Figure 3<br />
Yellow<br />
Orange<br />
Orange<br />
Yellow<br />
DIGITAL<br />
AUDIO<br />
VIDEO<br />
AUDIO<br />
HOME STEREO<br />
TELEVISION<br />
INPUT SELECTION<br />
For your Audio/Video components to recognize this connection, you must enter the menu of each device and set the proper<br />
input. For instructions on how to set the proper input selection for your other A/V components, refer to the owner’s manual of<br />
the connected equipment.<br />
Connecting the DVD portion of the <strong>Electrohome</strong> <strong>EH8008PB</strong> using<br />
composite video (yellow) and optical cables<br />
If your Audio/Video equipment does not support S-Video or Component Video connections, Composite Video (Yellow) cables<br />
should be used to connect the DVDs Video signal.<br />
If your stereo system supports Optical or Digital Coax connectors, either one should be used to connect the DVD players<br />
Audio signal. Below illustrates the correct hook-up using an Optical cable connection.<br />
Figure 4<br />
COAX<br />
IN<br />
DVD/VCR<br />
IN<br />
IN<br />
Yellow<br />
Yellow<br />
VIDEO<br />
AUDIO<br />
AUDIO<br />
TELEVISION<br />
HOME STEREO<br />
INPUT SELECTION<br />
For your Audio/Video components to recognize this connection, you must enter the menu of each device and set the proper<br />
input. For instructions on how to set the proper input selection for your other A/V components, refer to the owner’s manual of<br />
the connected equipment.<br />
14<br />
IN<br />
IN<br />
OPTICAL<br />
IN<br />
2D80321A[E](10-17) 14<br />
9/6/04, 10:35
ENGLISH<br />
Connecting the DVD portion of the <strong>Electrohome</strong> <strong>EH8008PB</strong> using<br />
s-video and rca audio (red & white) cables<br />
S-Video, also known as Super-Video or SVHS, provides superior quality picture over traditional Composite Video connections.<br />
You should use this type of connection for Video if your television supports it and does not support Component Video. If<br />
your television supports this connection as many newer televisions do, you must still connect audio cables as S-Video<br />
connections carry only the Video signal.<br />
If your A/V equipment does not support either Optical or Digital Coax connections, use RCA Audio (Red and White) cables to<br />
connect the DVD players Audio signal.<br />
DVD/VCR<br />
Figure 5<br />
Red<br />
White<br />
White<br />
Red<br />
AUDIO<br />
TELEVISION<br />
S-VIDEO<br />
NOTES:<br />
• When you make this connection, set the COMPONENT/S-VIDEO selector switch to S-VIDEO position.<br />
• When connecting to a TV using the VIDEO or S-VIDEO jack, make sure that the PROGRESSIVE indicator on the display<br />
window is not lit. If it is lit, the VIDEO and S-VIDEO outputs do not feed the correct signals and you cannot see any picture. To<br />
turn off the PROGRESSIVE indicator, make the Progressive scanning mode inactive (see page 34).<br />
INPUT SELECTION<br />
For your Audio/Video components to recognize this connection, you must enter the menu of each device and set the proper<br />
input. For instructions on how to set the proper input selection for your other A/V components, refer to the owner’s manual of<br />
the connected equipment.<br />
Connecting the DVD portion of the <strong>Electrohome</strong> <strong>EH8008PB</strong> using<br />
s-video and digital coax (orange) cables<br />
S-Video, also known as Super-Video or SVHS, provides superior quality picture over traditional Composite Video connections.<br />
You should use this type of connection for Video if your television supports it and does not support Component Video. If your<br />
television supports this connection as many newer televisions do, you must still connect audio cables as S-Video connections<br />
carry only the Video signal.<br />
If your stereo system supports Optical or Digital Coax connectors, either one should be used to connect the DVD players Audio<br />
signal. Below illustrates the correct hook-up using a DIGITAL COAX cable connection.<br />
Figure 6<br />
DVD/VCR<br />
IN<br />
HOME STEREO OR TELEVISION<br />
Orange<br />
Orange<br />
DIGITAL<br />
AUDIO<br />
TELEVISION<br />
S-VIDEO<br />
NOTES:<br />
• When you make this connection, set the COMPONENT/S-VIDEO selector switch to S-VIDEO position.<br />
• When connecting to a TV using the VIDEO or S-VIDEO jack, make sure that the PROGRESSIVE indicator on the display<br />
window is not lit. If it is lit, the VIDEO and S-VIDEO outputs do not feed the correct signals and you cannot see any picture. To<br />
turn off the PROGRESSIVE indicator, make the Progressive scanning mode inactive (see page 34).<br />
INPUT SELECTION<br />
For your Audio/Video components to recognize this connection, you must enter the menu of each device and set the proper<br />
input. For instructions on how to set the proper input selection for your other A/V components, refer to the owner’s manual of<br />
the connected equipment.<br />
COAX<br />
IN<br />
HOME STEREO<br />
15<br />
2D80321A[E](10-17) 15<br />
9/6/04, 10:35
Connecting the DVD portion of the <strong>Electrohome</strong> <strong>EH8008PB</strong><br />
using s-video and optical cables<br />
S-Video, also known as Super-Video or SVHS, provides superior quality picture over traditional Composite Video connections.<br />
You should use this type of connection for Video if your television supports it and does not support Component Video. If<br />
your television supports this connection as many newer televisions do, you must still connect audio cables as S-Video<br />
connections carry only the Video signal.<br />
If your stereo system supports Optical or Digital Coax connectors, either one should be used to connect the DVD players<br />
Audio signal. Below illustrates the correct hook-up using an OPTICAL cable connection.<br />
DVD/VCR<br />
Figure 7<br />
AUDIO<br />
TELEVISION<br />
NOTES:<br />
• When you make this connection, set the COMPONENT/S-VIDEO selector switch to S-VIDEO position.<br />
• When connecting to a TV using the VIDEO or S-VIDEO jack, make sure that the PROGRESSIVE indicator on the display<br />
window is not lit. If it is lit, the VIDEO and S-VIDEO outputs do not feed the correct signals and you cannot see any picture. To<br />
turn off the PROGRESSIVE indicator, make the Progressive scanning mode inactive (see page 34).<br />
INPUT SELECTION<br />
For your Audio/Video components to recognize this connection, you must enter the menu of each device and set the proper<br />
input. For instructions on how to set the proper input selection for your other A/V components, refer to the owner’s manual of<br />
the connected equipment.<br />
Connecting the DVD portion of the <strong>Electrohome</strong> <strong>EH8008PB</strong><br />
using component video and rca audio (red & white) cables<br />
Component Video connections offer the best quality picture available. If your A/V equipment supports this type of connection,<br />
it is highly recommended that this connection be utilized. You must still connect an audio cable as well, as Component<br />
Video cables are “video-only” connectors.<br />
If your A/V equipment does not support either Optical or Digital Coax connections, use RCA Audio (Red and White) cables<br />
to connect the DVD players Audio signal.<br />
DVD/VCR<br />
Figure 8<br />
S-VIDEO<br />
OPTICAL<br />
IN<br />
HOME STEREO<br />
Green<br />
Blue<br />
Red<br />
Red<br />
White<br />
Red<br />
Green<br />
Blue<br />
White<br />
Red<br />
AUDIO<br />
NOTE:<br />
When you make this connection, set the COMPONENT/S-VIDEO selector switch to COMPONENT position.<br />
INPUT SELECTION<br />
For your Audio/Video components to recognize this connection, you must enter the menu of each device and set the proper<br />
input. For instructions on how to set the proper input selection for your other A/V components, refer to the owner’s manual of<br />
the connected equipment.<br />
16<br />
TELEVISION<br />
Y Pb Pr<br />
IN<br />
HOME STEREO OR TELEVISION<br />
2D80321A[E](10-17) 16<br />
9/6/04, 10:35
ENGLISH<br />
Connecting the DVD portion of the <strong>Electrohome</strong> <strong>EH8008PB</strong><br />
using component video and digital coax (orange) cables<br />
Component Video connections offer the best quality picture available. If your A/V equipment supports this type of connection,<br />
it is highly recommended that this connection be utilized. You must still connect an audio cable as well, as Component Video<br />
cables are “video-only” connectors.<br />
If your stereo system supports Optical or Digital Coax connectors, either one should be used to connect the DVD players<br />
Audio signal. Below illustrates the correct hook-up using a DIGITAL COAX cable connection.<br />
DVD/VCR<br />
Figure 9<br />
Green<br />
Red<br />
Blue<br />
Orange<br />
Red<br />
Green<br />
Blue<br />
Orange<br />
DIGITAL<br />
AUDIO<br />
TELEVISION<br />
NOTE:<br />
When you make this connection, set the COMPONENT/S-VIDEO selector switch to COMPONENT position.<br />
Y Pb Pr<br />
INPUT SELECTION<br />
For your Audio/Video components to recognize this connection, you must enter the menu of each device and set the proper<br />
input. For instructions on how to set the proper input selection for your other A/V components, refer to the owner’s manual of<br />
the connected equipment.<br />
Connecting the DVD portion of the <strong>Electrohome</strong> <strong>EH8008PB</strong><br />
using component video and optical cables<br />
Component Video connections offer the best quality picture available. If your A/V equipment supports this type of connection, it is highly<br />
recommended that this connection be utilized. You must still connect an audio cable as well, as Component Video cables are<br />
“video-only” connectors.<br />
If your stereo system supports Optical or Digital Coax connectors, either one should be used to connect the DVD players Audio<br />
signal. Below illustrates the correct hook-up using an OPTICAL cable connection.<br />
DVD/VCR<br />
Figure 10<br />
COAX<br />
IN<br />
HOME STEREO<br />
Green<br />
Red<br />
Blue<br />
Red<br />
Green<br />
Blue<br />
AUDIO<br />
TELEVISION<br />
NOTE:<br />
When you make this connection, set the COMPONENT/S-VIDEO selector switch to COMPONENT position.<br />
Y Pb Pr<br />
INPUT SELECTION<br />
For your Audio/Video components to recognize this connection, you must enter the menu of each device and set the proper<br />
input. For instructions on how to set the proper input selection for your other A/V components, refer to the owner’s manual of<br />
the connected equipment.<br />
OPTICAL<br />
IN<br />
HOME STEREO<br />
17<br />
2D80321A[E](10-17) 17<br />
9/6/04, 10:35
Setting up the VCR section<br />
Setting the video channel<br />
To view playback of a recorded tape or DVD disc, or to<br />
watch a program selected by the VCR's channel<br />
selector, the TV must be set to channel 3 or 4 (video<br />
channel).<br />
When a TV is connected with the 75 ohm coaxial cable only.<br />
1 Press and hold 3 or 4 on the<br />
remote control for 3 seconds<br />
in the standby mode to select<br />
CH 3 or 4. The selected channel<br />
number will flash on the display for about 4 seconds.<br />
2 Turn ON the TV and set to CH 3 or 4 to correspond with<br />
the channel selected in step 1.<br />
3 Press POWER to turn on the DVD/VCR.<br />
4 Press VCR/DVD to select the VCR mode. The VCR<br />
indicator on the front panel will light.<br />
5 Press TV/VCR to select the VCR position.<br />
The VCR indicator will appear in the display.<br />
6 Select any channel to receive a TV station in your area.<br />
The channel number will appear on the screen for about<br />
4 seconds.<br />
For a push-button TV tuner<br />
If CH 3 or 4 corresponding to the video channel cannot be<br />
tuned on your TV, proceed as follows: set the VCR 3/4<br />
channel selector and the TV to CH 3 or 4, play back a<br />
prerecorded tape and tune the TV to receive a sharp color<br />
picture from the video cassette recorder. Refer to your TV<br />
owner's manual for details.<br />
NOTES:<br />
• When shipped from factory, the video channel is set to<br />
CH 3.<br />
• If the unit does not operate properly, or No key operation<br />
(by the unit and/or the remote control): Static electricity,<br />
etc., may affect the player's operation. Disconnect the<br />
AC power cord once, then connect it again.<br />
Setting the language<br />
You can choose from three different languages<br />
(English, French and Spanish) for the on-screen displays.<br />
1 Press VCR MENU.<br />
The VCR menu screen<br />
will appear. Press SET +<br />
or – to select the “SYS-<br />
TEM SETUP” menu, then<br />
press ENTER.<br />
If you use the unit for the<br />
first time and press VCR<br />
MENU<br />
TIMER REC SET<br />
AUTO REPEAT ON OFF<br />
SAP<br />
CH SETUP<br />
SYSTEM SETUP<br />
ON OFF<br />
〈+/-/ENTER/MENU〉<br />
MENU, instead of the main menu screen on the right the<br />
“SYSTEM SETUP” menu screen in step 2 may appear.<br />
2 Press SET + or – to select<br />
the “LANGUAGE” option,<br />
then press ENTER.<br />
3 Press SET + or – to select<br />
the desired language: English<br />
(ENGLISH), Spanish<br />
(ESPAÑOL) or French<br />
(FRANCAIS), then press<br />
ENTER.<br />
SYSTEM SETUP<br />
CLOCK SET<br />
LANGUAGE/IDIOMA/LANGUE<br />
NO NOISE BACKGROUND<br />
ON OFF<br />
AUTO CLOCK<br />
STANDARD TIME<br />
ON OFF<br />
DAYLIGHT SAVING TIME<br />
〈+/-/ENTER/MENU〉<br />
4 Press VCR MENU until the menu screen is cleared.<br />
NOTES:<br />
• Both the VCR and the DVD have their own menu option<br />
(See page 27).<br />
• If no buttons are pressed for more than 60 seconds, the<br />
MENU screen will return to normal TV-operation automatically.<br />
18<br />
2D80321A[E](18-21) 18<br />
9/6/04, 10:35
ENGLISH<br />
Auto clock setting<br />
The Auto Clock function will automatically set the builtin<br />
clock (Month, Day, Year and Time) when the DVD/<br />
VCR is connected to an Antenna or Cable system and it<br />
is turned off. As the DVD/VCR searches for a receivable<br />
station in your area and it receives a broadcast signal<br />
for Auto Clock, the Auto Clock needs several minutes<br />
to set itself.<br />
1 Connect the Antenna or Cable system.<br />
• If you use a cable box, turn it on.<br />
2 Plug the AC Power cord to the AC outlet.<br />
3 Make sure the DVD/VCR is turned off.<br />
• If you press POWER, the Auto Clock set is not effective.<br />
4 Wait at least three minutes and press POWER.<br />
5 Press DISPLAY to check the clock on the screen.<br />
6 If the clock is not set, check the Antenna condition. The<br />
Auto Clock may not function properly if the reception condition<br />
is not good.<br />
Auto clock adjustment<br />
The Auto Clock Adjustment will be performed at 12:00 PM<br />
everyday if you turn off the DVD/VCR.<br />
• If you use a cable box and you want Auto Clock adjustment<br />
to be performed, the cable box must be left on.<br />
• The Auto Clock Adjustment is not effective when there is<br />
a difference of more than 5 minutes exists between the<br />
built-in clock time and the actual time.<br />
To set auto clock to off<br />
When shipped from factory the “AUTO CLOCK” option is set<br />
to “ON”.<br />
But if you do not want Auto Clock set (Adjustment):<br />
1 Turn on the DVD/VCR.<br />
2 Press VCR MENU.<br />
3 Press SET + or – to select the “SYSTEM SETUP”<br />
option, then press ENTER.<br />
4 Press SET + or – to select the “AUTO CLOCK” option.<br />
5 Press ENTER to select “OFF”.<br />
6 Press VCR MENU repeatedly to return to the normal<br />
screen.<br />
• When the “AUTO CLOCK” is set to “OFF”, the Auto Clock<br />
adjustment does not function.<br />
• Set the clock manually (see page 20).<br />
To set standard time<br />
In the rare event that you live within broadcast range of two<br />
stations in two different time zones, the DVD/VCR may<br />
recognize the wrong station for the Auto Clock set.<br />
To correct the situation:<br />
1 Press VCR MENU.<br />
2 Press SET + or – to select the “SYSTEM SETUP”<br />
option, then press ENTER.<br />
3 Press SET + or – to select the “STANDARD TIME”<br />
option, then press ENTER.<br />
4 Press SET + or – to select your time zone, then press<br />
ENTER.<br />
ATLANTIC : GMT – 4 hours<br />
(GMT: Greenwich Mean Time)<br />
EASTERN : GMT – 5 hours<br />
CENTRAL : GMT – 6 hours<br />
MOUNTAIN : GMT – 7 hours<br />
PACIFIC : GMT – 8 hours<br />
ALASKA : GMT – 9 hours<br />
HAWAII : GMT – 10 hours<br />
AUTO : AUTO SET<br />
5 Press VCR MENU twice to return to the normal screen.<br />
NOTES:<br />
• To be able to select the standard time, the clock must first<br />
be set by “AUTO CLOCK” once.<br />
• If you live in Newfoundland and the Auto Clock does not<br />
function properly, set the “AUTO CLOCK” menu option to<br />
“OFF” and set the clock manually.<br />
Daylight saving time setting<br />
You can set the Daylight saving time automatically or<br />
manually.<br />
1 Press VCR MENU. Press SET +<br />
or – to select the “SYSTEM<br />
SETUP” option, then press<br />
ENTER.<br />
2 Press SET + or – to select the<br />
“DAYLIGHT SAVING TIME”<br />
option, then press ENTER.<br />
3 Press SET + or – to select one of<br />
the options, then press ENTER.<br />
Press VCR MENU until the menu<br />
screen is cleared.<br />
ON: for manual setting<br />
(forward one hour)<br />
OFF: for manual setting<br />
(back one hour)<br />
AUTO: for automatic setting<br />
(read XDS in the signal)<br />
MENU<br />
TIMER REC SET<br />
AUTO REPEAT ON OFF<br />
SAP<br />
CH SETUP<br />
SYSTEM SETUP<br />
ON OFF<br />
〈+/-/ENTER/MENU〉<br />
SYSTEM SETUP<br />
CLOCK SET<br />
LANGUAGE/IDIOMA/LANGUE<br />
NO NOISE BACKGROUND<br />
ON OFF<br />
AUTO CLOCK<br />
STANDARD TIME<br />
ON OFF<br />
DAYLIGHT SAVING TIME<br />
〈+/-/ENTER/MENU〉<br />
DAYLIGHT SAVING TIME<br />
á+/-/ENTER/MENUñ<br />
When you want to set the Daylight Saving Time manually, on<br />
the first Sunday in April you set to “ON”, and on the last Sunday<br />
in October you set to “OFF”.<br />
NOTES:<br />
• When shipped from factory, the “DAYLIGHT SAVING<br />
TIME” option is set to “AUTO” position.<br />
• When the clock is not set, Daylight Saving Time setting is<br />
not available.<br />
• When there is no Daylight Saving Time in your area, always<br />
select “OFF” position in step 3.<br />
ON<br />
OFF<br />
AUTO<br />
19<br />
2D80321A[E](18-21) 19<br />
9/6/04, 10:35
Manual clock setting<br />
EXAMPLE: Setting the clock to “8:30 AM”, 30th (SAT)<br />
October, 2004.<br />
1 Press VCR MENU.<br />
Press SET + or – to select the<br />
“SYSTEM SETUP” option, then<br />
press ENTER.<br />
2 Press SET + or – to select the<br />
“CLOCK SET” option, then press<br />
ENTER.<br />
3 Press SET + or – to set the month,<br />
then press ENTER.<br />
4 Set the day, year and time as in<br />
step 3.<br />
After setting the clock, date and time<br />
starts functioning automatically.<br />
NOTES:<br />
• After a power failure or disconnection of the power plug,<br />
the time display will be lost. In this case, set the present<br />
time again if the Auto Clock did not set correctly.<br />
• You must set the date and time manually for Timer<br />
Recordings, ON/OFF Timer and Daylight Saving Time if the<br />
Auto Clock process did not set them correctly.<br />
• To move cursor backward, press CANCEL.<br />
Tuner setting<br />
This DVD/VCR is equipped with a channel memory<br />
feature which allows channels to skip up or down to the<br />
next channel set into memory, skipping over unwanted<br />
channels. Before selecting channels, they must be<br />
programmed into the DVD/VCR’s memory. In addition to<br />
normal VHF and UHF channels, this DVD/VCR can<br />
receive up to 113 Cable TV channels. To use this DVD/<br />
VCR with an antenna, set the TV/CABLE menu option to<br />
the TV mode. When shipped from the factory, this menu<br />
option is in the CABLE mode.<br />
TV/CABLE selection<br />
1 Press VCR MENU.<br />
Press SET + or – to select the “CH<br />
SETUP” mode, then press ENTER.<br />
MENU<br />
TIMER REC SET<br />
AUTO REPEAT ON OFF<br />
SAP<br />
CH SETUP<br />
SYSTEM SETUP<br />
ON OFF<br />
〈+/-/ENTER/MENU〉<br />
SYSTEM SETUP<br />
CLOCK SET<br />
LANGUAGE/IDIOMA/LANGUE<br />
NO NOISE BACKGROUND<br />
ON OFF<br />
AUTO CLOCK<br />
STANDARD TIME<br />
ON OFF<br />
DAYLIGHT SAVING TIME<br />
〈+/-/ENTER/MENU〉<br />
MONTH<br />
DAY<br />
YEAR<br />
TIME<br />
〈+/-/ENTER/CANCEL/MENU〉<br />
MENU<br />
10<br />
30 (SAT)<br />
2004<br />
8 : 30 AM<br />
TIMER REC SET<br />
AUTO REPEAT ON OFF<br />
SAP<br />
ON OFF<br />
CH SETUP<br />
SYSTEM SETUP<br />
Automatic memory tuning<br />
The VCR can receive a maximum of 181 channels by<br />
presetting the channels into memory.<br />
1 In the “CH SETUP” menu, press<br />
SET + or – to select “AUTO CH<br />
MEMORY”, then press ENTER.<br />
2 The DVD/VCR will begin memorizing all the channels<br />
available in your area.<br />
To add/delete channels<br />
1 Press VCR MENU.<br />
Press SET + or – to select the<br />
“CH SETUP” mode, then press<br />
ENTER.<br />
2 Press SET + or – to select the<br />
“ADD/DELETE” mode, then press<br />
ENTER.<br />
3 Select the desired channel to be<br />
memorized or deleted using SET<br />
+ or – button, or using Number<br />
keys.<br />
4 Press ENTER to select the “ADD” or “DELETE”.<br />
5 Press VCR MENU until the menu screen is cleared.<br />
Noise elimination<br />
When you don't want to receive a weak signal broadcast,<br />
the Blue back screen can be obtained by selecting<br />
the NO NOISE BACKGROUND “ON”. When the unit is<br />
shipped from the factory, the NO NOISE BACKGROUND<br />
is set to the “ON”.<br />
1 In the “SYSTEM SETUP” menu,<br />
press SET + or – to select “ NO<br />
NOISE BACKGROUND”.<br />
2 Press ENTER to select the “ON”<br />
position.<br />
CH SETUP<br />
TV CABLE<br />
AUTO CH MEMORY<br />
ADD/DELETE<br />
〈+/-/ENTER/MENU〉<br />
You can add the channels you want or delete the channels<br />
you do not want manualy.<br />
CH SETUP<br />
TV CABLE<br />
AUTO CH MEMORY<br />
ADD/DELETE<br />
〈+/-/ENTER/MENU〉<br />
SYSTEM SETUP<br />
CLOCK SET<br />
LANGUAGE/IDIOMA/LANGUE<br />
NO NOISE BACKGROUND<br />
ON OFF<br />
AUTO CLOCK<br />
STANDARD TIME<br />
ON OFF<br />
DAYLIGHT SAVING TIME<br />
〈+/-/ENTER/MENU〉<br />
3 Press VCR MENU until the menu screen is cleared.<br />
ADD<br />
〈+/-/0-9/ENTER/MENU〉<br />
CH 003<br />
á+/-/ENTER/MENUñ<br />
2 Press SET + or – to select the<br />
TV/CABLE mode.<br />
3 Press ENTER to select the TV or<br />
CABLEmode.<br />
The arrow indicates the selected<br />
mode.<br />
TV - VHF/UHF channels<br />
CABLE - CABLE TV channels<br />
20<br />
CH SETUP<br />
TV CABLE<br />
AUTO CH MEMORY<br />
ADD/DELETE<br />
〈+/-/ENTER/MENU〉<br />
4 Press VCR MENU until the menu screen is cleared.<br />
2D80321A[E](18-21) 20<br />
9/6/04, 10:35
ENGLISH<br />
Tape playback operation<br />
Loading and Unloading a cassette tape Cassette tape playback<br />
Use only video cassette tapes marked .<br />
Loading<br />
Push the center of the tape until it is automatically retracted<br />
into the unit.<br />
Load a prerecorded tape (When loading a cassette tape<br />
without the erase prevention tab, playback will start automatically).<br />
To start playback<br />
Automatic power on and play<br />
When loading a cassette tape without the erase prevention<br />
tab intact, the unit will turn on automatically and playback will<br />
start immediately.<br />
Press PLAY to begin playback. “<br />
To stop playback<br />
” will appear on the screen.<br />
Insert the cassette with its labeled side facing you.<br />
An inverted video cassette cannot be inserted.<br />
Unloading<br />
To unload a video cassette, press EJECT on the remote<br />
control, or press 5 (EJECT) on the unit.<br />
Automatic eject<br />
If the unit automatically rewinds the tape to the<br />
beginning (AUTO REWIND FEATURE), the tape will<br />
be ejected automatically.<br />
To prevent accidental erasure<br />
After recording, break off the erase prevention tab if you do<br />
not wish to record over the tape.<br />
Screwdriver<br />
Press STOP once. The tape will stop, but remain fully loaded<br />
and ready to play. “ ” will appear on the screen.<br />
NOTES:<br />
• This unit selects the playback tape speed SP, LP or SLP<br />
automatically.<br />
• The Cassette tape and DVD disc can be played back simultaneously.<br />
If you press VCR/DVD, the tape playback and<br />
DVD playback alternate with each other on the screen.<br />
To rewind or forward the tape rapidly<br />
Press REW or F.FWD in the Stop mode.<br />
“ ” or “ ” will appear on the screen.<br />
FORWARD/REVERSE PICTURE SEARCH<br />
If you want to see the tape during REW or FWD mode, press<br />
and hold the REW or F.FWD. The backward or forward<br />
visual search picture will be seen on the screen. Release to<br />
return to the REW or FWD mode.<br />
Special playback<br />
Erase prevention tab<br />
To record again<br />
Cover the hole with adhesive tape.<br />
Be careful the tape does not extend past the edges of the<br />
video cassette housing.<br />
Adhesive tape<br />
Tape Speed<br />
Video cassette tape<br />
T-160 T-120 T-60<br />
SP (Standard Play) 2-2/3 hours 2 hours 1 hour<br />
SLP (Super Long Play) 8 hours 6 hours 3 hours<br />
Picture Search<br />
Reverse picture search function<br />
Press REW x 1 or x 2 during the playback.<br />
Forward picture search function<br />
Press F.FWD x 1 or x 2 during the playback.<br />
To return to playback: Press PLAY.<br />
TAPE SPEED<br />
SP (Standard Play)<br />
LP (Long Play)<br />
SLP (Super Long Play)<br />
SPEED SEARCH TIMES<br />
PICTURE SEARCH SPEED<br />
PRESS ONCE<br />
3 X<br />
7 X<br />
9 X<br />
PRESS TWICE<br />
5 X<br />
9 X<br />
15 X<br />
Still Picture<br />
Press PAUSE during playback. To resume normal playback,<br />
press PLAY.<br />
21<br />
2D80321A[E](18-21) 21<br />
9/6/04, 10:35
Slow Motion<br />
During playback press SLOW.<br />
To return to playback, press PLAY or SLOW.<br />
Slow tracking and vertical lock adjustment<br />
If noise bars appear in the picture during slow motion, press<br />
the TRK + or – to reduce the noise bars.<br />
If the still picture jitters excessively, press TRK + or – to<br />
stabilize the still picture.<br />
Frame by Frame picture<br />
Press PAUSE during playback.<br />
Press SLOW one by one. The picture advances frame by<br />
frame.<br />
To return to playback, press PLAY or PAUSE.<br />
Adjusting tracking condition<br />
Automatic tracking adjustment<br />
Whenever you insert a tape and start playback, automatic<br />
tracking starts working and continuously analyzes the signal<br />
to enable optimum picture quality during playback.<br />
Manual tracking adjustment<br />
If automatic tracking cannot eliminate noises well during<br />
playback, press TRK +/– to eliminate the noises.<br />
“MANUAL TR.” will appear. Press it briefly for a fine adjustment,<br />
or press and hold for a coarse adjustment.<br />
• Press ATR to reactivate automatic tracking again.<br />
“AUTO TR.” will appear.<br />
Repeat playback<br />
The entire video tape will be played until its end. The tape will<br />
then automatically rewind to the beginning and the playback<br />
will be repeated.<br />
1 Press VCR MENU. Press SET + or – to select “AUTO<br />
REPEAT”.<br />
2 Press ENTER to select<br />
MENU<br />
“ON” or “OFF”.<br />
TIMER REC SET<br />
AUTO REPEAT ON OFF<br />
If “ON” is selected, the playback<br />
will be repeated end-<br />
SAP<br />
ON OFF<br />
CH SETUP<br />
SYSTEM SETUP<br />
lessly.<br />
3 Press VCR MENU until the menu screen is cleared.<br />
if you press DISPLAY, “ ” will appear on the screen.<br />
4 To start the playback, press PLAY.<br />
The playback will be repeated endlessly.<br />
To cancel repeat mode:<br />
Follow the above step 1, then press ENTER to select the<br />
“OFF” position. Press VCR MENU to return to the TV.<br />
NOTES:<br />
• The audio output is muted during SPEED SEARCH, STILL,<br />
FRAME ADVANCE and SLOW MOTION.<br />
• During picture search mode there will be noise bars which are<br />
caused by the system.<br />
• The Special Playback will automatically change to playback<br />
after approx. 5 minutes to protect the video tape against<br />
excessive wear.<br />
This function makes tape-rewinding stop at the counter<br />
00:00:00 position automatically.<br />
1<br />
2<br />
3<br />
ZERO RETURN function<br />
Press DISPLAY.<br />
The counter display shows the tape<br />
running time during playback or recording.<br />
Press COUNTER RESET at the<br />
desired tape position. The counter<br />
display will be reset to the<br />
“00:00:00” position (e.g. the<br />
beginning of recording).<br />
Press STOP when playback or recording is finished.<br />
Press ZERO RETURN.<br />
The tape will be rewinded or fast forwarded and automatically<br />
stop at the “00:00:00” position.<br />
The CLOCK/COUNTER-button<br />
Press CLOCK/COUNTER. The clock and tape counter alternate<br />
with each other in the display.<br />
NOTES:<br />
• If you rewind the tape beyond “00:00:00”, a minus sign<br />
(“–”) will be displayed in front of the time.<br />
• When you load a tape, the counter will reset to “00:00:00”.<br />
• The counter does not function on nonrecorded (blank) sections<br />
of the tape. When you rewind, fast forward or play tapes<br />
through blank sections, the counter stops.<br />
Video index search system<br />
This function enables you to locate the beginning of any<br />
recording made on the VCR.<br />
Recording an INDEX MARK<br />
The Index Search function automatically records an INDEX<br />
mark on the tape whenever a recording is initiated.<br />
Index Search<br />
Press INDEX or during stop or play mode.<br />
For Succeeding programs: Press INDEX .<br />
For Preceding programs: Press INDEX .<br />
(Additional press increases the INDEX NO. up to 9.)<br />
When the INDEX or is pressed, the unit starts<br />
searching the INDEX NO. selected and finds the portion,<br />
then playback starts automatically.<br />
To stop the Index Search, press STOP.<br />
NOTES:<br />
• When you record an INDEX mark at the very beginning of the<br />
tape, the mark may not be found.<br />
• During INDEX search, the tape may stop and begin to play<br />
at a slightly different location.<br />
• INDEX may not function properly with old or worn out video<br />
tapes.<br />
• INDEX marks may not be found if it is extremely close to the<br />
point where the search began.<br />
• In recording, if you stop recording temporarily, the INDEX<br />
mark is not recorded on the tape.<br />
VCR<br />
VCR<br />
22<br />
2D80321A[E](22-27) 22<br />
9/6/04, 10:35
ENGLISH<br />
Recording and viewing the same TV program.<br />
1<br />
Load a cassette tape with the erase prevention tab intact.<br />
The unit will automatically turn on.<br />
2 Press SPEED to select the desired tape speed SP or<br />
SLP.<br />
The tape counter and SP or SLP will appear on the<br />
screen for about 4 seconds.<br />
3<br />
Recording a TV program<br />
Set the TV/CABLE option to the appropriate position<br />
(See page 20).<br />
4 Press Number keys or CH / to select the channel<br />
to be recorded.<br />
1-9 Press 0 twice and then 1-9 as required.<br />
Example: To select 2, Press 002.<br />
10-12 Press 0 first and then the remaining 2 digits<br />
in order from left to right.<br />
Example: Press 012 for “12”.<br />
13-99 Press 2 digits in order.<br />
Example: Press 22 for “22”.<br />
100-125 Press the 3 digits in order.<br />
Example: Press 110 for “110”.<br />
VHF/UHF/CABLE CHANNELS<br />
TV<br />
VHF<br />
2-13<br />
UHF<br />
14-69<br />
CABLE<br />
VHF<br />
2-13<br />
STD/HRC/IRC<br />
14-36 (A) (W)<br />
37-59 (AA) (WW)<br />
60-85 (AAA) (ZZZ)<br />
86-94 (86) (94)<br />
95-99 (A-5) (A-1)<br />
100-125 (100)(125)<br />
01 (5A)<br />
To stop recording<br />
Recording<br />
Press STOP to stop recording.<br />
“ ” will appear on screen for about 4 seconds.<br />
To stop recording temporarily<br />
Press PAUSE/STILL to avoid recording unwanted material.<br />
“ ” will appear on screen for about 4 seconds.<br />
Press again to continue the recording.<br />
NOTES:<br />
• The pause function will be released after 5 minutes to prevent<br />
damage to the tape or the VCR. The VCR will change to the<br />
STOP mode.<br />
• You can select a recording channel in the recording pause<br />
mode.<br />
Recording one program while watching<br />
another<br />
While the VCR is recording, press TV/VCR to select the TV<br />
position.<br />
The “VCR” will go off and recording will continue.<br />
Select the TV channel you want to watch by using the TV<br />
channel selector.<br />
NOTE:<br />
Some CABLE hookups do not permit viewing one channel<br />
while recording another. See page 11.<br />
To display VCR operation status<br />
Press DISPLAY. The clock, day of the week and more information<br />
will be indicated.<br />
While watching TV<br />
CLOCK<br />
8 : 47AM MON<br />
STEREO SAP<br />
DAY OF THE WEEK<br />
CH 125<br />
CHANNEL<br />
5 Press REC/OTR.<br />
“ ” will appear on the screen<br />
for about 4 seconds and “REC”<br />
will appear on the display.<br />
INDEX<br />
CH 110<br />
STEREO AND<br />
SECOND AUDIO<br />
PROGRAM (SAP)<br />
00 : 00 : 00 SP<br />
TAPE SPEED<br />
REAL TIME COUNTER<br />
While operating a tape<br />
NOTES:<br />
• If the erase prevention tab is removed, the tape will eject when<br />
REC/OTR is pressed for recording.<br />
• If you wish to watch the DVD playback during the normal<br />
recording on VCR, press VCR/DVD to change to DVD mode<br />
and perform the DVD playback (see page 28).<br />
• You can not record disc material in DVD, Audio CD, etc. onto<br />
a video tape with this DVD/VCR.<br />
HI-FI STEREO<br />
AUTO REPEAT<br />
8 : 30AM MON<br />
HI-FI<br />
00 : 15 : 12 SP<br />
OPERATING<br />
MODE<br />
TAPE IN<br />
To cancel the display: Press DISPLAY until all indicators<br />
disappear.<br />
Auto Rewind feature<br />
This VCR will automatically rewind the tape when the tape has<br />
ended (except during OTR and TIMER REC). It will also eject<br />
the tape.<br />
23<br />
2D80321A[E](22-27) 23<br />
9/6/04, 10:35
The One-touch Timer Recording feature provides a<br />
simple and convenient way to make a timed recording.<br />
Example: One-touch Timer Recording for 30 minutes.<br />
1<br />
3<br />
24<br />
Load a cassette tape with the erase prevention tab<br />
intact.<br />
The VCR will automatically turn on.<br />
2 Press SPEED to select the desired tape speed SP or<br />
SLP.<br />
The tape counter and SP or SLP will appear on the<br />
screen for about 4 seconds.<br />
4<br />
5<br />
One-touch Timer Recording (OTR) Timer recording<br />
Set the “TV/CABLE” option to the appropriate position.<br />
Press Number keys or CH / to select the channel<br />
to be recorded.<br />
Press REC/OTR. Press the button again to stop recording<br />
after 30 minutes. Each additional press of REC/OTR<br />
will increase recording time as shown in the chart below,<br />
up to a maximum of 6 hours. The OTR and recording time<br />
will appear on the screen for about 4 seconds. And, “REC”<br />
will keep blinking in the display.<br />
Press<br />
once<br />
twice<br />
3 times<br />
4 times<br />
5 times<br />
Recording time Press Recording time<br />
NORMAL REC<br />
0:30<br />
1:00<br />
1:30<br />
6 times<br />
7 times<br />
8 times<br />
9 times<br />
3:00<br />
4:00<br />
5:00<br />
6:00<br />
2:00 10 times NORMAL REC<br />
To cancel OTR<br />
Press STOP or turn off the power.<br />
“ ” will appear on screen for about 4 seconds.<br />
NOTE:<br />
If you wish to watch the DVD playback during the OTR, press<br />
VCR/DVD to change to DVD mode and perform the DVD<br />
playback (see page 28).<br />
Timer recording can be programmed on-screen with the<br />
remote control. The built-in timer allows automatic<br />
unattended recording of up to 8 programs within 1 month.<br />
Example: Program a timer recording for the 26th day,<br />
channel 125 (CABLE), 11:00 - 11:30 PM on timer program<br />
number 1 (Tape speed: SLP).<br />
1<br />
3<br />
Press VCR MENU. Select<br />
the “TIMER REC SET”<br />
option, then press ENTER.<br />
2 Press SET + or – to select<br />
one of the program line,<br />
then press ENTER.<br />
4<br />
Press SET + or – to select<br />
the date, then press<br />
ENTER.<br />
Set the start time, end time,<br />
channel and tape speed as<br />
in step 3.<br />
MENU<br />
TIMER REC SET<br />
AUTO REPEAT ON OFF<br />
SAP<br />
CH SETUP<br />
SYSTEM SETUP<br />
ON OFF<br />
á+/-/ENTER/MENUñ<br />
DATE START END CH<br />
26(SU) 11:00PM 11:30PM125SLP<br />
á+/-/ENTER/CANCEL/MENUñ<br />
NOTES:<br />
• Press CANCEL to move cursor backward for correction.<br />
• To record from external source set the channel to “L”. “L”<br />
will appear next to CH 125 (or 69).<br />
5 To enter other programs, repeat step 2 through 4.<br />
• To return to the normal screen, press VCR MENU twice.<br />
6 Press TIMER REC. The clock symbol( ) will appear on<br />
the display and the VCR stands by for recording. At the<br />
same time, VCR mode will change to DVD mode<br />
automatically. You can use DVD even if the VCR is in<br />
the Timer recording mode.<br />
If you do not use the DVD, turn the power off.<br />
The timer recording will start at 20 seconds before the<br />
time you predetermined.<br />
NOTES:<br />
• If the clock symbol( ) does not appear on the display<br />
in spite of the pressing of TIMER REC, the cassette may<br />
not have been loaded yet (see page 21).<br />
• If the cassette is ejected in spite of the pressing of TIMER<br />
REC, the erase prevention tab of the cassette may have<br />
been removed (see page 21).<br />
NOTES:<br />
• If the clock symbol ( ) blinks when the timer recording<br />
ended, the TV program has not been completely recorded<br />
because of an insufficient tape supply. Press TIMER REC to<br />
cancel the timer program or press EJECT to remove the<br />
cassette tape.<br />
• During timer recording standby mode, the VCR mode cannot<br />
be selected. To use the VCR, press TIMER REC at first,<br />
then press VCR/DVD to change to VCR mode. After you use<br />
the VCR, press TIMER REC again to put the VCR into timer<br />
recording standby mode.<br />
• If you press TIMER REC during timer recording, the recording<br />
operation will be interrupted. If you press TIMER REC<br />
again within the programmed time, the recording operation<br />
will start again.<br />
• After a power failure or disconnection of the power plug, all<br />
programmed recording settings and time display will be lost<br />
upon resumption of power. In this case, reset the clock (see<br />
page 19) and reprogram any timer recordings.<br />
2D80321A[E](22-27) 24<br />
9/6/04, 10:35
ENGLISH<br />
Timer recording special case<br />
Weekly (e.g. WKL-TU: each Tuesday) or daily (e.g. MO-SA:<br />
Monday to Saturday) Timer recording.<br />
Follow the procedure of timer recording on the previous page.<br />
At picture 3 press SET + or – repeatedly until the desired setting<br />
appears. Then press ENTER.<br />
When you press SET – repeatedly, the indicator at DATE will<br />
change as follows, in this case the day is Friday.<br />
The current day (Friday)<br />
One month later<br />
minus one day<br />
WKL-WE<br />
(Weekly Wednesday)<br />
DATE START END CH<br />
WKL-WE<br />
SU-SA (Sunday to Saturday)<br />
MO-SA (Monday to Saturday)<br />
MO-FR (Monday to Friday)<br />
WKL-TH (Weekly Thursday)<br />
Confirmation / Cancellation of the Timer<br />
recording<br />
1 If the Timer has been activated, press TIMER REC to<br />
deactivate the Timer. The clock symbol( ) will disappear.<br />
Then press VCR/DVD to change to VCR mode.<br />
2<br />
3<br />
To confirm Timer program:<br />
At picture 1 on the previous<br />
page select the “TIMER REC<br />
SET” option and press EN-<br />
TER.<br />
Then the timer program list<br />
as right will appear on the<br />
screen.<br />
To cancel Timer program:<br />
Press SET + or – to select<br />
the unnecessary program,<br />
then press CANCEL to cancel<br />
the program.<br />
DATE START END CH<br />
26(SU) 11:00PM 11:30PM125SLP<br />
á+/-/ENTER/CANCEL/MENUñ<br />
DATE START END CH<br />
Ð<br />
á+/-/ENTER/CANCEL/MENUñ<br />
In case Timer programs-overlap<br />
• Do not overlap timer programs as portions of the conflicting<br />
programs will be lost. The first recording time has priority over<br />
the next recording time as shown in the diagram below.<br />
Program 1<br />
Program 2<br />
Program 3<br />
Recording<br />
Control Settings<br />
á+/-/ENTER/CANCEL/MENUñ<br />
8 : 00 9 : 00 10 : 00 11 : 00<br />
Prog.1<br />
Deleted Parts<br />
Non Recorded Portion Parts<br />
Prog.2<br />
Prog.3<br />
4 Press VCR MENU repeatedly until the TV-picture appears.<br />
NOTES:<br />
• If there are other timer record programs remaining, TIMER<br />
REC must be pressed to reactivate the timer, otherwise the<br />
remaining timer record programs will be ignored.<br />
• You cannot confirm the Timer program during timer recording<br />
operation.<br />
• You can also correct the programmed setting in program<br />
confirm mode.<br />
At step 2 above, press ENTER to enter the program input<br />
mode. Then press ENTER repeatedly until the item you wish<br />
to correct blinks. Then correct the data with SET + or –.<br />
Then press VCR MENU repeatedly until the TV-picture<br />
appears.<br />
DATE START END CH<br />
26(SU) 11:00PM 11:30PM125 SLP<br />
–––––– –:–– –:–– ––– –<br />
–––––– –:–– –:–– ––– –<br />
–––––– –:–– –:–– ––– –<br />
–––––– –:–– –:–– ––– –<br />
–––––– –:–– –:–– ––– –<br />
–––––– –:–– –:–– ––– –<br />
–––––– –:–– –:–– ––– –<br />
á+/–/ENTER/CANCEL/MENU ñ<br />
NOTES:<br />
• The daily/weekly recording can be made continuously until<br />
the recording is canceled or the tape reaches the end.<br />
• During timer recording the automatic rewinding mechanism<br />
does not function.<br />
25<br />
2D80321A[E](22-27) 25<br />
9/6/04, 10:35
Advanced function of VCR<br />
Stereo recording and playback<br />
The VHS Hi-Fi audio system permits high fidelity recording<br />
of MTS STEREO TV broadcasts.<br />
When a MTS STEREO broadcast<br />
is received, the word<br />
“STEREO” will appear on the STEREO<br />
screen and the program can be<br />
viewed or recorded in stereo.<br />
The Hi-Fi STEREO recording procedure is the same as for<br />
normal recordings.<br />
NOTE:<br />
When using a CABLE system, stereo TV programs may be<br />
transmitted over a mono cable channel. In this case the word<br />
“STEREO” will not appear and the sound will be in mono.<br />
Output selection<br />
When viewing an MTS STEREO TV program, or playing a<br />
prerecorded VHS Hi-Fi STEREO videotape, press AUDIO<br />
SELECT to select how the audio will be heard through the<br />
speakers. Normally set to the Hi-Fi STEREO position, this<br />
button can be set to the MONO position if the stereo<br />
broadcast or videotape audio is of poor quality. The “R” and<br />
“L” positions allow the audio from the Right or Left Hi-Fi<br />
channel to be heard over both TV speakers. This button has<br />
no effect when viewing a MONO videotape or TV program.<br />
Each time when you press the button, output selection<br />
display appears on the screen for several seconds. Refer to<br />
the chart below.<br />
NOTES:<br />
• When playing back a tape that is not recorded in Hi-Fi stereo<br />
mode, the audio will automatically be monaural.<br />
• When listening to a VHS Hi-Fi video tape or MTS broadcast<br />
through the VHF/UHF jack (Audio/Video cord not connected),<br />
the sound will be monaural.<br />
26<br />
OUTPUT<br />
SELECTION<br />
STEREO<br />
L ch<br />
R ch<br />
MONO<br />
SOUND HEARD ON BOTH<br />
SPEAKERS<br />
STEREO<br />
LEFT CHANNEL AUDIO<br />
RIGHT CHANNEL AUDIO<br />
MONO<br />
Second Audio Program (SAP)<br />
Your VCR is fitted with a SAP broadcast system which<br />
enables you to switch to a second audio program when<br />
viewing a selected channel.<br />
This function applies only when the program is broadcast<br />
in multi-languages through the SAP broadcast<br />
system.<br />
1<br />
Press VCR MENU. Then press SET + or – to select<br />
“SAP”.<br />
2 Then press ENTER to select “ON”.<br />
Then press VCR MENU until the menu screen is cleared.<br />
3<br />
Listening to SAP<br />
When the VCR is turned on or a channel selection is made,<br />
make certain the letters “SAP” appears on the screen. This<br />
means that the “Second Audio Program” broadcasting is<br />
available.<br />
If you connect the VCR to another VCR or camcorder, you<br />
can duplicate a previously recorded tape.<br />
Make all connections before turning on the power.<br />
1 Load a blank cassette tape with the erase prevention tab<br />
intact into the recording VCR.<br />
Load a previously recorded tape into the playback VCR<br />
or CAMCORDER.<br />
2<br />
3<br />
4<br />
5<br />
6<br />
Duplicating a video tape<br />
Press SPEED to select the desired tape speed SP or SLP.<br />
It is recommended that you set the Speed to the SP mode<br />
on the recording VCR for best results.<br />
Press INPUT SELECT to select<br />
AUDIO/VIDEO input position. “L” will<br />
appear in the display.<br />
Press REC/OTR on the recording VCR, then press<br />
PAUSE/STILL.<br />
Press the PLAY button on the playback VCR or<br />
CAMCORDER, then press the PAUSE/STILL button.<br />
Release the recording pause and the playback still simultaneously<br />
to begin the duplicating process.<br />
Connection with second Video recorder<br />
Playback VCR<br />
To VIDEO OUT<br />
AUDIO/VIDEO Cord (supplied)<br />
To VIDEO IN<br />
To VIDEO IN<br />
To AUDIO (R) IN<br />
To AUDIO (L) IN<br />
Recording VCR<br />
To AUDIO (R) IN<br />
To AUDIO (L) IN<br />
Playback Camcorder<br />
Recording VCR<br />
To AUDIO (R) OUT<br />
To AUDIO (L) OUT<br />
Connection with Video camera<br />
AUDIO/VIDEO Cord (not supplied)<br />
To AV Jack<br />
For duplicating a previously recorded tape from a<br />
camcorder, follow the camcorder manufacturer’s instructions.<br />
A typical camcorder dubbing hookup is shown above.<br />
2D80321A[E](22-27) 26<br />
9/6/04, 10:35
ENGLISH<br />
Disc playback operation<br />
Disc Setting setup language<br />
This unit applies to DVD discs from Region 1 or Region ALL.<br />
The loaded Disc (DVD, Audio-CD and MP3-CD) will be recognized<br />
automatically.<br />
The suitable Disc-formats are: DVD, CD-R and CD-RW.<br />
Some CD-R/RW discs may be incompatible.<br />
Do not play DVD-ROM, DVD-Audio, CDV, Video-CD, CD-G or<br />
Photo CD to prevent accidental erasure of prerecorded material.<br />
This unit cannot record disc material in DVD, Audio CD etc.<br />
onto a video tape.<br />
If you press REC/OTR during DVD playback, a symbol mark<br />
" " will appear on the screen for aprox. 4 seconds.<br />
Title<br />
When two or more movies are recorded on a disc, the disc is<br />
divided into two or more sections. Each section is called a<br />
“TITLE”.<br />
Chapter<br />
The titles can be subdivided into many sections.<br />
Each section is called a “CHAPTER”.<br />
Track<br />
An Audio CD can contain several items.<br />
These are assigned to the tracks.<br />
The setup language can be selected.<br />
1 Press VCR/DVD to<br />
select the DVD mode<br />
(The DVD indicator will<br />
light).<br />
“No Disc” will appear<br />
on the screen (If a DVD<br />
disc has already loaded,<br />
the playback will start<br />
automatically.).<br />
2 Press SETUP in the<br />
stop mode. The SETUP<br />
MENU of DVD will<br />
appear on the screen.<br />
Then press to select<br />
“Other”.<br />
3 Press or ENTER to<br />
select “OSD Language”.<br />
Reading<br />
Language Picture<br />
Language Picture<br />
OSD Language<br />
Sound Parental Other<br />
/Enter/Setup/Return<br />
Sound Parental Other<br />
English<br />
DVD DISC<br />
CHAPTER 1<br />
TITLE1<br />
TITLE2<br />
CHAPTER 2 CHAPTER 1 CHAPTER 2 CHAPTER 3<br />
/Enter/Setup/Return<br />
CD<br />
TRACK 1 TRACK 2 TRACK 3 TRACK 4 TRACK 5<br />
4<br />
Press or ENTER<br />
and then press or<br />
to select desired<br />
language (e.g.<br />
English), then press<br />
ENTER.<br />
Language Picture<br />
Sound Parental Other<br />
OSD Language English English<br />
Francais<br />
Espanol<br />
/Enter/Setup/Return<br />
Removing Disc from Case<br />
Be sure to hold the edge of disc. Do<br />
not touch the surface of the disc.<br />
Pick up the disc gently from the case.<br />
• Do not scratch the disc.<br />
• Do not get dirt on the surface of<br />
the disc.<br />
• Do not stick a label or adhesive<br />
tape on the disc.<br />
• Do not drop or bend the disc.<br />
Storing Disc<br />
• Store the disc in the case to<br />
avoid risk of scratches, dirt or<br />
damage.<br />
• Do not leave disc exposed to direct<br />
sunlight or in hot or humid<br />
places.<br />
Cleaning Disc<br />
Wipe the disc with a clean, dry<br />
cloth from center to edge.<br />
• Do not wipe the disc round.<br />
• Do not use liquid or aerosol<br />
cleaners.<br />
NOTE:<br />
To make the SETUP screen disappear, press<br />
SETUP (or RETURN).<br />
If the DVD/VCR does not operate properly: Static electricity,<br />
etc., may affect the player's operation. Disconnect the AC<br />
power cord once, then connect it again.<br />
27<br />
2D80321A[E](22-27) 27<br />
9/6/04, 10:35
1 Press OPEN/CLOSE.<br />
The disc tray will open.<br />
2 Place a disc onto the tray.<br />
Hold the disc, position it with the printed label side up, align<br />
it with the guides, and place it in its proper position.<br />
3<br />
4<br />
Playback procedure Special playback<br />
28<br />
Press PLAY or OPEN/CLOSE.<br />
The disc tray closes automatically.<br />
On the screen, changes to “Reading” and then playback<br />
will commence.<br />
• A menu screen may appear on the TV screen, if the<br />
disc has a menu feature. In this case, press , ,<br />
, or ENTER to operate a menu feature.<br />
Press STOP to end playback.<br />
• The DVD/VCR memorizes the stopped point, depending<br />
onthe disc. “ ” appears on the screen. Press PLAY<br />
to resume playback (from the scene point).<br />
• If you press STOP again(“ ” appears on the screen)<br />
or unload the disc, the DVD/VCR will clear the stopped<br />
point.<br />
5 Then press OPEN/CLOSE.<br />
The disc tray opens.<br />
Remove the disc and press POWER.<br />
The disc tray closes automatically and DVD/VCR turns off.<br />
NOTES:<br />
• If a non-compatible disc is loaded, “Incorrect Disc”, “Region<br />
Code Error” or “Parental Error” will appear on the TV screen<br />
according to the type of loaded disc. In this case, check your<br />
disc again (See page 27 and 32).<br />
• Some discs may take a minute or so to start playback.<br />
• A “Prohibition” symbol may appear at the upper left of the<br />
screen. This symbol means either the feature you tried is not<br />
available on the disc, or the DVD/VCR can not access the<br />
feature at this time. This does not indicate a problem with<br />
the DVD/VCR.<br />
• When you set a single-faced disc label downwards (ie. the<br />
wrong way up) and press PLAY or OPEN/CLOSE, “Reading”<br />
will appear and remain on the screen for approx. 40 seconds<br />
and then it will change to “Incorrect Disc”.<br />
• Some playback operations of DVDs may be intentionally fixed<br />
by software producers. Since this DVD/VCR plays DVDs according<br />
to the disc contents the software producers designed,<br />
some playback features may not be available. Also refer to<br />
the instructions supplied with the DVDs.<br />
• When playing DTS-encoded Audio CDs, excessive noise will<br />
be heard from the analog stereo outputs. To avoid possible<br />
damage to the audio system, the consumer should take<br />
proper precautions when the analog stereo outputs of the<br />
DVD/VCR are connected to an amplification system.<br />
NOTE:There may be a slight delay between pressing the<br />
button and the function activation.<br />
Fast Forward Playback<br />
Press F.FWD during normal playback.<br />
Each press of F.FWD will increase the speed of the search<br />
(x2), (x4), (x8), (x20).<br />
• To resume normal playback, press PLAY.<br />
Review Playback<br />
Press REW during normal playback.<br />
Each press of REW will increase the speed of the search<br />
(x2), (x4), (x8), (x20).<br />
• To resume normal playback, press PLAY.<br />
Still Playback<br />
Press PAUSE/STILL during normal playback.<br />
• To resume normal playback, press PLAY.<br />
Frame Advance<br />
Press PAUSE/STILL during still playback.<br />
One frame is advanced each time you press PAUSE/STILL.<br />
• To resume normal playback, press PLAY.<br />
Slow-motion Playback<br />
Press SLOW during normal playback or still playback.<br />
Each press of SLOW will change the speed of the slow x1/2,<br />
x1/4, x1/6, x1/7.<br />
• To resume normal playback, press PLAY.<br />
• To resume the still playback, press PAUSE/STILL.<br />
Locating a chapter or track<br />
Press SKIP ( ) Forward or SKIP ( ) Reverse during<br />
playback to locate a chapter that you want to watch.<br />
Each time you press the button, a chapter or track is skipped.<br />
NOTE:<br />
The unit is capable of holding a still video image or On screen<br />
display image on your television screen indefinitely. If you leave<br />
the still video image or On screen display image displayed on<br />
your TV for an extended period of time, you risk permanent<br />
damage to your television screen. Projection televisions are<br />
very susceptible.<br />
This unit will allow you to zoom in on the frame image. You<br />
can then make selections by switching the position of the<br />
frame.<br />
1 Press ZOOM during playback.<br />
The center part of the image will be zoomed in.<br />
Each press of ZOOM will change the ZOOM 1<br />
(x 1.3), 2 (x 1.5) and 3 (x 2.0).<br />
2<br />
3<br />
Zooming<br />
Press / or / to view a different part of the frame.<br />
You may move the frame from the center position to UP,<br />
DOWN, LEFT or RIGHT direction.<br />
In the zoom mode press ZOOM repeatedly to return to a<br />
1:1 view ( Off).<br />
NOTE:<br />
You can use the Pause, Slow, Search or Skip feature in the<br />
zoom mode.<br />
2D80321A[E](28-31) 28<br />
9/6/04, 10:35
ENGLISH<br />
Use the title, chapter and time recorded on the disc to<br />
locate the desired point to play back.<br />
To check the title, chapter and time, press DISPLAY (see page<br />
34).<br />
1 Press JUMP during<br />
playback or stop mode.<br />
2 Press or to select<br />
the “Time”, “Title” or<br />
“Chapter”.<br />
3<br />
4<br />
Locating desired scene<br />
Jump Time<br />
Title<br />
Chapter<br />
/Enter/0 9/Cancel/Jump<br />
Press Number keys to change the number.<br />
• If you input a wrong number, press CANCEL.<br />
• Refer to the package supplied with the disc to check the<br />
numbers.<br />
Press ENTER.<br />
Playback starts.<br />
• When you change the title, playback starts from<br />
Chapter 1 of the selected title.<br />
• Some discs may not work in the above operation.<br />
Marking desired Scenes<br />
The unit stores the points that you want to watch again up<br />
to 3 points. You can resume playback from each scene.<br />
Marking the Scenes<br />
1 Press MARKER<br />
during playback.<br />
2 Select the blank Marker<br />
using / .<br />
Then press ENTER at the desired scene.<br />
• Repeat this procedure to set the other 2 scenes.<br />
3 Press MARKER to remove this display.<br />
Returning to the Scenes<br />
1 Press MARKER during<br />
playback or stop mode.<br />
2 Press / to select<br />
the Marker 1-3.<br />
Marker 1<br />
Marker 2<br />
Marker 3<br />
/Enter/Cancel/Marker<br />
Marker 1<br />
Marker 2<br />
Marker 3<br />
00 27<br />
01 16<br />
02 08<br />
/Enter/Cancel/Marker<br />
3 Press ENTER.<br />
Playback starts from the marked scene.<br />
To Cancel the Mark<br />
1 Press MARKER.<br />
2 Press / to select the Marker 1-3.<br />
3 Press CANCEL.<br />
To remove this display, press MARKER.<br />
54<br />
25<br />
31<br />
NOTES:<br />
• Some discs may not work with the marking operation.<br />
• The marking is canceled when you open the disc tray or turn<br />
the power off.<br />
• Some subtitles recorded around the marker may fail to appear.<br />
Changing soundtrack language<br />
You can select the language when you play a multilingual<br />
disc.<br />
1 Press AUDIO during playback.<br />
1/8 Eng DolbyDigital<br />
The current soundtrack language<br />
will appear.<br />
2 Press AUDIO repeatedly until the desired language is selected.<br />
The on-screen display will disappear after a few seconds.<br />
Subtitles<br />
Turning the Subtitles On and Off<br />
When playing back a disc recorded with subtitles, you can<br />
turn the subtitles on or off.<br />
Press SUBTITLE during playback until “Off”<br />
Off<br />
appears.<br />
Changing the subtitle language<br />
You can select the language when playing back a disc<br />
recorded with multi-lingual subtitles.<br />
Press SUBTITLE repeatedly during playback<br />
until your desired language appears. 1/32 Eng<br />
The on-screen display will disappear after<br />
a few seconds.<br />
NOTES:<br />
• If the desired language is not heard after pressing the button<br />
several times, the language is not recorded on the disc.<br />
• Changing soundtrack or subtitle language is cancelled when<br />
you open the disc tray. The initial default language or available<br />
language will be heard and seen if the disc is played<br />
back again.<br />
• Depending on the DVD you may be unable to turn on, turn<br />
off, or change the subtitles, even if they are recorded on the<br />
disc. While playing the DVD, the subtitle may change while<br />
opening or closing the disc tray, or while changing the title.<br />
• In some cases, the subtitle language is not changed to the<br />
selected one immediately.<br />
Karaoke playback<br />
When playing back a DVD KARAOKE disc, you can turn<br />
the vocal on or off.<br />
1 Press AUDIO during DVD KARAOKE disc playback.<br />
2 Press or to select “On” or “Off”.<br />
On: The primary vocal is output when it is recorded<br />
on the disc.<br />
Off: The primary vocal is not output.<br />
NOTES:<br />
• The vocal output feature is used during playback of Dolby Digital<br />
(multi-channel) recorded DVD KARAOKE discs. This feature<br />
allows you to turn off vocal audio tracks, or restore them for<br />
background accompaniment.<br />
• When playing KARAOKE, connect appropriate audio equipment<br />
such as an amplifier to the DVD/VCR.<br />
29<br />
2D80321A[E](28-31) 29<br />
9/6/04, 10:35
Changing angles<br />
When playing back a disc recorded with multi-angle facility,<br />
you can change the angle that you are viewing the scene<br />
from.<br />
1 Press ANGLE during playback.<br />
The current angle will appear.<br />
1/9<br />
2 Press ANGLE repeatedly until the desired angle is selected.<br />
Title selection<br />
Two or more titles are recorded on some discs. If the<br />
title menu is recorded on the disc, you can select the<br />
desired title.<br />
1 Press TOP MENU during playback.<br />
Title menu appears on the screen.<br />
• Press TOP MENU again to resume playback at the<br />
scene when you pressed TOP MENU.<br />
2 Press / or / to select the desired title.<br />
3<br />
30<br />
Press ENTER or PLAY.<br />
The playback of the selected title will start.<br />
DVD menu<br />
Some DVDs allow you to select the disc contents using<br />
the menu. When you play back these DVDs, you can<br />
select the subtitle language and soundtrack language,<br />
etc. using the DVD menu.<br />
1 Press DVD MENU during playback.<br />
The DVD menu appears on the screen.<br />
• Press DVD MENU again to resume playback at the<br />
scene when you pressed DVD MENU.<br />
2 Press / or / to select the desired item.<br />
3<br />
Press ENTER. The menu continues to another screen. Repeat<br />
steps 2 and 3 to set the item completely.<br />
NOTE:<br />
Depending on the DVD, you may not be able to change the<br />
angles even if multi-angles are recorded on the disc, or you<br />
may be unable to select the title, and a “title menu” may<br />
simply be called a “menu” or “title” in the instructions<br />
supplied with the disc.<br />
Repeat playback<br />
Title, Chapter, Track Playback<br />
1 Press PLAY MODE during playback or stop mode.<br />
DVD<br />
CD<br />
Repeat : Off<br />
/Enter/Play Mode<br />
Play Mode : Off<br />
Repeat : Off<br />
/Enter/Play Mode<br />
2 Press ENTER once or twice to select “Chapter” or “Title”.<br />
In case of CD, at first press to select “Repeat” and then<br />
press ENTER once or twice to select “Track” or “All”.<br />
DVD<br />
CD<br />
Repeat : Chapter<br />
/Enter/Play Mode<br />
Play Mode : Off<br />
Repeat : All<br />
/Enter/Play Mode<br />
3 Press PLAY MODE again to make the screen disappear.<br />
• Press PLAY to start Repeat playback.<br />
• To resume normal playback, select Repeat “Off”.<br />
A-B Repeat Playback<br />
A-B repeat playback allows you to repeat material between<br />
two selected points.<br />
1 Press REPEAT A-B<br />
during playback.<br />
A<br />
The start point is selected.<br />
2 Press REPEAT A-B<br />
again.<br />
A B<br />
The end point is selected.<br />
Playback starts at the<br />
point that you selected.<br />
Playback stops at the end point, returns to Point A automatically,<br />
then starts again.<br />
To resume normal playback press REPEAT A-B again.<br />
“ Off” appears on the screen.<br />
NOTES:<br />
• Some discs may not work with the repeat operation.<br />
• In A-B repeat mode, subtitles near point A or B may not appear.<br />
• During the A-B Repeat Playback the ANGLE feature will not<br />
operate.<br />
• You may not be able to set A-B Repeat, depending on the<br />
scenes of the DVD.<br />
• A-B repeat does not work with an interactive DVD and MP3-CD.<br />
Program playback (CD)<br />
You can arrange the order of tracks on the disc.<br />
1 Press PLAY MODE in<br />
the stop mode.<br />
Play Mode : Off<br />
Repeat : Off<br />
/Enter/Play Mode<br />
2 Press ENTER repeatedly<br />
until the program table<br />
shown at right appears.<br />
3 Example: In case you<br />
wish to program in order<br />
of 7, 3, 11:<br />
Enter as 7 , 3 , 11.<br />
If you input a wrong<br />
number, press CANCEL.<br />
Play Mode : Program<br />
Repeat : Off<br />
1 7 4 7 10<br />
2 3 5 8 11<br />
3 11 6 9 12<br />
Clear Program Playback<br />
/Enter/0 9/Cancel/Play Mode<br />
4 Press / or /<br />
Program Playback<br />
to select “Program<br />
Playback” and press<br />
ENTER. “Program Playback” will appear on the screen.<br />
The program you selected will begin to playback in the<br />
order set. To return to normal playback, select “Play<br />
Mode: Off” at step 2 above.<br />
2D80321A[E](28-31) 30<br />
9/6/04, 10:35
ENGLISH<br />
Random playback (CD)<br />
1 Press PLAY MODE in<br />
the stop mode.<br />
2 Press / to select<br />
“Random”.<br />
3 Press PLAY.<br />
Play Mode : Random<br />
Repeat : Off<br />
/Enter/Play Mode<br />
“Random Play” will appear on the screen and Random<br />
Playback will start.<br />
NOTES:<br />
• To cancel program play, select “Clear” at step 4 and press<br />
ENTER.<br />
• The program is cancelled when you open the disc tray or turn<br />
the power off.<br />
• Random playback can not be combined with Repeat playback.<br />
MP3 playback<br />
This player can play back the MP3-data which has been<br />
recorded on CD-R or CD-RW. To produce the MP3-data,<br />
you need a Windows-PC with CD-ROM drive and a MP3-<br />
encoding Software (not supplied).<br />
The Apple-HFS-System can not be played.<br />
MP3 CD Information<br />
Limitations on MP3 CD playback<br />
• MP3 CD is the disc that is standardized by ISO9660, its file<br />
name must include 3-digits extension letters, “mp3”.<br />
• The directory and file names of the MP3 CD must correspond<br />
to the ISO standardized files.<br />
• This unit can read 200 files per disc. If one directory has<br />
more than 200 files, it reads up to 200 files, the remaining<br />
files will be omitted.<br />
• As for multi-session disc, only the first session can be<br />
played.<br />
• If the CD has both audio tracks and MP3 files, only audio<br />
tracks are played.<br />
• It may take more than one minute for this unit to read MP3<br />
files depending on its structure.<br />
• Music recorded by “Joliet Recording Specification” can be<br />
played back, the file name is displayed (within 16 letters) on<br />
the screen. Long file names will be condensed.<br />
• The music files recorded by “Hierarchical File System” (HFS)<br />
cannot be played.<br />
Limitations on display<br />
• The maximum number for display is 16 letters. Available<br />
letters for display are the following: capital or small alphabets<br />
of A through Z, numbers of 0 through 9, and _ (under score).<br />
• Other characters than those above are replaced by a<br />
hyphen.<br />
1 Press OPEN/CLOSE.<br />
The disc tray will open.<br />
Place a disc onto the tray.<br />
2 Press PLAY or OPEN/CLOSE. The disc tray closes automatically.<br />
On the TV-screen, “Reading” will appear. Reading<br />
will take as much time as the number of file.<br />
3 A MP3 menu screen will<br />
appear on the TV screen.<br />
Press / or ENTER to<br />
select folder.<br />
4<br />
Press / or / or Number keys to select the desired<br />
track, then press ENTER. Track is selected and play<br />
commences.<br />
• In case the folder includes more than 15 tracks, press<br />
or to display next track list.<br />
CD-R<br />
-/72 --:--<br />
Pops<br />
1<br />
2<br />
Japan<br />
Bay Bridge<br />
8<br />
9<br />
flower<br />
Lies and Truthwinter<br />
3 CLOSE MY EYES 10<br />
fall<br />
4<br />
5<br />
DIVE TO BLUE<br />
Honey<br />
11<br />
12<br />
Rain<br />
Strawberry<br />
6 BLUE EYES 13 Welcome party<br />
7 Blurry Eyes 14 Thailand<br />
/0-9/Enter/Play Mode<br />
CD-R<br />
Pops<br />
15 Mother<br />
16 Hold Your Last<br />
/0-9/Enter/Play Mode<br />
5 Press STOP to end playback.<br />
• The unit records the stopped point. “ ” appears on the<br />
screen. Press PLAY to resume playback (from the<br />
scene point).<br />
• If you press STOP again or unload the disc, the unit will<br />
clear the stopped point.<br />
6 Then press OPEN/CLOSE.<br />
The disc tray opens.<br />
Remove the disc and press POWER.<br />
The disc tray closes automatically and DVD/VCR turns off.<br />
NOTES:<br />
• During MP3-Playback, you can not use SEARCH, A-B Repeat<br />
functions.<br />
• You can use Repeat (Track or All), Random functions and<br />
Program playback for MP3 CD Playback.<br />
-/72<br />
--:--<br />
Notes on MP3 files<br />
To play back MP3 CD in the recorded order,<br />
1. Use MP3 software that records data alphabetically or<br />
numerically.<br />
2. Name each file including two-digit or three-digit number (e.g.<br />
“01” “02” or “001” “002”).<br />
3. Refrain from making too many sub-folders.<br />
CAUTION:<br />
• Some MP3 CDs can not be played back depending on the<br />
recording conditions.<br />
• The CD-R/RW that has no music data or non-MP3 files can<br />
not be played back.<br />
31<br />
2D80321A[E](28-31) 31<br />
9/6/04, 10:35
Advanced function of DVD<br />
Parental control<br />
Some discs are specified not suitable for children. Such<br />
discs can be prevented from play back with the unit.<br />
Parental control setting<br />
1 Press SETUP in the stop mode.<br />
Press or to select “Parental”.<br />
Then press or ENTER.<br />
2 Press once to select “Parental Off”, then press<br />
ENTER until the level you desire appears (e.g.: 1).<br />
3 Press once to select “Password ”.<br />
Then press Number keys to input a 4-digit password<br />
(e.g.: 1234).<br />
• If you input a wrong number, press CANCEL.<br />
• Be sure to remember this number!<br />
Level Off : The parental control setting does not<br />
function.<br />
Level 1 : DVD software for adults cannot be<br />
played back.<br />
Level 8 : All DVD software can be played back.<br />
Select from level 1 to level 8.<br />
On a scale of 1-8, “1” is the most restrictive.<br />
4 Press ENTER.<br />
Password<br />
Parental<br />
1234 change to .<br />
Language Picture Sound Parental Other<br />
Off<br />
0 9/Cancel<br />
/Enter/Setup/Return<br />
5 To make SETUP screen disappear, press SETUP.<br />
To unlock the Parental control setting<br />
Cancel the password so as to set the Parental level freely<br />
again.<br />
1 Select “Password ”<br />
(step 2) and press Number<br />
keys to input your 4-digit<br />
password.<br />
Then press ENTER.<br />
Language Picture Sound Parental Other<br />
Password 1234<br />
Parental 1<br />
0 9/Cancel<br />
/Enter/Setup/Return<br />
2 If the input password was right, will appear.<br />
You can move to “Parental 1”(e.g.) to input the desired<br />
level or to cancel parental control.<br />
NOTES:<br />
• If each setup (pages 27, 32~34) has been completed,<br />
the unit can always be worked under the same<br />
conditions (especially with DVD discs).<br />
Each setup will be retained in the memory if you turn<br />
the power off.<br />
• Depending on the discs, the unit cannot limit playback.<br />
• Some discs may not be encoded with specific rating level<br />
information though its disc jacket says “adult”. For those<br />
discs, the age restriction will not work.<br />
• Do not forget the password. If you forget the password,<br />
contact customer service.<br />
Temporary disabling of rating level<br />
by DVD disc<br />
Depending on the DVD disc, the disc may try to<br />
temporarily cancel the rating level that you have set.<br />
It is up to you to decide whether to cancel the rating<br />
level or not.<br />
1 Load a DVD disc and press PLAY or OPEN/CLOSE (see<br />
page 28).<br />
2 If the DVD disc has<br />
been designed to<br />
temporarily cancel the<br />
Rating level, the screen<br />
which follows the<br />
“Reading” screen will<br />
change, depending on<br />
which disc is played. If<br />
you select “YES” with<br />
3<br />
4<br />
5<br />
ENTER key, “Your disc exceeds the parental control level<br />
1.” (e.g.) screen will then appear.<br />
If you wish to cancel the set rating level temporarily,<br />
select “Parental Control Level” with or , then<br />
press ENTER. If the 4-digits password at step 3 on left<br />
column has been set, the password entering screen will<br />
appear as shown in step 4 below.<br />
Alternatively, if the password has not been set, playback<br />
will commence. If you don’t know (or have forgotten) the<br />
password, select “Cancel Picture”.<br />
The setting screen will disappear. Press OPEN/CLOSE<br />
to remove the disc.<br />
Enter the password<br />
with Number keys.<br />
Then press ENTER.<br />
If you interrupt the<br />
entering, press<br />
RETURN.<br />
Your disc exceeds<br />
the parental control level 1.<br />
Parental Control Level<br />
Cancel Picture<br />
/Enter/Return<br />
Please enter the<br />
4 digit password<br />
Enter/0<br />
9/Cancel/Return<br />
Playback will commence if the entered password was<br />
correct.<br />
NOTE:<br />
This temporary cancellation of rating level will be kept until<br />
the disc is ejected.<br />
When the disc is ejected, the original rating level will be set<br />
again automatically.<br />
32<br />
2D80321A[E](32-BACK) 32<br />
9/6/04, 10:35
ENGLISH<br />
Setting language Setting the aspect ratio of TV screen<br />
You can select the language of the disc menu messages<br />
of DVDs.<br />
1<br />
2<br />
3<br />
Press SETUP in the stop mode.<br />
Press or to select “Language”.<br />
Press or ENTER, then press or to select desired<br />
option.<br />
Press or ENTER.<br />
Press or to<br />
select your desired<br />
language, then press<br />
ENTER.<br />
Language Picture Sound Parental Other<br />
Menu<br />
Subtitle<br />
Audio<br />
English<br />
Automatic<br />
English<br />
/Enter/Setup/Return<br />
English, Francais, Espanol:<br />
The selected language will be heard or seen.<br />
Other:<br />
Other language can be selected (see the “Language<br />
code list” on page 35).<br />
English<br />
Francais<br />
Espanol<br />
Other<br />
Automatic: (Subtitle)<br />
• The unit will automatically select the same language in<br />
the AUDIO setting.<br />
• When the unit selects the same language as the<br />
AUDIO, the subtitles will not appear during playback.<br />
• When you do not use the same language as the<br />
AUDIO, the subtitles will appear during playback.<br />
You can select the aspect ratio for your TV.<br />
1 Press SETUP in the stop mode.<br />
Press or to select “Picture”.<br />
2<br />
3<br />
Press or ENTER, then press or to select “Tv<br />
Screen”.<br />
Press or ENTER.<br />
Press or to<br />
select your desired<br />
screen type, then press<br />
ENTER.<br />
Language Picture Sound Parental Other<br />
Tv Screen<br />
Display<br />
4:3<br />
On<br />
/Enter/Setup/Return<br />
4:3<br />
4:3<br />
16:9<br />
You have the following screen sizes to choose from:<br />
4:3 Letter box<br />
Select this mode when connecting to a conventional TV.<br />
When playing back a wide screen-DVD disc, it displays<br />
the wide picture with black bands at the top and bottom of<br />
screen.<br />
4:3 Pan Scan<br />
It displays the wide picture on the whole screen with left<br />
and right edges automatically cut off.<br />
16:9 Wide<br />
Select this mode when connecting to a wide-screen TV.<br />
A wide screen picture is displayed full size.<br />
Off: (Subtitle)<br />
Subtitles do not appear.<br />
4<br />
To make SETUP screen disappear, press SETUP.<br />
Original: (Audio)<br />
The unit will select the first priority language of each disc.<br />
NOTE:<br />
If the DVD disc is not formatted in the pan & scan style, it<br />
displays 4:3 style.<br />
4<br />
To make SETUP screen disappear, press SETUP.<br />
NOTE:<br />
If the selected language is not recorded on the disc, the firstpriority<br />
language is selected.<br />
33<br />
2D80321A[E](32-BACK) 33<br />
9/6/04, 10:35
Setting on screen display Progressive scan<br />
On screen display can be switched on or off when you<br />
press the DISPLAY button.<br />
1<br />
2<br />
3<br />
4<br />
Each press of DISPLAY, the status display of the disc will<br />
appear on the screen and change as follows.<br />
DVD<br />
34<br />
Press SETUP in the stop mode.<br />
Press or to select “Picture”<br />
Press or ENTER, then<br />
press or to select<br />
“Display”.<br />
Press or ENTER to<br />
select “On” or “Off”.<br />
On:<br />
Off:<br />
To make SETUP screen disappear, press SETUP.<br />
Status display of disc<br />
00:34:56 01:12:33<br />
00:34:56 01:12:33<br />
Title 1/99 Chapter 1/999 1/9<br />
1/8 Eng DolbyDigital<br />
1/32 Eng<br />
To make status display disappear, press DISPLAY again.<br />
AUDIO CD<br />
Track 11/99<br />
On screen displays appears when you press any<br />
buttons (factory setting).<br />
On screen displays do not appear when you press<br />
any buttons except SETUP, SEARCH MODE,<br />
PLAY MODE, MARKER and DISPLAY.<br />
34:56 71:33<br />
Language Picture<br />
Sound<br />
Parental<br />
Other<br />
Tv Screen<br />
Display<br />
4:3<br />
Off<br />
/Enter/Setup/Return<br />
When you playback the CD disc, the status display will<br />
appear on the screen and continue displaying.<br />
DRC (Dynamic Range Control) enables you to control<br />
the dynamic range so as to achieve a suitable sound<br />
for your equipment.<br />
1 Press SETUP in the stop mode.<br />
Press or to select “Sound”.<br />
2<br />
3<br />
Dynamic Range Control<br />
Press or ENTER to<br />
select “DRC”.<br />
Press or ENTER,<br />
then press or to<br />
select desired setting.<br />
Max:<br />
Std:<br />
Min:<br />
Language Picture Sound Parental Other<br />
DRC Std Max<br />
Std<br />
Min<br />
Full dynamic range is increased.<br />
Full dynamic range is maintained.<br />
Dynamic range is reduced.<br />
/Enter/Setup/Return<br />
NOTES:<br />
• This function works only during playback of Dolby Digital<br />
recorded discs.<br />
• The level of Dynamic Range Reduction may differ<br />
depending on DVD video disc.<br />
The unit supports the Progressive scanning system as<br />
well as the conventional interlaced scanning system.<br />
If your TV is equipped with component jacks which<br />
support the progressive video input, you can enjoy high<br />
quality picture by making the Progressive scanning<br />
mode active.<br />
S-VIDEO/COMPONENT<br />
Video selector switch<br />
1 Press PROGRESSIVE in the stop mode.<br />
The PROGRESSIVE indicator “ ” on the display<br />
window will light.<br />
• The unit recognizes the picture source (film or video) of<br />
the current disc according to the disc information.<br />
2 Press PLAY to start playback.<br />
• To make the progressive scanning mode inactive, press<br />
PROGRESSIVE in the stop mode.<br />
The PROGRESSIVE indicator “ ” on the display<br />
window will go off.<br />
About PROGRESSIVE SCANNING MODE<br />
To display video on the TV screen, the conventional<br />
scanning method is called “Interlaced scanning.” With this<br />
method, only half of the horizontal lines are displayed at a<br />
time. So two fields complete a single picture (frame); i.e.,<br />
the first field, containing all the odd-numbered lines, is<br />
displayed followed by the second field, containing all the<br />
even-numbered lines.<br />
The Progressive scanning system scans all horizontal<br />
lines at a time, so you can double the number of lines<br />
compared with the interlaced scanning, resulting in a<br />
high-density, flicker-free picture.<br />
To enjoy a progressive scanned video, the TV connected<br />
to the unit must have Progressive inputs.<br />
Depending on the material source format, DVD discs can<br />
be classified into two categories; film and video (note that<br />
some DVD discs contain both a film source and a video<br />
source). Film sources are recorded as 24-frame-persecond<br />
information, while (NTSC) video sources are<br />
recorded as 30-frame-per second (60-field-per-second<br />
interlaced) information.<br />
When the unit plays back a film source material,<br />
uninterlaced progressive output signals are created using<br />
the original information. When a video source material is<br />
played back, the unit interleaves lines between the<br />
interlaced lines on each to create the interpolated picture<br />
and outputs as the progressive signal.<br />
NOTES:<br />
• Some discs may not be played back with the progressive scanning<br />
mode correctly because of the disc characteristics or recording<br />
condition.<br />
• There are some progressive TV and High-Definition TV sets that<br />
are not fully compatible with the unit, resulting in the unnatural<br />
picture when playing back a DVD disc in the Progressive scanning<br />
mode. In such a case, use the Interlaced scanning mode.<br />
• You cannot make the progressive scanning mode active in following<br />
cases.<br />
– The unit is in the VCR mode.<br />
– The disc is played back in the DVD mode.<br />
– The S-VIDEO/COMPONENT video selector swich is set to<br />
S-VIDEO positon.<br />
2D80321A[E](32-BACK) 34<br />
9/6/04, 10:35
ENGLISH<br />
Language code list<br />
Enter the appropriate code number for the initial settings “Menu”, “Subtitle” and/or “Audio” (see page 33).<br />
Language Name Code Language Name Code Language Name Code Language Name Code<br />
Abkhazian 1112 Fiji 1620 Lingala 2224 Singhalese 2919<br />
Afar 1111 Finnish 1619 Lithuanian 2230 Slovak 2921<br />
Afrikaans 1116 French 1628 Macedonian 2321 Slovenian 2922<br />
Albanian 2927 Frisian 1635 Malagasy 2317 Somali 2925<br />
Amharic 1123 Galician 1722 Malay 2329 Spanish 1529<br />
Arabic 1128 Georgian 2111 Malayalam 2322 Sundanese 2931<br />
Armenian 1835 German 1415 Maltese 2330 Swahili 2933<br />
Assamese 1129 Greek 1522 Maori 2319 Swedish 2932<br />
Aymara 1135 Greenlandic 2122 Marathi 2328 Tagalog 3022<br />
Azerbaijani 1136 Guarani 1724 Moldavian 2325 Tajik 3017<br />
Bashkir 1211 Gujarati 1731 Mongolian 2324 Tamil 3011<br />
Basque 1531 Hausa 1811 Nauru 2411 Tatar 3030<br />
Bengali; Bangla 1224 Hebrew 1933 Nepali 2415 Telugu 3015<br />
Bhutani 1436 Hindi 1819 Norwegian 2425 Thai 3018<br />
Bihari 1218 Hungarian 1831 Oriya 2528 Tibetan 1225<br />
Breton 1228 Icelandic 1929 Panjabi 2611 Tigrinya 3019<br />
Bulgarian 1217 Indonesian 1924 Pashto, Pushto 2629 Tonga 3025<br />
Burmese 2335 Interlingua 1911 Persian 1611 Turkish 3028<br />
Byelorussian 1215 Irish 1711 Polish 2622 Turkmen 3021<br />
Cambodian 2123 Italian 1930 Portuguese 2630 Twi 3033<br />
Catalan 1311 Japanese 2011 Quechua 2731 Ukrainian 3121<br />
Chinese 3618 Javanese 2033 Rhaeto-Romance 2823 Urdu 3128<br />
Corsican 1325 Kannada 2124 Romanian 2825 Uzbek 3136<br />
Croatian 1828 Kashmiri 2129 Russian 2831 Vietnamese 3219<br />
Czech 1329 Kazakh 2121 Samoan 2923 Volapük 3225<br />
Danish 1411 Kirghiz 2135 Sanskrit 2911 Welsh 1335<br />
Dutch 2422 Korean 2125 Scots Gaelic 1714 Wolof 3325<br />
English 1524 Kurdish 2131 Serbian 2928 Xhosa 3418<br />
Esperanto 1525 Laothian 2225 Serbo-Croatian 2918 Yiddish 2019<br />
Estonian 1530 Latin 2211 Shona 2924 Yoruba 3525<br />
Faroese 1625 Latvian, Lettish 2232 Sindhi 2914 Zulu 3631<br />
35<br />
2D80321A[E](32-BACK) 35<br />
9/6/04, 10:35
Problems and troubleshooting<br />
Use the following check list for troubleshooting when you have problems with your unit. Consult your local dealer or service<br />
outlet if problems persist.<br />
Be sure all connections are properly made when using with other units.<br />
SYMPTOMS<br />
DVD/VCR<br />
DVD/VCR does not operate.<br />
No picture.<br />
No sound.<br />
POSSIBLE SOLUTIONS<br />
• Make sure the power cord is plugged in.<br />
• Try another AC outlet.<br />
• Power is off, check fuse or circuit breaker.<br />
• Unplug unit, then plug it back in.<br />
• Select the DVD or VCR mode before operating.<br />
• Antenna connection is not correct or antenna cable is disconnected.<br />
• Check the unit is connected correctly.<br />
• The video channel is not in the correct position or the TV is not set to<br />
the video channel 3 or 4.<br />
• The video input selector of the TV is not set to VIDEO. Set to VIDEO (or<br />
equivalent).<br />
• Channel is set to the external mode.<br />
• Check the unit is connected correctly.<br />
• Check the input selector of the amplifier is set properly.<br />
• The unit is in the Special playback mode.<br />
PAGE<br />
9<br />
–<br />
–<br />
9<br />
–<br />
10,11<br />
12~17<br />
18<br />
–<br />
–<br />
12~17<br />
–<br />
21,28<br />
The remote control does not function.<br />
No CABLE reception.<br />
VCR<br />
• Aim at the remote control at the remote sensor.<br />
• Operate within Approx. 5 Meters or reduce the light in the room.<br />
• Clear the path of the beam.<br />
• The batteries are weak. Replace the batteries.<br />
• Check the batteries are inserted correctly.<br />
• Check all CABLE connections.<br />
• Station or CABLE system problems, try another station.<br />
9<br />
11<br />
• The erase prevention tab of the video cassette is broken off.<br />
TV recording does not work.<br />
• The unit is in the external input mode.<br />
21,23<br />
Timer recording does not work.<br />
Noise bars on screen.<br />
DVD<br />
• The time is not set correctly.<br />
• The recording start/end time is not set correctly.<br />
• TIMER REC has not been pressed ( is not lit).<br />
• Tracking adjustment beyond range of automatic tracking circuit. Try<br />
Manual tracking adjustment.<br />
• Video heads are dirty.<br />
• The tape is worn or damaged.<br />
Display is not shown in your language. • Select proper language in the menu options.<br />
27<br />
19,20<br />
24<br />
24<br />
21,22<br />
37<br />
–<br />
Playback doesn’t start.<br />
Stopping playback, search, slowmotion<br />
play, repeat play, or program<br />
play, etc. cannot be performed.<br />
No picture, or the screen is blurred or<br />
divided into two parts.<br />
• No disc is inserted.<br />
• The disc may be dirty. Clean up the disc.<br />
• The unit cannot play DVD-ROMs, etc.<br />
• Some discs may not do some of the functions.<br />
• The S-VIDEO/COMPONENT selector is not set correctly.<br />
• The progressive scanning mode is active through the unit is<br />
connected to a TV via the VIDEO OUT jack.<br />
28<br />
27<br />
27<br />
–<br />
12<br />
34<br />
36<br />
2D80321A[E](32-BACK) 36<br />
9/6/04, 10:35
ENGLISH<br />
Problems and troubleshooting / Video head cleaning<br />
SYMPTOMS POSSIBLE SOLUTIONS PAGE<br />
No 4:3 (16:9) picture.<br />
• The setup does not match your TV.<br />
33<br />
No on-screen display.<br />
• Select Display On.<br />
34<br />
No surround sound.<br />
• The setup does not match your stereo system.<br />
13<br />
The unit or remote operation key is<br />
not functioning.<br />
Playback does not start when the title<br />
is selected.<br />
Audio soundtrack and/or subtitle<br />
language is not changed when you<br />
play back a DVD.<br />
No subtitle.<br />
Angle cannot be changed.<br />
appears on the screen.<br />
• Turn off the unit and unplug the AC power cord for several minutes,<br />
then replug it.<br />
• Check the Parental setup.<br />
• Multilingual language is not recorded on the DVD disc.<br />
• Some discs have no subtitles.<br />
• Subtitles are cleared. Press SUBTITLE.<br />
• Multi-angles are not recorded on the DVD disc.<br />
• The function is prohibited with the unit or the disc.<br />
–<br />
32<br />
33<br />
29,33<br />
30<br />
28<br />
Video head cleaning<br />
Video head clogging<br />
The video heads are the means by which the DVD/VCR reads<br />
the picture from the tape during playback. In the unlikely event<br />
that the heads become dirty enough to be clogged, no picture<br />
will be played back. This can easily be determined if, during<br />
playback of a known good tape, there is good sound, but no<br />
picture (picture is extremely snowy). If this is the case, have<br />
the DVD/VCR checked by qualified service personnel.<br />
Good Picture<br />
Snowy Picture<br />
NOTES:<br />
• DO NOT ATTEMPT TO CLEAN THE VIDEO HEADS OR SERVICE THE UNIT BY REMOVING THE TOP COVER.<br />
• Video heads may eventually wear out and should be replaced when the fail to produce clear pictures.<br />
• To help prevent video head clogging, use only good quality VHS tapes. Discard worn out tapes.<br />
37<br />
2D80321A[E](32-BACK) 37<br />
9/6/04, 10:35
Specifications<br />
GENERAL<br />
Power supply:<br />
Power consumption:<br />
Weight:<br />
Dimensions:<br />
Inputs/Outputs:<br />
Video:<br />
Audio:<br />
Antenna:<br />
Hi-Fi frequency response:<br />
Hi-Fi dynamic range:<br />
AC 120V 60Hz<br />
Operation: 18W<br />
Stand by: 2W<br />
7.7 lbs (3.5 kg)<br />
Width : 16-15/16 inches (430 mm)<br />
Height : 3-7/8 inches (99 mm)<br />
Depth : 8-15/16 inches (227 mm)<br />
In: 1 Vp-p/75 ohm<br />
Out: 1 Vp-p/75 ohm<br />
In: –8 dBm/50k ohm<br />
Out: –8 dBm/1k ohm<br />
UHF/VHF IN/OUT: 75 ohm coaxial<br />
20Hz to 20,000Hz<br />
More than 90dB<br />
VCR section<br />
Video head:<br />
Audio track:<br />
Tuner:<br />
RF channel output:<br />
F.FWD/REW Time<br />
at 25 ˚C (77 ˚F):<br />
4 Rotary Heads<br />
Hi-Fi Sound - 2 Tracks / MONO Sound - 1 Track<br />
181 Channel Freq. Synthesized<br />
VHF 2-13<br />
UHF 14-69<br />
CABLE TV 14-36 (A)-(W)<br />
37-59 (AA)-(WW)<br />
60-85 (AAA)-(ZZZ)<br />
86-94 (86)-(94)<br />
95-99 (A-5)-(A-1)<br />
100-125 (100)-(125)<br />
01 (5A)<br />
Channel 3 or 4, Switchable<br />
F.FWD Time: Approx. 4minutes and 50 seconds<br />
REW Time: Approx. 2minutes and 30 seconds<br />
(with T-120 Cassette Tape)<br />
DVD section<br />
Signal system:<br />
Applicable disc:<br />
Audio characteristics<br />
frequency response:<br />
S/N Ratio:<br />
Harmonic distortion:<br />
Wow and flutter:<br />
Dynamic range:<br />
Output:<br />
Pickup:<br />
ACCESSORIES:<br />
NTSC<br />
DVD (12cm, 8cm), CD (12cm, 8cm)<br />
DVD: 4Hz - 22kHz<br />
CD: 4Hz - 20kHz<br />
90dB<br />
0.02%<br />
Less than 0.01% Wrms<br />
More than 90 dB<br />
Video : (RCA) 1 Vp-p/75 ohm<br />
Audio : (RCA) –12 dBm/1k ohm<br />
Digital Audio : 0.5 Vp-p/75 ohm<br />
CD : Wavelength: 770 - 800 nm<br />
Maximum output power: 0.7 mW<br />
DVD :Wavelength: 645 - 660 nm<br />
Maximum output power: 0.5 mW<br />
Remote control x 1<br />
75 ohm Coaxial Cable x 1<br />
AUDIO/VIDEO Cable x 1<br />
38<br />
2D80321A[E](32-BACK) 38<br />
9/6/04, 10:35
ENGLISH<br />
<strong>Electrohome</strong> Warranty Certificate (Canada)<br />
VIDEO PRODUCT LIMITED WARRANTY<br />
We appreciate your purchase of an <strong>Electrohome</strong> Video Product. We take pride in the quality of our products and have<br />
manufactured your product to exacting quality standards. We feel confident that, in normal use, it will provide you with<br />
satisfactory performance. <strong>Electrohome</strong> Video Products, if proved defective upon our inspection, are warranted against<br />
manufacturing defects in materials and workmanship, in normal use, for the following periods from the date of purchase by<br />
the original retail purchaser in an unused condition. This warranty is conditional upon the unit being installed and used as<br />
directed in the instruction manual. Service for your <strong>Electrohome</strong> DVD/VCR can be obtained at the <strong>Electrohome</strong> Service<br />
depot listed at the bottom of this certificate or at any of the authorized service depots listed, at www.citizen-electronics.com<br />
ELECTROHOME <strong>EH8008PB</strong>, DVD/VCR COMBINATION:<br />
1 YEAR PARTS / 1 YEAR LABOUR / 6 MONTHS VIDEO HEADS / 90 DAYS REMOTE CONTROL<br />
(carry-in service)<br />
JUTAN INTERNATIONAL LIMITED’S OBLIGATIONS<br />
Jutan International Limited’s obligation under this warranty shall be limited to the repair, including all necessary parts and<br />
the cost of shop labour connected therewith, or at our option, the exchange of any video product which shows evidence of<br />
a manufacturing defect within the warranty period. Replacement parts furnished in connection with this warranty shall be<br />
warranted for a period equal to the unexpired portion of the original equipment warranty.<br />
WARRANTY EXCLUSION<br />
This warranty is extended to <strong>Electrohome</strong> Video Products purchased in Canada and distributed through Jutan International<br />
Limited and its dealer network. This warranty shall not apply to appearance or accessory items including, but not limited to<br />
antenna, cabinet parts, knobs, batteries, connecting cables, and tapes. This warranty shall, in addition, not apply to<br />
customer adjustments that are covered in the instruction book; damages due to handling, transportation, unpacking, set-up,<br />
installation, repair or replacement of parts supplied by other than an Authorized <strong>Electrohome</strong> Service Depot: or any<br />
malfunction or failure caused by abnormal environmental conditions, improper unauthorized service, improper<br />
maintenance, modifications or repair by the consumer, abuse, misuse, neglect, accident, incorrect inline voltage, fire, flood,<br />
or any other natural disasters, cleaning of video heads (if applicable), signal reception problems caused by external<br />
antenna, cable systems or interference. This video product is only warranted to the original retail purchaser or gift recipient.<br />
This warranty becomes void in the event of commercial or rental use. The warranty in this case shall be limited to 30 days<br />
parts and labour (An optional extended warranty on products used for commercial purposes may be available. Contact us<br />
for further information.) This warranty becomes void in the event serial numbers are altered, defaced, or removed. Jutan<br />
International Limited reserves the right to make changes in design and/or to make additions to or improvements upon this<br />
product, without incurring any obligation to install the same on products previously manufactured. The foregoing is in lieu of<br />
all other warranties expressed or implied. In no event shall Jutan International Limited or its dealers be liable for special or<br />
consequential damages arising from the use of this product, or for any delay in performance of this warranty due to cause<br />
beyond our control. The purchaser may have other rights under existing provincial or federal laws, and where such laws<br />
prohibit any terms of this warranty, they are deemed null and void, but the remainder of the warranty shall remain in effect.<br />
CUSTOMER OBLIGATIONS<br />
The dealer’s original, dated bill-of-sale should be retained as proof of purchase and must be presented, together with this<br />
warranty certificate to the <strong>Electrohome</strong> Authorized Service Centre in Canada when this product is to be serviced under the<br />
provisions of this warranty. Transportation to and from the service centre is the responsibility of the owner. Warranty<br />
service is available only in Canada.<br />
HOW TO OBTAIN WARRANTY SERVICE<br />
Should this product require warranty service, you may obtain specific information on how to obtain warranty service by<br />
contacting us directly between 9:00AM – 5:00PM, (Toronto time) Monday to Friday.<br />
Date Purchased:__________________________________ Serial Number:____________________________________<br />
JUTAN INTERNATIONAL LIMITED<br />
455 GORDON BAKER ROAD, TORONTO, ONTARIO M2H 4H2<br />
(416) 499-5449 / 1-800-663-5954<br />
39<br />
2D80321A[E](32-BACK) 39<br />
9/6/04, 10:35
MEMO<br />
...............................................................................................................................................................................<br />
...............................................................................................................................................................................<br />
...............................................................................................................................................................................<br />
...............................................................................................................................................................................<br />
...............................................................................................................................................................................<br />
...............................................................................................................................................................................<br />
...............................................................................................................................................................................<br />
...............................................................................................................................................................................<br />
...............................................................................................................................................................................<br />
...............................................................................................................................................................................<br />
...............................................................................................................................................................................<br />
...............................................................................................................................................................................<br />
...............................................................................................................................................................................<br />
...............................................................................................................................................................................<br />
...............................................................................................................................................................................<br />
...............................................................................................................................................................................<br />
...............................................................................................................................................................................<br />
...............................................................................................................................................................................<br />
...............................................................................................................................................................................<br />
...............................................................................................................................................................................<br />
...............................................................................................................................................................................<br />
...............................................................................................................................................................................<br />
...............................................................................................................................................................................<br />
...............................................................................................................................................................................<br />
...............................................................................................................................................................................<br />
...............................................................................................................................................................................<br />
...............................................................................................................................................................................<br />
...............................................................................................................................................................................<br />
...............................................................................................................................................................................<br />
...............................................................................................................................................................................<br />
...............................................................................................................................................................................<br />
...............................................................................................................................................................................<br />
...............................................................................................................................................................................<br />
...............................................................................................................................................................................<br />
...............................................................................................................................................................................<br />
...............................................................................................................................................................................<br />
...............................................................................................................................................................................<br />
...............................................................................................................................................................................<br />
...............................................................................................................................................................................<br />
...............................................................................................................................................................................<br />
...............................................................................................................................................................................<br />
...............................................................................................................................................................................<br />
2D80321A[E](32-BACK) 40<br />
9/6/04, 10:35
MEMO<br />
...............................................................................................................................................................................<br />
...............................................................................................................................................................................<br />
...............................................................................................................................................................................<br />
...............................................................................................................................................................................<br />
...............................................................................................................................................................................<br />
...............................................................................................................................................................................<br />
...............................................................................................................................................................................<br />
...............................................................................................................................................................................<br />
...............................................................................................................................................................................<br />
...............................................................................................................................................................................<br />
...............................................................................................................................................................................<br />
...............................................................................................................................................................................<br />
...............................................................................................................................................................................<br />
...............................................................................................................................................................................<br />
...............................................................................................................................................................................<br />
...............................................................................................................................................................................<br />
...............................................................................................................................................................................<br />
...............................................................................................................................................................................<br />
...............................................................................................................................................................................<br />
...............................................................................................................................................................................<br />
...............................................................................................................................................................................<br />
...............................................................................................................................................................................<br />
...............................................................................................................................................................................<br />
...............................................................................................................................................................................<br />
...............................................................................................................................................................................<br />
...............................................................................................................................................................................<br />
...............................................................................................................................................................................<br />
...............................................................................................................................................................................<br />
...............................................................................................................................................................................<br />
...............................................................................................................................................................................<br />
...............................................................................................................................................................................<br />
...............................................................................................................................................................................<br />
...............................................................................................................................................................................<br />
...............................................................................................................................................................................<br />
...............................................................................................................................................................................<br />
...............................................................................................................................................................................<br />
...............................................................................................................................................................................<br />
...............................................................................................................................................................................<br />
...............................................................................................................................................................................<br />
...............................................................................................................................................................................<br />
...............................................................................................................................................................................<br />
...............................................................................................................................................................................<br />
2D80321A[E](32-BACK) 41<br />
9/6/04, 10:35