Perkins Motor Operation and Maintenance Manual (English) - REED
Perkins Motor Operation and Maintenance Manual (English) - REED
Perkins Motor Operation and Maintenance Manual (English) - REED

You also want an ePaper? Increase the reach of your titles
YUMPU automatically turns print PDFs into web optimized ePapers that Google loves.
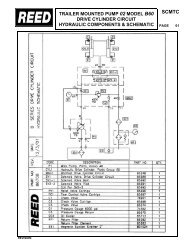
SEBU8325-01 63<br />
<strong>Maintenance</strong> Section<br />
Engine Air Precleaner - Check/Clean<br />
Engine Air Precleaner -<br />
Check/Clean<br />
i02690451<br />
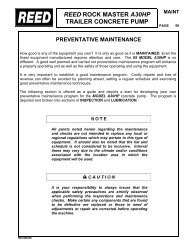
Illustration 28<br />
Typical service indicator<br />
g00103777<br />
Observe the service indicator. The air cleaner<br />
element should be cleaned or the air cleaner element<br />
should be replaced when one of the following<br />
conditions occur:<br />
• The yellow diaphragm enters the red zone.<br />
• The red piston locks in the visible position.<br />
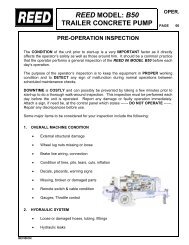
Illustration 29<br />
Typical example<br />
(1) Wing nut<br />
(2) Cover<br />
(3) Body<br />
g00287039<br />
Test the Service Indicator<br />
Service indicators are important instruments.<br />
• Check for ease of resetting. The service indicator<br />
should reset in less than three pushes.<br />
• Check the movement of the yellow core when the<br />
engine is accelerated to the engine rated speed.<br />
The yellow core should latch approximately at the<br />
greatest vacuum that is attained.<br />
If the service indicator does not reset easily, or if the<br />
yellow core does not latch at the greatest vacuum,<br />
the service indicator should be replaced. If the new<br />
service indicator will not reset, the hole for the service<br />
indicator may be restricted.<br />
The service indicator may need to be replaced<br />
frequently in environments that are severely dusty.<br />
Remove wing nut (1) <strong>and</strong> cover (2). Check for an<br />
accumulation of dirt <strong>and</strong> debris in body (3). Clean the<br />
body, if necessary.<br />
After cleaning the precleaner, install cover (2) <strong>and</strong><br />
wing nut (1).<br />
Note: When the engine is operated in dusty<br />
applications, more frequent cleaning is required.<br />
Engine Mounts - Inspect<br />
i02676012<br />
Note: The engine mounts may not have been<br />
supplied by <strong>Perkins</strong>. Refer to the OEM information<br />
for further information on the engine mounts <strong>and</strong> the<br />
correct bolt torque.<br />
Inspect the engine mounts for deterioration <strong>and</strong> for<br />
correct bolt torque. Engine vibration can be caused<br />
by the following conditions:<br />
• Incorrect mounting of the engine<br />
• Deterioration of the engine mounts<br />
• Loose engine mounts<br />
Any engine mount that shows deterioration should<br />
be replaced. Refer to the OEM information for the<br />
recommended torques.