Perkins Motor Operation and Maintenance Manual (English) - REED
Perkins Motor Operation and Maintenance Manual (English) - REED
Perkins Motor Operation and Maintenance Manual (English) - REED

Create successful ePaper yourself
Turn your PDF publications into a flip-book with our unique Google optimized e-Paper software.
66 SEBU8325-01<br />
<strong>Maintenance</strong> Section<br />
Engine Valve Lash - Inspect/Adjust<br />
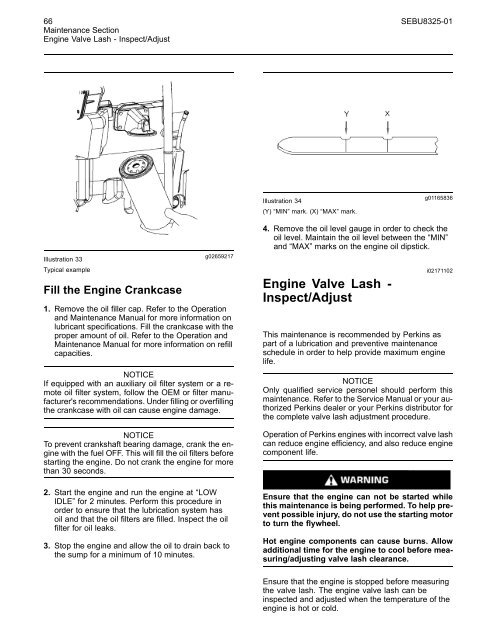
Illustration 34<br />
(Y) “MIN” mark. (X) “MAX” mark.<br />
g01165836<br />
Illustration 33<br />
Typical example<br />
Fill the Engine Crankcase<br />
g02659217<br />
1. Remove the oil filler cap. Refer to the <strong>Operation</strong><br />
<strong>and</strong> <strong>Maintenance</strong> <strong>Manual</strong> for more information on<br />
lubricant specifications. Fill the crankcase with the<br />
proper amount of oil. Refer to the <strong>Operation</strong> <strong>and</strong><br />
<strong>Maintenance</strong> <strong>Manual</strong> for more information on refill<br />
capacities.<br />
NOTICE<br />
If equipped with an auxiliary oil filter system or a remote<br />
oil filter system, follow the OEM or filter manufacturer's<br />
recommendations. Under filling or overfilling<br />
the crankcase with oil can cause engine damage.<br />
NOTICE<br />
To prevent crankshaft bearing damage, crank the engine<br />
with the fuel OFF. This will fill the oil filters before<br />
starting the engine. Do not crank the engine for more<br />
than 30 seconds.<br />
2. Start the engine <strong>and</strong> run the engine at “LOW<br />
IDLE” for 2 minutes. Perform this procedure in<br />
order to ensure that the lubrication system has<br />
oil <strong>and</strong> that the oil filters are filled. Inspect the oil<br />
filter for oil leaks.<br />
3. Stop the engine <strong>and</strong> allow the oil to drain back to<br />
the sump for a minimum of 10 minutes.<br />
4. Remove the oil level gauge in order to check the<br />
oil level. Maintain the oil level between the “MIN”<br />
<strong>and</strong> “MAX” marks on the engine oil dipstick.<br />
Engine Valve Lash -<br />
Inspect/Adjust<br />
i02171102<br />
This maintenance is recommended by <strong>Perkins</strong> as<br />
part of a lubrication <strong>and</strong> preventive maintenance<br />
schedule in order to help provide maximum engine<br />
life.<br />
NOTICE<br />
Only qualified service personel should perform this<br />
maintenance. Refer to the Service <strong>Manual</strong> or your authorized<br />
<strong>Perkins</strong> dealer or your <strong>Perkins</strong> distributor for<br />
the complete valve lash adjustment procedure.<br />
<strong>Operation</strong> of <strong>Perkins</strong> engines with incorrect valve lash<br />
can reduce engine efficiency, <strong>and</strong> also reduce engine<br />
component life.<br />
Ensure that the engine can not be started while<br />
this maintenance is being performed. To help prevent<br />
possible injury, do not use the starting motor<br />
to turn the flywheel.<br />
Hot engine components can cause burns. Allow<br />
additional time for the engine to cool before measuring/adjusting<br />
valve lash clearance.<br />
Ensure that the engine is stopped before measuring<br />
the valve lash. The engine valve lash can be<br />
inspected <strong>and</strong> adjusted when the temperature of the<br />
engine is hot or cold.