Setting up cross compiling environment & Qt/X11 ... - Bytemark Hosting
Setting up cross compiling environment & Qt/X11 ... - Bytemark Hosting
Setting up cross compiling environment & Qt/X11 ... - Bytemark Hosting
Create successful ePaper yourself
Turn your PDF publications into a flip-book with our unique Google optimized e-Paper software.
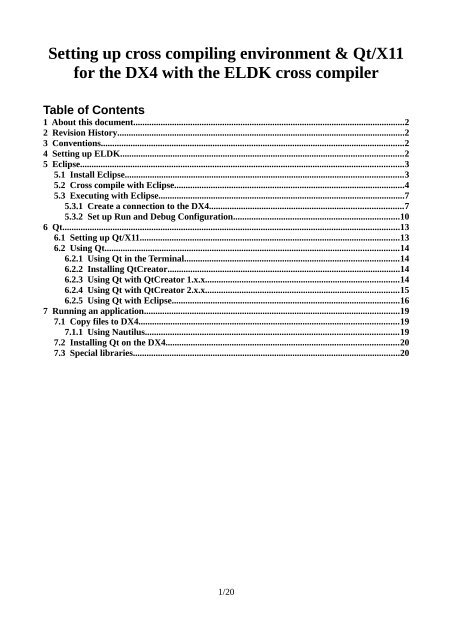
<strong>Setting</strong> <strong>up</strong> <strong>cross</strong> <strong>compiling</strong> <strong>environment</strong> & <strong>Qt</strong>/<strong>X11</strong><br />
for the DX4 with the ELDK <strong>cross</strong> compiler<br />
Table of Contents<br />
1 About this document.......................................................................................................................2<br />
2 Revision History..............................................................................................................................2<br />
3 Conventions.....................................................................................................................................2<br />
4 <strong>Setting</strong> <strong>up</strong> ELDK............................................................................................................................2<br />
5 Eclipse..............................................................................................................................................3<br />
5.1 Install Eclipse..........................................................................................................................3<br />
5.2 Cross compile with Eclipse.....................................................................................................4<br />
5.3 Executing with Eclipse............................................................................................................7<br />
5.3.1 Create a connection to the DX4.....................................................................................7<br />
5.3.2 Set <strong>up</strong> Run and Debug Configuration.........................................................................10<br />
6 <strong>Qt</strong>....................................................................................................................................................13<br />
6.1 <strong>Setting</strong> <strong>up</strong> <strong>Qt</strong>/<strong>X11</strong>..................................................................................................................13<br />
6.2 Using <strong>Qt</strong>.................................................................................................................................14<br />
6.2.1 Using <strong>Qt</strong> in the Terminal..............................................................................................14<br />
6.2.2 Installing <strong>Qt</strong>Creator......................................................................................................14<br />
6.2.3 Using <strong>Qt</strong> with <strong>Qt</strong>Creator 1.x.x.....................................................................................14<br />
6.2.4 Using <strong>Qt</strong> with <strong>Qt</strong>Creator 2.x.x.....................................................................................15<br />
6.2.5 Using <strong>Qt</strong> with Eclipse....................................................................................................16<br />
7 Running an application................................................................................................................19<br />
7.1 Copy files to DX4..................................................................................................................19<br />
7.1.1 Using Nautilus...............................................................................................................19<br />
7.2 Installing <strong>Qt</strong> on the DX4......................................................................................................20<br />
7.3 Special libraries.....................................................................................................................20<br />
1/20
1 About this document<br />
This documents describes how to set <strong>up</strong> a <strong>cross</strong> <strong>compiling</strong> <strong>environment</strong> for the DX4 using the<br />
ELKD <strong>cross</strong> compiler. The whole <strong>environment</strong> is set <strong>up</strong> using the Ubuntu 32Bit Linux distribution.<br />
Additionally there are two ways described to use <strong>Qt</strong>Creator and Eclipse to <strong>cross</strong> compile an<br />
application for the DX4. With Eclipse it is also possible to remote launch the application from<br />
within the IDE on the DX4.<br />
Anders Electronics provides a completely set <strong>up</strong> Ubuntu 10.04 32 Bit within a VirtualBox virtual<br />
machine.<br />
2 Revision History<br />
Revision Date Changes<br />
A 24/07/2012 • Initial version<br />
B 27/07/2012 • Added a lot of pictures<br />
• Added a chapter on how to copy files to the DX4<br />
3 Conventions<br />
All kinds of code and file snippets are shown like the line below.<br />
This is a code line<br />
If there is a $ at the beginning like in the line below, this means that this is a command to be<br />
executed in a terminal as a normal user.<br />
$ user command<br />
If there is a # in front of the line it is a command to be executed as root (s<strong>up</strong>er user):<br />
# root command<br />
All names from menues, folders and file names are written in italic.<br />
When commands have to be split in multiple lines it looks like this:<br />
export PATH=/opt/eldk5.2.1/armv7a/sysroots/i686eldklinux/<br />
usr/bin/armv7avfpneonlinuxgnueabi/:$PATH<br />
4 <strong>Setting</strong> <strong>up</strong> ELDK<br />
Install an Ubuntu 10.04 LTS, 32 Bit system on a computer or a virtual machine. This will probably<br />
also work with other distributions. It is recommended to use 10.04 LTS because there where<br />
problems with Drag&Drop in the <strong>Qt</strong> integration for Eclipse when using Ubuntu 12.04 LTS.<br />
Make sure all <strong>up</strong>dates are installed.<br />
Download the ELDK iso file for armv7a from http://ftp.denx.de/pub/eldk/.<br />
For example: http://ftp.denx.de/pub/eldk/5.2.1/iso/eldk-5.2.1-armv7a.iso<br />
This mirror can be used alternatively because the denx.de server seems to be very slow: http://ftpstud.hs-esslingen.de/pub/Mirrors/eldk/<br />
Extract the iso file to a folder like /home/anders/eldk-5.2.1.<br />
Open a terminal and go to the directory where you put the installer:<br />
$ cd eldk5.2.1<br />
2/20
Make sure that the installer script is executable:<br />
$ chmod +x install.sh<br />
Install the ELDK:<br />
$ ./install.sh armv7a<br />
He asks for the user password to get root privileges and then he will install the ELDK into<br />
/opt/eldk-5.2.1/armv7a/. It is possible to install the ELDK into a different directory, see<br />
$ ./install help<br />
for more information.<br />
Now you have to set <strong>up</strong> some <strong>environment</strong> variables that are required to use the <strong>cross</strong> compiler. Add<br />
this at the end of your .profile file in the users home directory. It may be required to modify it to the<br />
version number and paths according to the version of ELDK you are using (there are no spaces in<br />
the lines!).<br />
export PATH=/opt/eldk5.2.1/armv7a/sysroots/i686eldklinux/usr/bin/armv7avfpneonlinuxgnueabi/:$PATH<br />
export PATH=/opt/eldk5.2.1/armv7a/sysroots/i686eldklinux/usr/bin/:$PATH<br />
export ARCH=arm<br />
export PKG_CONFIG_PATH="/opt/eldk5.2.1/armv7a/sysroots/i686eldklinux/usr/lib/pkgconfig"<br />
export PKG_CONFIG_SYSROOT_DIR="/opt/eldk5.2.1/armv7a/sysroots/i686eldklinux"<br />
export CROSS_COMPILE=armlinuxgnueabi<br />
You will need to log off and on again that the changes will take effect.<br />
Now the basic <strong>cross</strong> <strong>compiling</strong> <strong>environment</strong> is set <strong>up</strong>. To compile a simple C program you type<br />
$ ${CROSS_COMPILE}gcc o hello hello.c<br />
5 Eclipse<br />
An more comfortable way of <strong>cross</strong> <strong>compiling</strong> is Eclipse. Besides the basic features you get from an<br />
IDE like syntax highlighting and automatic makefile generation Eclipse also provides functions for<br />
a remote launch of your application.<br />
5.1 Install Eclipse<br />
Before you can install Eclipse you have to make sure that you have installed a Java Runtime<br />
Environment. Open a Terminal and execute this command:<br />
$ aptget install defaultjre<br />
Now go to http://www.eclipse.org/downloads/ and download the Eclipse Classic version for Linux<br />
32Bit. Extract the archive to your desktop.<br />
Start Eclipse by executing the file called eclipse in the extracted folder.<br />
Go the Help → Install new Software and add a new Repository by clicking on Add on the top right<br />
of the window. Call it CDT and use this link: http://download.eclipse.org/tools/cdt/releases/juno<br />
This path may be adjusted, when you are not using Eclipse Juno. Click OK to add the new<br />
repository.<br />
3/20
Select --All Available Sites-- from the drop down menu and wait for Eclipse to refresh the list<br />
below.<br />
Under “CDT Main Features” select:<br />
• C/C++ Development Tools<br />
• C/C++ Development Tools SDK<br />
Under “CDT Optional Features” select:<br />
• C/C++ GCC Cross Compiler S<strong>up</strong>port<br />
• C/C++ Remote Launch<br />
Under “Mobile and Device Development” select:<br />
• Remote System Explorer End-User Runtime<br />
• Remote System Explorer User Actions<br />
Install the selected packages by following the instructions of the wizard.<br />
5.2 Cross compile with Eclipse<br />
Eclipse offers some nice functions which allow you to <strong>cross</strong> compile your application.<br />
Create a new C project by going to File → New → Other. Select the C Project under C/C++ and<br />
click Next.<br />
4/20
Set a name for the project, we will use <strong>cross</strong>1 in this example. Set the project type to Executable →<br />
Empty Project. Set the Toolchains to Cross GCC and click Next.<br />
On the second page are no settings to be changed, just click Next.<br />
On the third page set the Cross compiler prefix to arm-linux-gnueabi- and the Cross compiler path<br />
to /opt/eldk-5.2.1/armv7a/sysroots/i686-eldk-linux/usr/bin/armv7a-vfp-neon-linux-gnueabi.<br />
5/20
Press Finish to create the project.<br />
Create a new source file by clicking on File → New → Source File, call it main.c.<br />
Press Finish to create the file and add a small hello world program in the file:<br />
#include <br />
int main(int argc, char* argv[])<br />
{<br />
printf("Hello world\n");<br />
return 0;<br />
}<br />
6/20
Compile the program by hitting the button with a hammer. When you open the Console at the<br />
bottom of Eclipse you should see him invoking the arm-linux-gnueabi-gcc <strong>cross</strong> compiler to<br />
compile the program.<br />
In the project directory you will find a file called <strong>cross</strong>1. This is the executable which you have to<br />
copy to the DX4. How to do this will be described later in chapter 7.<br />
5.3 Executing with Eclipse<br />
Now you can just copy the created file <strong>cross</strong>1 to the target and execute it. A better and easier way is<br />
to let Eclipse do that for you by a remote execution.<br />
5.3.1 Create a connection to the DX4<br />
First of all you will need to create a connection to the DX4. Go to Window → Show View → Other,<br />
expand Remote Systems and select the Remote System Explorer and click OK.<br />
7/20
At the bottom of Eclipse you should see a Remote Systems tab which should look like this:<br />
Create a new connection by clicking on the small symbol with a “+” in the Remote Systems tab.<br />
As Remote System Type select Linux and press Next.<br />
For the Host Name enter the IP address of your DX4 and press Next.<br />
In the Files tab select ssh.files for Configuration and press Next.<br />
In the Process tab select process.shell.linux for Configuration and press Next.<br />
In the Shells tab select ssh.shells for Configuration and press Next.<br />
In the SSH Terminals tab select ssh.terminals for Configuration and press Finish.<br />
Now you have a new connection in the Remote Systems tab. It is better to move the Remote Systems<br />
tab with Drag&Drop on the left side of Eclipse.<br />
8/20
Right click on the connection and select Connect. He may ask you to accept the SSH connection<br />
and other things, accept that. After that you should be able to browse the remote file system by<br />
going to Sftp Files → Root. He will also ask for a user name and password to use, use the user and<br />
password of the DX4. He may also ask you to create a new password for the Eclipse password<br />
storage.<br />
It is now possible to Drag&Drop files from your local file browser to a folder in Eclipse. We will<br />
later introduce a even more comfortable way of copying files.<br />
9/20
5.3.2 Set <strong>up</strong> Run and Debug Configuration<br />
To tell Eclipse to run the current application <strong>cross</strong>1 on the DX4 a special Run Configuration has to<br />
be created. Click on Run → Run Configurations. Here are all the Run Configurations listed. If there<br />
is already any configuration you should remove it, because it will not be used.<br />
Double click on C/C++ Remote Application to create a new remote launch configuration.<br />
Next to Connection select the connection you created before and click on Properties next to it. Here<br />
you have to set the remote workspace path. This path must exist! For example use /home/root/ and<br />
press OK.<br />
Make sure the box Select configuration using C/C++ Application is not checked.<br />
In Remote Absolute File Path For C/C++ Application set the complete path where to put the<br />
executable including the name of the file. For example /home/root/<strong>cross</strong>1.<br />
Put this in the field Commands to execute before application to make the file executable after<br />
Eclipse copied it to the DX4: chmod 777 /home/root/<strong>cross</strong>1<br />
After that click Apply and Close to save the settings. Now open Run → Debug Configurations.<br />
There should already be a C/C++ Remote Application where Eclipse made the same settings as in<br />
the Run Configuration.<br />
10/20
Go the the Debugger tab. In the area Debugger Option go to the tab Main and set this in the field<br />
GDB Debugger (there is no space in the line!):<br />
/opt/eldk5.2.1/armv7a/sysroots/i686eldklinux/usr/bin/armv7avfpneonlinuxgnueabi/armlinuxgnueabigdb<br />
Click Apply and close the configuration dialogue.<br />
To s<strong>up</strong>port debugging on the DX4 you will have to install the gdbserver on it. The gdbserver is not<br />
required if you don't want to debug the application. When you are in the Remote System Explorer<br />
view of Eclipse you can open a terminal in Eclipse by right clicking on Ssh Terminals under your<br />
connection and select Launch Terminal.<br />
11/20
Type this to install the gdbserver type this in the new created terminal:<br />
# opkg <strong>up</strong>date<br />
# opkg install gdbserver<br />
The DX4 has to be connected to the internet.<br />
When you want to run or debug the application for the first time you have to go to Run →<br />
Run/Debug Configurations, select the configuration you created and click the Run or Debug button.<br />
After that is is possible to run the application from the small arrow next to the run and debug<br />
buttons at the top of Eclipse. Here you click on the name of your run or debug configuration and he<br />
will automatically load the executable to the DX4 and execute it.<br />
You can see the output of the application in the Console tab of Eclipse.<br />
6 <strong>Qt</strong><br />
<strong>Qt</strong> is a powerful C++ library for creating graphical user interfaces and many more things. It is<br />
portable over many operation systems and platforms. There is also a embedded version of <strong>Qt</strong> called<br />
12/20
<strong>Qt</strong>/embedded which doesn't need a X server which makes systems very lightweight and fast. In this<br />
document we will discuss how to set <strong>up</strong> <strong>Qt</strong> using the X server but <strong>compiling</strong> it for embedded use is<br />
not a big difference.<br />
6.1 <strong>Setting</strong> <strong>up</strong> <strong>Qt</strong>/<strong>X11</strong><br />
You first need to set <strong>up</strong> the terminal compilation method described above. Download the <strong>Qt</strong> sources<br />
from http://qt.nokia.com/downloads. Scroll a bit down to "<strong>Qt</strong> libraries". The file should have a<br />
name like qt-everywhere-opensource-src-4.8.2.tar.gz. Extract the sources into you home directory:<br />
$ tar xzf Downloads/qteverywhereopensourcesrc4.8.2.tar.gz<br />
Change into the <strong>Qt</strong> directory:<br />
$ cd qteverywhereopensourcesrc4.8.2<br />
Copy the modified configuration for <strong>Qt</strong> and replace the existing one. You will find the modified file<br />
in the Anders DX4 wiki:<br />
$ cp ../Downloads/qmake.conf mkspecs/qws/linuxarmgnueabig++/qmake.conf<br />
Then open the file in mkspecs/qws/linux-arm-gnueabi-g++/qmake.conf and make sure that all the<br />
paths to the ELDK are correct.<br />
Make sure all required tools like make are installed:<br />
$ sudo aptget install buildessential<br />
After that use the following command line to configure <strong>Qt</strong>. The path behind -prefix defines the<br />
folder where <strong>Qt</strong> will be installed. This is the folder for the local computer and the DX4. You should<br />
not install it in / because this will cause problems with a local x86 installation of <strong>Qt</strong>. Execute the<br />
following command to configure the <strong>Qt</strong> sources (hit return after each line):<br />
./configure arch arm xplatform qws/linuxarmgnueabig++ \<br />
forcepkgconfig nomake demos nomake examples noopenssl \<br />
nosqlsqlite nophonon nophononbackend nowebkit \<br />
prefix /usr/local/Trolltech/<strong>Qt</strong>arm<strong>X11</strong> \<br />
D QT_RX71_MULTITOUCH confirmlicense<br />
When the script finishes without any error continue <strong>compiling</strong> <strong>Qt</strong>:<br />
$ make j X<br />
Where X is the number of cores your CPU has plus one. So type<br />
$ make j 5<br />
on a quad core machine. This will speed <strong>up</strong> things by using parallel compilation.<br />
Note: Depending on the speed of your computer this process can take several hours.<br />
To install <strong>Qt</strong> on your local machine (which is required to <strong>cross</strong> compile) just type<br />
$ sudo make install<br />
Now you should add /usr/local/Trolltech/<strong>Qt</strong>-arm-<strong>X11</strong>/bin to your PATH variable by adding the<br />
following line to your users .profile file:<br />
export PATH=/usr/local/Trolltech/<strong>Qt</strong>arm<strong>X11</strong>/bin/:$PATH<br />
To open the file type:<br />
$ gedit ~/.profile<br />
13/20
You will have to log out and log in again for changes to take effect.<br />
6.2 Using <strong>Qt</strong><br />
There are tree different ways of using <strong>Qt</strong> for compilation. You can simply use the terminal to<br />
compile your <strong>Qt</strong> code, you can use the <strong>Qt</strong>Creator or you can use Eclipse. For the <strong>Qt</strong>Creator there<br />
are two guides, depending on which version of <strong>Qt</strong>Creator you are using. It is recommended to use<br />
version 2 of <strong>Qt</strong>Creator because it is much easier to set <strong>up</strong> <strong>cross</strong> <strong>compiling</strong>.<br />
6.2.1 Using <strong>Qt</strong> in the Terminal<br />
To use <strong>Qt</strong> in the terminal you simply need to go into the folder where your sources are and run<br />
$ qmake project<br />
to create the .pro file. This is required only once for each project but it needs to be done again when<br />
you add source files. After that you can create a make file by invoking<br />
$ qmake<br />
<strong>Qt</strong> will take care of <strong>cross</strong> compilation and you just have to run<br />
$ make<br />
to compile the project.<br />
6.2.2 Installing <strong>Qt</strong>Creator<br />
Install the normal <strong>Qt</strong>Creator for X86 on your desktop machine. You do not need to install the whole<br />
<strong>Qt</strong> libraries, only what is required for the <strong>Qt</strong>Creator itself. To install <strong>Qt</strong>Creator on a Debian based<br />
system (like Ubuntu) type this in a terminal:<br />
$ sudo aptget install qtcreator<br />
If you also want to install <strong>Qt</strong> for a local compilation invoke this command:<br />
$ sudo aptget install libqt4dev<br />
6.2.3 Using <strong>Qt</strong> with <strong>Qt</strong>Creator 1.x.x<br />
Start your <strong>Qt</strong>Creator and create a simple project.<br />
Now go to Tools → Options → Debugger → Gdb and select the ARM <strong>cross</strong> gdb:<br />
/opt/eldk5.2.1/armv7a/sysroots/i686eldklinux/usr/bin/armv7avfpneonlinuxgnueabi/armlinuxgnueabigdb<br />
On the left side go to <strong>Qt</strong>4 → <strong>Qt</strong> Versions and add a new <strong>Qt</strong> version to Manual. Call it something<br />
like <strong>Qt</strong> 4.8.2 for ARM and add the qmake executable:<br />
/usr/local/Trolltech/<strong>Qt</strong>arm<strong>X11</strong>/bin/qmake<br />
Now the <strong>Qt</strong>Creator is ready for <strong>cross</strong> <strong>compiling</strong>. There is one issue with the ELDK which causes g+<br />
+ to complain about this:<br />
note: the mangling of 'va_list' has changed in GCC 4.4<br />
This is a known issue and can be ignored. To tell GCC to s<strong>up</strong>press this message you can pass the<br />
argument -Wno-psabi to it. To do this in a <strong>Qt</strong> project add the following line at the end of your .pro<br />
file:<br />
14/20
QMAKE_CXXFLAGS += Wnopsabi<br />
6.2.4 Using <strong>Qt</strong> with <strong>Qt</strong>Creator 2.x.x<br />
First create your project like you would do it for a normal desktop application. Therefore click on<br />
File → New File or Project and select the type of project you want to create. For example a <strong>Qt</strong> GUI<br />
Application like below.<br />
Click Choose to continue. After that you will be asked to choose a project name:<br />
Enter a name and click Next to continue. The next step is to select which compilers to use. Normally<br />
you should let the default setting "For Each <strong>Qt</strong> Version One Debug And One Release". This will<br />
create a build configuration for your local <strong>Qt</strong> (if you have installed it) and the <strong>cross</strong> <strong>compiling</strong><br />
version.<br />
15/20
Follow the instructions to finish the wizard.<br />
Normally the <strong>Qt</strong>Creator should automatically detect the <strong>cross</strong> compiler and the self build <strong>Qt</strong>. To<br />
check this click on the button above the Run button on the left side of <strong>Qt</strong>Creator and click on the<br />
drop down menu next to Build. If the <strong>cross</strong> compiler was detected it should look like in the picture<br />
below.<br />
There should be two build targets with <strong>Qt</strong>-arm-<strong>X11</strong> in the brackets, one for release and one for<br />
debug. If this does not work for you this normally means that you does not have set <strong>up</strong> your .profile<br />
file in your home directory correctly. Double check the paths in the .profile file. Or you forgot to log<br />
out and log in again. It is also possible to set it <strong>up</strong> manually by clicking on the Projects button on<br />
the left side of <strong>Qt</strong>Creator. Here you can add the <strong>Qt</strong> libraries and the <strong>cross</strong> compiler tool chain<br />
manually.<br />
6.2.5 Using <strong>Qt</strong> with Eclipse<br />
It is possible to combine <strong>Qt</strong> with Eclipse. This will make it possible to remote launch <strong>Qt</strong><br />
applications like you maybe did already with a normal C/C++ application. First you have to follow<br />
the instructions above to install Eclipse and <strong>Qt</strong> for command line usage.<br />
Then download the <strong>Qt</strong> integration for Eclipse from and install it:<br />
http://qt.nokia.com/products/eclipse-integration/<br />
Start Eclipse and create a <strong>Qt</strong> Project by clicking on File → New → Other. Select <strong>Qt</strong> → <strong>Qt</strong> GUI<br />
Project and press Next.<br />
16/20
Enter a name for the project, I will use <strong>Qt</strong>Cross1 and press Finish.<br />
When creating the first project he will complain about a missing <strong>Qt</strong> at the end of the creation<br />
process. It is also possible to open this dialogue by clicking on Window → Preferences → <strong>Qt</strong> →<br />
Add afterwords.<br />
Click on Open preferences and click on Add. Enter a version name like <strong>Qt</strong> 4.8.2 ARM, the <strong>Qt</strong> bin<br />
path is /usr/local/Trolltech/<strong>Qt</strong>-arm-<strong>X11</strong>/bin and the <strong>Qt</strong> include path is /usr/local/Trolltech/<strong>Qt</strong>-arm-<br />
<strong>X11</strong>/include.<br />
17/20
Press Finish to finish the set <strong>up</strong>.<br />
After that the project is ready to compile. Click on Project → Build project to compile the project.<br />
If you want to set <strong>up</strong> a remote launch do it like described above with one extra thing. Set this in the<br />
field Commands to execute before application:<br />
chmod 777 /home/root/<strong>Qt</strong><strong>cross</strong>1;export DISPLAY=:0.0<br />
Important is the additional export command which will tell your application where to find the X<br />
server.<br />
There are some problems with Eclipse to find the correct include paths and it shows some errors<br />
which are no errors, the application will compile just fine but Eclipse will not let you start the<br />
application. To solve this you have to disable the Code Analysis in Eclipse. Go to Window →<br />
Preferences → C/C++ → Code Analysis. Uncheck all check boxes for the Code Analysis.<br />
After that Eclipse may still have some Warnings about not finding some include files. To fix this<br />
right click on your <strong>Qt</strong> project and select Properties. Click on C/C++ Include Paths and Symbols<br />
and add these two paths with Add External Include Path:<br />
/opt/eldk5.2.1/armv7a/sysroots/armv7avfpneonlinuxgnueabi/usr/include<br />
/opt/eldk5.2.1/armv7a/sysroots/armv7avfpneonlinuxgnueabi/usr/include/c++<br />
18/20
7 Running an application<br />
After you have compiled your application with you preferred IDE simply copy the application to<br />
the DX4 and run it. Follow the instructions below to copy the executable to the DX4.<br />
7.1 Copy files to DX4<br />
When you are running Linux with Nautilus as file browser it is very simple to copy files to the<br />
DX4. Nautilus is used for example in Ubuntu.<br />
7.1.1 Using Nautilus<br />
First of all you have to set a password for the user you are going to use on the DX4. Probably this<br />
will be root. Log in as the user and type<br />
$ passwd<br />
to change the password. After that open Nautilus on your host machine and click on File →<br />
Connect to Server. As Type select SSH, enter the IP address of the DX4 in the field Server and type<br />
your user name and password. This should look like the picture below.<br />
19/20
Click on Connect to connect to the DX4. Nautilus will create a SFTP network connection and<br />
mount it for you. You can right click on the mounted folder on the left side and select Add<br />
Bookmark to add this connection as a bookmark.<br />
Keep in mind that you are acting as the user you selected when you created the connection. Means<br />
that as a normal user you don't have write access to files except those in you home directory. If you<br />
are logged in as root and create files in the home directory of an other user, the other use will not be<br />
able to delete or modify the files you created.<br />
7.2 Installing <strong>Qt</strong> on the DX4<br />
To run a <strong>Qt</strong> application on the DX4 it is required to copy the <strong>Qt</strong> libraries and some other stuff to the<br />
DX4. You should first set <strong>up</strong> the connection to copy files to the DX4 like described in chapter 7.1.<br />
Now you have to copy the files from /usr/local/Trolltech/ on your host machine in the same<br />
directory on the DX4. It is required to be connected as root to the DX4.<br />
The folder /usr/local/ may not exist on the DX4, just create it.<br />
7.3 Special libraries<br />
If you need special libraries and special versions from ELDK which already exist on the DX4 you<br />
need to run the application with a dynamic linker because it is not recommended to overwrite the<br />
existing libraries. To do this copy the rootfs of ELDK to the target system in a subdirectory, for<br />
example in /eldk. The rootfs of ELDK is located in /opt/eldk-5.2.1/armv7a/sysroots/i686-eldk-linux/<br />
You should end <strong>up</strong> with a folder structure like /eldk/usr/lib/ on the DX4. You do not have to copy<br />
the full rootfs. Required are only the folders /lib and /usr/lib. It is also possible to remove unneeded<br />
libraries from this folders.<br />
To run you application with a dynamic linker that uses special paths use the following command<br />
(this is a single line with a space at the line break):<br />
$ /eldk/lib/ldlinux.so.3 librarypath /eldk/lib:/eldk/usr/lib<br />
/path/to/your/program<br />
20/20


