
You also want an ePaper? Increase the reach of your titles
YUMPU automatically turns print PDFs into web optimized ePapers that Google loves.
◦ Type in the name for your new layer and name it PROFILE. (Note: If the cursor is<br />
not all ready flashing in the name field for the layer, the user can click+pause+click<br />
the text in order to edit the name.)<br />
◦ Click on the PROFILE layer icon so that a check mark appears, making it the active<br />
layer.<br />
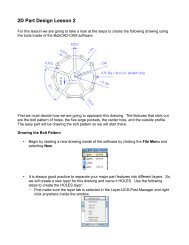
• Begin the outer profile by drawing the 3 main arcs that comprise the outside shape.<br />
<strong>Part</strong>s of these arcs will also be used for the internal pockets later on in the lesson.<br />
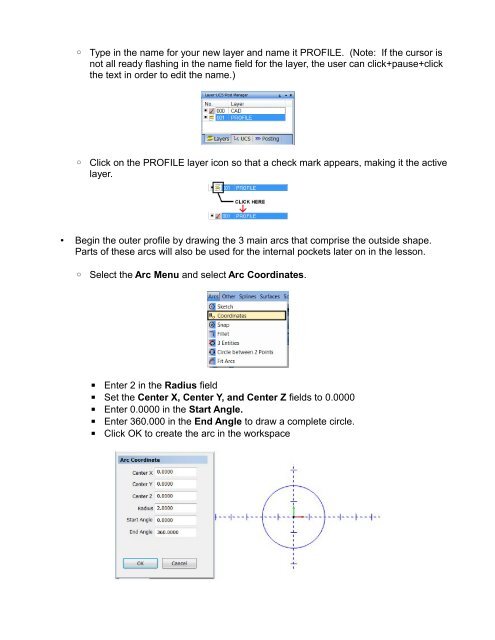
◦ Select the Arc Menu and select Arc Coordinates.<br />
▪ Enter 2 in the Radius field<br />
▪ Set the Center X, Center Y, and Center Z fields to 0.0000<br />
▪ Enter 0.0000 in the Start Angle.<br />
▪ Enter 360.000 in the End Angle to draw a complete circle.<br />
▪ Click OK to create the arc in the workspace