
Create successful ePaper yourself
Turn your PDF publications into a flip-book with our unique Google optimized e-Paper software.
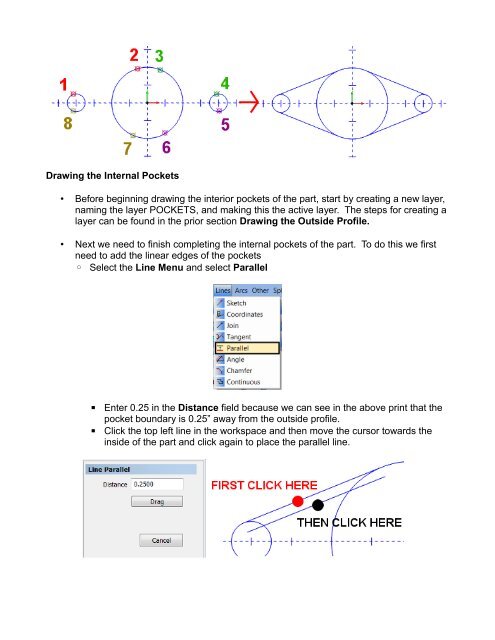
Drawing the Internal Pockets<br />
• Before beginning drawing the interior pockets of the part, start by creating a new layer,<br />
naming the layer POCKETS, and making this the active layer. The steps for creating a<br />
layer can be found in the prior section Drawing the Outside Profile.<br />
• Next we need to finish completing the internal pockets of the part. To do this we first<br />
need to add the linear edges of the pockets<br />
◦ Select the Line Menu and select Parallel<br />
▪<br />
▪<br />
Enter 0.25 in the Distance field because we can see in the above print that the<br />
pocket boundary is 0.25” away from the outside profile.<br />
Click the top left line in the workspace and then move the cursor towards the<br />
inside of the part and click again to place the parallel line.